The Catalog module in Pabbly Chatflow allows you to sync your product listings from Meta (Facebook) Catalogs directly into your Chatflow account, providing a seamless browsing and interactive shopping experience for your customers.
Before connecting the catalog to Pabbly Chatflow, you first need to create it inside Meta.
Step 1: Log In to Facebook Business Manager
- Go to Meta Business Suite.

- Log in with your Facebook account that has access to your Business Manager.
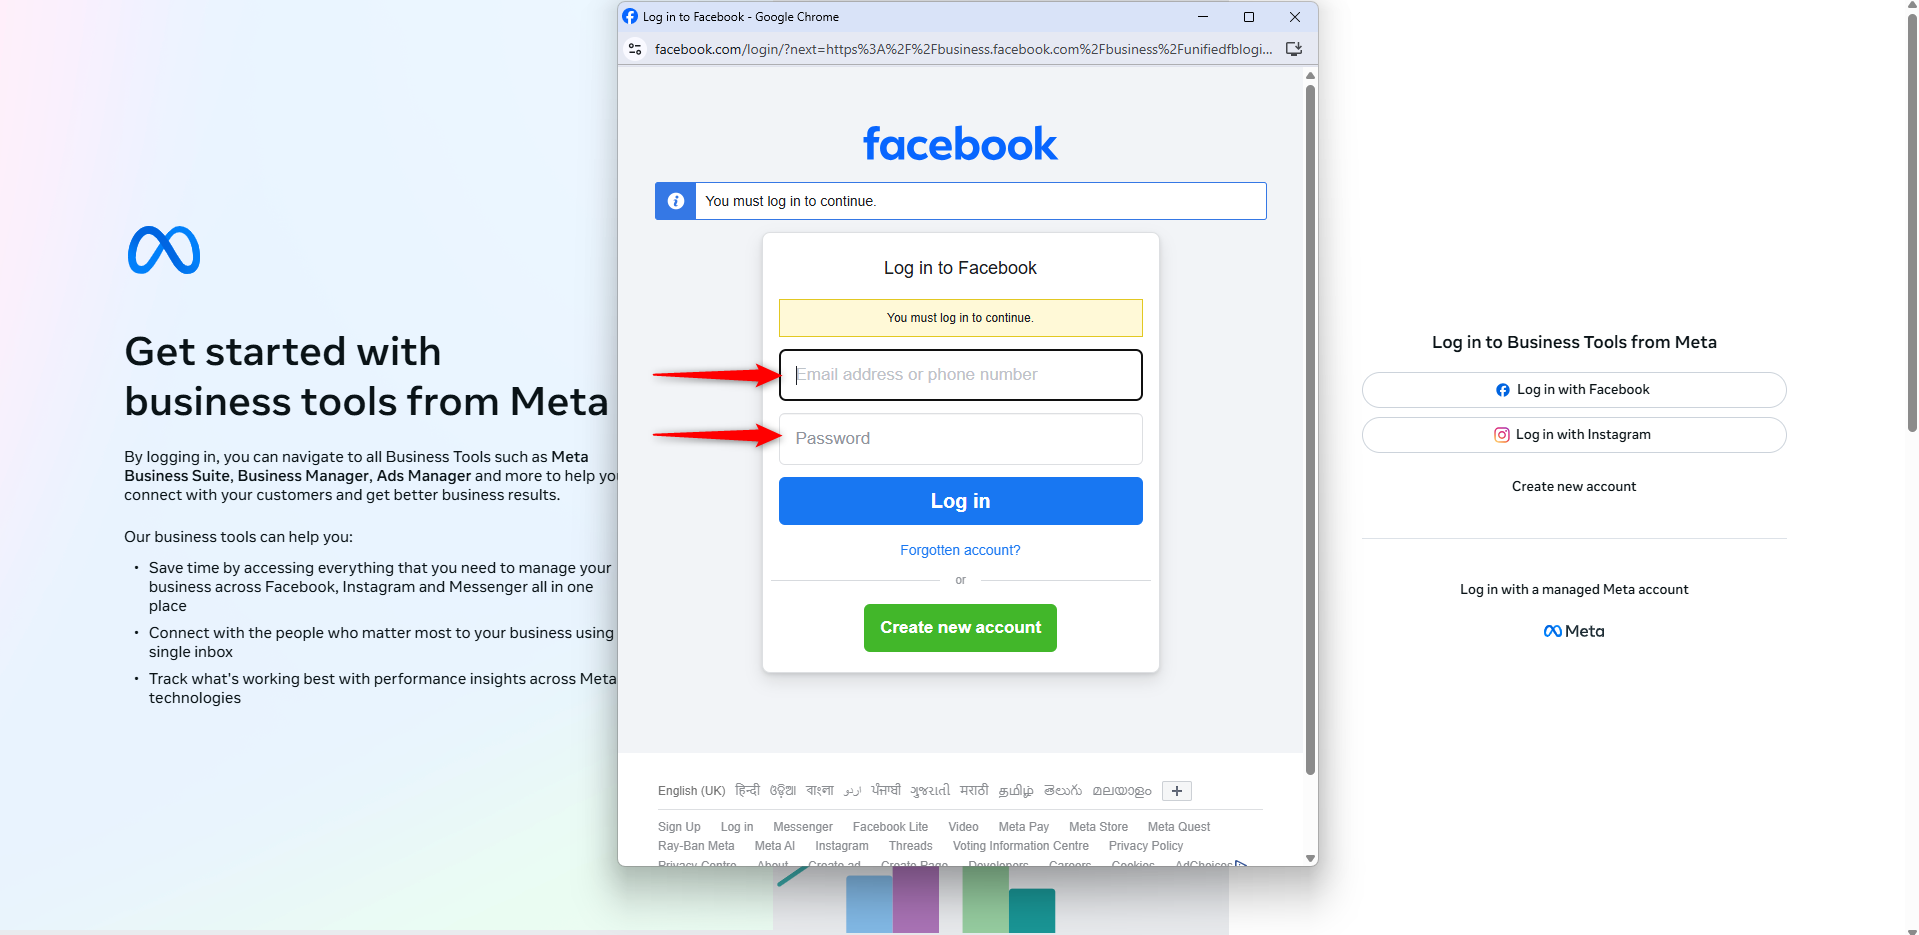
If you don’t have a Business Manager account, you can create one here.
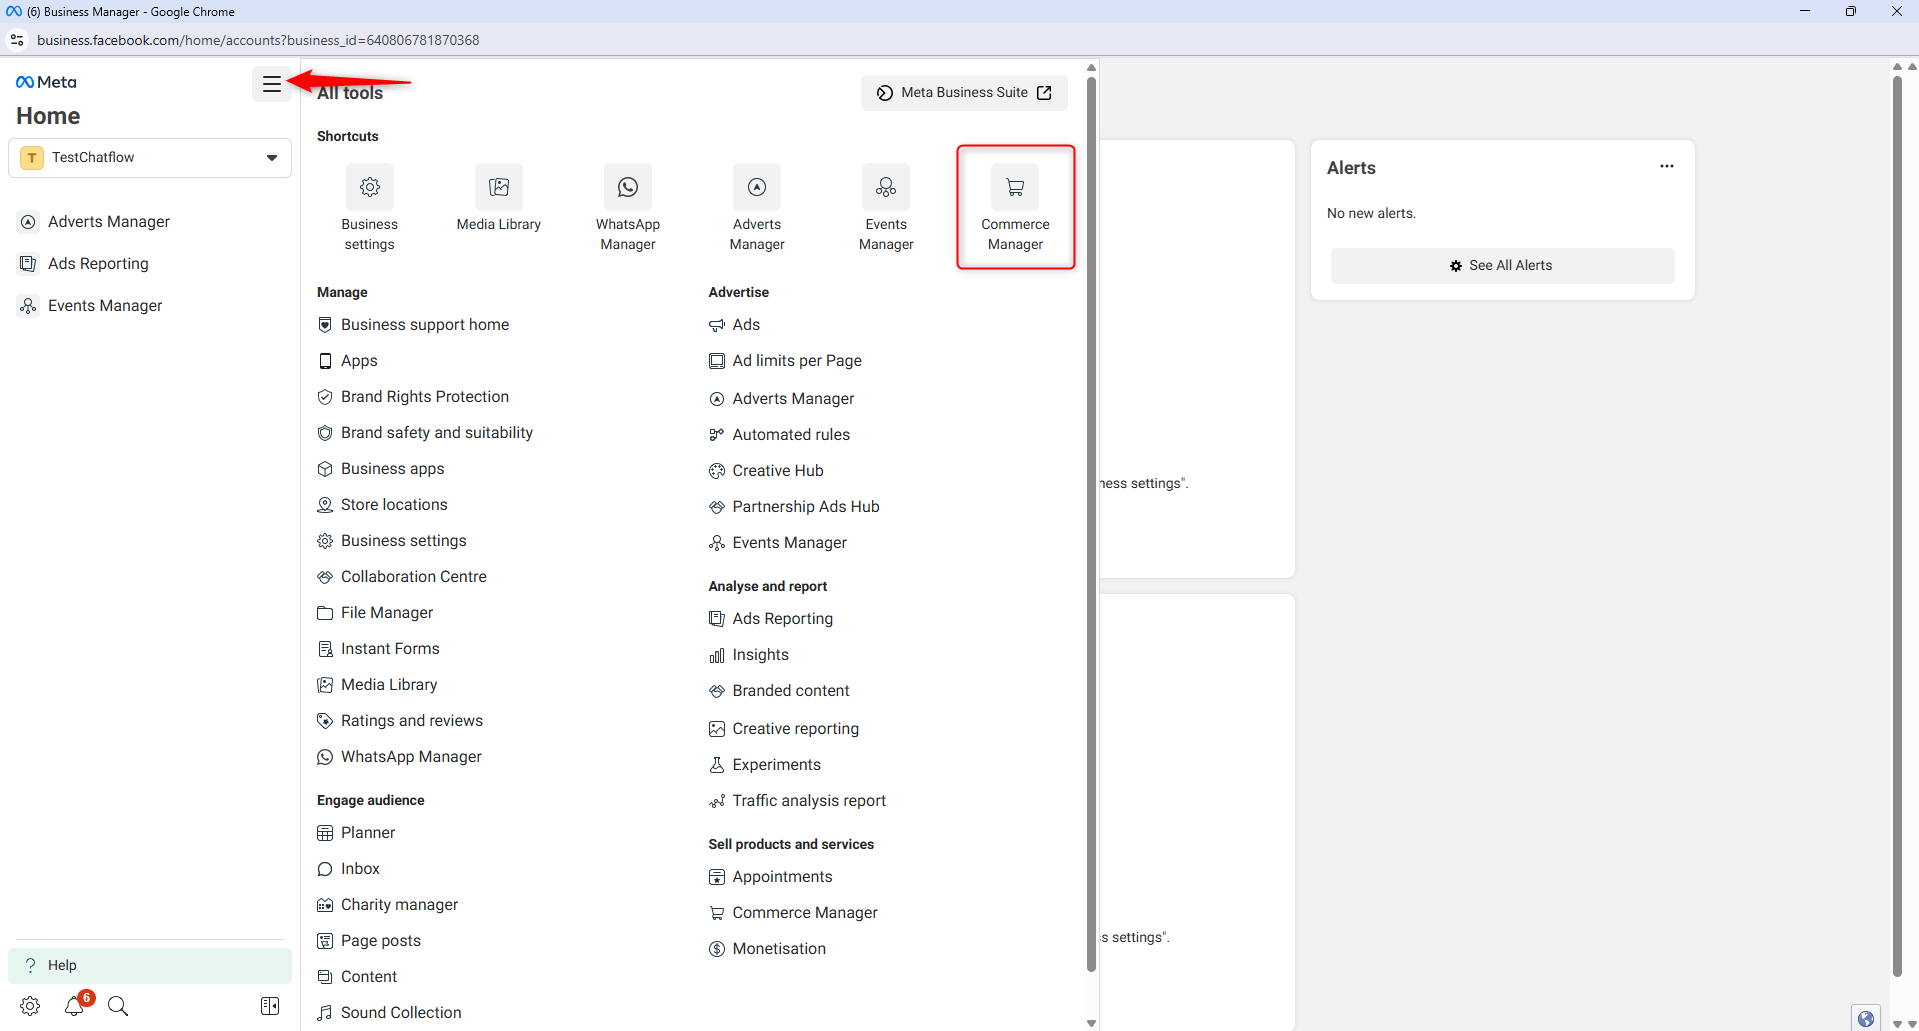
Step 2: Open Commerce Manager
Step 3: Create a New Catalog
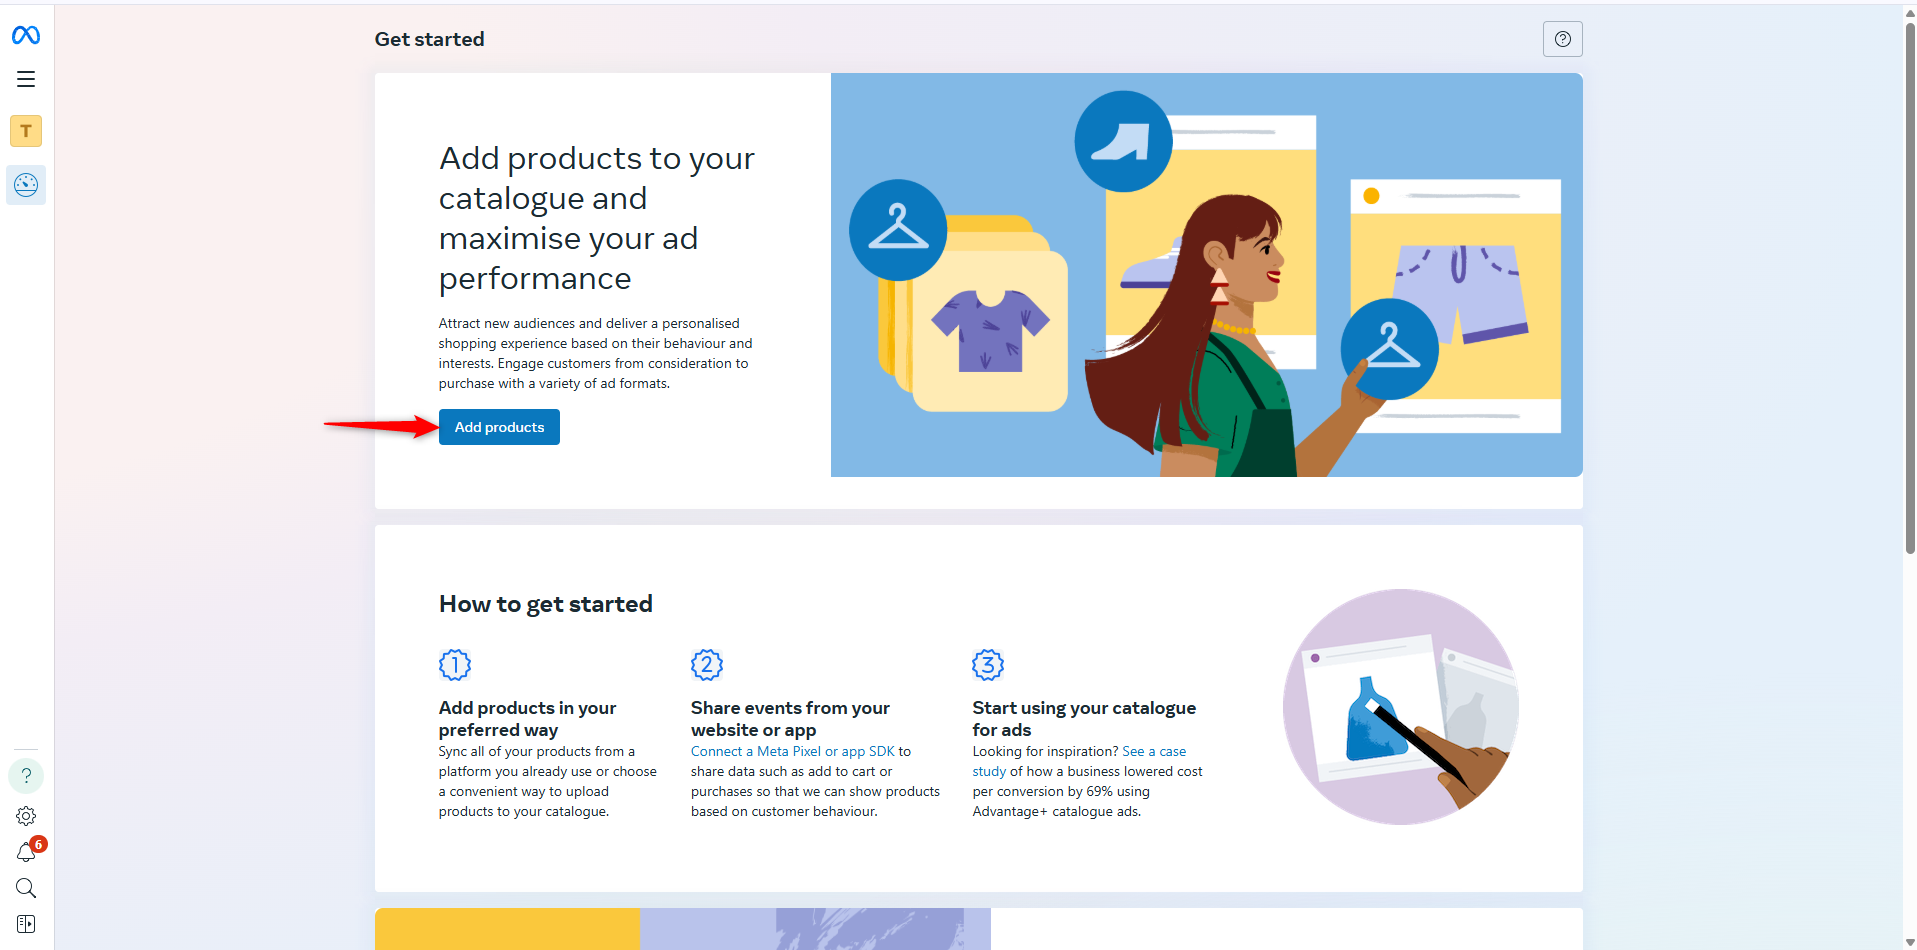
- Click + Add Product to start creating your catalog.
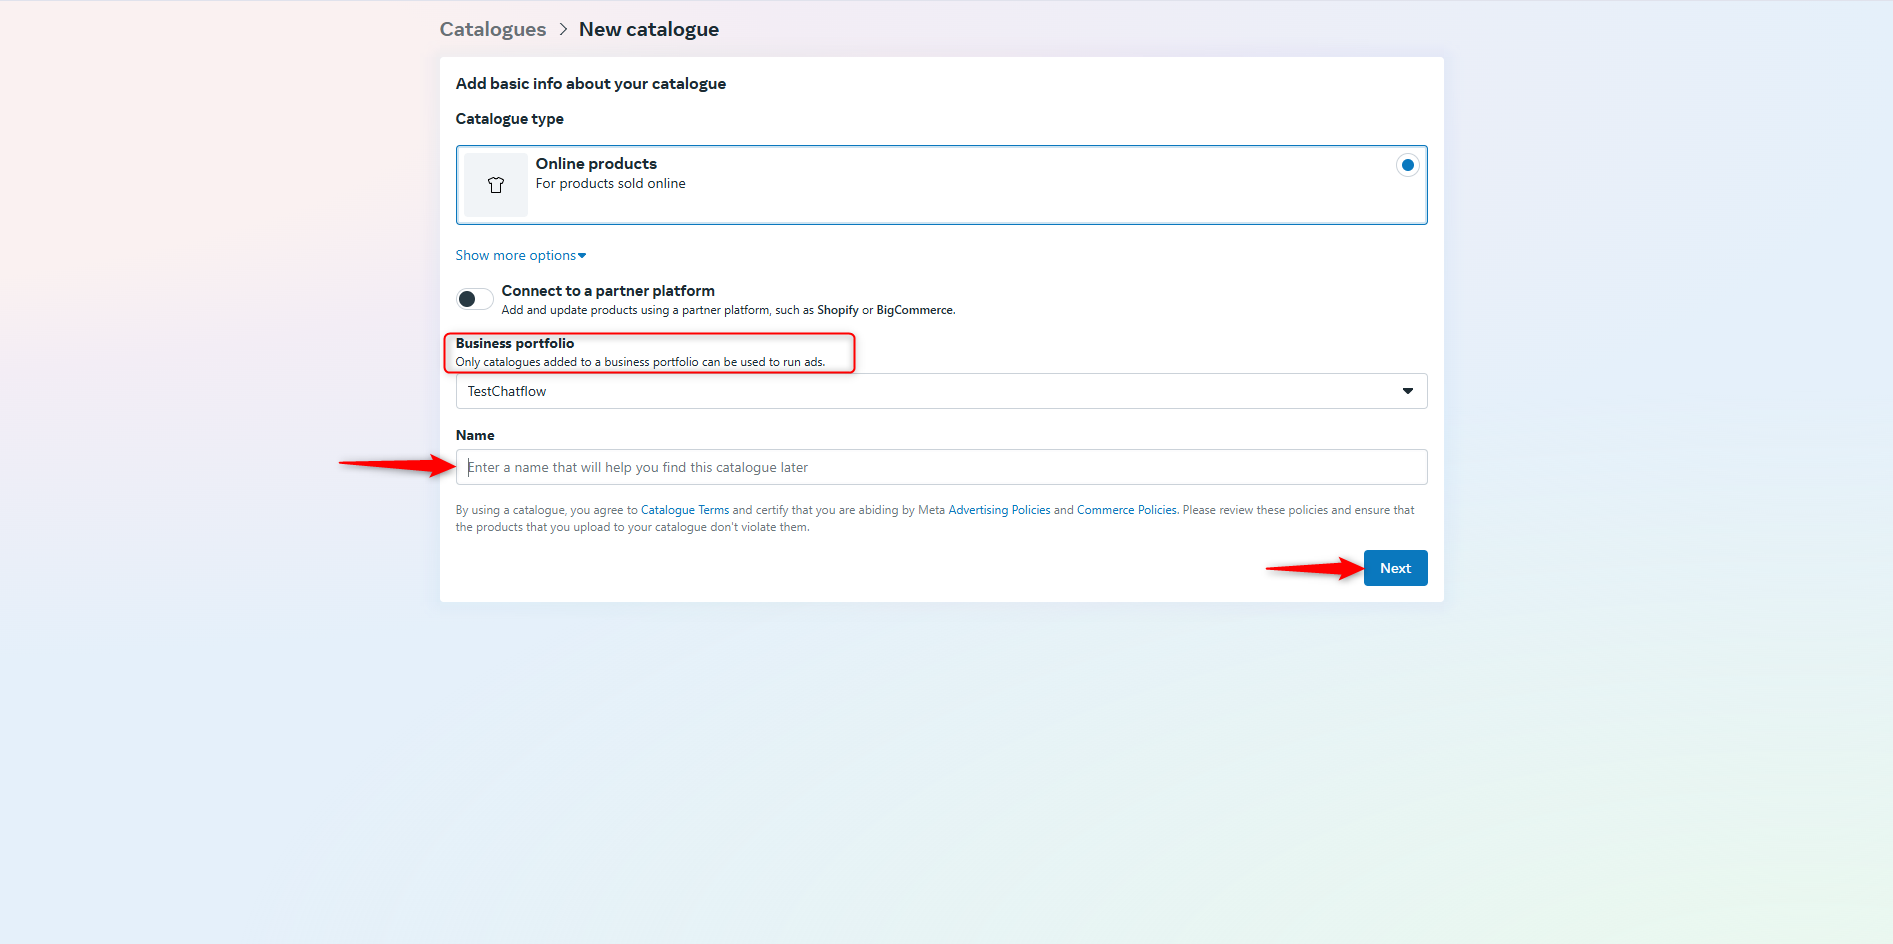
- Provide basic catalog information:
- Catalog Type: Choose the type of catalog (e.g., products, services).
- Connect to a Partner Platform: You can integrate with platforms like Shopify or BigCommerce for automatic product updates.
- Business Portfolio: Catalogs linked to a business portfolio can be used to run ads.
- Name: Choose a name for your catalog.
- Click Next to proceed.
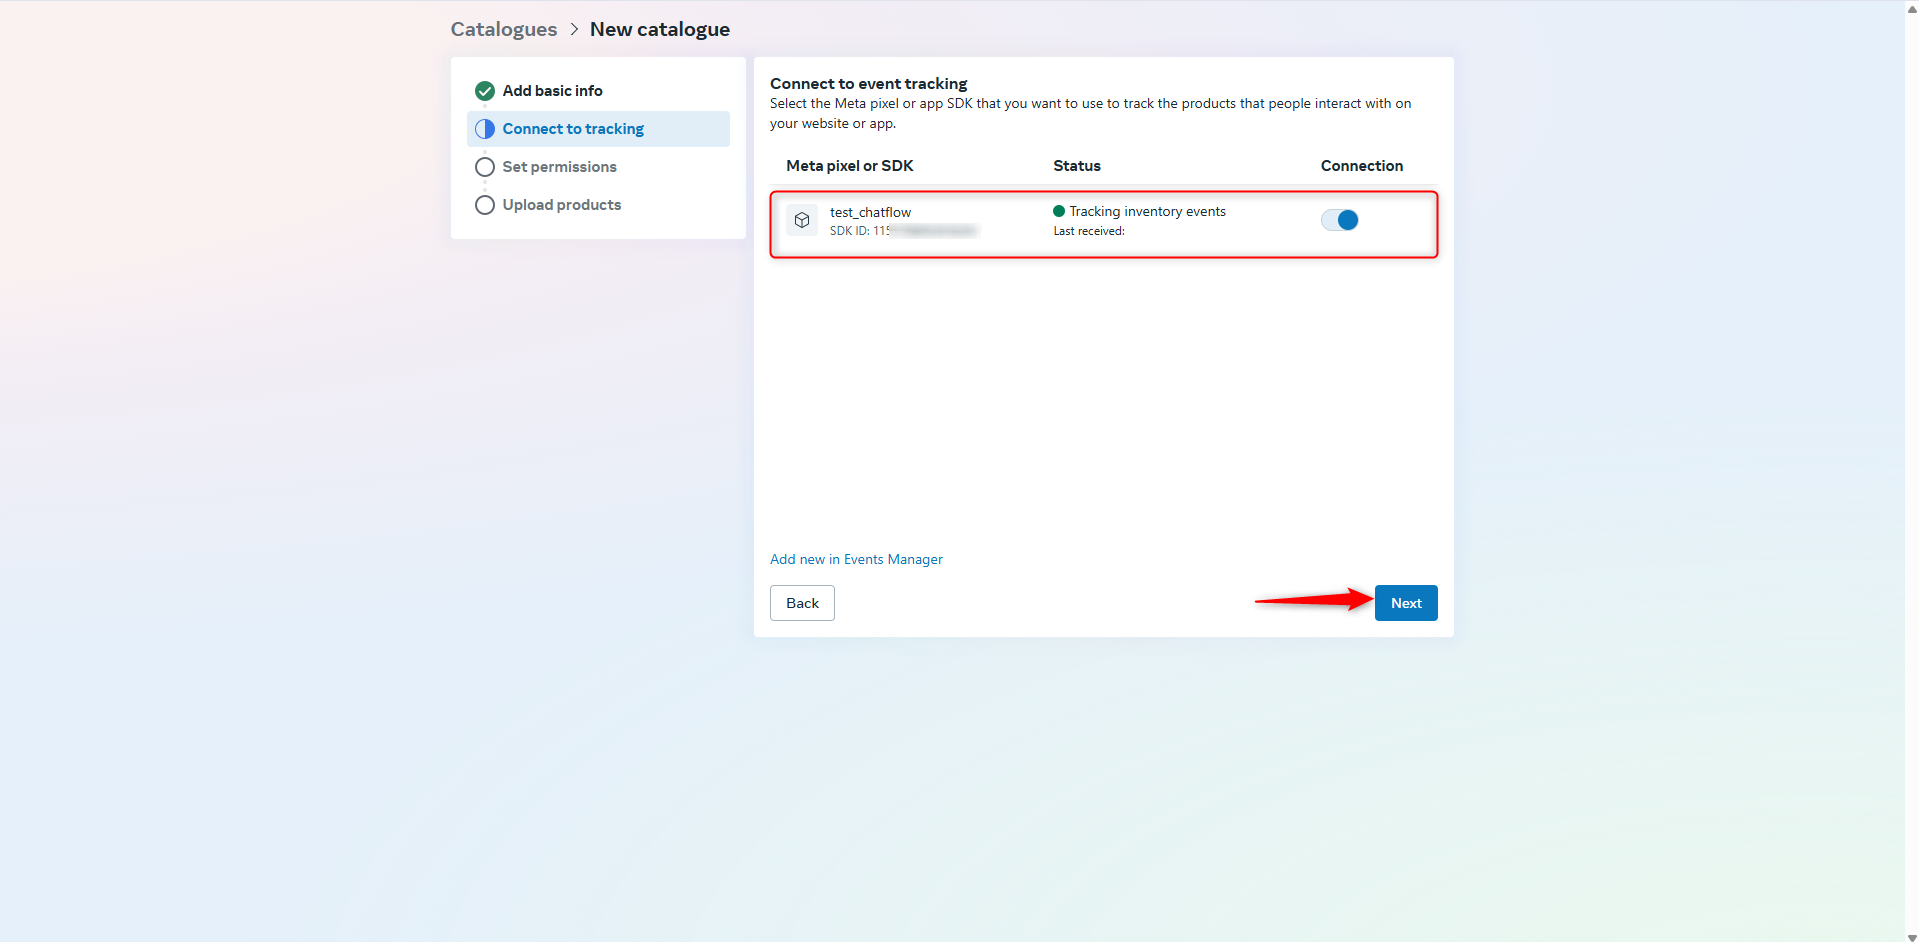
Step 4: Connect to Event Tracking
- Select the Meta Pixel or App SDK you want to use to track interactions with products on your website or app.
- Click Next.
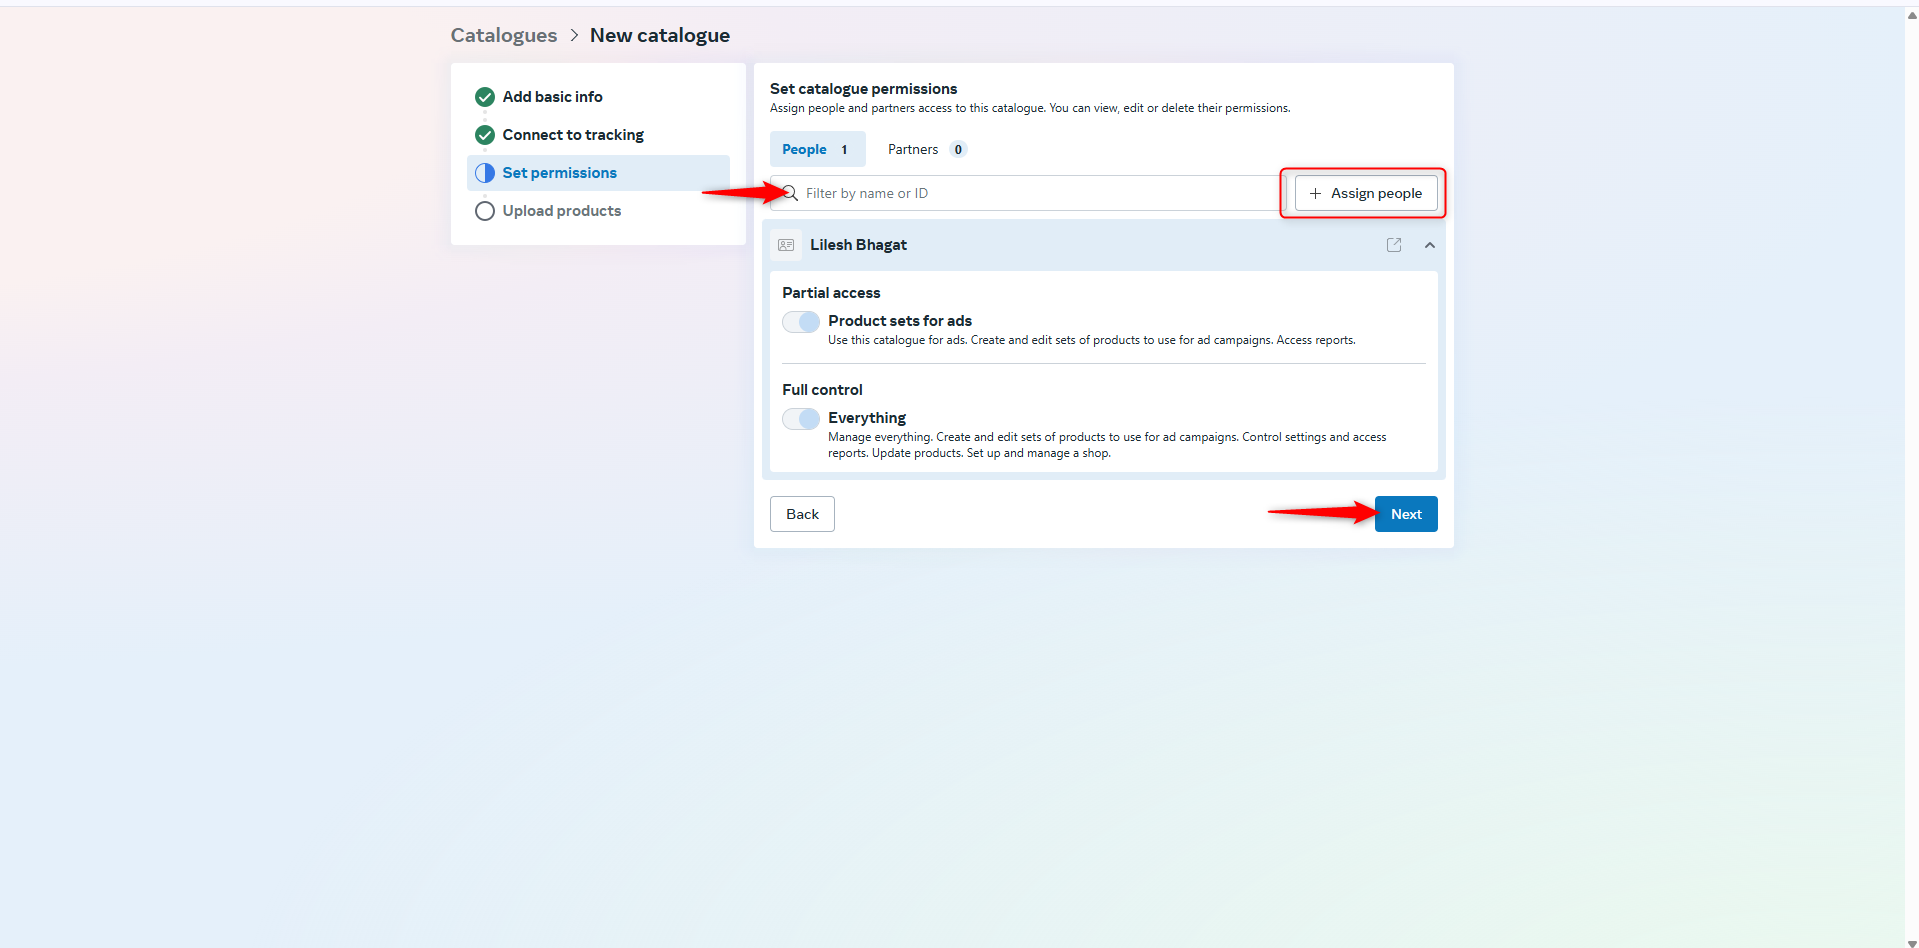
Step 5: Set Catalog Permissions
- Assign people and partners who can view, edit, or delete this catalog.
- Click Next to proceed.
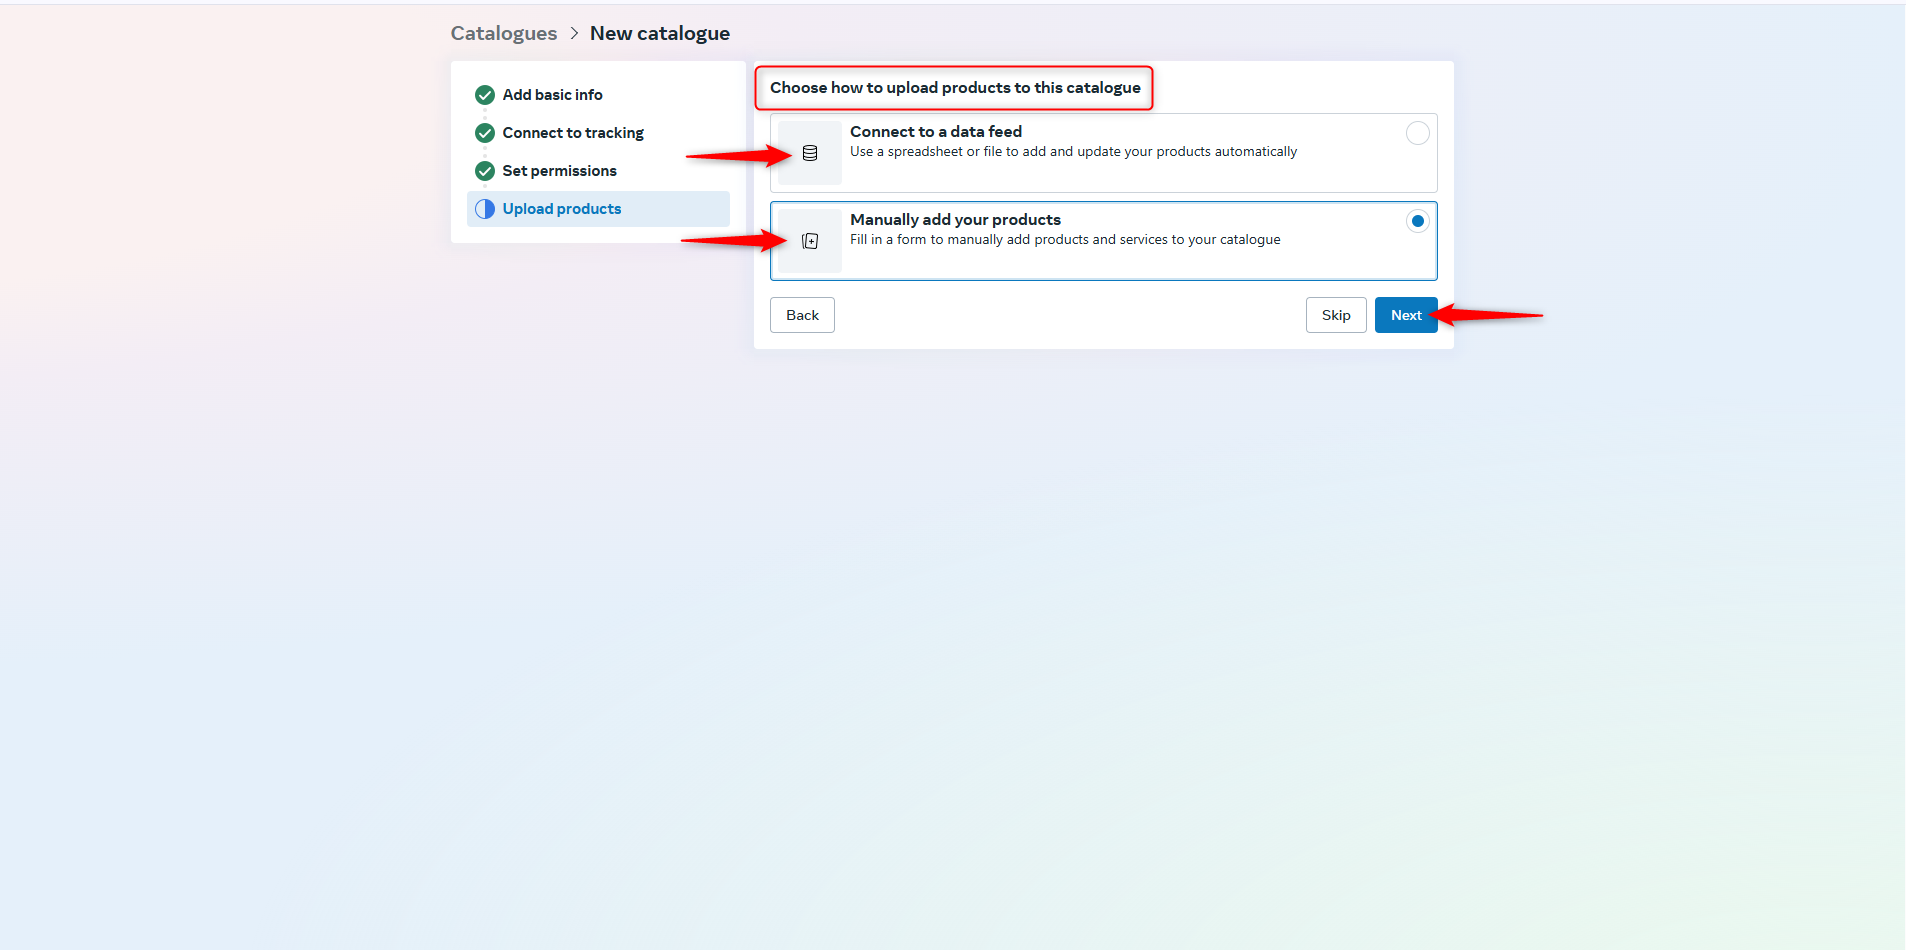
Step 6: Choose How to Upload Products
- Connect to Data Feed: Automatically update products using a CSV, XML file, or API.
- Manually Add Products: Enter product details manually via a form.
Click Next once your choice is made.
Step 7: Set Catalog Management Options
- Choose Upload Product Info Manually if you plan to add products yourself.
- Alternatively, select integration with Shopify, WooCommerce, etc., if you have these platforms connected.
Step 8: Assign Business Ownership
- Assign the catalog to your Business Manager account.
- Click Create Catalog to finalize the setup.
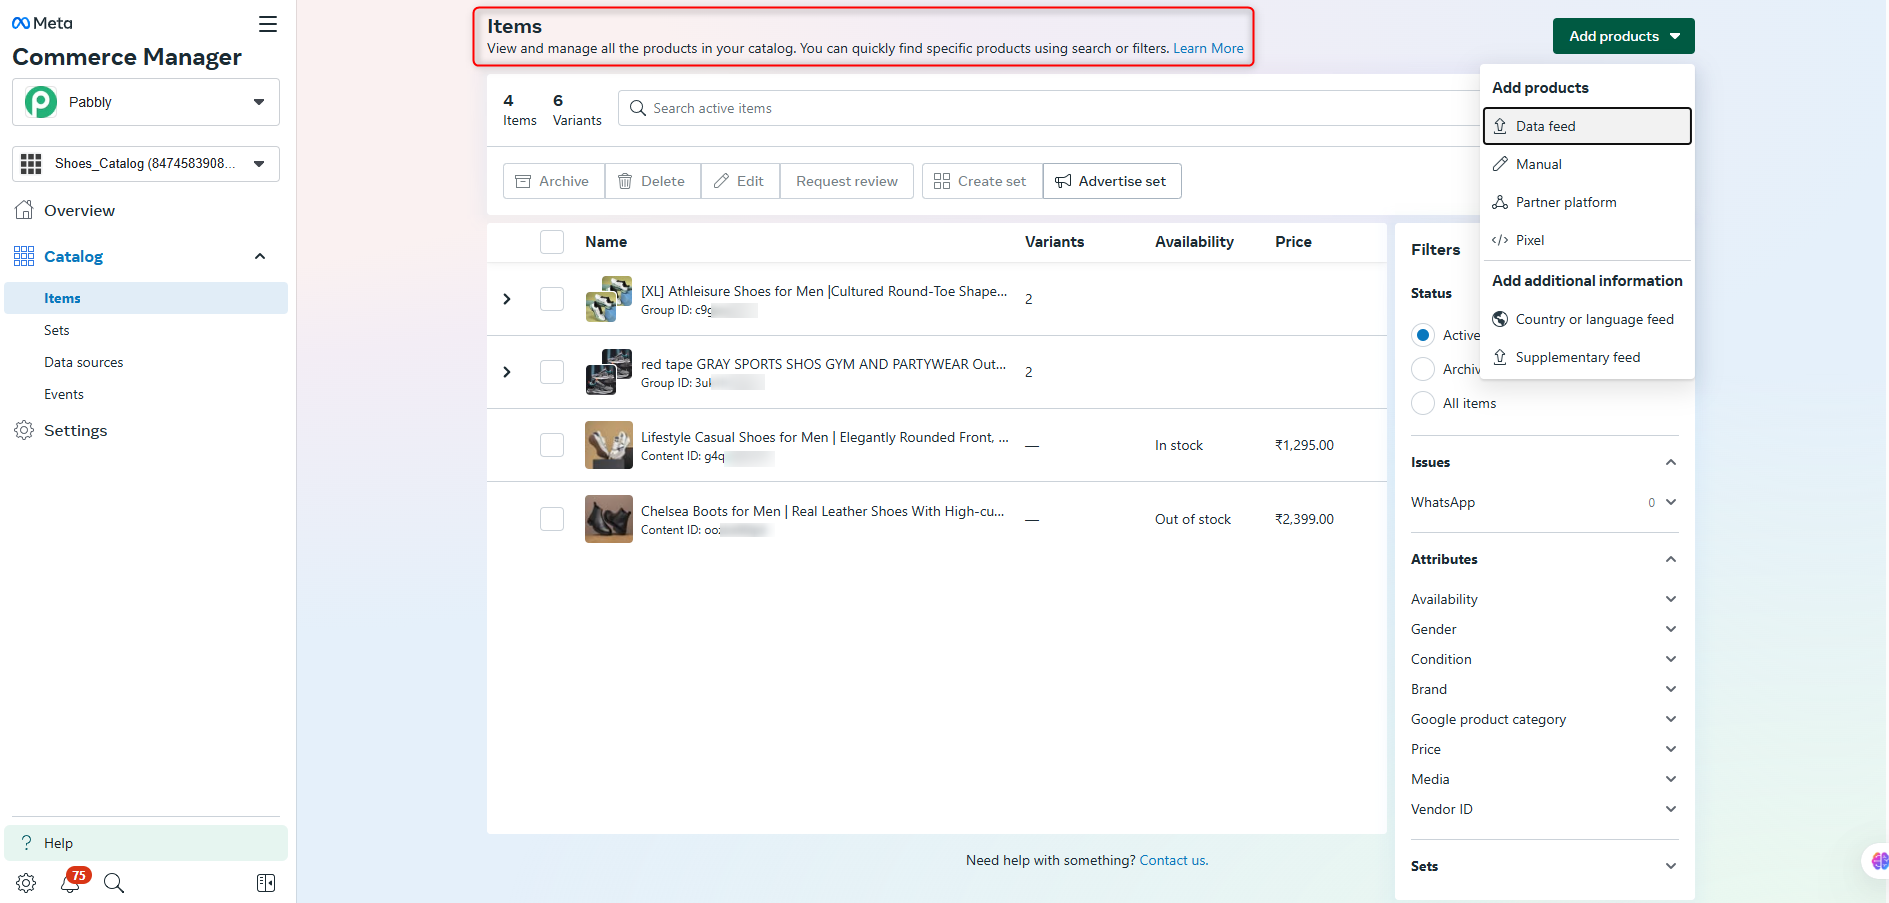
✅ Your catalog is now created within Facebook Business Manager.
 **
**
Part 2: How to Connect Your Catalog in Pabbly Chatflow
Once the catalog is created, follow these steps to integrate it with Pabbly Chatflow.
Step 1: Log in to Your Pabbly Chatflow Account
Access your Pabbly Chatflow dashboard by signing in with your credentials.
Step 2: Navigate to the Catalog Module
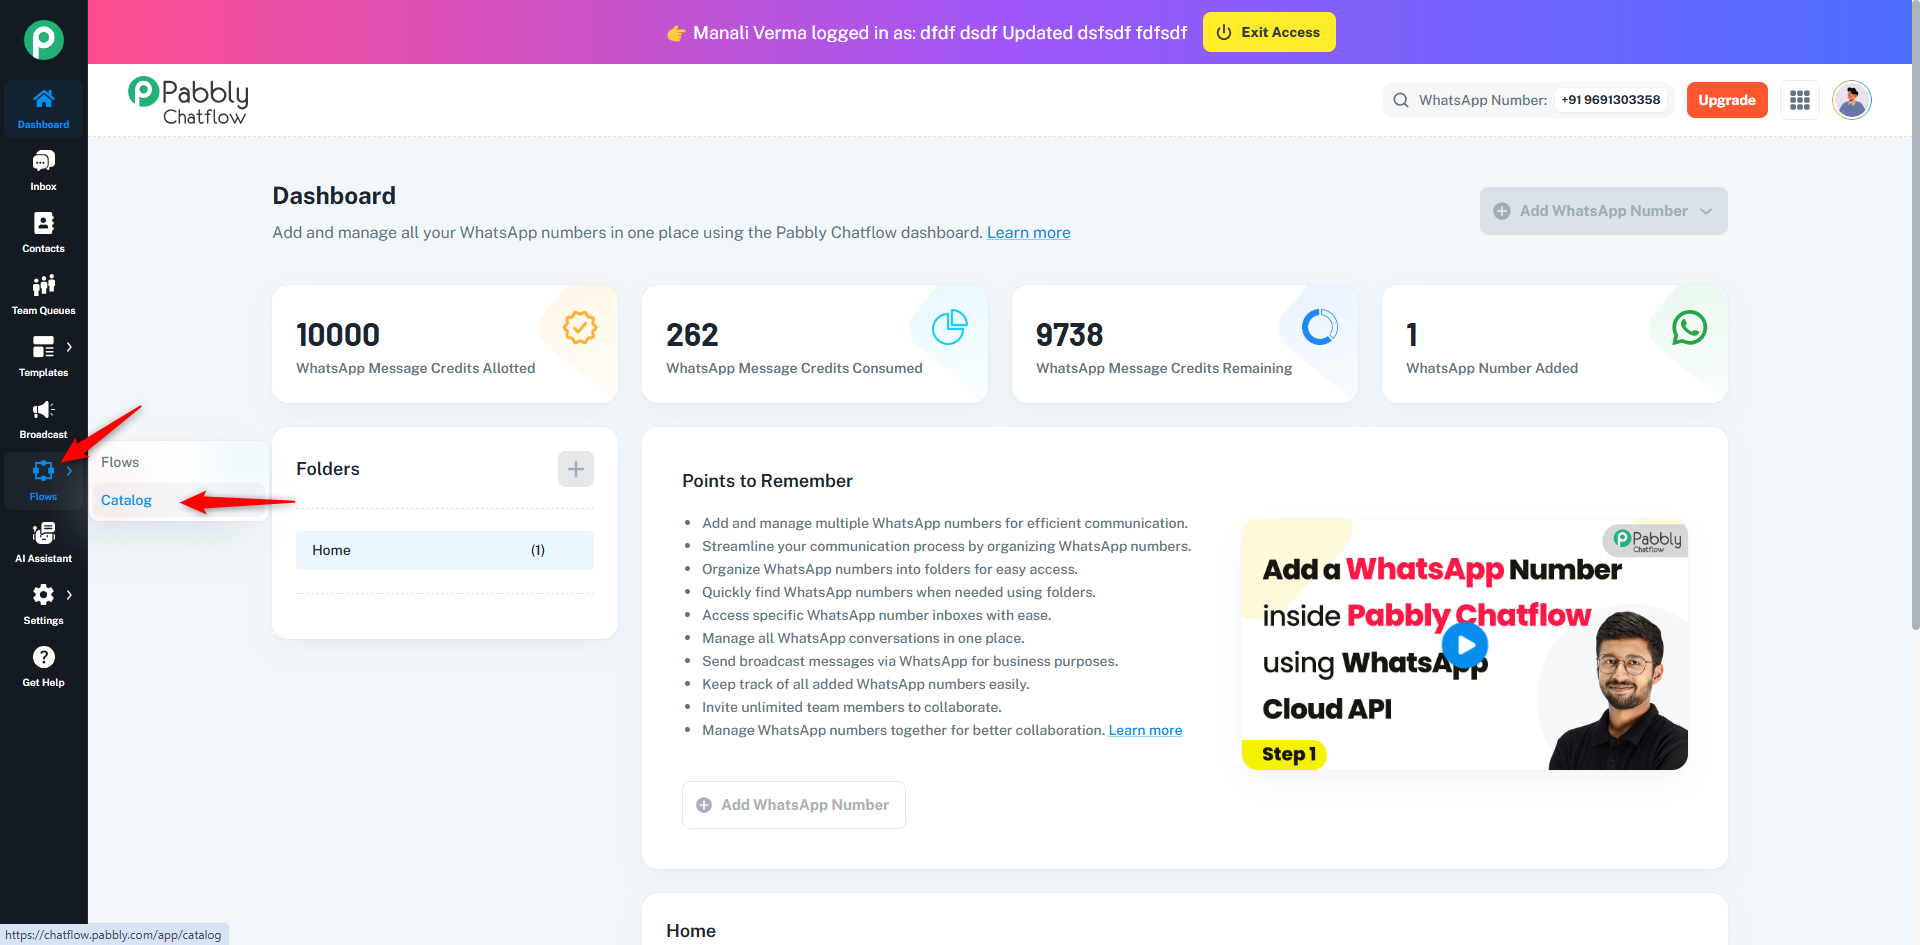
- Go to the Flows module.
- In the navigation panel, click on Catalog.
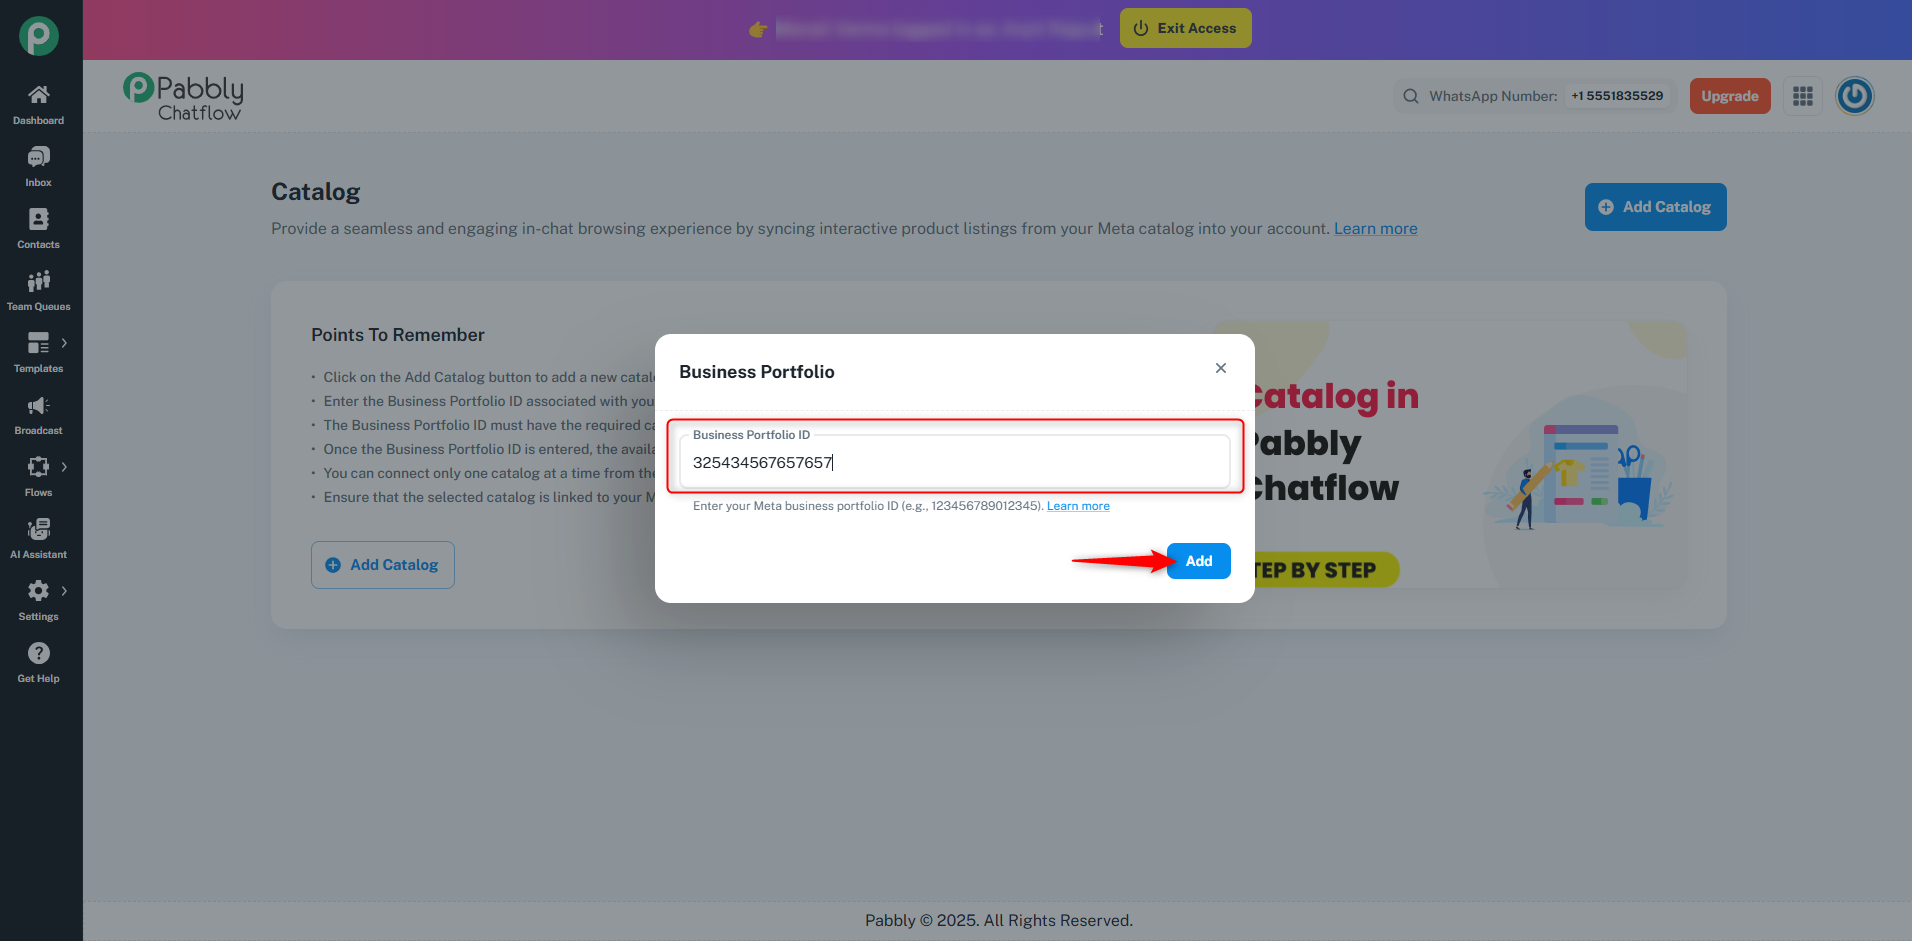
Step 3: Add Your Business Portfolio ID
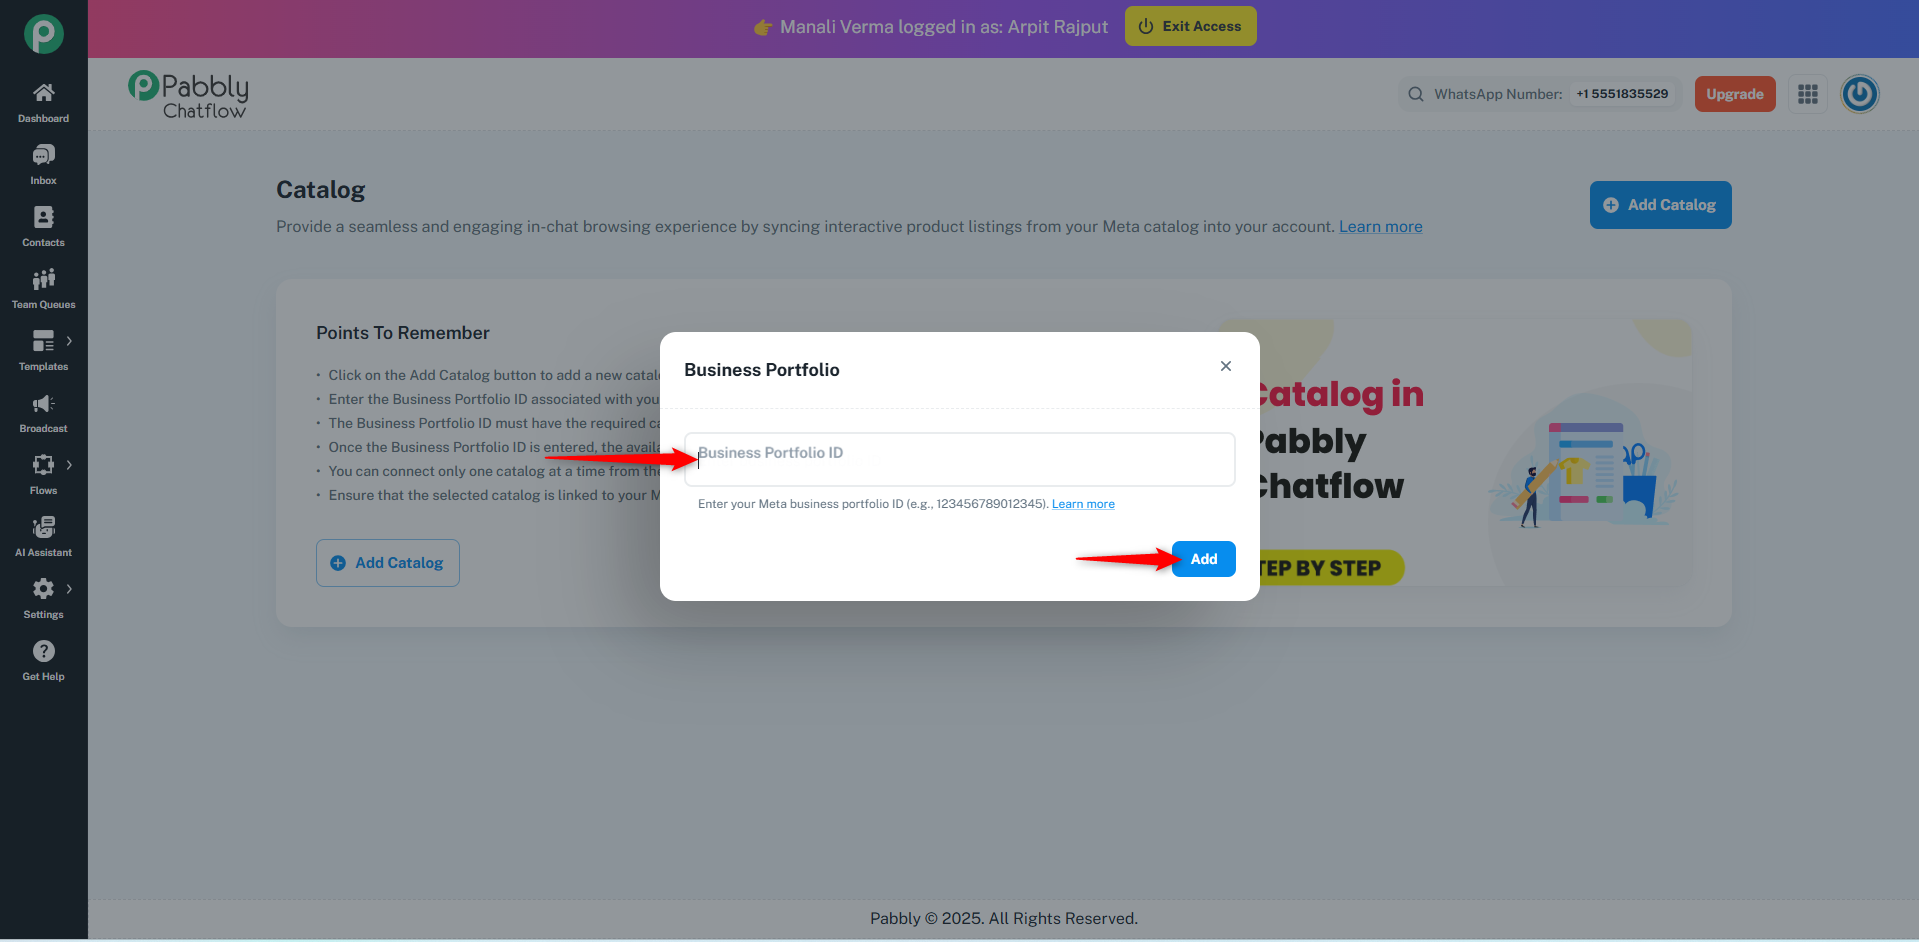
- Click the Add Catalog button.
- A pop-up will appear asking for your Business Portfolio ID.
- The format should be like: 123456789012345.
- (You can find your Business Portfolio ID inside your Meta Business Manager).
- After entering the ID, click Add.
Where to Find Your Business Portfolio ID
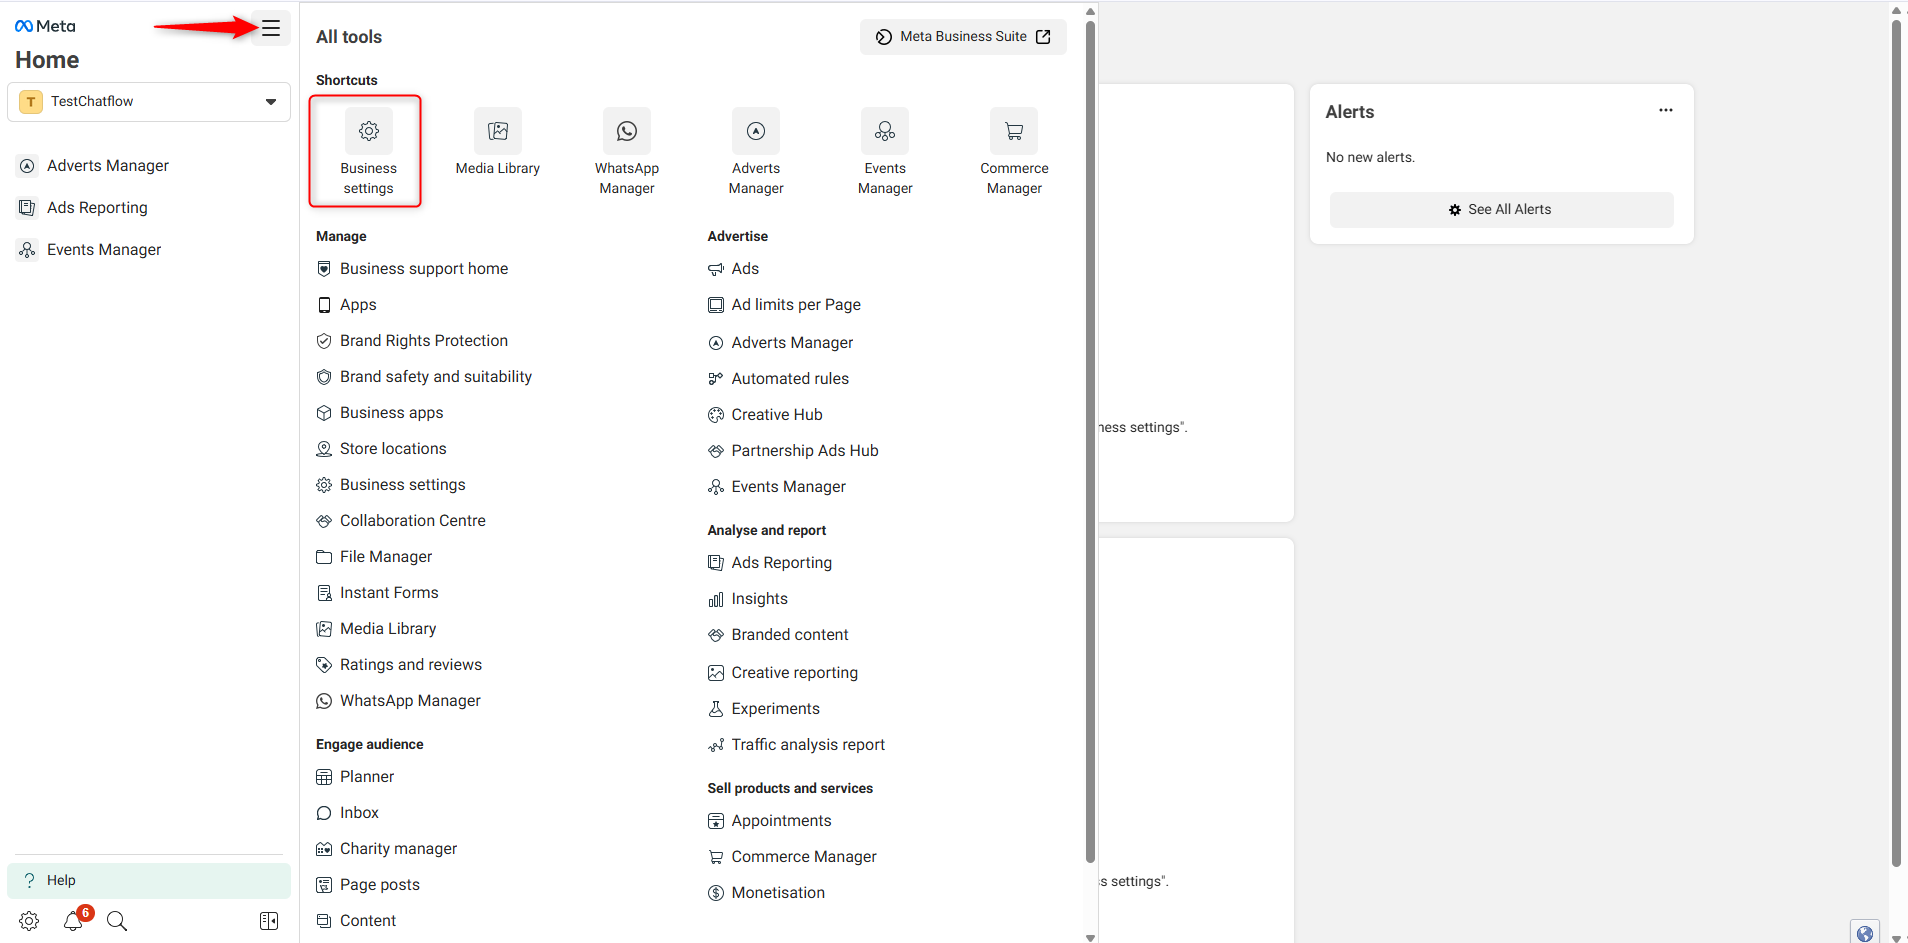
- Visit Meta Business Settings.
- In the sidebar, click Business Info.
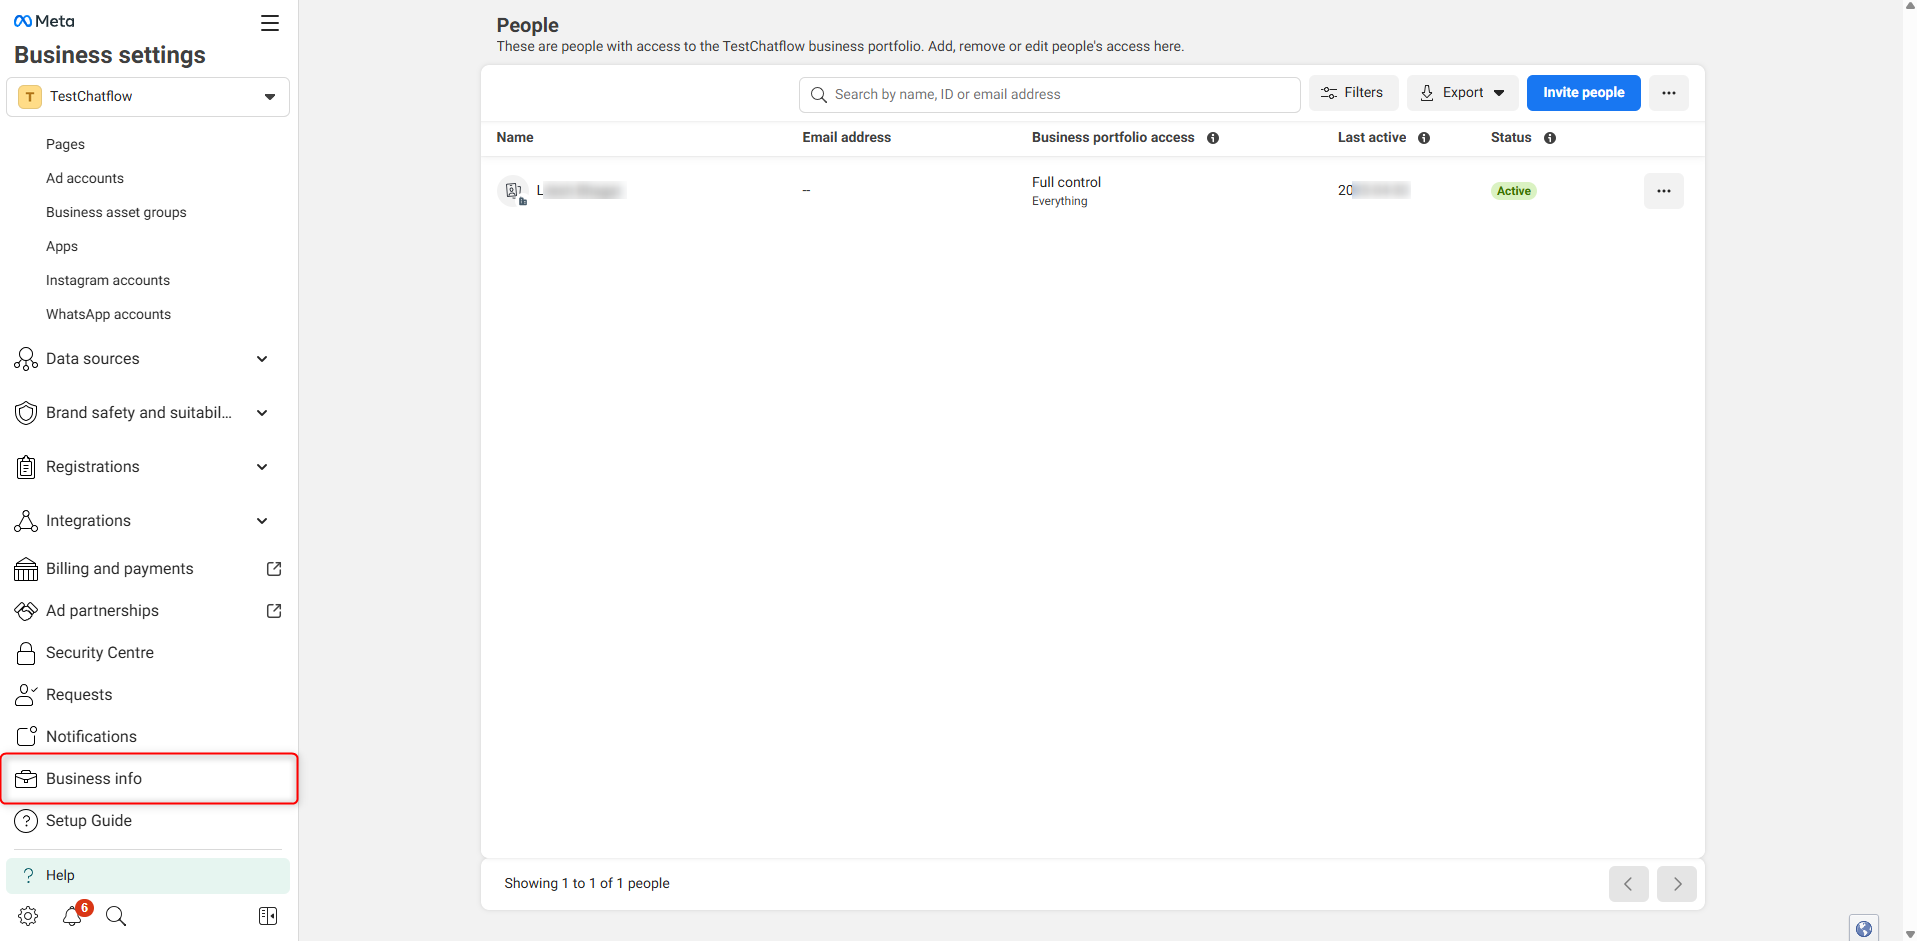
- Locate your Business Manager ID (also known as Business Portfolio ID).
- This ID will be a 15-digit number (e.g., 123456789012345).
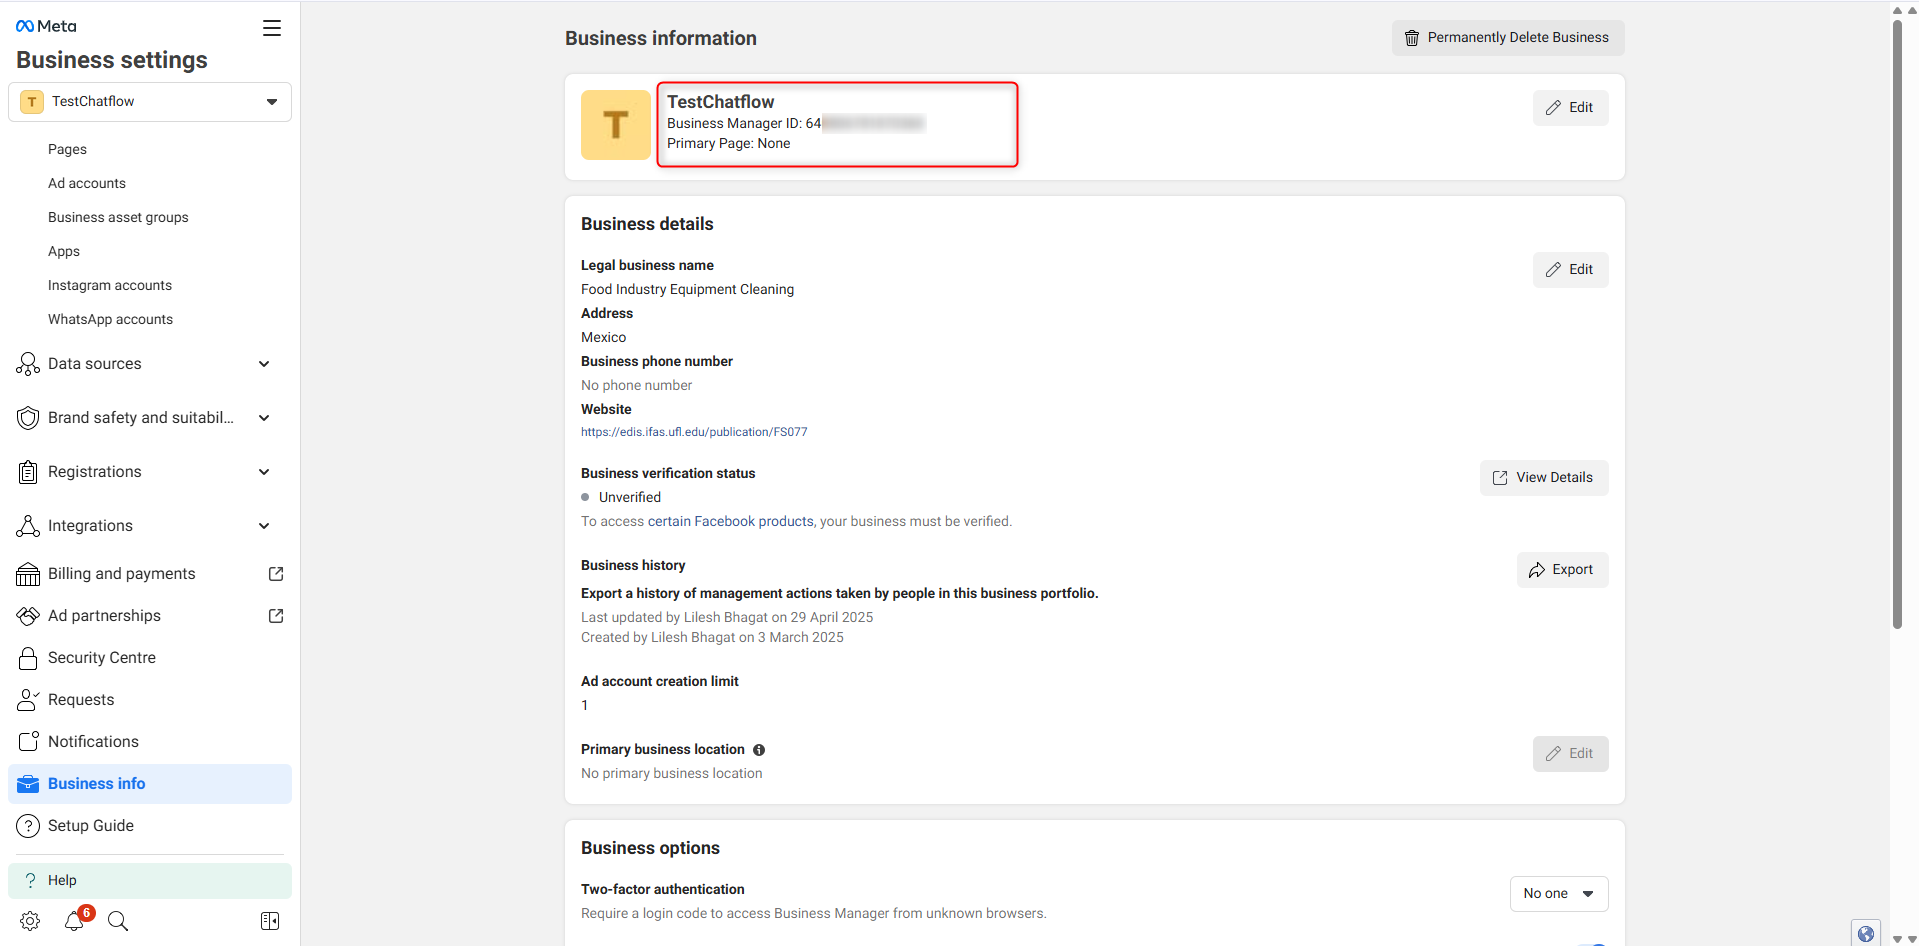
Copy this ID and paste it into the Business Portfolio ID field in Pabbly Chatflow.
Step 4: Save and Connect
- After entering the Business Portfolio ID, click Add.
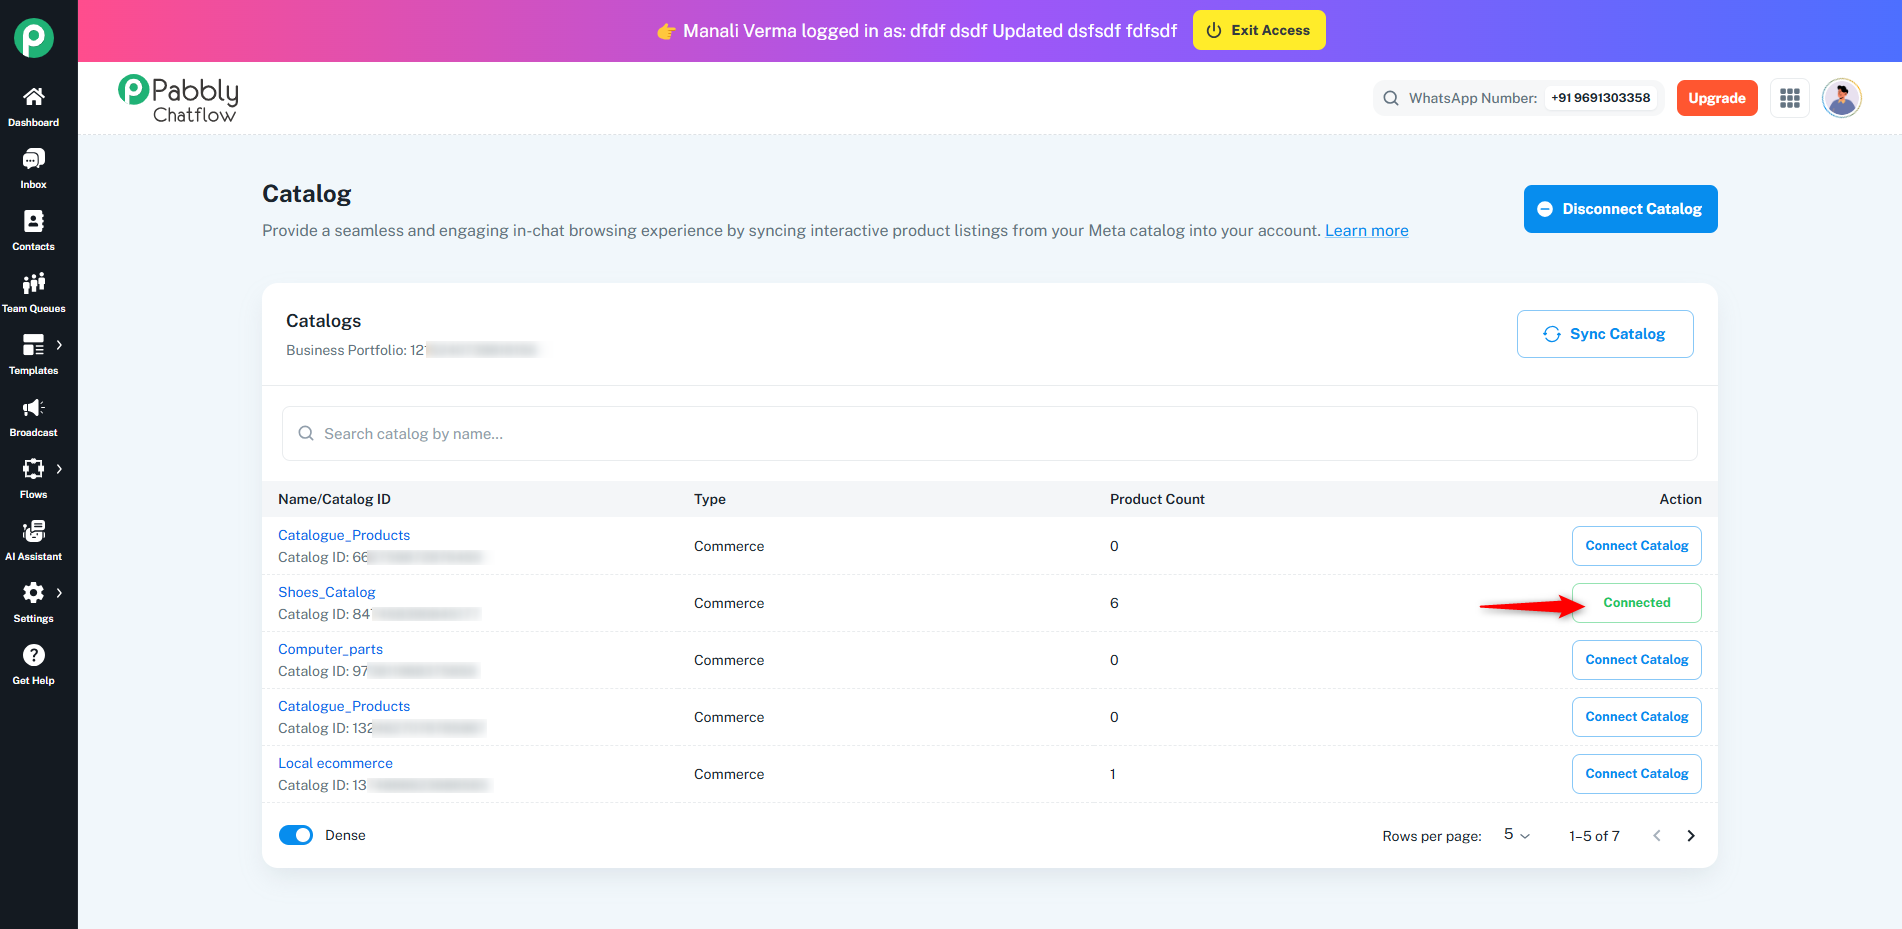
- The available catalogs under your Meta Business Manager will be fetched automatically.
- Select the appropriate catalog you wish to use.
Points to Remember
- ✅ The Business Portfolio ID must be correctly associated with your Meta catalog.
- ✅ Only one catalog can be connected at a time inside Pabbly Chatflow.
- ✅ Ensure that the selected catalog is linked to your Meta account for proper integration.
Note: Adding your Meta catalog enables you to showcase products inside WhatsApp conversations, automate product recommendations in Flows, and provide a richer chat commerce experience.
Originally posted by Manali Verma on 2025-04-29 (forum thread #28724).
 Pabbly Chatflow Team•Updated Jul 25, 2026•3 min read