Payment Notifications allow you to automatically send Meta Approved Templates to customers on WhatsApp whenever a payment is successful or fails.
Follow the detailed steps below to configure both notification events.
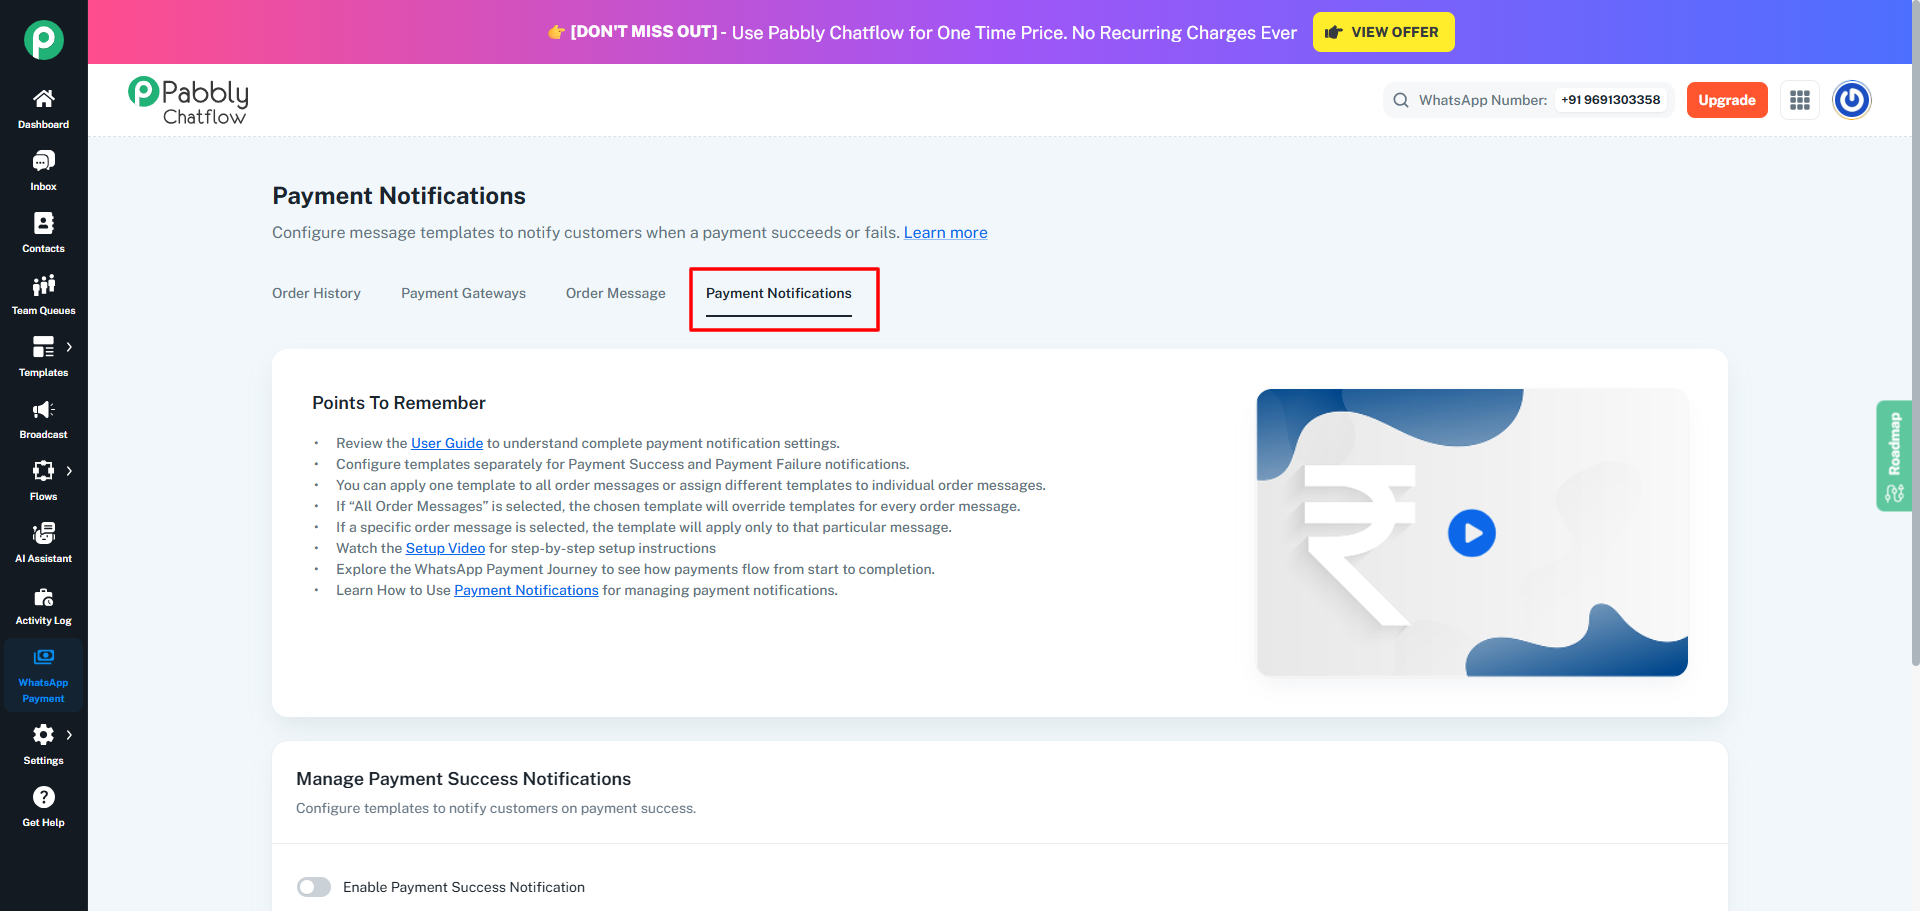
1. Open the Payment Notifications Section
- Go to Dashboard
- Open WhatsApp Payments
- Click the Payment Notifications tab (fourth tab)
This page contains settings for both Success and Failure notifications.
2. Set Up Payment Success Notifications
Step 2.1 — Enable Success Notification
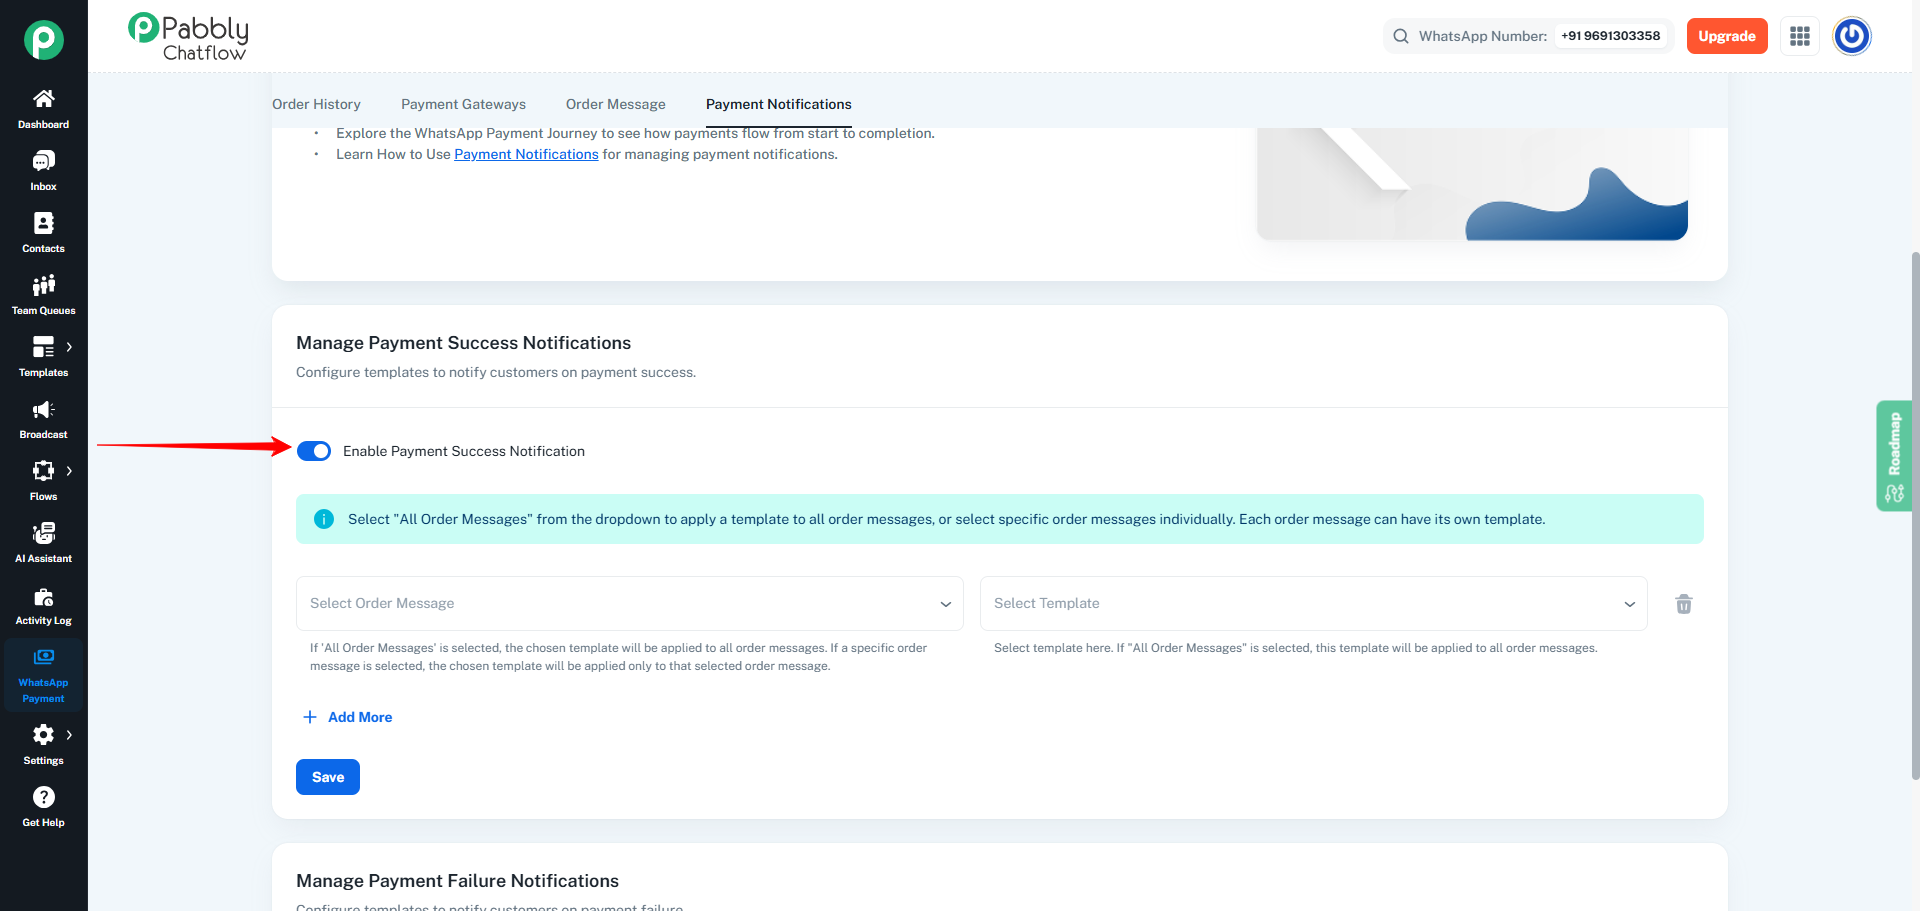
Inside the Payment Notifications tab, locate the Manage Payment Success Notifications section.
- Turn ON the Enable Payment Success Notification toggle.
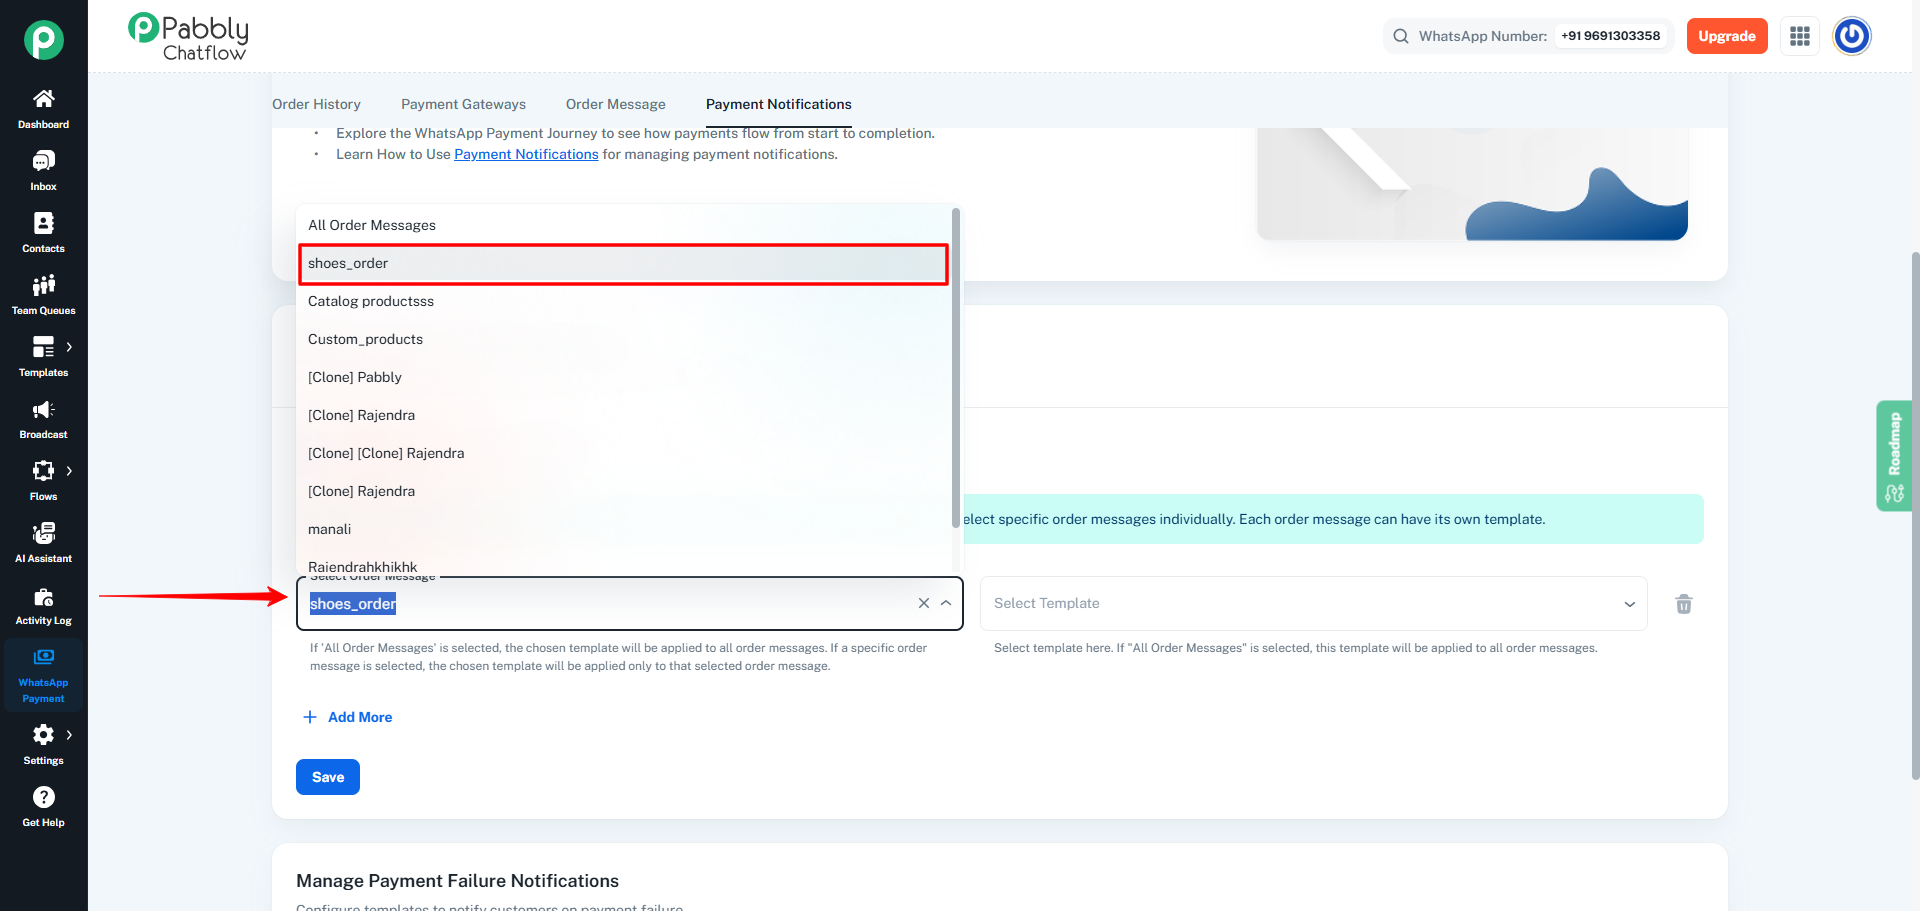
Step 2.2 — Select Order Message
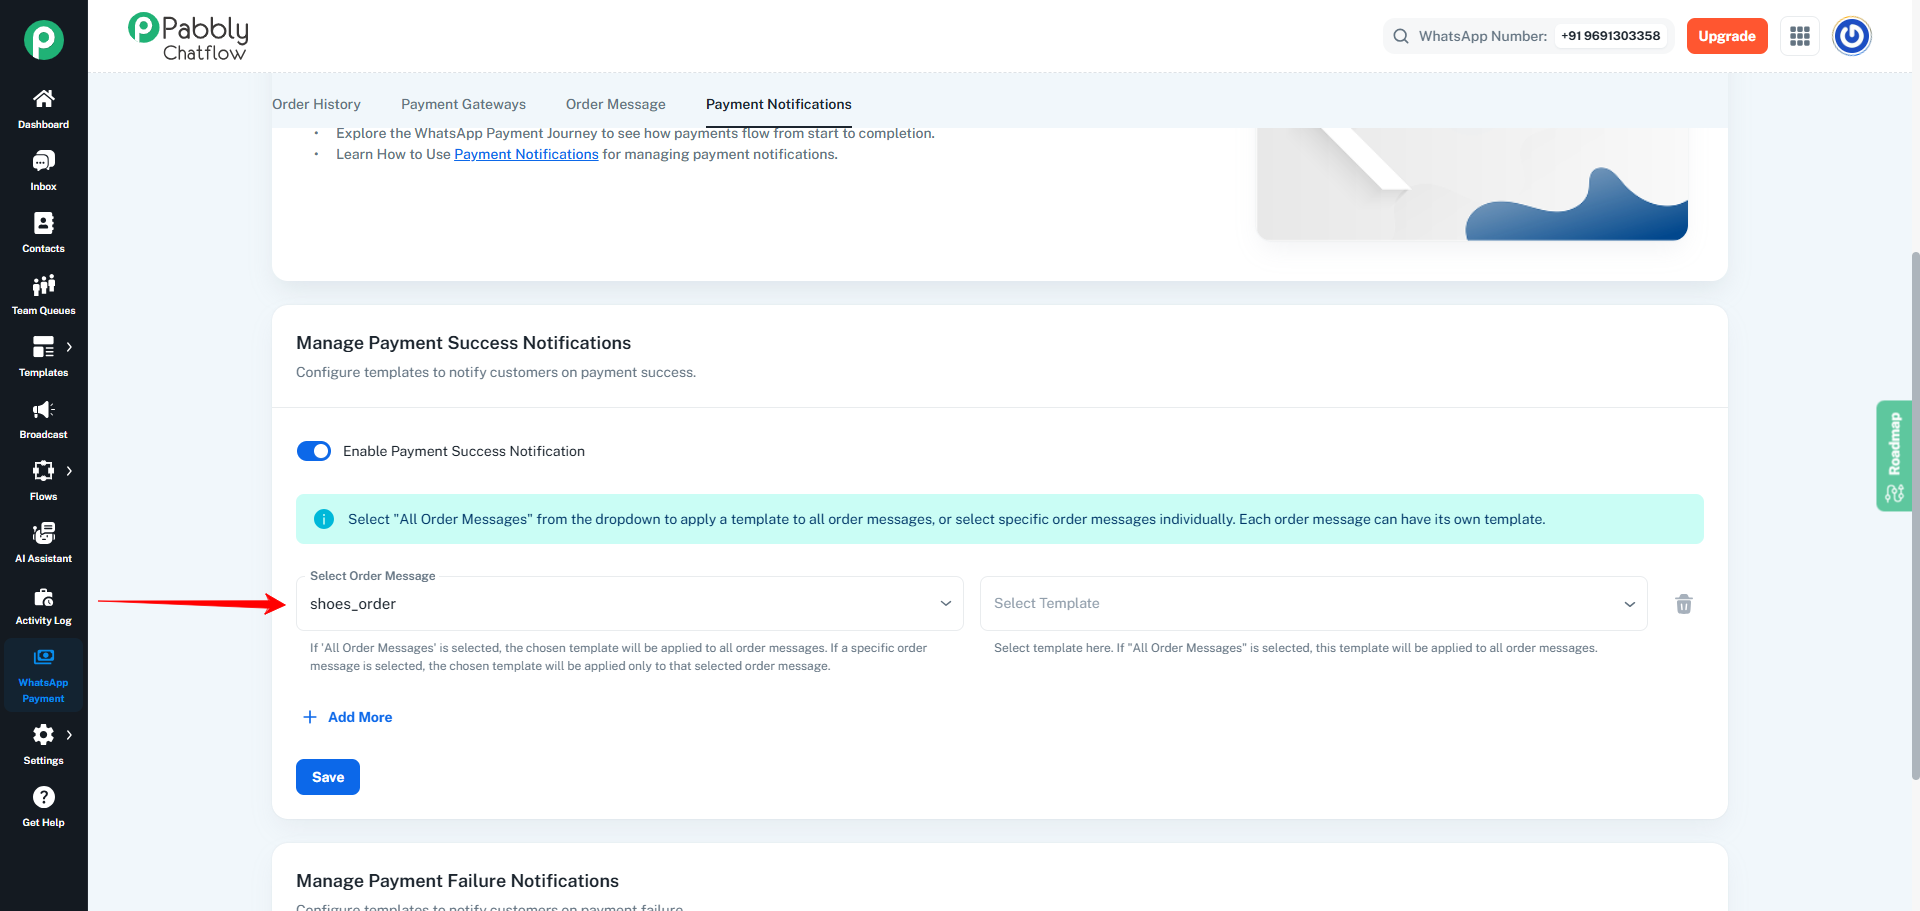
Click on the Select Order Message dropdown.
You will see:
- All Order Messages
- A list of individual Order Messages you previously created
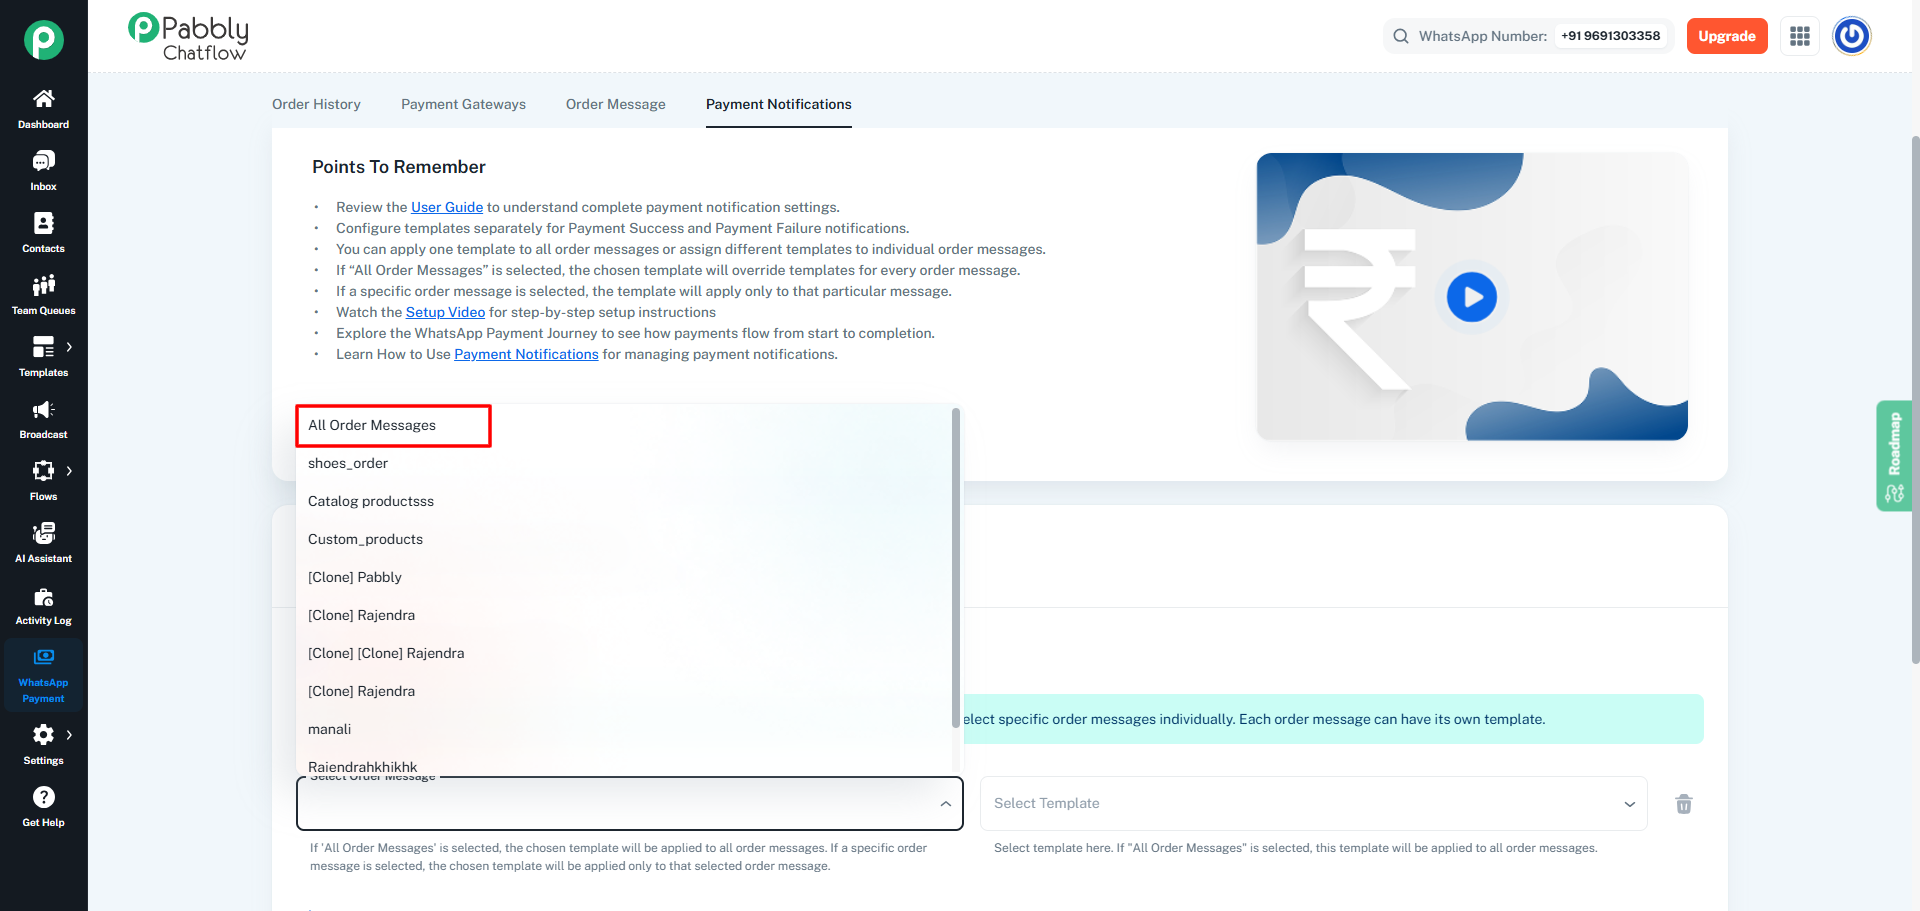
What happens if you select “All Order Messages”?
If you choose All Order Messages:
- The selected Meta Approved Template will be applied to every payment success, regardless of which Order Message was used.
- You do not need to configure each Order Message separately.
- This option is ideal when you want one common success notification across all order flows.
📌 What happens if you select a specific Order Message?
If you choose a specific Order Message:
- The notification template will only be sent for payments related to that specific Order Message.
- You can create different success messages for different types of orders.
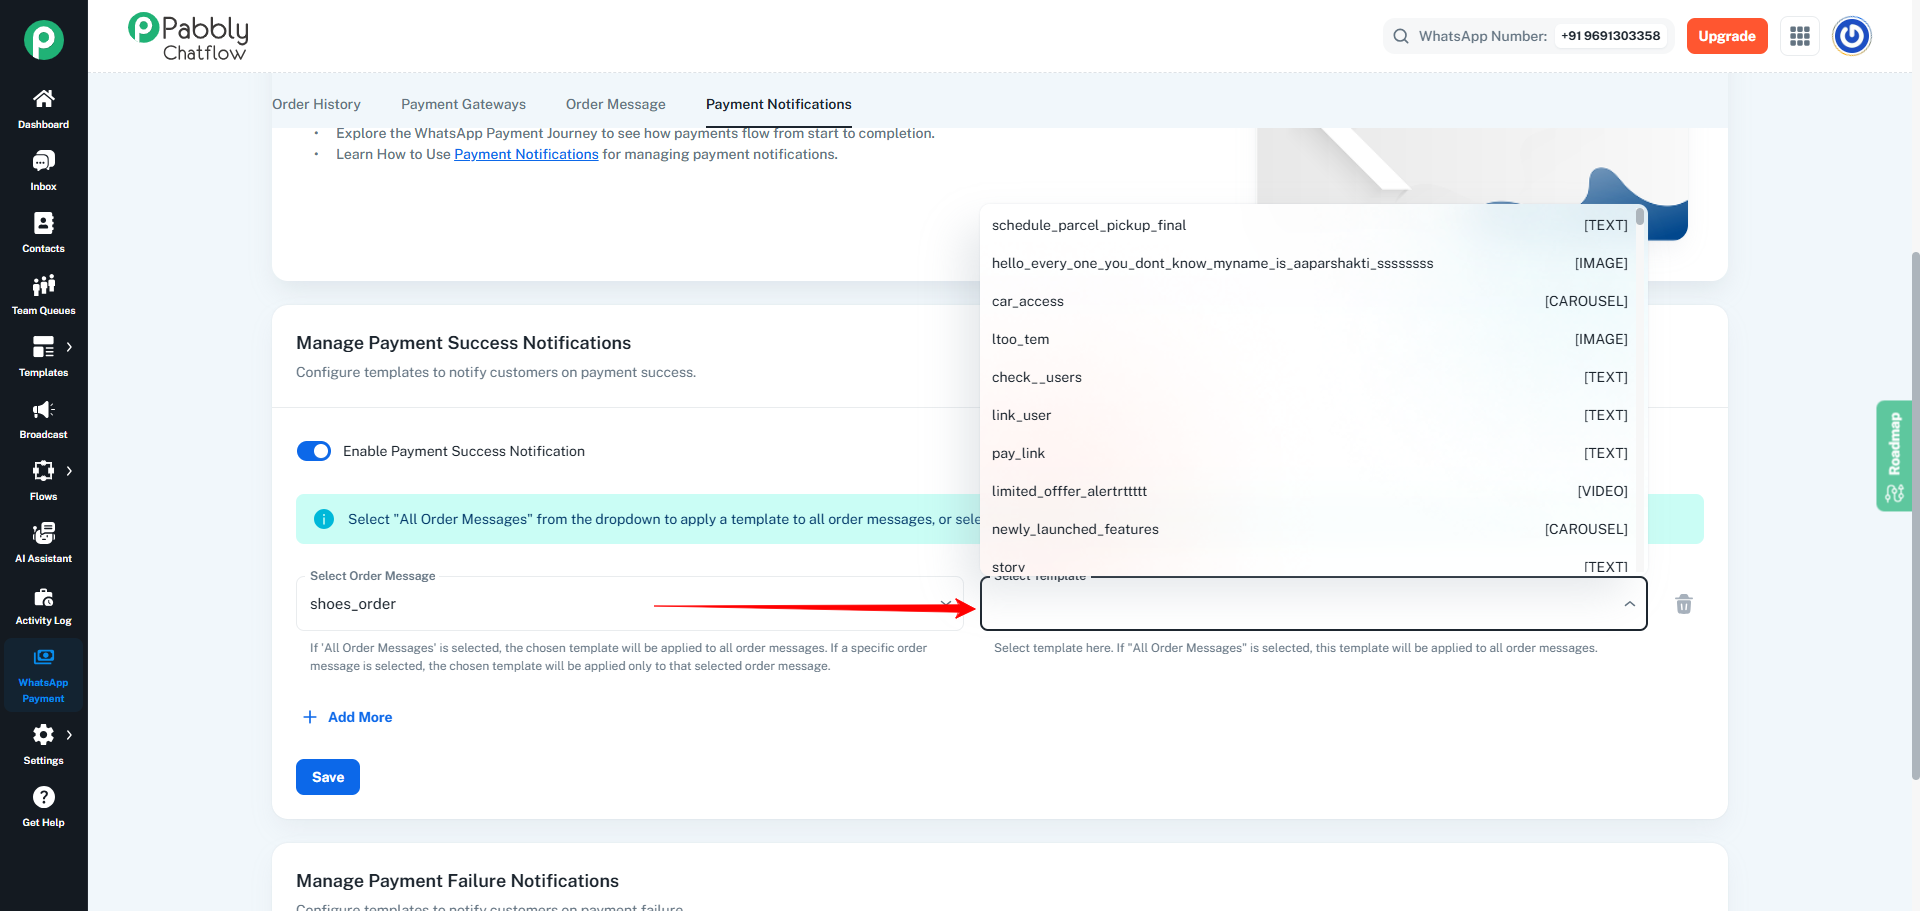
Click the Select Template dropdown and choose a Meta Approved Template that should be sent when payment succeeds.
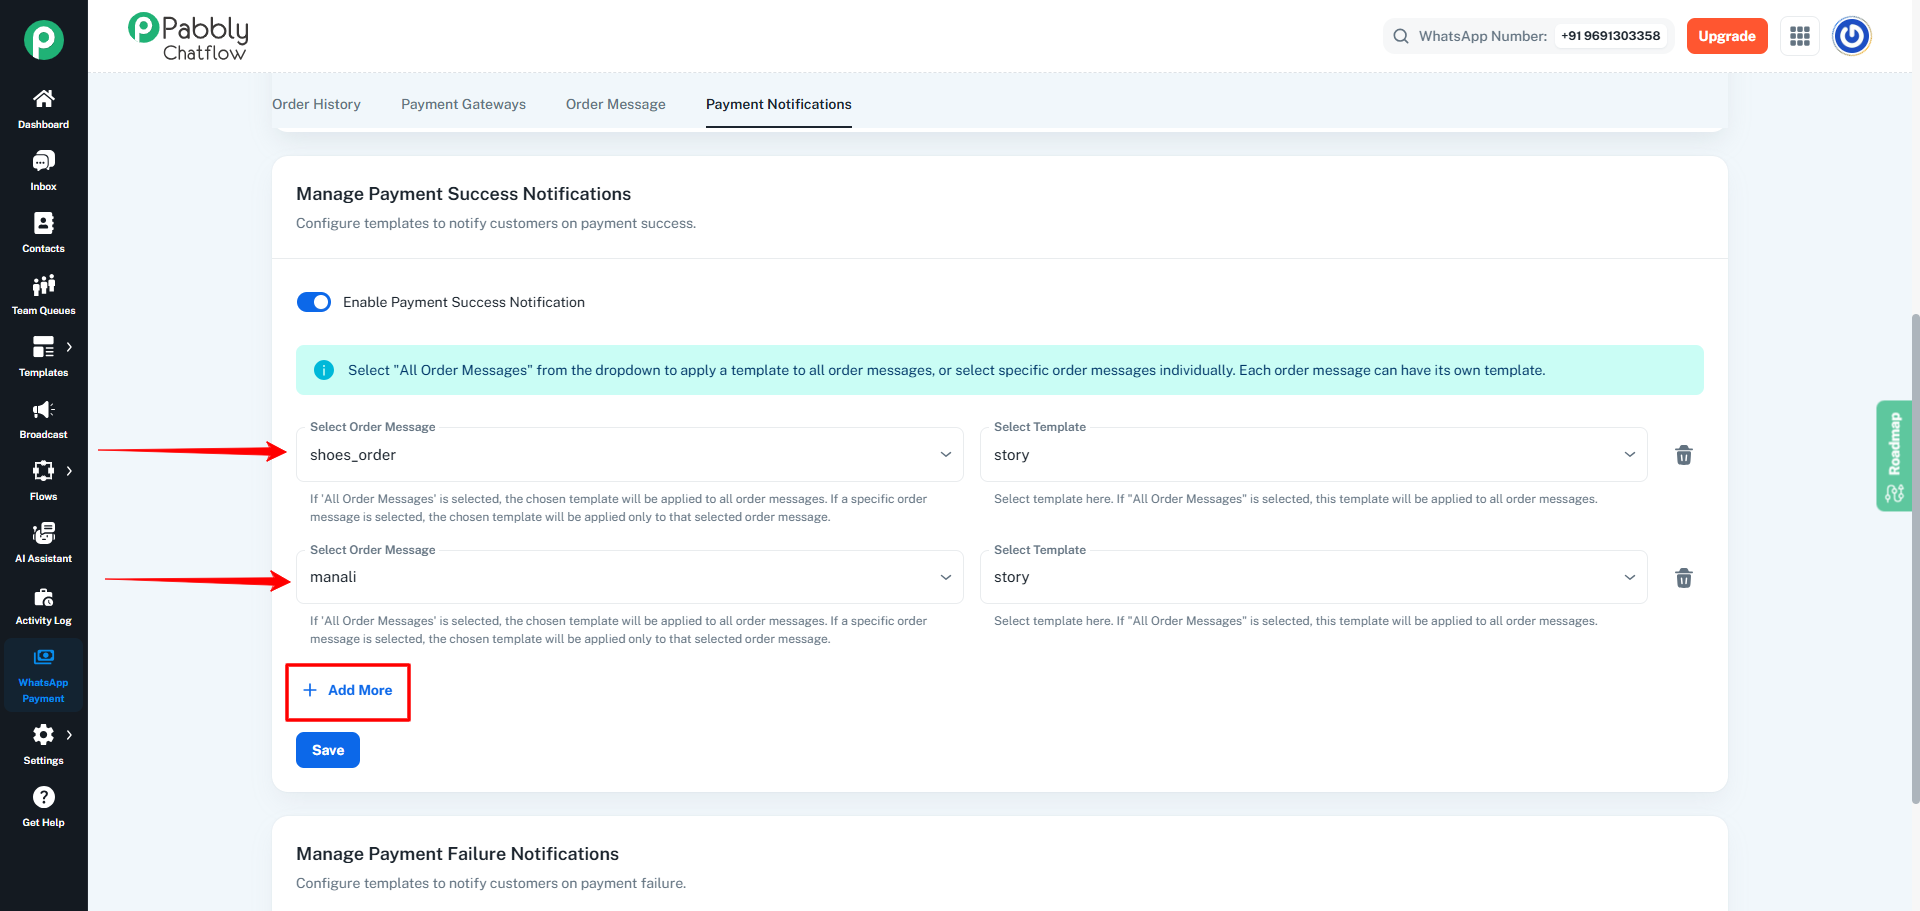
Step 2.4 — Add More Success Notifications (Optional)
If you want unique success messages for different types of orders:
- Click Add More
- Select Order Message
- Select Meta Approved Template
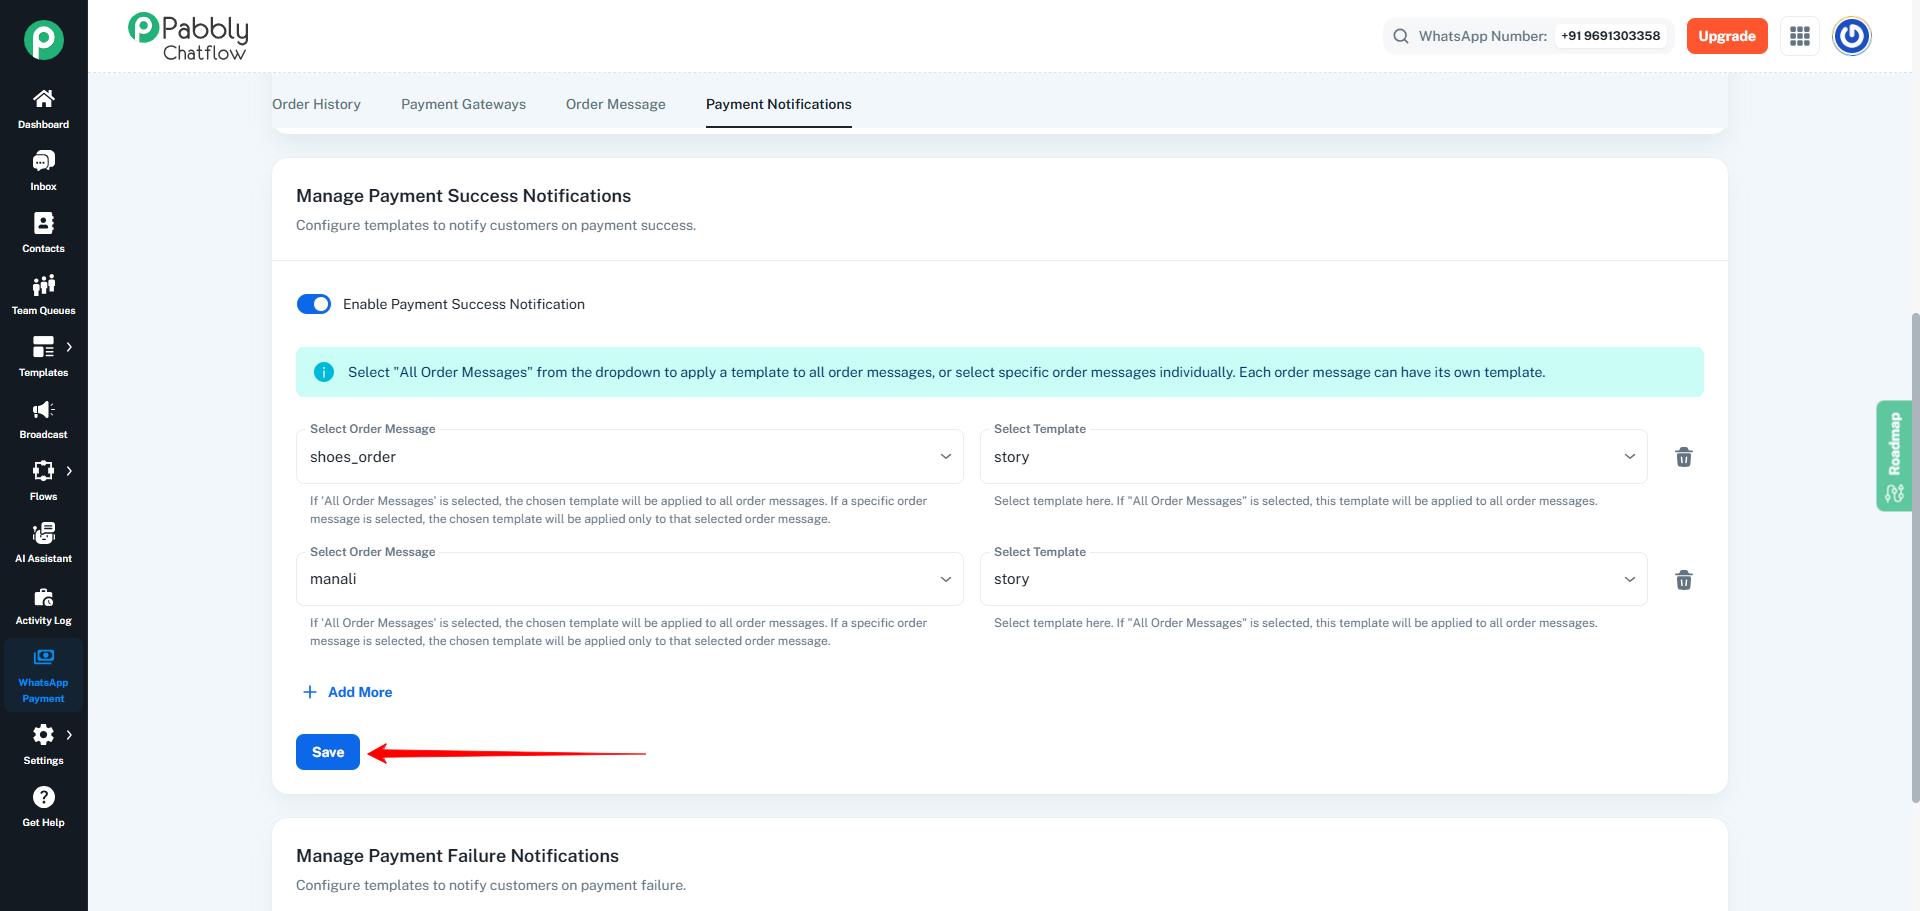
Step 2.5 — Save the Success Configuration
Click the Save button.
A confirmation message (toast) will appear once the configuration has been saved.
Important Notes for Success Notifications
- You must have at least one complete row when the Success toggle is enabled.
- Each row must contain:
- An Order Message
- A Meta Approved Template
- If a row is incomplete, validation errors will appear.
📸 Insert Screenshot Here
[Image: Validation Error – Missing Fields (Order Message or Template)]
3. Set Up Payment Failure Notifications
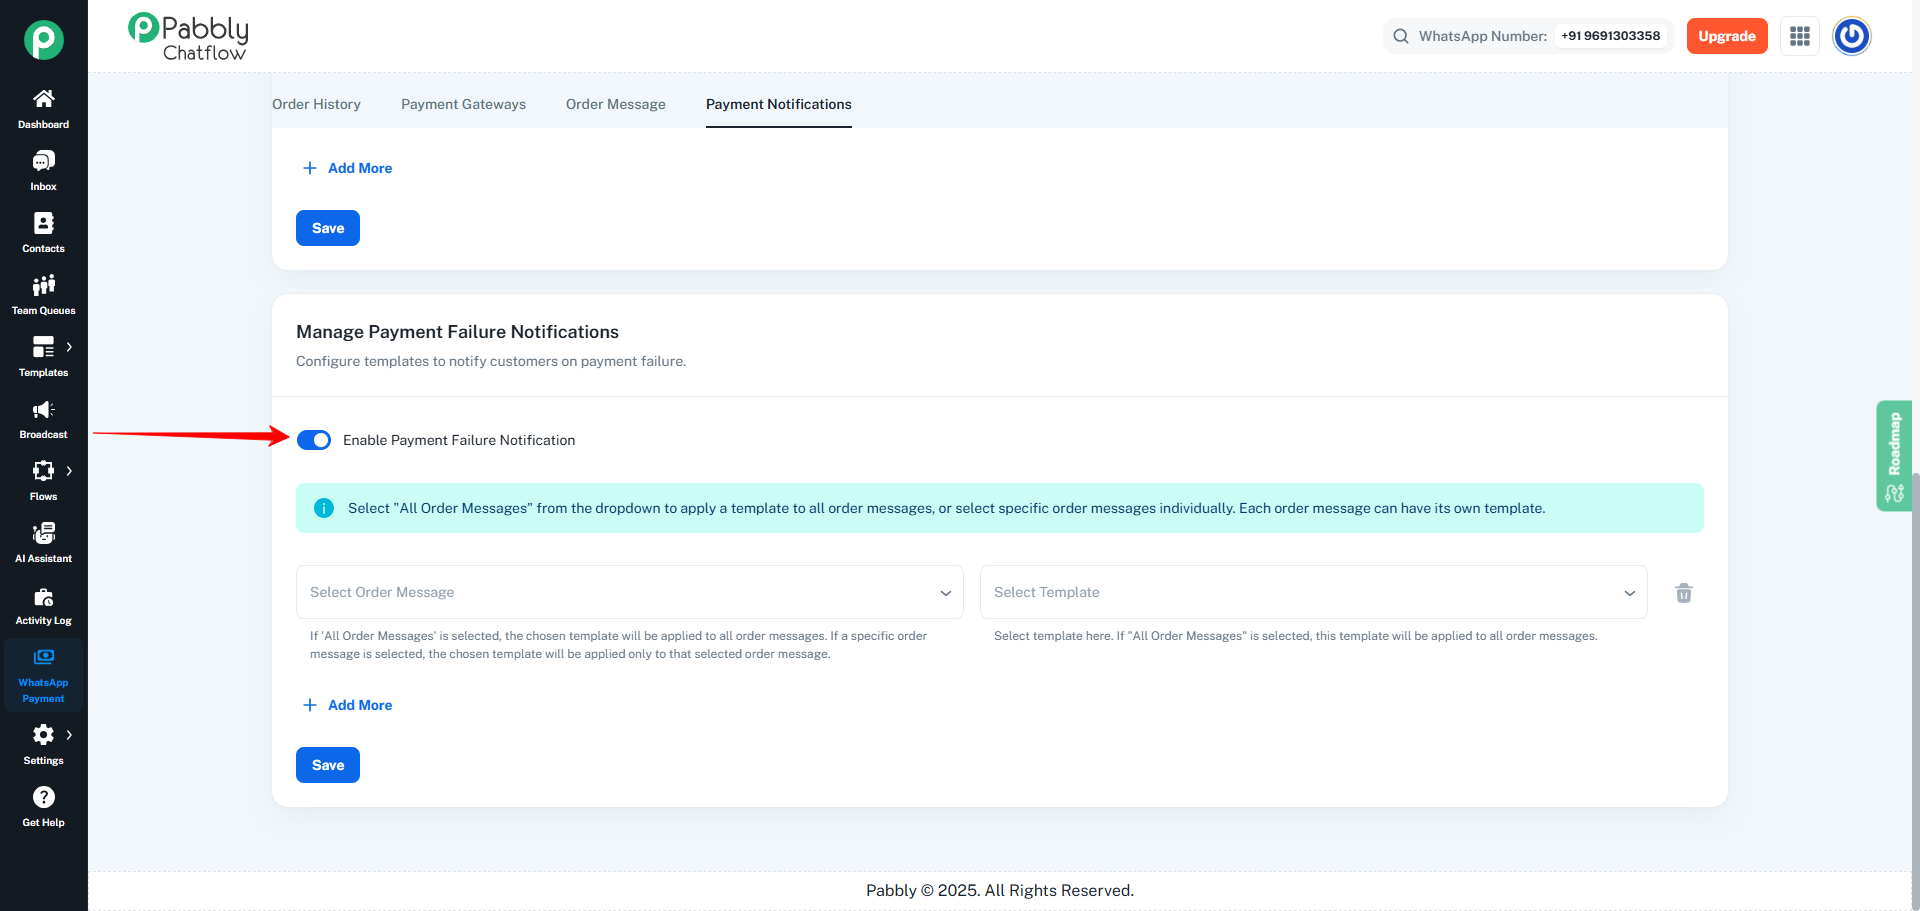
Step 3.1 — Enable Failure Notification
Scroll down to the Manage Payment Failure Notifications section.
- Turn ON the Enable Payment Failure Notification toggle.
Step 3.2 — Select Order Message
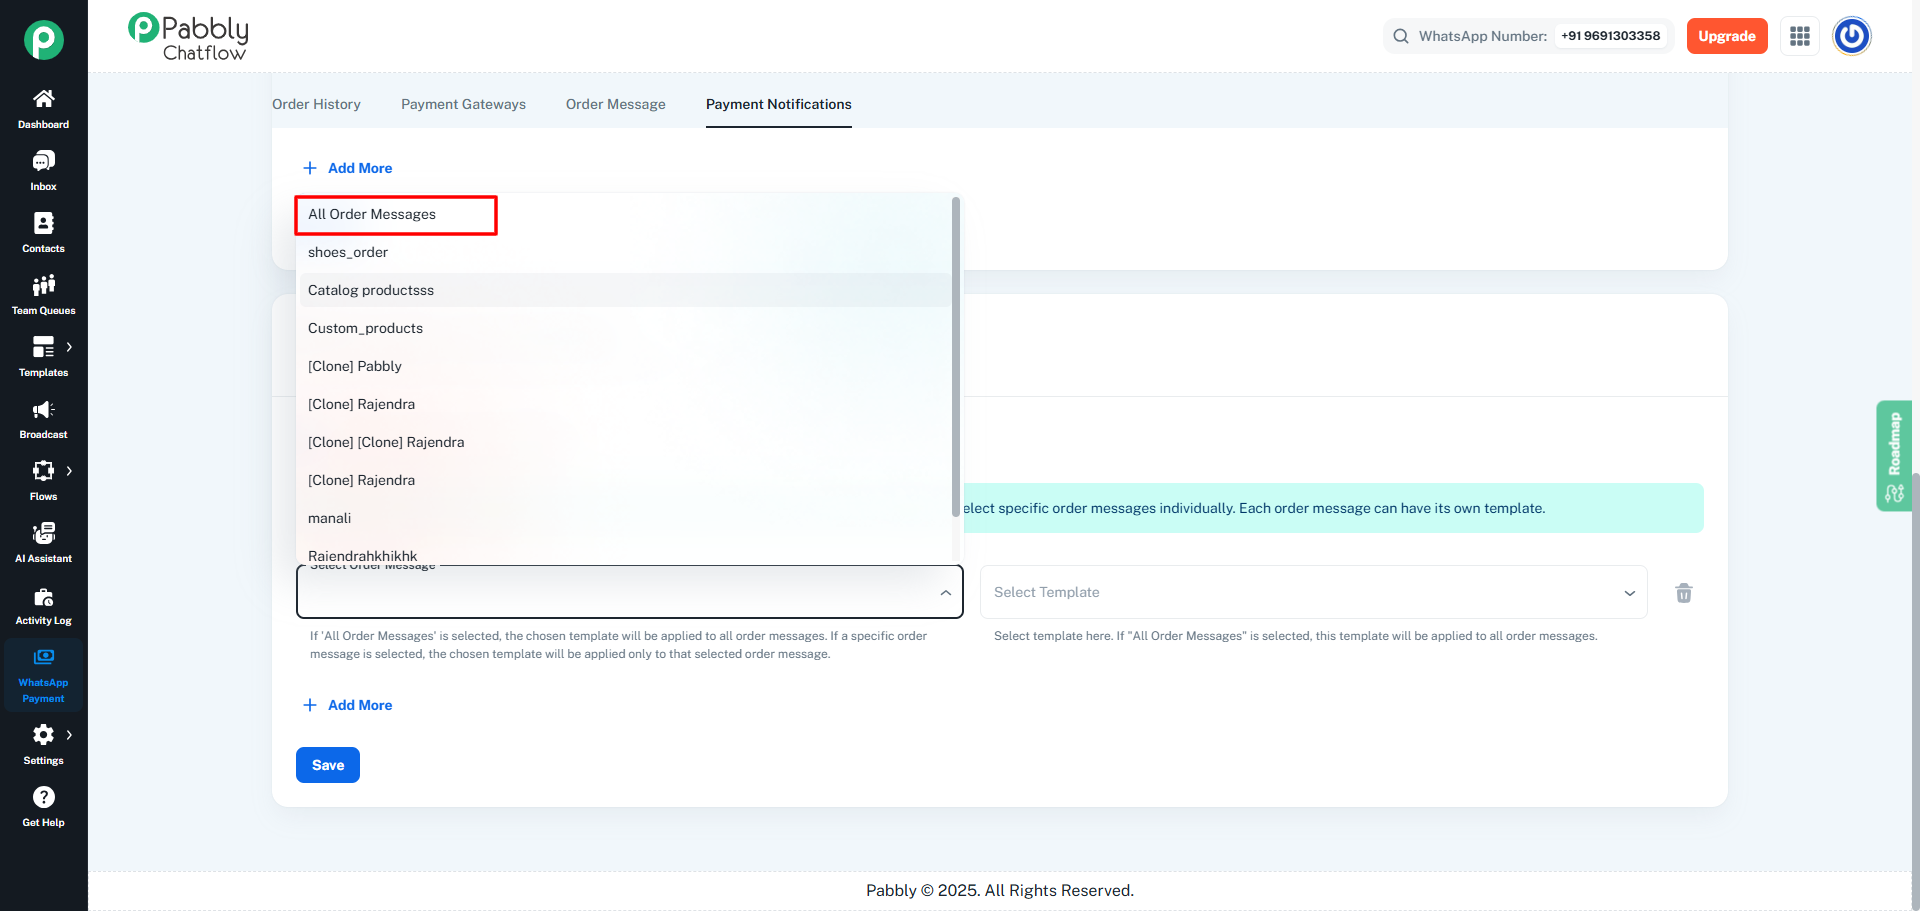
Choose between:
- All Order Messages, or
- A specific Order Message
What happens if you select “All Order Messages”?
If you select All Order Messages:
- The chosen Meta Approved Template will be applied to all payment failures, regardless of which Order Message triggered the payment.
- This is ideal when you want one universal failure notification.
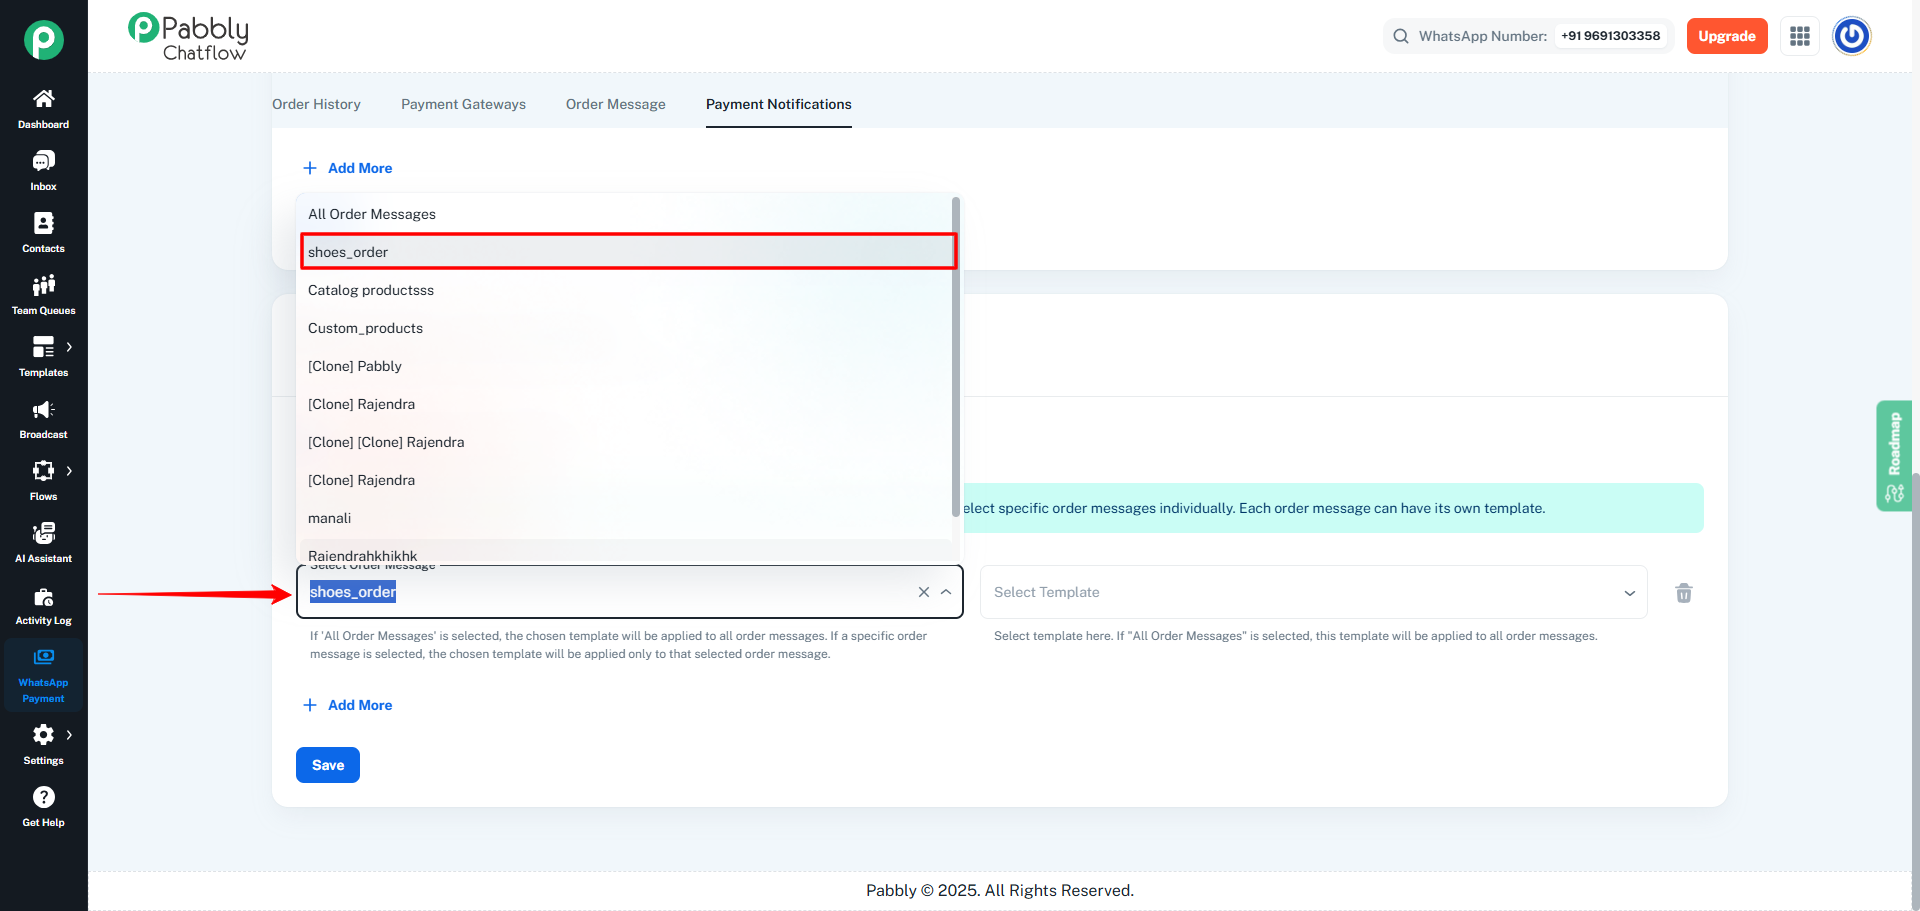
What happens if you select a specific Order Message?
- Only failures related to that specific Order Message will trigger the chosen template.
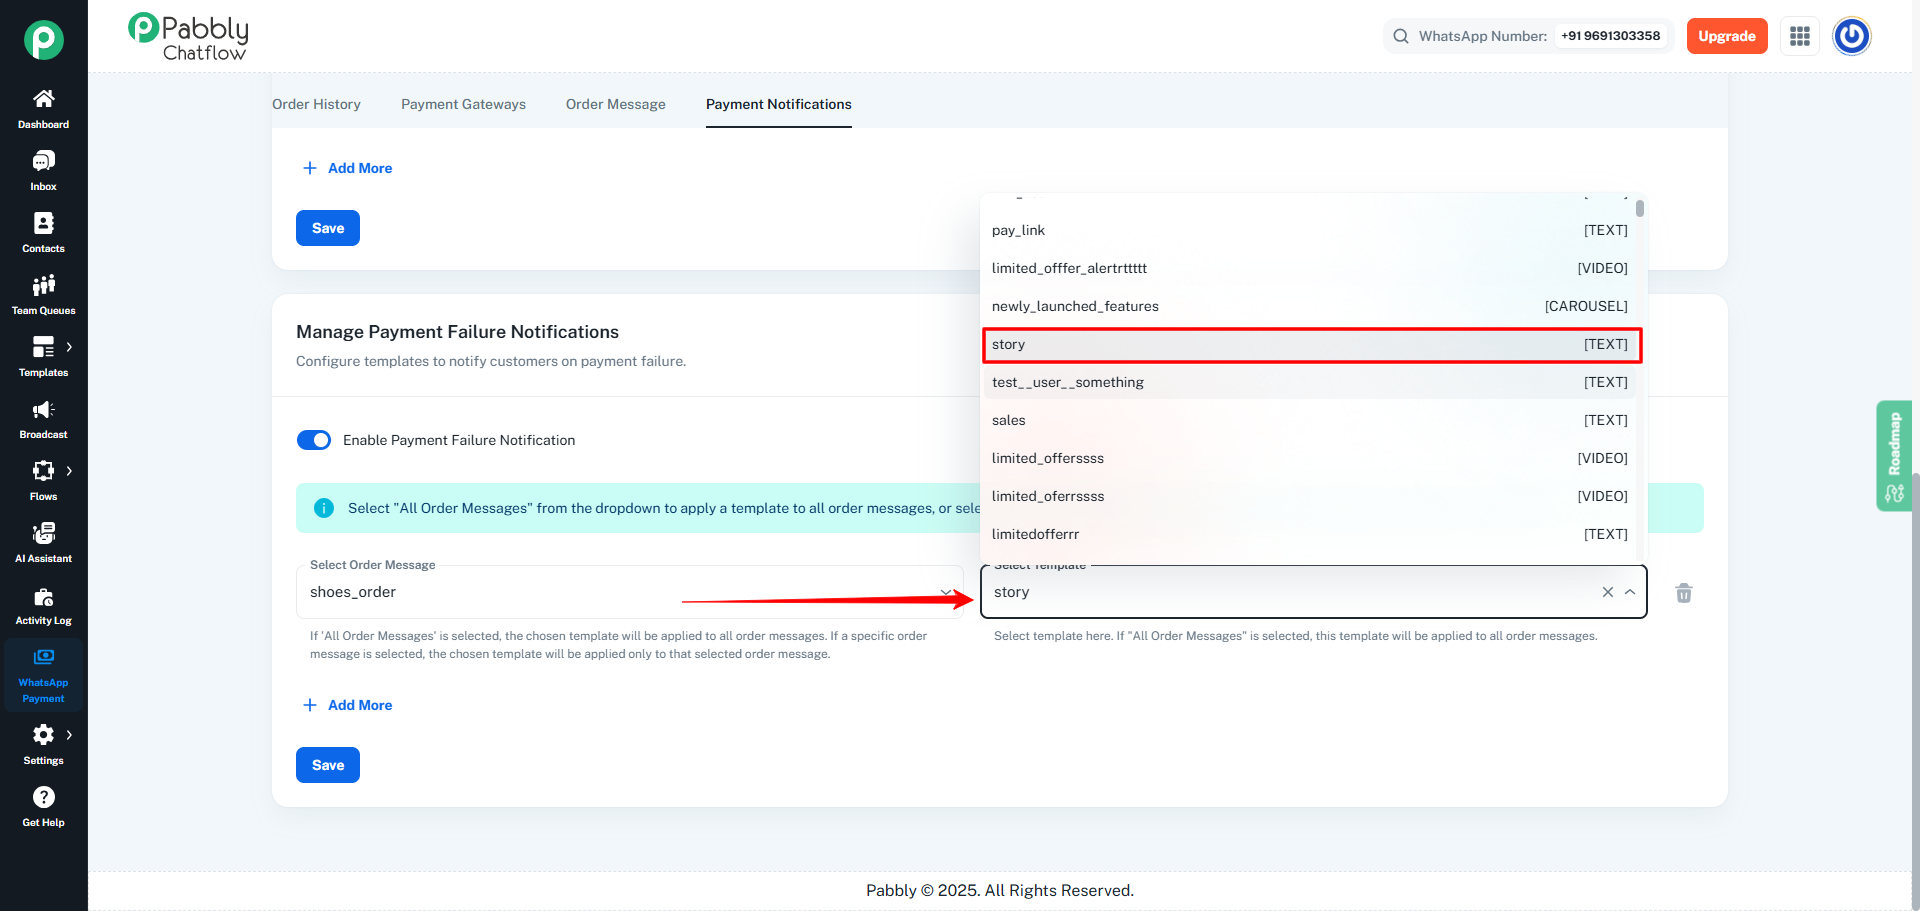
Choose the Meta Approved Template that should be sent when a payment fails.
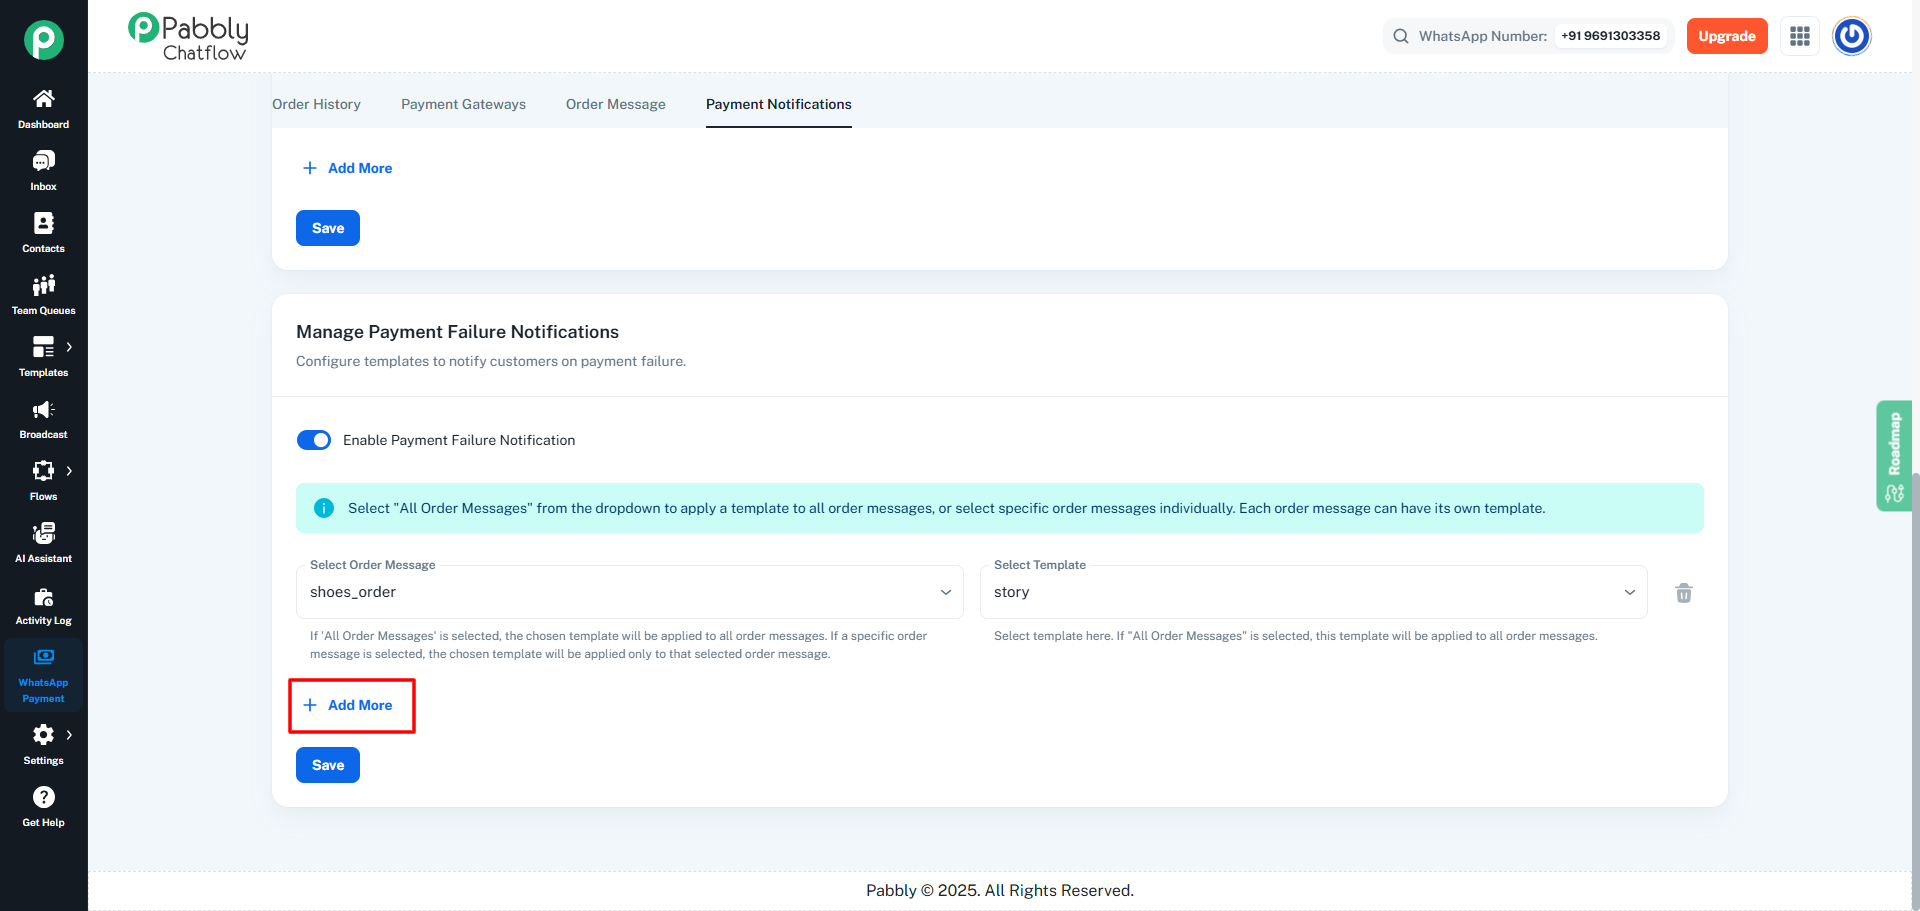
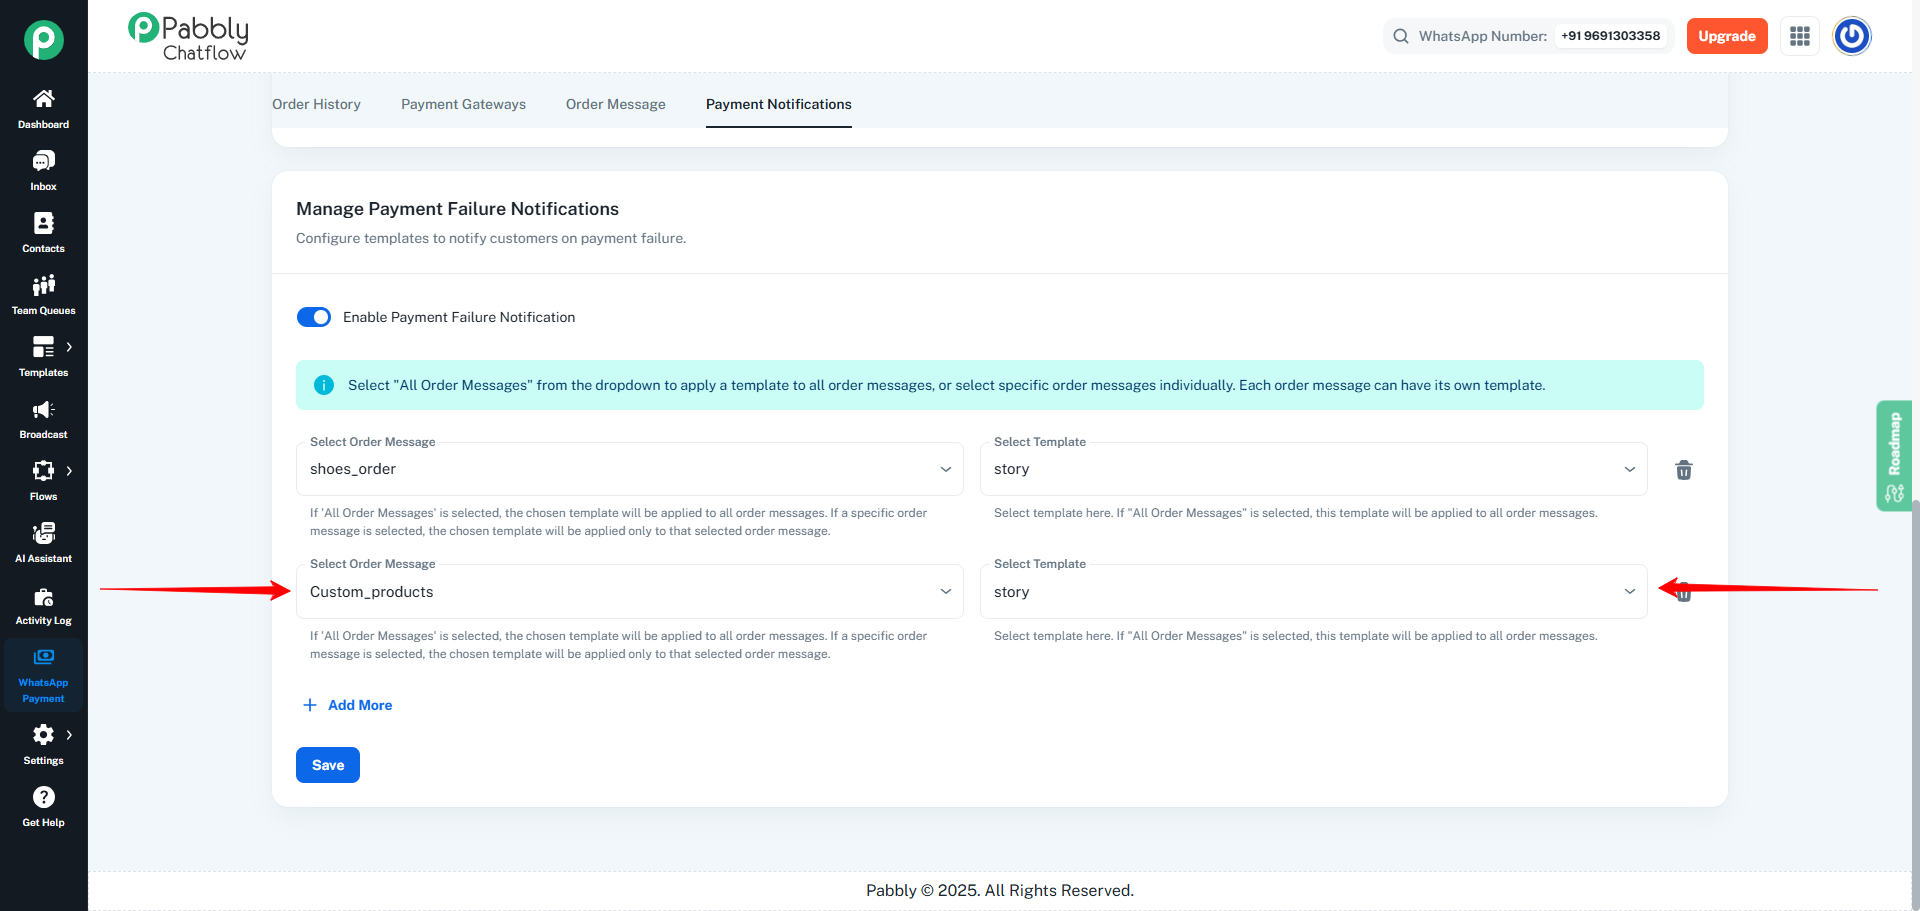
Step 3.4 — Add More Failure Notifications (Optional)
If you want different failure notifications for different order types:
- Click Add More
- Select Order Message
- Select Meta Approved Template
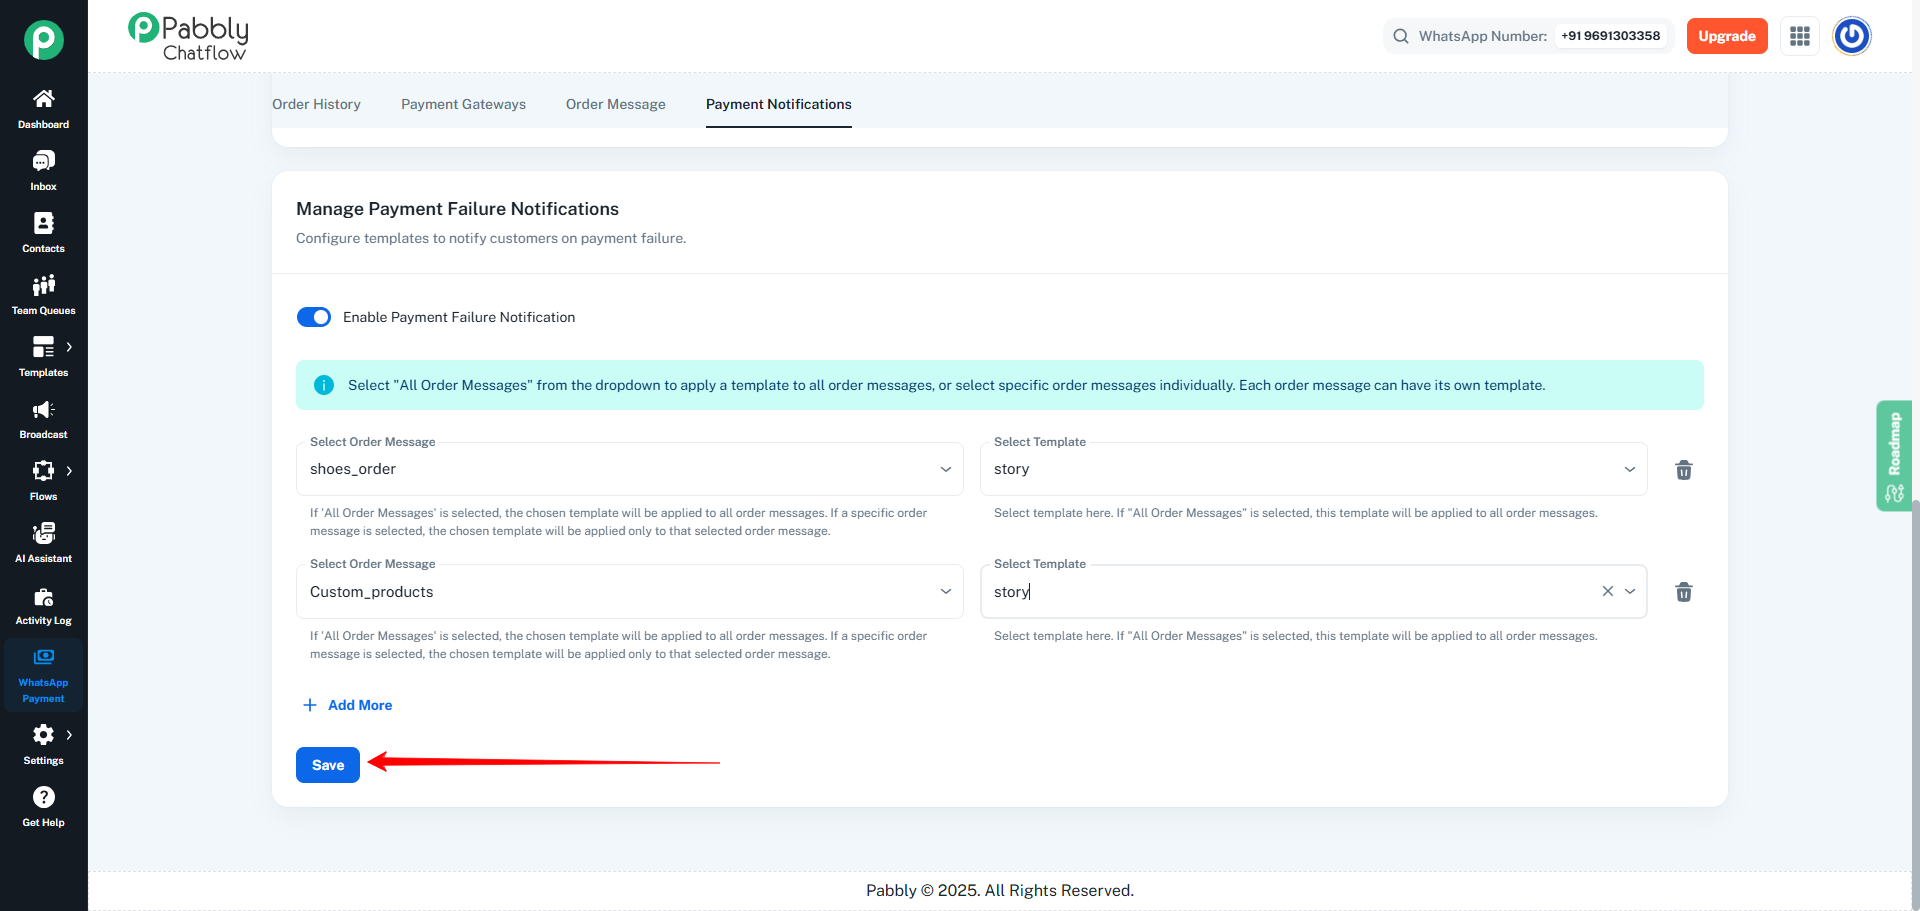
Step 3.5 — Save the Failure Configuration
Click the Save button.
You will see a success toast confirming the settings.
4. Review & Finalize Your Notification Settings
Before leaving this section, ensure:
- Success Notification = ON (if required)
- Failure Notification = ON (if required)
- Each enabled event contains at least one complete mapping row
- Every row includes:
- A valid Order Message
- A valid Meta Approved Template
Your Payment Notifications setup is now complete.
 Pabbly Chatflow Team•Updated Oct 24, 2026•3 min read Video included
