Pabbly Email Marketing
Follow these steps to add a new business in Pabbly Email Marketing:
Login / Sign up to your Pabbly Email Marketing account.
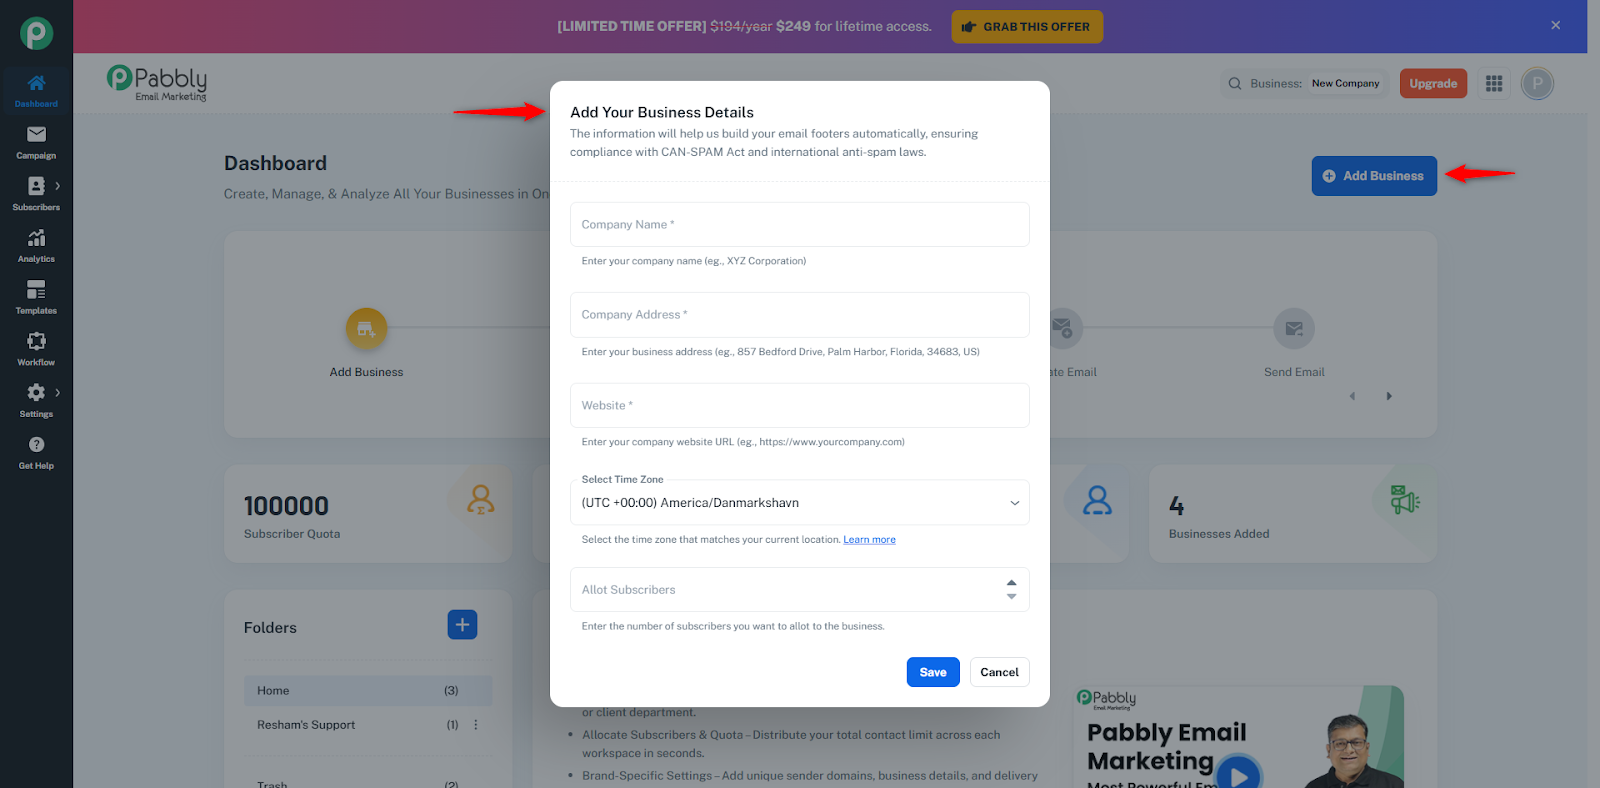
After entering the dashboard, you’ll see the “Add Your Business Details” dialog automatically.
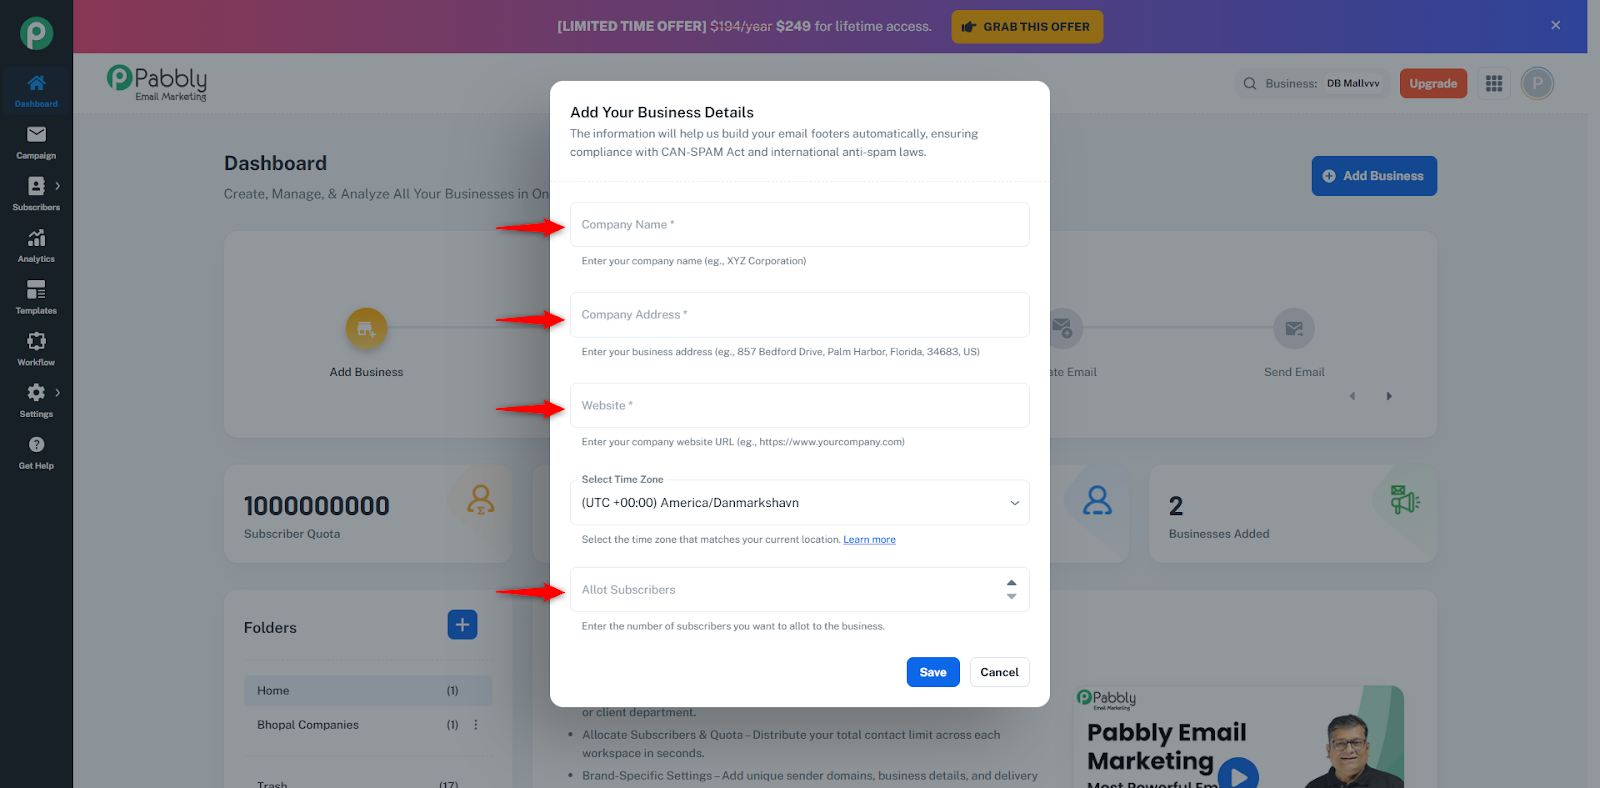
Enter your Company Name.
Fill in your Company Address.
Add your Website URL.
Select your Time Zone from the dropdown.
Enter the number of subscribers you want to assign to this business in Allot Subscribers.
Click on the Save button.
✅ Your business will be added successfully and you can start managing campaigns.
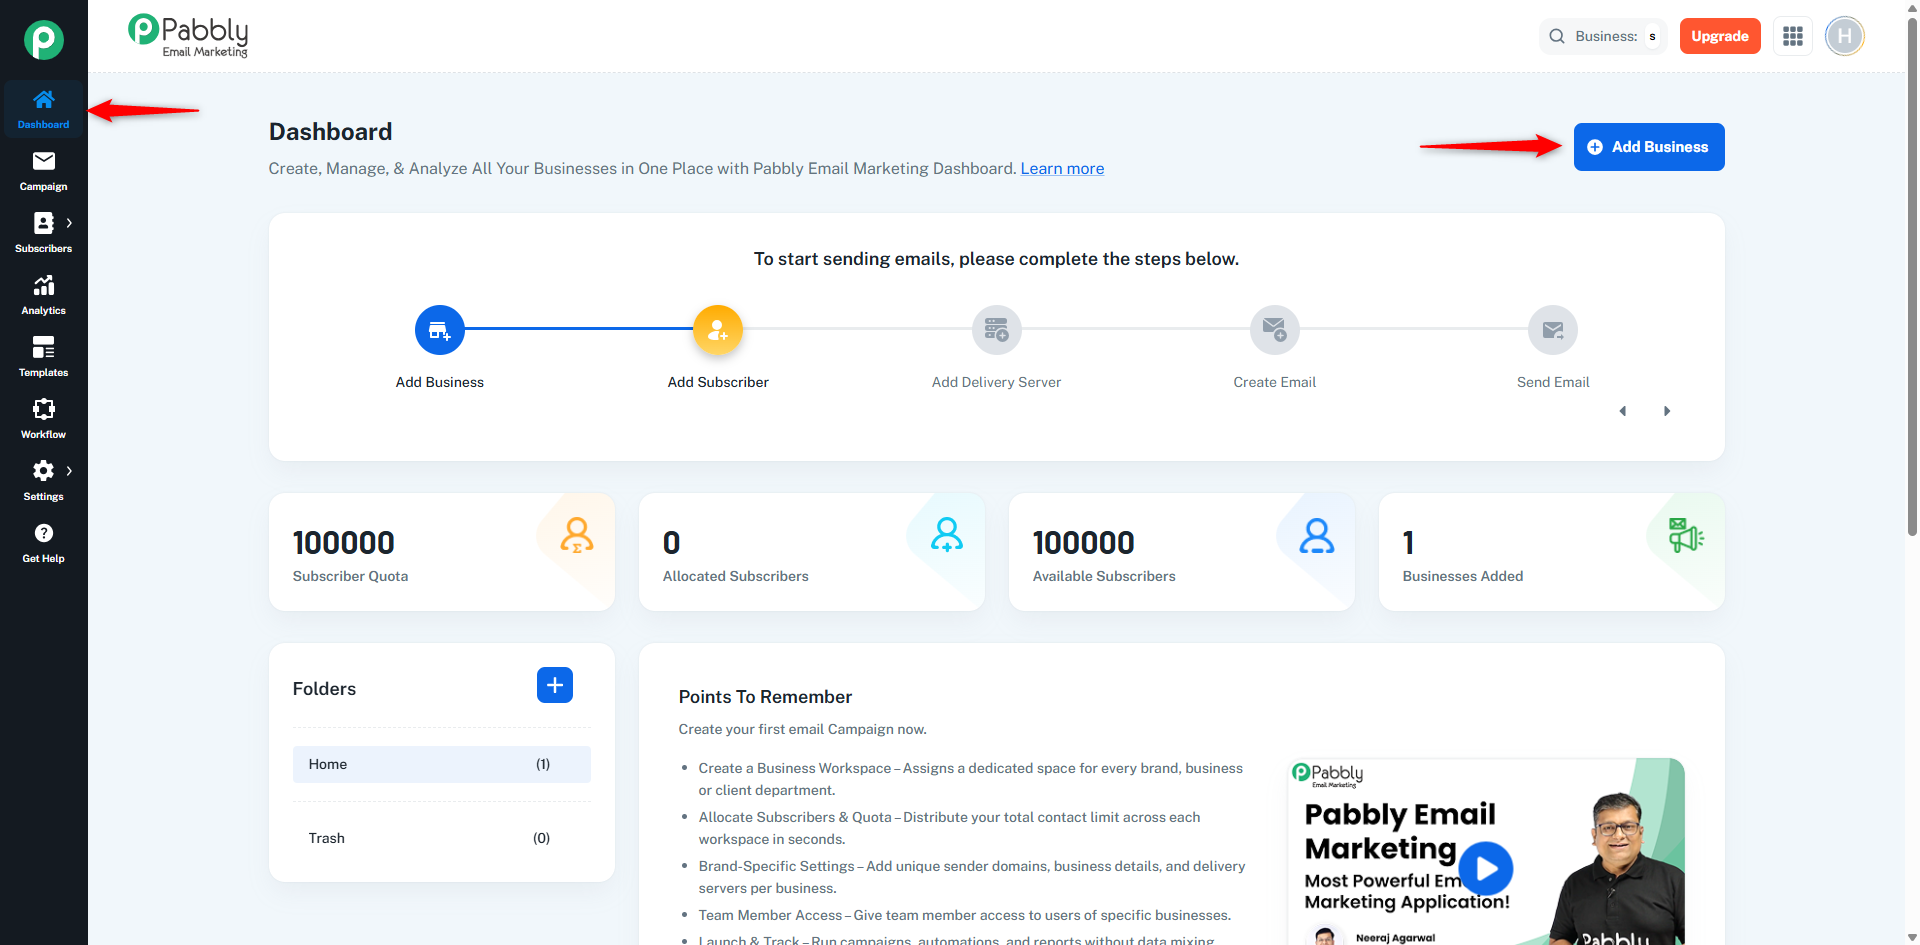
On the Dashboard, you will first see the “Add Business” button to add more businesses.
After the Add Business button, you will see four stats cards:
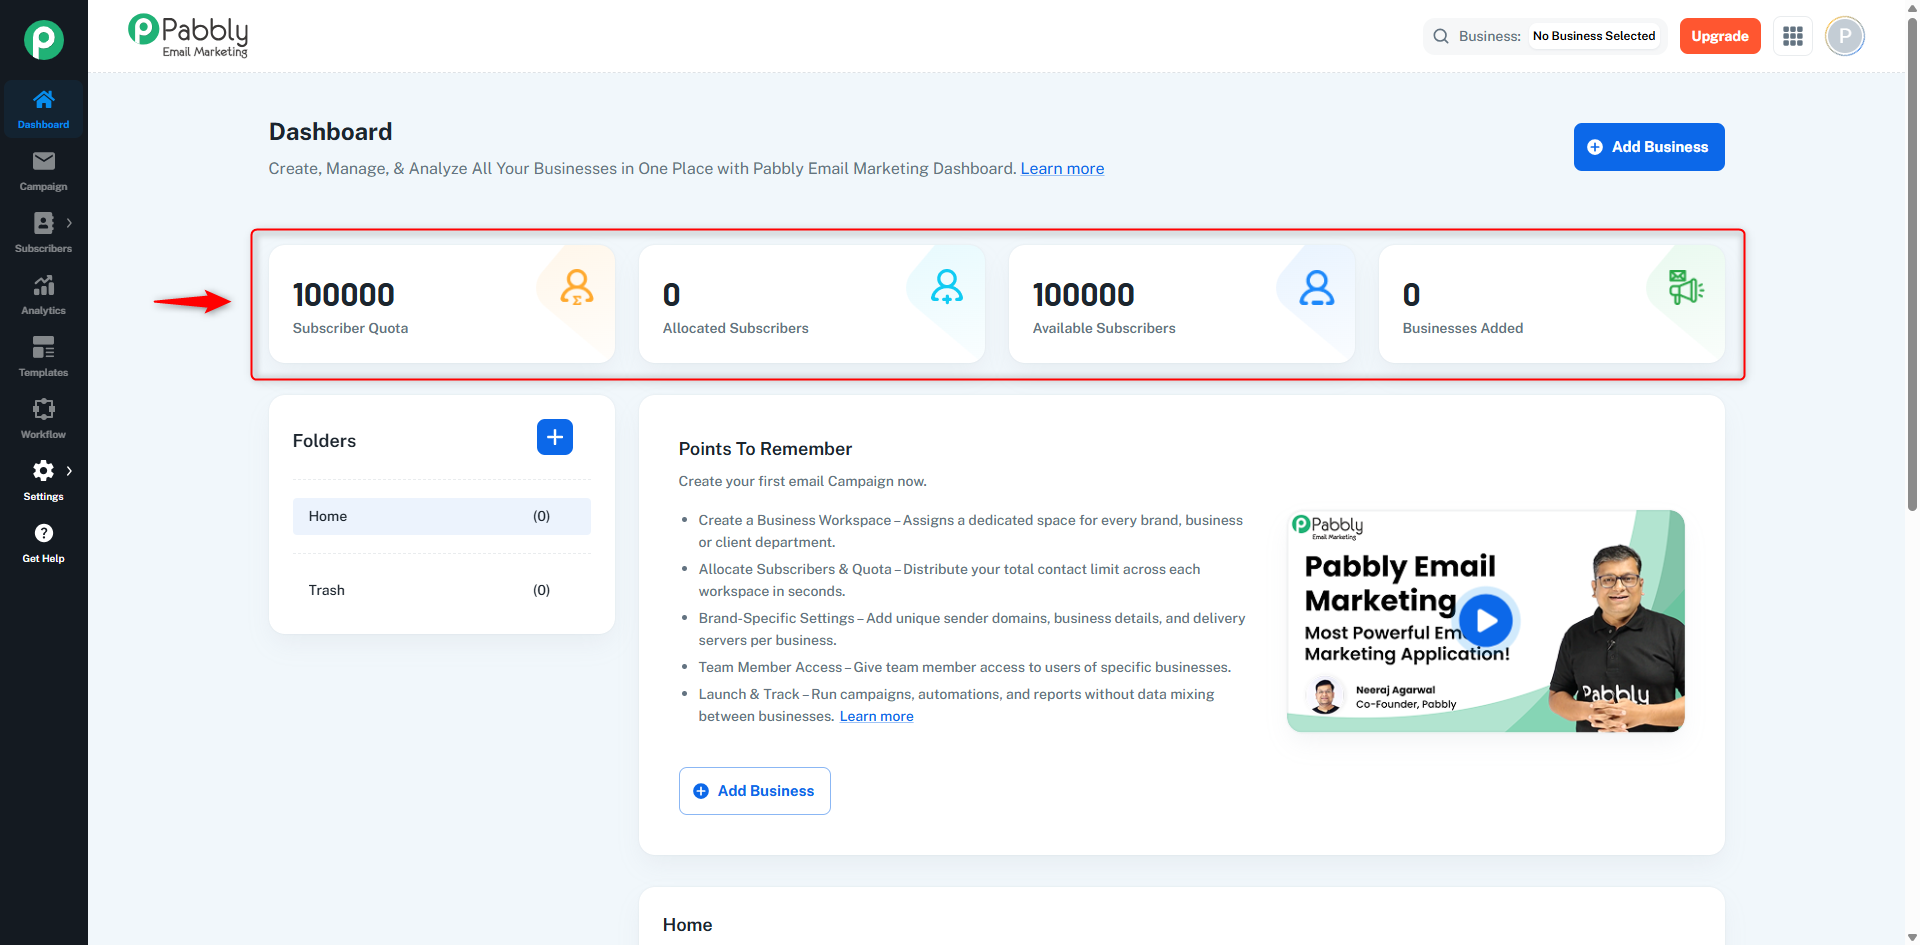
Subscriber Quota – Shows the total number of subscribers that can be added under your account/subscription plan.
Allocated Subscribers – Displays how many subscribers have already been assigned to your added businesses.
Available Subscribers – Shows the remaining subscriber limit that is still free to allocate.
Businesses Added – Displays the total number of businesses created under your account.
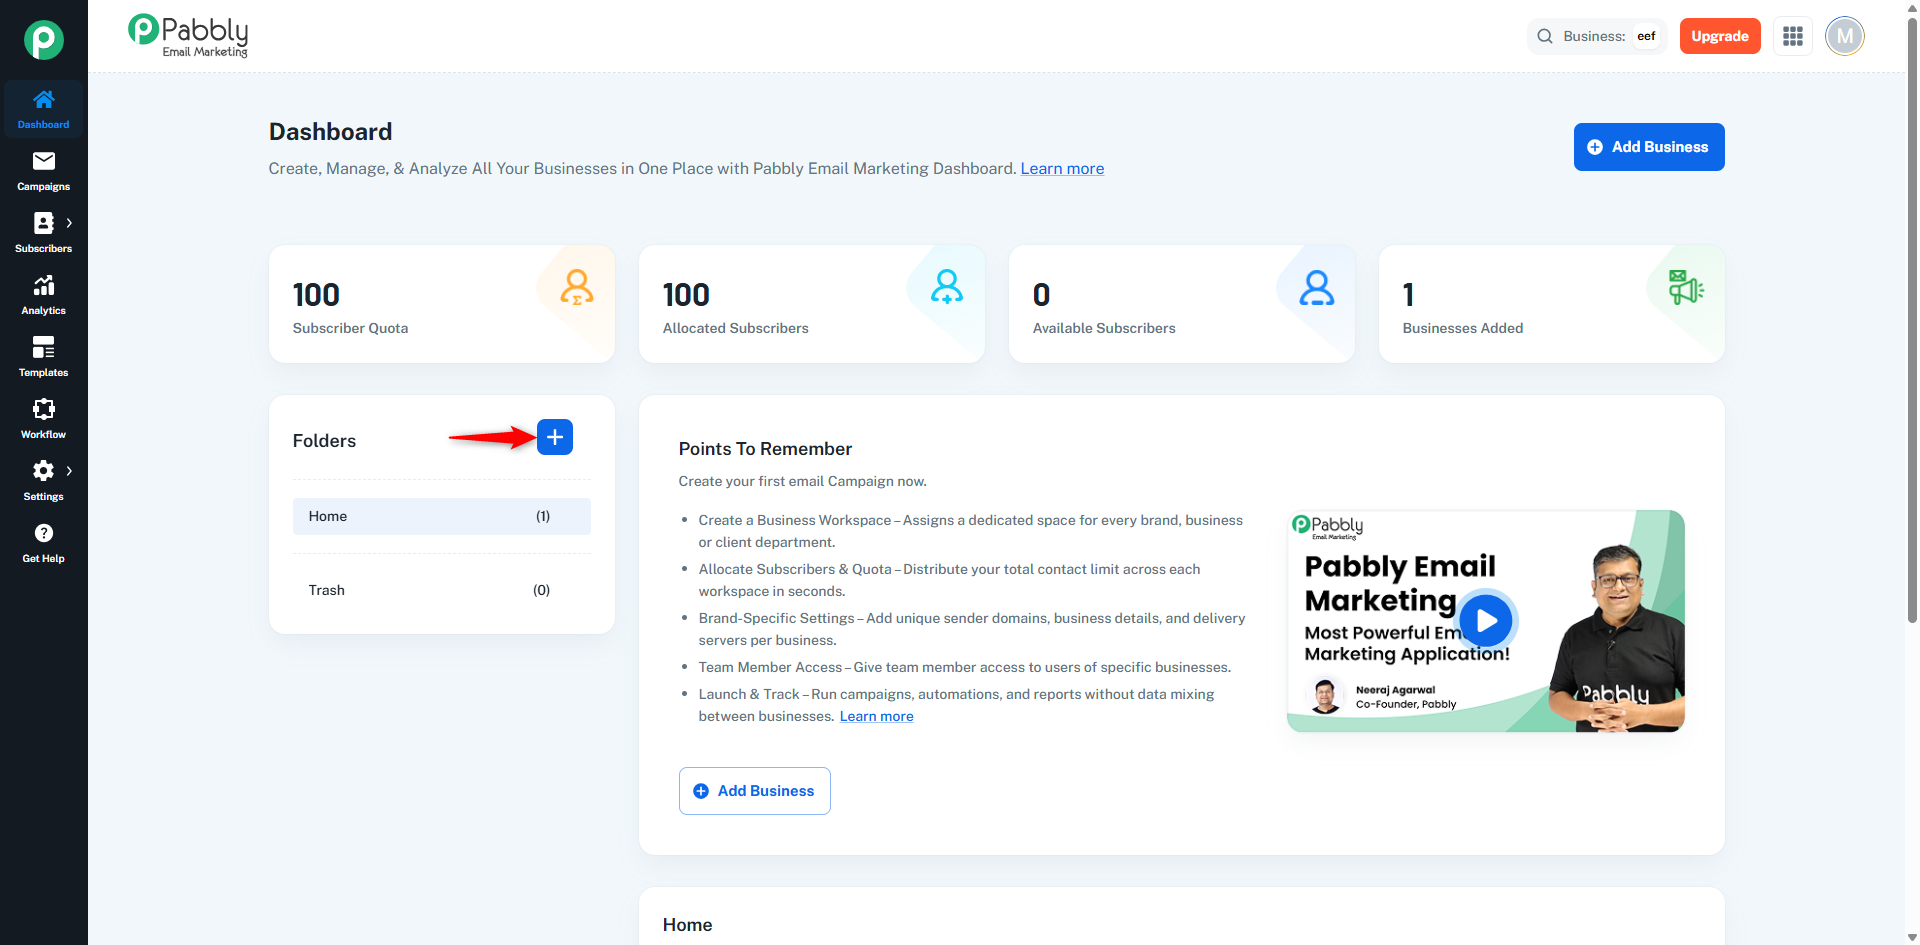
At the bottom, there is a Folders card. By default, it contains two folders:
Home – All newly added businesses are automatically added to the Home folder by default.
Trash – All deleted businesses are moved to the Trash folder.
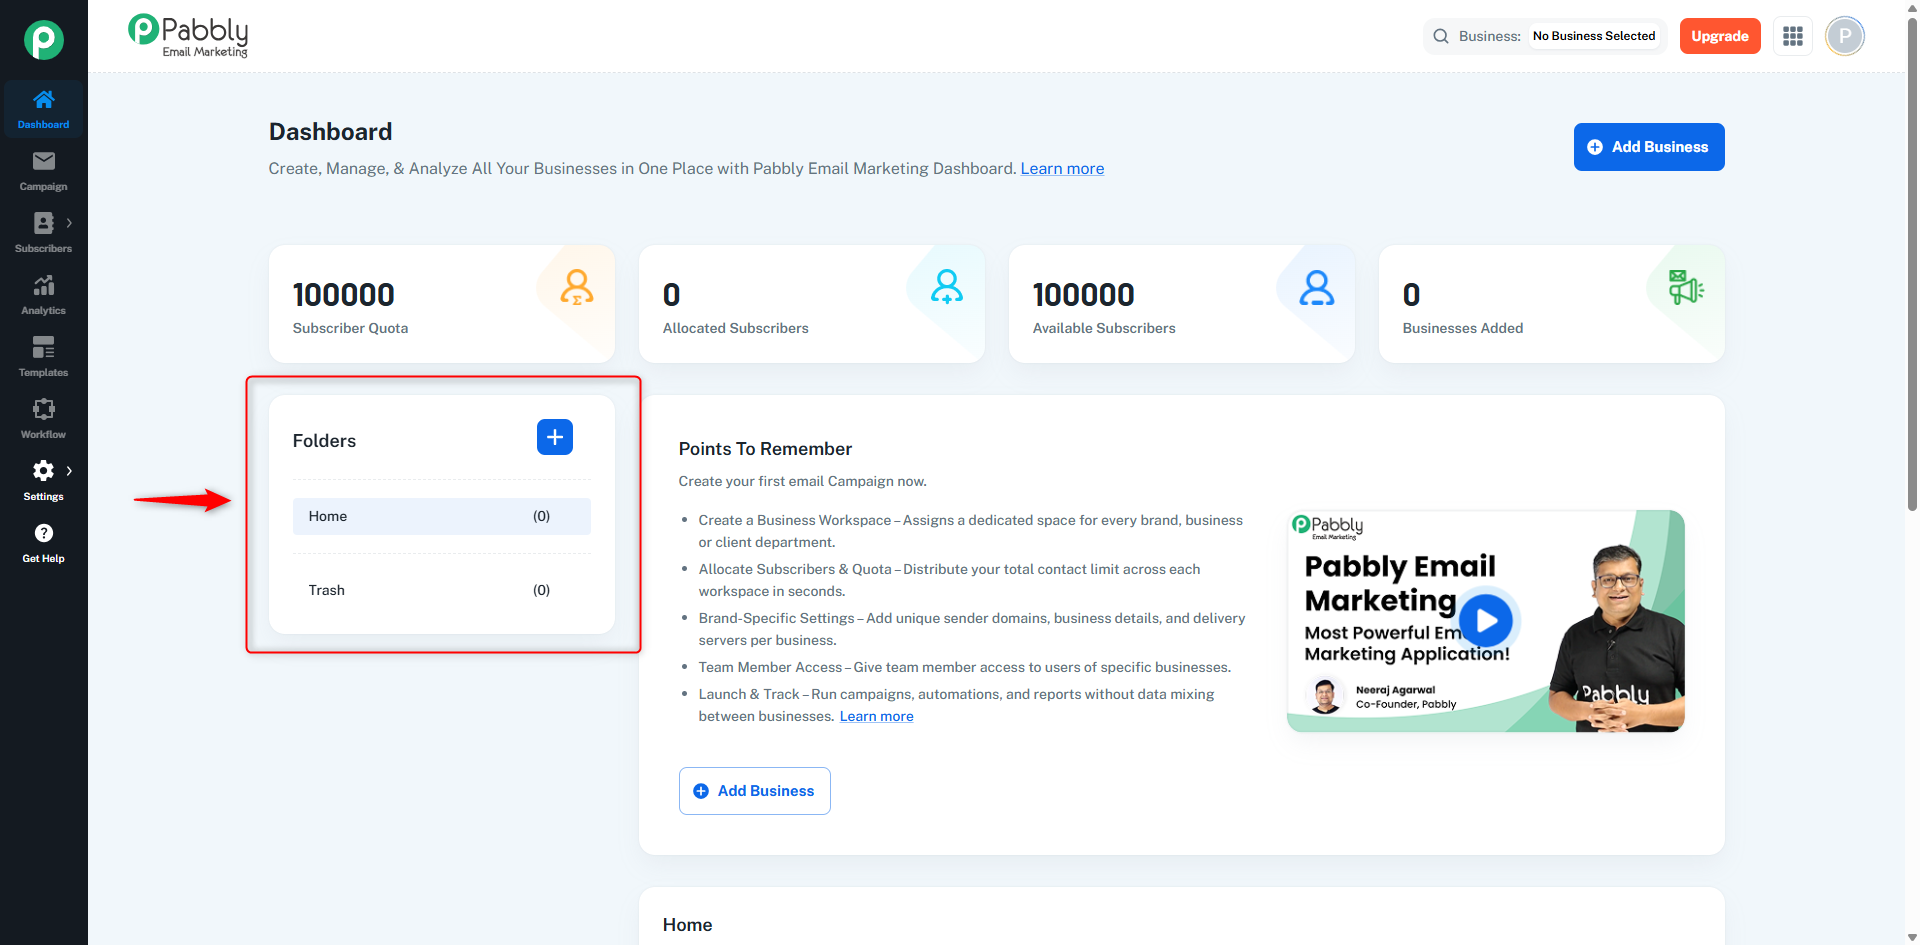
Any business you add will be automatically placed inside the Home folder, and once the business is added successfully, it will be displayed in the Home table under the Folders section.
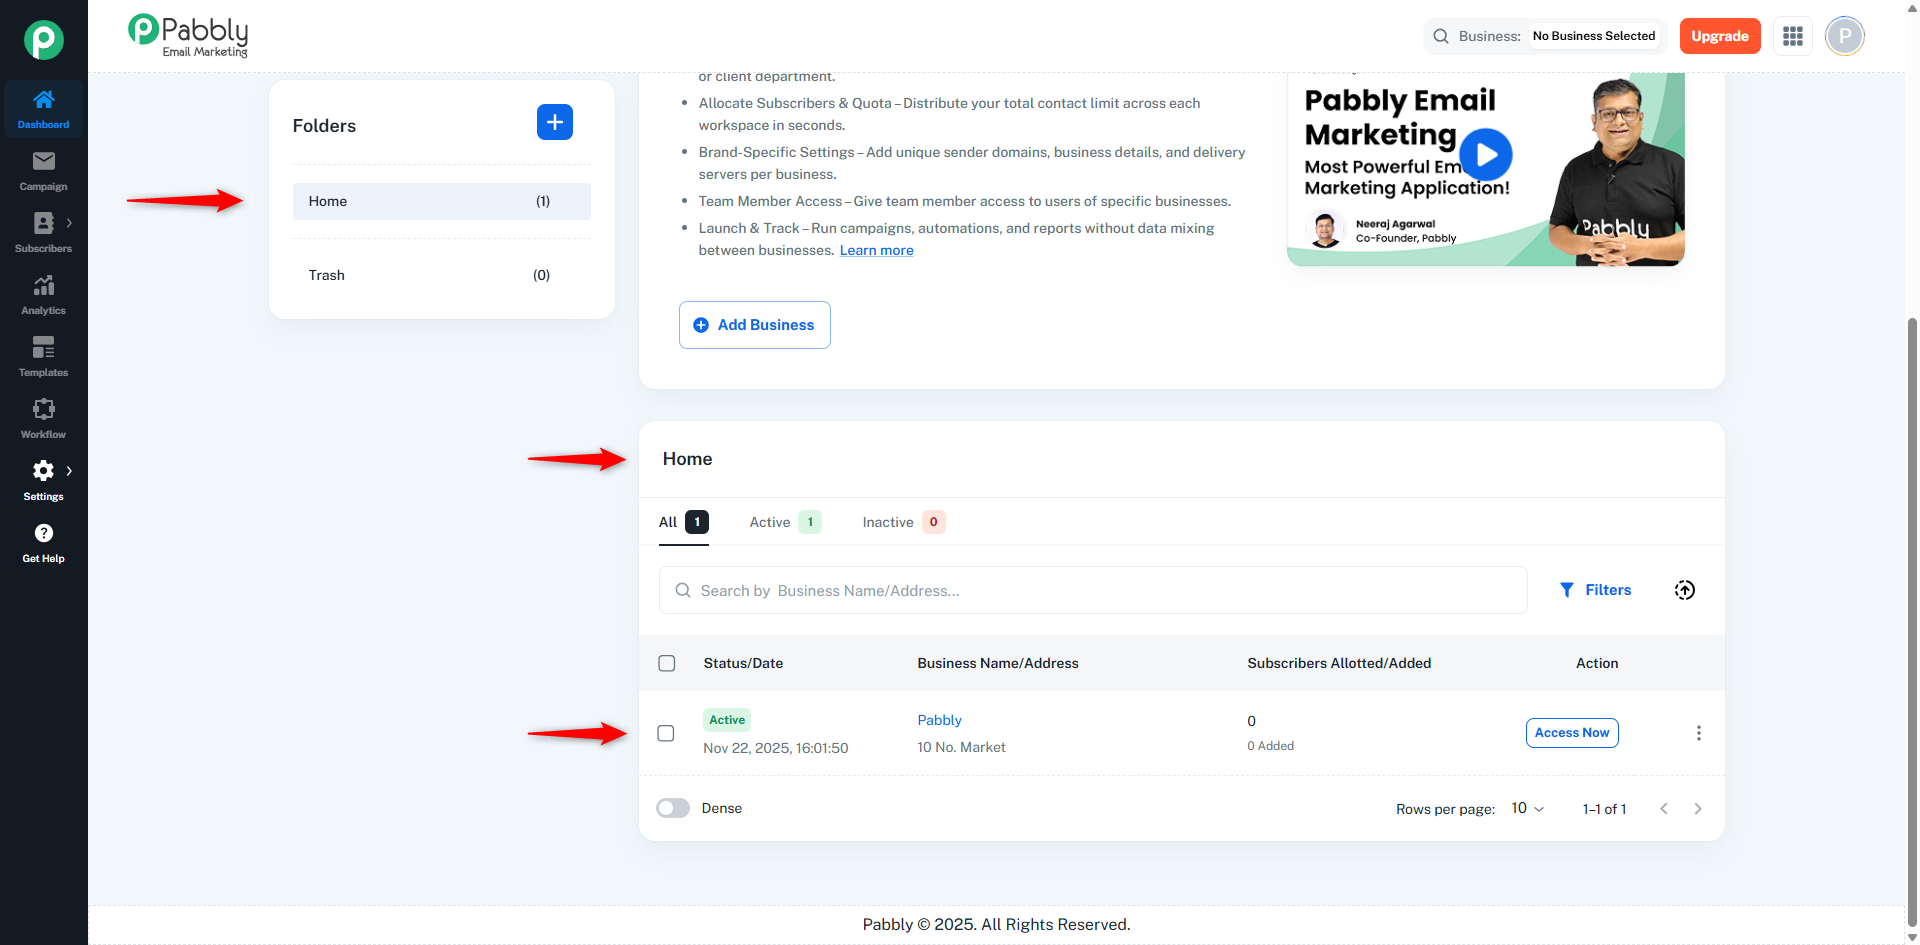
In the Home section, all your added businesses are displayed in a table format. This table helps you easily search, filter, manage, and access your businesses.
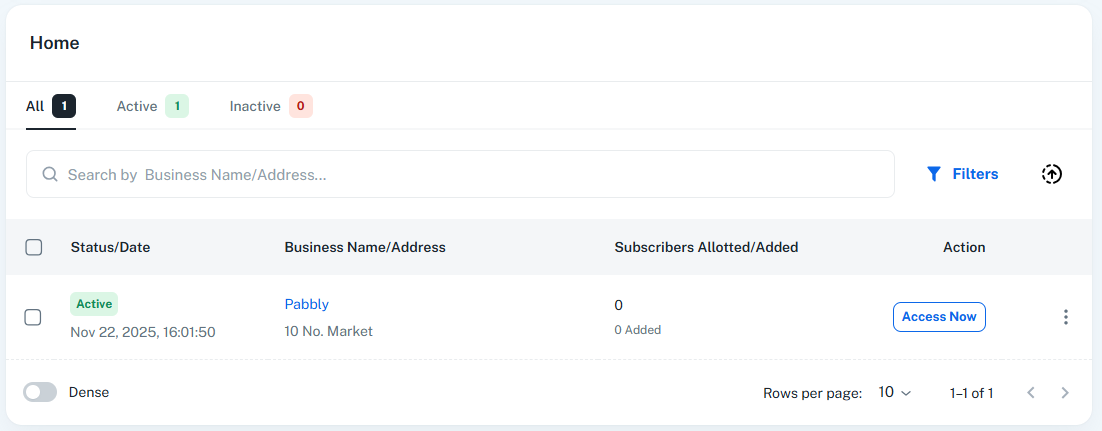
At the top of the table, you will find:
Tabs:
All – Displays all businesses.
Active – Displays only active businesses.
Inactive – Displays only inactive businesses.
Search Bar:
You can search businesses using their Business Name or Business Address.
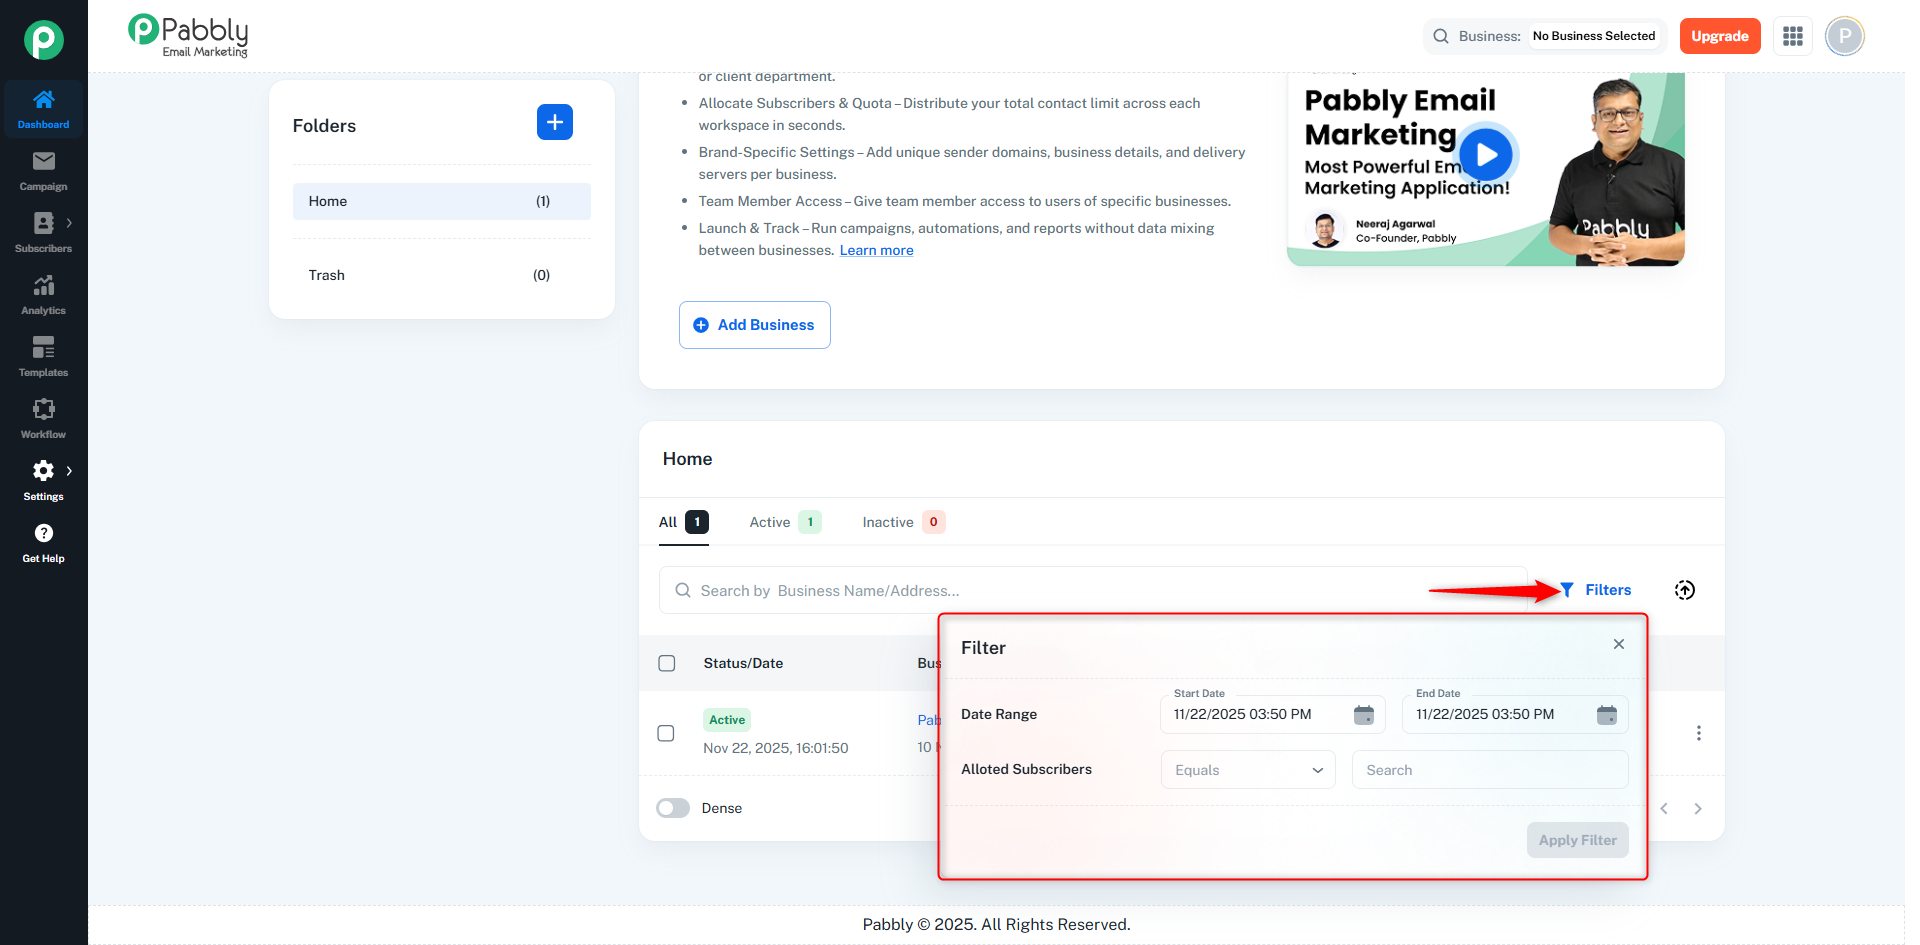
Filters:
The filter option allows you to refine businesses based on:
Date Range
Allotted Subscribers
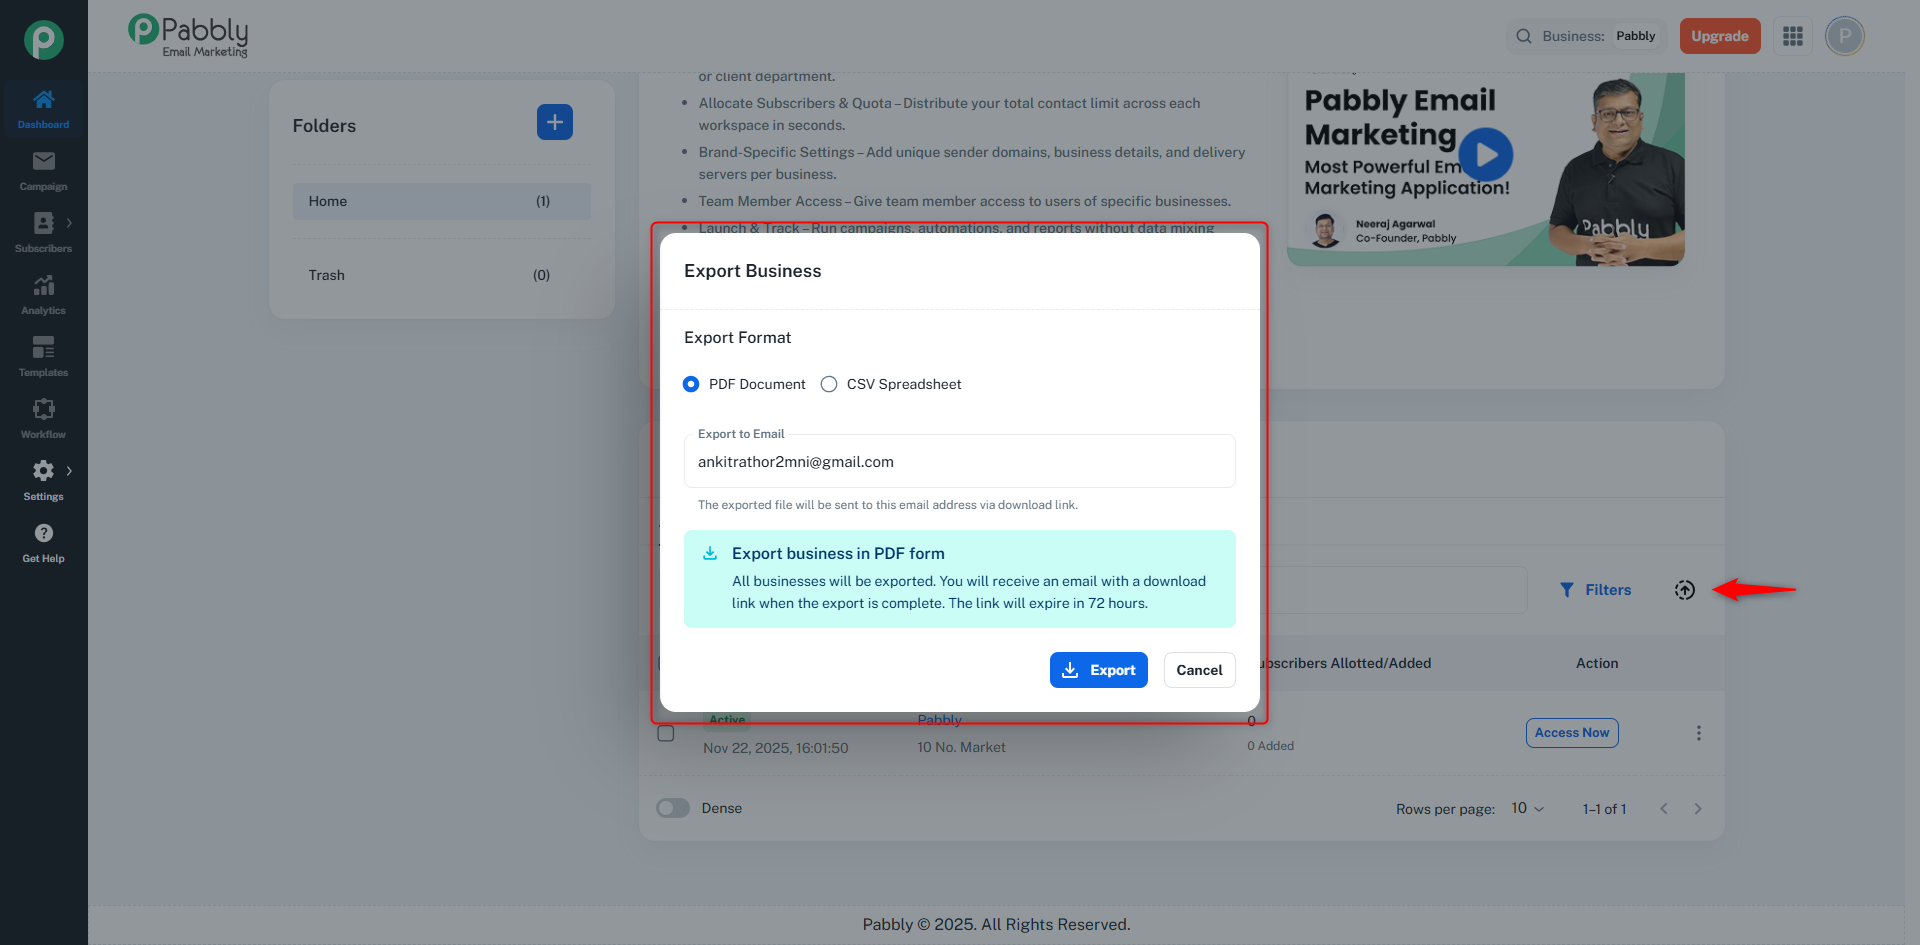
Export Option:
On the right side, there is an Export icon.
Users can export their business data in PDF and CSV formats.
Each business entry in the table contains the following information:
Status / Date
Shows whether the business is Active or Inactive.
Also displays the date and time when the business was added.
Business Name / Address
Displays the business name along with its registered address.
Subscribers Allotted / Added
Shows the total number of subscribers allotted to that business.
Also displays how many subscribers have been added so far.
Action
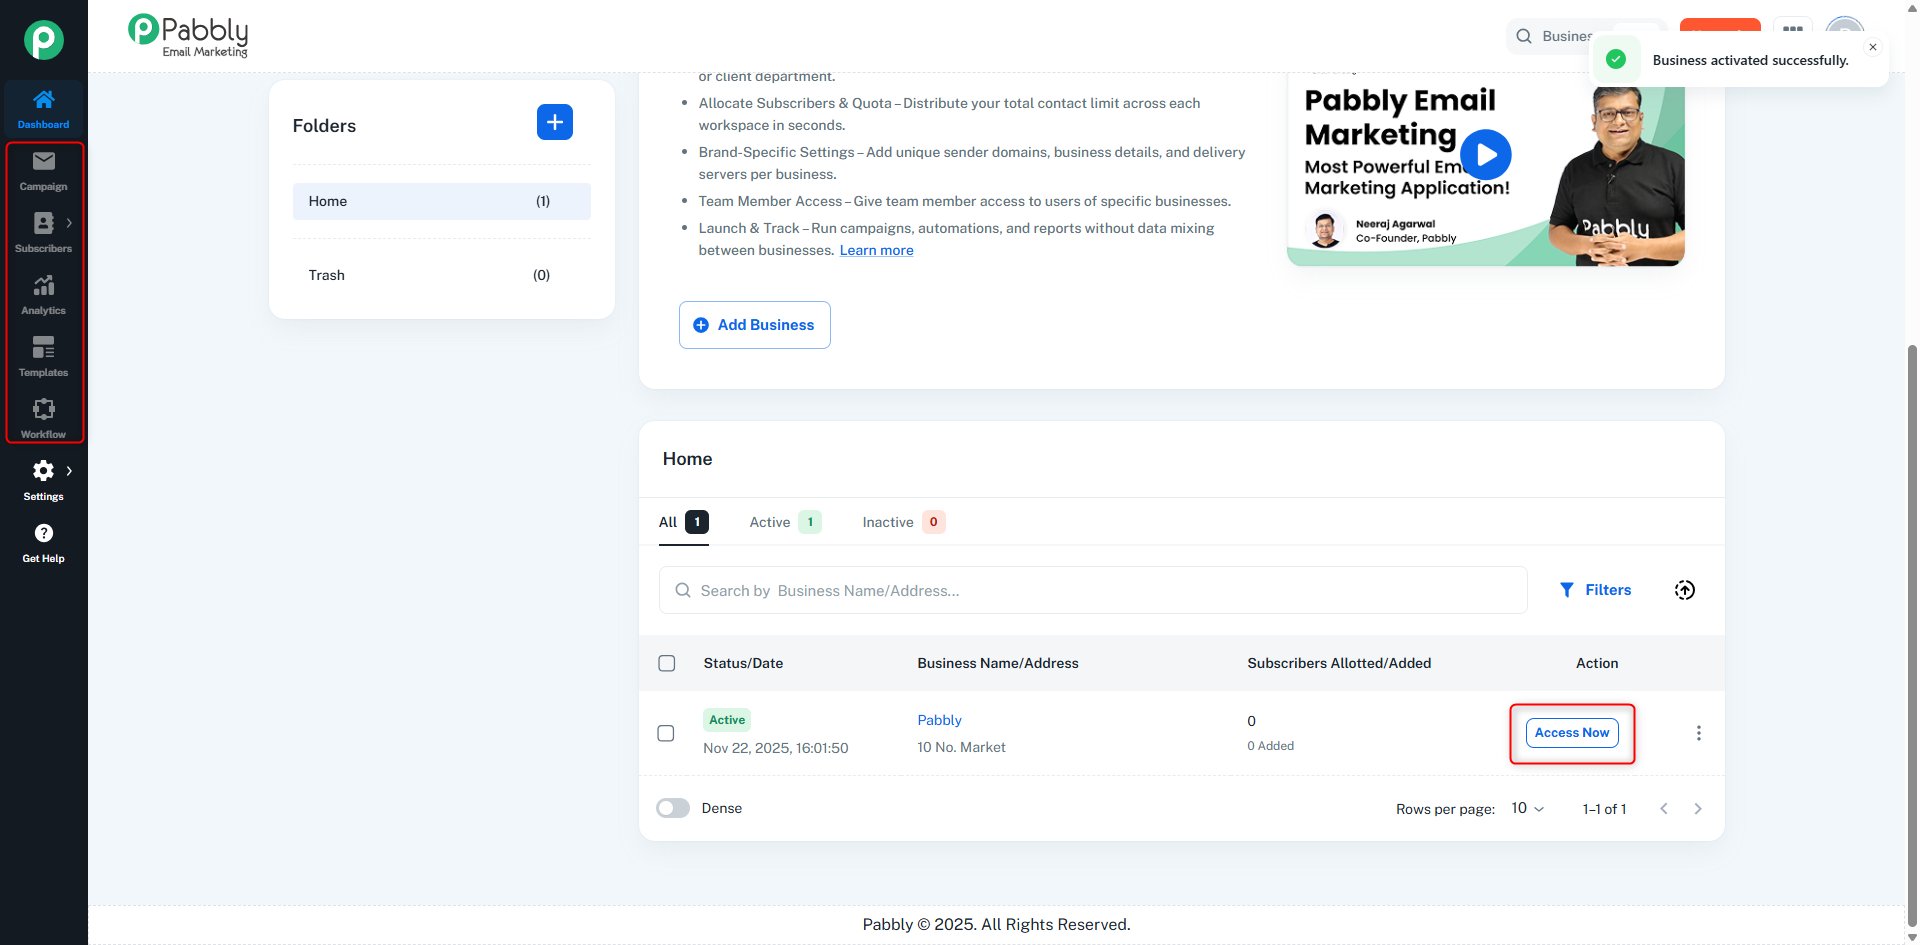
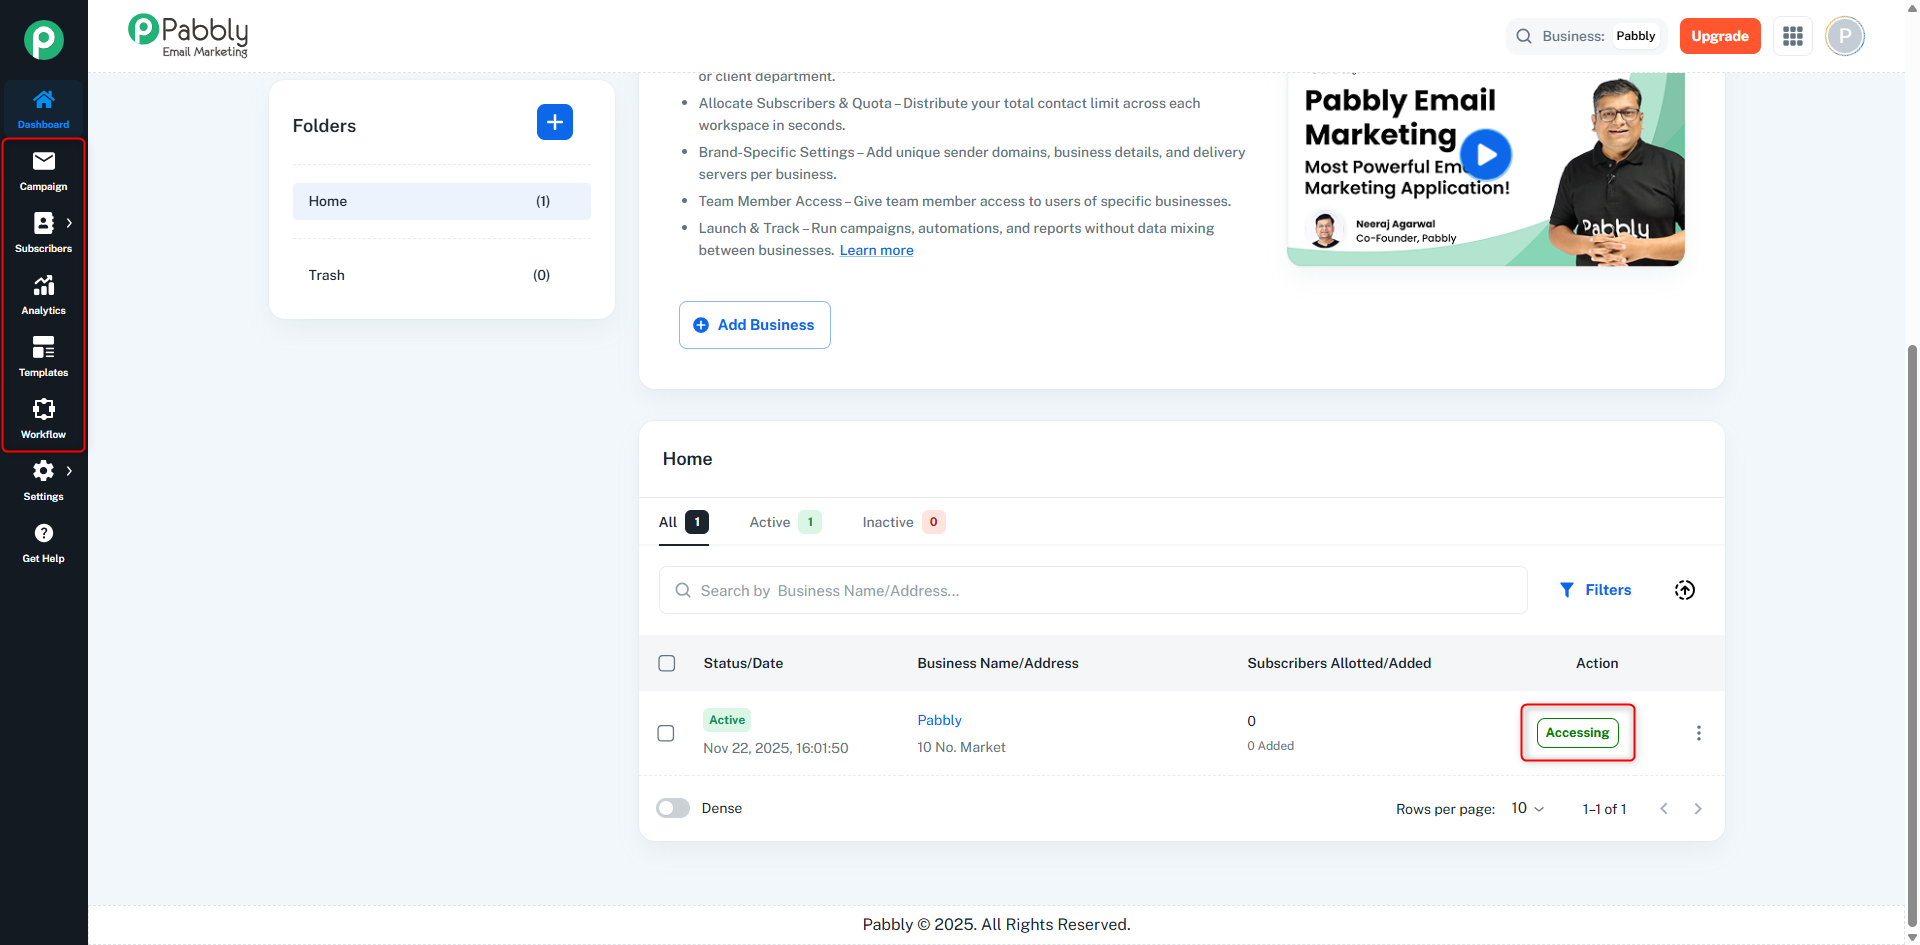
Contains the Access Now button.
When the user clicks on Access Now, that business becomes active, and all related modules like:
Campaigns
Subscribers
Analytics
Templates
Workflow
get enabled.
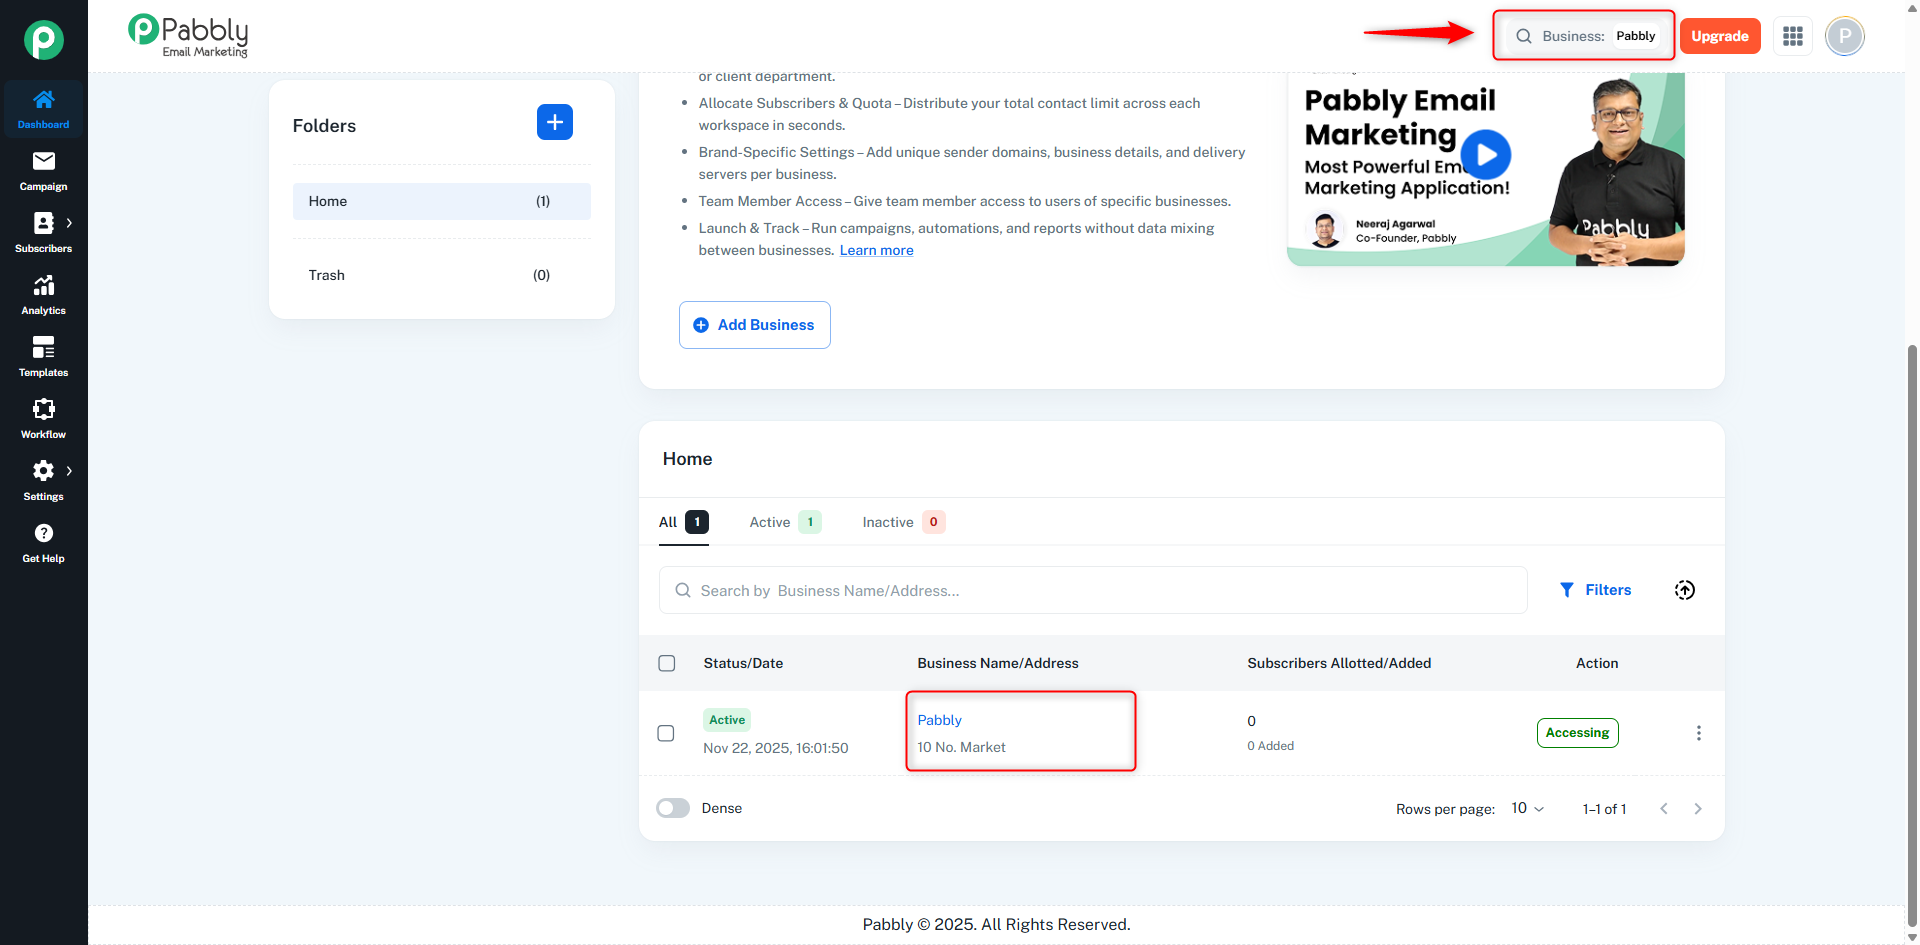
After accessing a business, its name will start appearing in the Business switcher at the top.
There is also a three-dot menu (⋮) for additional actions, which we will discuss later.
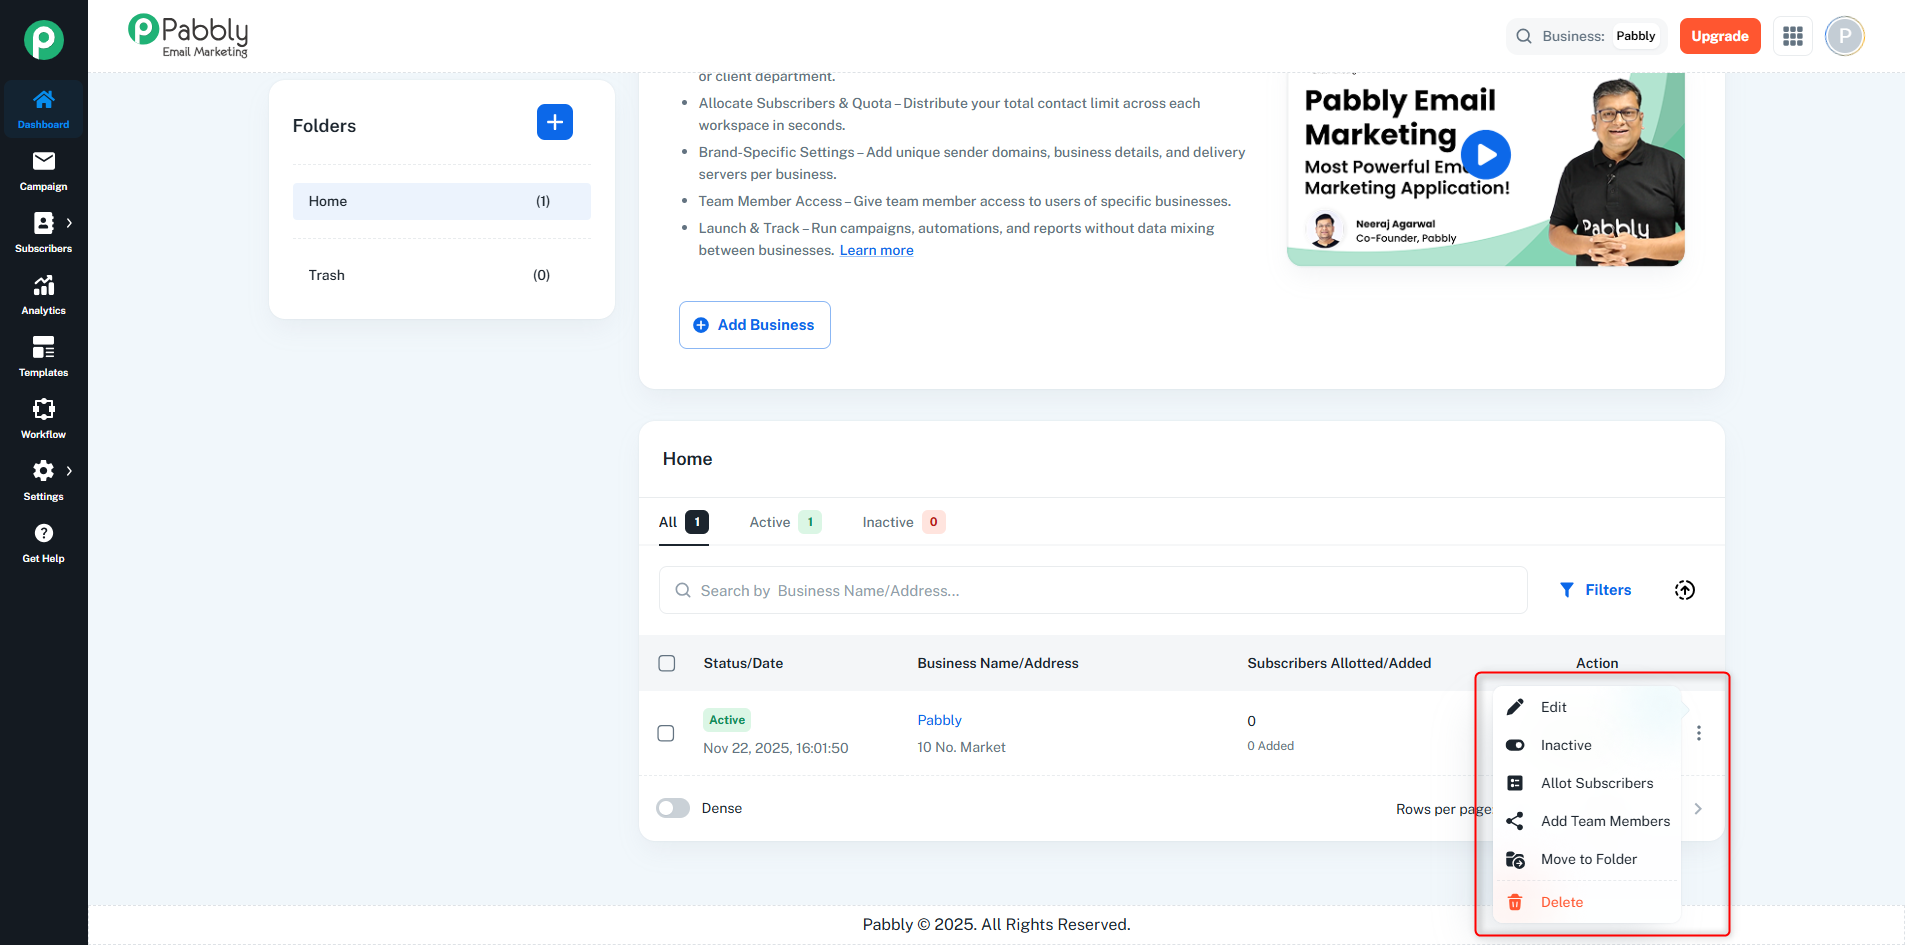
1. Edit
Allows you to edit business details like company name, address, website, time zone,etc.
2. Active / Inactive
You can temporarily deactivate a business by marking it Inactive.
When inactive, you won’t be able to run campaigns or perform activities for that business.
You can switch it back to Active anytime when required.
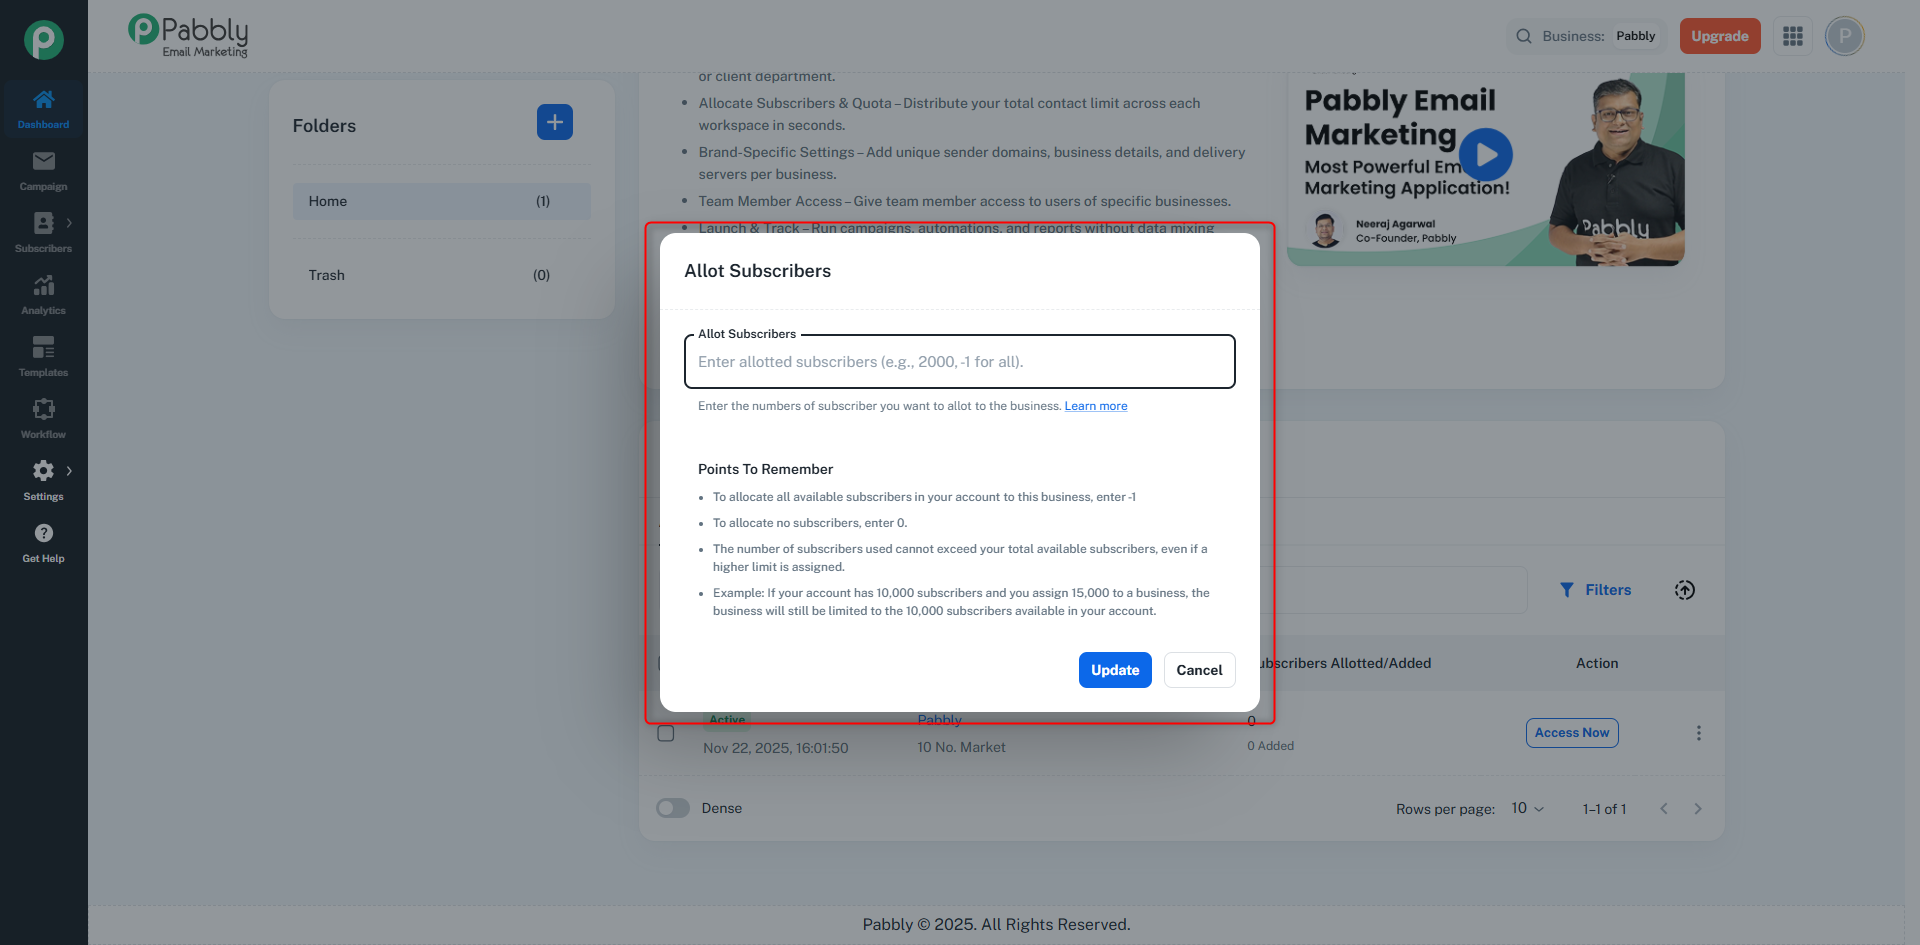
3. Allot Subscribers
This option lets you assign or modify the number of subscribers allocated to that business.
It means you can control how much of your total subscriber quota is given to this business.
4. Add Team Members
You can give access of this business to your team members.
For example: marketers, developers, or support staff — and manage their roles/permissions.
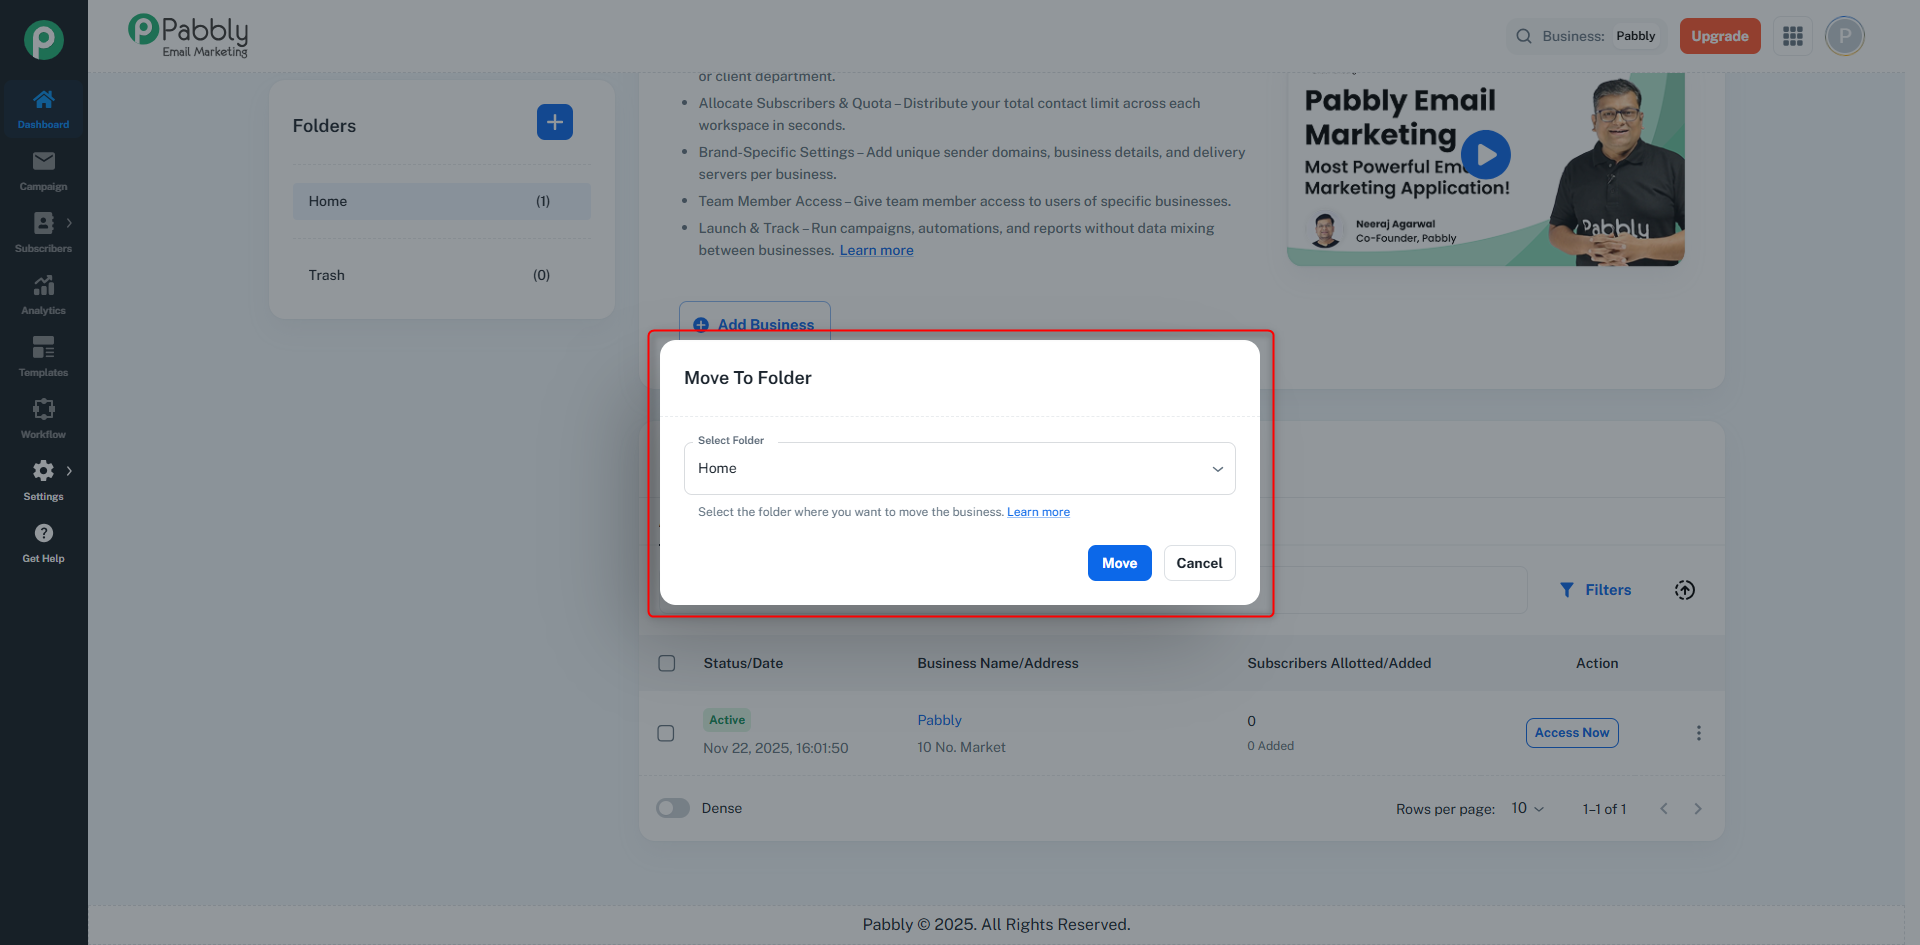
5. Move to Folder
Used to move the business from one folder (like Home) to another custom folder.
6. Delete
When you click Delete from the 3-dots menu, the business is removed from the current folder and moved to the Trash folder.
It is not permanently deleted from the system.
You can restore it later from the Trash if required.
When a business is inside the Trash folder, the three dots menu shows only these options:
Move to Folder
You can restore the business by moving it back to the Home folder or any other folder.
Delete Permanently
This will permanently delete the business from your account.
Once deleted permanently, it cannot be recovered.
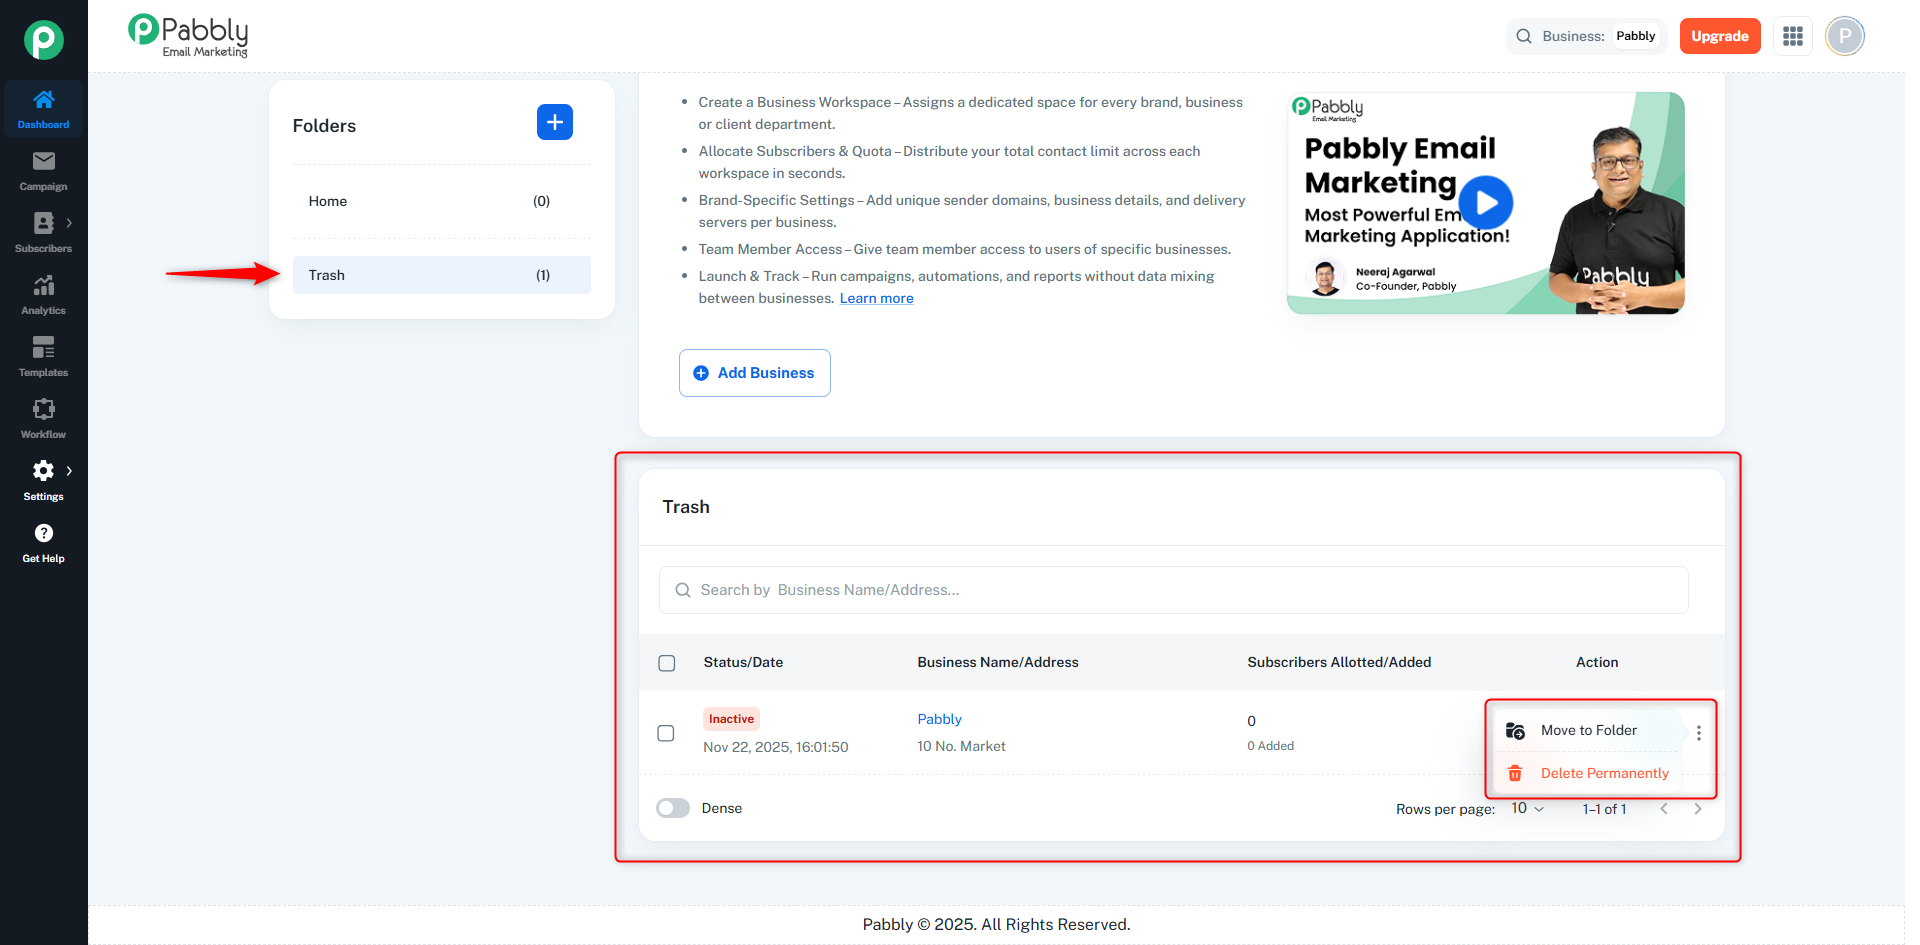
Also, if a business stays in the Trash folder for 30 days, it will be automatically and permanently deleted from the system without any action from the user.
Click on the “+” icon located at the top-right corner of the folder section.
When you click on it, a dialog titled “Create Folder” will open.
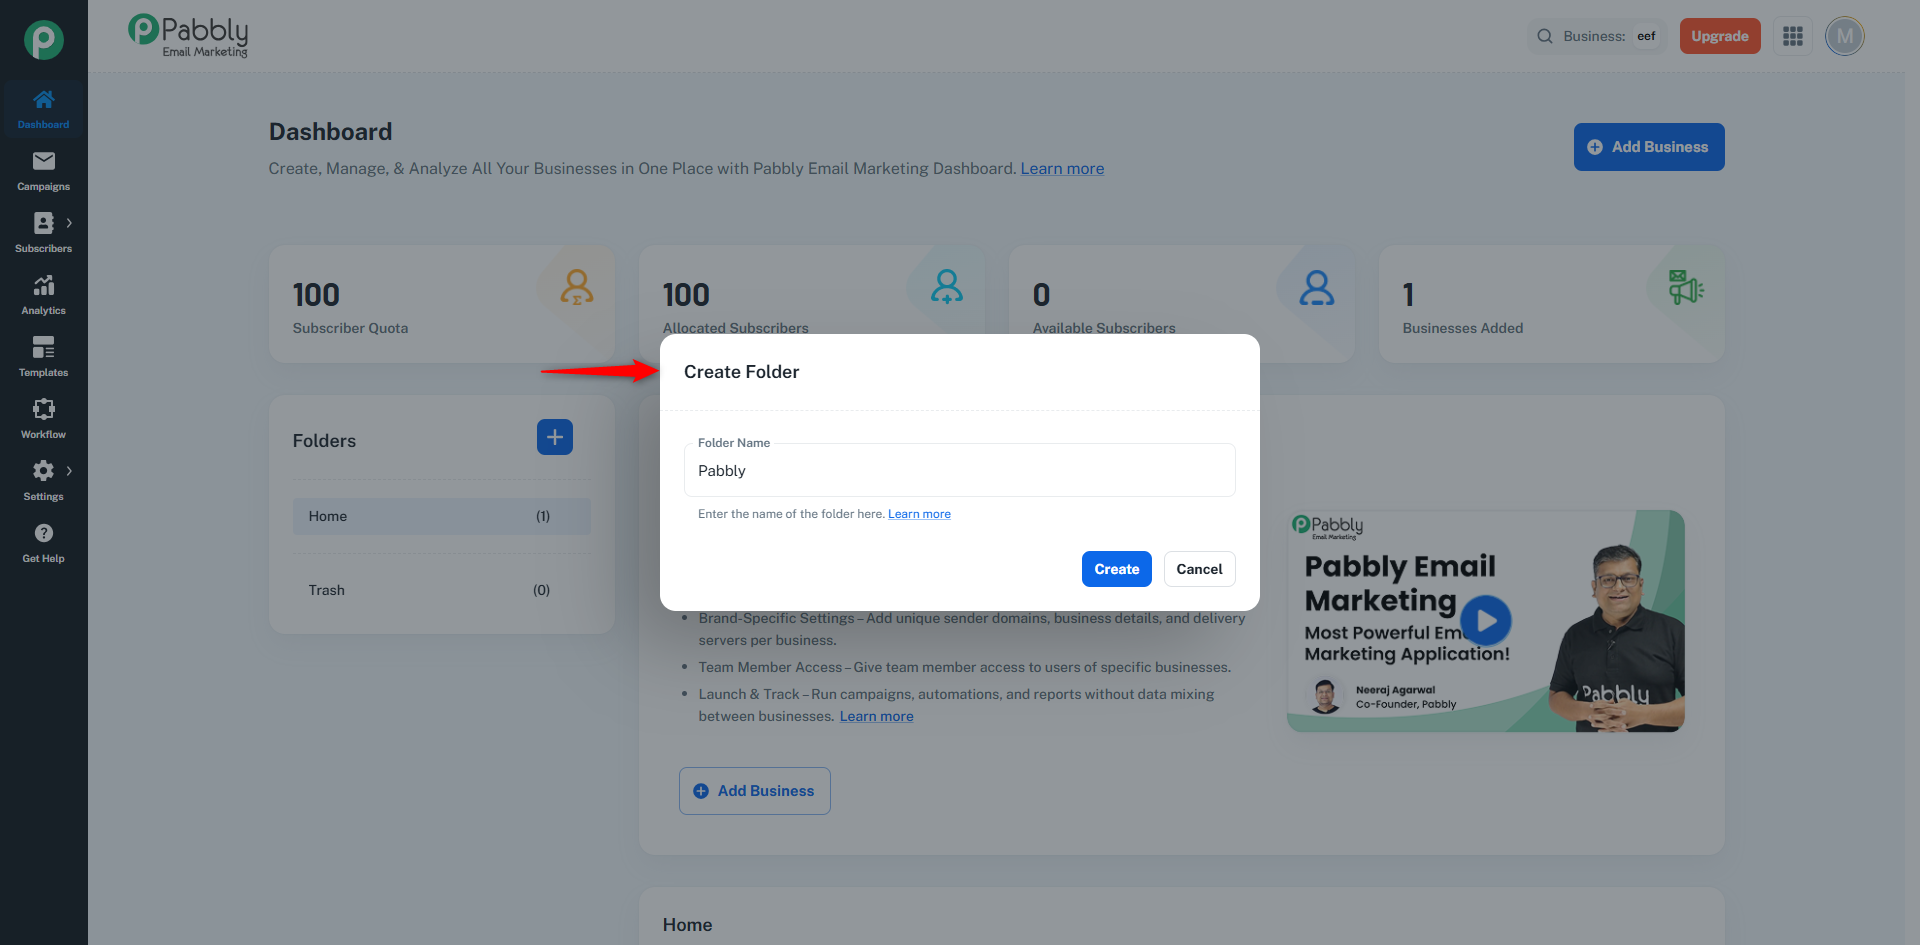
In this dialog, you will see a text field where you can enter the name of the folder you want to create.
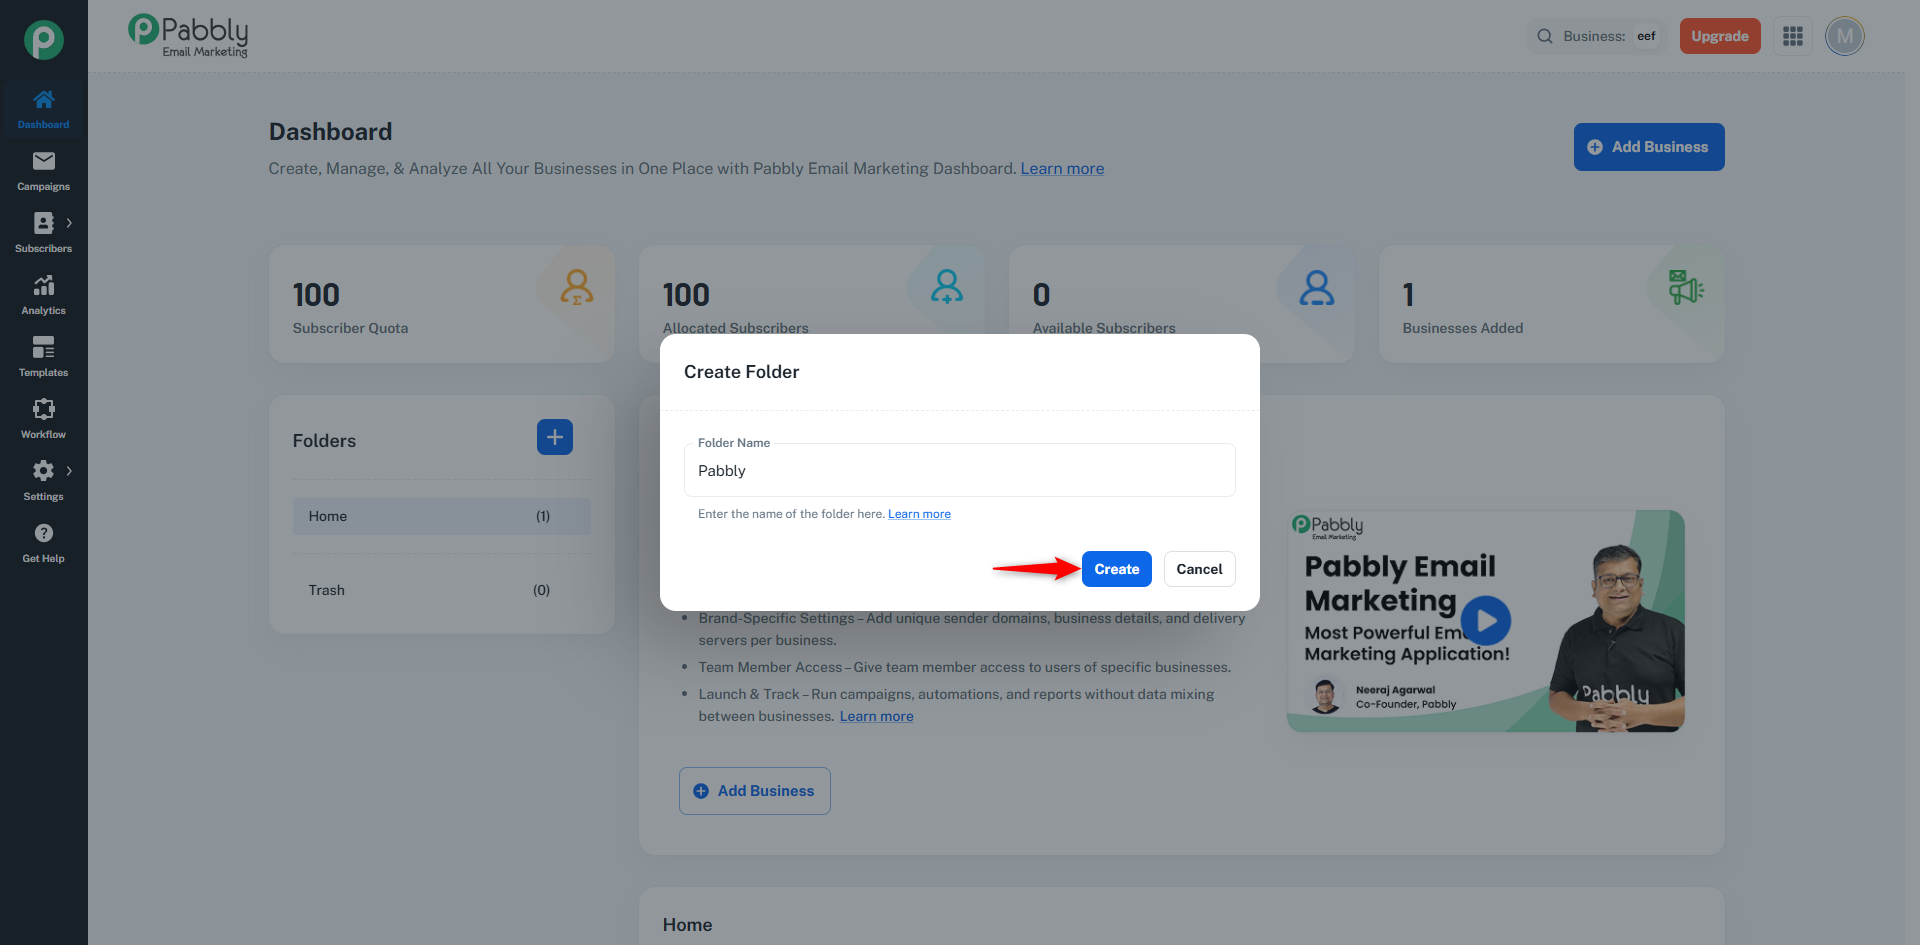
After entering the folder name, click on the “Create” button at the bottom-right of the dialog.
Once the folder is created successfully:
The newly created folder will appear as a folder card.
The folder’s table view will also be displayed.
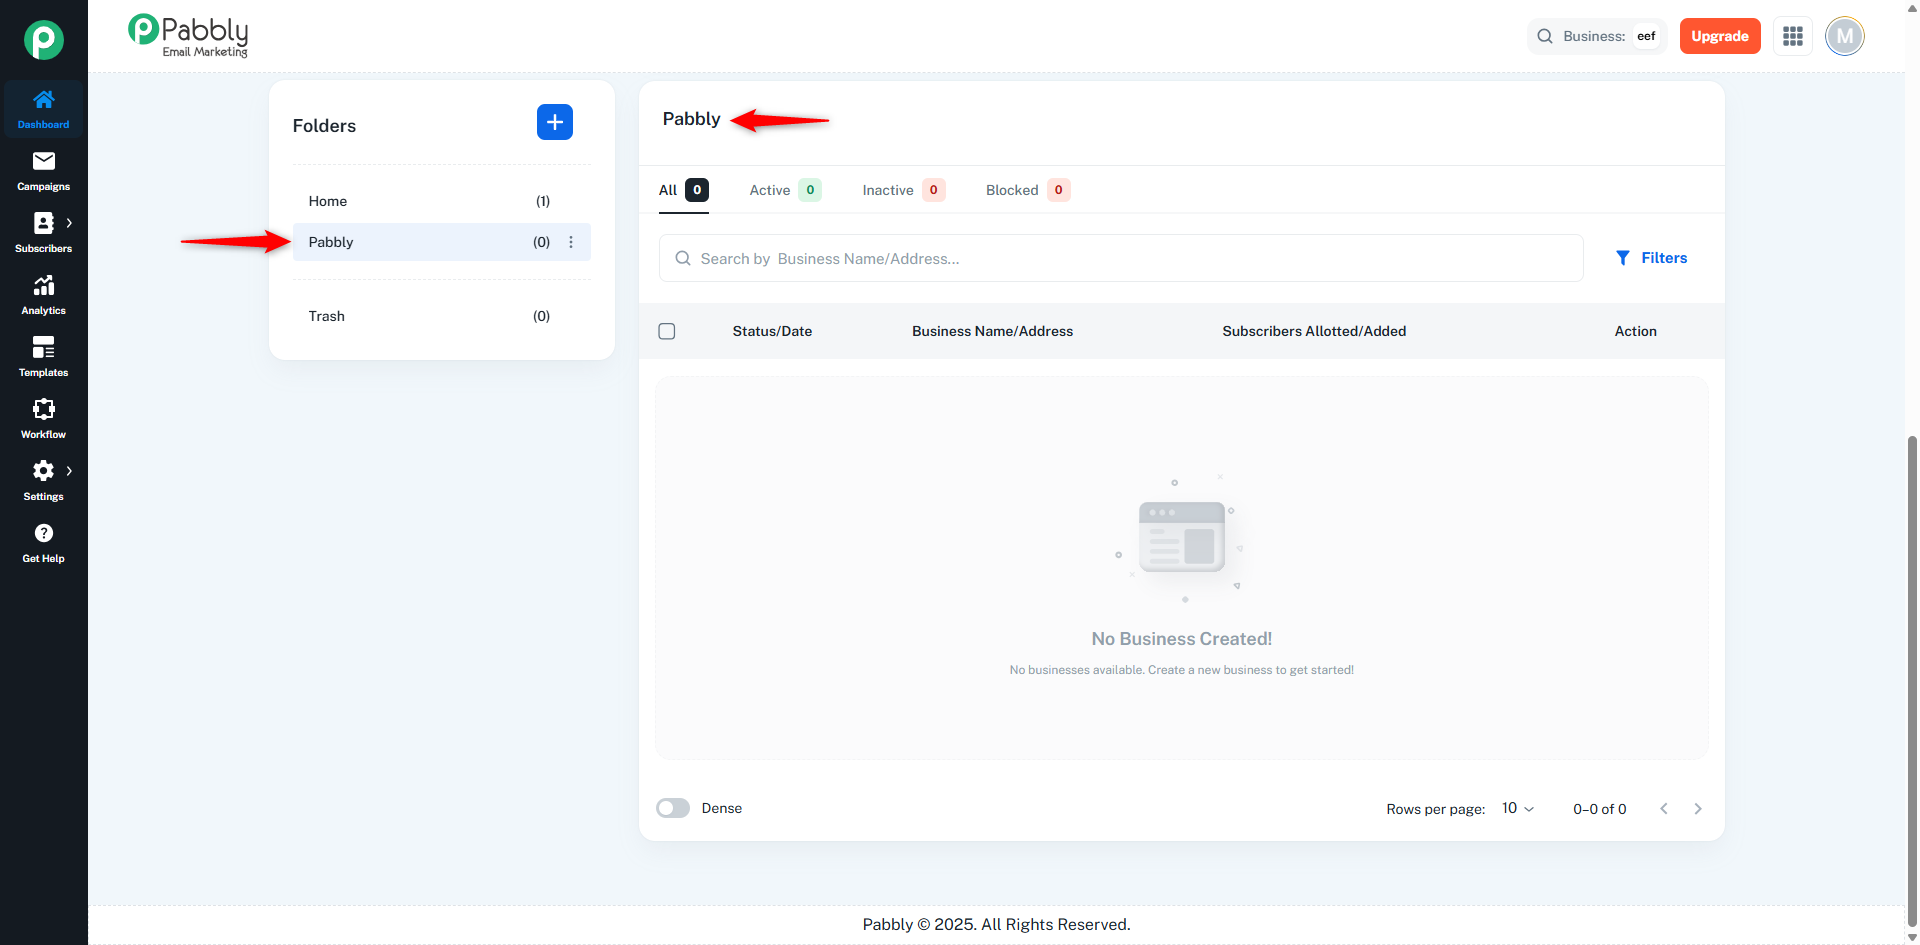
If you add businesses to the folder, they will appear in the Folder table and will be automatically accessible.
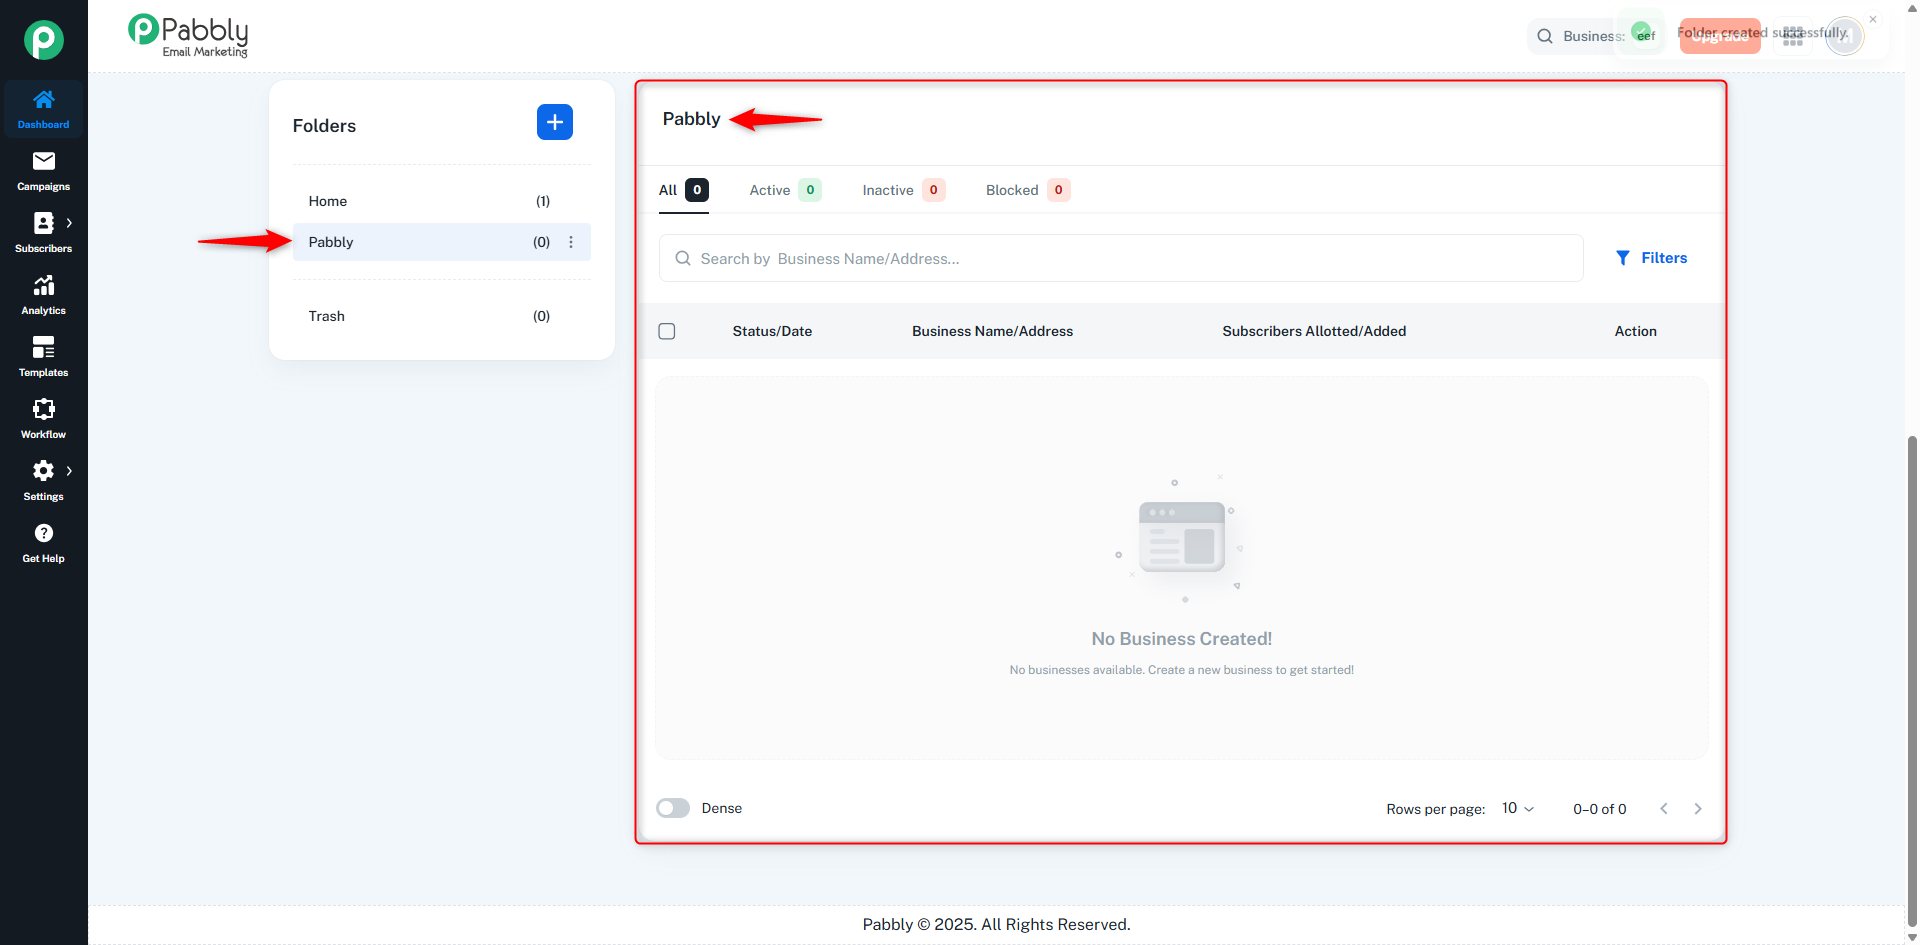
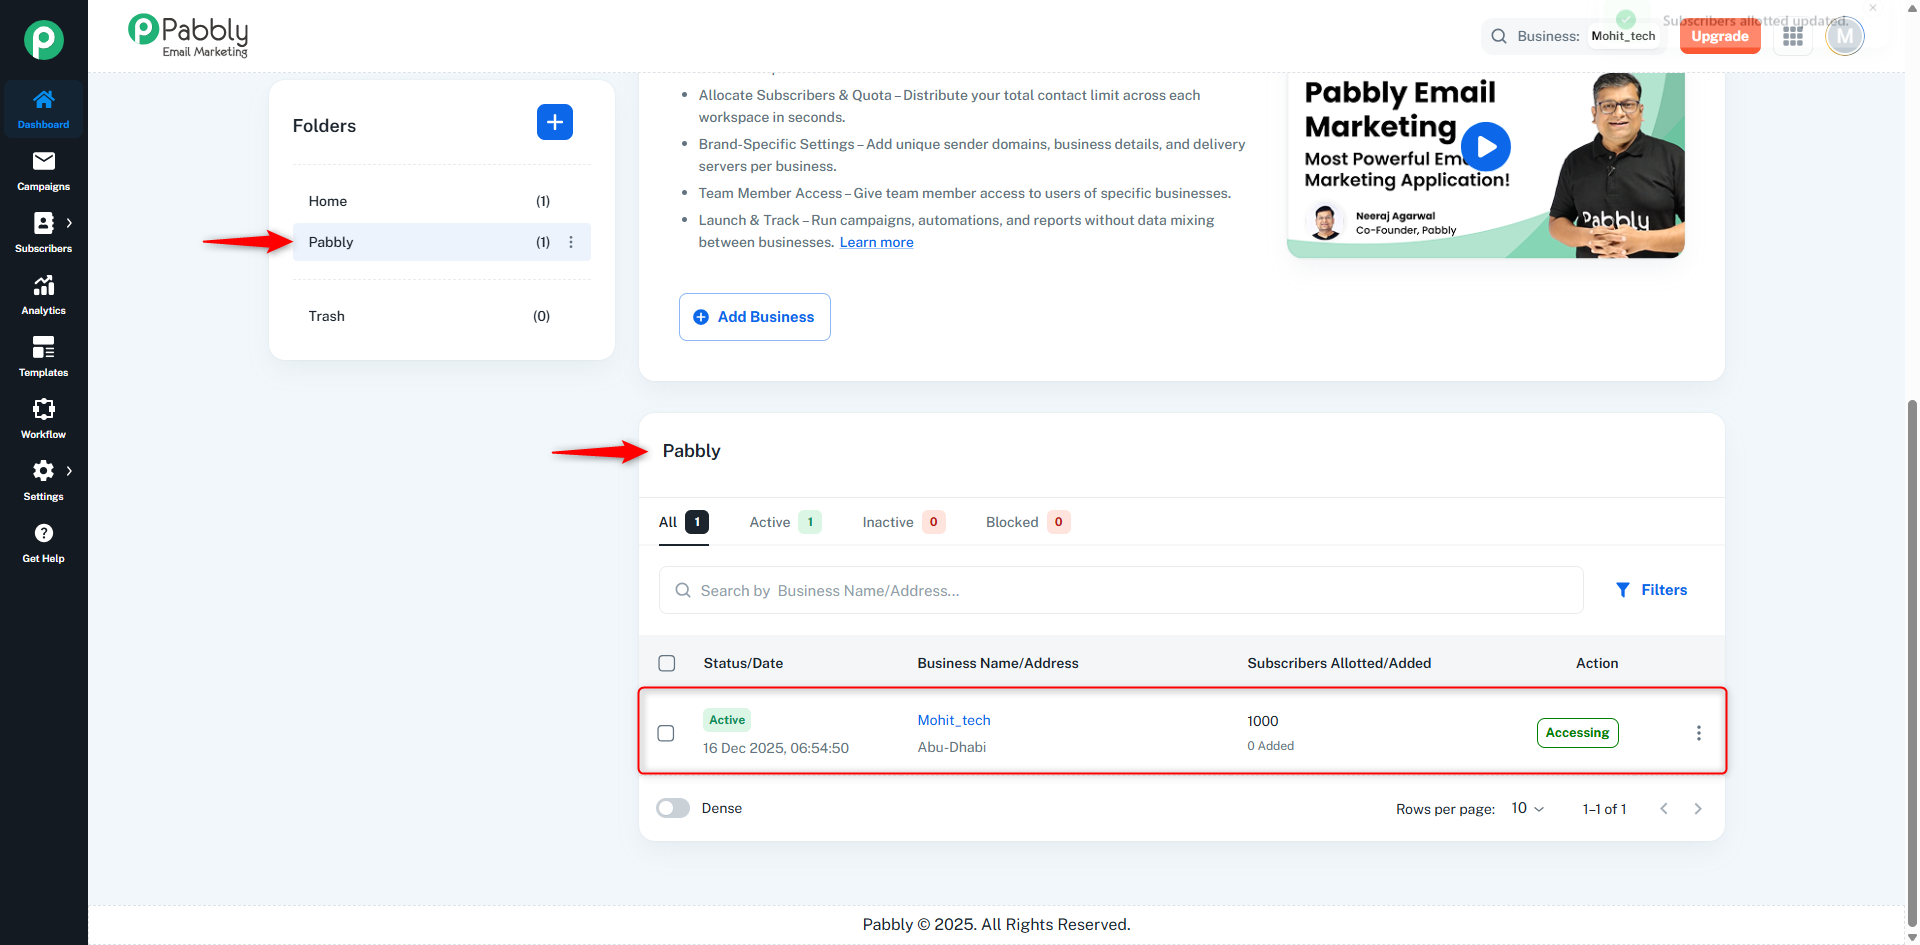 If no businesses are added, the following message will be displayed in the table:
“No Business Created!
No businesses available. Create a new business to get started!”
If you add a business to a custom folder, it will stay inside that folder until you move it.
You can rename your created folders anytime.
You can also delete your folders.
When you delete a folder, only the folder gets deleted.
The businesses inside that folder will not be deleted.
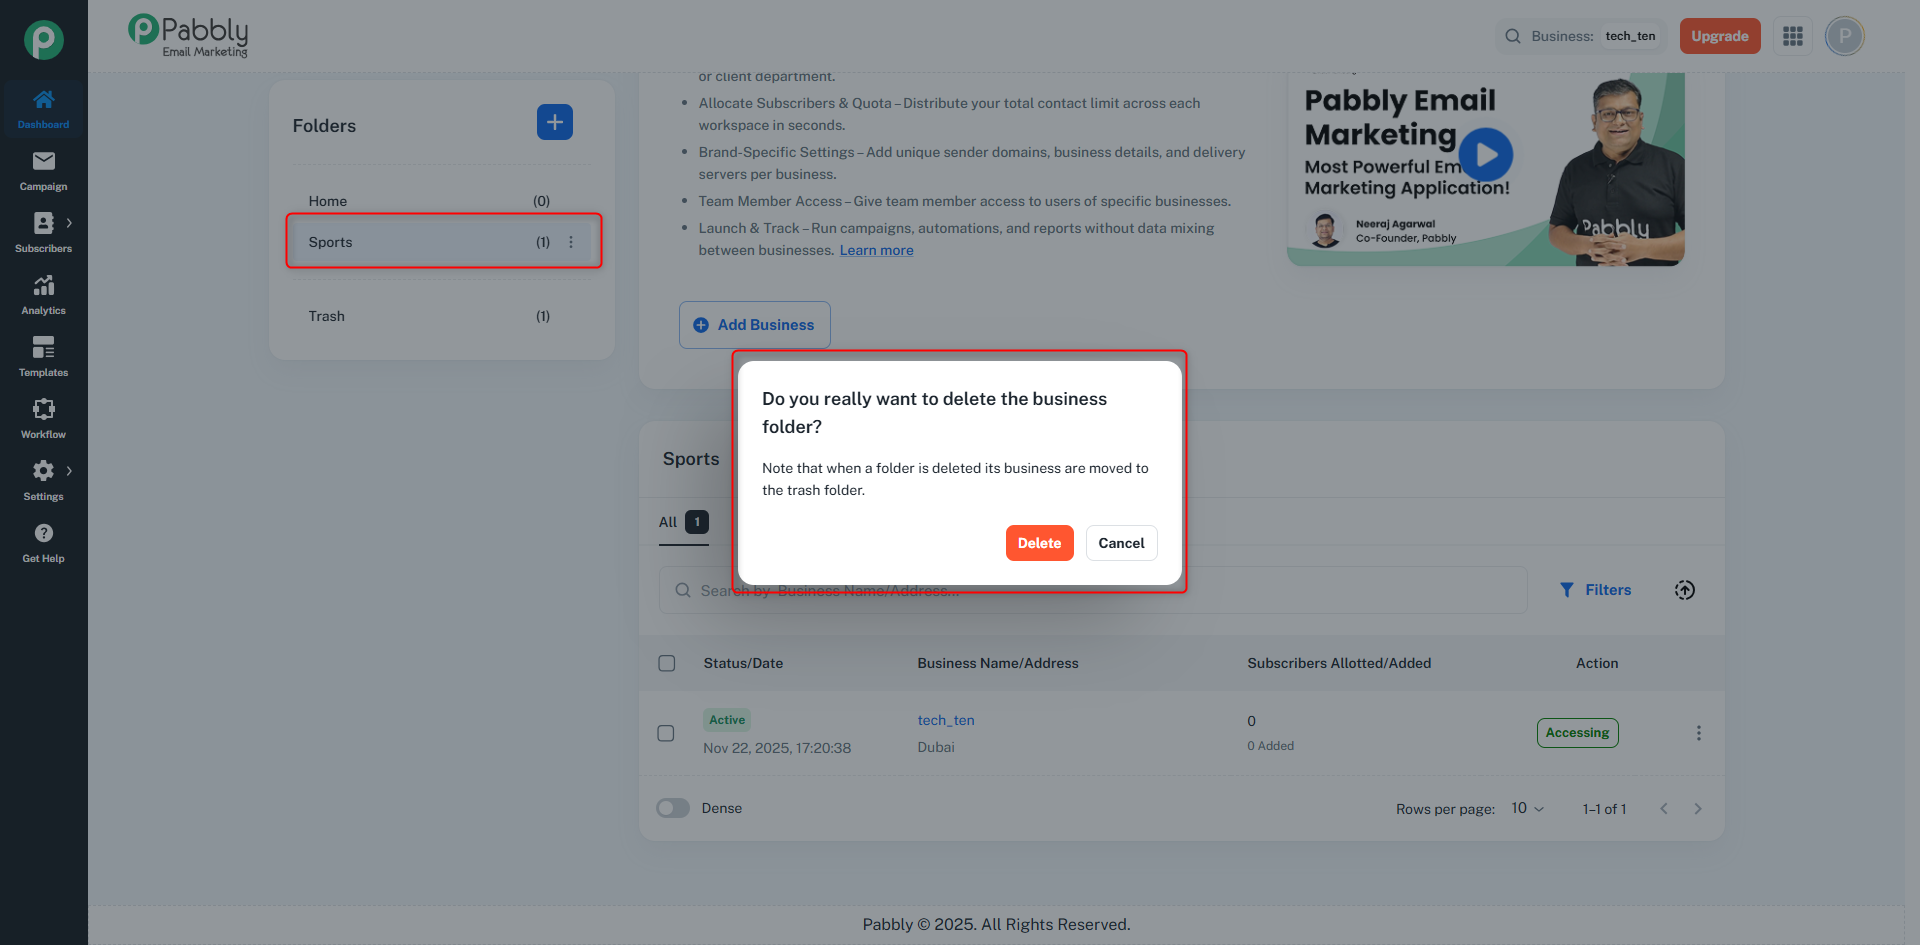
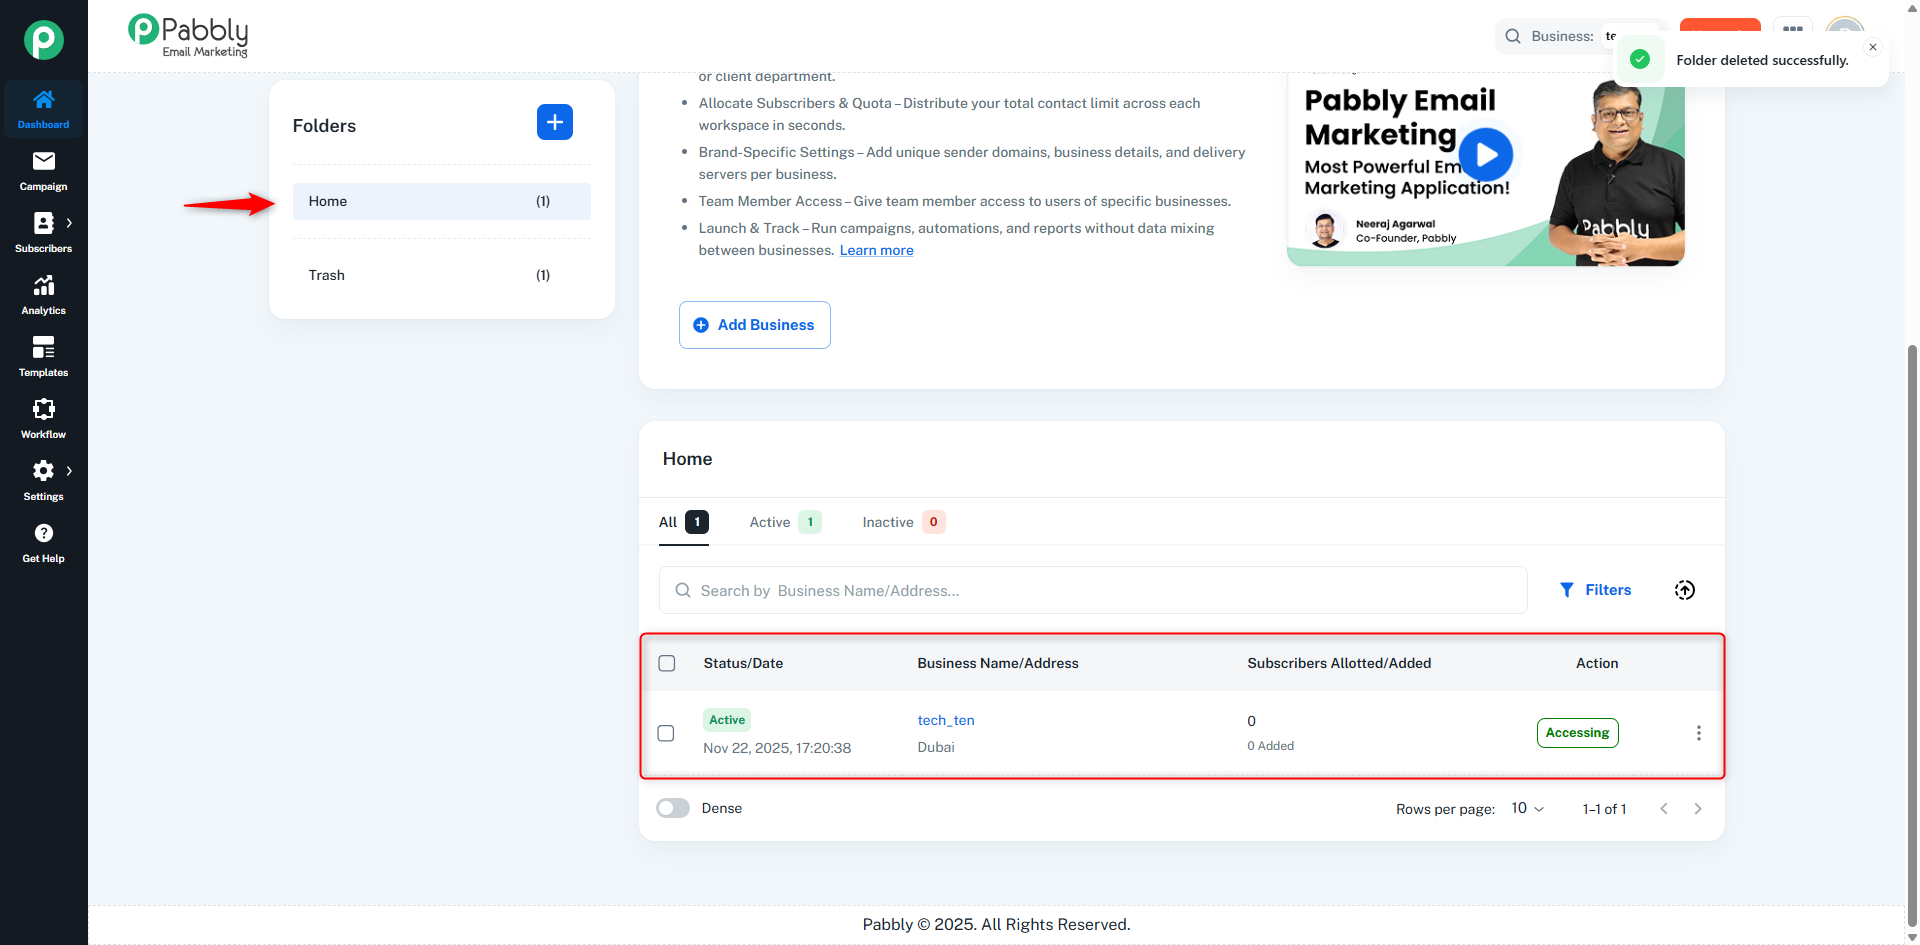
All businesses from the deleted folder will be automatically moved to the Home folder.
First, you must delete the businesses manually.
After deleting all businesses, then you can delete the folder.
We have completely understood the Dashboard page.
