Settings
The Delivery Server section allows you to configure how your email campaigns will be sent.
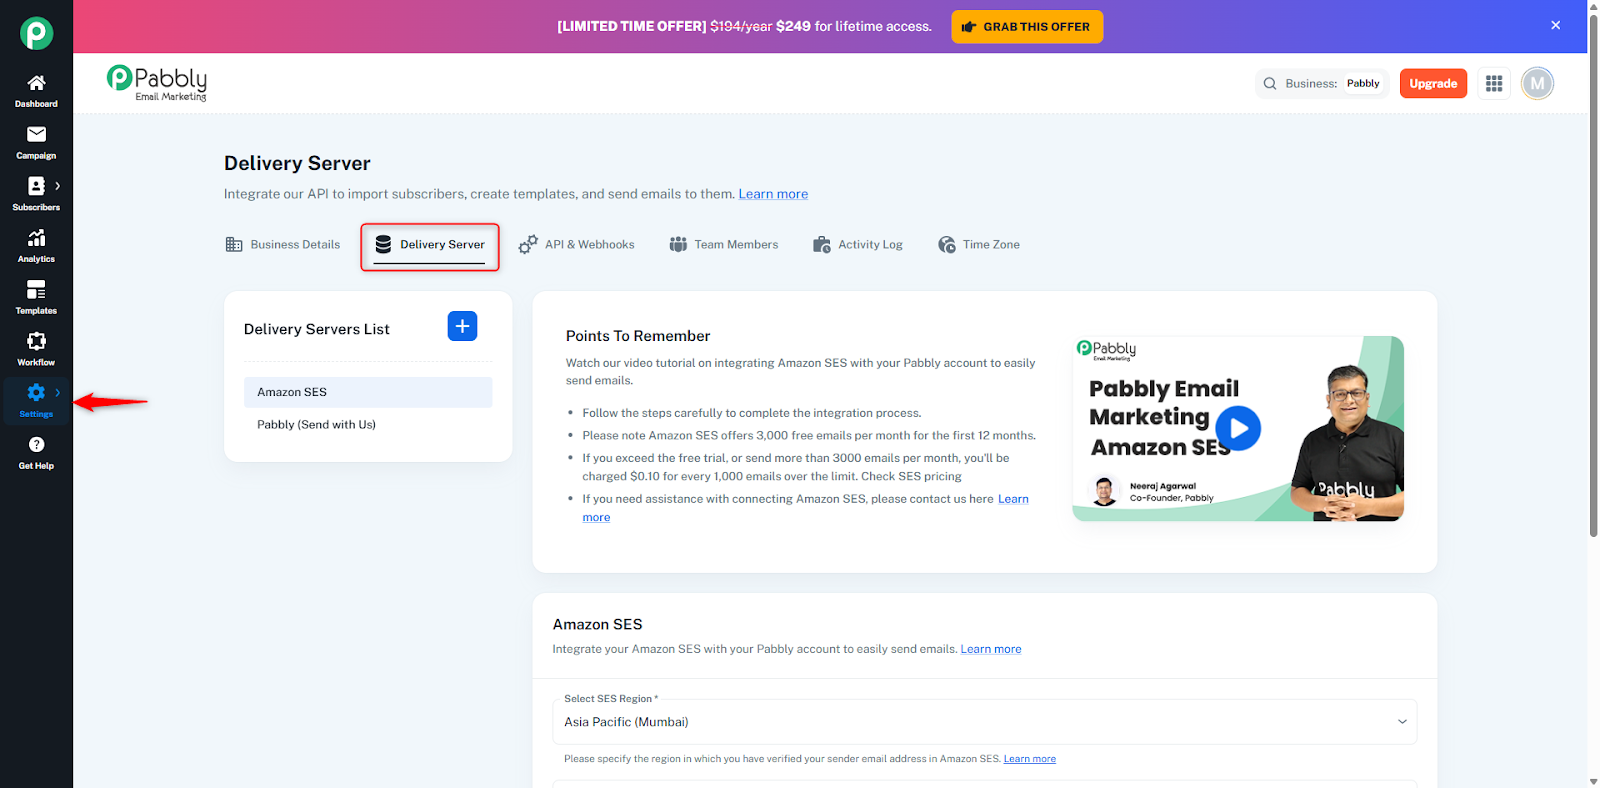
We provide two delivery server options by default:
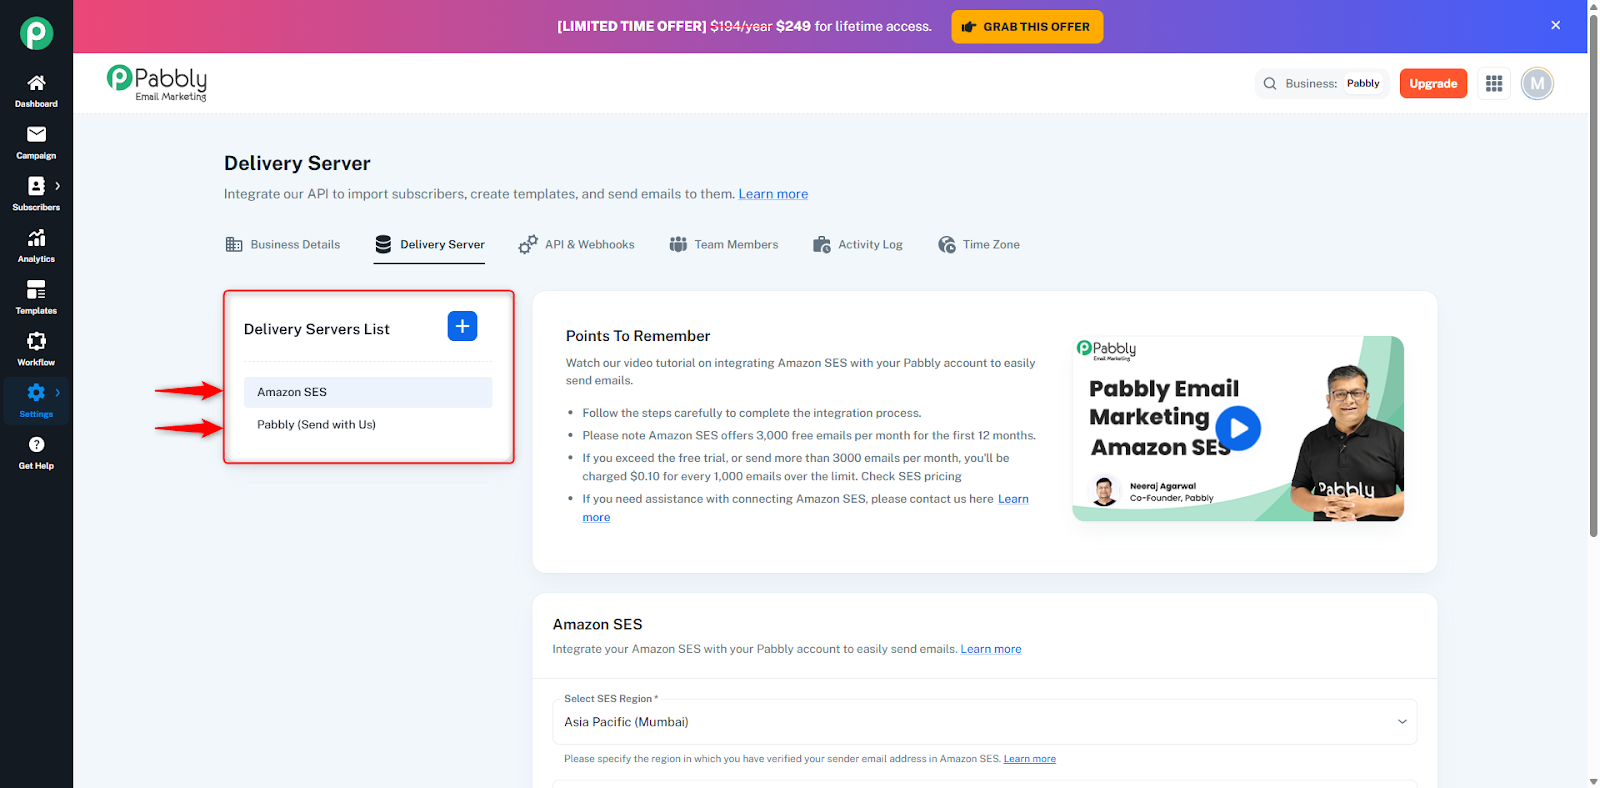
If you already have Amazon SES, you can connect your SES credentials here and send emails using Amazon’s infrastructure.
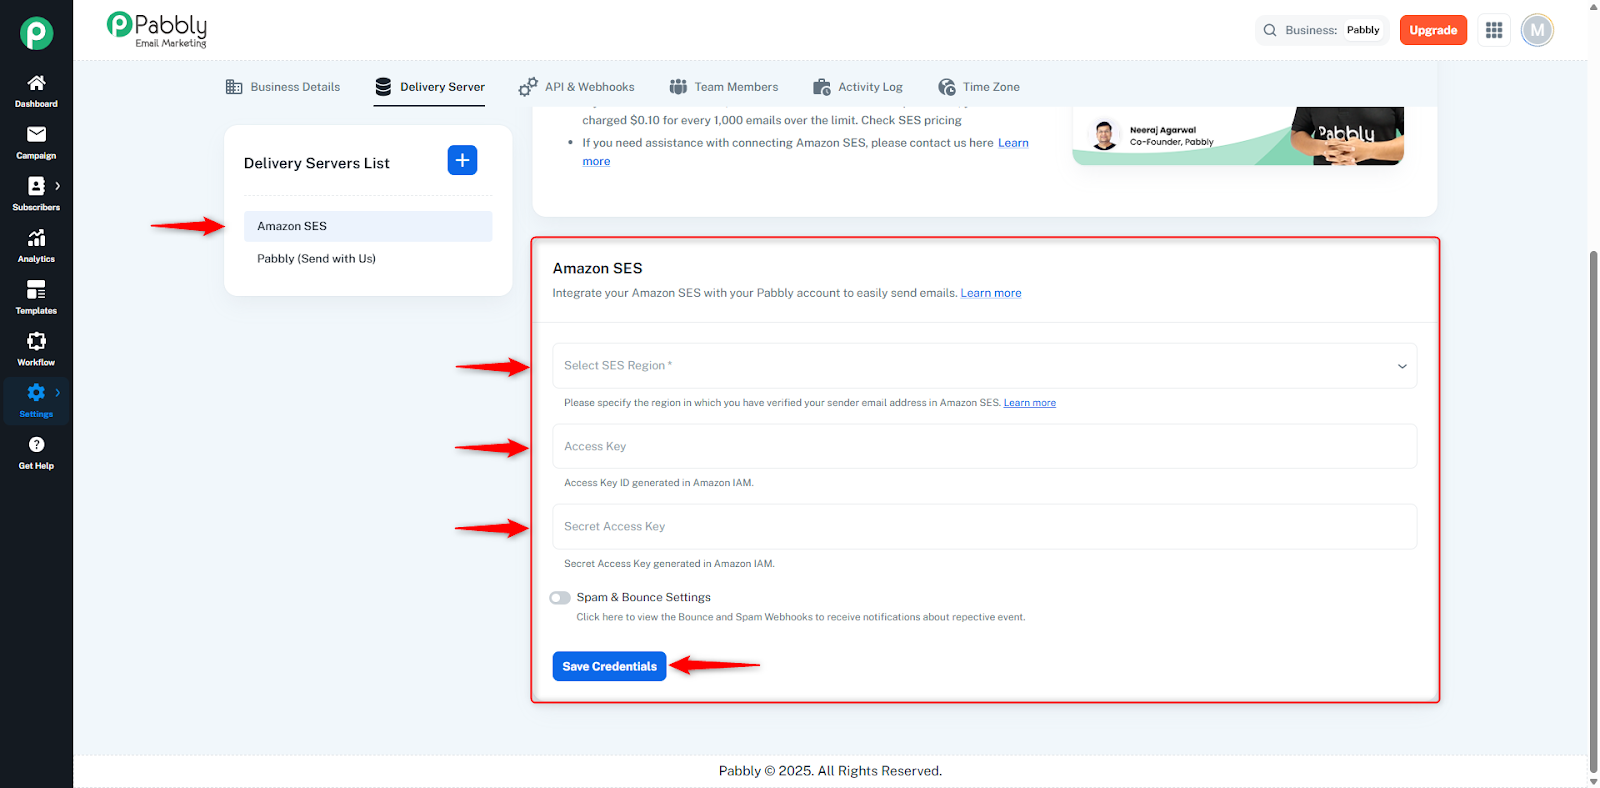
If you want to send emails using your own domain, you can use Pabbly (Send with Us).
This option allows you to authenticate your domain and send campaigns directly from it.
Below is the complete process to set up your domain in Pabbly (Send with Us).
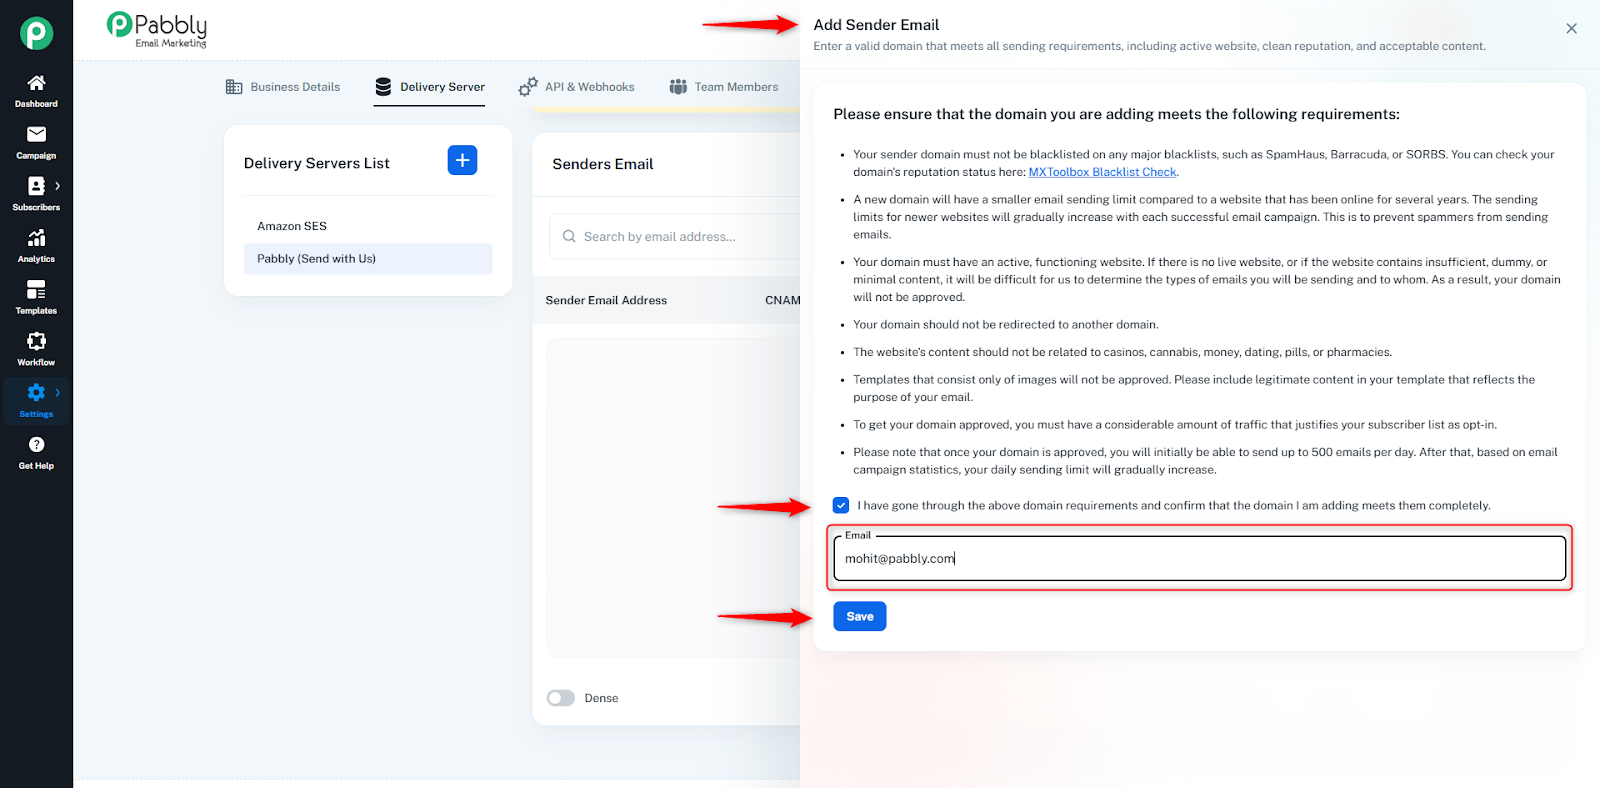
Click the Add Sender Email button.
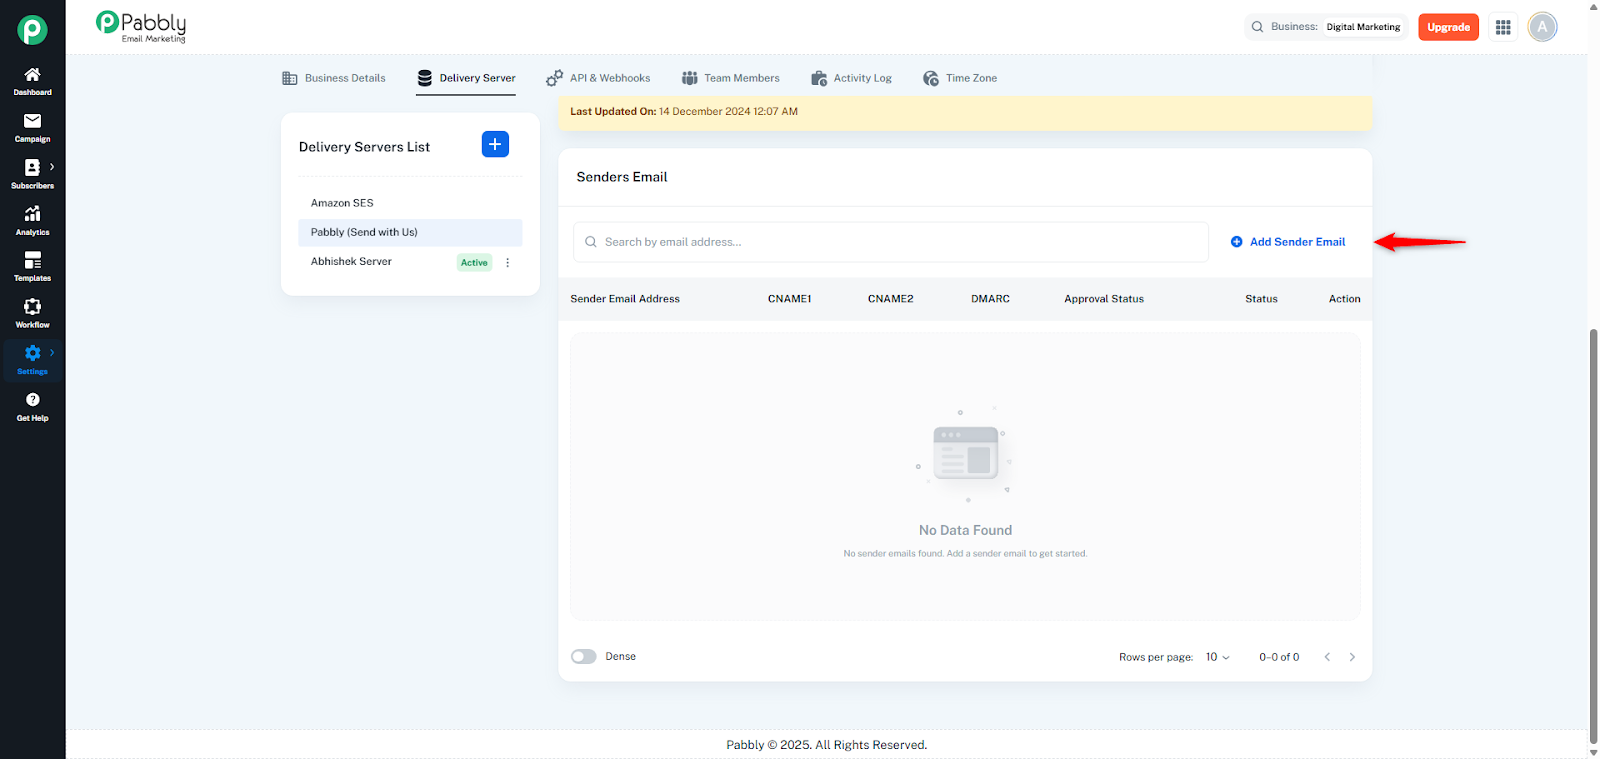
A drawer will open on the right side.
Enter an email address that belongs to your domain (example: [email protected]).
Check the confirmation checkbox at the top — this step is mandatory.
Click Save.
Your email will appear in the Sender Email table.
The Approval Status will show Pending.
On the right side, you will see a toggle dropdown.
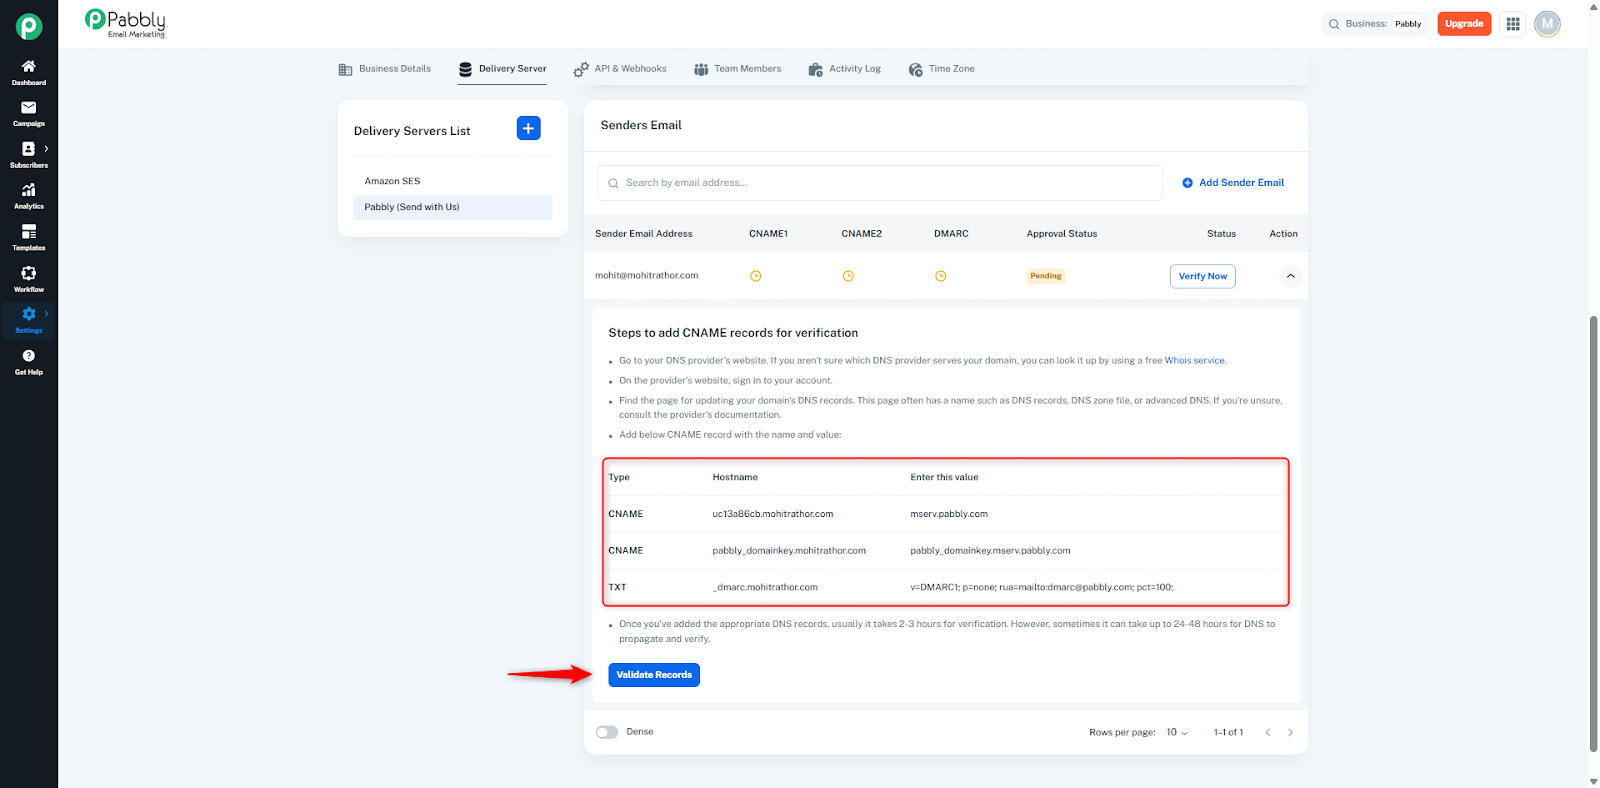
When you open the dropdown, a card named
“Steps to add CNAME records for verification” will appear.
This card shows:
CNAME Record 1
CNAME Record 2
TXT Record (DMARC)
Each record includes:
Type
Hostname
Value
Go to your domain provider such as:
GoDaddy
Namecheap
Cloudflare
BigRock, etc.
Then:
Login to your account.
Open DNS Management / DNS Zone.
Add all CNAME + TXT records exactly as shown.
Save the DNS changes.
After adding the DNS records:
Return to the Pabbly (Send with Us) page.
Open the same toggle dropdown.
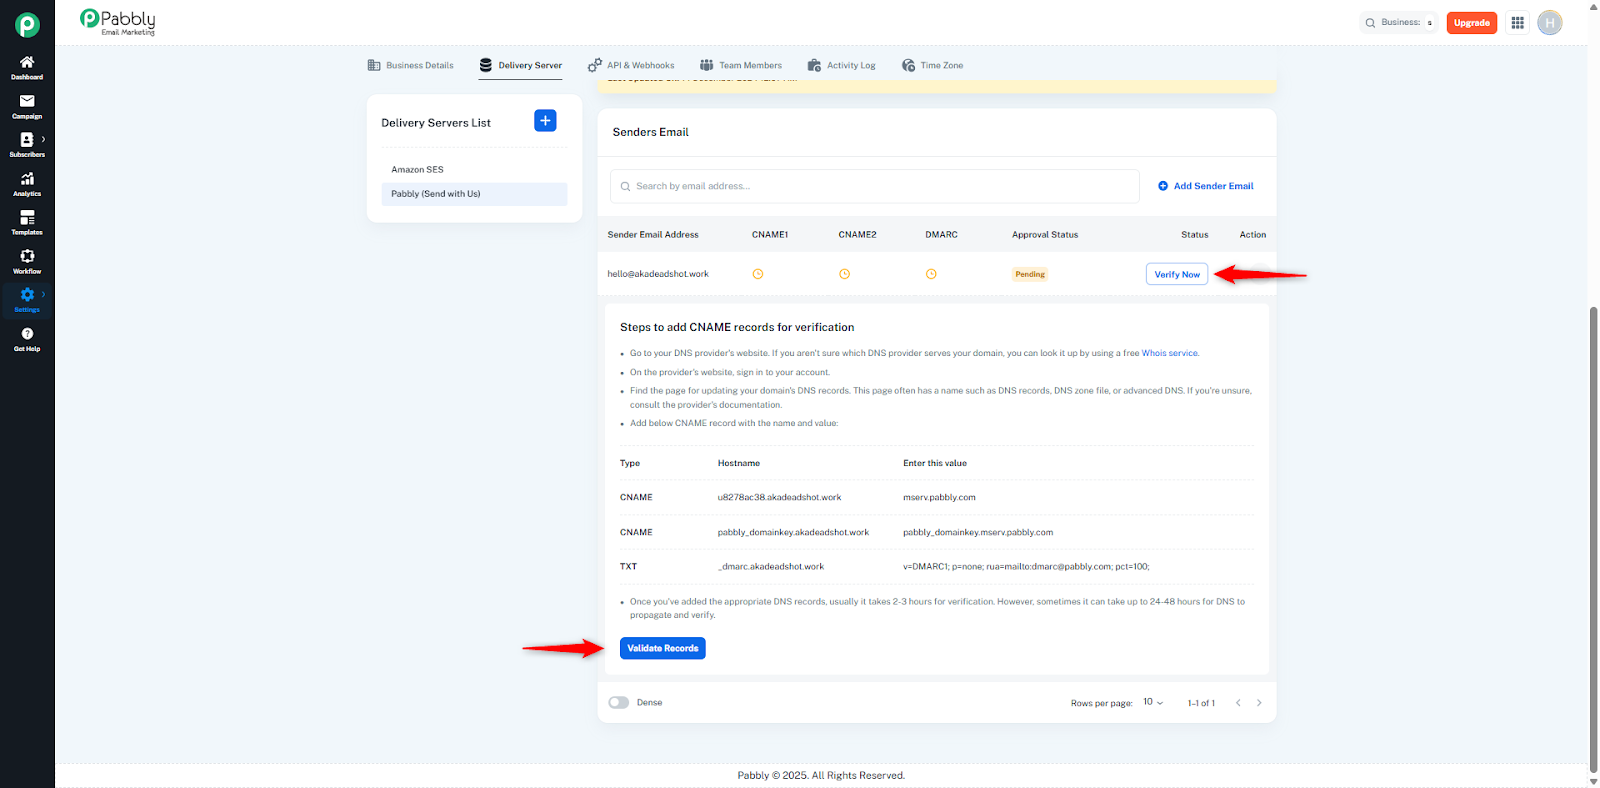
Inside the card, click Validate Records.
You can also click the Verify button from the Sender Email table (both work the same).
If DNS records are added correctly
If the domain is valid
Domain age
Whether it meets all sender requirements
Once DNS is verified:
The Approval Status in the table will remain Pending.
But now the table will show a new button: Approve.
Click the Approve button.
A test email will be sent to confirm your domain works properly.
After the test email is delivered successfully:
Approval Status → Approved
The Status button will update to Ready to Send
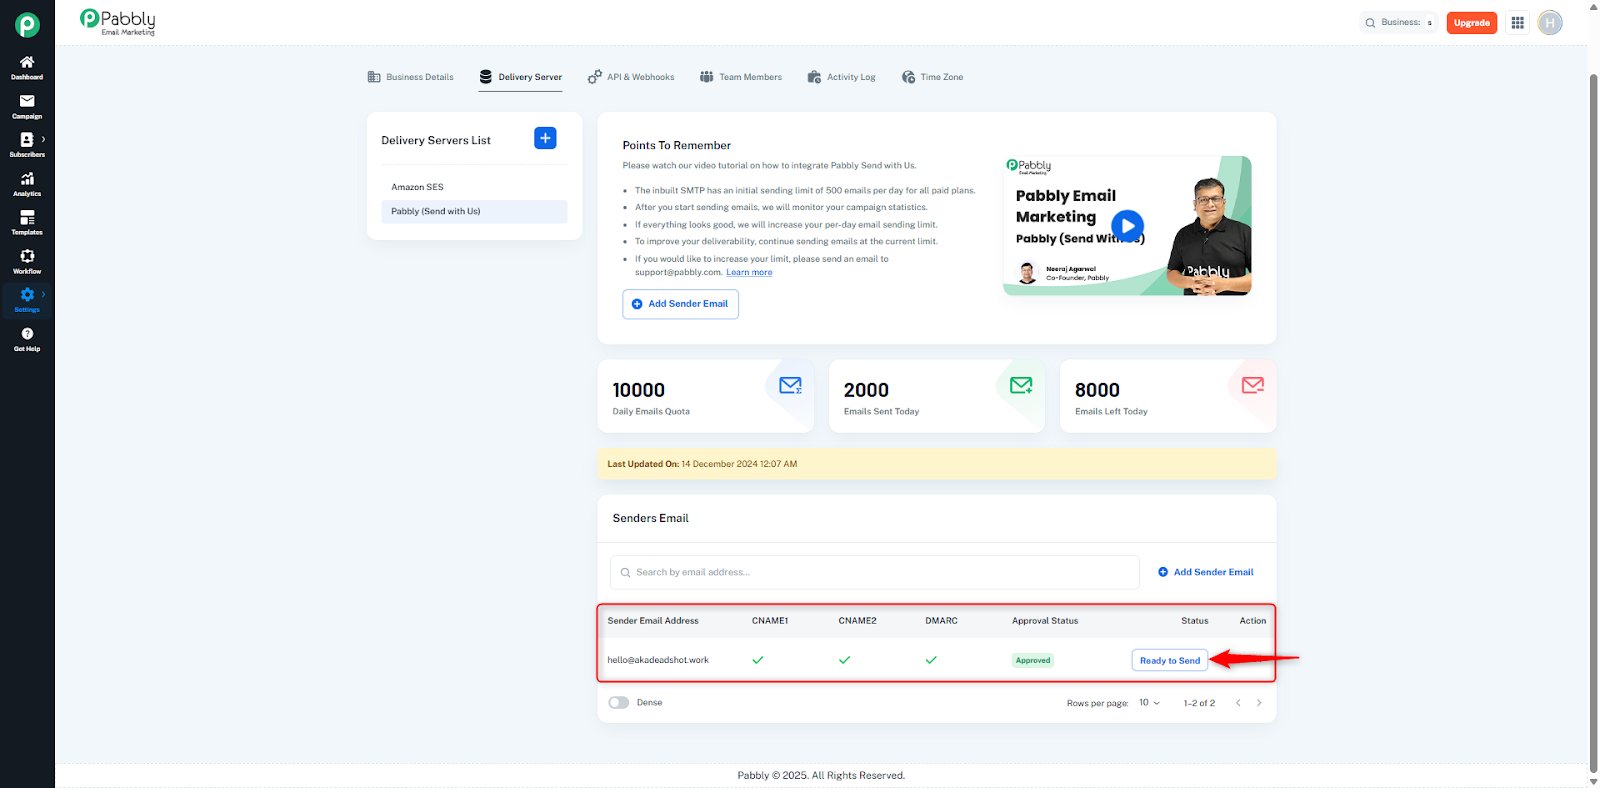
This means your domain has been fully verified and approved.
In the Delivery Server section, you can connect your own SMTP provider like SendGrid, Mailgun, Postmark, Amazon SES, Elastic Email, Gmail, Outlook, and many more.
This allows you to send emails using your personal SMTP credentials.
Go to Settings → Delivery Server.
Inside the Delivery Servers List, click on the + icon.
A dialog box will appear named Add Delivery Server.
Enter your delivery server name (example: “Server_01”).
Click on Create.
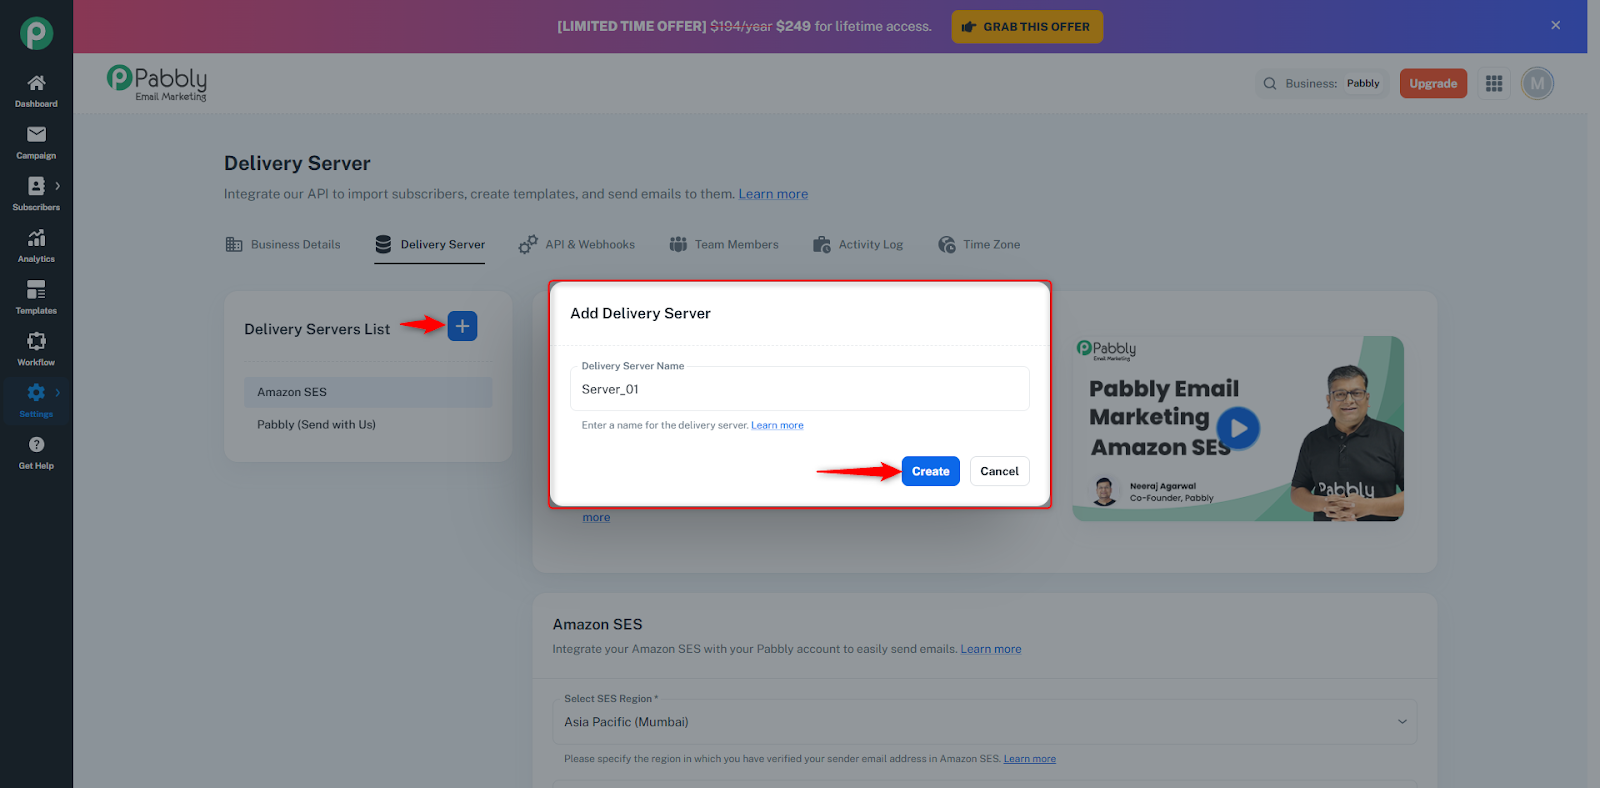
Once you create a new delivery server:
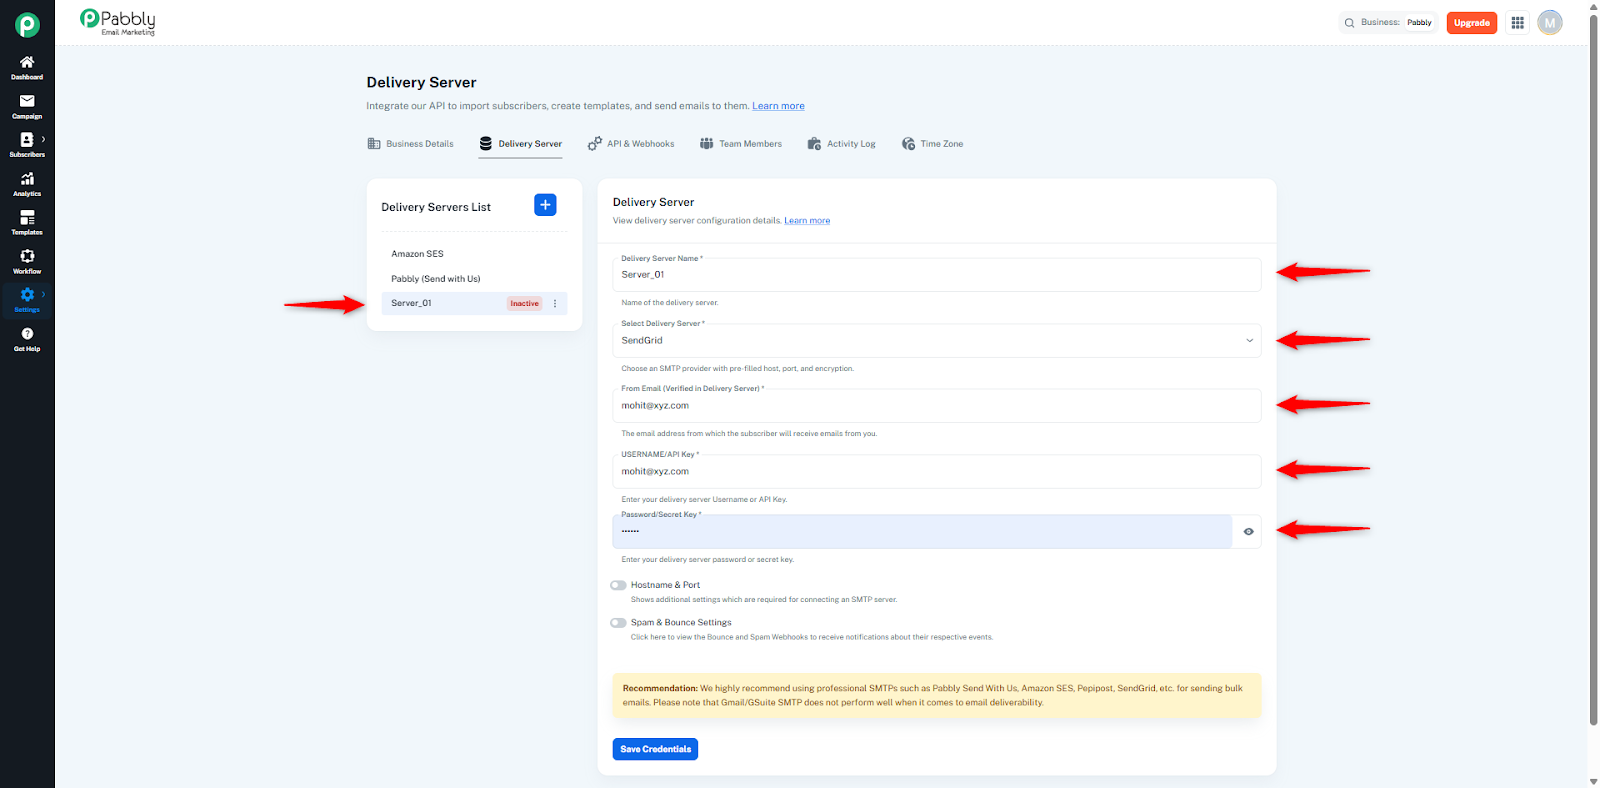
The delivery server will appear in the Delivery Servers List (folder).
By default, its status will be Inactive.
This is because no SMTP credentials have been added yet.
Inside your delivery server settings, you will see these fields:
1. Delivery Server Name
This is just your custom name.
Example: Server_01
Here you can select your SMTP provider from the dropdown.
Available SMTP Providers:
Custom
Elastic Email
Gmail
G Suite
MailerSend
Mailchimp
Mailgun
Mandrill
Outlook
Pepipost
Postmark
SendGrid
Sendinblue
SendPulse
SMTP2Go
SparkPost
Users can select any provider they want.
Enter the email address from which your subscribers will receive emails.
This email should be verified in your SMTP provider.
Enter the SMTP username or API key provided by your SMTP service.
Enter the SMTP password or secret key.
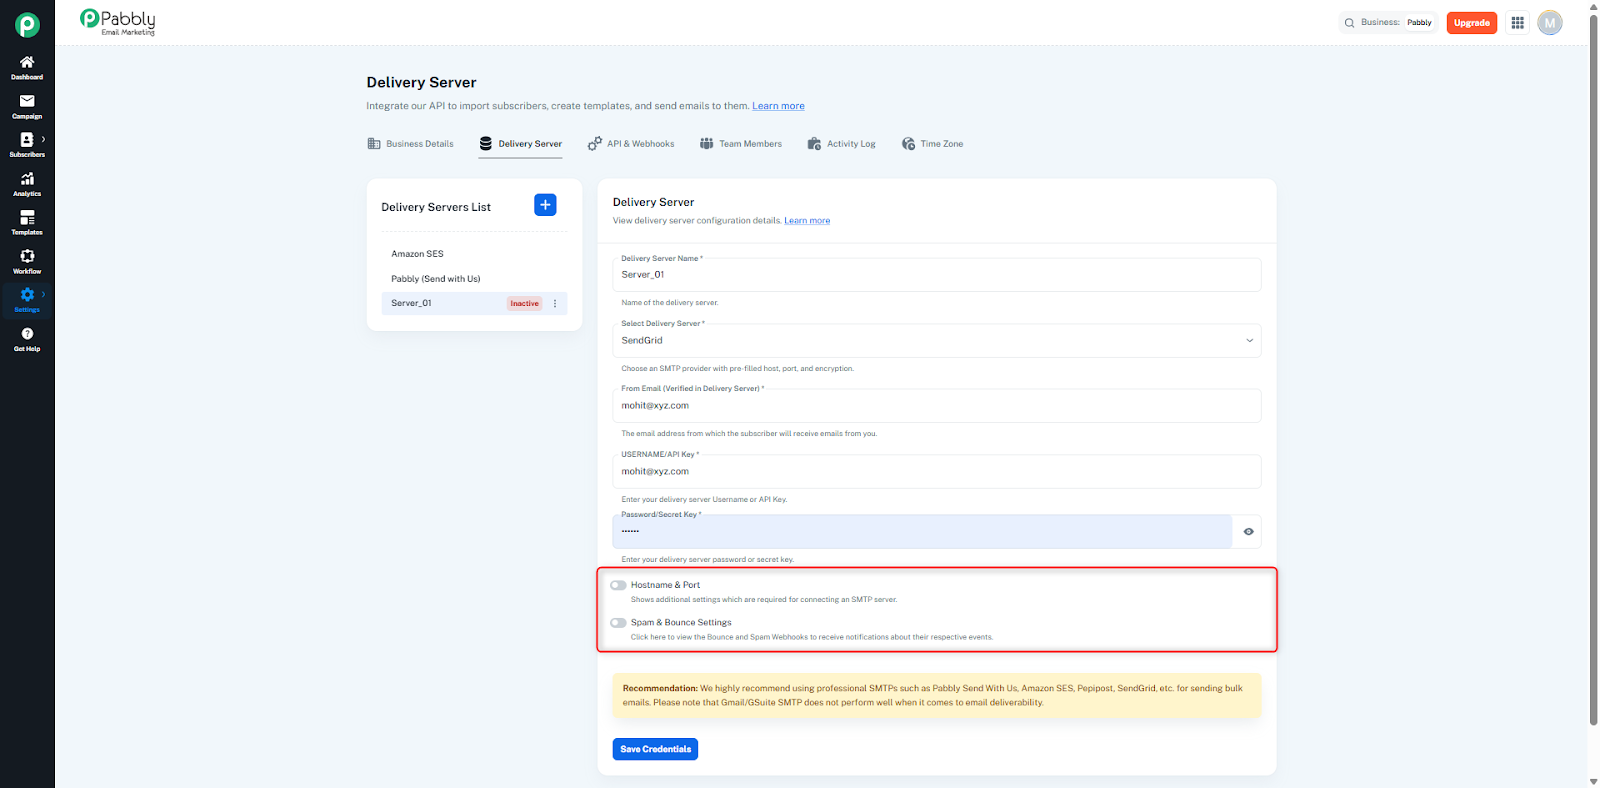
When you enable this option, you can manually enter:
Host (example: smtp.sendgrid.net)
Port (25 / 465 / 587)
Encryption Type (TLS / SSL / None)
If you select a pre-configured SMTP (like SendGrid), these values are automatically filled.
Here you get two auto-generated webhook URLs:
Bounce Webhook URL
Spam Webhook URL
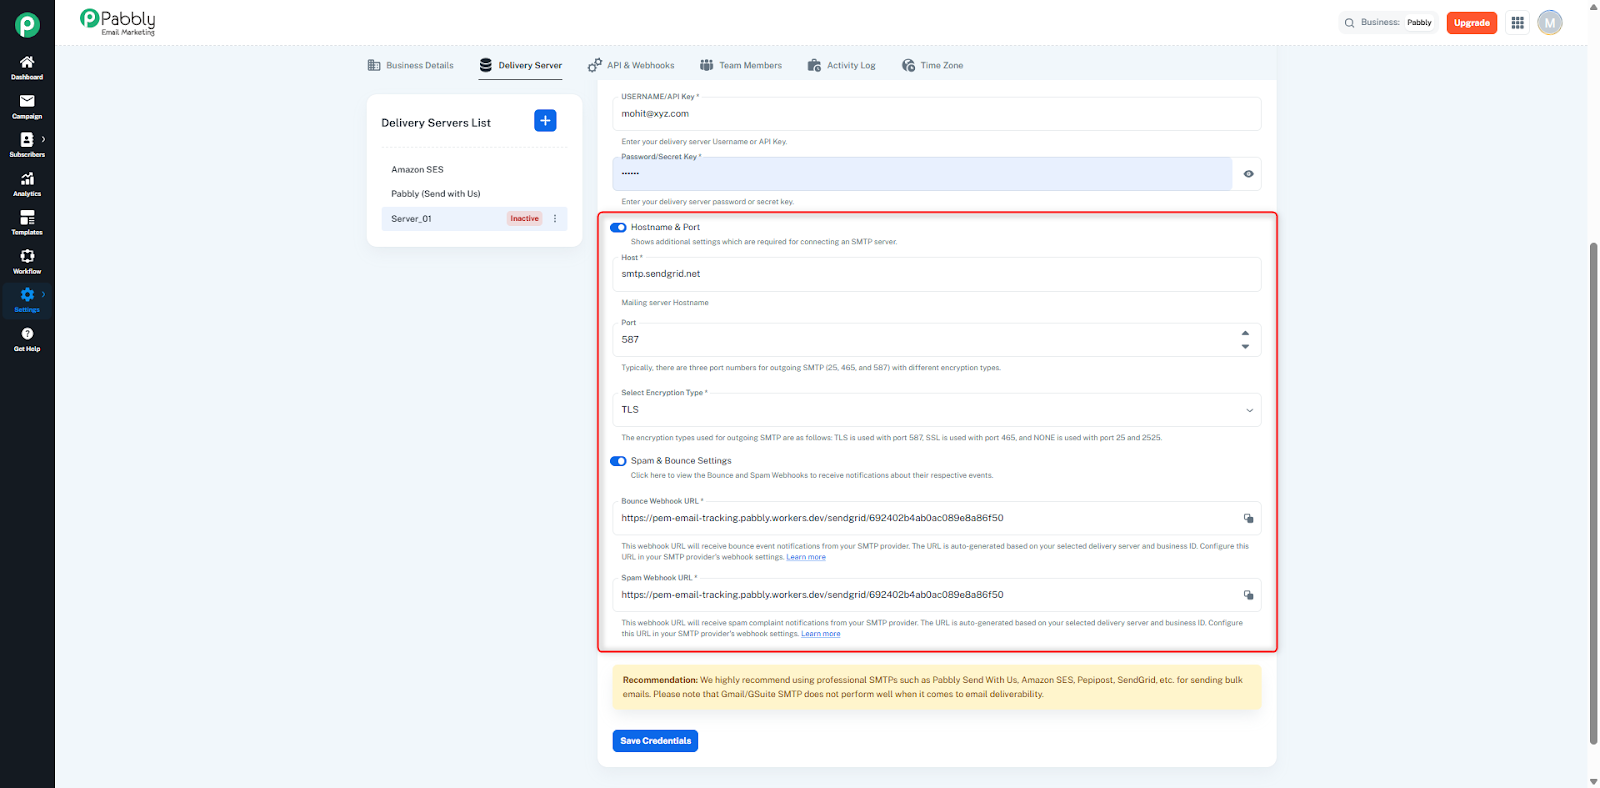
These URLs allow your SMTP provider to send real-time updates to your system.
Using these links, the user can track:
Bounce
Spam
Failed
Delivered
Complaints
Unsubscribes
So they can monitor the exact email status for the delivery server they are using.
After filling the fields, click on the Save Credentials button.
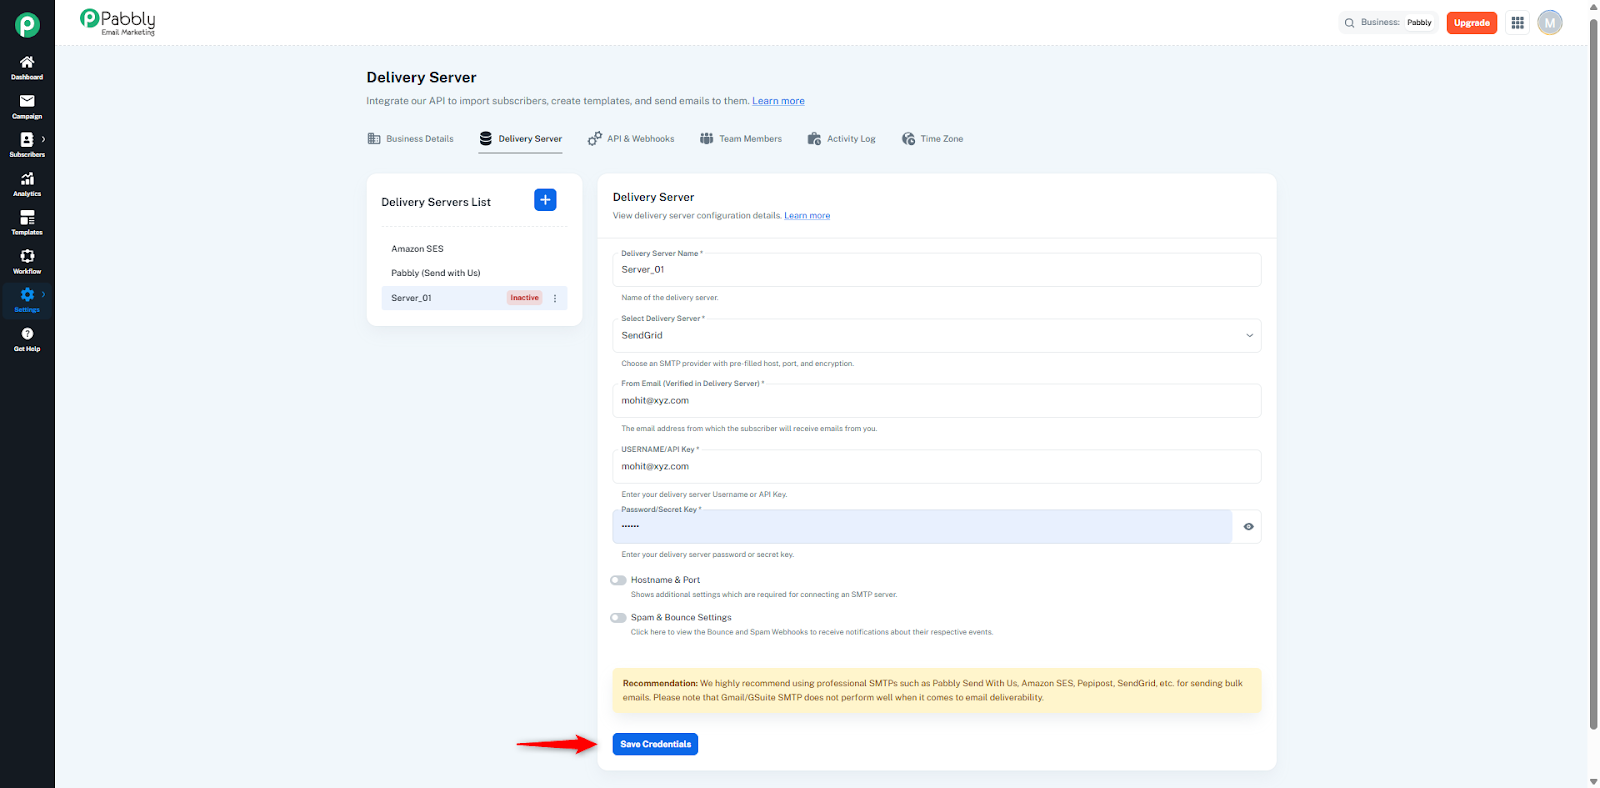
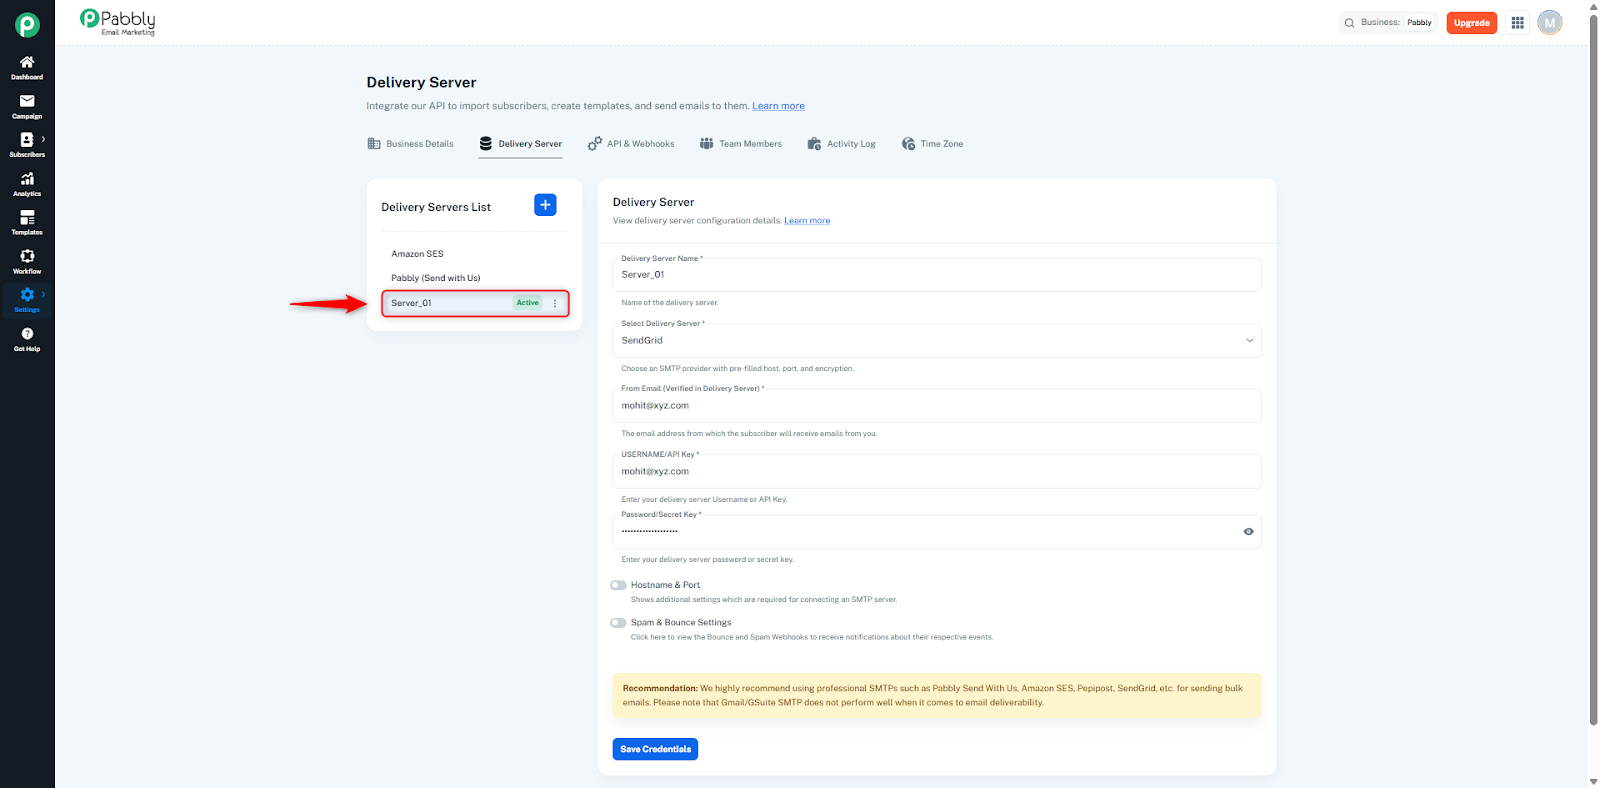
The delivery server will become Active.
You can now send emails using this server.
In the folder list, the server status will show Active.
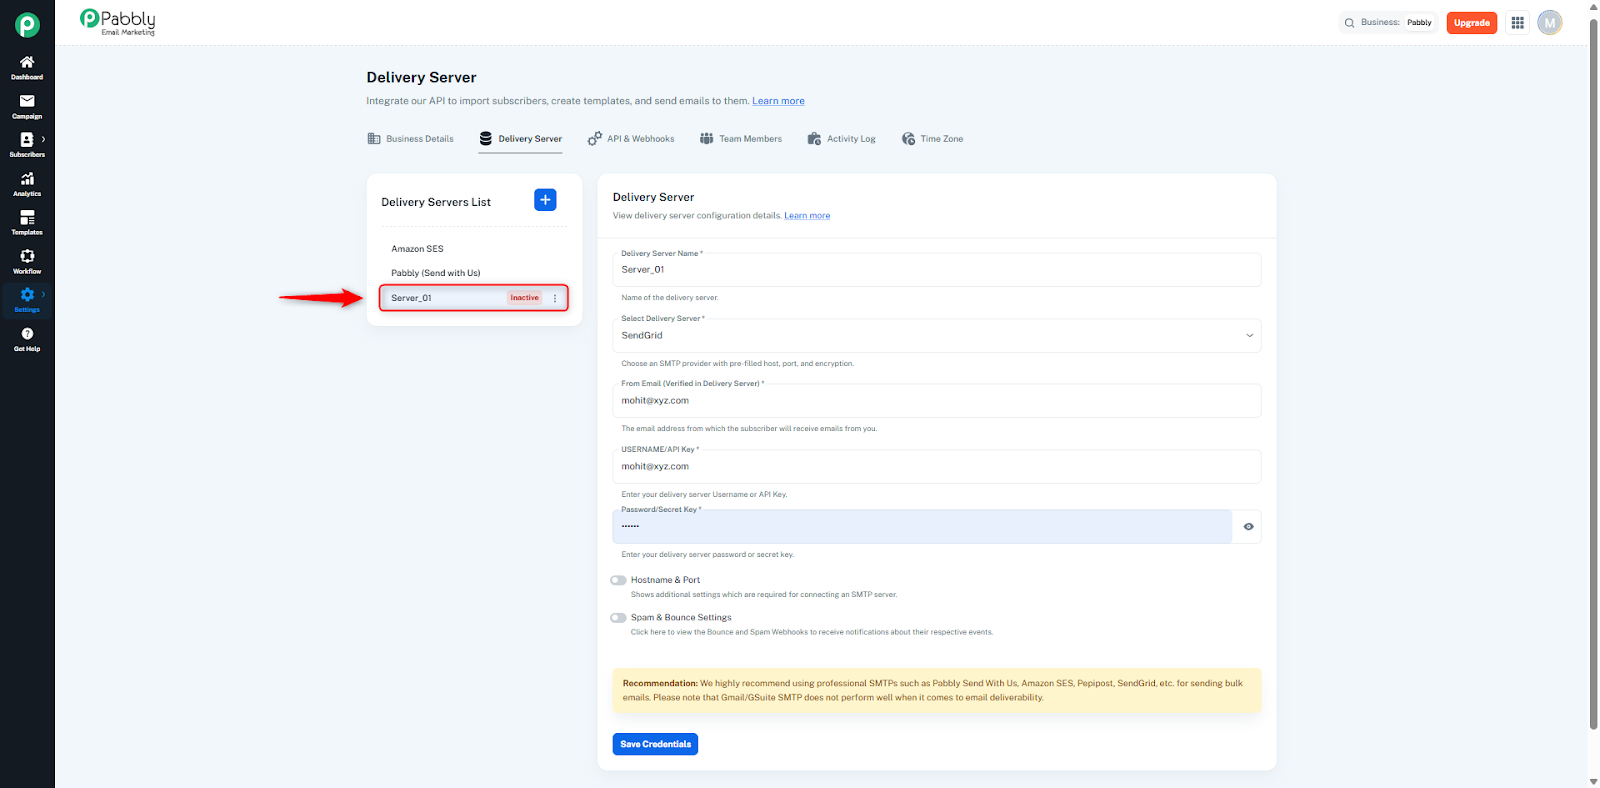
The server will stay Inactive.
Emails will NOT be sent from this server until corrections are made.
We highly recommend using professional SMTPs such as:
Pabbly Send With Us
Amazon SES
Pepipost
SendGrid
Mailgun
Postmark
Because they provide better deliverability for bulk emails.
Note: Gmail / GSuite SMTP does not perform well for bulk sending.
