Features & Capabilities
For complete API references, endpoints, and integration guides, visit the official Pabbly Chatflow API Documentation.
To access the API token in Pabbly Chatflow, follow these steps:
Use your credentials to log in to your Pabbly Chatflow account.
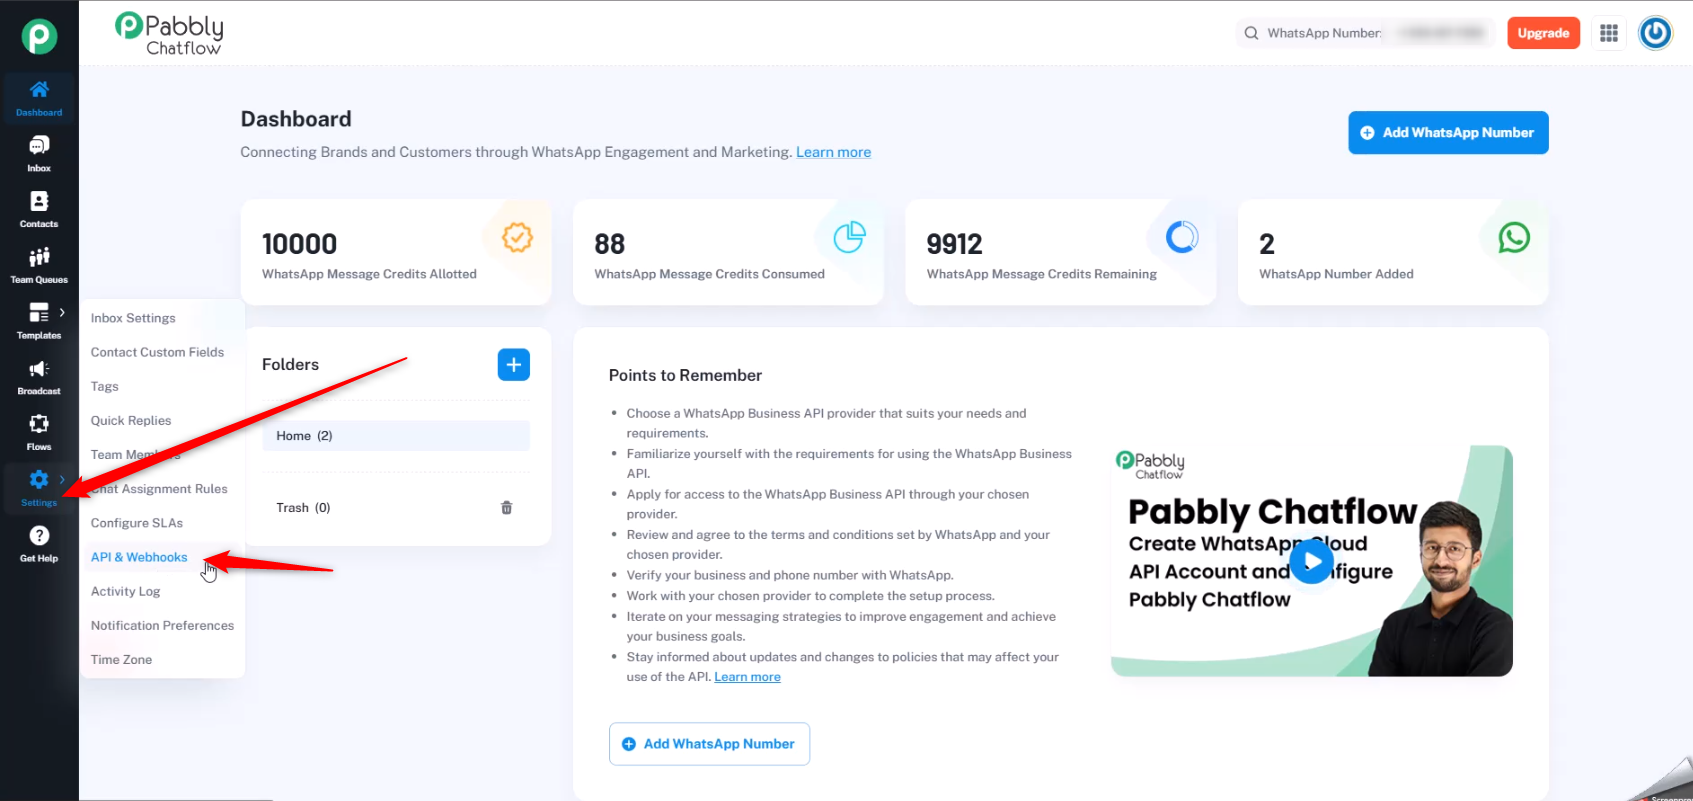
In the Pabbly Chatflow application, go to the Settings section.
Select the API & Webhook option.
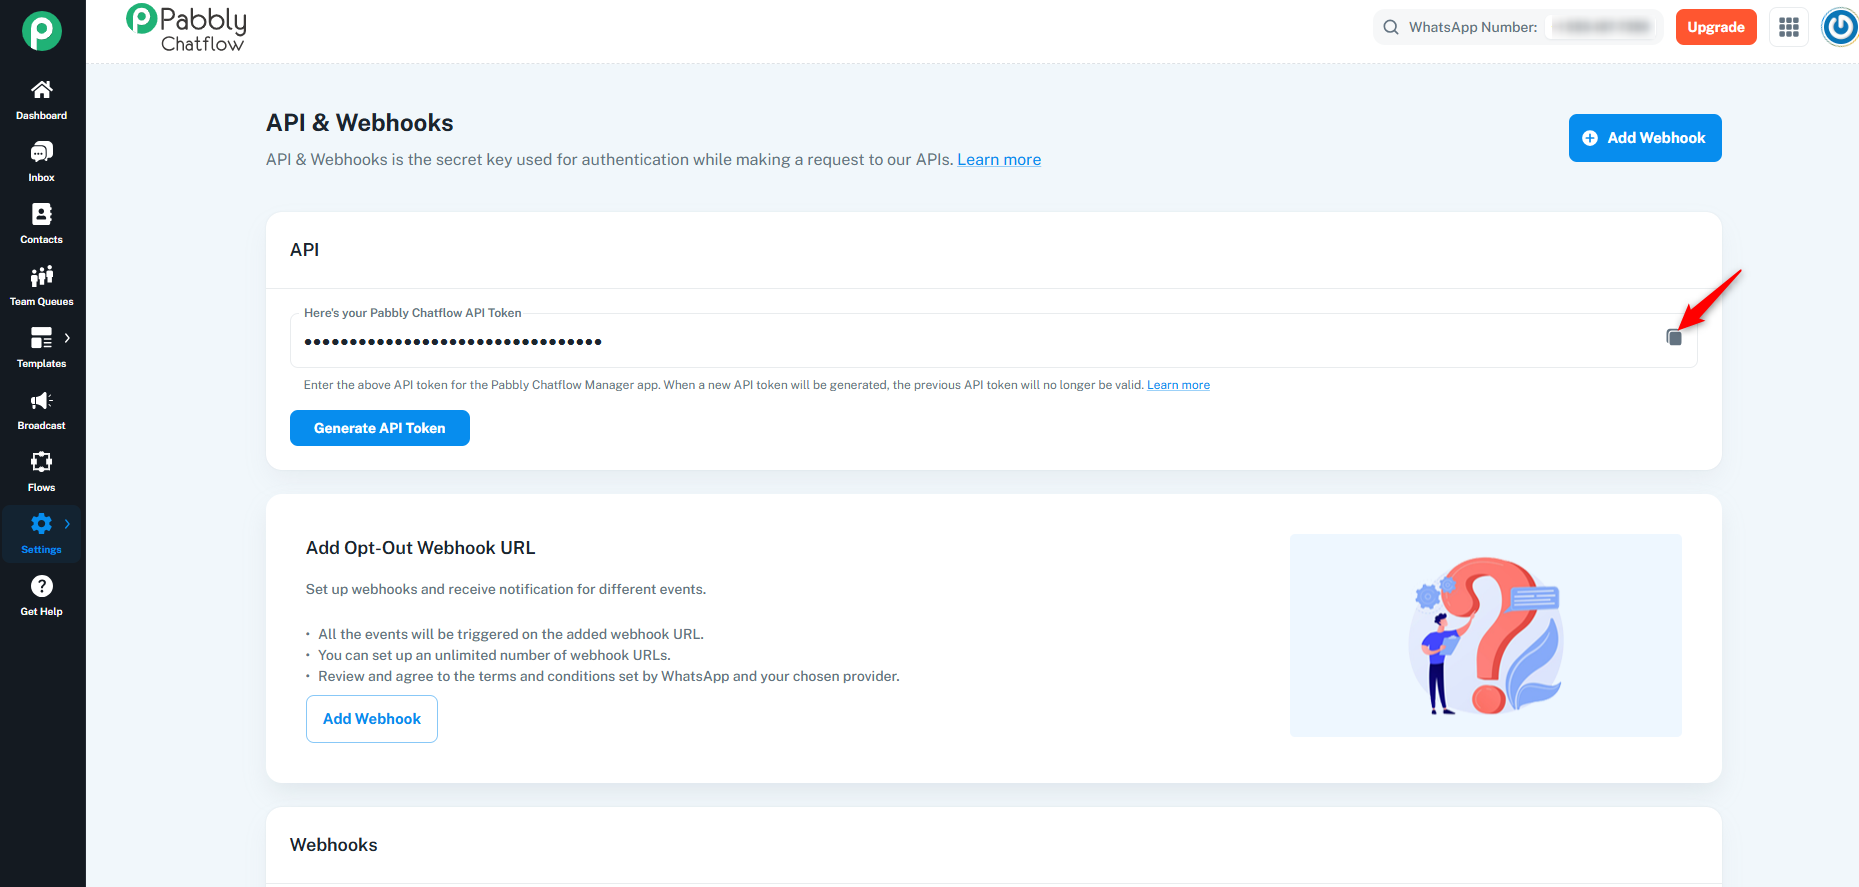
You will see the Pabbly Chatflow API Token displayed.
Click on the Copy button to copy the token for use in your integrations.
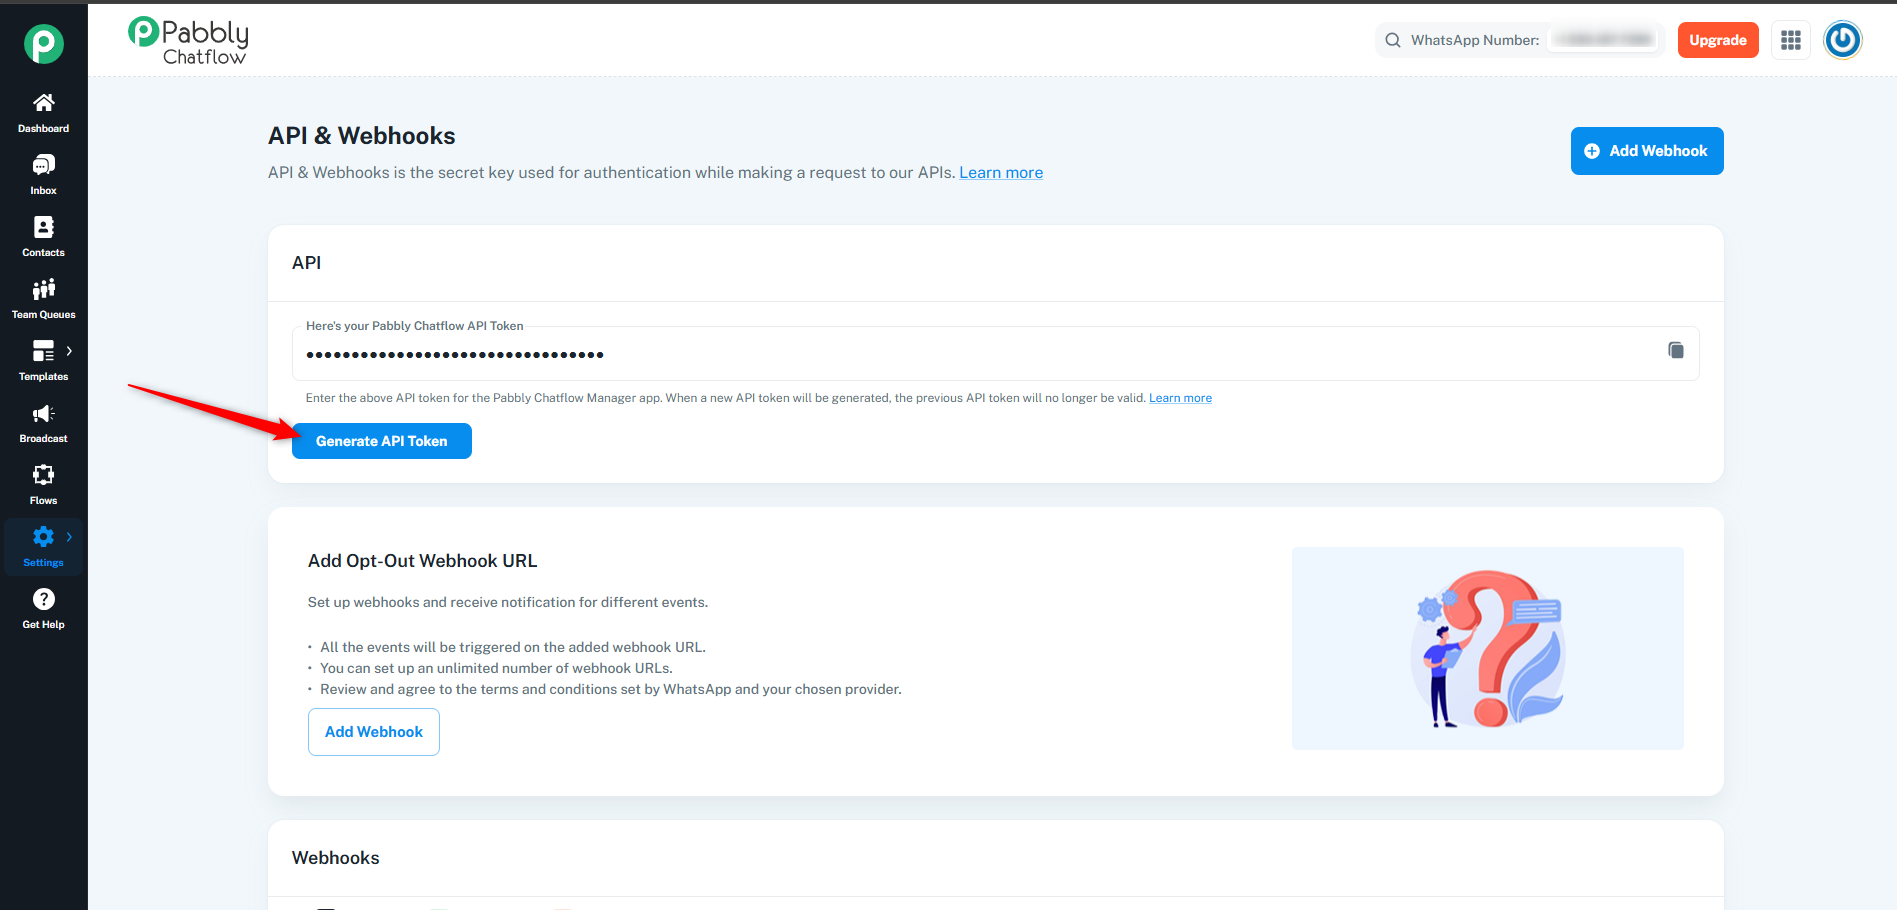
To generate a new API token, click on the Regenerate API Token button.
A new token will be generated, replacing the existing one.
Webhooks allow you to receive real-time notifications for different events occurring in Pabbly Chatflow. Follow these steps to set up a webhook:
Navigate to the API & Webhook section.
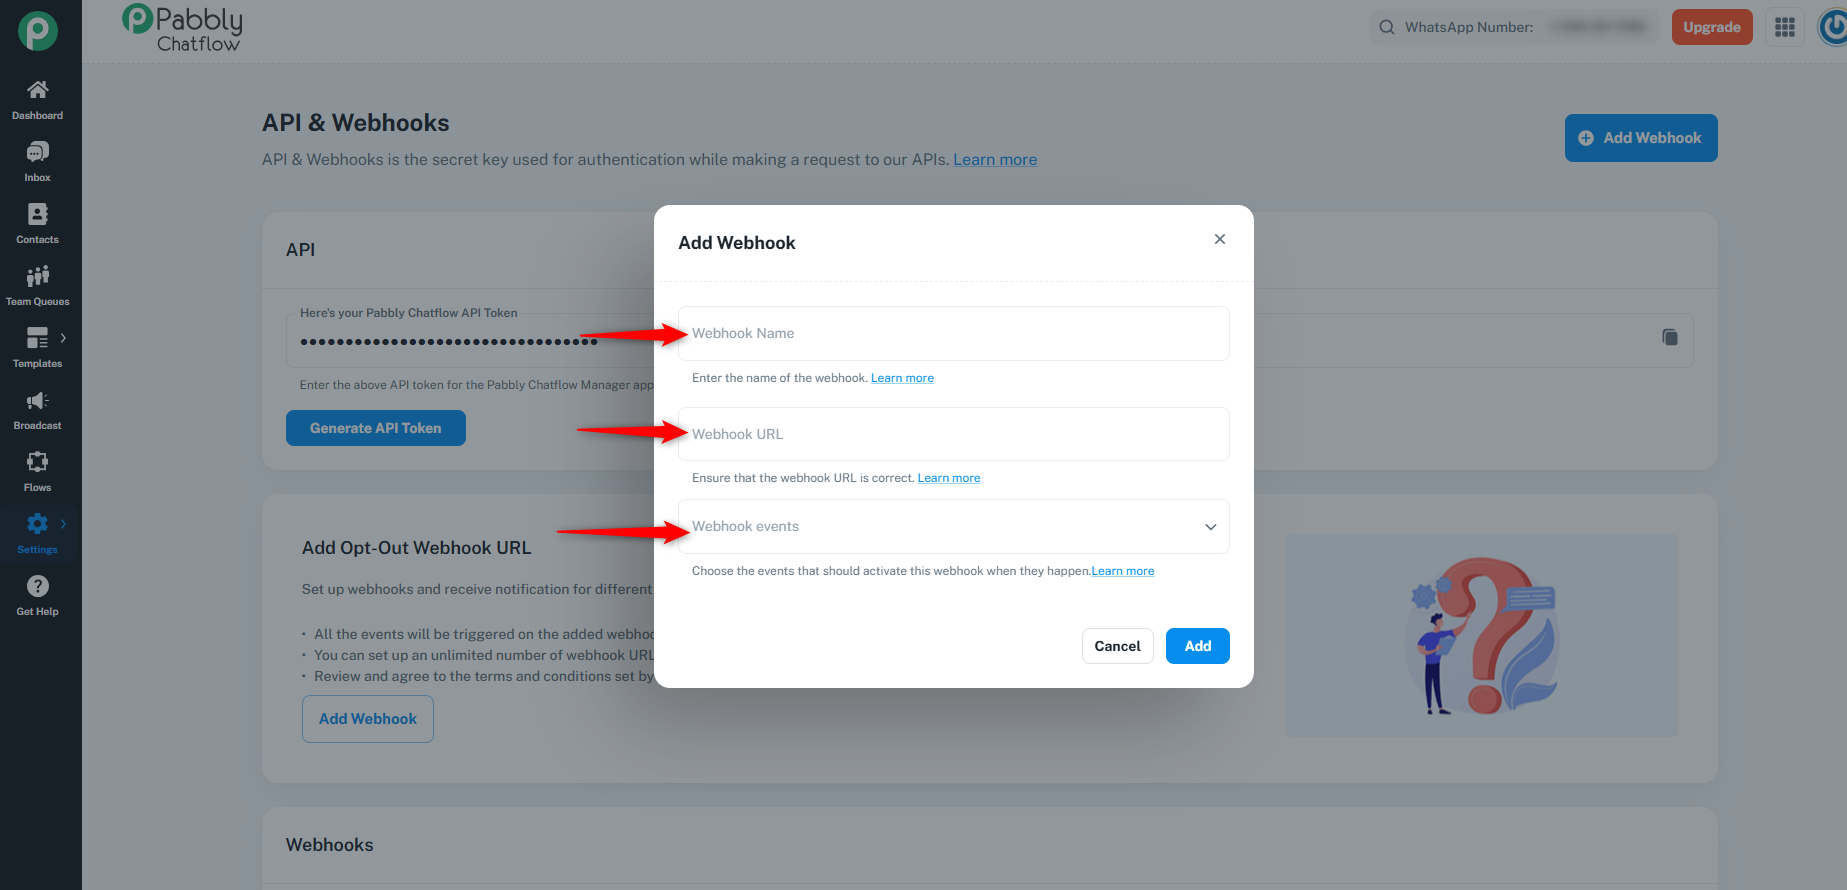
Click on the Add Webhook button to begin the setup.
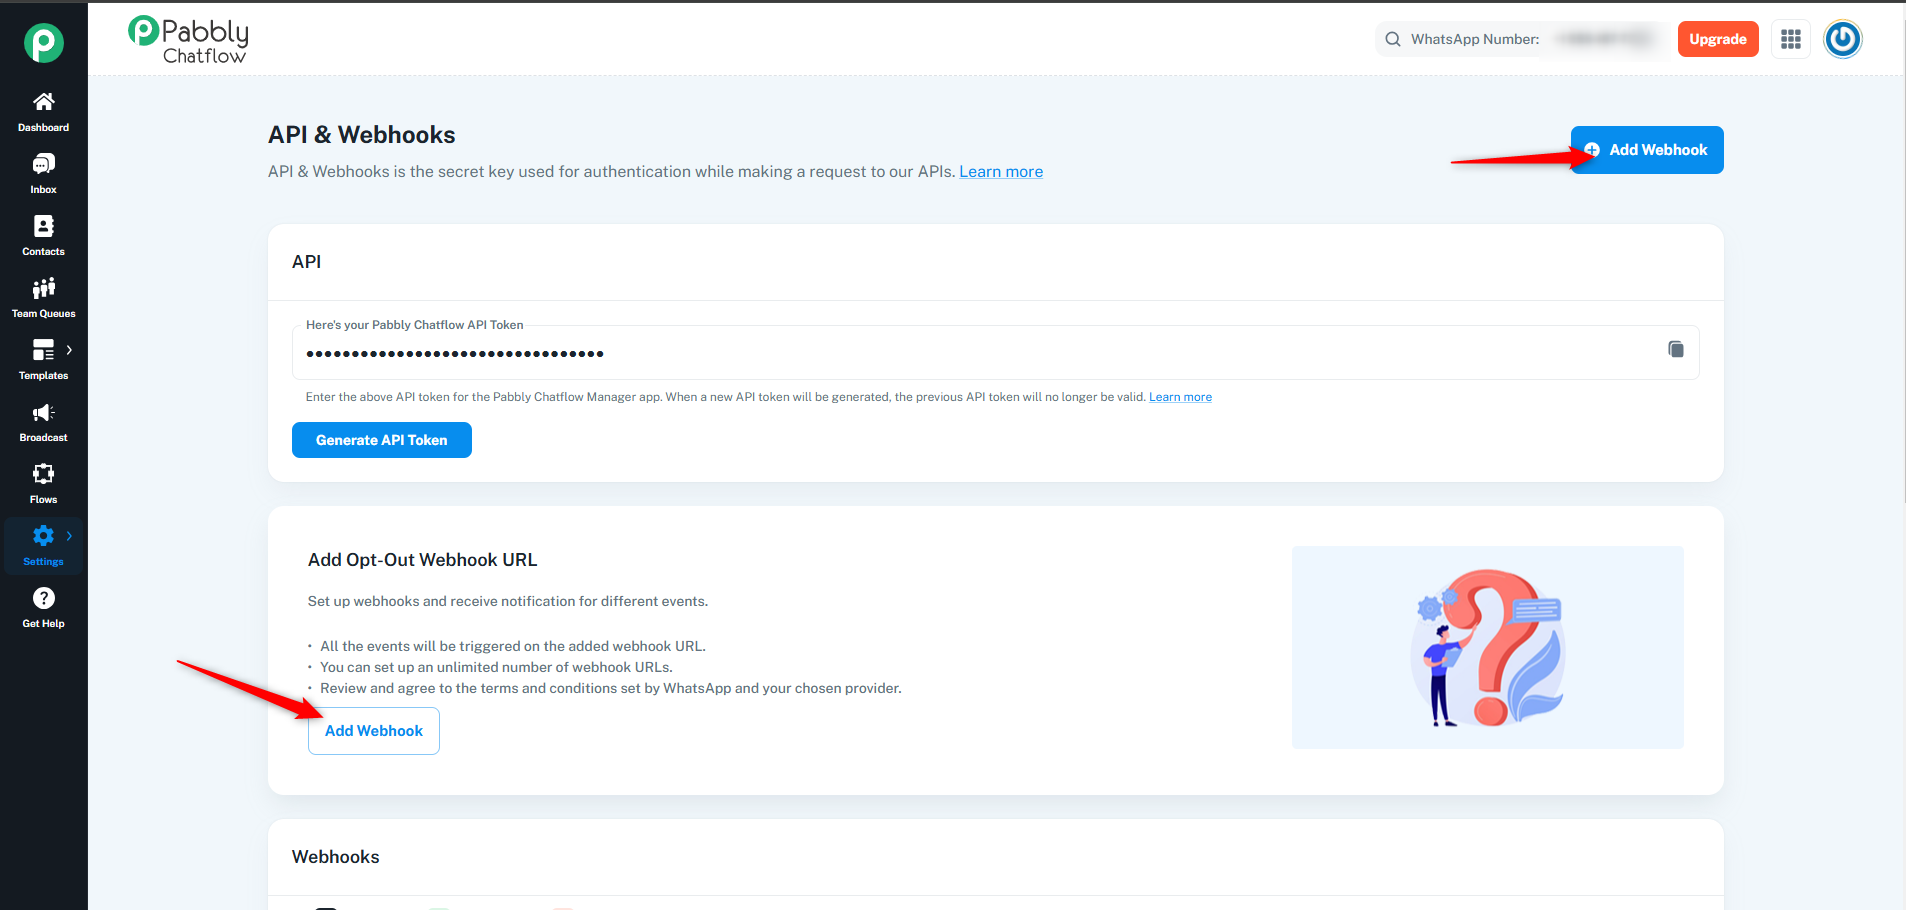
A dialog box will appear, prompting you to enter the following information:
Webhook Name
Webhook URL (where notifications will be sent)
Webhook Events (select the event types you want to receive notifications for)
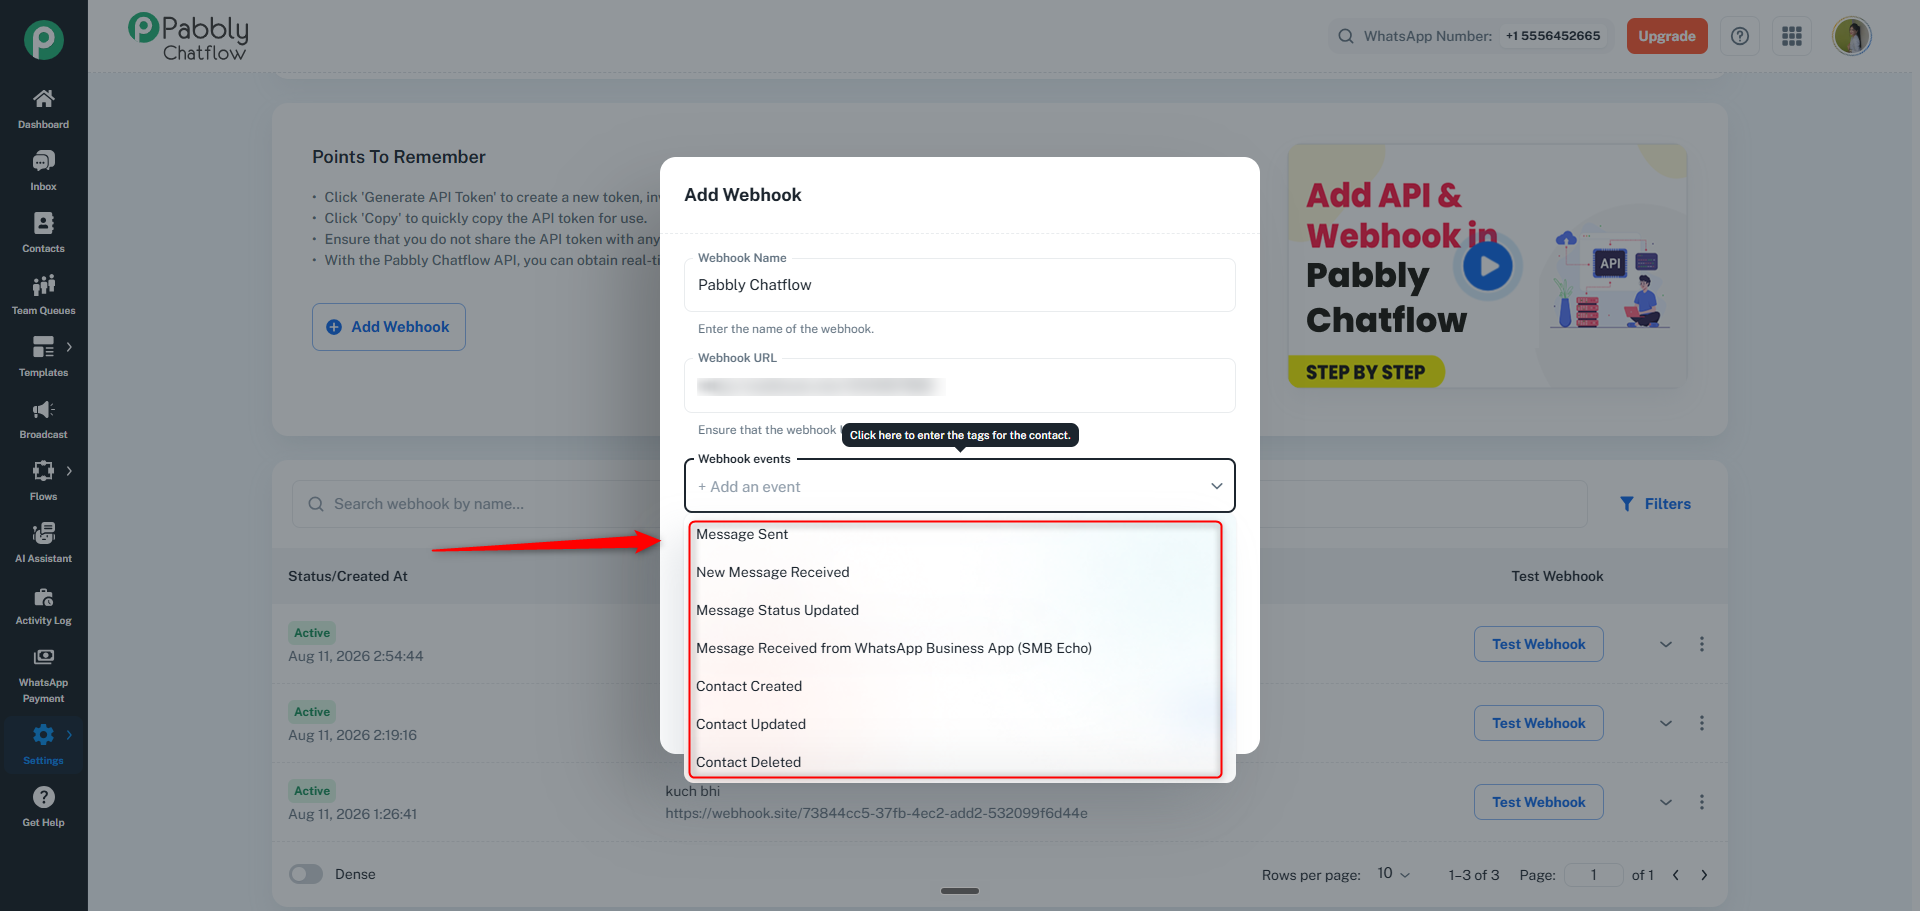
Pabbly Chatflow supports the following event types:
Message Sent: Triggered when a message is sent via Chatflow.
New Message Received: Triggered when a new message is received from a user.
Message Status Updated: Triggered when the status of a message is updated.
Message Received from WhatsApp Business App (SMB Echo): Triggers only when a message is sent from the WhatsApp Business App (WABA) and delivered to Pabbly Chatflow. Does not trigger for messages exchanged within the WhatsApp Business App.
Contact Created: Triggered when a new contact is created in Chatflow.
Contact Updated: Triggered when an existing contact’s information is updated.
Contact Deleted: Triggered when a contact is deleted from Chatflow.
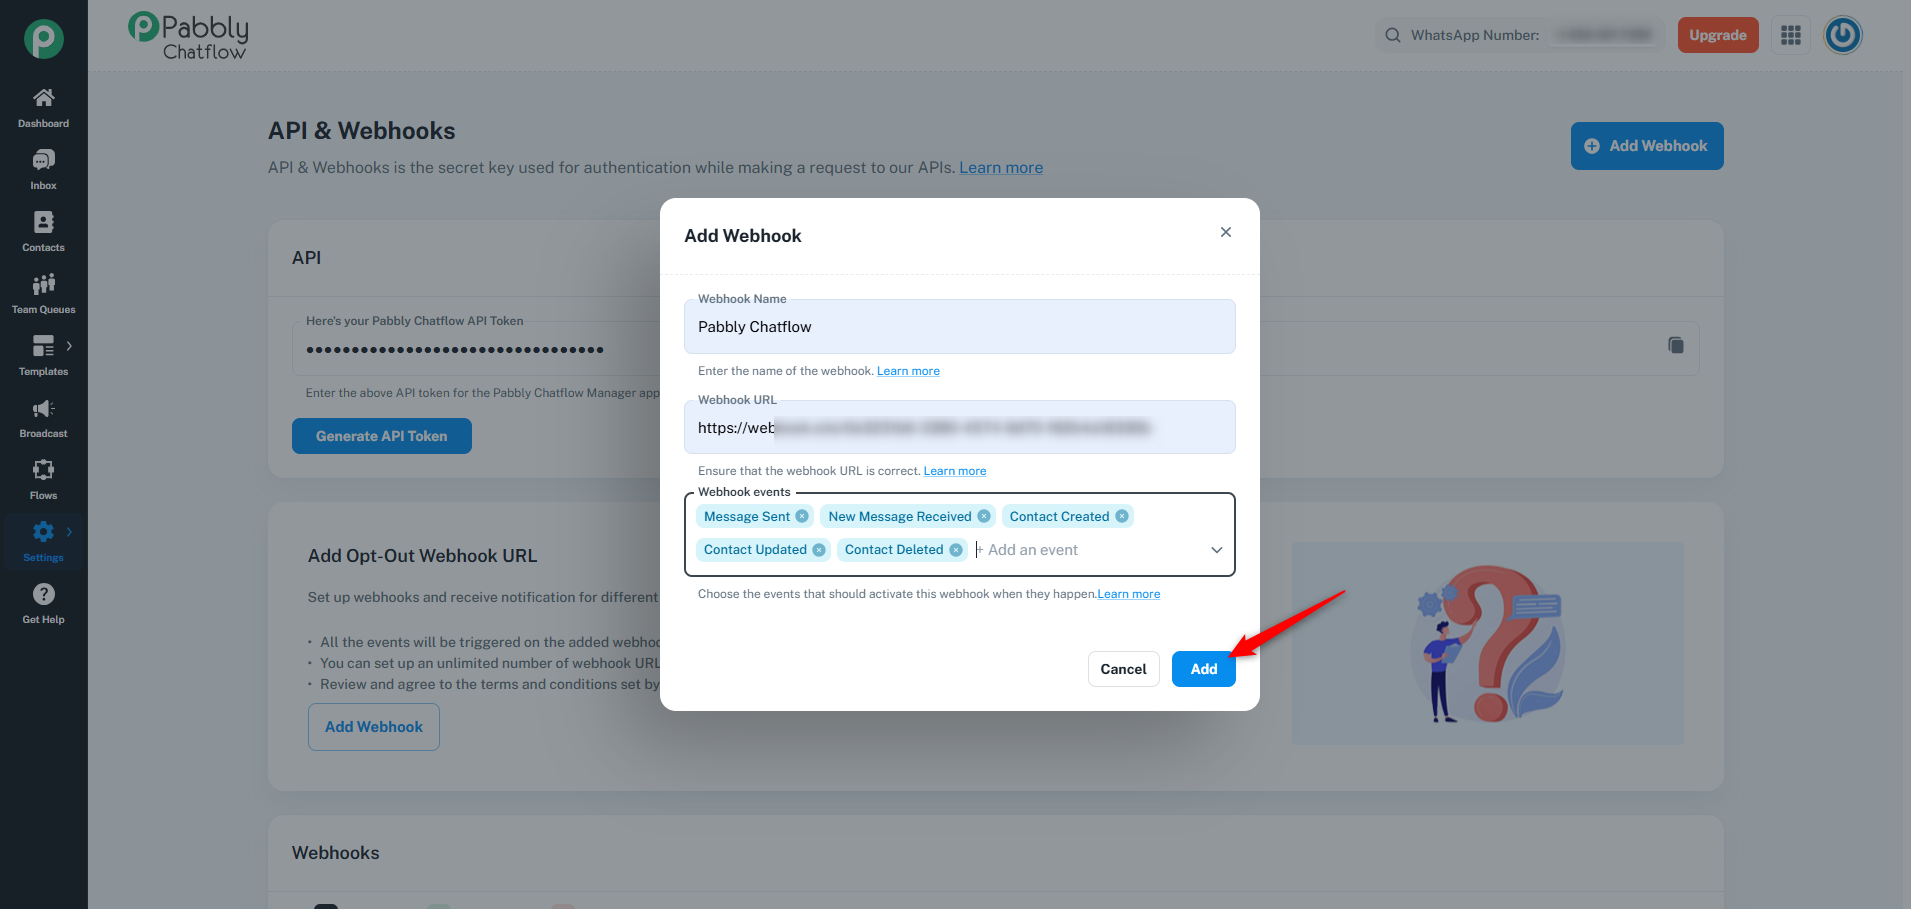
After filling in the required details, click on the Add button to save the webhook.
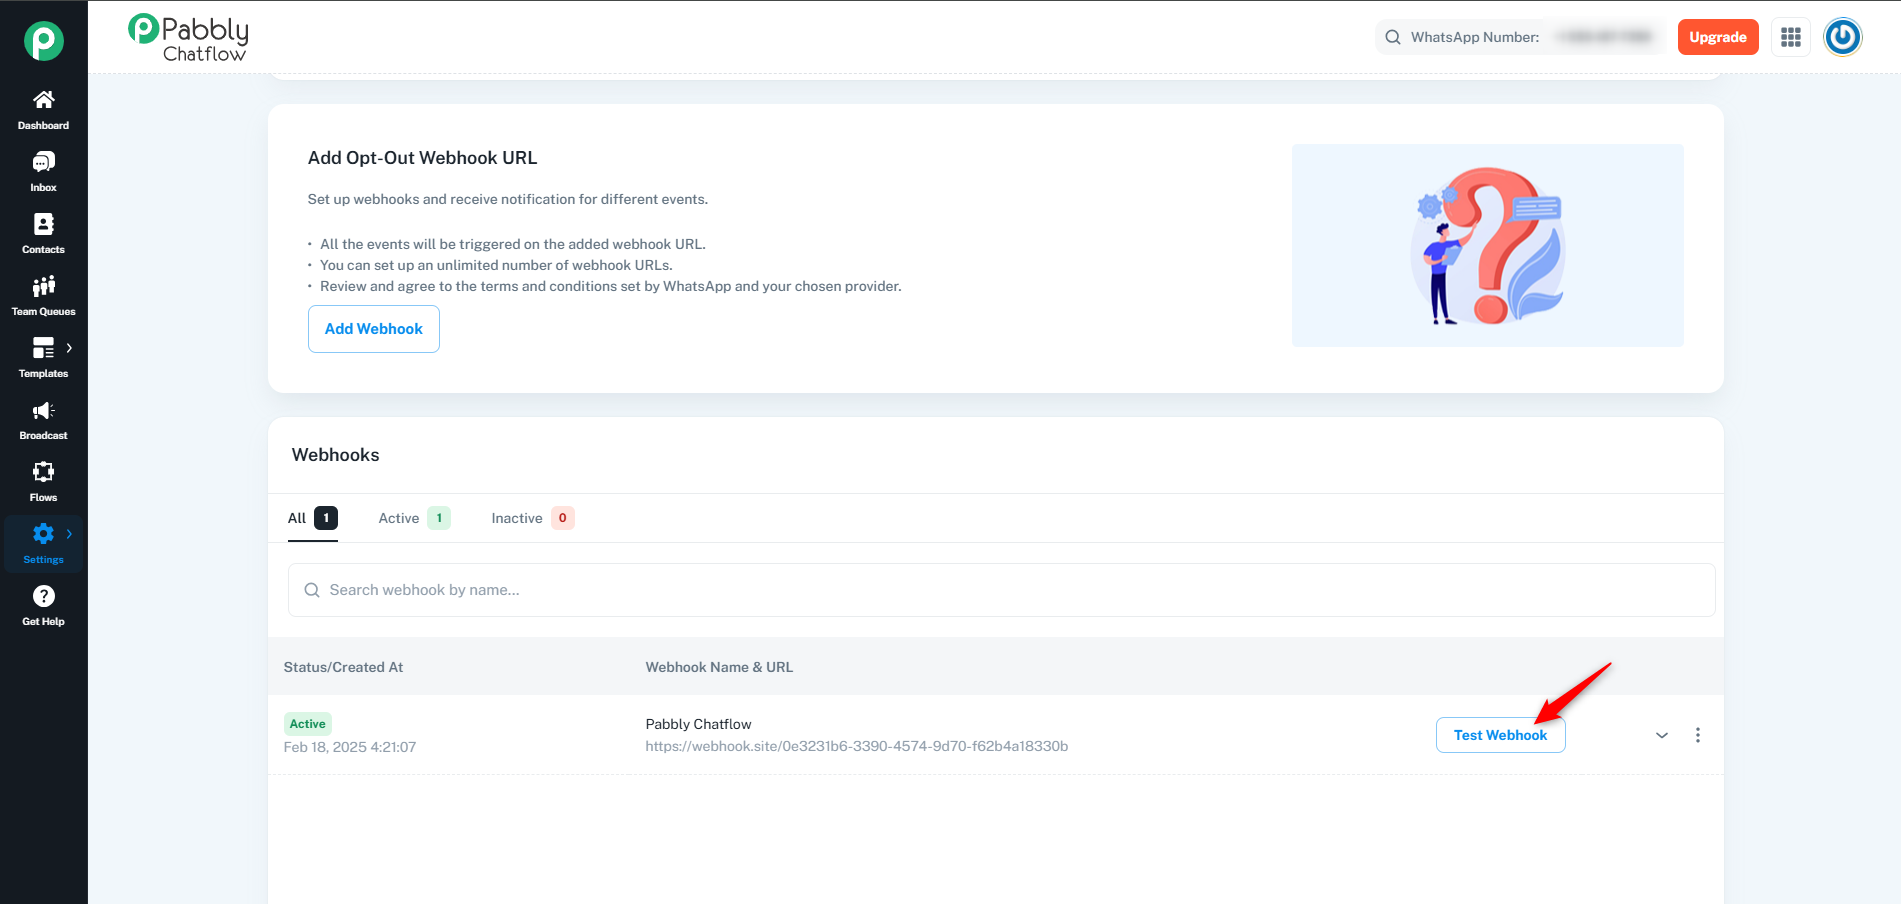
The newly created webhook will now be listed in the webhook table.
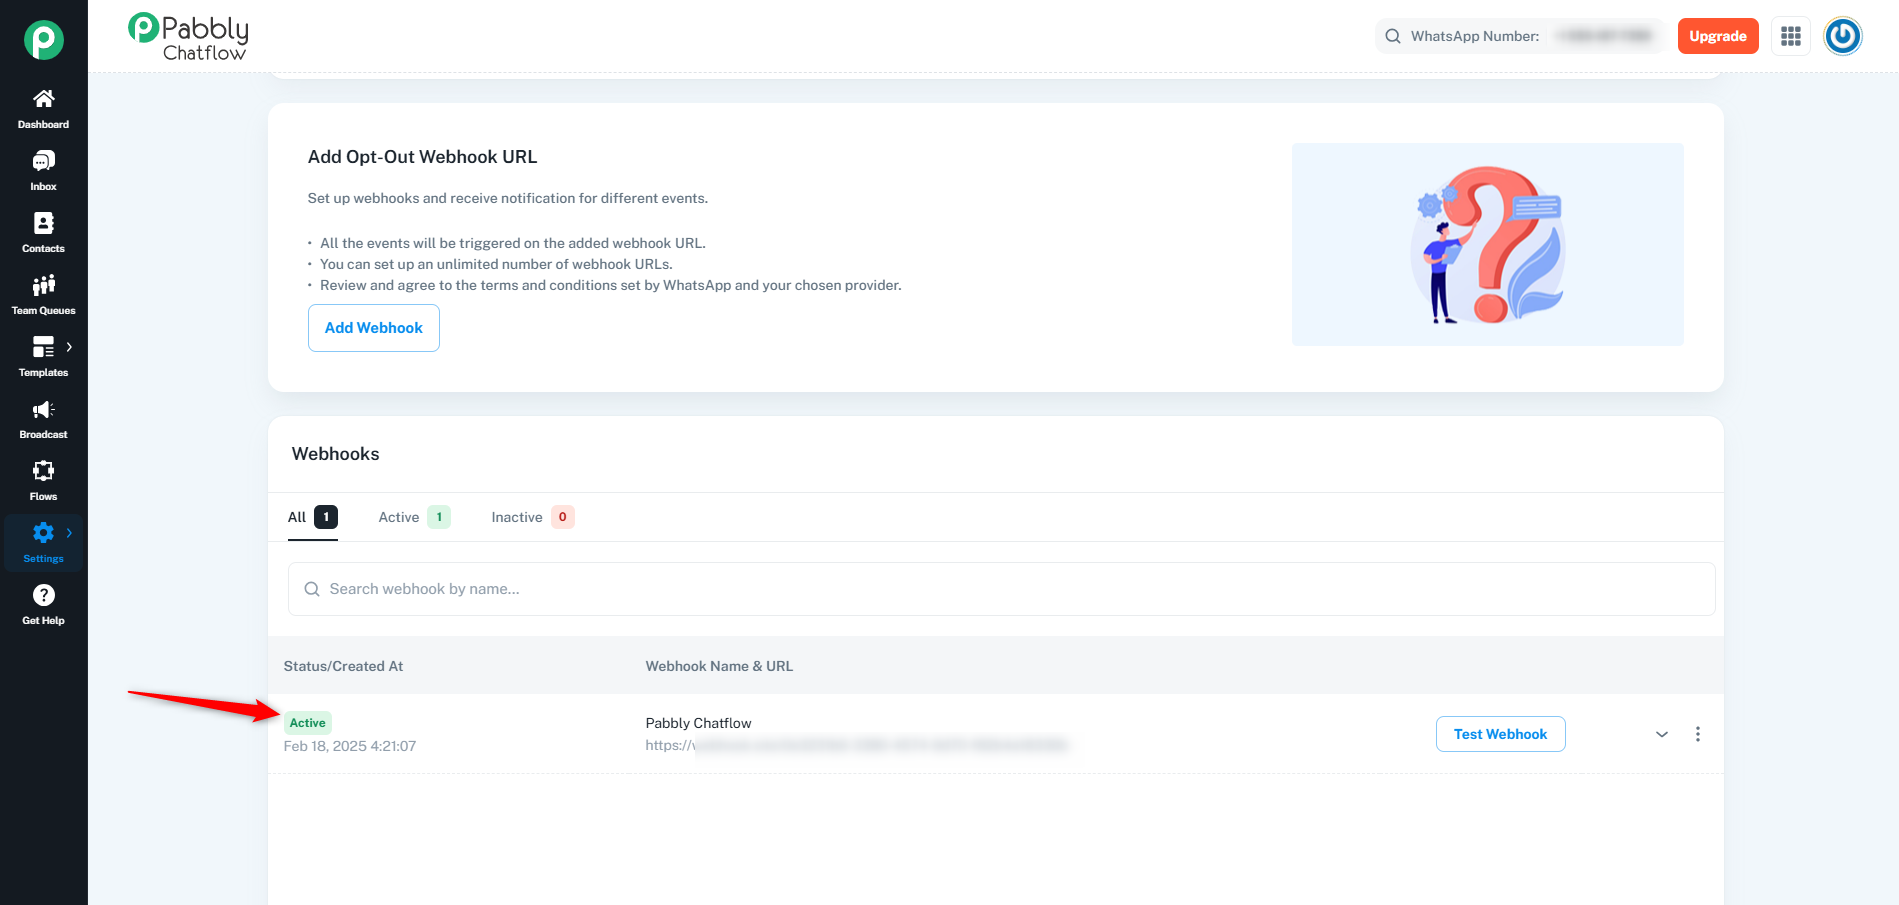
You have the option to test your webhook by clicking on the Test Webhook button.
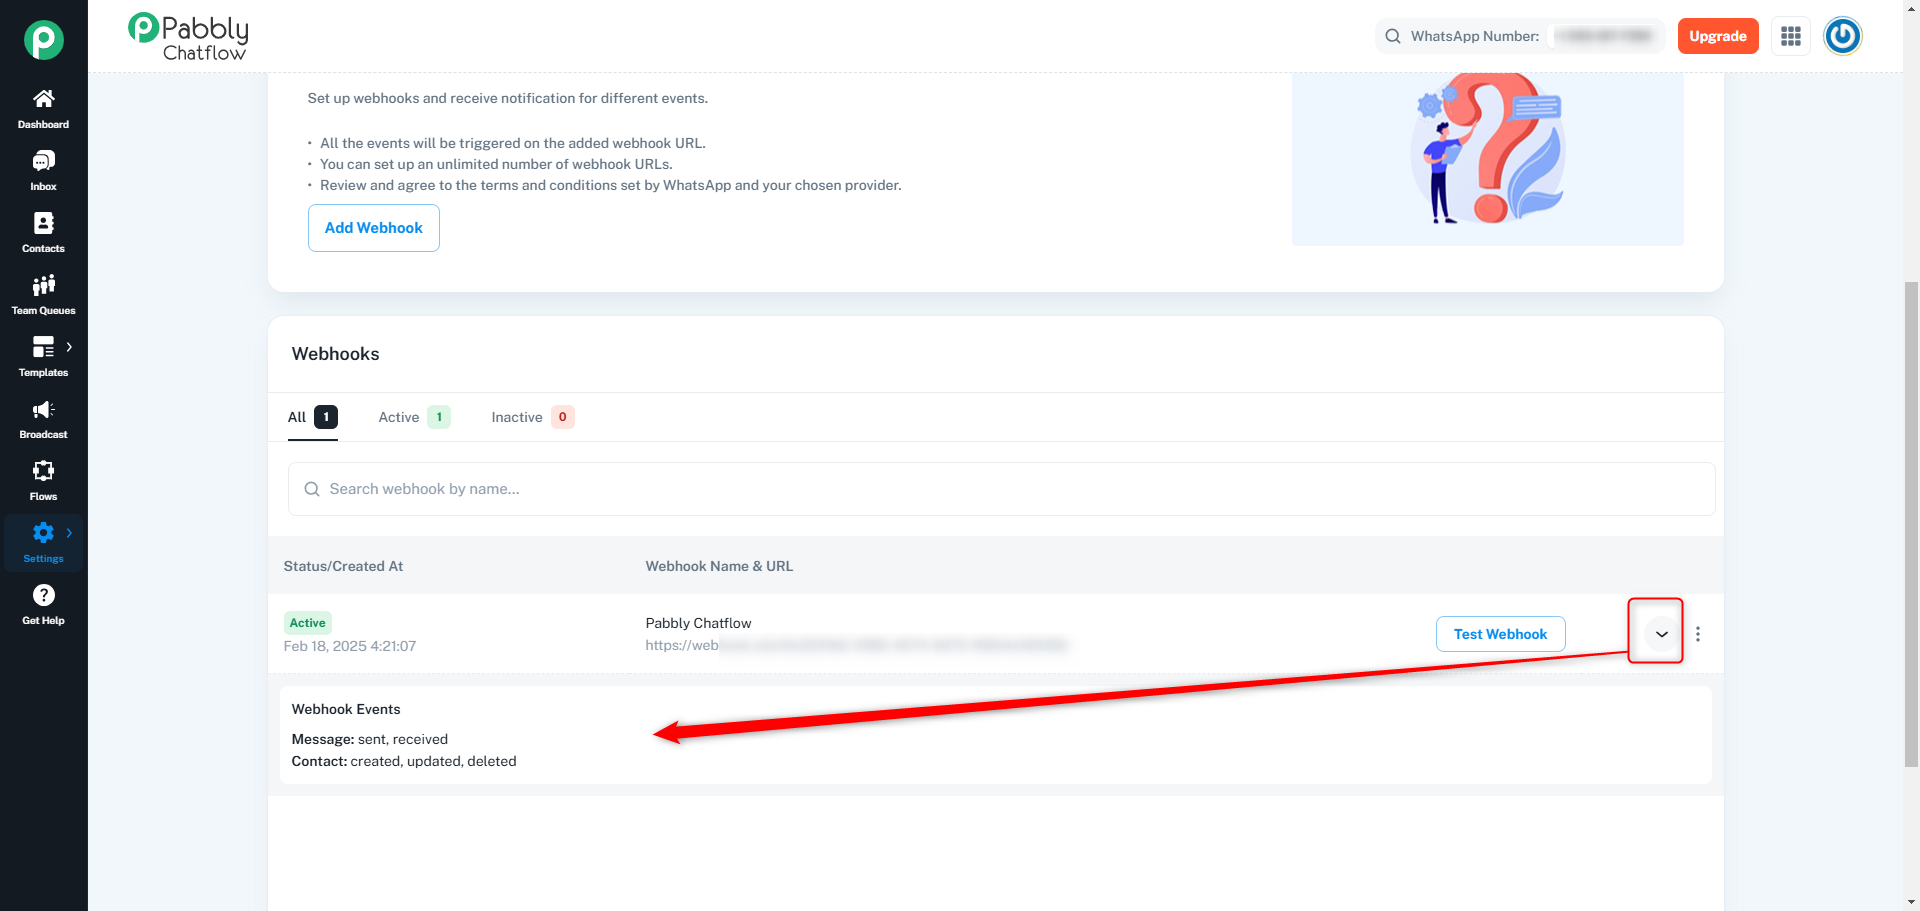
To check which events are linked to a specific webhook, click on the options next to the Test Webhook button.
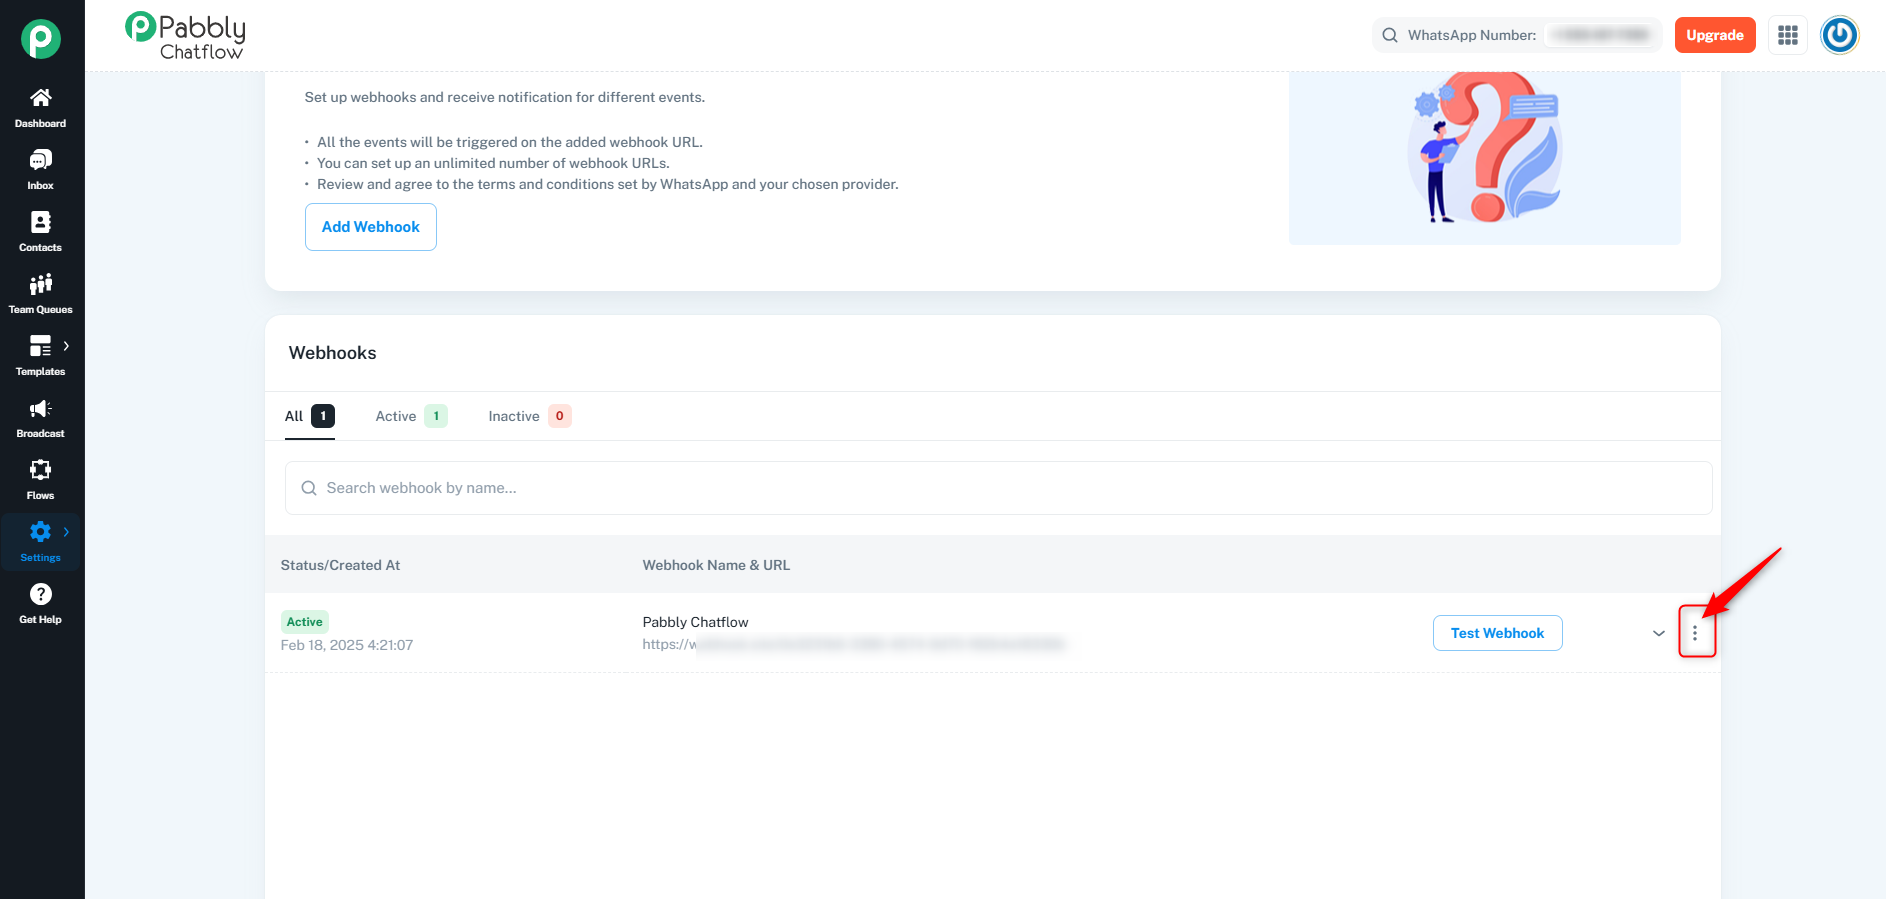
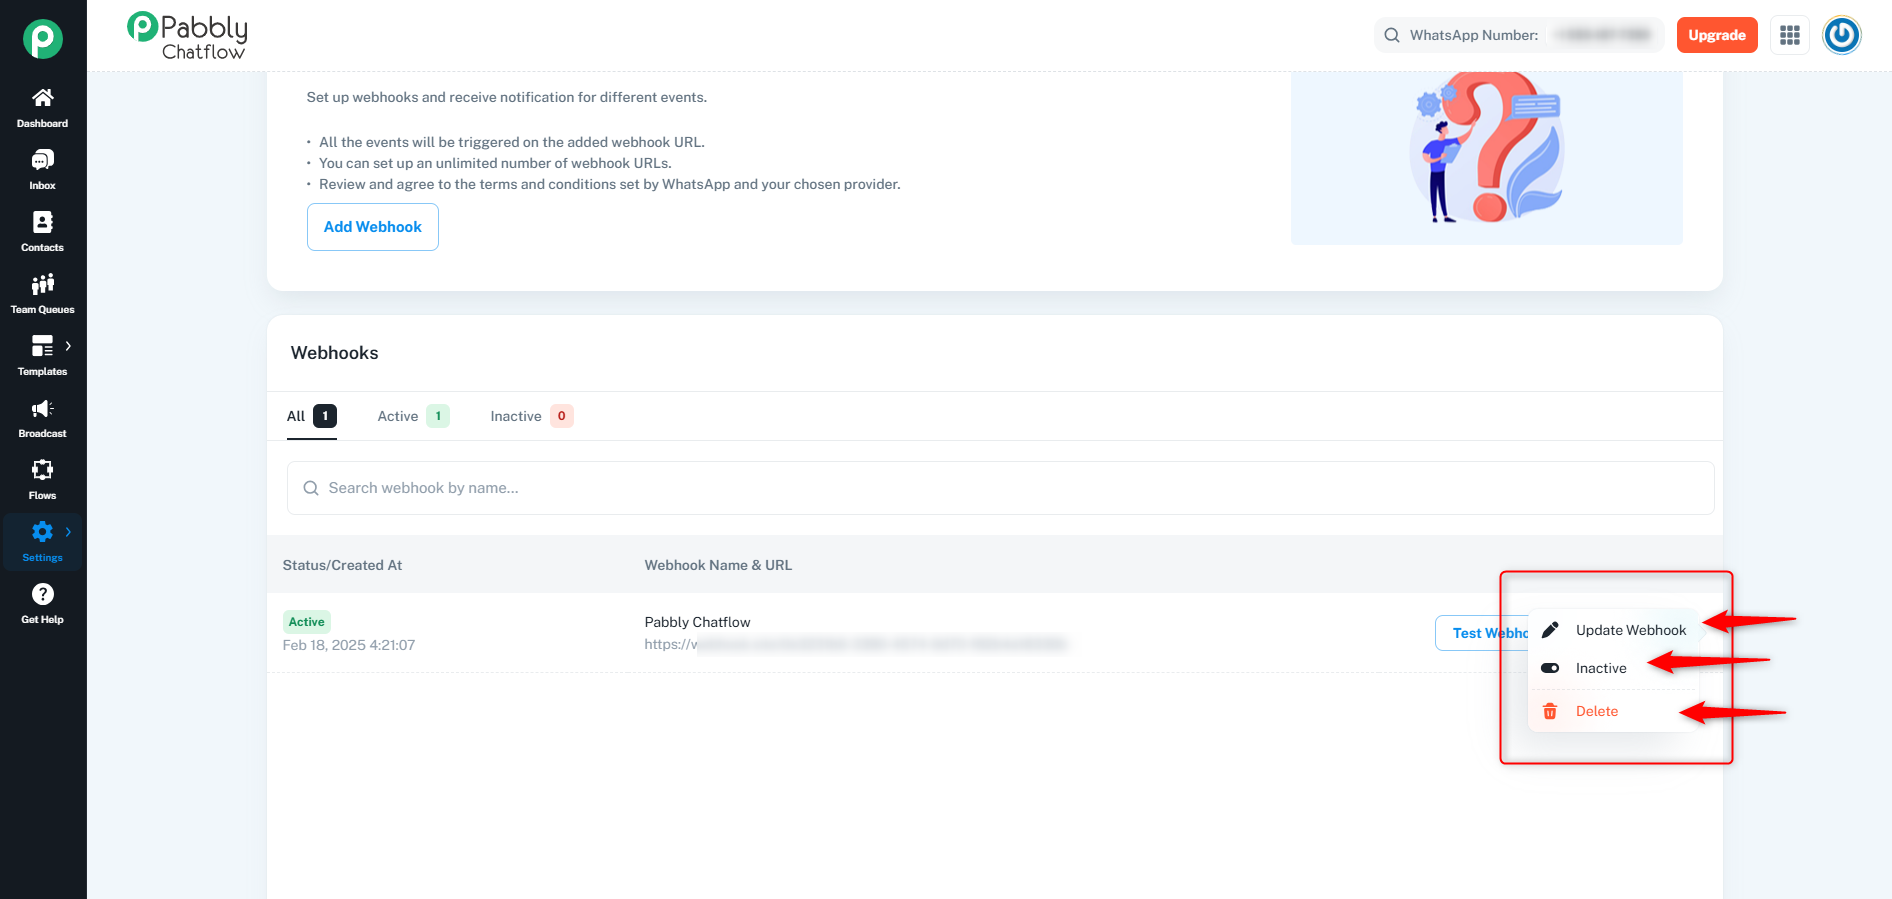
If you need to update, inactive, or remove a webhook, click on the three-dot menu next to the webhook entry and choose the appropriate action as per your requirement
By following these steps, you can easily manage your API tokens and webhooks in Pabbly Chatflow for seamless integration and automation.
For detailed API endpoint documentation, authentication methods, request/response examples, and advanced integration guides, refer to the Pabbly Chatflow API Documentation.
