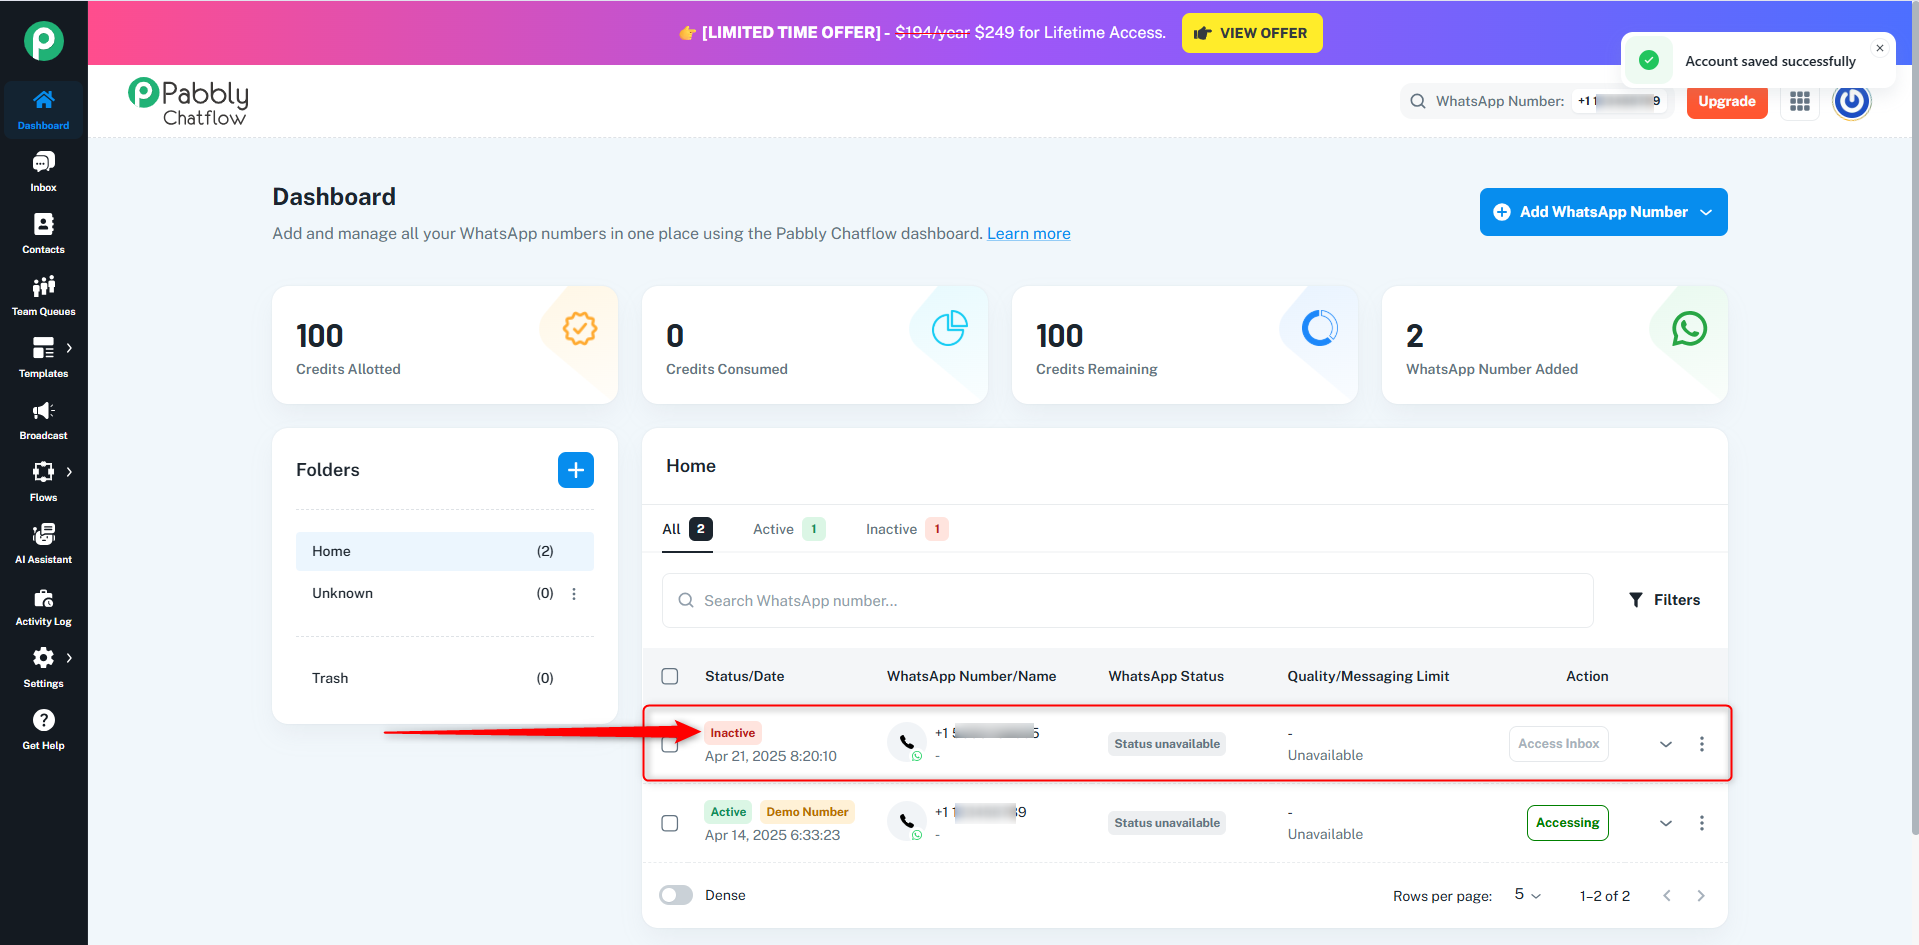
If you no longer want to use a specific WhatsApp number temporarily or need to disable it, you can set it to Inactive using the steps below:
Step 1: Locate the WhatsApp Number
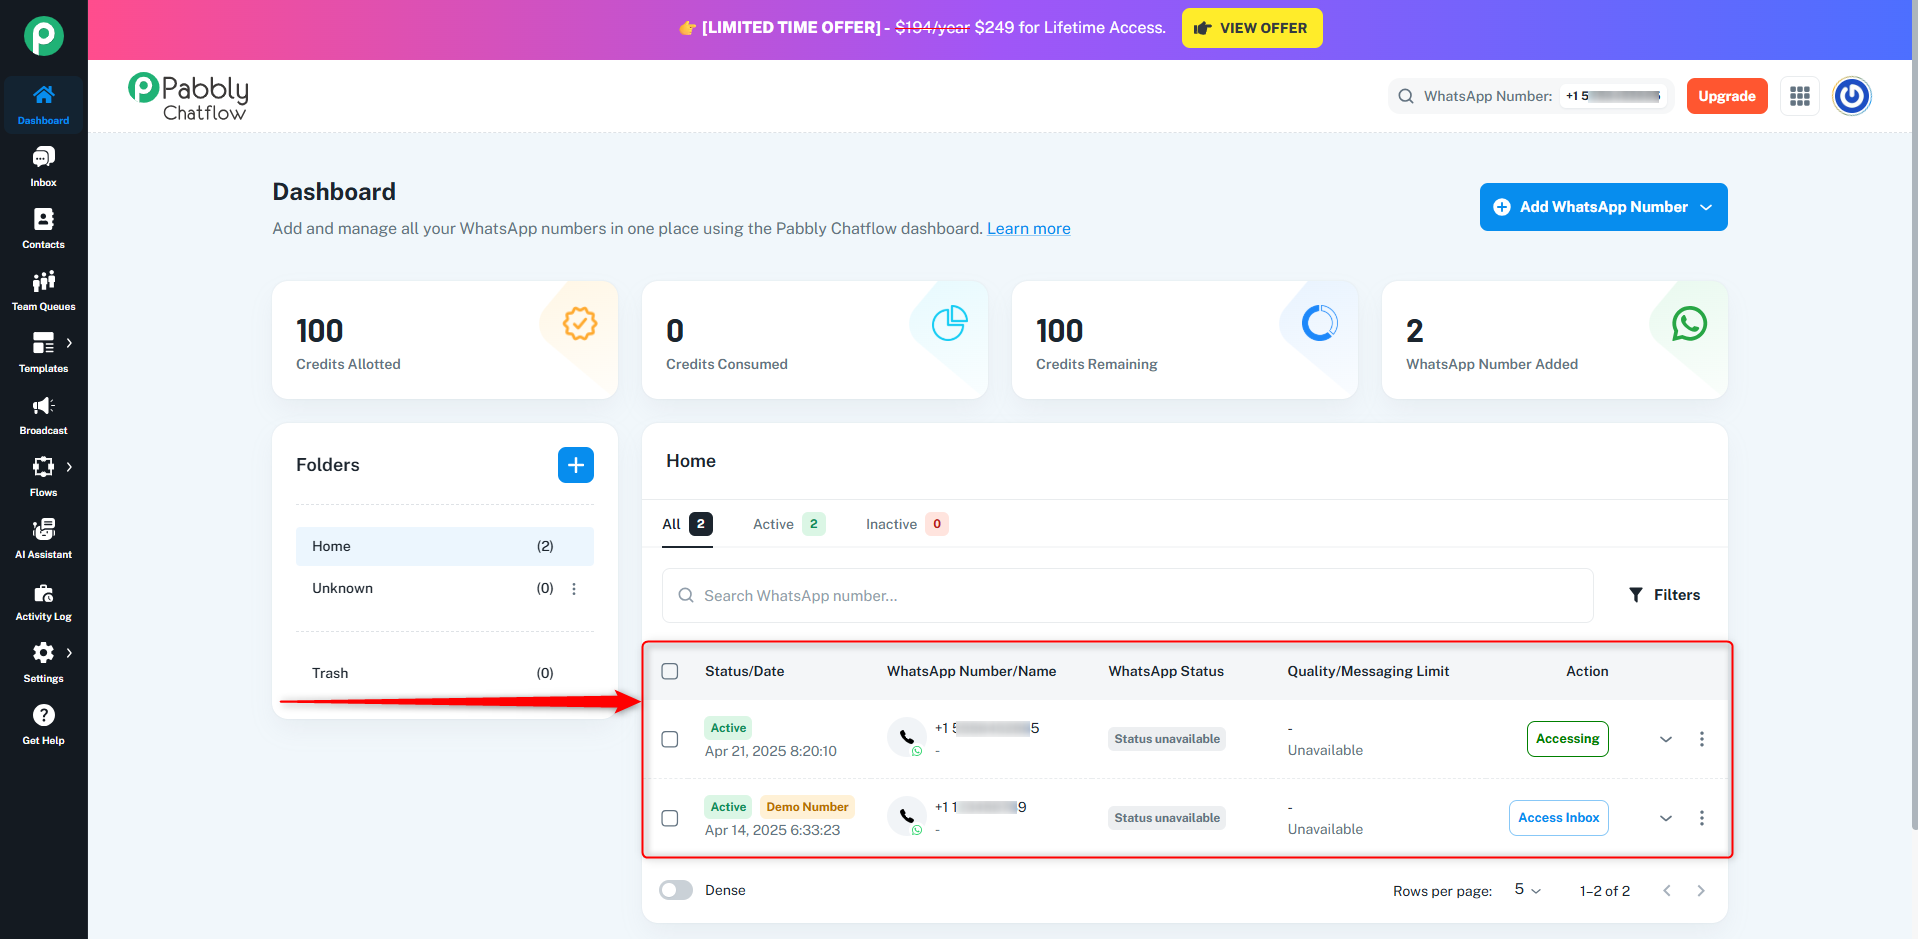
- Navigate to the Dashboard in your Pabbly Chatflow account.
- In the table, find the WhatsApp number you want to set to Inactive.
- The table lists all the added WhatsApp numbers with their details, such as Date/Status, Webhook URL, and Action buttons.
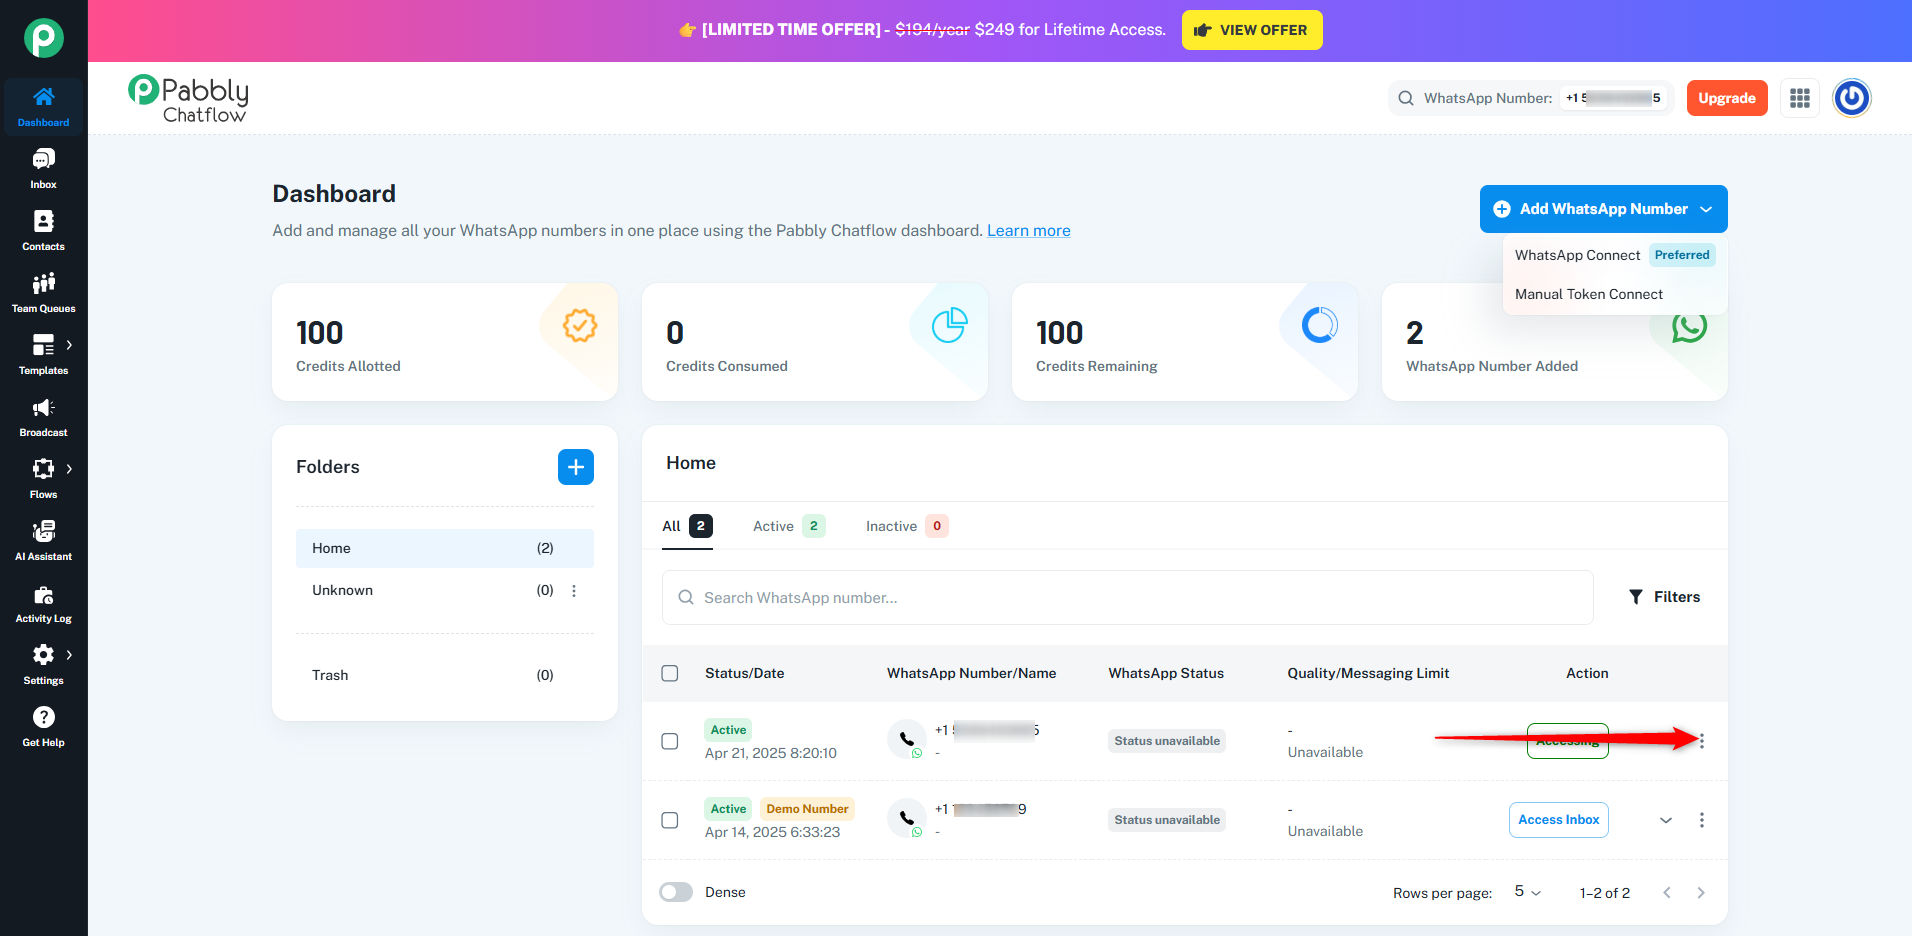
- On the right side of the row for the selected WhatsApp number, locate the three-dot menu (ellipsis) in the Action column.
- Click on the three-dot menu to open a menulist of actions.
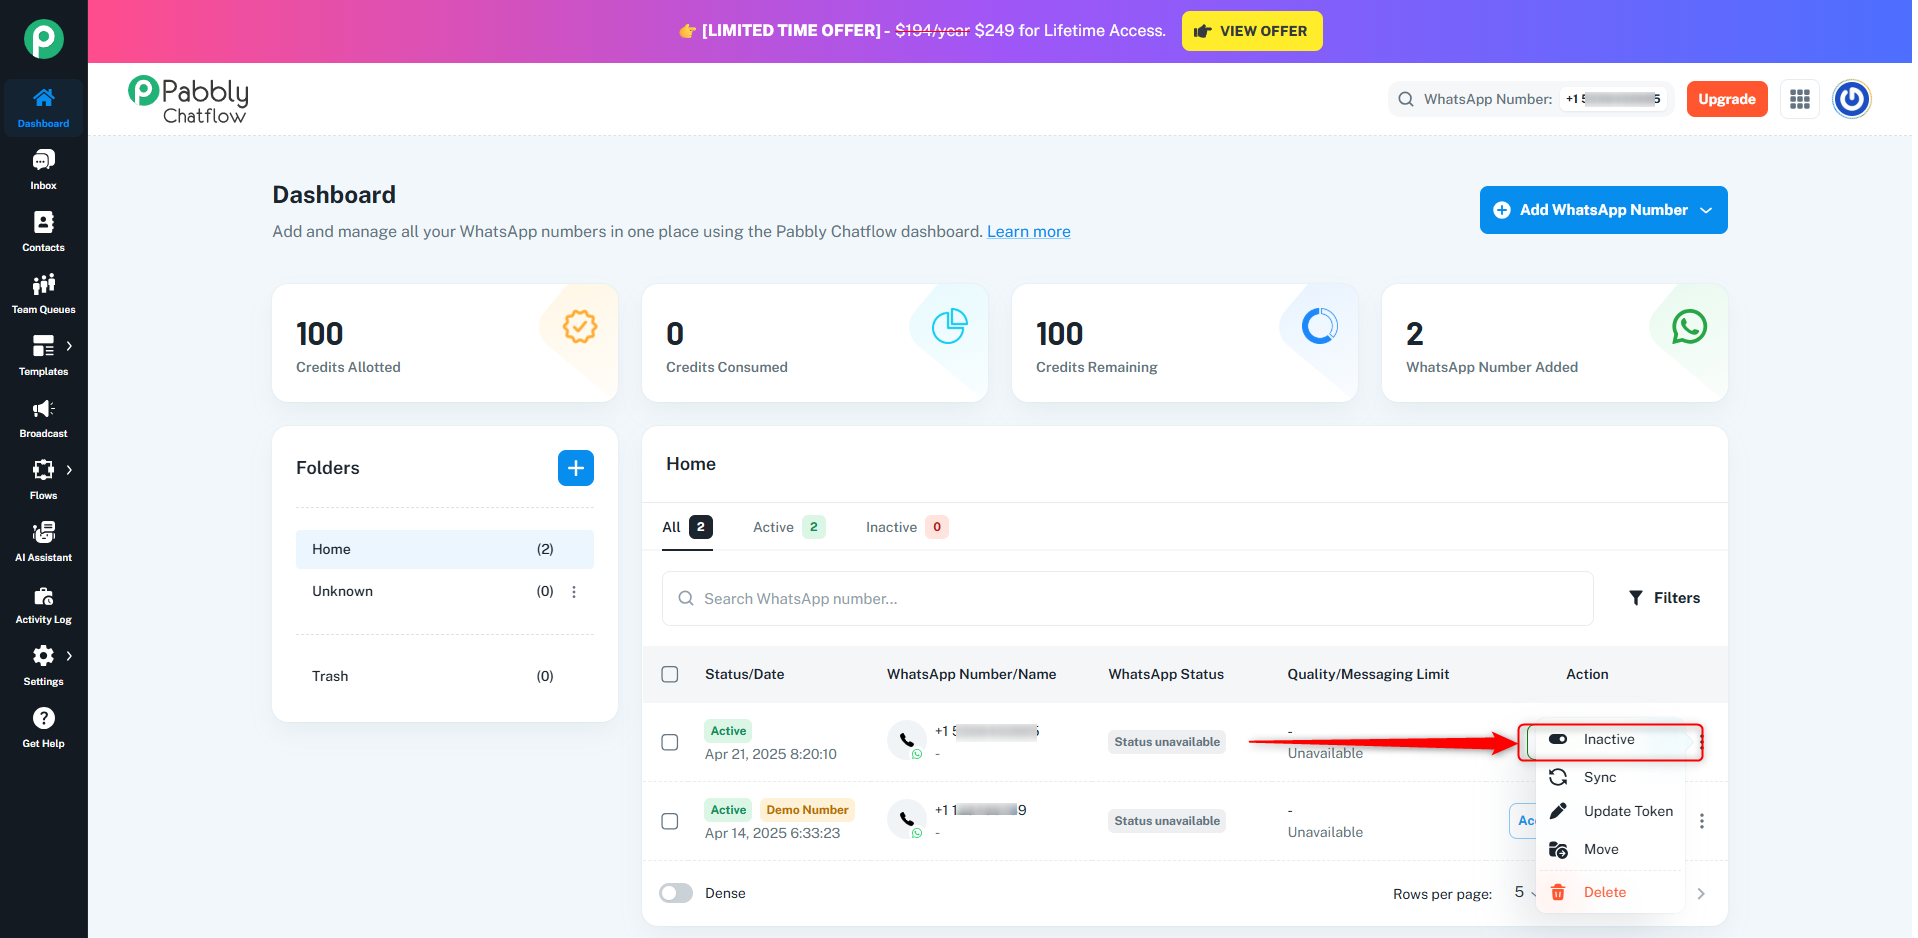
Step 3: Select "Inactive"
-
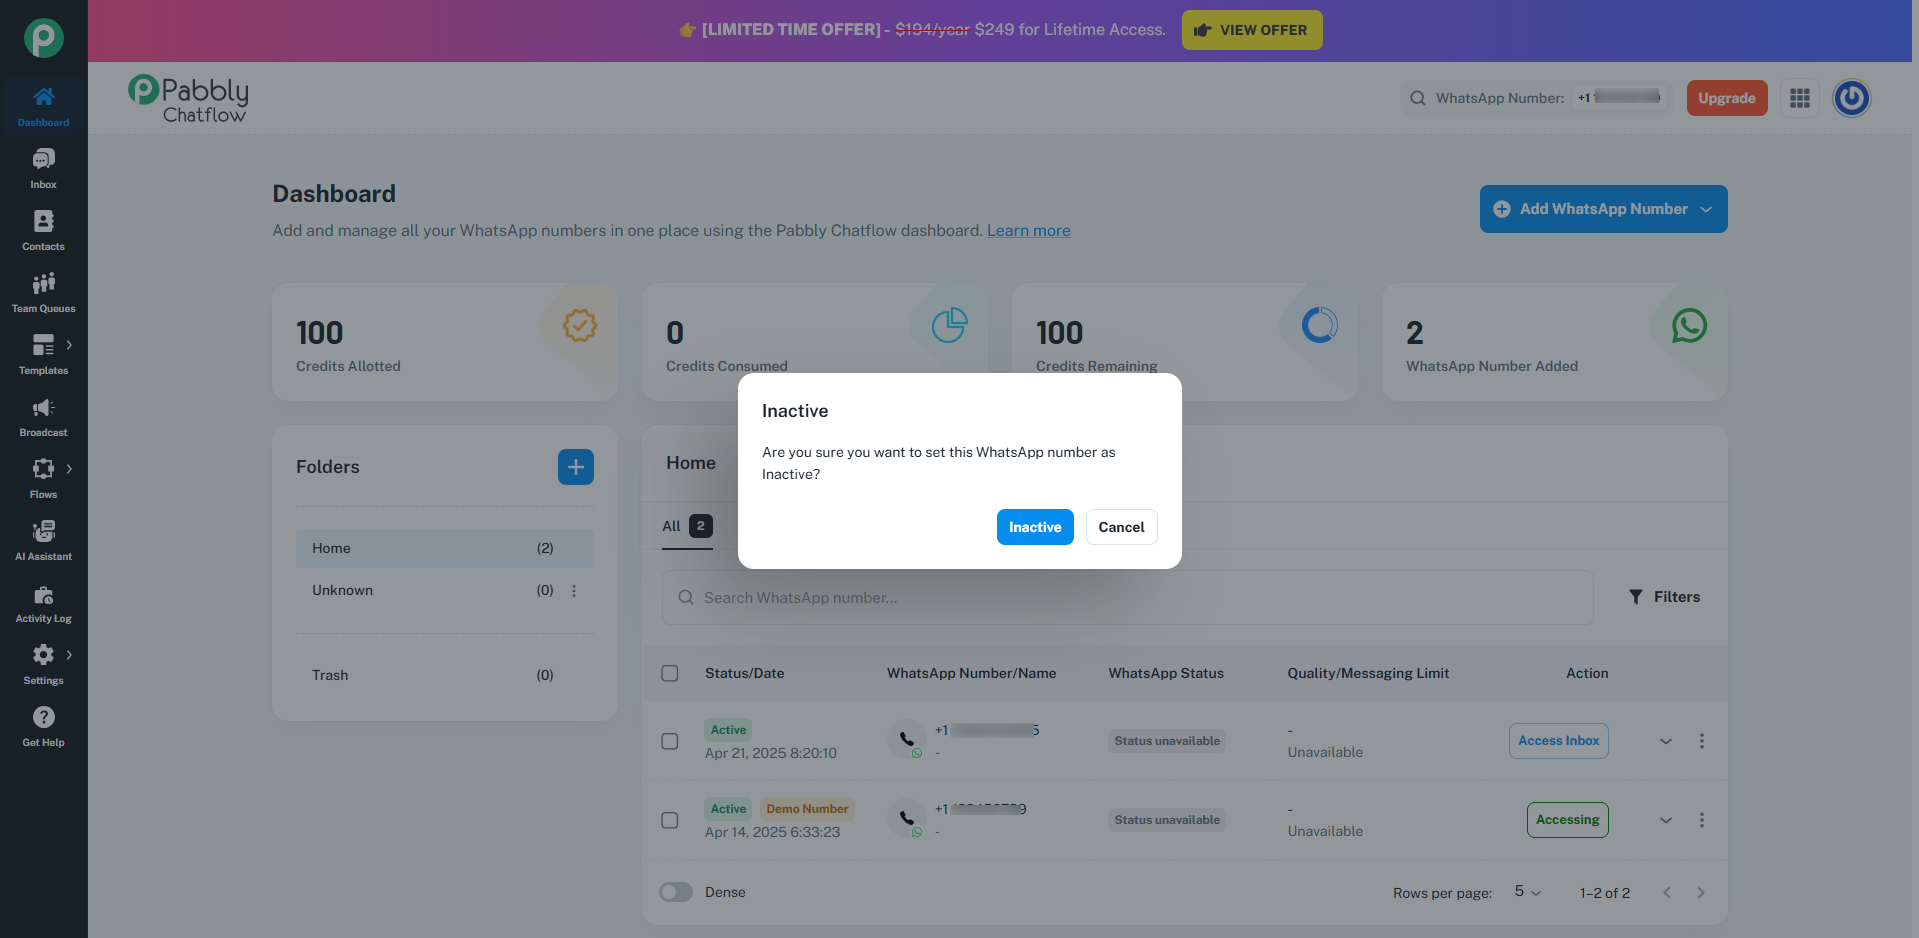
- A confirmation dialog box will appear, asking if you are sure you want to set the WhatsApp number to Inactive.
Step 4: Confirm the Action
- In the confirmation dialog box:
- Click the Inactive button to proceed with setting the WhatsApp number to inactive status.
- Alternatively, click Cancel if you decide not to make any changes.
Step 5: Verify the Status
- Once confirmed, the status of the WhatsApp number will change from Active to Inactive in the Dashboard Table.
- The number will no longer be available for sending or receiving messages until it is reactivated.