Overview
The Order Messages section allows you to create Order Messages that are used to send payment links through Pabbly Chatflow to WhatsApp customers.
These Order Messages define:
- How the order appears to customers
- What product details are included
- How the payment link behaves
- What charges, taxes, and discounts are applied
- Whether products come from Catalog, Custom Product, or WhatsApp Cart
1. Adding a New Order Message
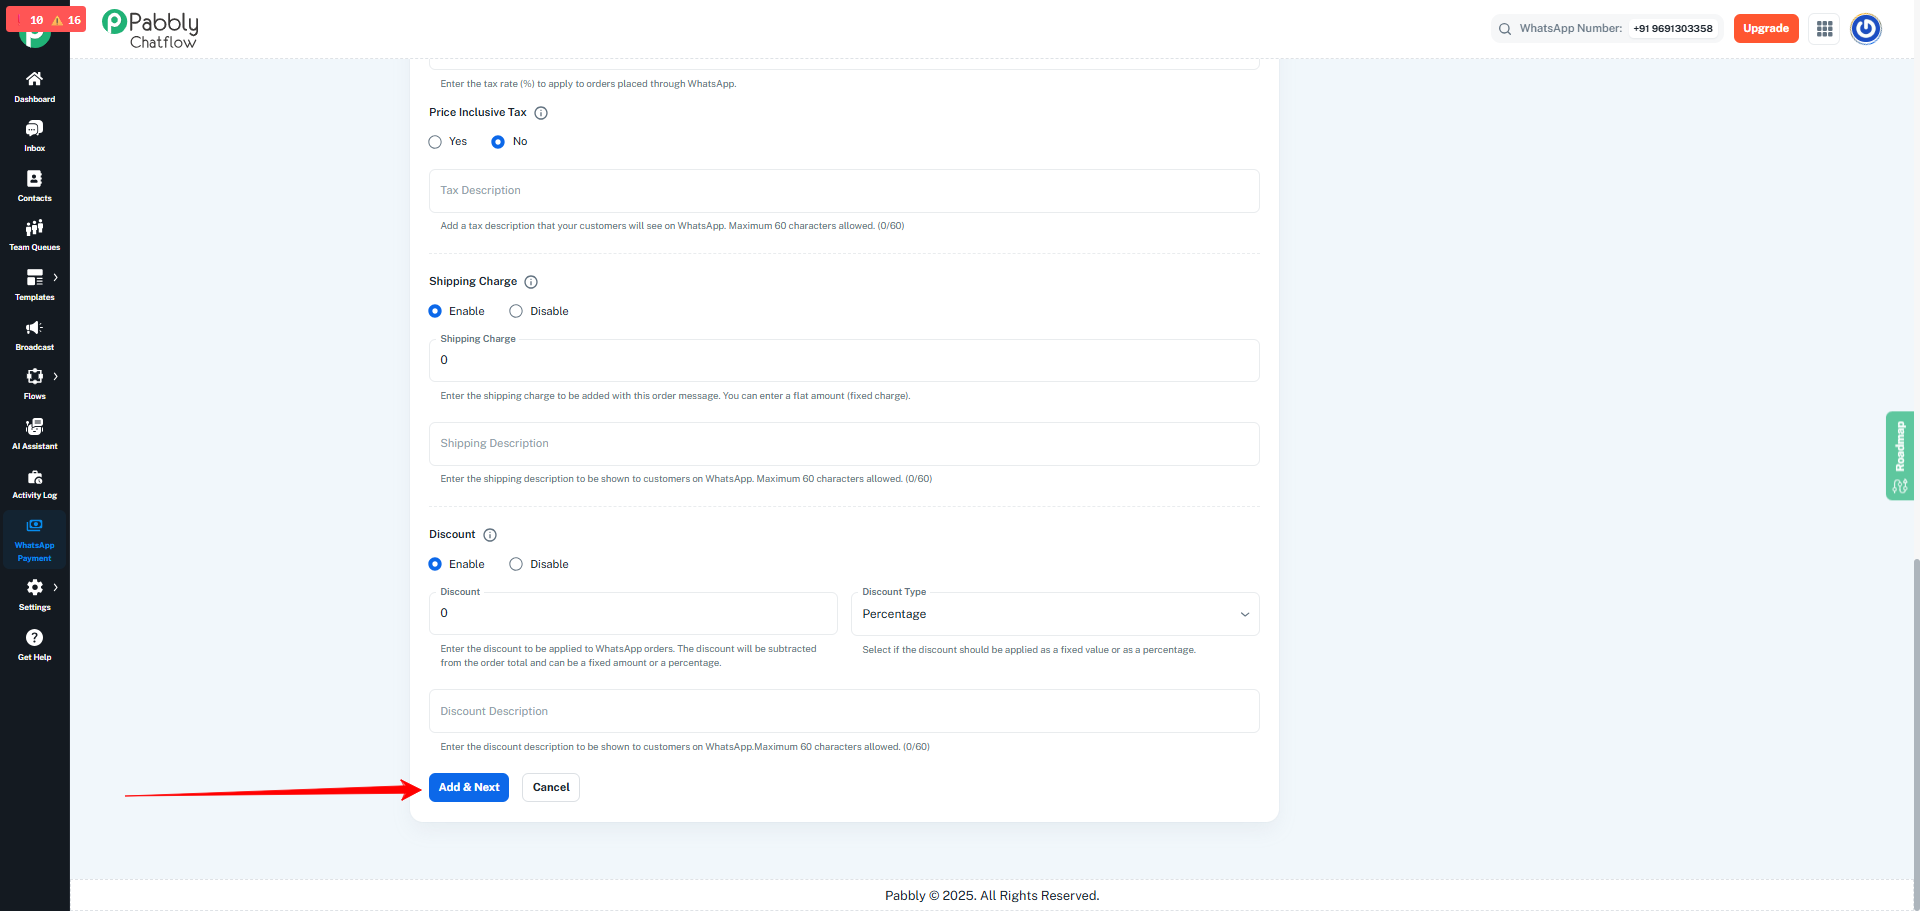
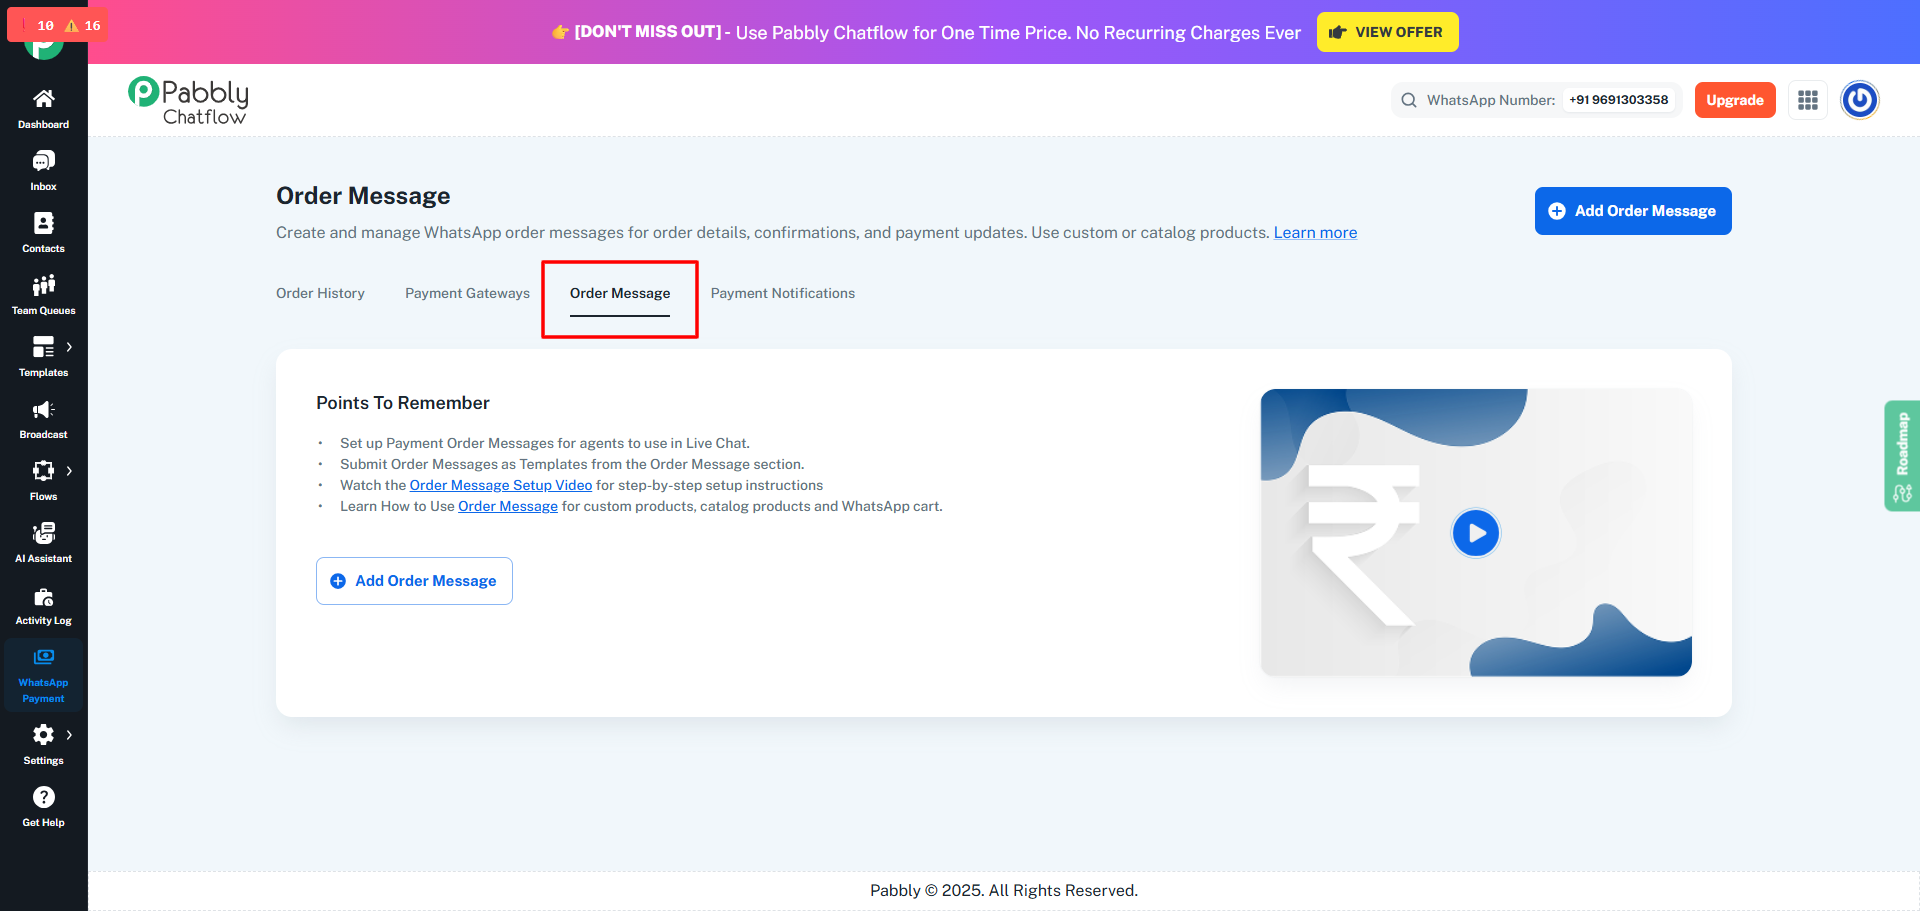
If you are setting up WhatsApp Payments for the first time, you will automatically be redirected to the Order Messages page after completing your Payment Configuration using Add & Next.
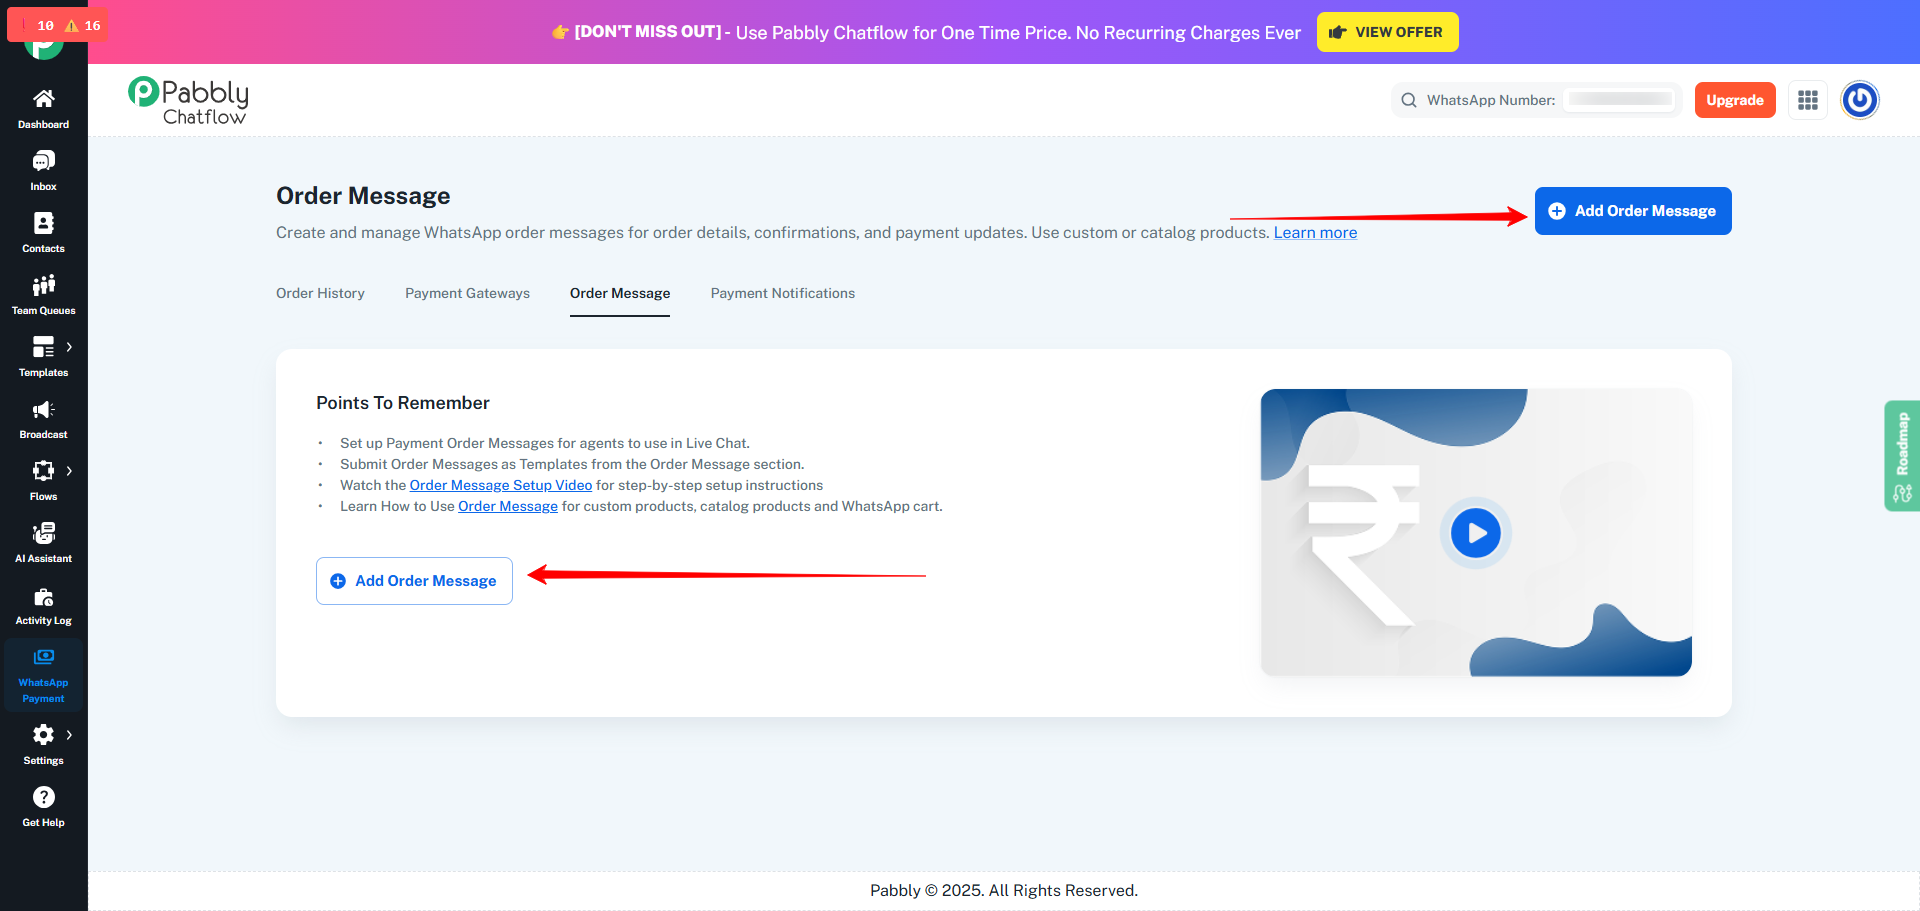
If Order Messages already exist, click the Add Order Message button to create a new Order Message.
2. Order Message Name
Enter a clear and meaningful name for your Order Message.
This name will appear wherever Order Messages are selectable inside Chatflow.
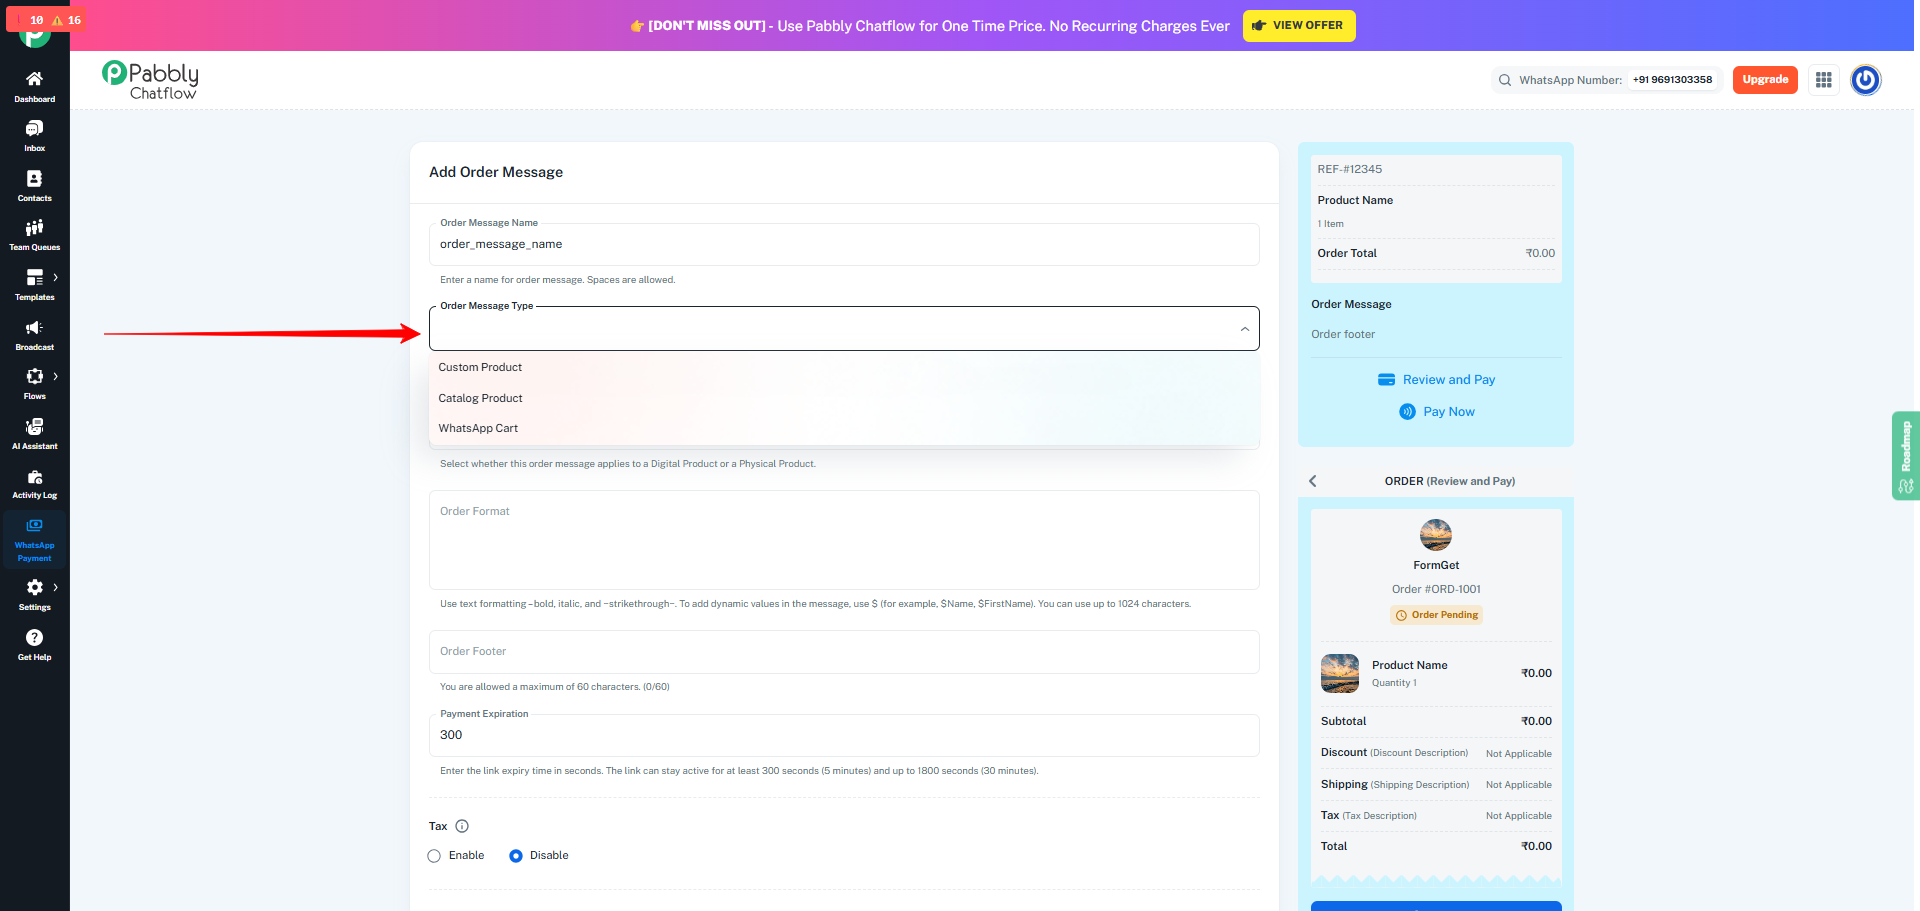
3. Select the Order Message Type
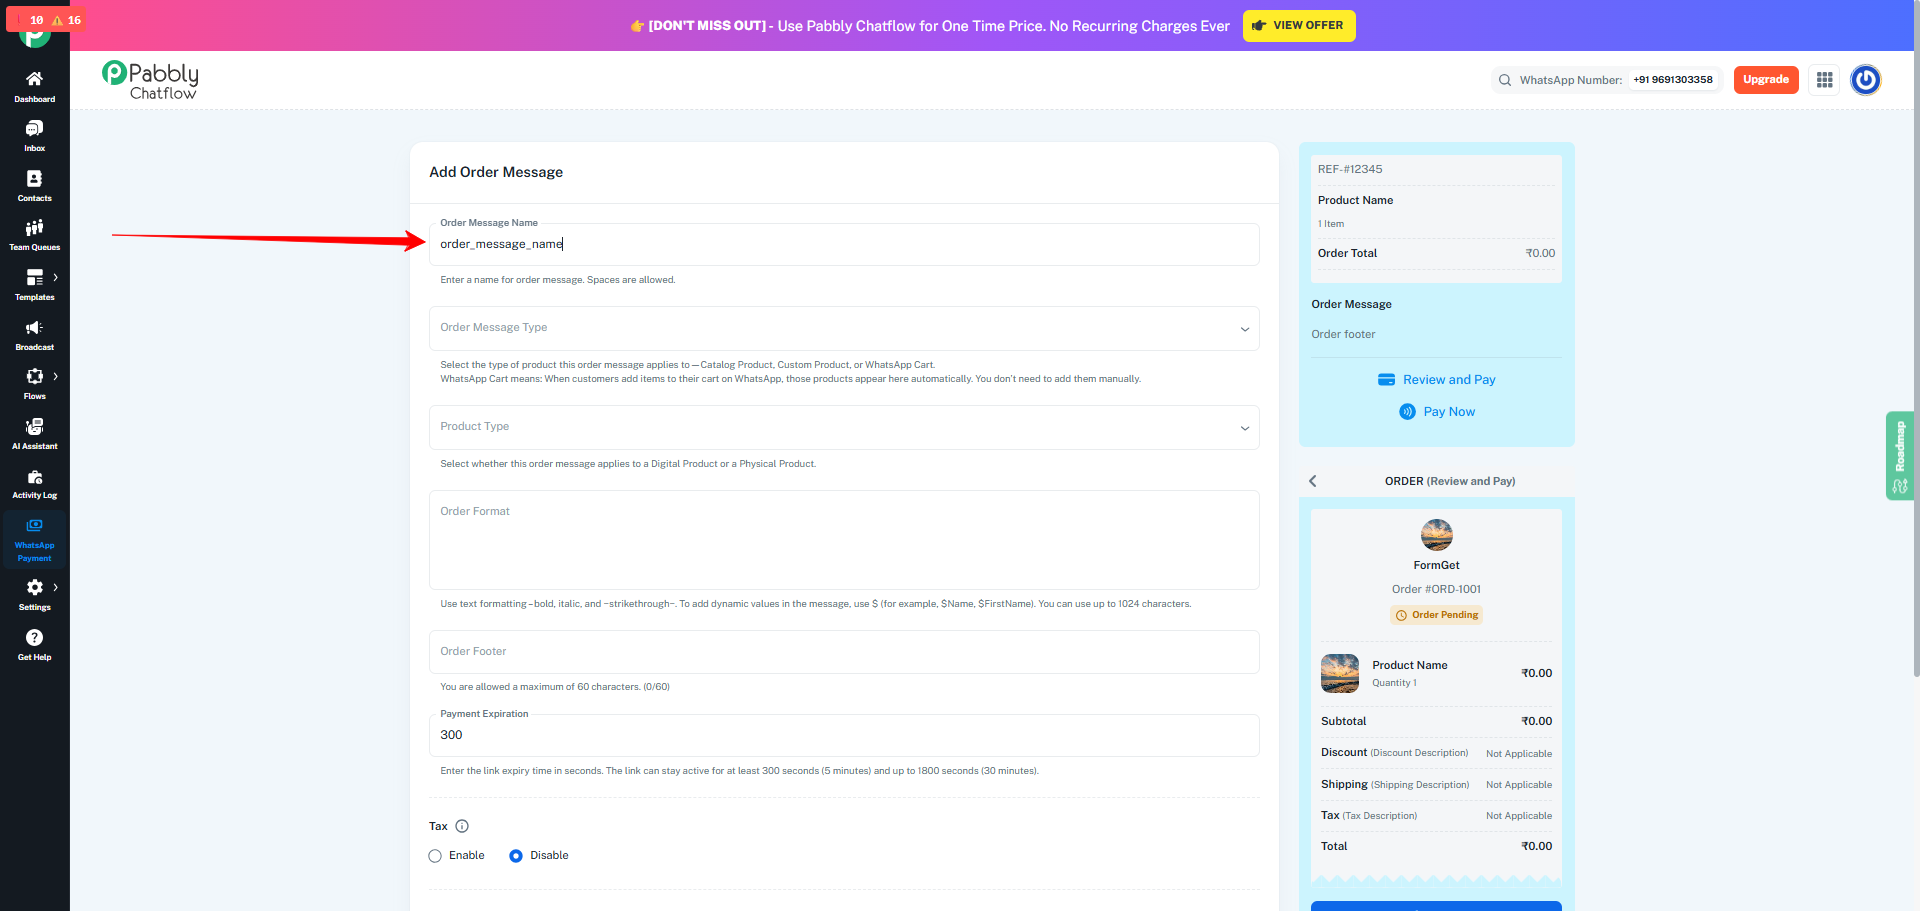
Choose one of the available options:
- Custom Product – Create and manage products manually inside the Order Message.
- Catalog Product – Use products that are synced from your Meta Catalog.
- WhatsApp Cart – Customer adds products directly in WhatsApp, and the order is received through the Order Received event.
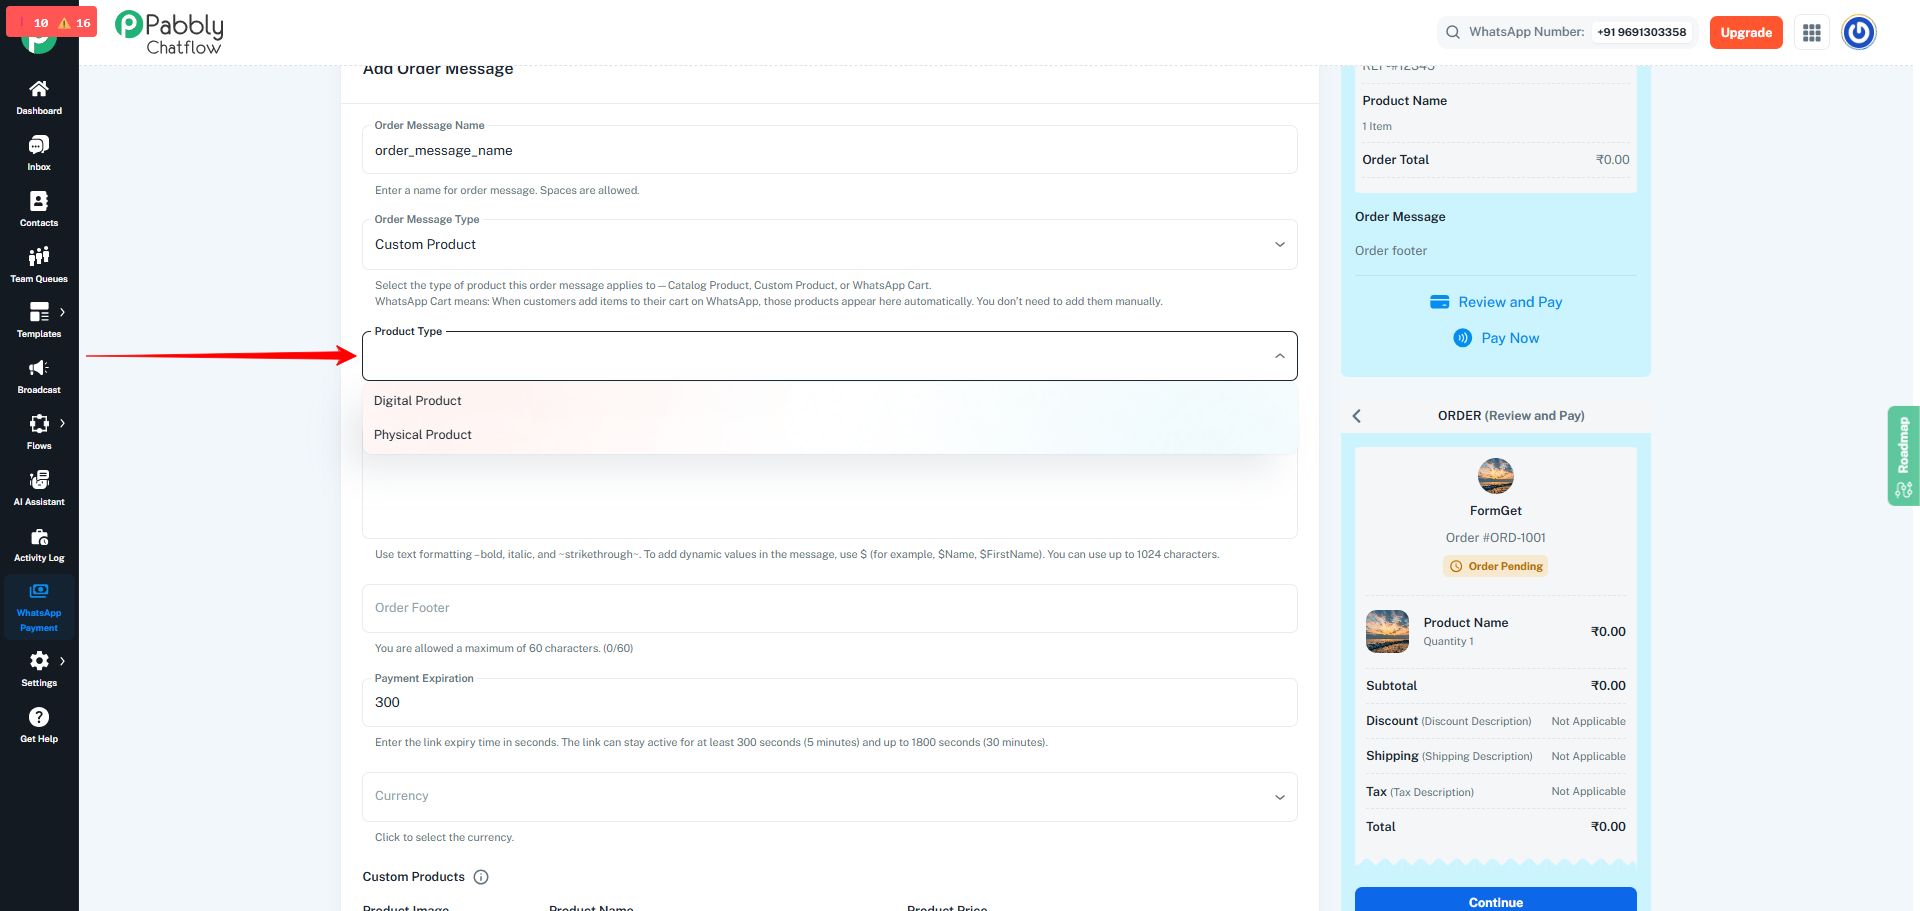
4. Product Type
Choose the product category:
- Digital Product – Courses, files, subscriptions, etc.
- Physical Product – Clothing, gadgets, accessories, etc.
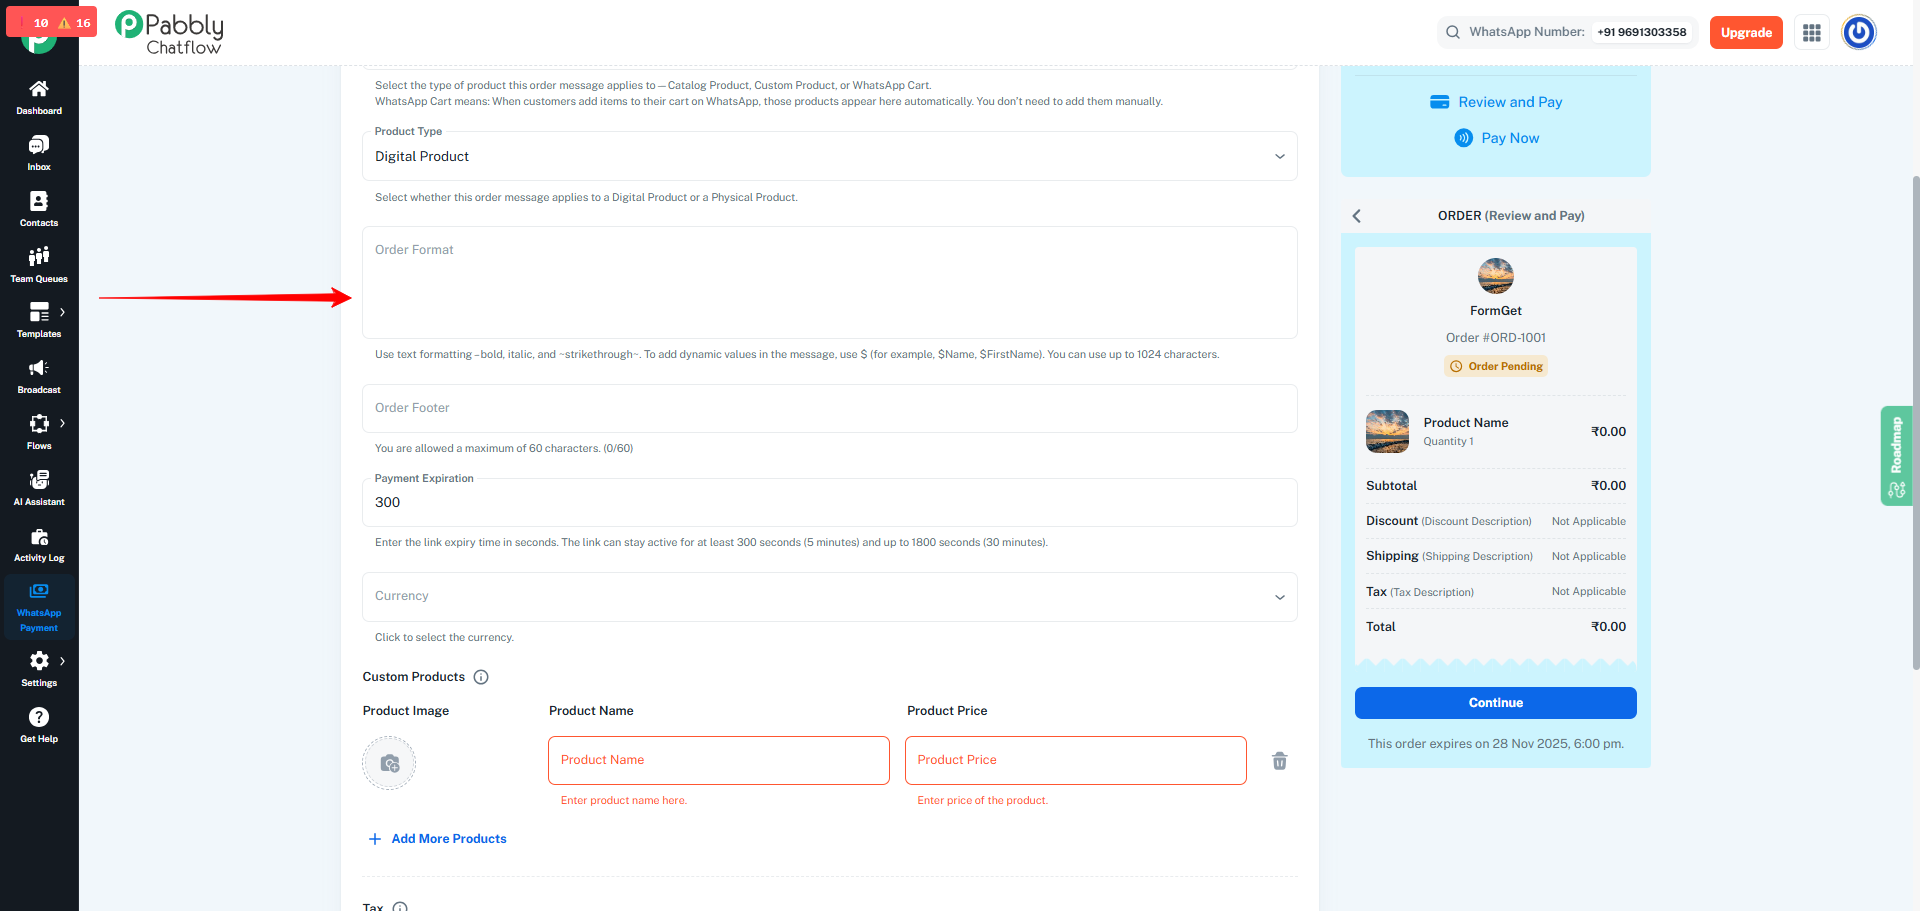
Enter the main order message that customers will see in WhatsApp.
Maximum length: 1024 characters
This section can include:
- Order summary
- Instructions for customers
- Notes or important information
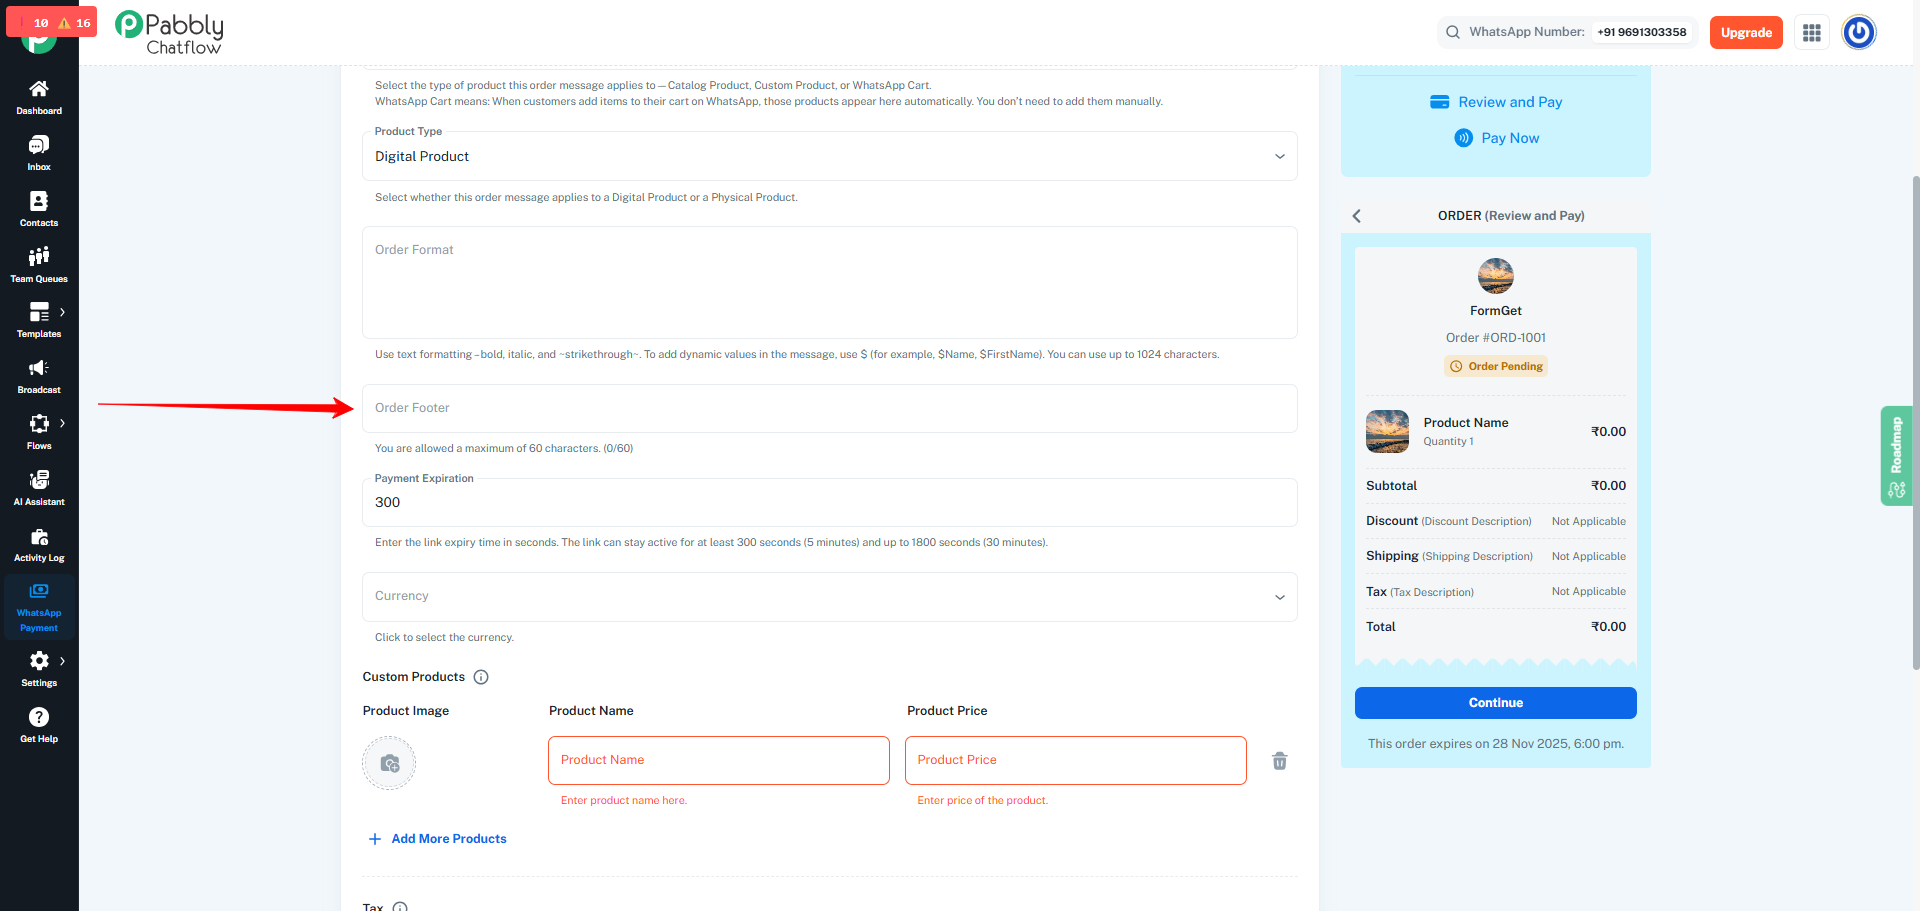
Enter a short footer message.
Maximum length: 60 characters
This is commonly used for:
- Disclaimers
- Brand tagline
- Support or contact information
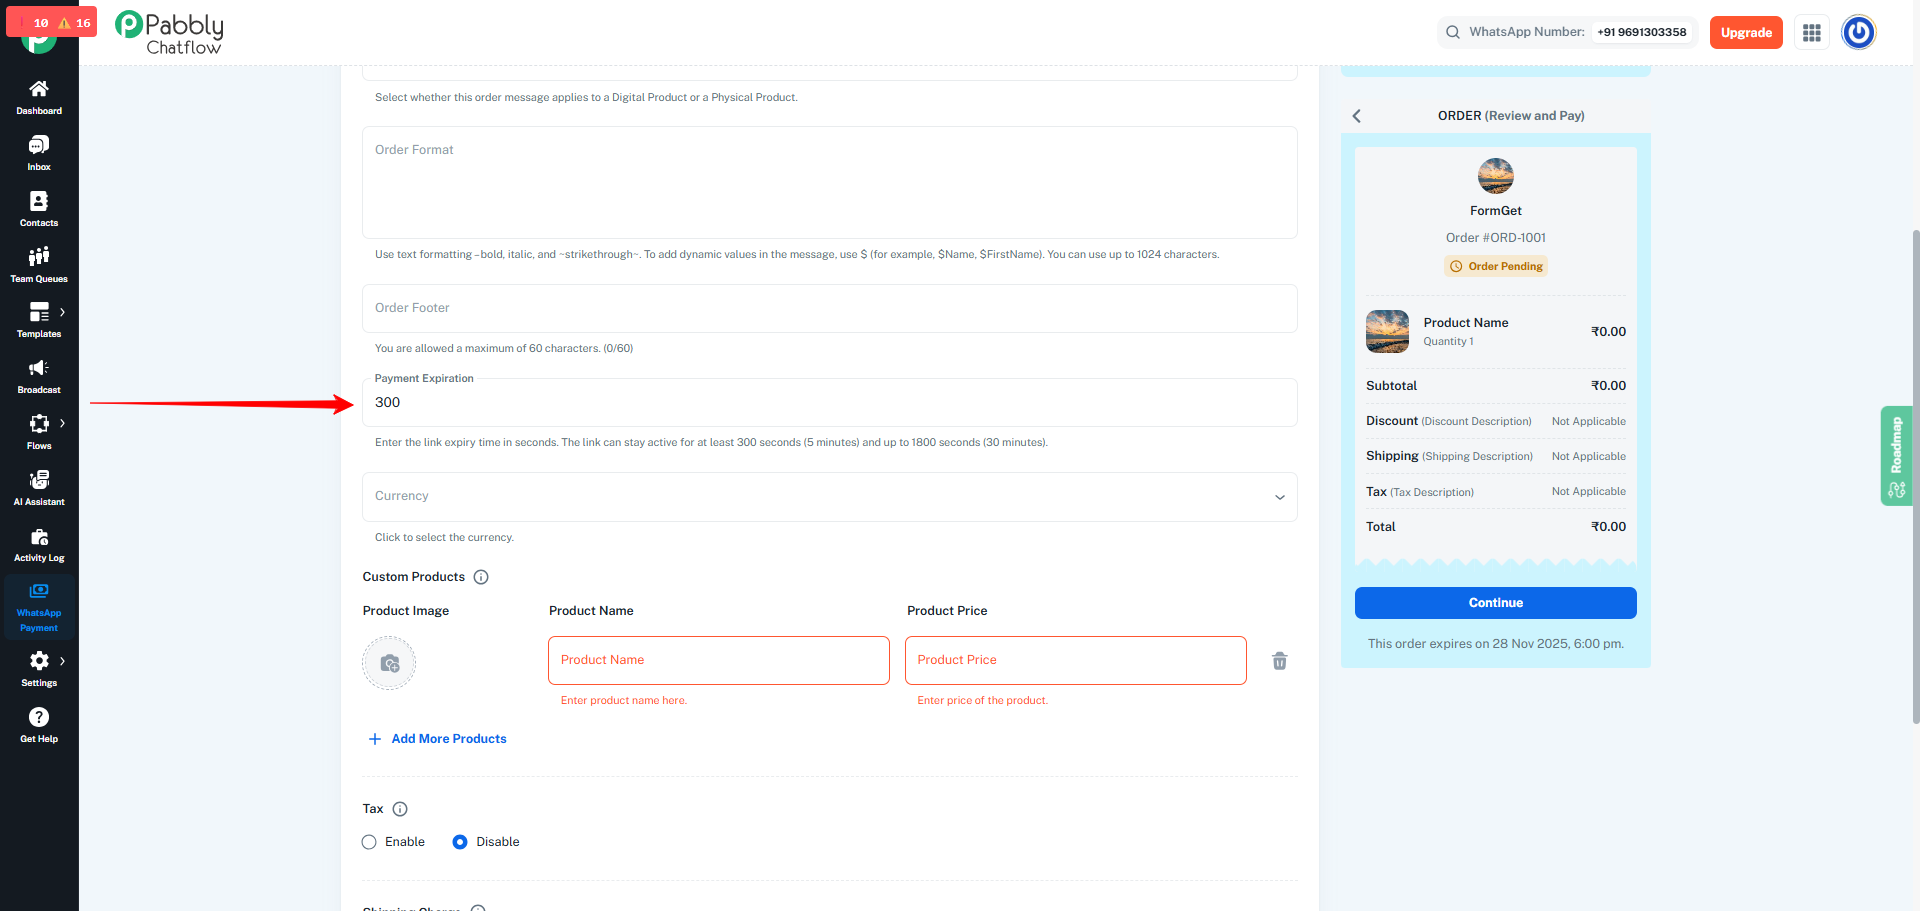
7. Payment Expiration Time
- Set the Payment Expiration Time in seconds.
- Minimum allowed time: 300 seconds (5 minutes).
- Maximum allowed time: 1800 seconds (30 minutes).
- This time is calculated from the moment the order is created.
Example:
- Order created at 10:01 AM.
- Payment Expiration Time = 300 seconds (5 minutes).
- The payment link will expire at 10:06 AM.
- After this time, the customer will not be able to pay using that link.
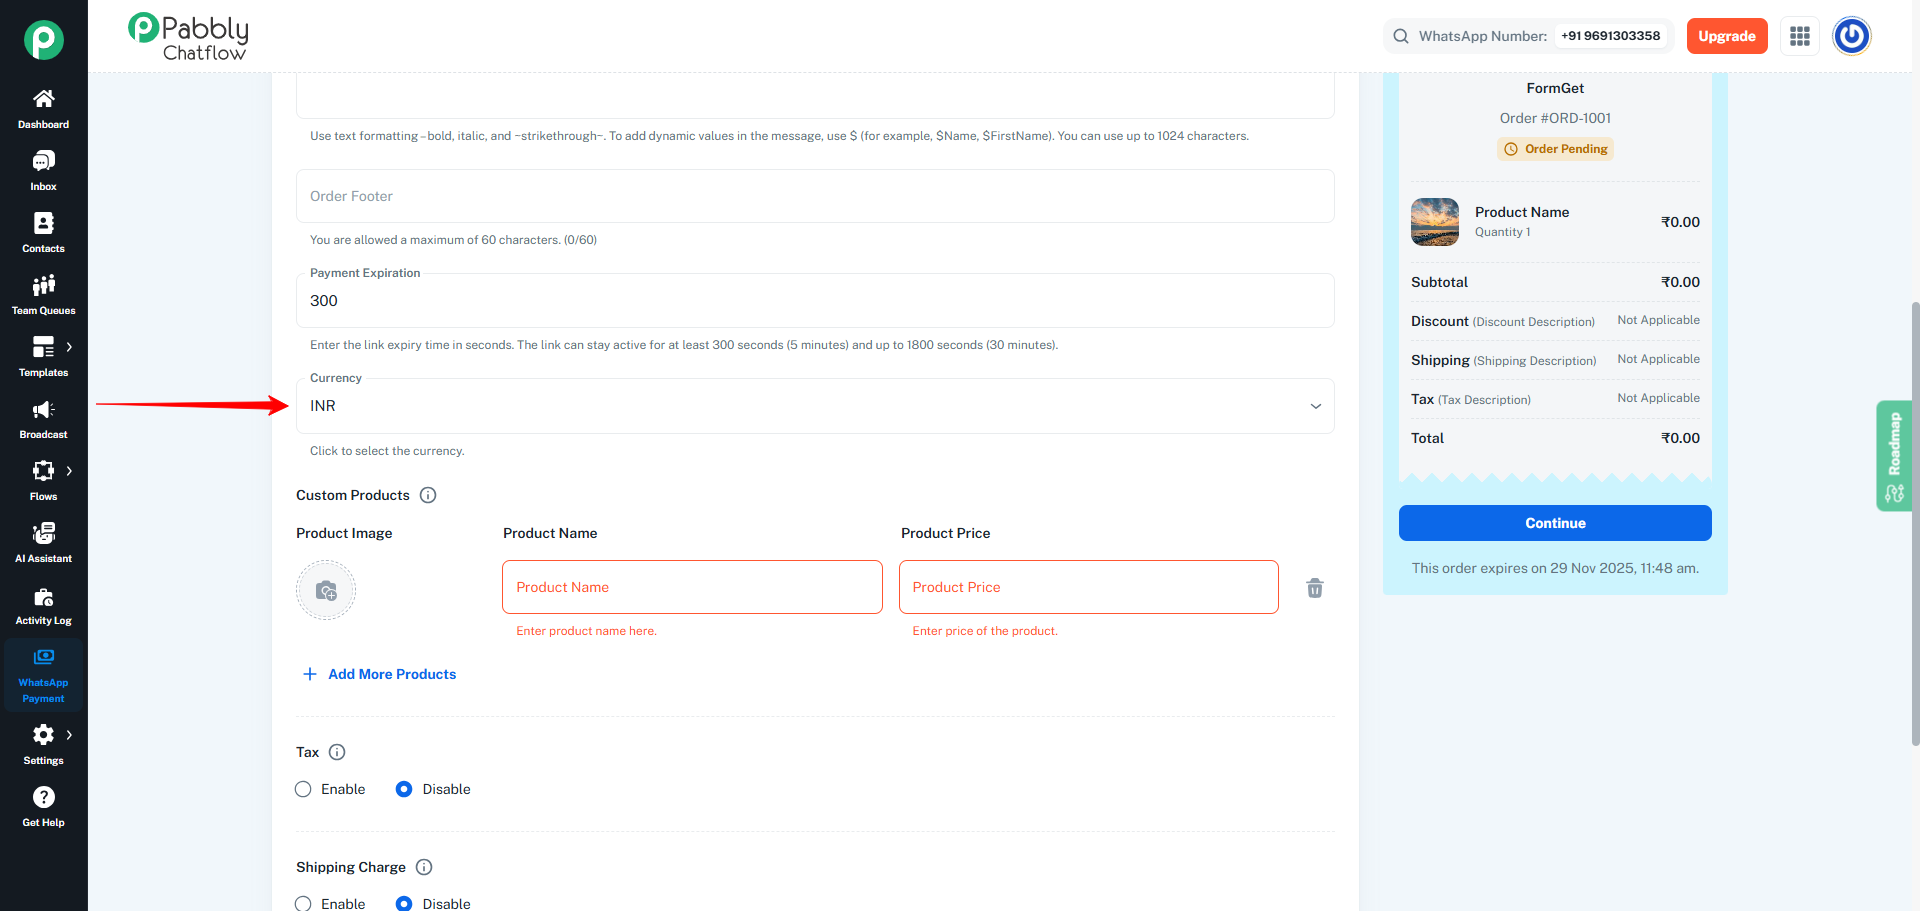
8. Currency
Select the currency in which the order amount will be generated.
Currently, INR is the only available currency.
You simply need to open the dropdown and select INR to proceed.
All order-related values such as product price, tax, shipping charges, discounts, and the final payable amount will be shown to the customer in INR inside WhatsApp.
You can add extra charges or apply deductions to your Order Message.
These will appear in the Order Summary.
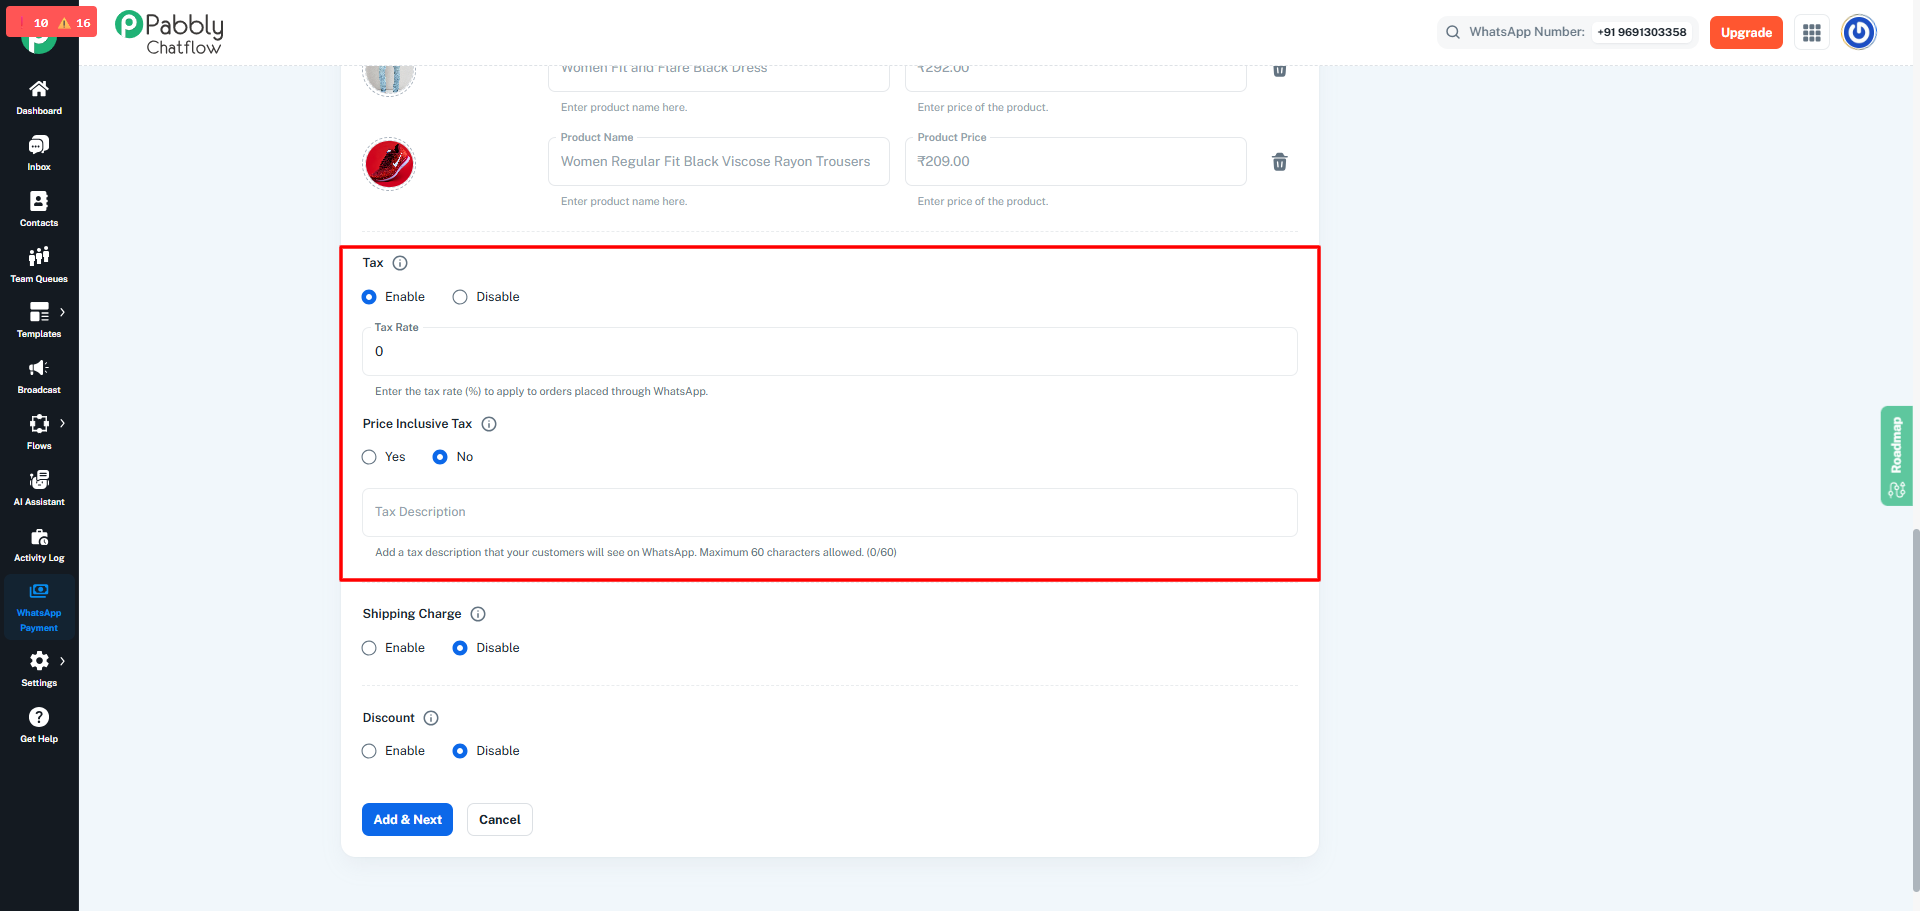
9.1 Tax Settings
Select Enable or Disable for Tax.
- Disable: No tax applied
- Enable: Additional fields appear
After enabling, fill in:
- Tax Rate (%) – Tax percentage
- Price Inclusive Tax – Select Yes if tax is included in product price
- Tax Description – Short note (max 60 characters)
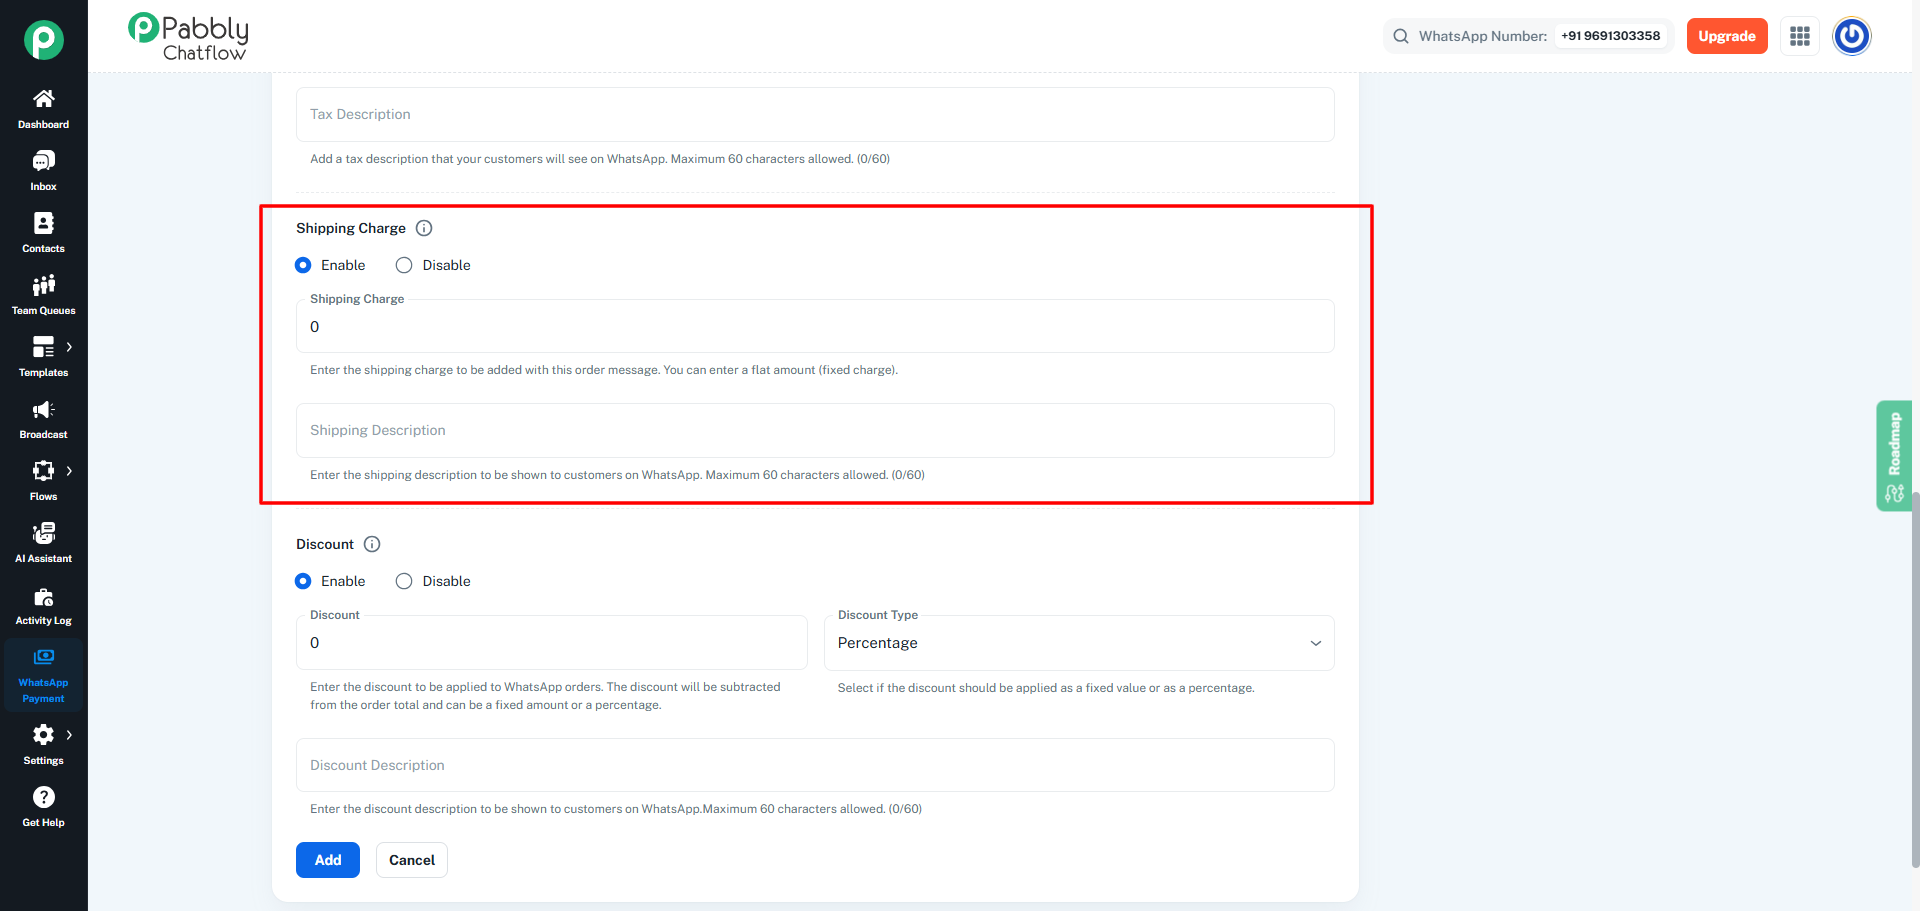
9.2 Shipping Charge
Select Enable or Disable for Shipping Charges.
- Disable: No shipping fee added
- Enable: Shipping fields appear
After enabling, fill in:
- Shipping Charge – Fixed delivery fee
- Shipping Description – Short message (max 60 characters)
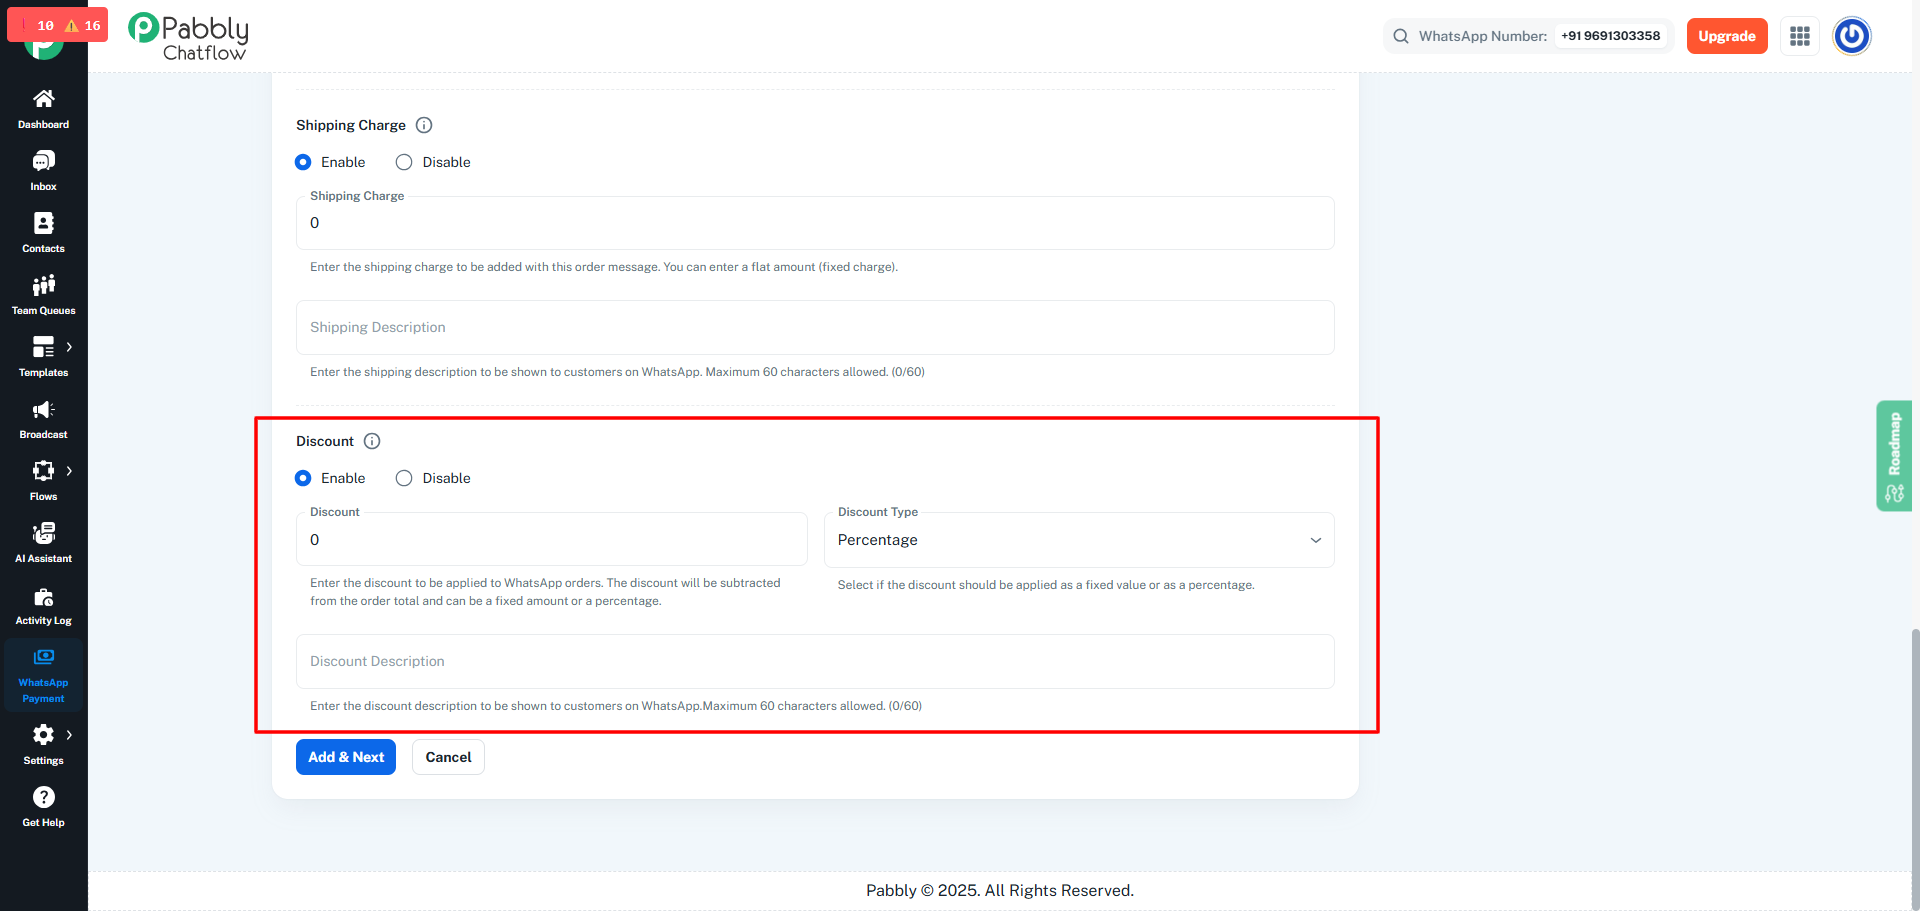
9.3 Discount
Select Enable or Disable for Discount.
- Disable: No discount applied
- Enable: Discount options appear
After enabling, fill in:
- Discount Value – Value between 1 and 100
- Discount Type – Fixed or Percentage
- Discount Description – Short note (max 60 characters)
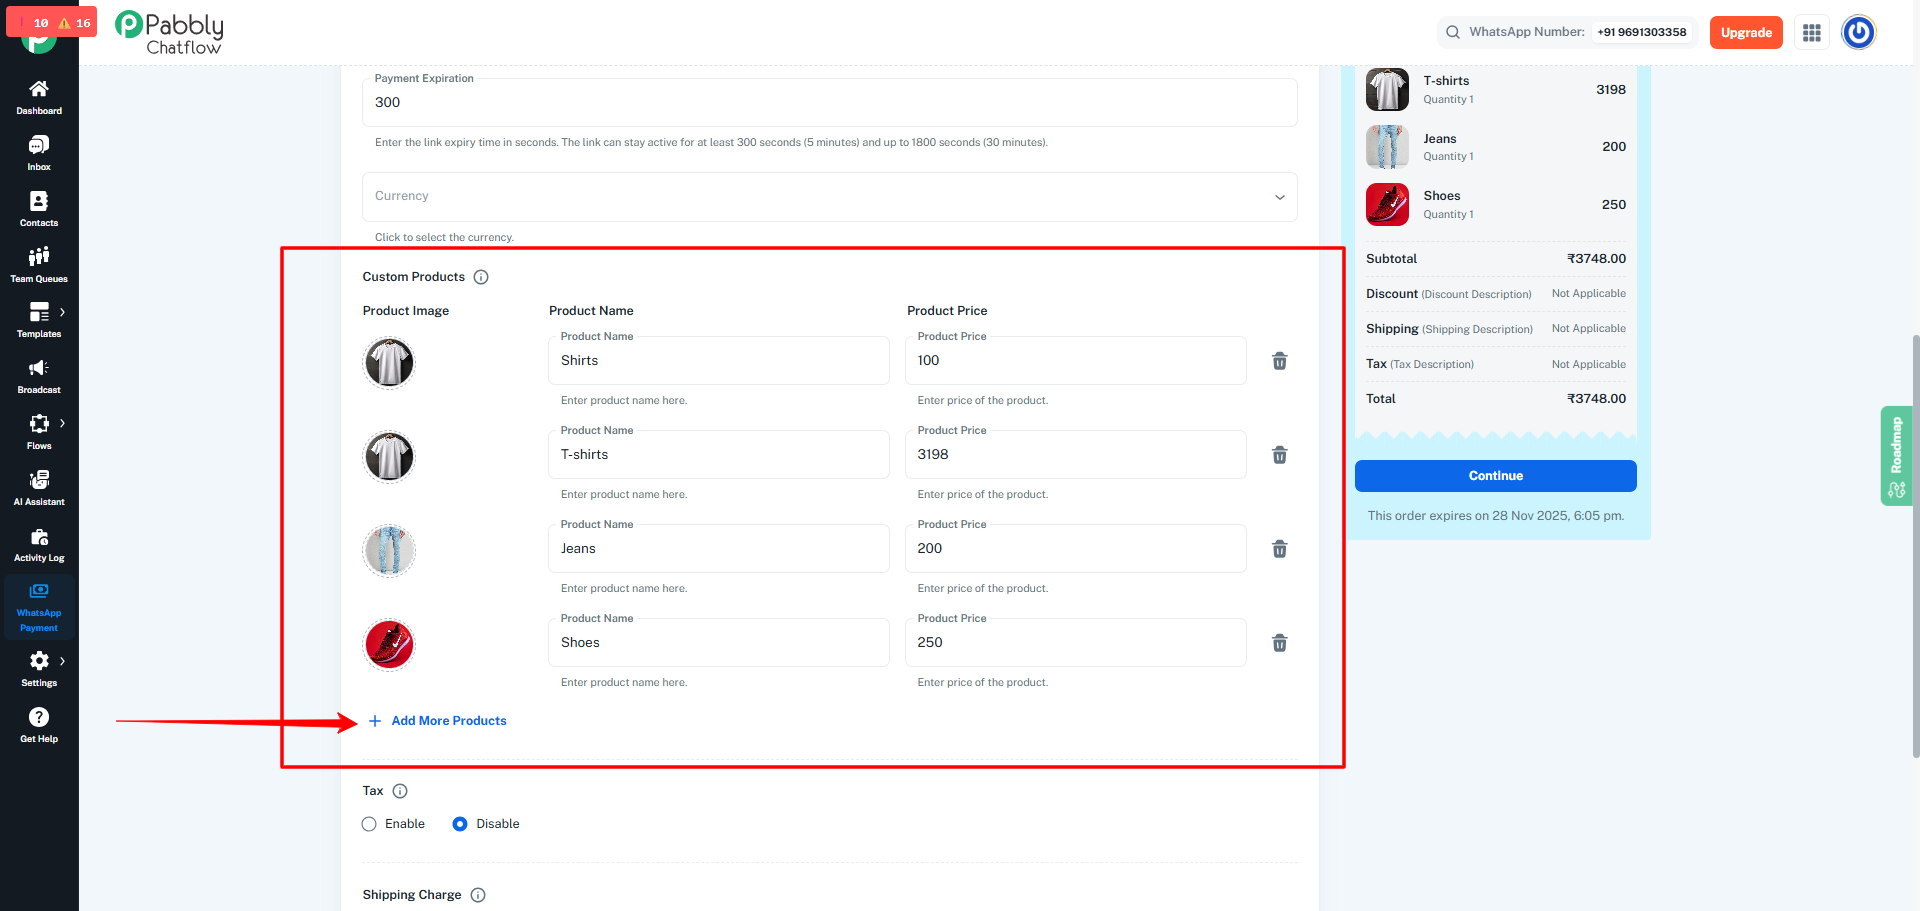
If you choose Custom Product, product fields will appear.
10.1 Add Product Details
For each product, enter:
- Product Image (optional)
- Product Name
- Product Price
These details appear in:
- The Order Message preview
- The WhatsApp message sent to the customer
10.2 Product Limit (Image Rule)
- If any product has an image → Maximum 10 products allowed
- If no product has images → Unlimited products allowed
11.1 Sync Catalog
Before selecting a catalog product, ensure your Meta Catalog and Catalog Products are synced.
You can sync products under the Catalog section in Flows.
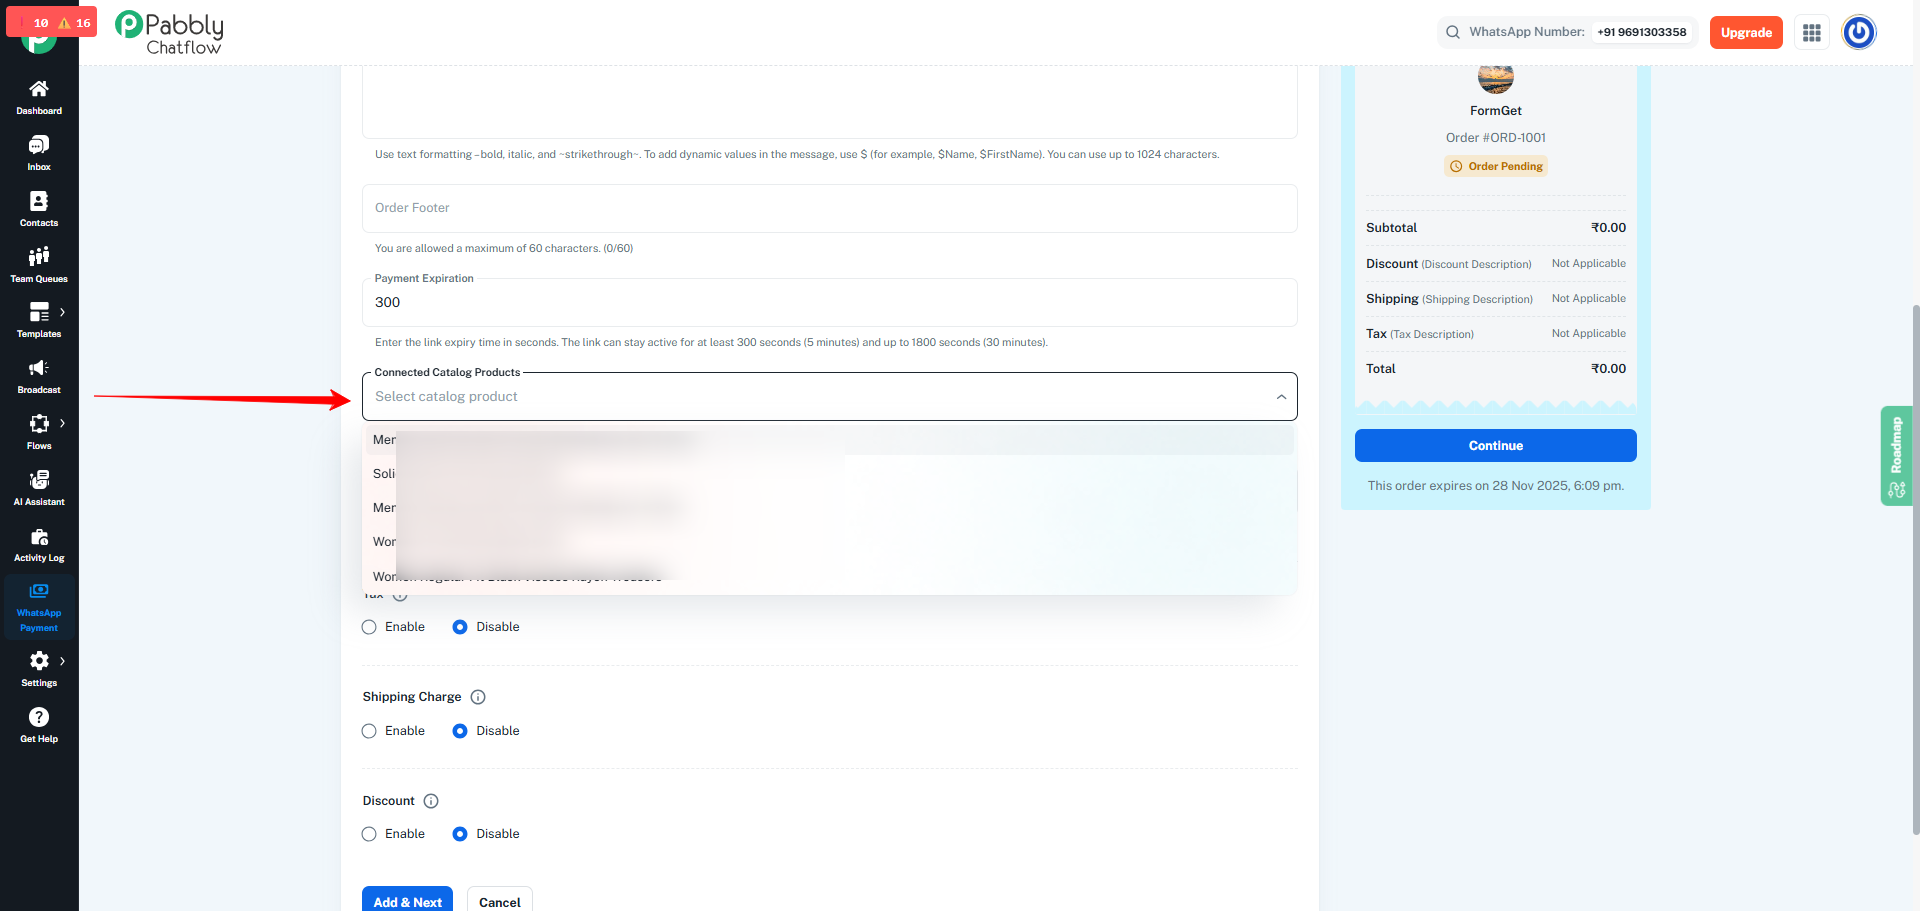
11.2 Select a Catalog Product
Once synced:
- Open the Catalog Product dropdown
- Select the required product
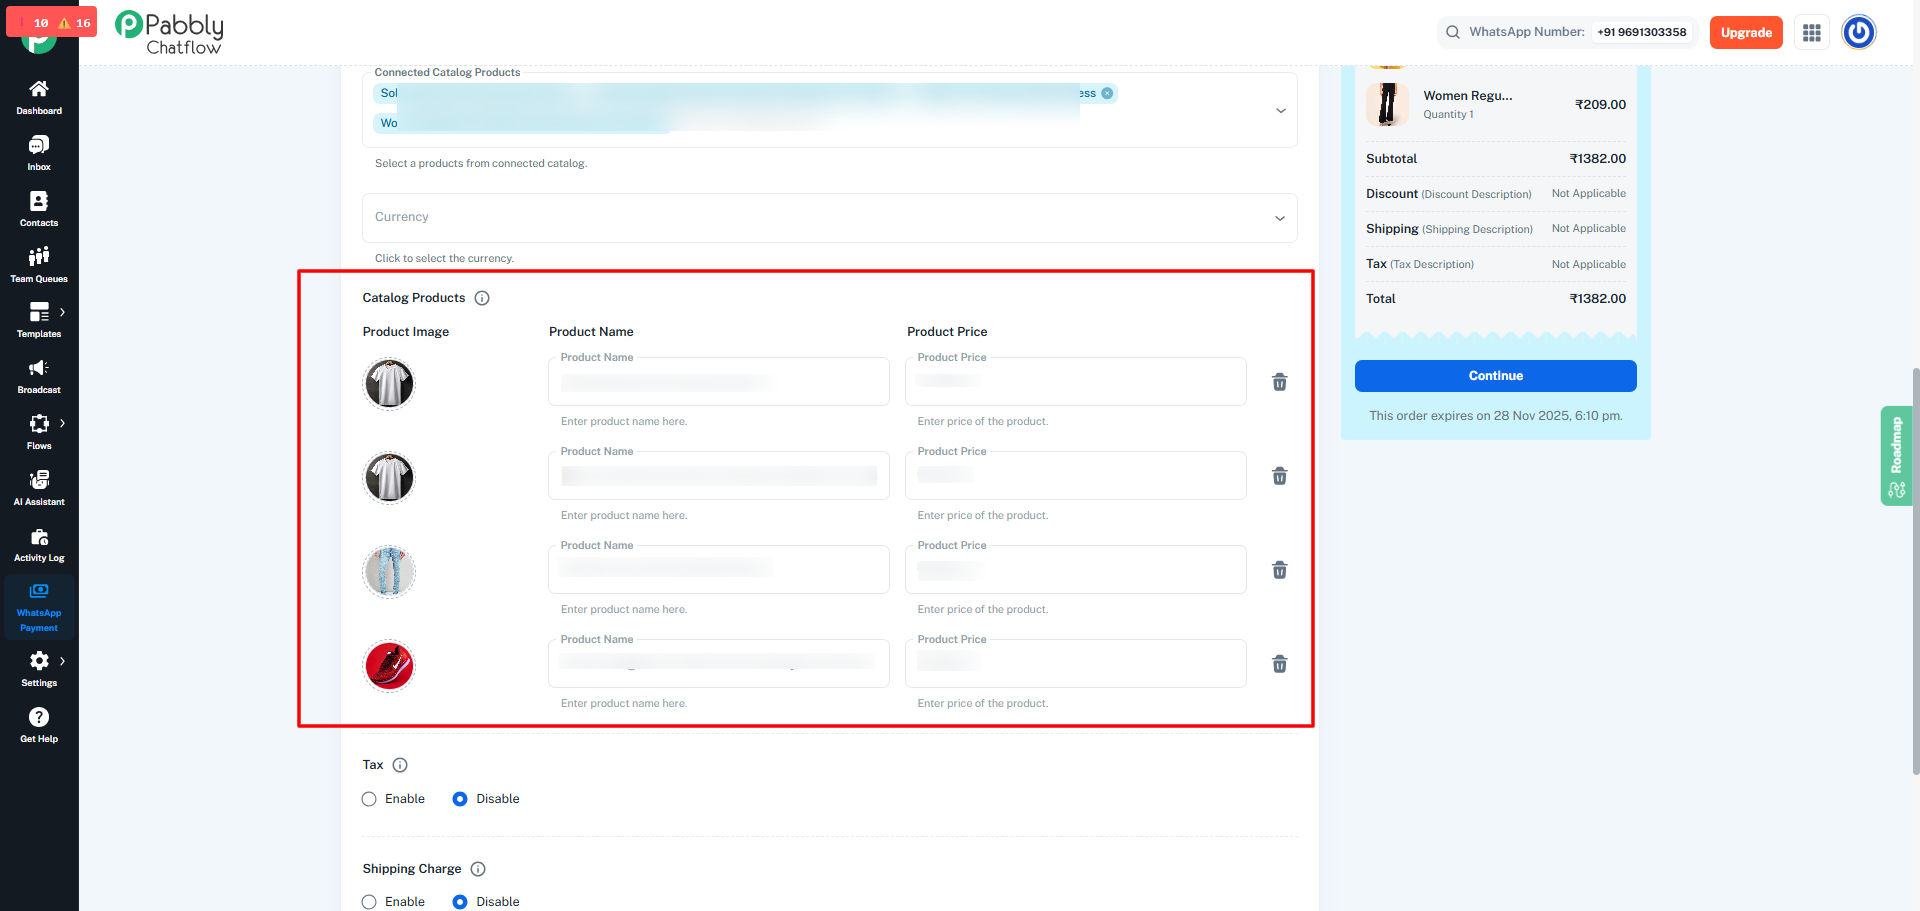
After selecting a product:
- Product Image
- Product Name
- Product Price
are filled automatically and shown in the Order Message preview.
When using WhatsApp Cart:
- You do not add products manually
- The customer adds products directly in WhatsApp
- The order is triggered through the Order Received event
This type is used when you want the customer to build their own cart.
13. Save and Complete the Order Message
After filling all fields:
The button will show Add & Next.
Clicking it will:
- Create the Order Message
- Redirect you to the Payment Notification tab
The button will show Add.
Clicking it will:
- Create the Order Message
- Keep you on the same page