Features & Capabilities
This guide walks you through creating a Cloudflare R2 bucket, an API token with read/write access, and the one manual step R2 needs - adding a CORS policy - so Pabbly Chatflow can back up your chats and media and show archived history in your inbox.
Sign in to the Cloudflare dashboard.
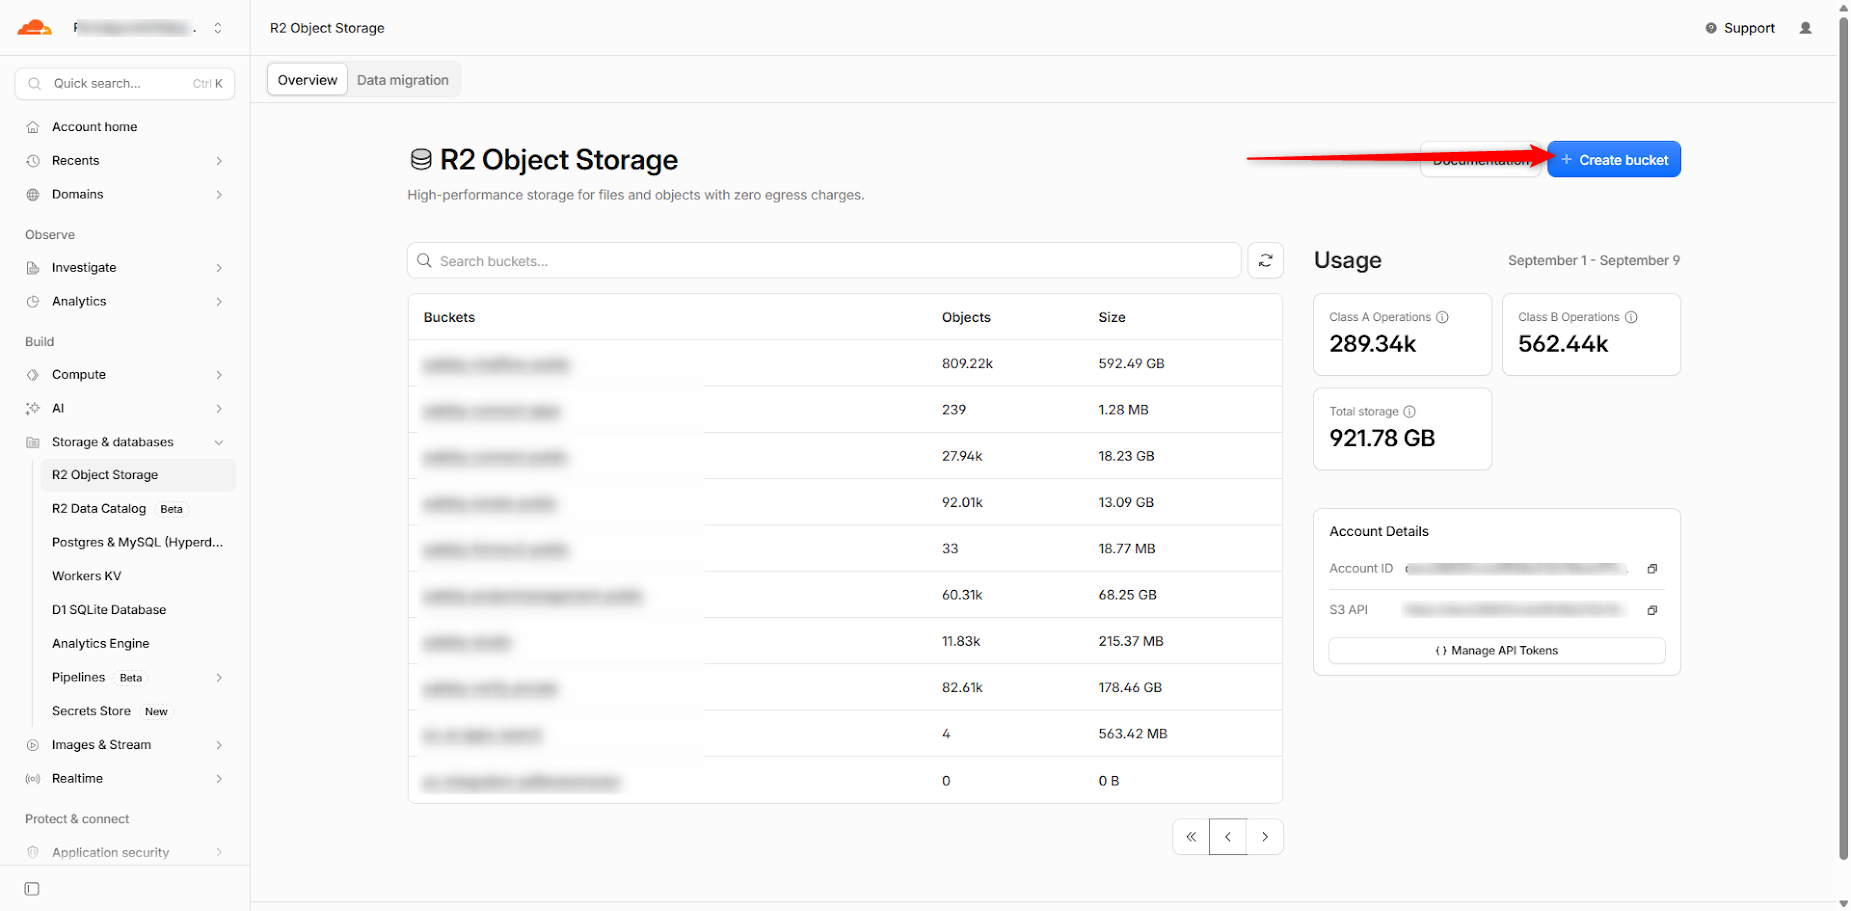
Open Storage & databases → R2 Object Storage.
Click Create bucket.
Keep the Account Details panel in mind, as it shows your Account ID.
The Manage API Tokens button in the Account Details panel will be used later.
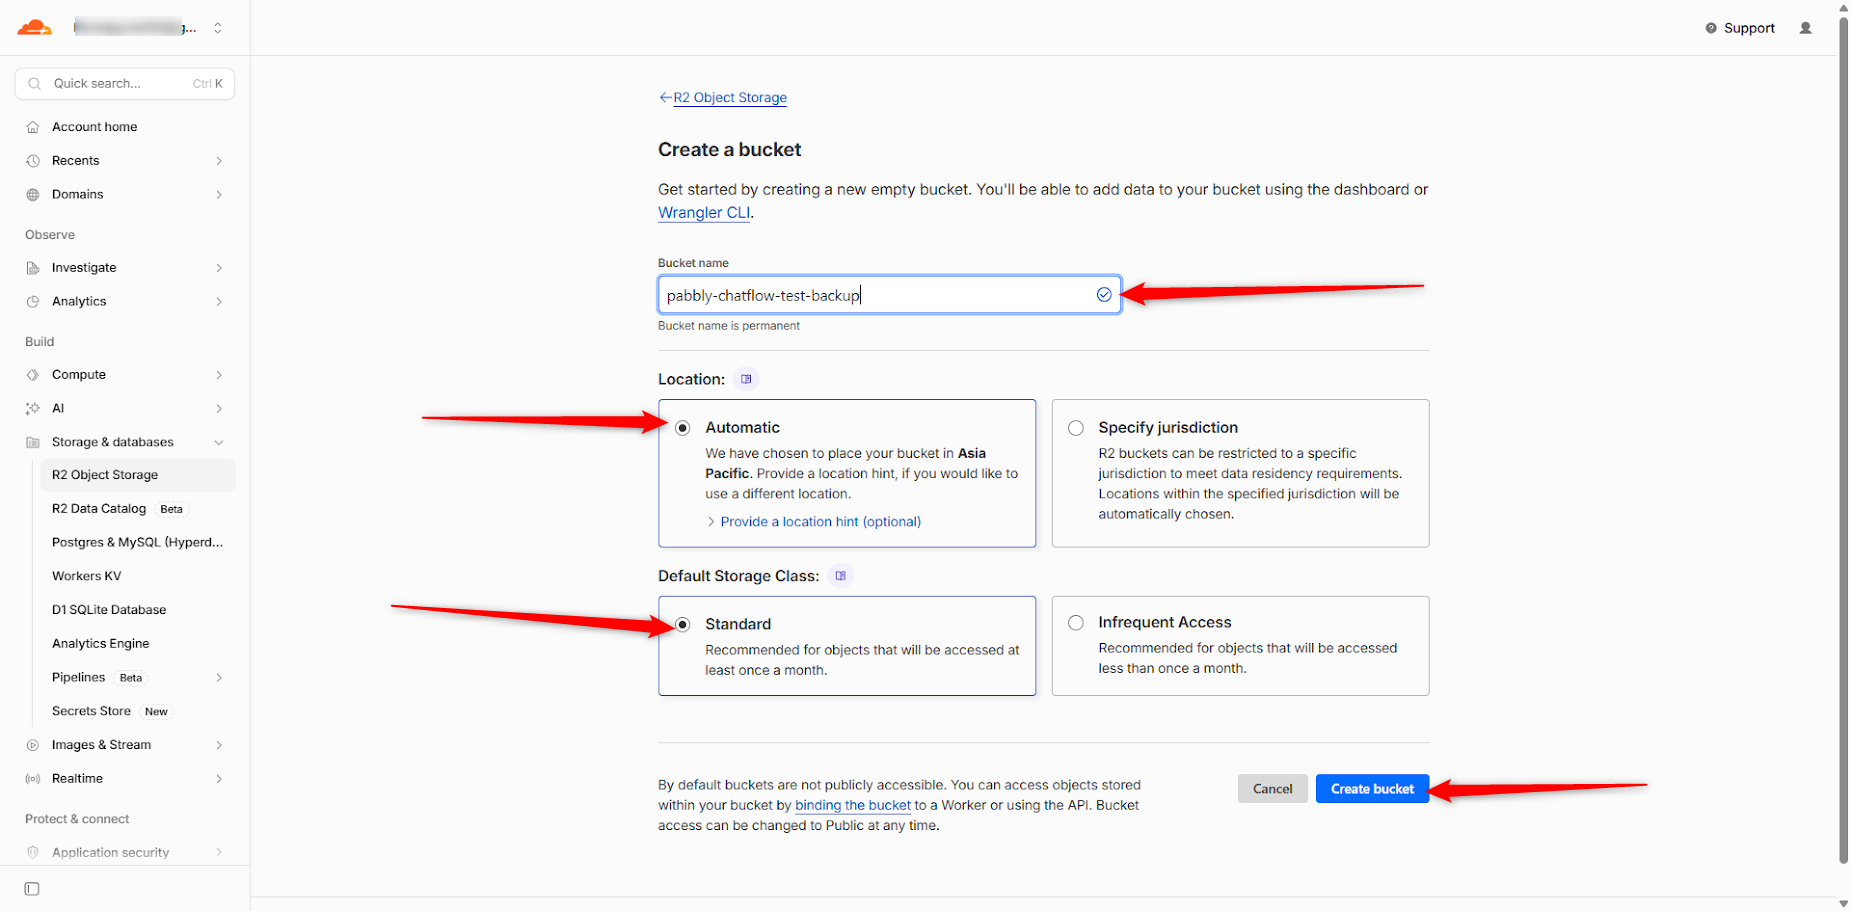
Enter a Bucket name.
Use a unique name, for example, mycompany-chatflow-backup.
Keep Location set to Automatic.
Keep Default Storage Class set to Standard.
Click Create bucket.
After creating the bucket, you will see “Your bucket is ready”.
Leave the bucket empty.
Pabbly Chatflow will fill it automatically once connected.
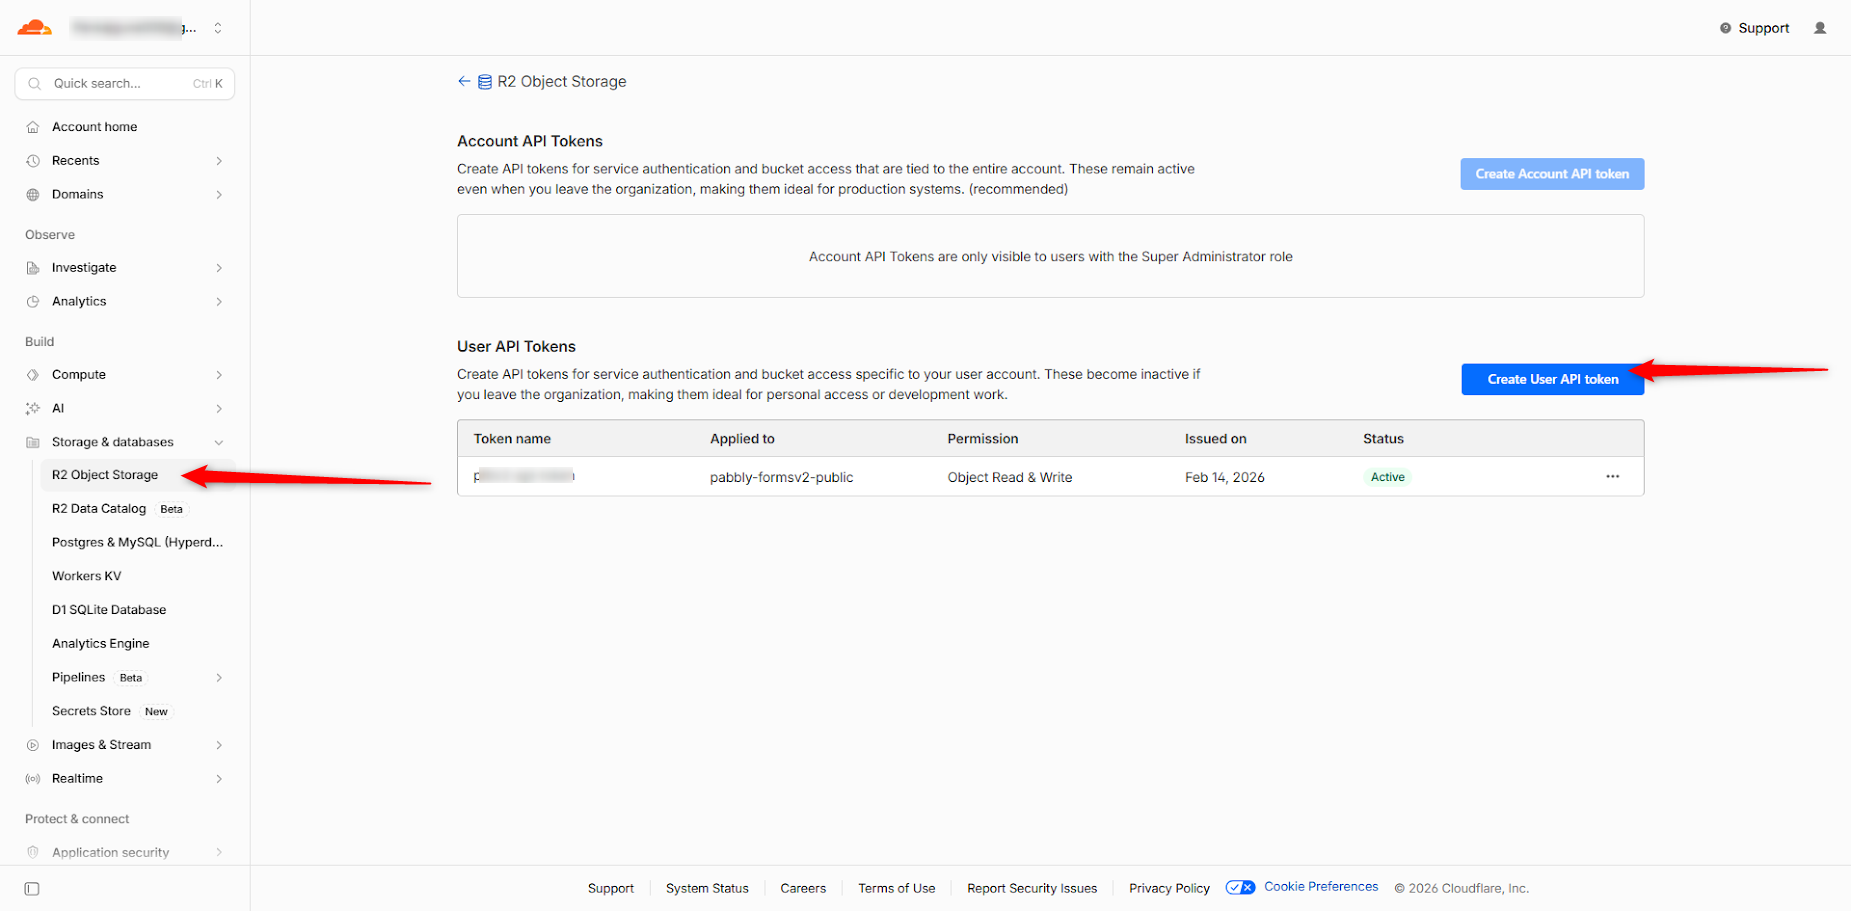
Go back to R2 Object Storage.
In the Account Details panel, click Manage API Tokens.
On the page that opens, click Create User API Token.
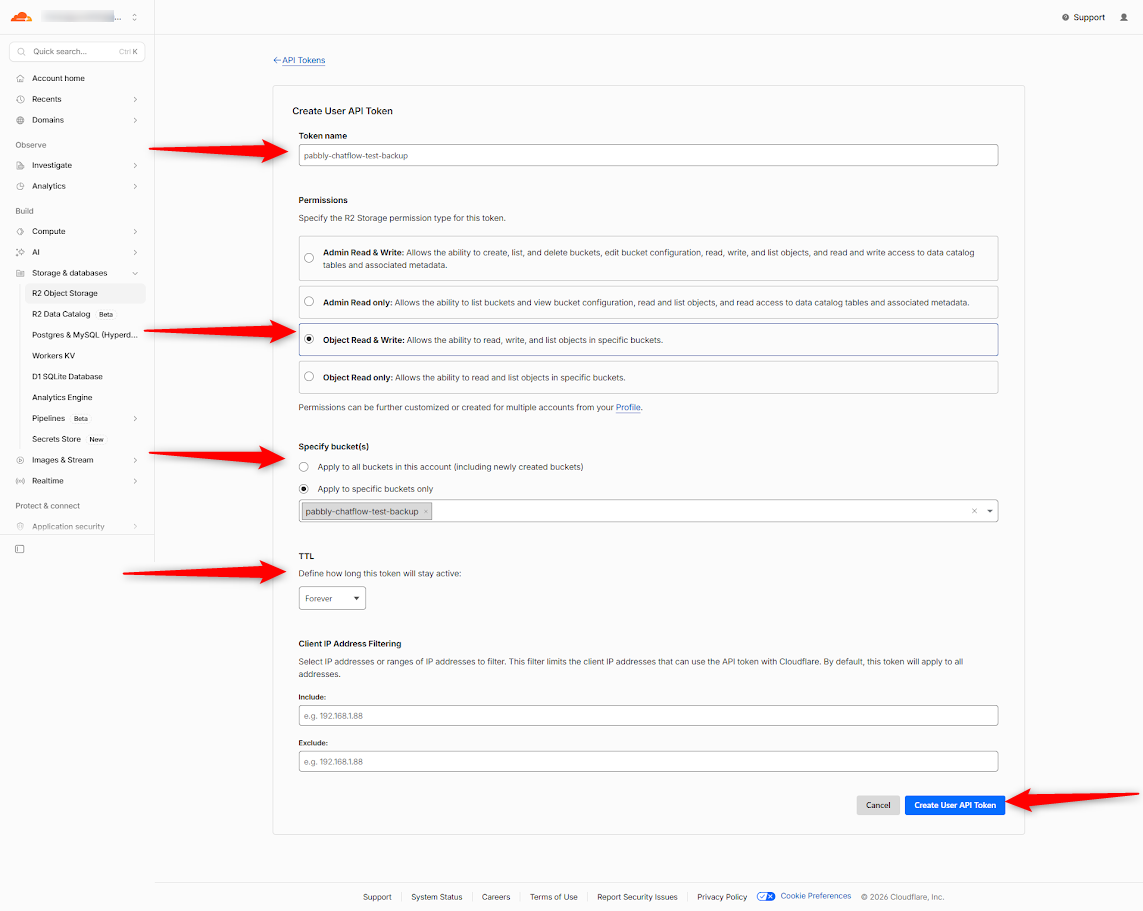
Enter a name for the token.
For example, use mycompany-chatflow-backup.
Under Permissions, select Object Read & Write.
Under Specify bucket(s), select Apply to specific buckets only.
Select the bucket you created in Step 2.
Leave TTL set to Forever.
Click Create User API Token
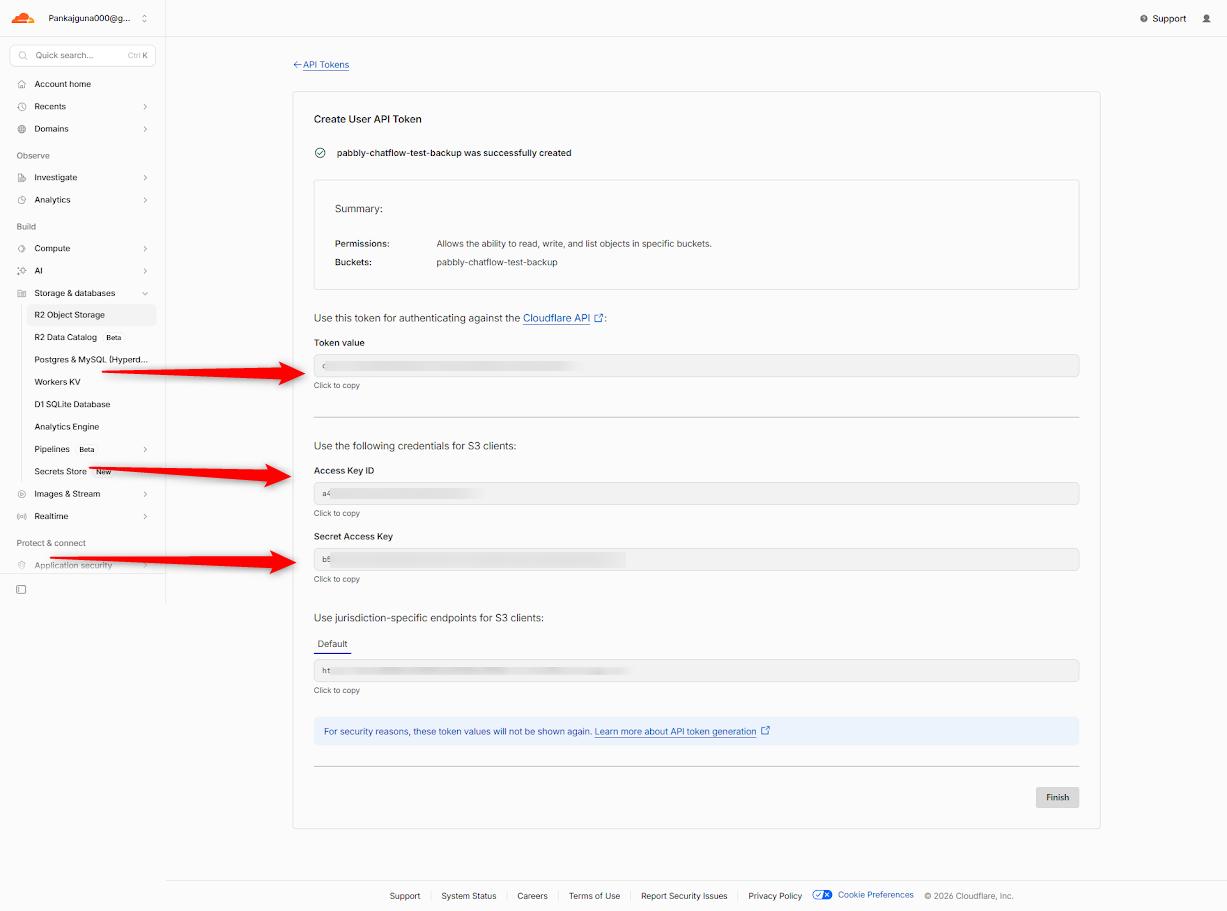
Copy the Access Key ID.
Copy the Secret Access Key.
Copy the jurisdiction-specific S3 client endpoint.
The endpoint will look like https://<account-id>.r2.cloudflarestorage.com.
Save these values securely because they are shown only once.
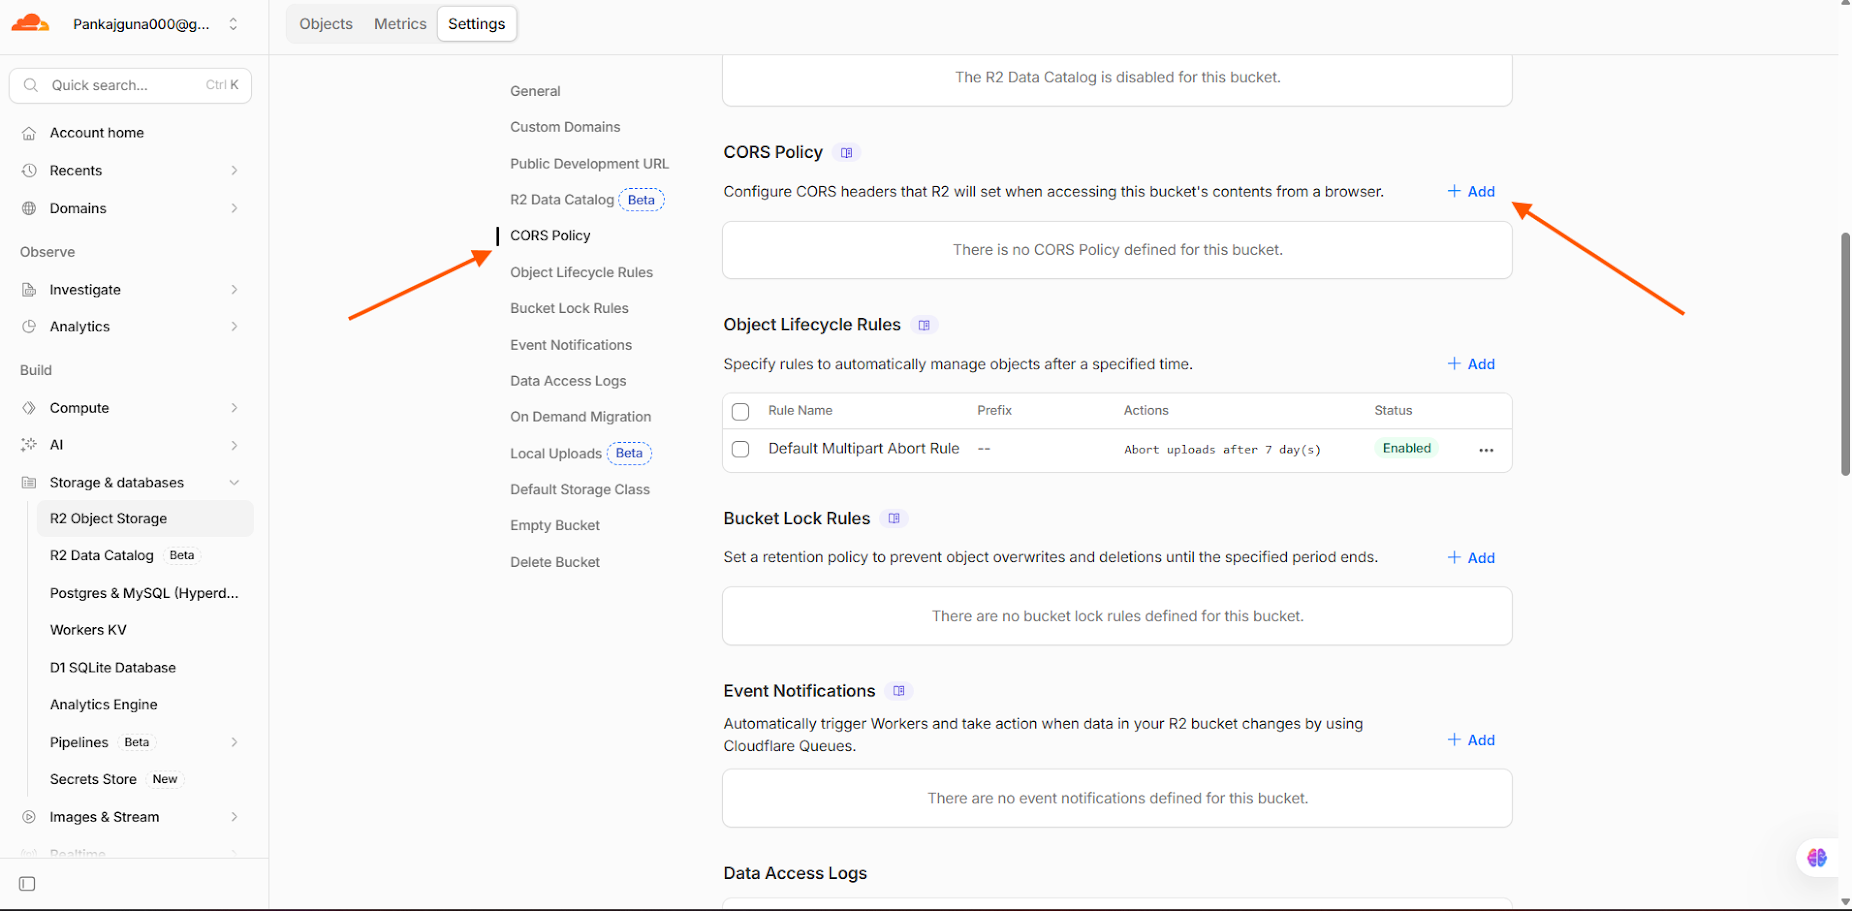
Open your R2 bucket.
Go to the Settings tab.
In the left menu, click CORS Policy.
Click Add.
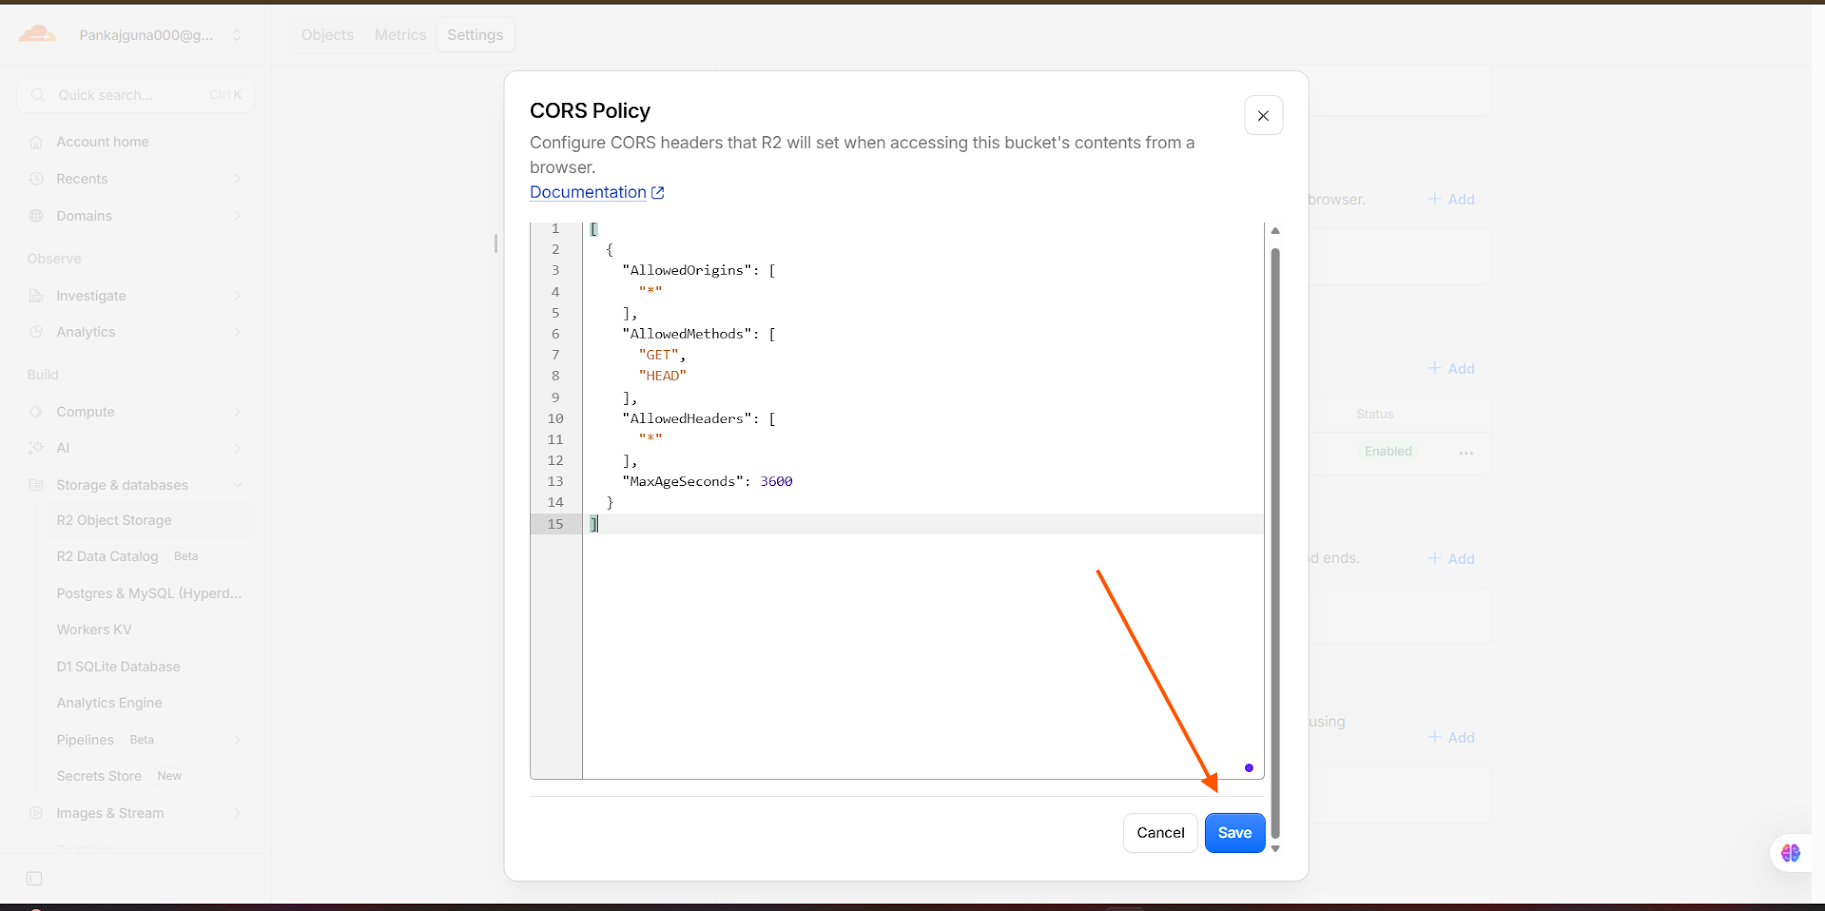
Paste the following policy into the editor:
[
  {
    "AllowedOrigins": ["*"],
    "AllowedMethods": ["GET", "HEAD"],
    "AllowedHeaders": ["*"],
    "MaxAgeSeconds": 3600
  }
]
Click Save.
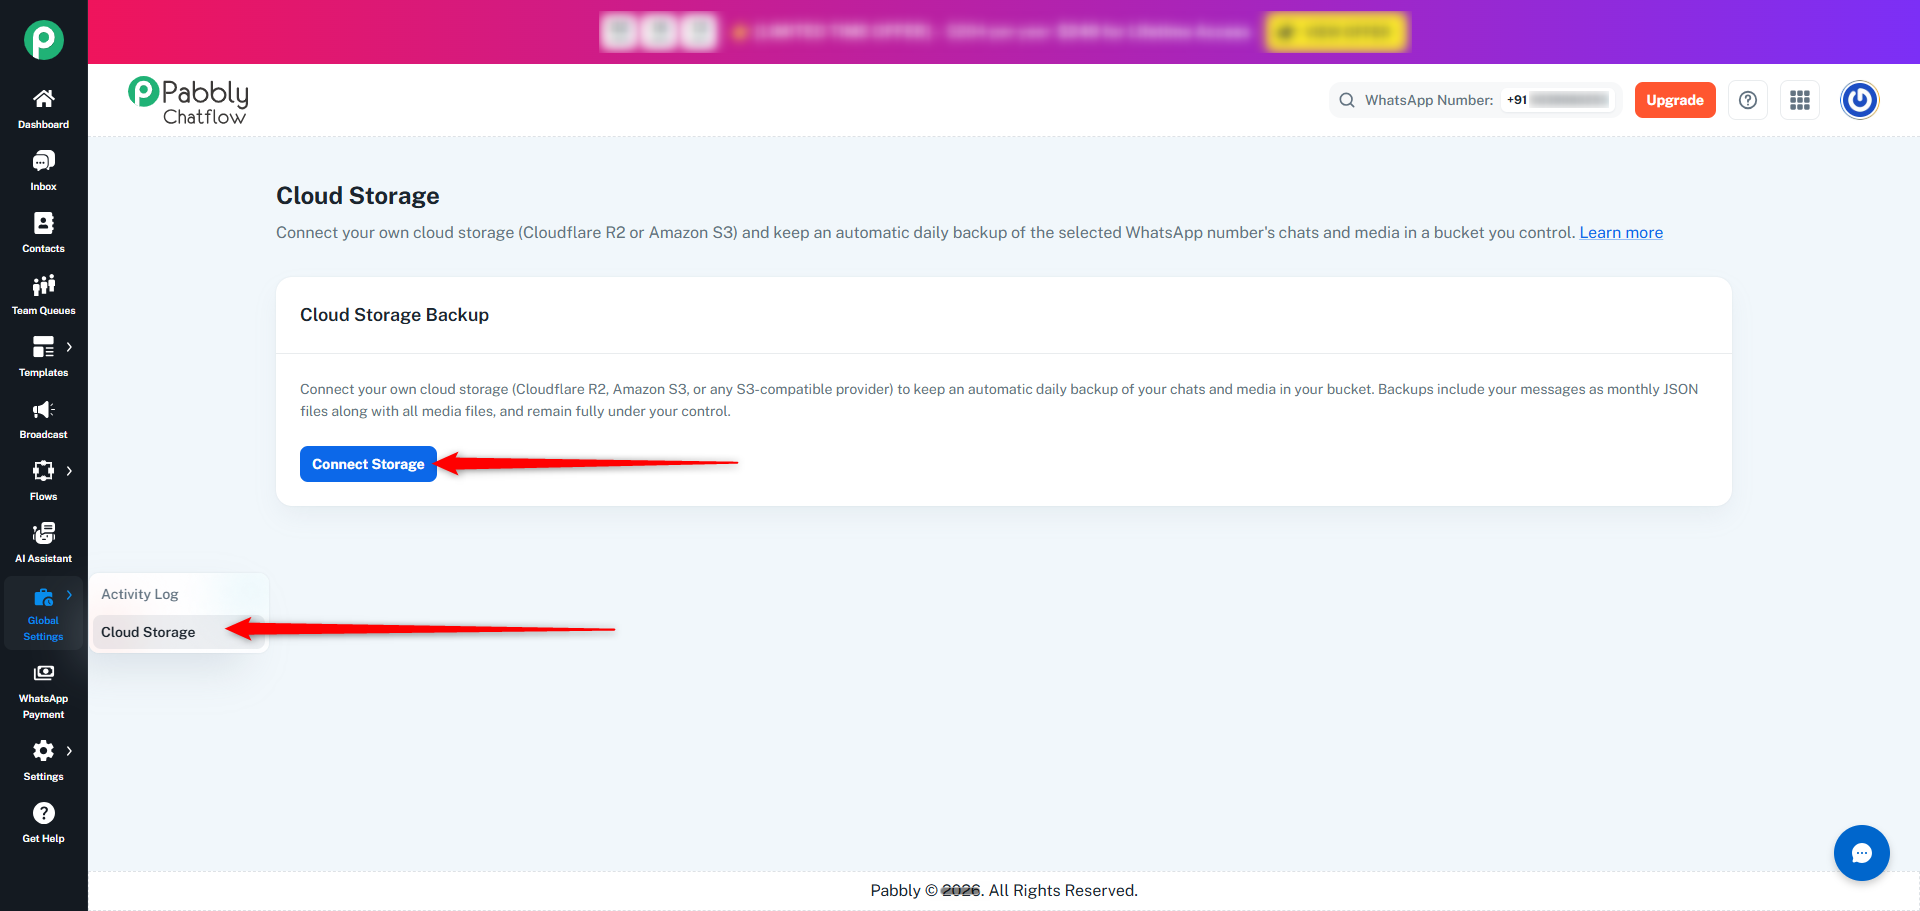
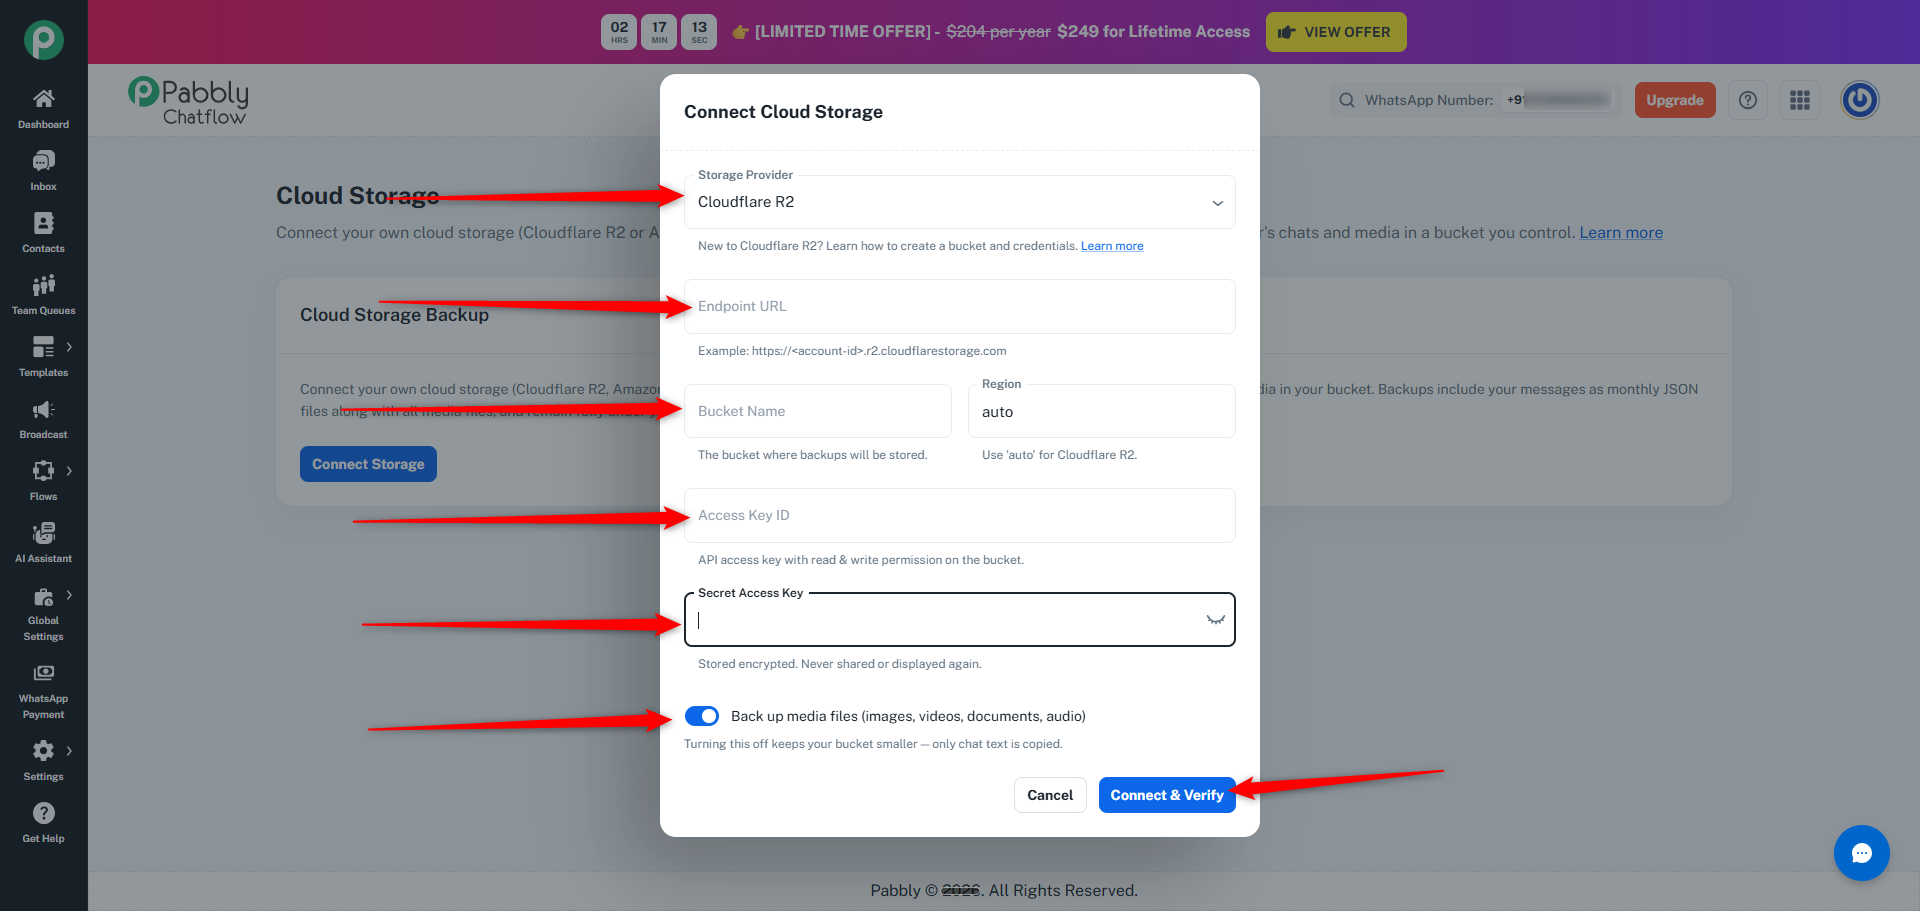
Open Pabbly Chatflow.
Go to Global Settings → Cloud Storage.
Click Connect Storage.
Select Cloudflare R2 as the provider.
Enter the Endpoint from Step 6.
Set Region to auto.
Enter the Bucket name from Step 2.
Enter the Access Key ID from Step 6.
Enter the Secret Access Key from Step 6.
Click Connect.
Pabbly Chatflow will verify that it can write to your bucket.
Your first backup will start in the background.
If you see a CORS notice, complete Steps 7 and 8.
Return to the Cloud Storage page and click Test Connection.
The notice will clear once the CORS policy is correctly configured.
Keep your Secret Access Key private.
Anyone holding the key can read and write to the bucket it is scoped to.
You can revoke or roll the token from R2 → Manage API Tokens.
