This is the complete process of editing an existing Order Message in Pabbly Chatflow. By following these steps, you can update product details, modify pricing, adjust tax, shipping, and discount settings, and customize the WhatsApp order message sent to your customers.
Step 1: Log in and open the Order Message tab
- Log in to your Pabbly Chatflow account.
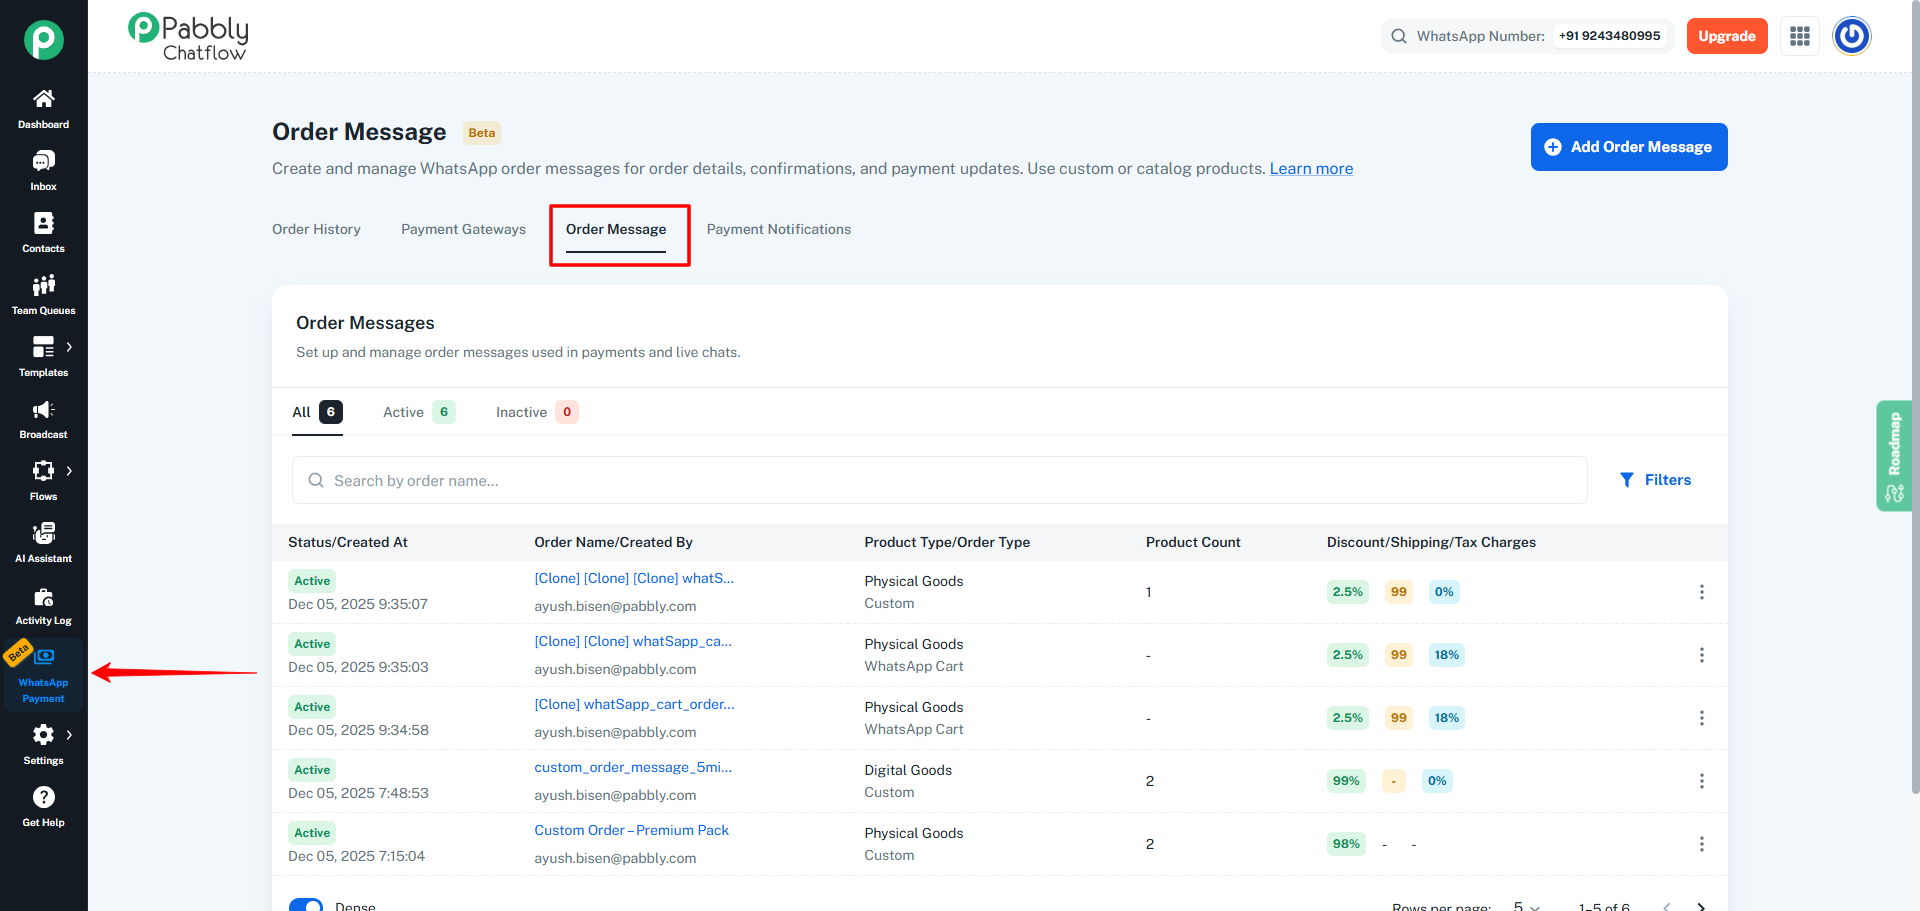
- From the left sidebar, click on WhatsApp Payment.
- On the top of the WhatsApp Payment screen, click the Order Message tab (3rd tab).
Step 2: Choose the Order Message to edit
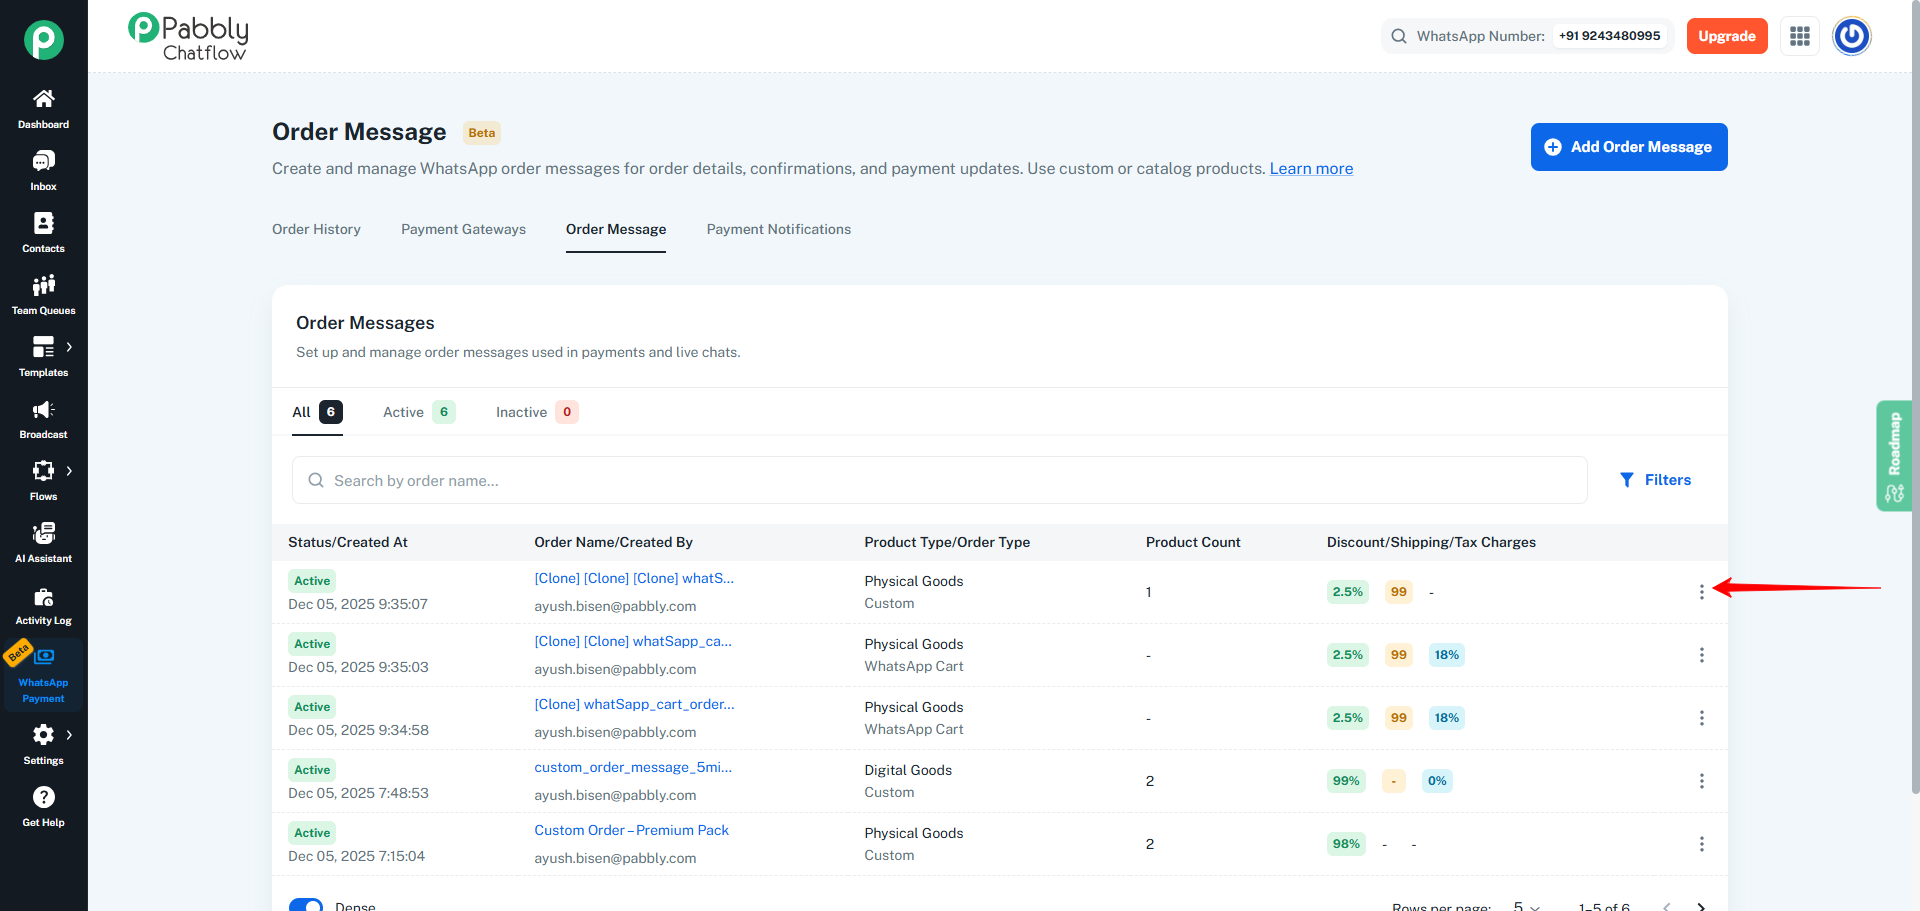
- In the Order Messages list, locate the order message you want to update.
- Go to the right side of that row and click the three-dot (⋮) menu.
Step 3: Open the Edit screen
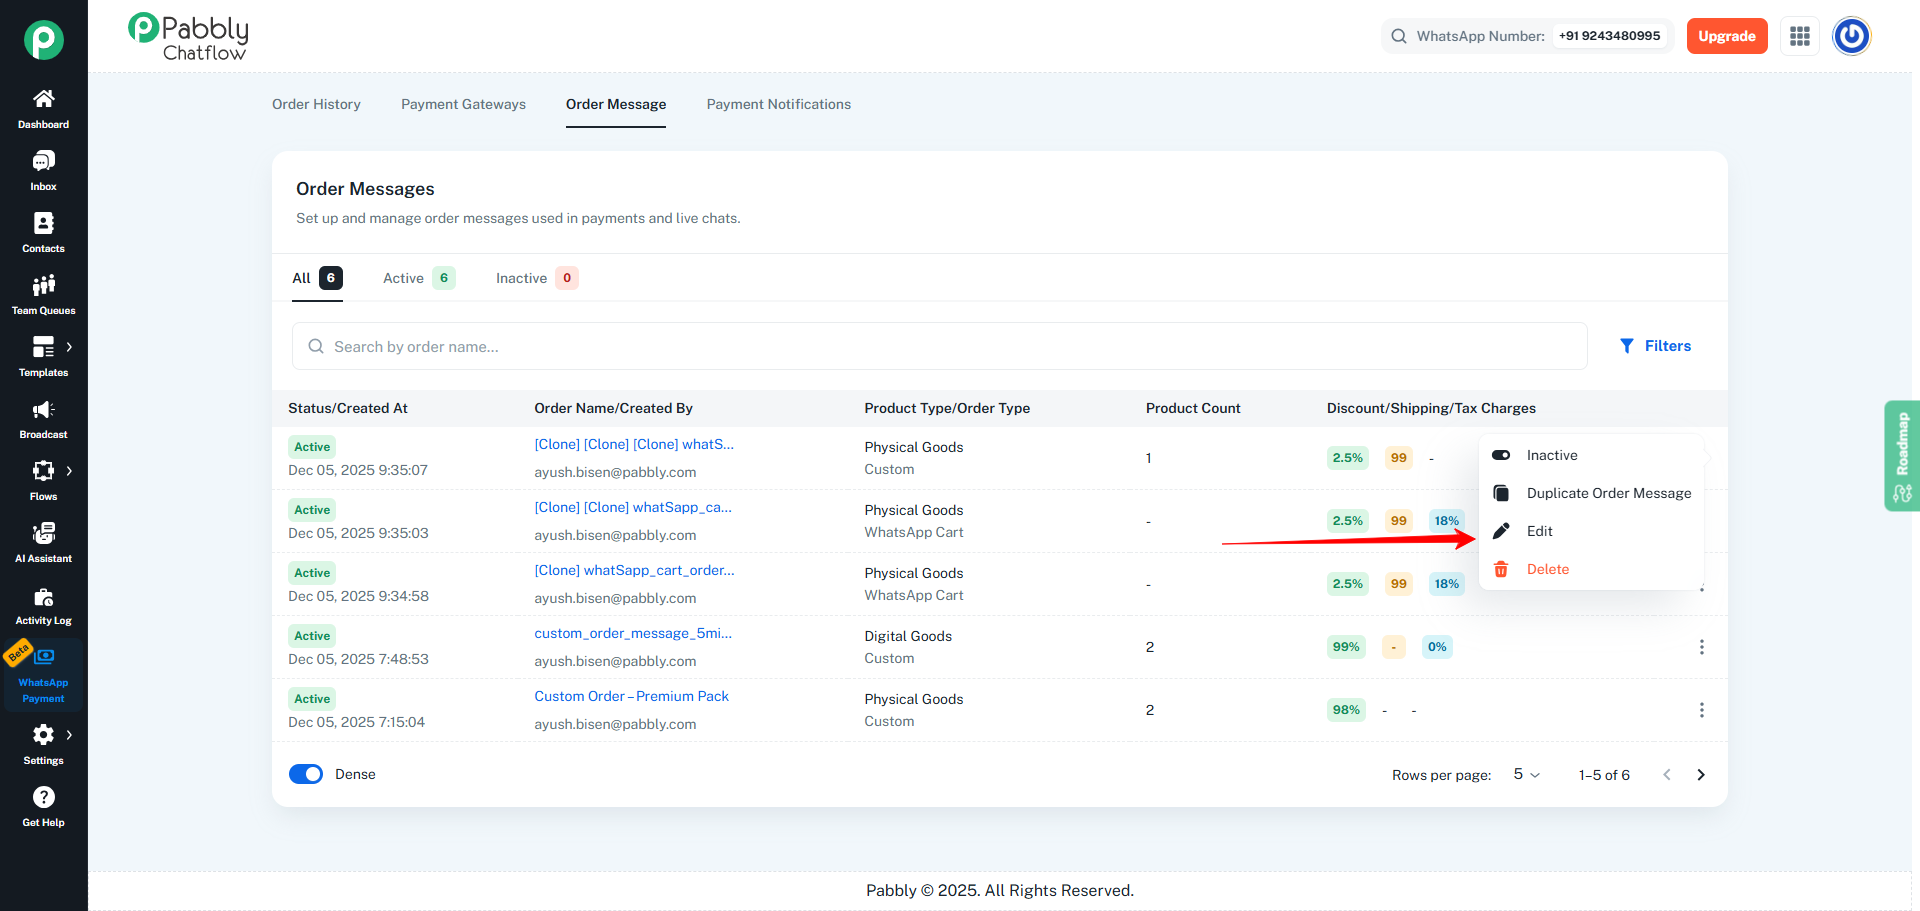
- From the dropdown menu that appears, click Edit.
- You will be redirected to the Edit Order Message page where all the existing details are loaded.
Step 4: Edit Order Message Name
- In the Order Message Name field, update the name of the order message.
- Use a clear and meaningful name so it’s easy to identify later (for example: Custom Order – Premium Pack).
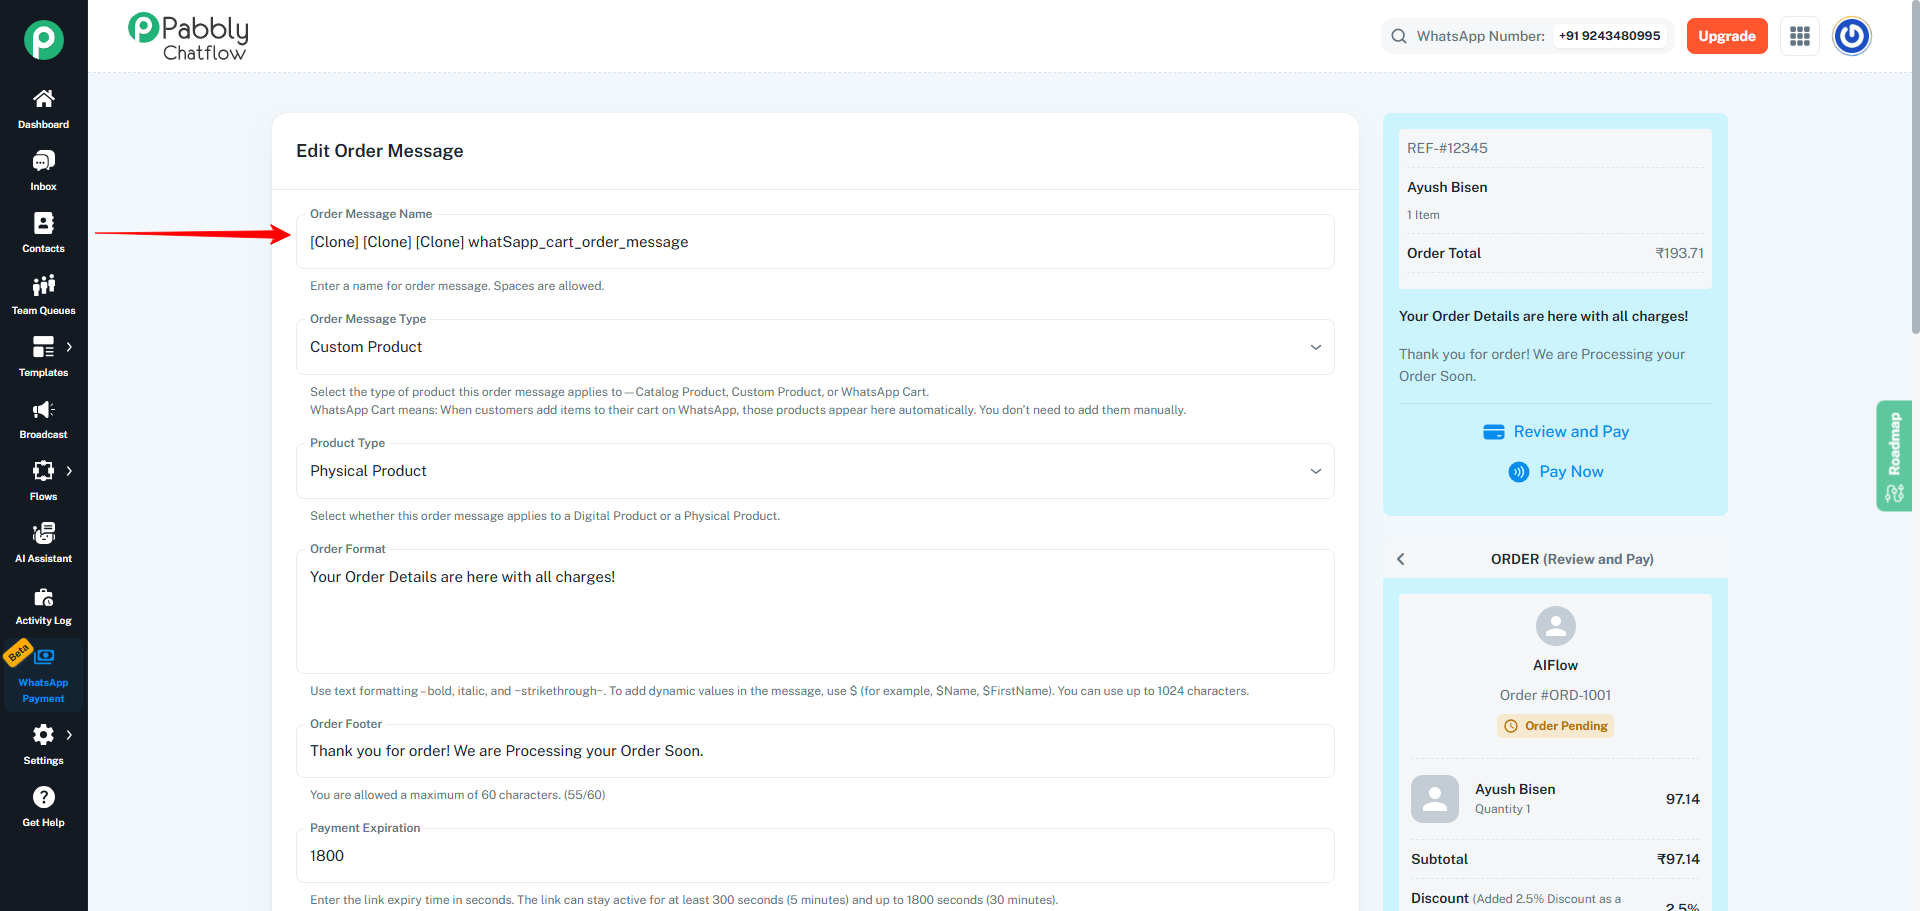 🖼️ Image Placeholder 4: Order Message Name field highlighted.
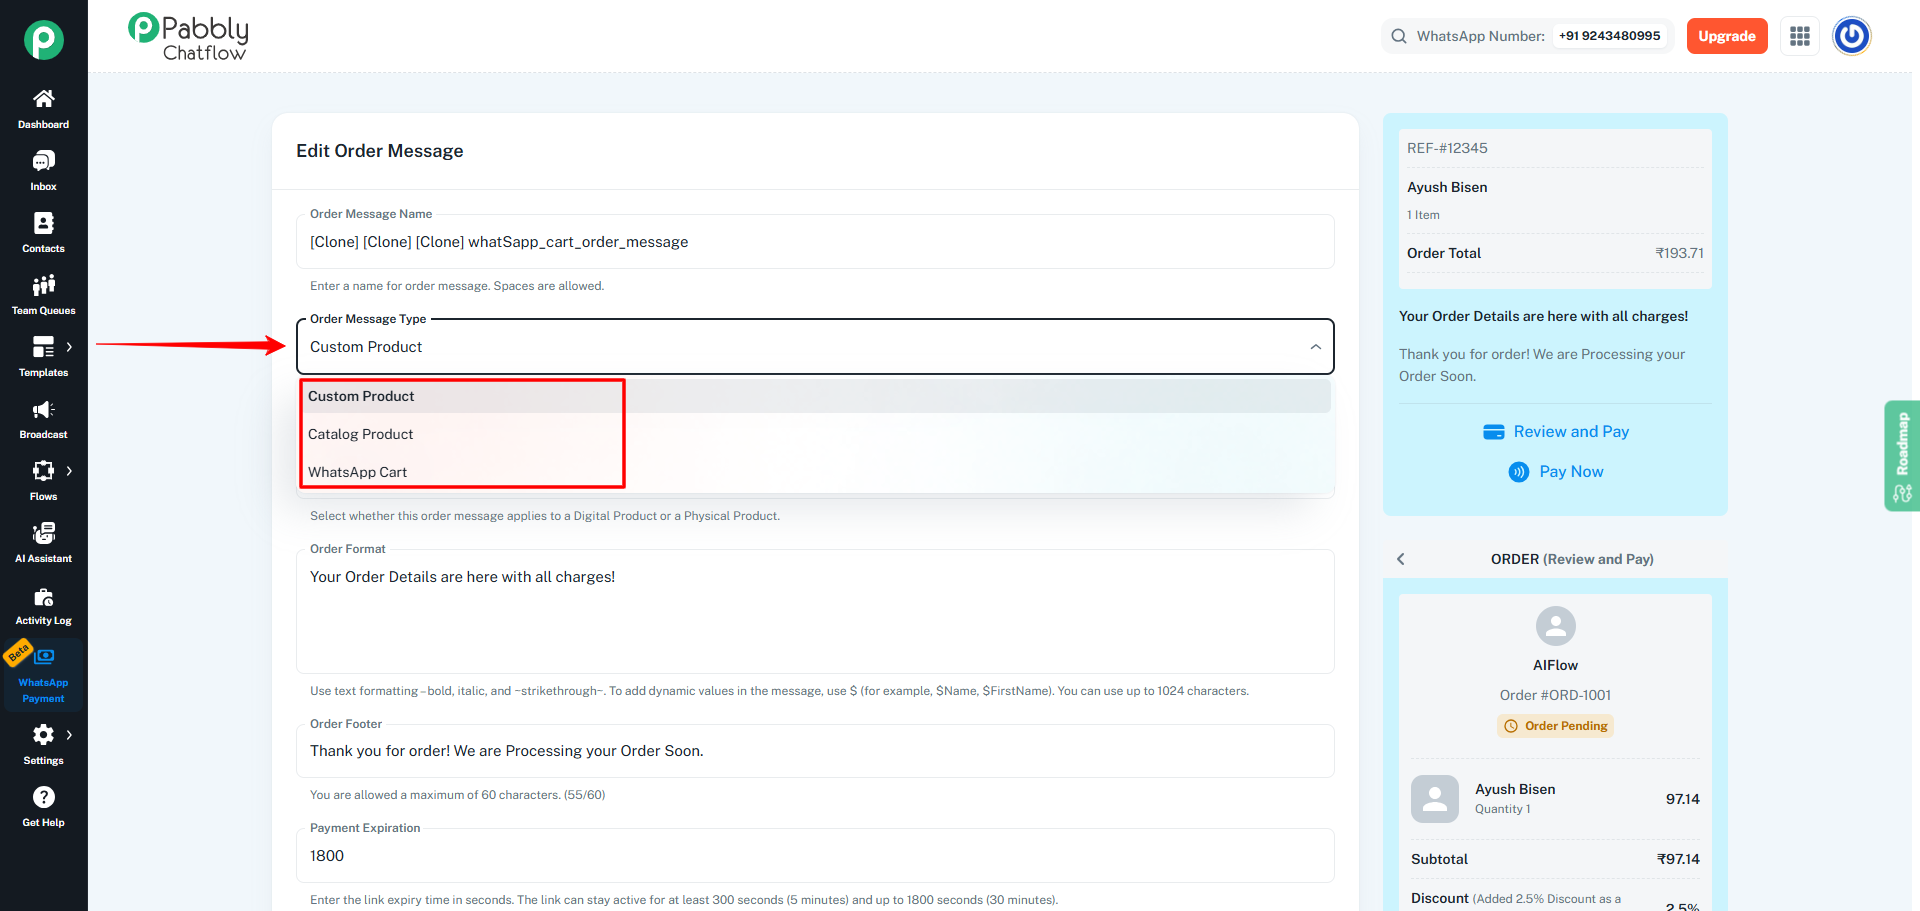
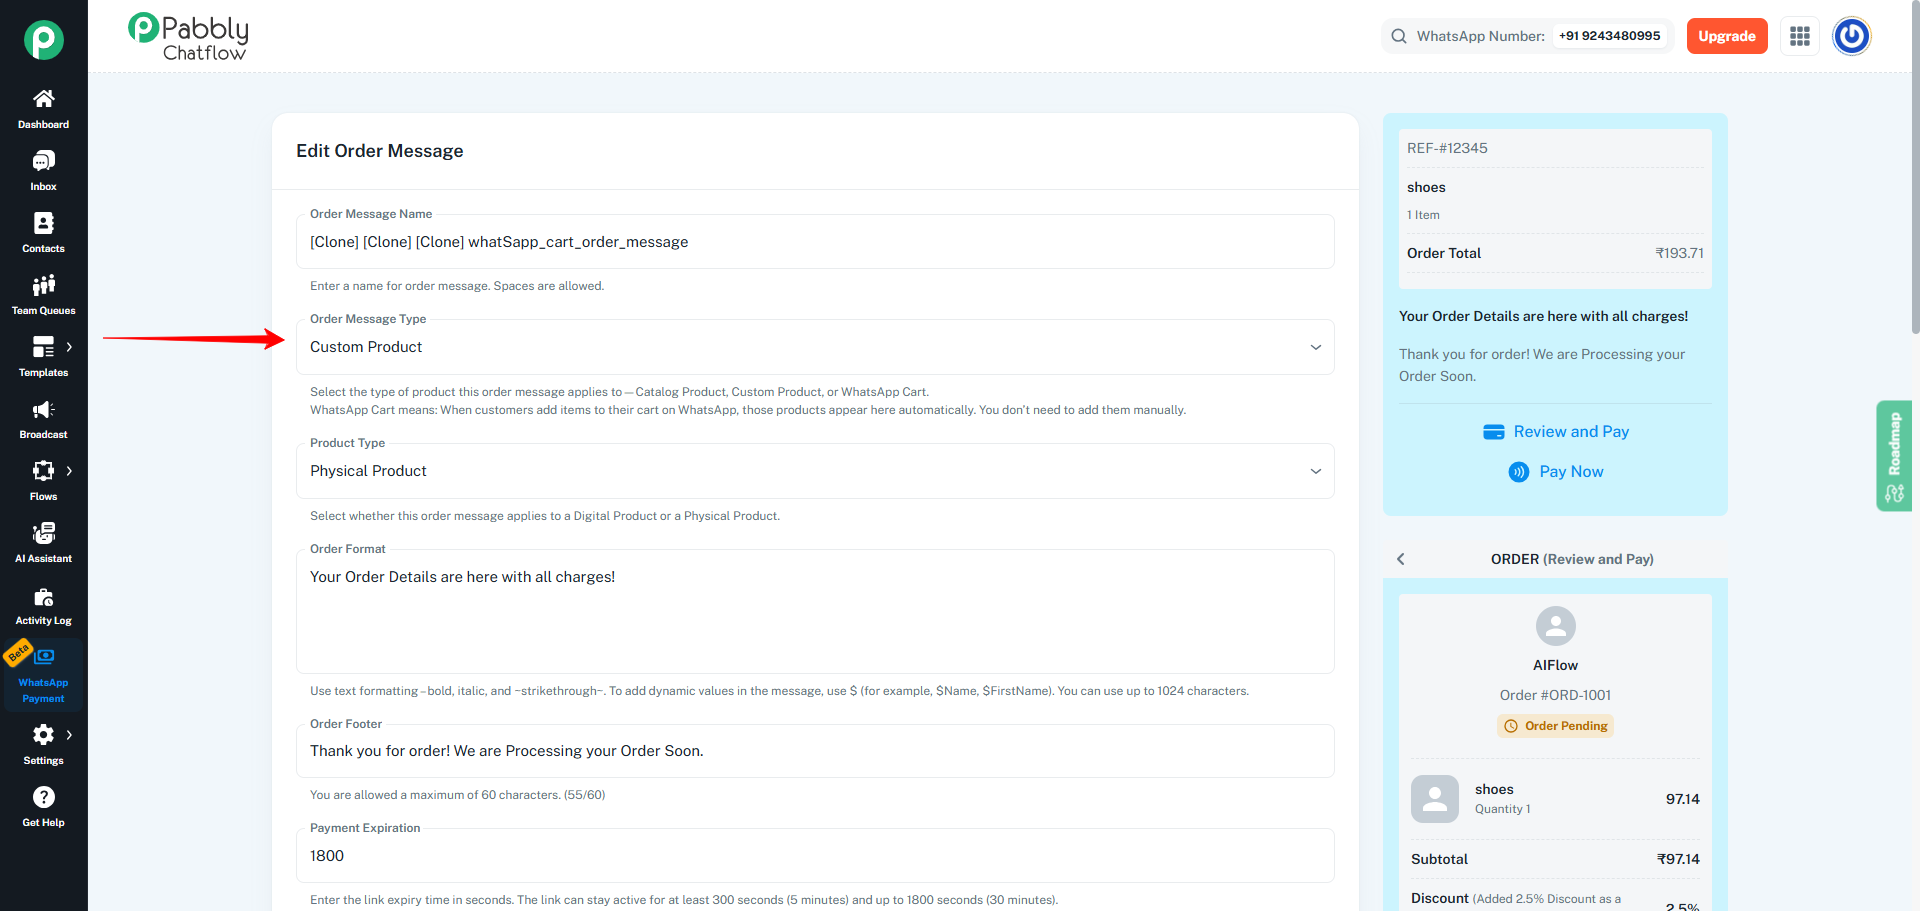
Step 5: Select Order Message Type
- Open the Order Message Type dropdown.
- Choose the appropriate type from the available options (for example: Custom Product, Catalog Product, or WhatsApp Cart).
✅ Important Note:
The Product Name, Product Image, and Price preview will be visible only when the Order Message Type is set to Custom Product or Catalog Product.
Step 6: Choose Product Type
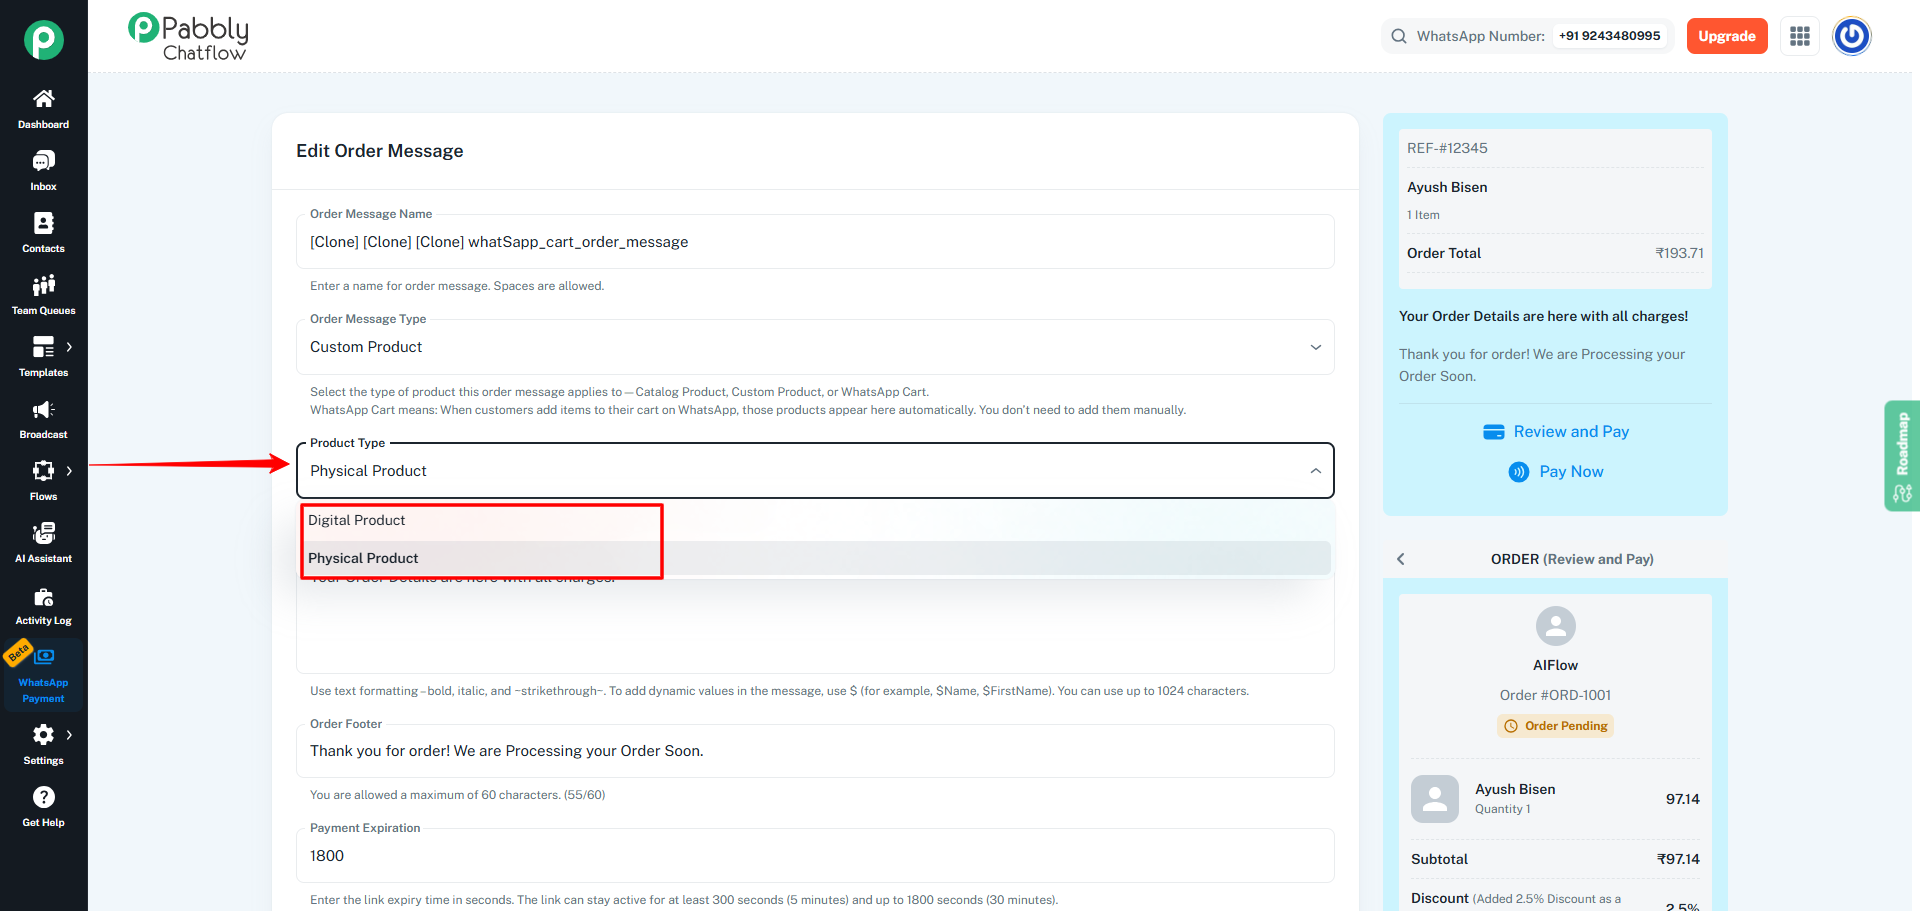
- Open the Product Type dropdown.
- Select whether this order message is for a Physical Product or a Digital Product.
- Physical Product – for items that require shipping.
- Digital Product – for downloadable or online products.
Step 7: Update Order Format (Main Message Text)
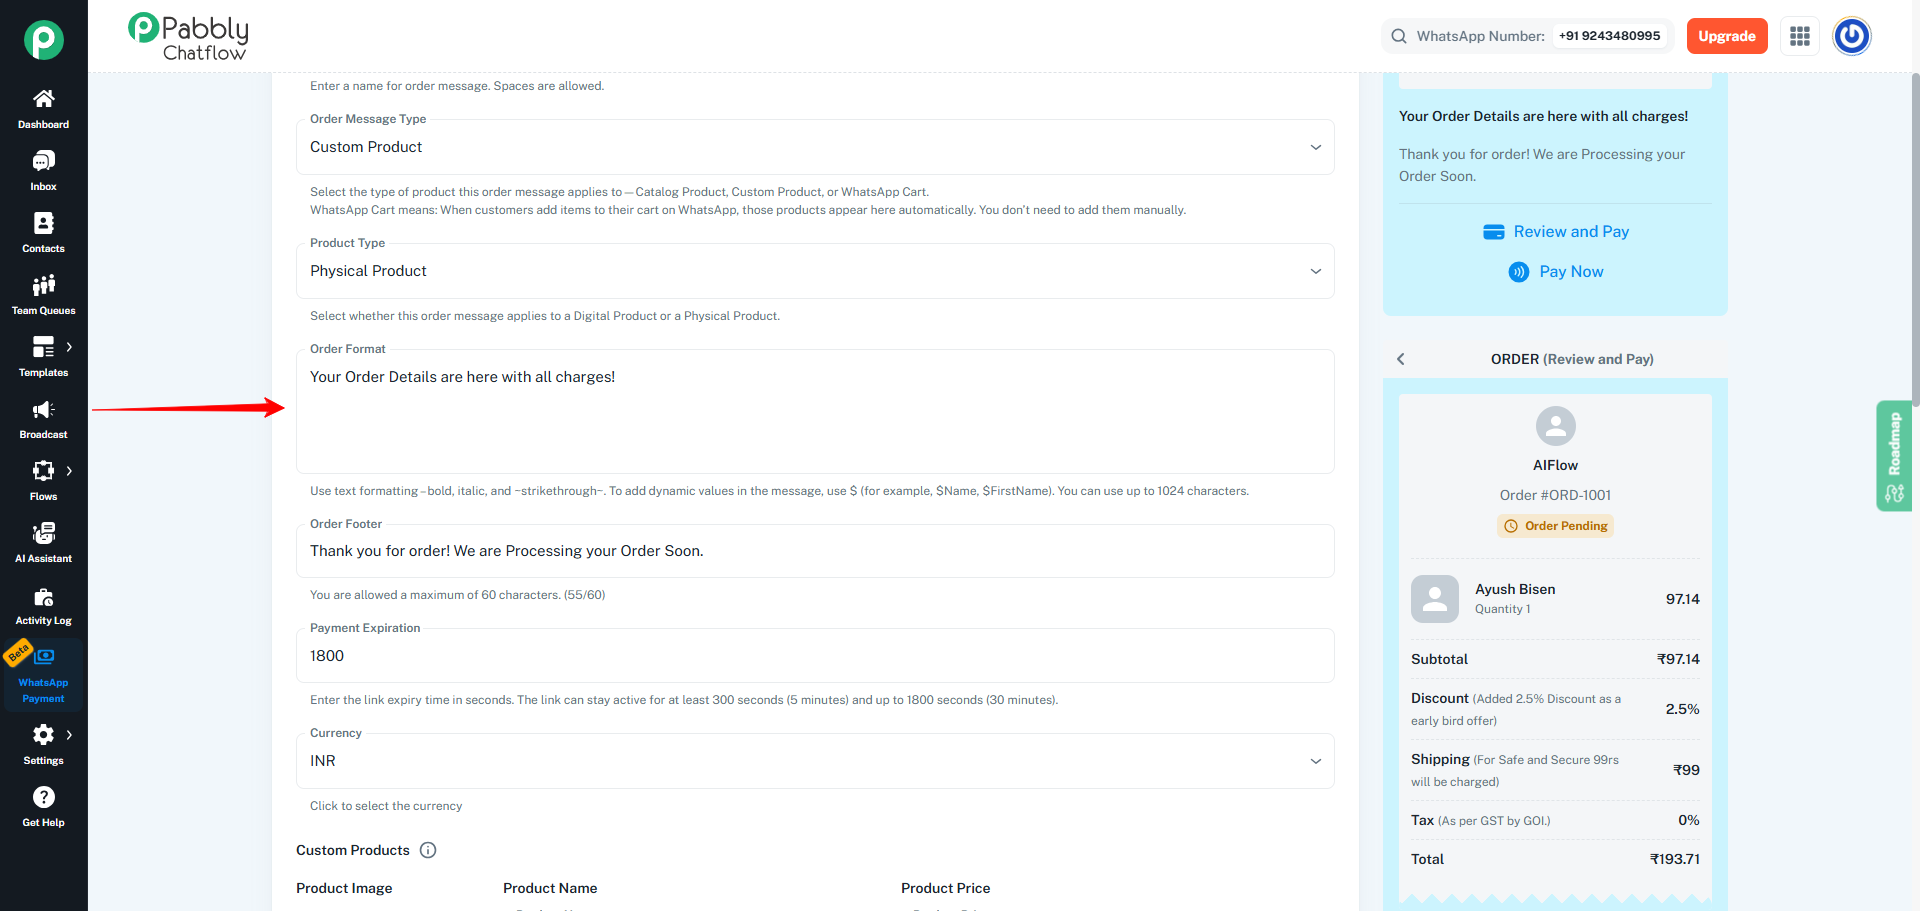
- In the Order Format text area, edit the main content of the order message that customers will receive.
- You can use the text formatting instructions provided (bold, italic, strikethrough).
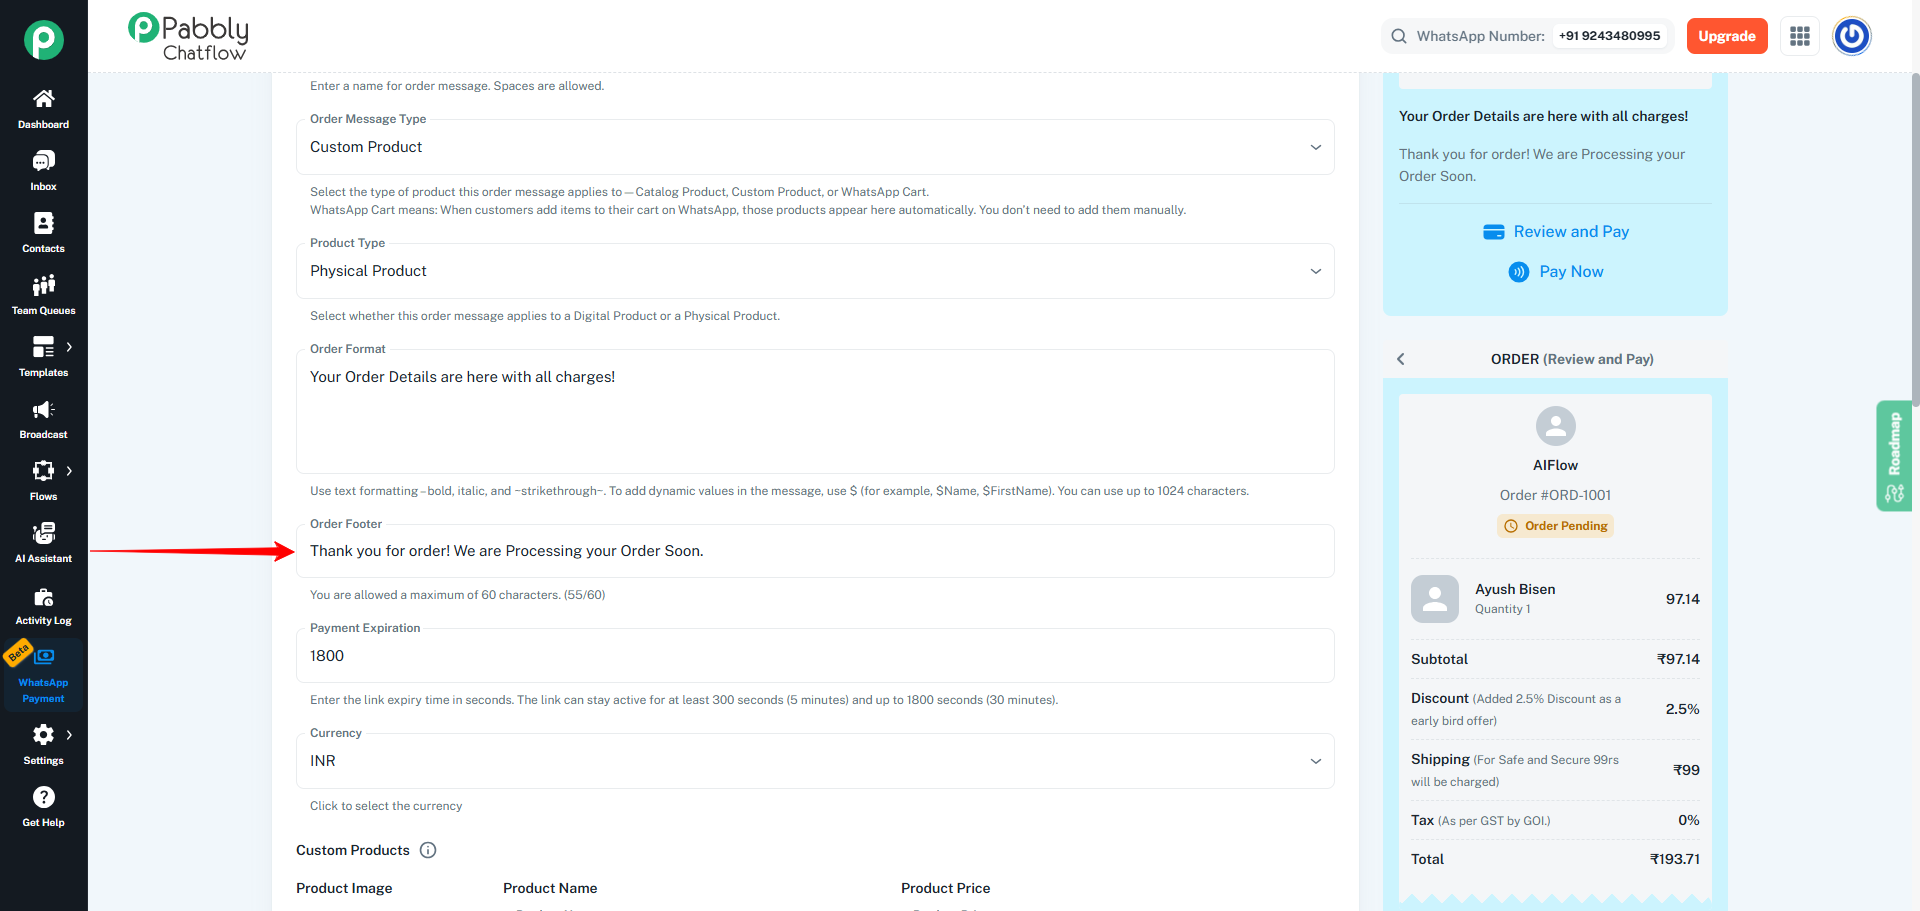
- Scroll down to the Order Footer field.
- Update the short footer text that appears at the bottom of the order message (for example: “Thank you for your order! We are processing it soon.”).
- Make sure the text stays within the allowed character limit.
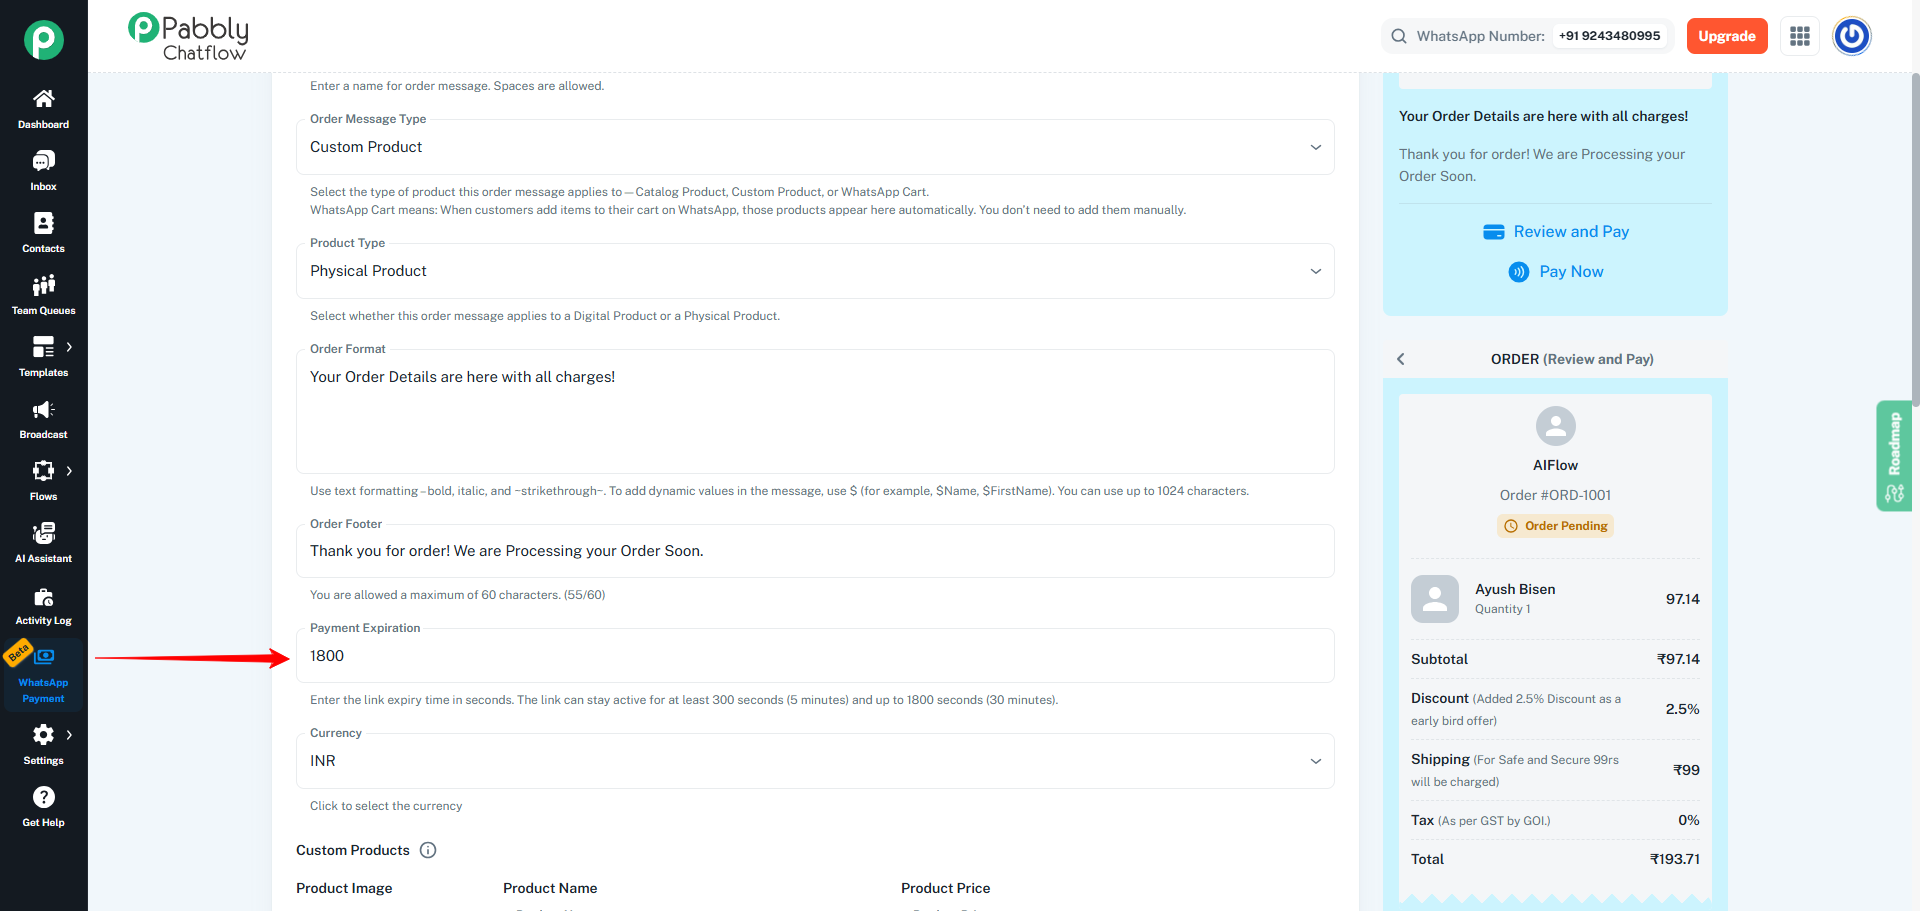
- Locate the Payment Expiration field.
- Enter the link expiry time in seconds (for example:
1800 seconds = 30 minutes).
- This defines how long the payment link will remain active for the customer.
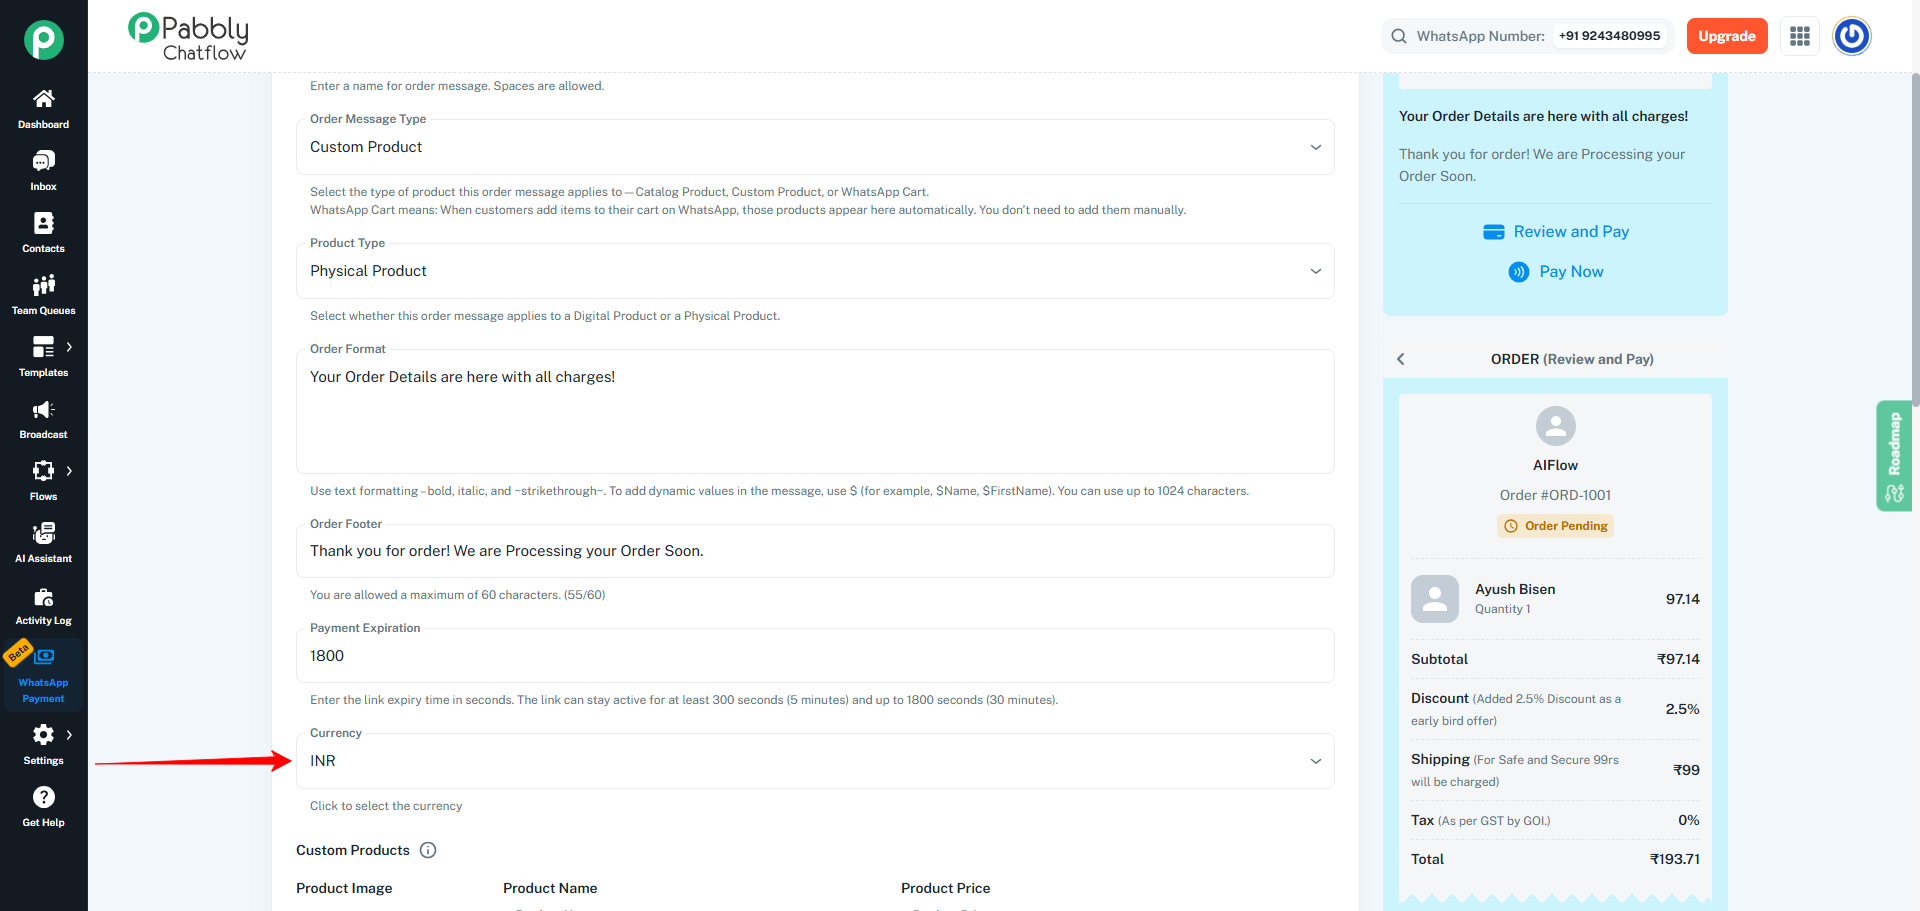
Step 10: Verify the Currency
Confirm the correct Currency (for example, INR).
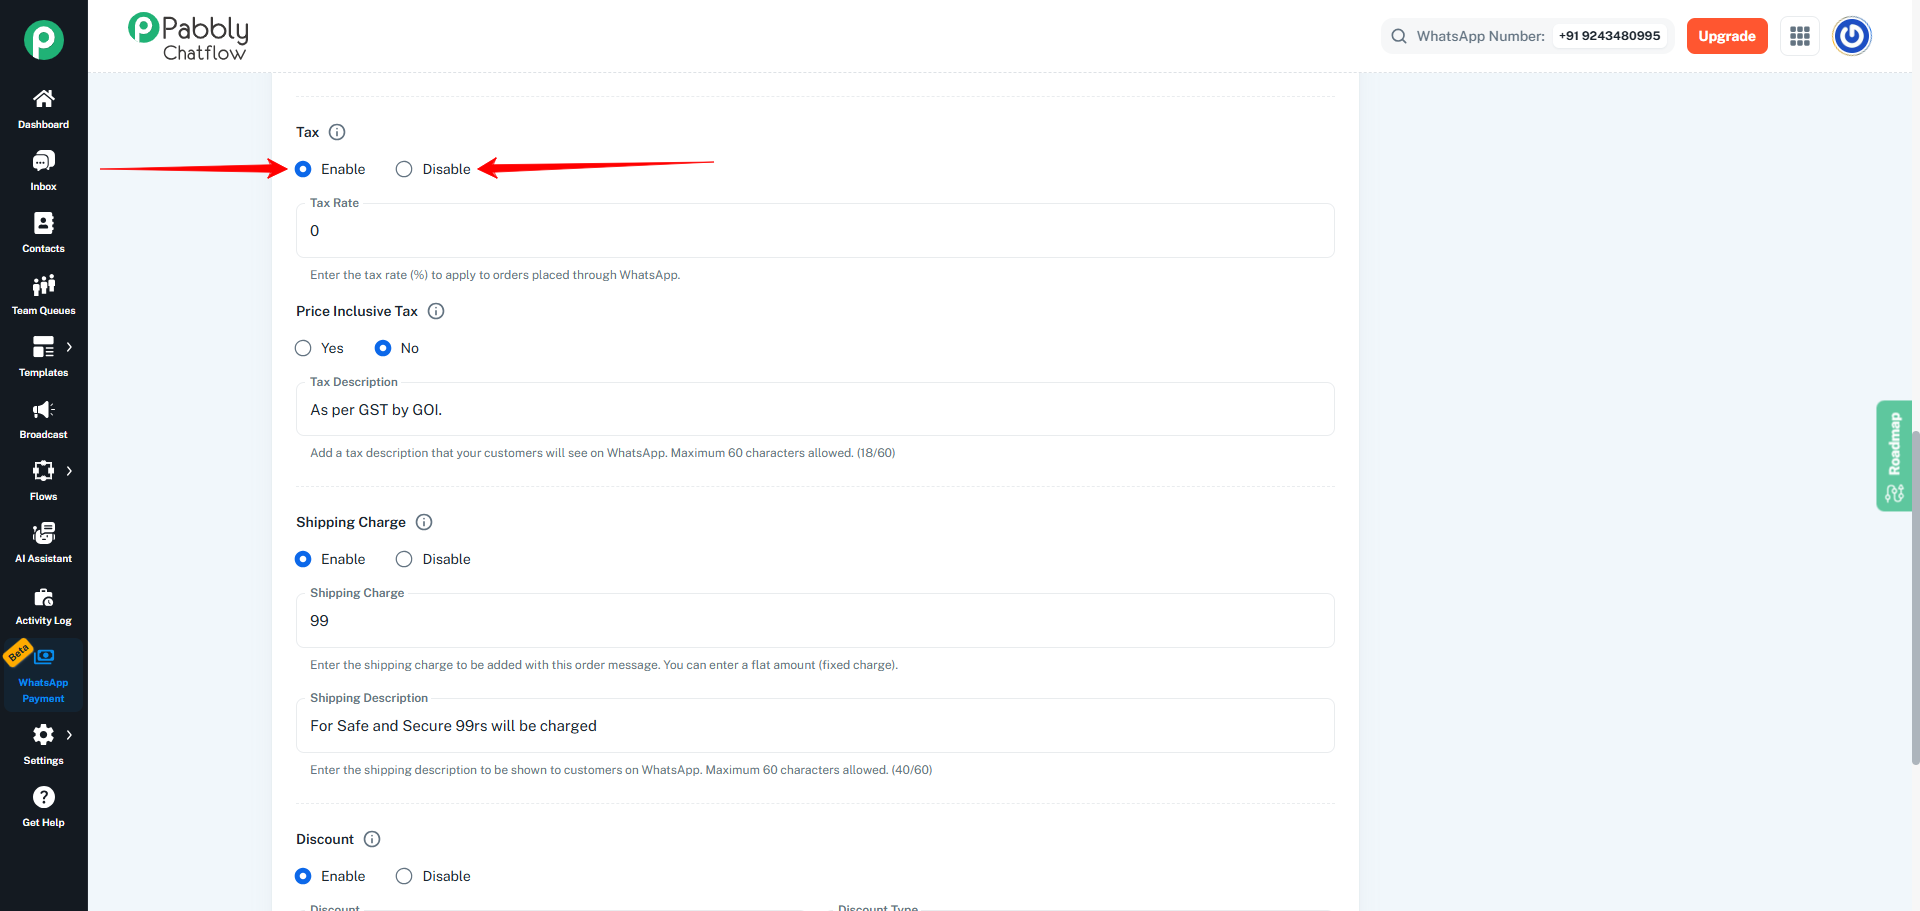
This step controls whether tax is applied to the order.
11.1 Enable or Disable Tax
- Go to the Tax section.
- Choose:
- Enable – to apply tax
- Disable – to remove tax
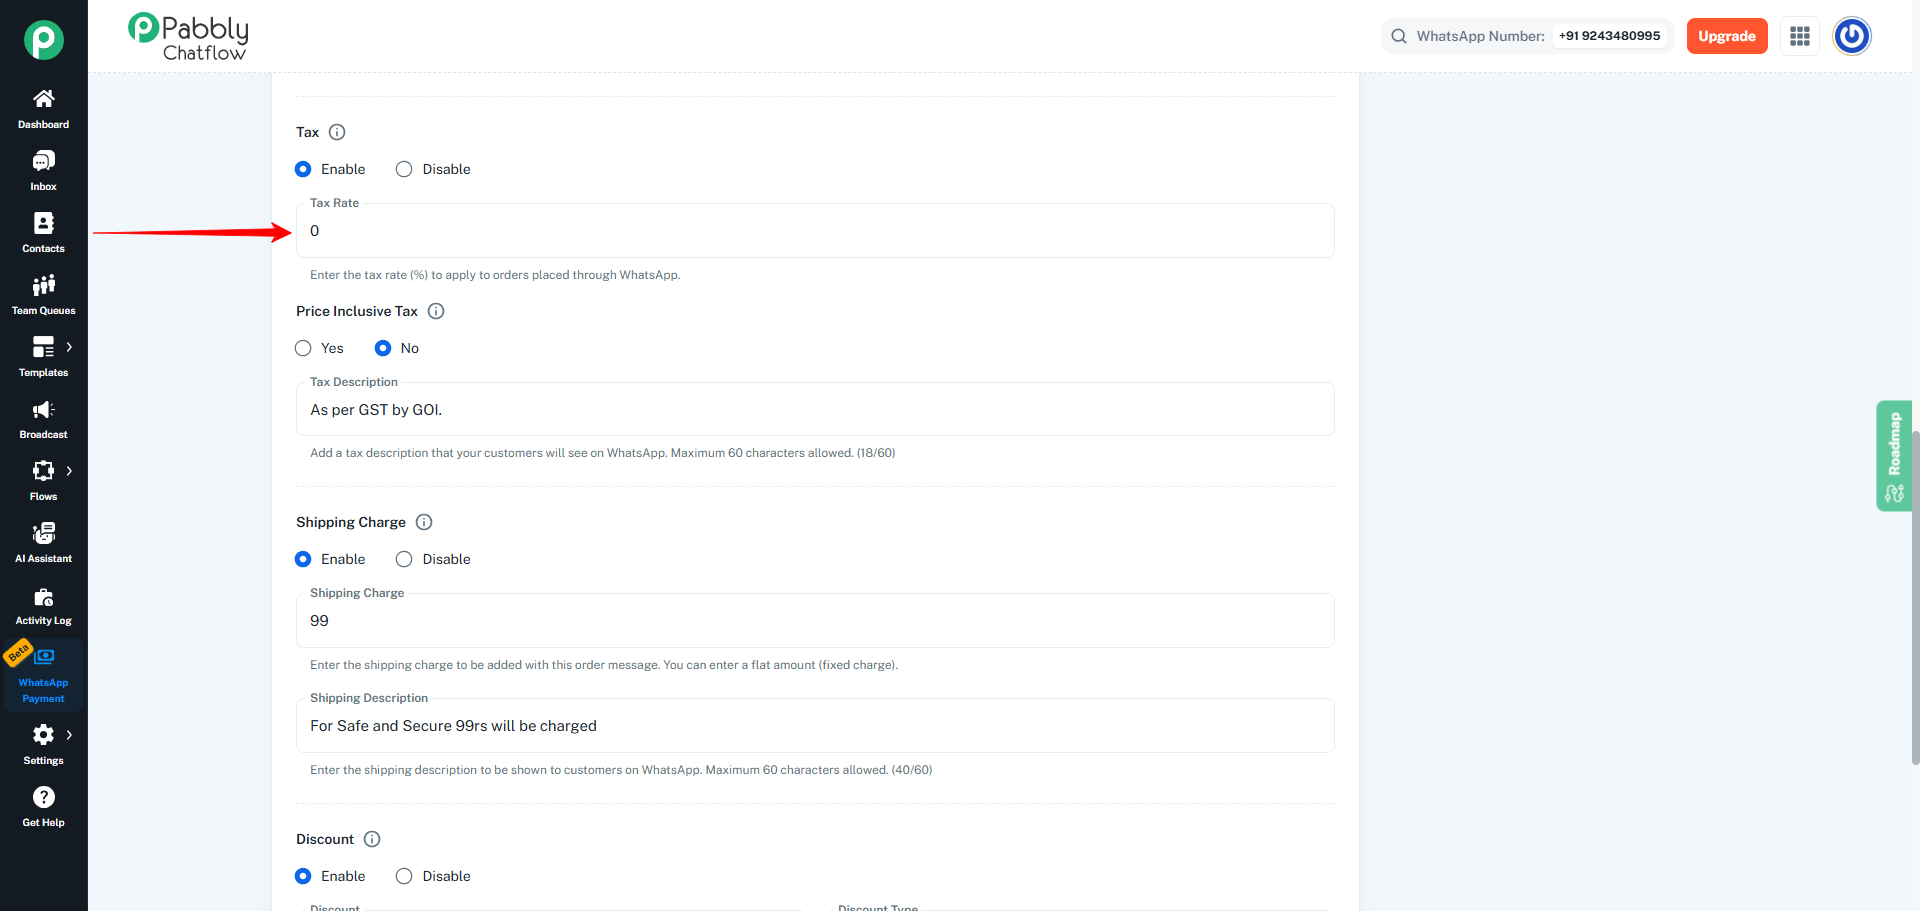
11.2 Enter Tax Rate
- If Tax is enabled, enter the Tax Rate (%) (for example:
18).
- This percentage will be applied to the order total.
11.3 Select Price Inclusive Tax
- Choose:
- Yes – if product prices already include tax
- No – if tax should be added separately
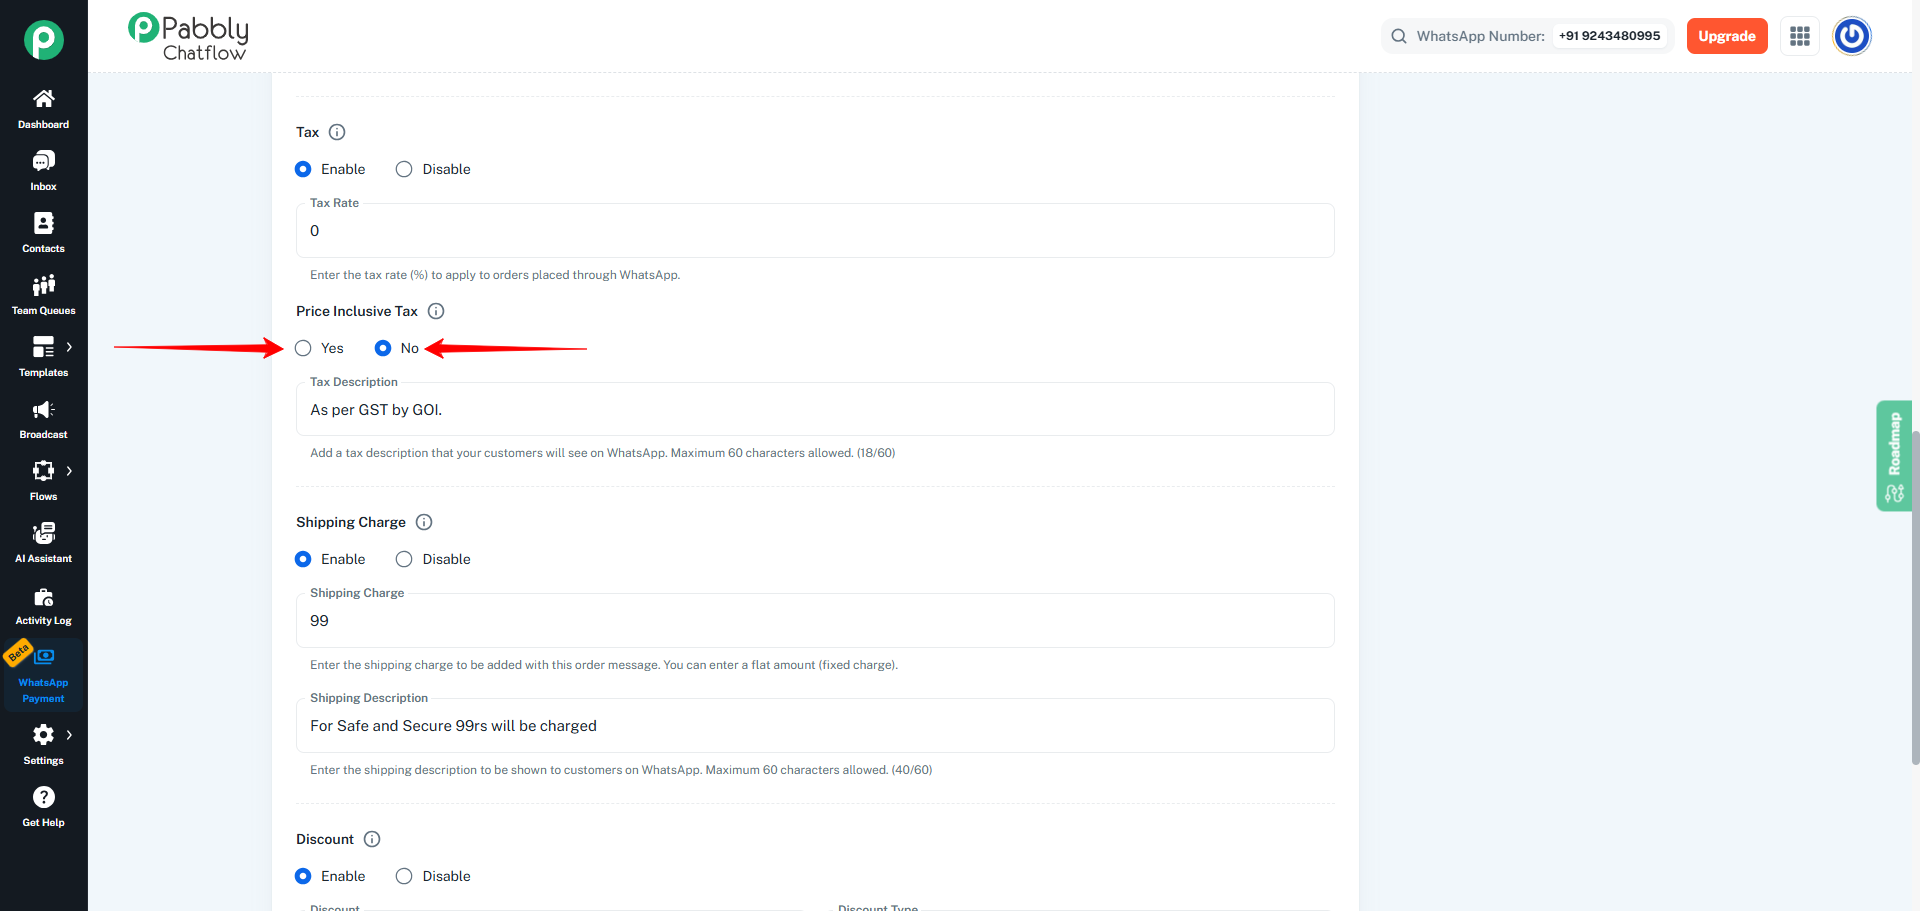
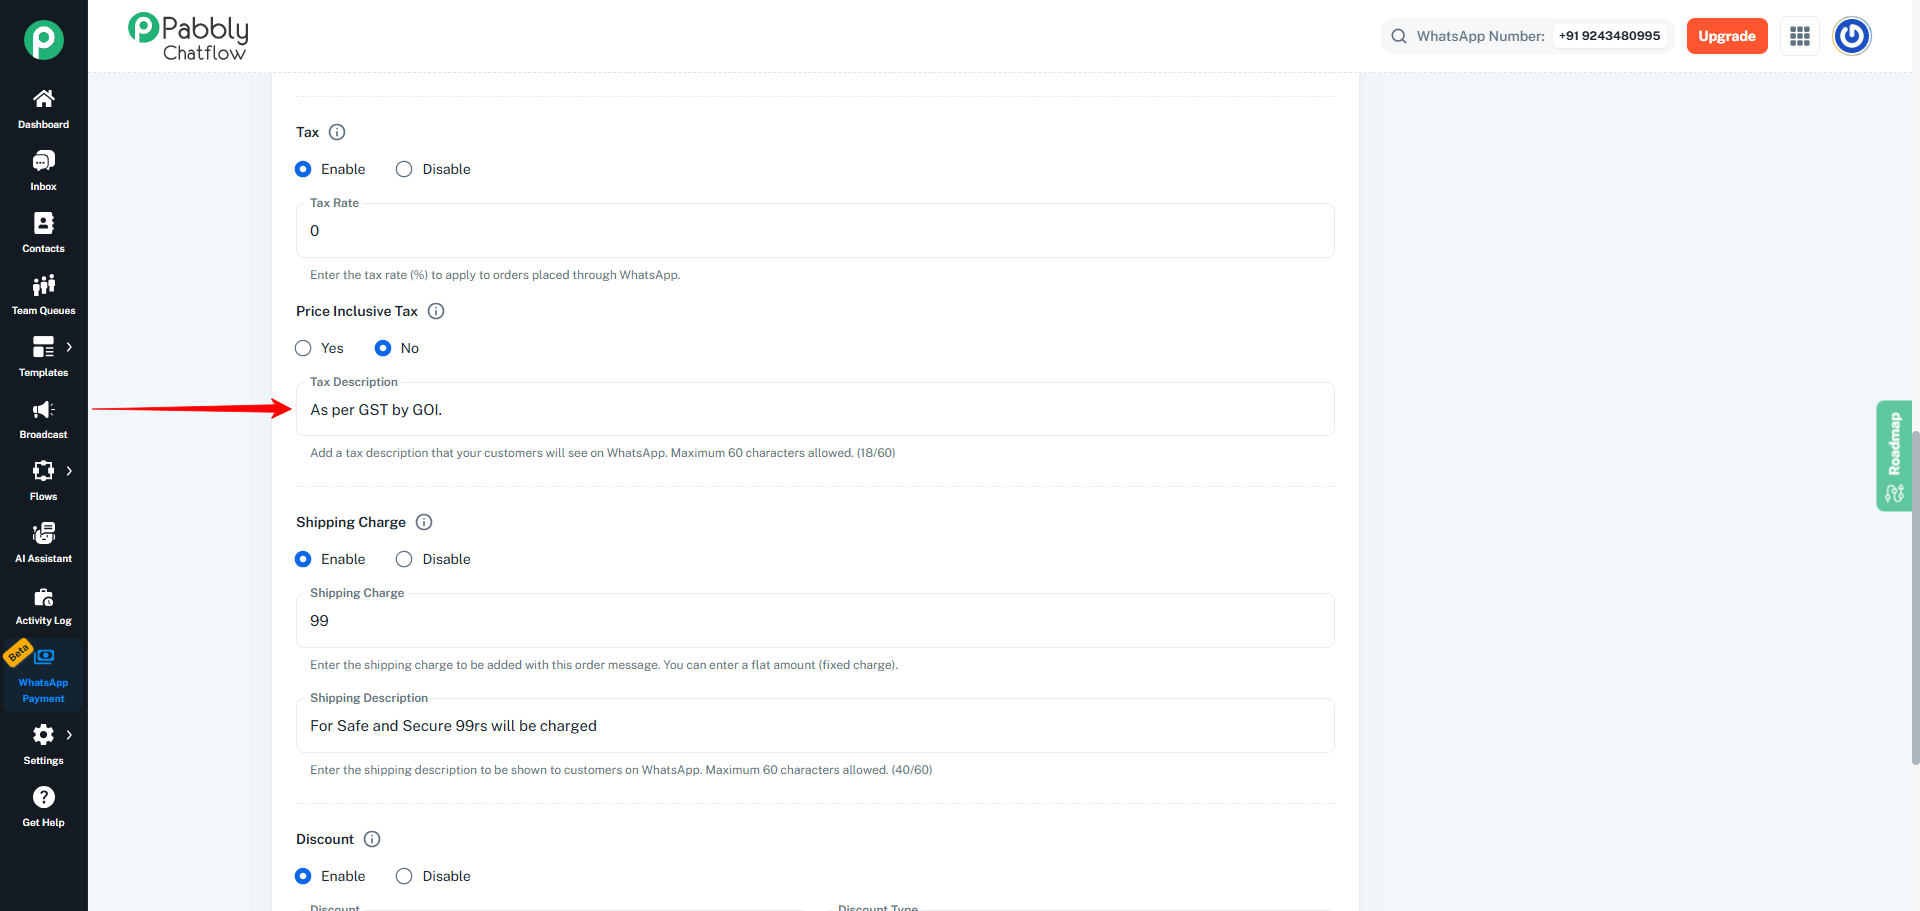
11.4 Add Tax Description
- Enter a short description customers will see on WhatsApp.
- Example: “As per GST by GOI”
- Maximum 60 characters allowed.
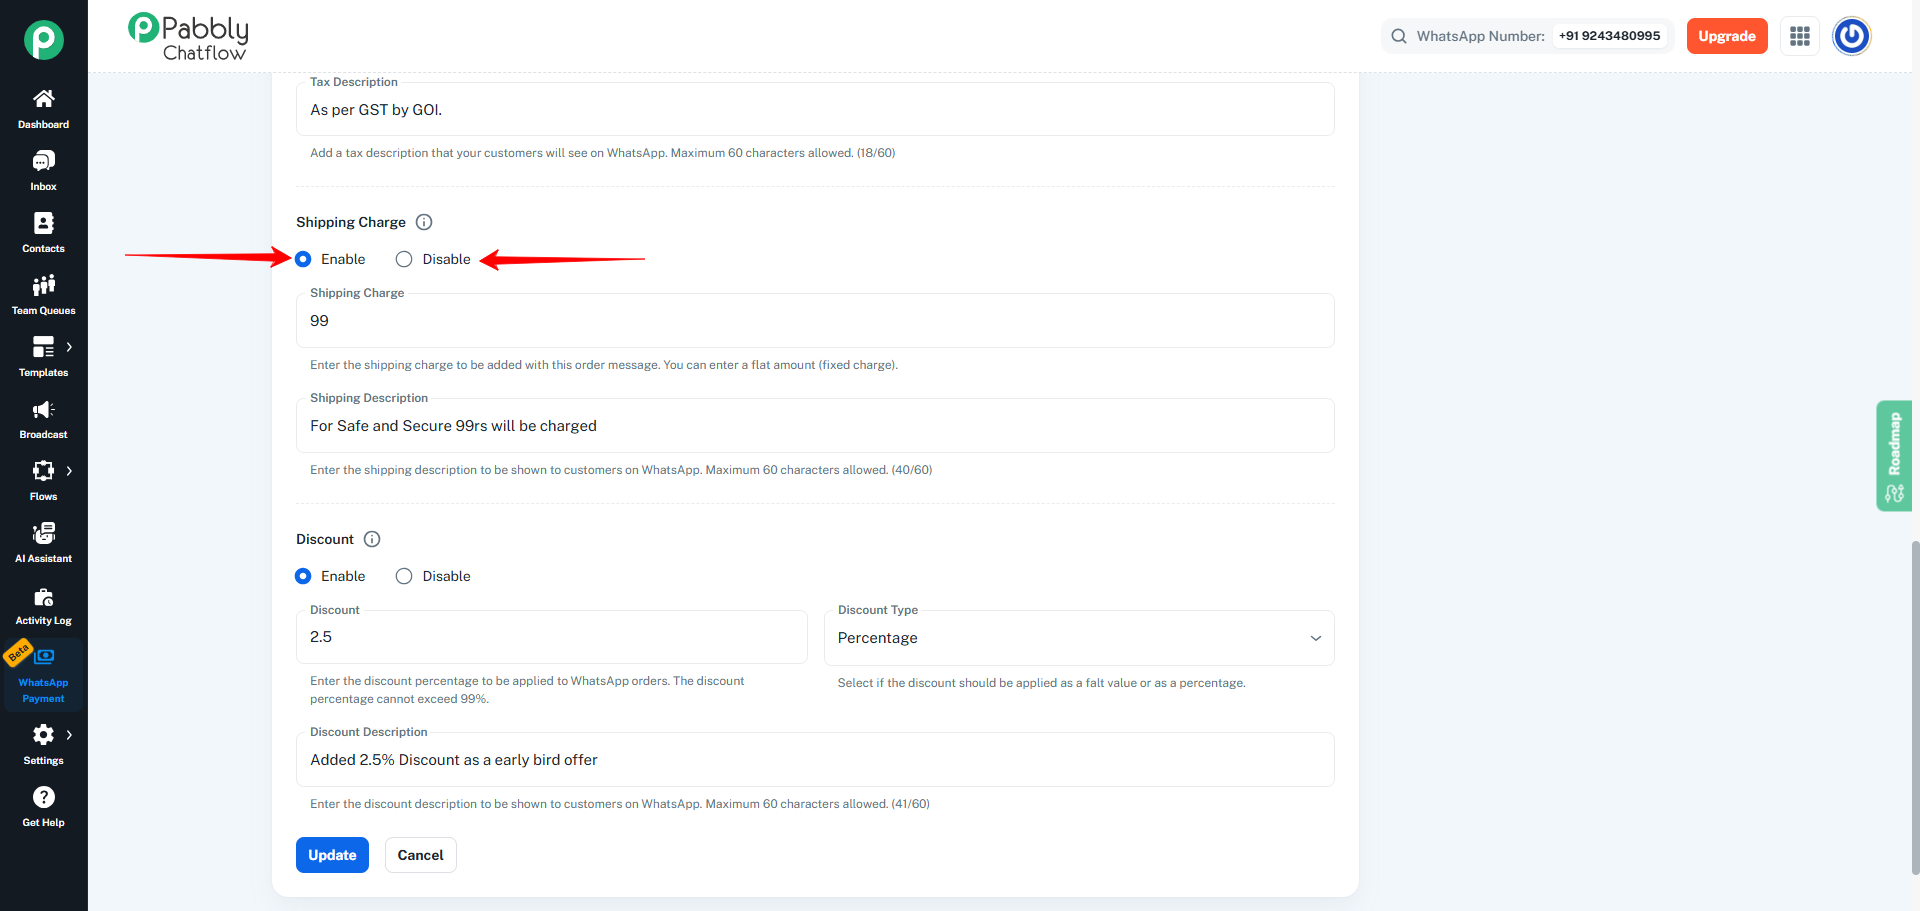
This step controls delivery or handling charges.
12.1 Enable or Disable Shipping Charge
- Go to the Shipping Charge section.
- Select:
- Enable – to apply shipping charge
- Disable – to remove shipping charge
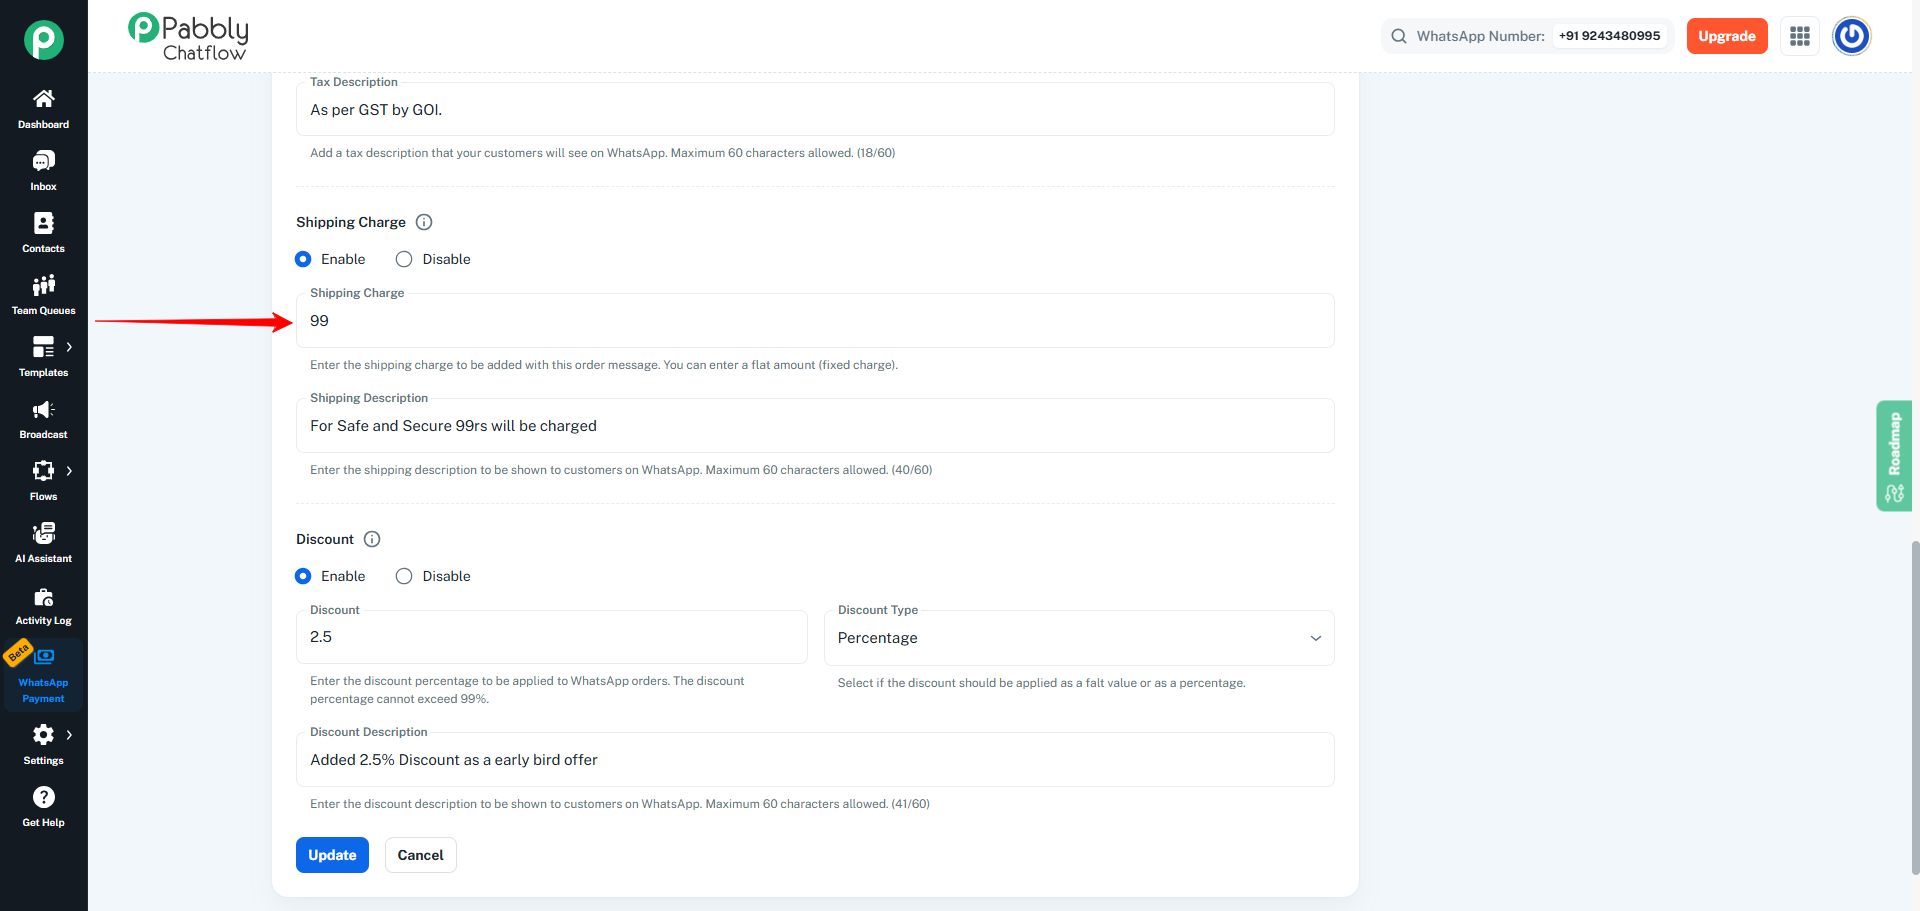
12.2 Enter Shipping Charge Amount
- Enter the shipping amount (for example:
99).
- This will be added to the order total as a flat charge.
12.3 Add Shipping Description
- Enter a short customer-facing message.
- Example: “For Safe and Secure ₹99 will be charged”
- Maximum 60 characters allowed.
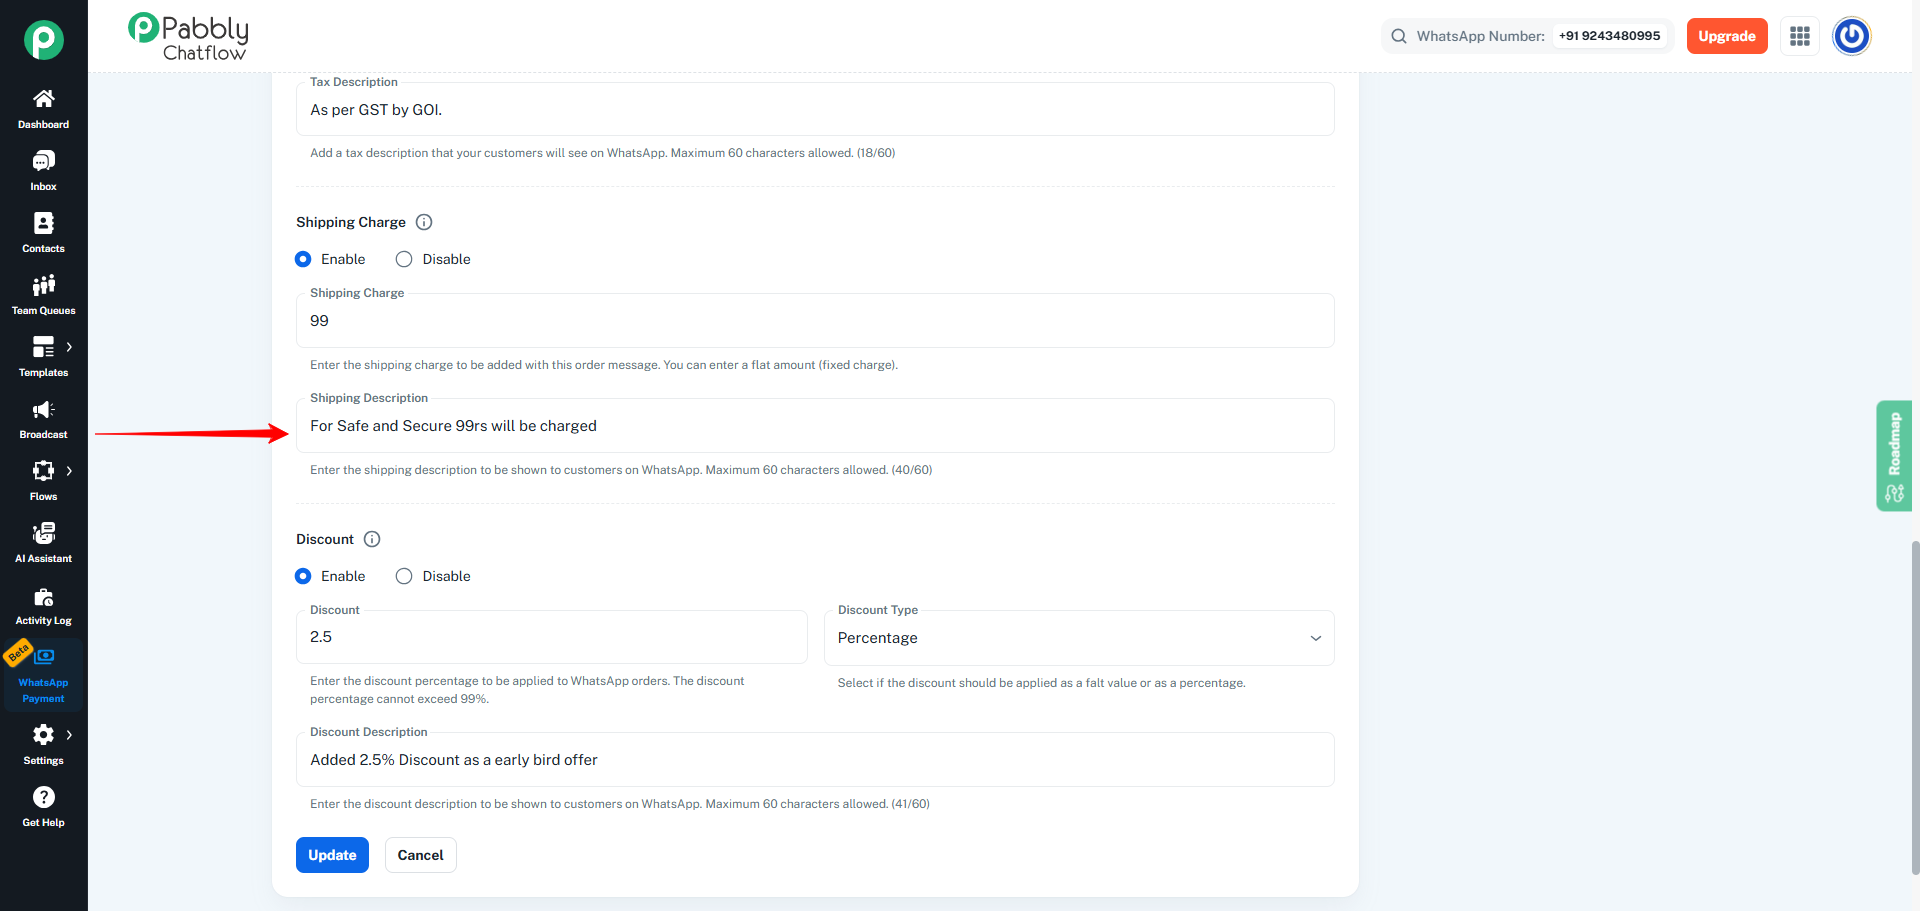
This step controls promotional discounts.
13.1 Enable or Disable Discount
- Go to the Discount section.
- Select:
- ✅ Enable – to apply discount
- ❌ Disable – to remove discount
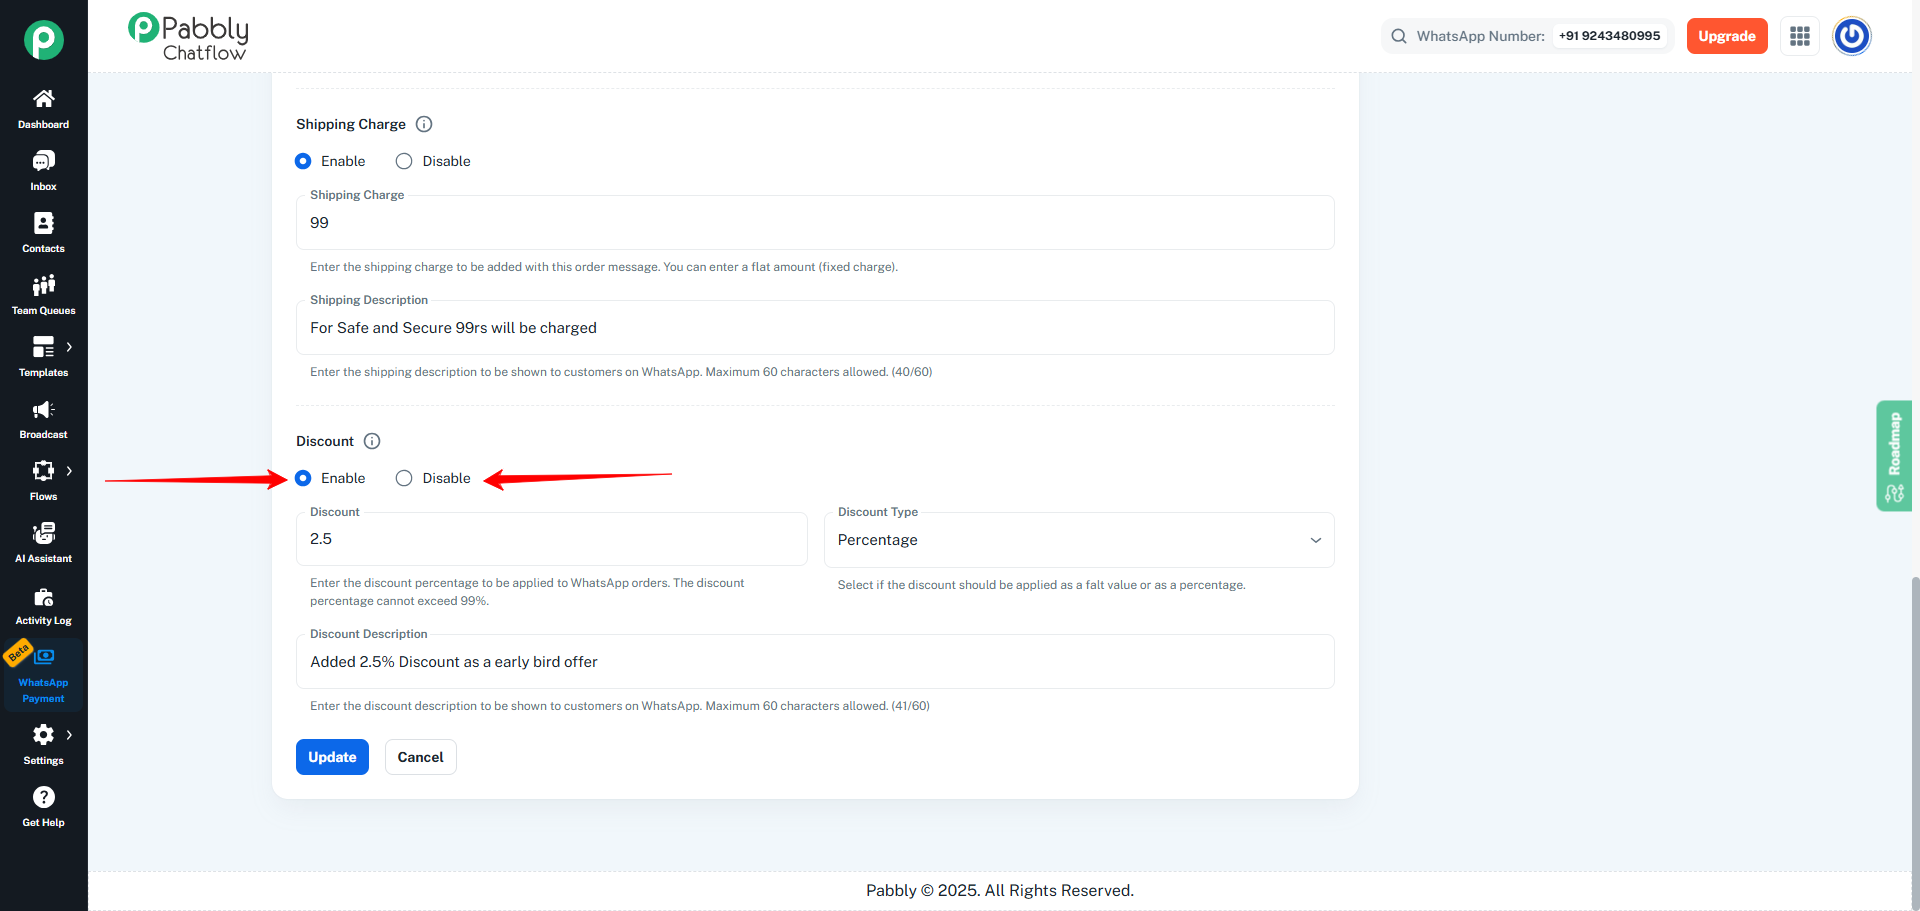
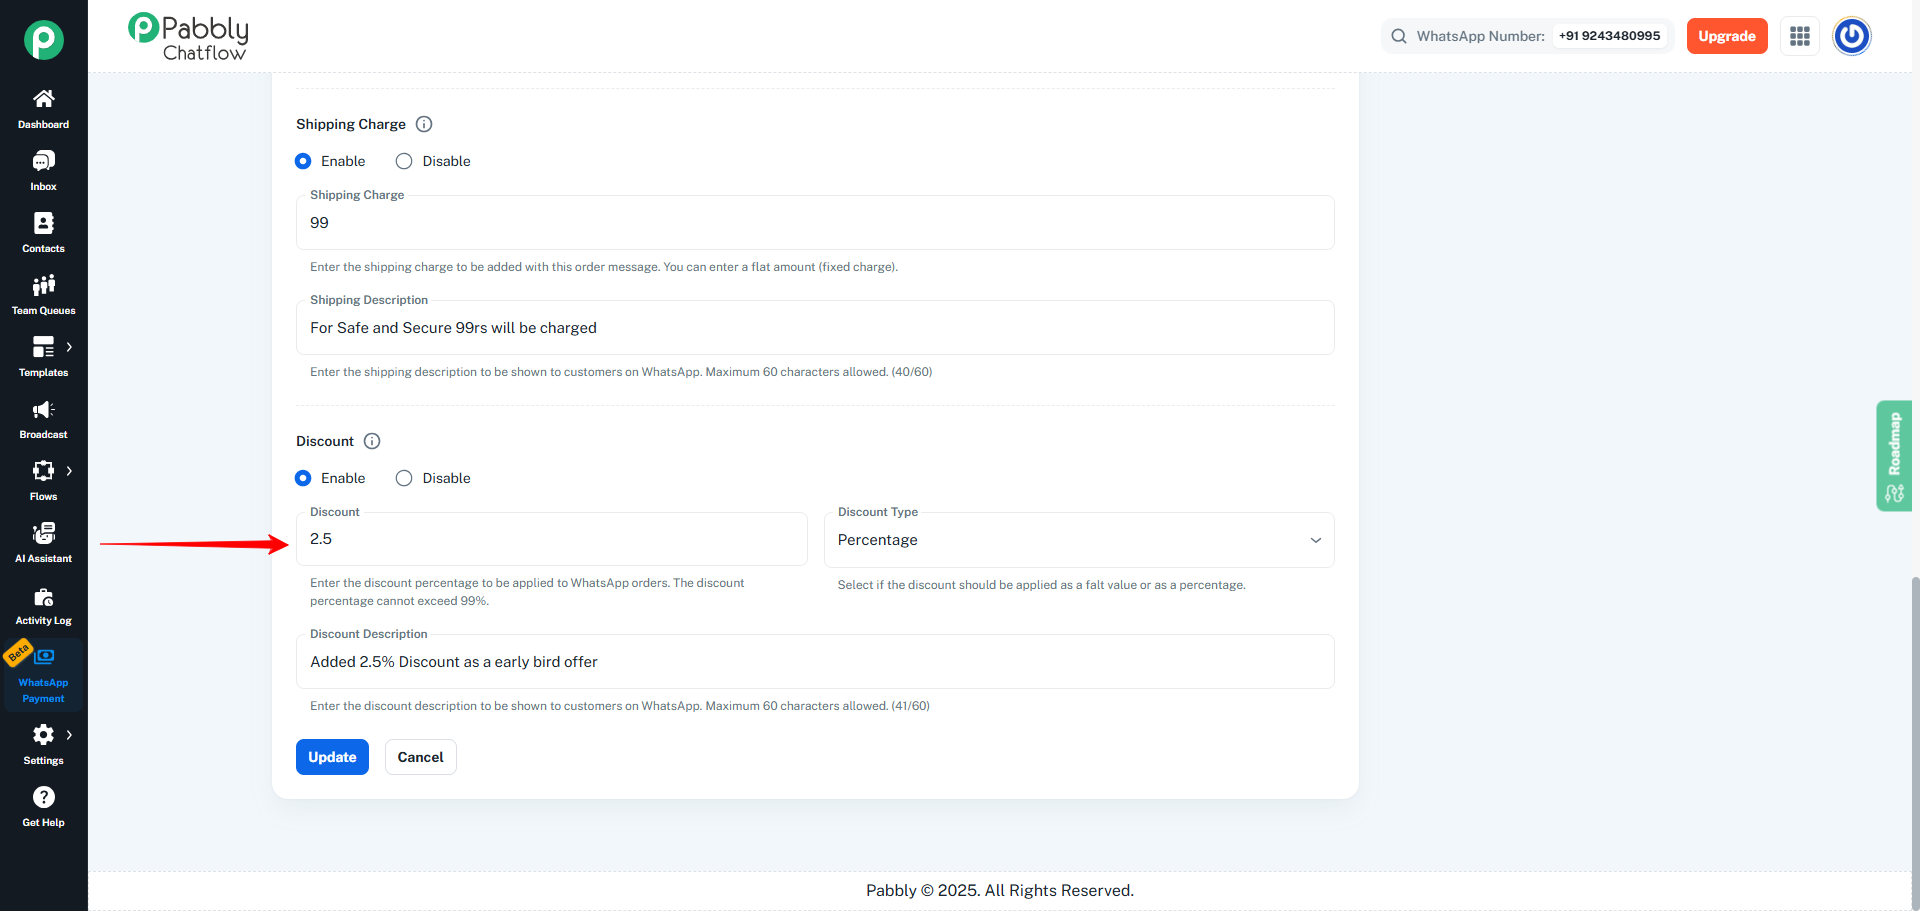
13.2 Enter Discount Value
- Enter the discount value (for example:
2.5).
- The value will be applied based on the Discount Type you choose.
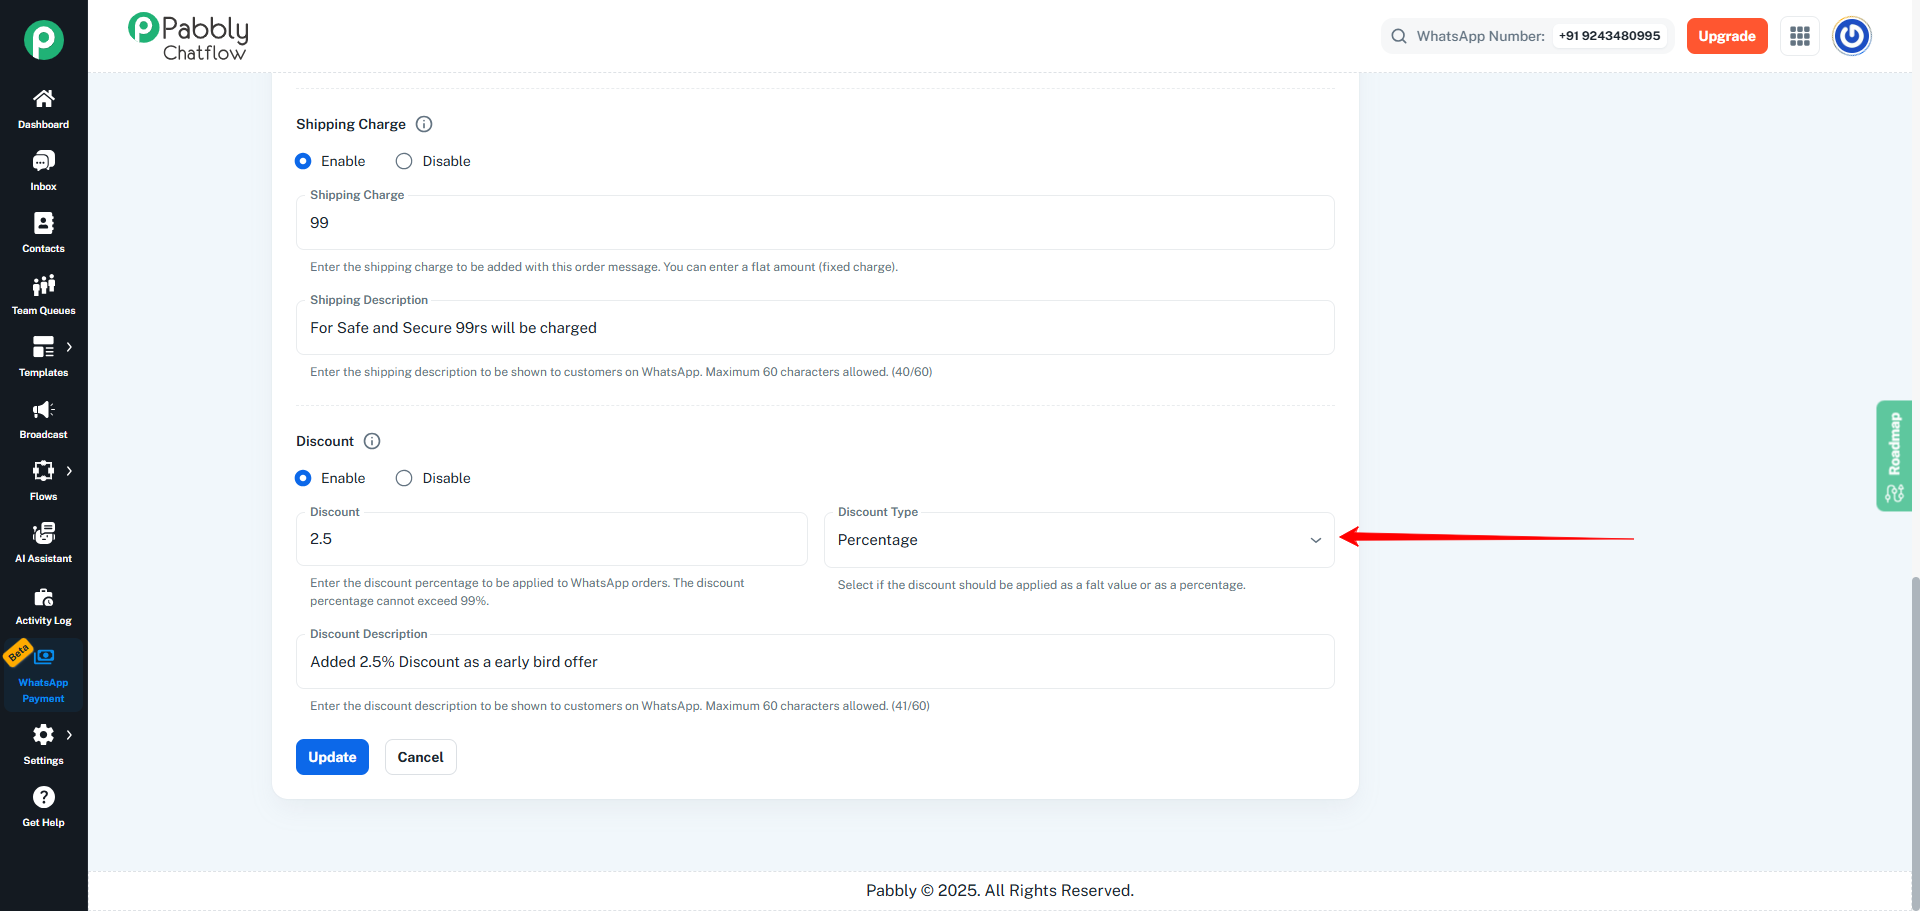
13.3 Select Discount Type
- Open the Discount Type dropdown.
- Choose:
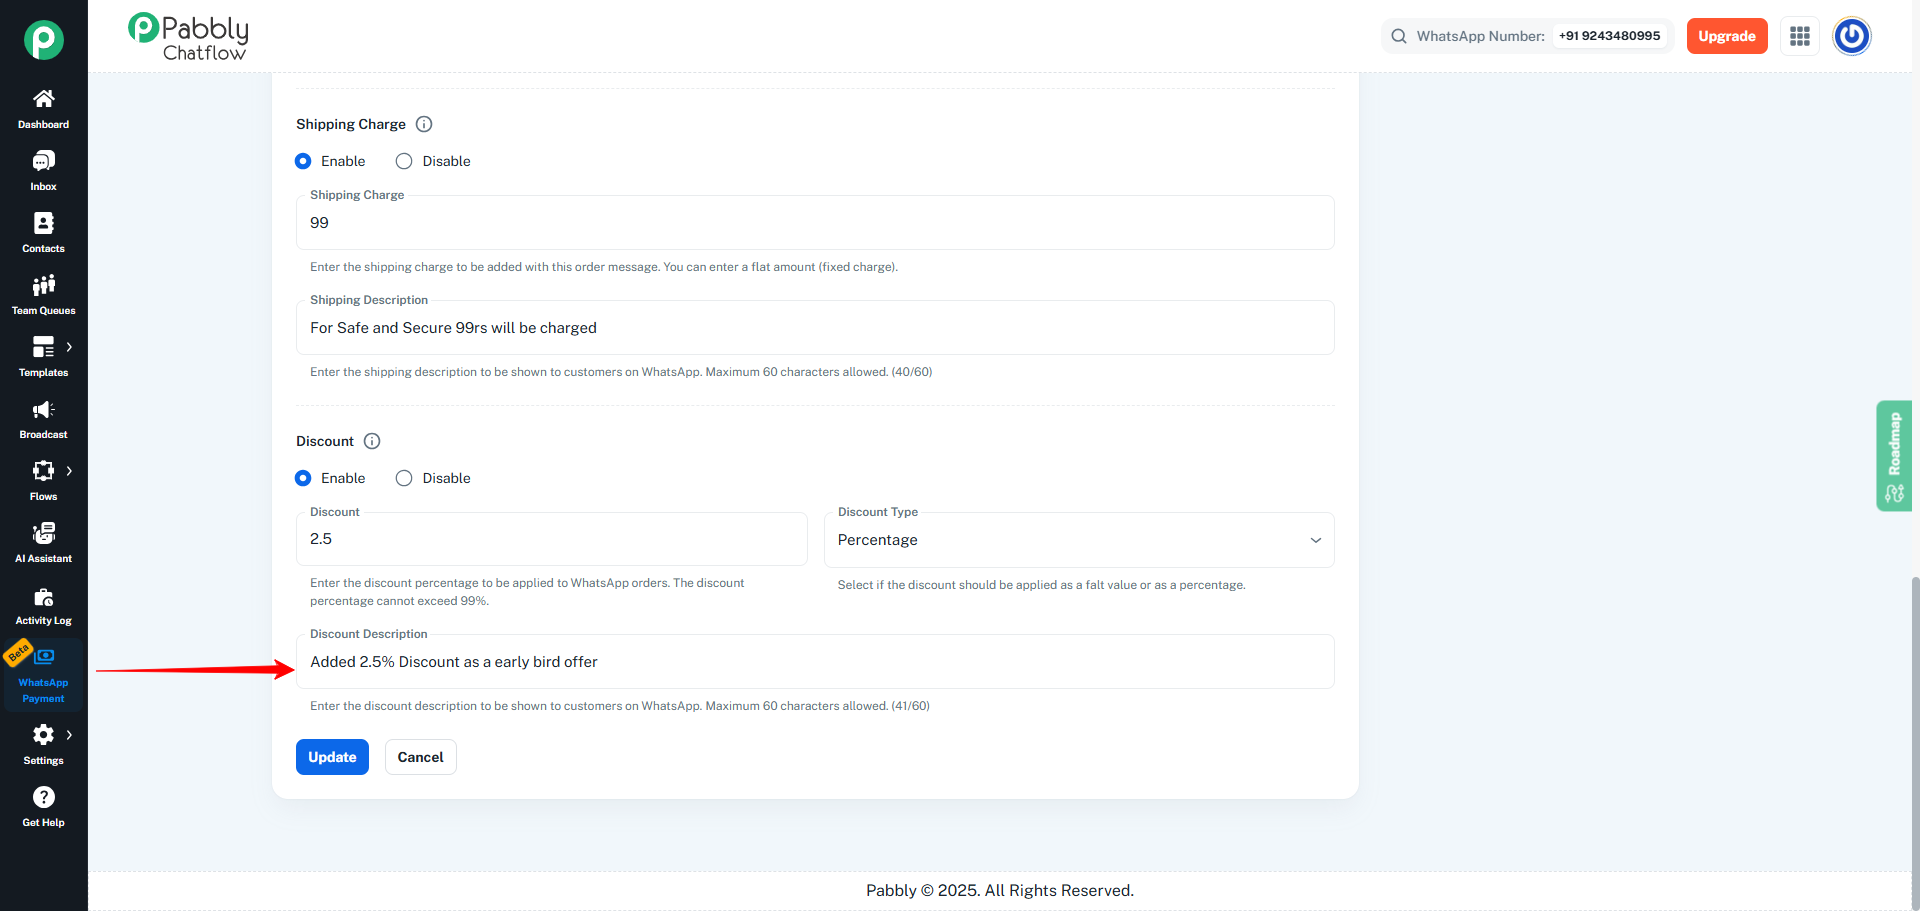
13.4 Add Discount Description
- Enter a short discount message for customers.
- Example: “Added 2.5% Discount as an early bird offer”
- Maximum 60 characters allowed.
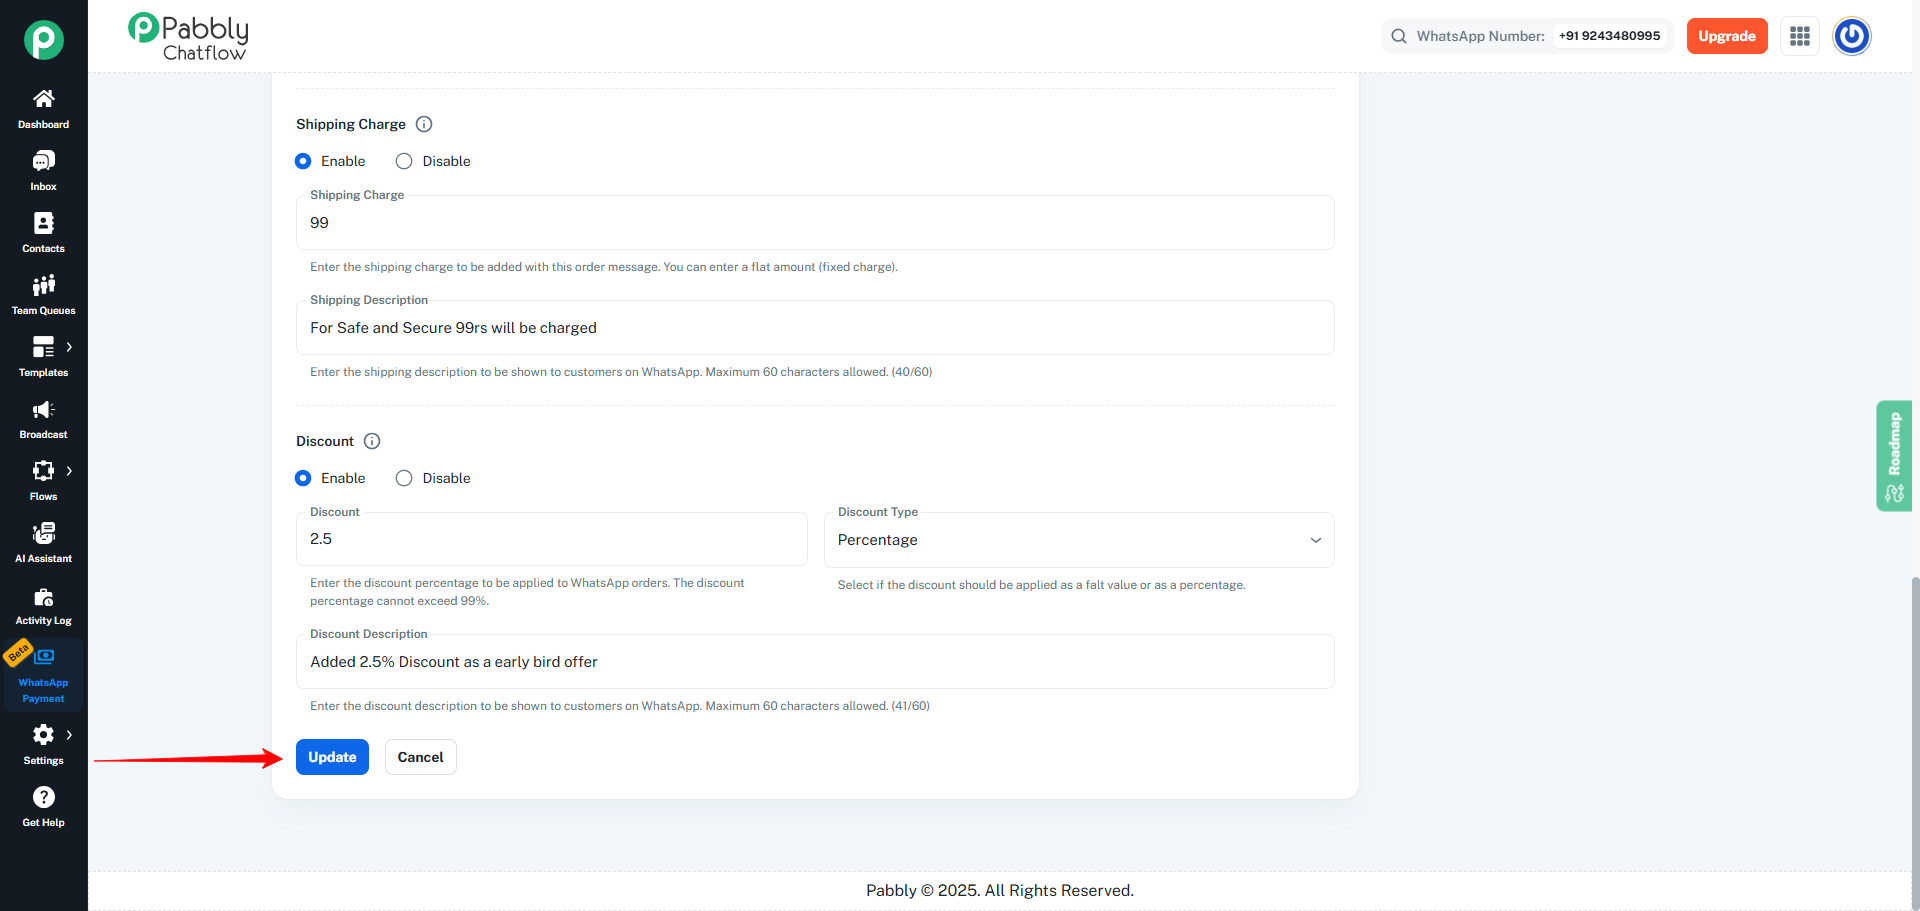
Step 14: Save the changes
- Click on the Update button to save all changes.
- Your edited Order Message will now be updated successfully.
How to Edit a Custom Product Order Message Type
Step by step explanation only the product editing part for:
-
Custom Product Order Message Type
-
Catalog Product Order Message Type
Note: Steps 1 to 13 (Order Message Name, Type, Product Type, Order Format, Footer, Payment Expiration, Currency, Tax, Shipping, Discount, Update, etc.)
remain exactly the same for both cases.
Only the Product section is different, as described below.
1. Editing Products for Custom Product Order Message
Use these steps when in Step 5 you selected Order Message Type = Custom Product.
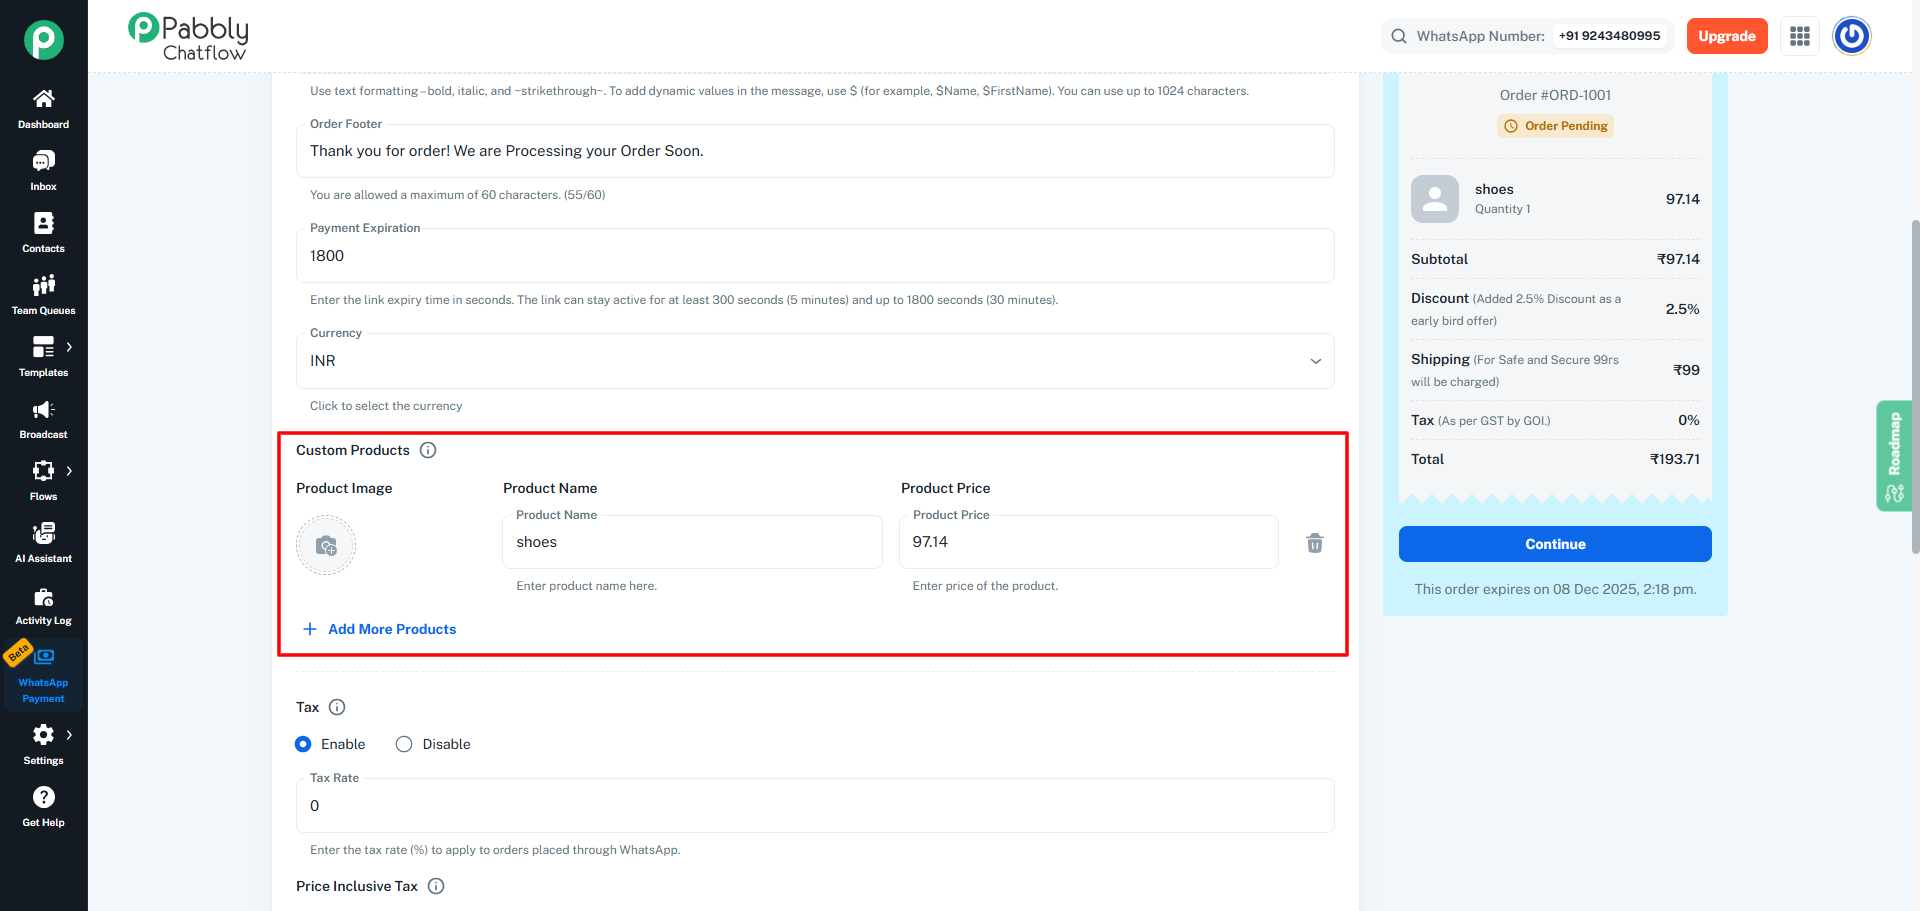
When this type is selected, a Custom Products section becomes visible where you can manually manage each product’s image, name, and price.
1.1 View the Custom Products Section
- Scroll down to the Custom Products section.
- You will see fields for:
- Product Image
- Product Name
- Product Price
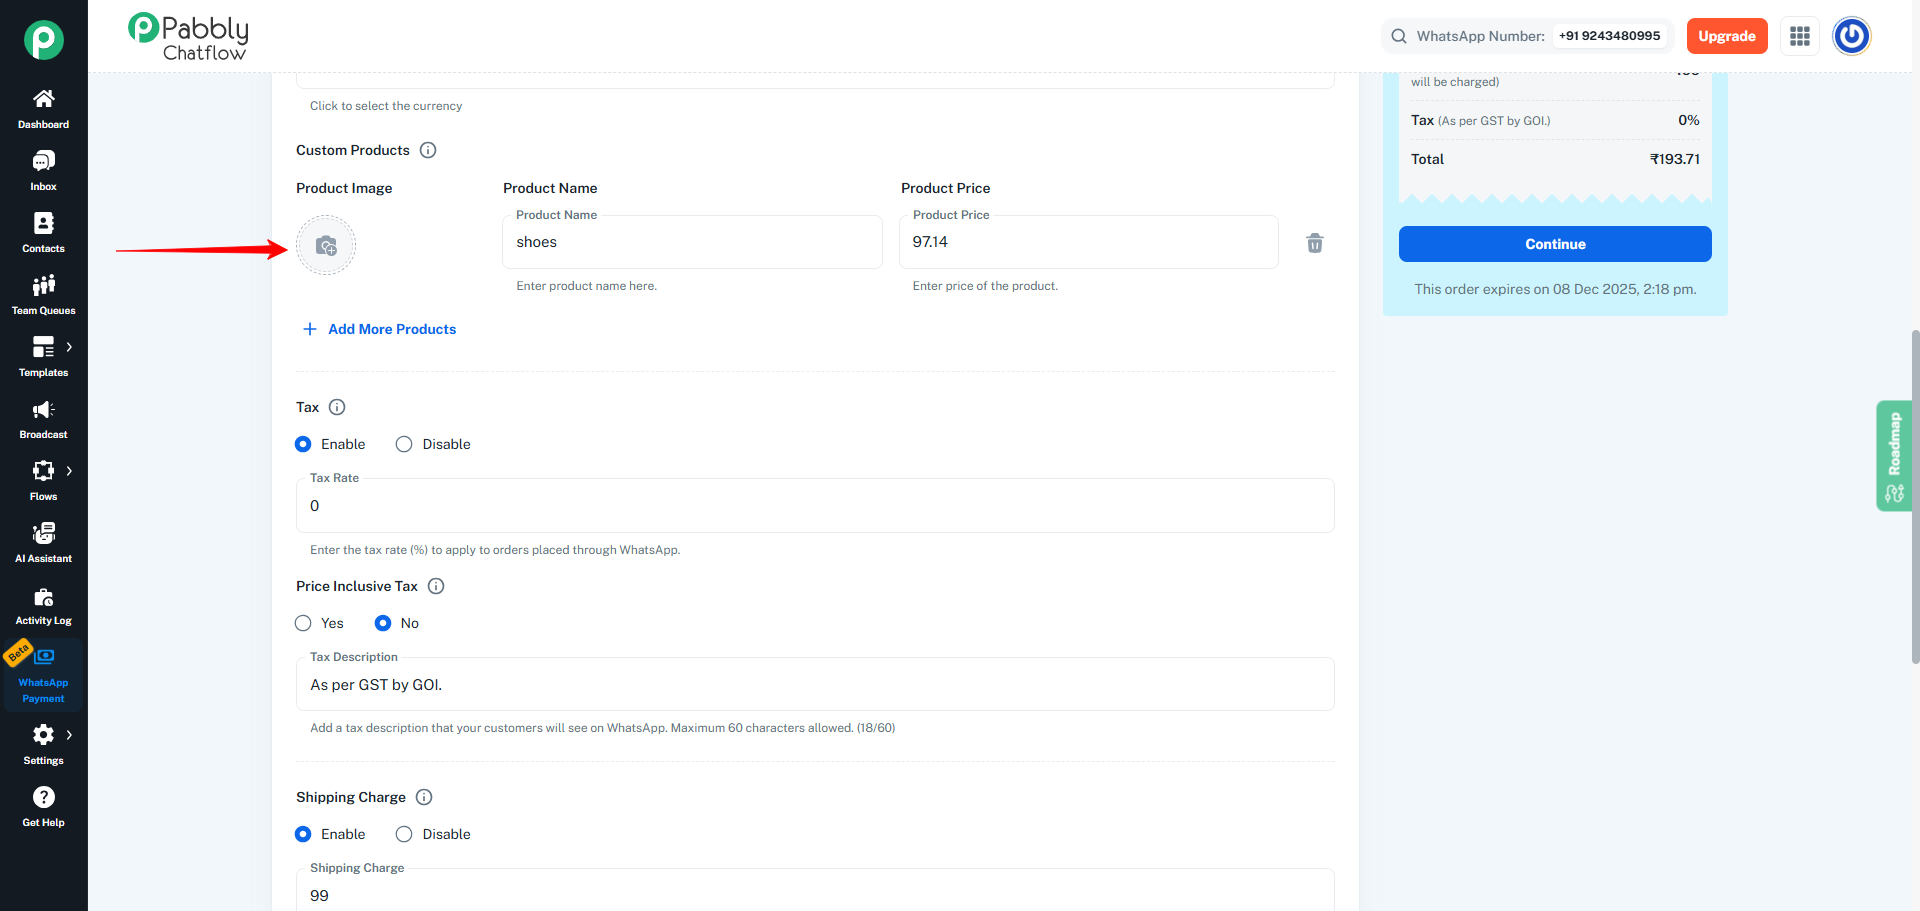
1.2 Change the Product Image
- Click on the image icon under Product Image.
- Select a new image from your system.
- Once uploaded, the new image will appear in the preview and will be used in the order.
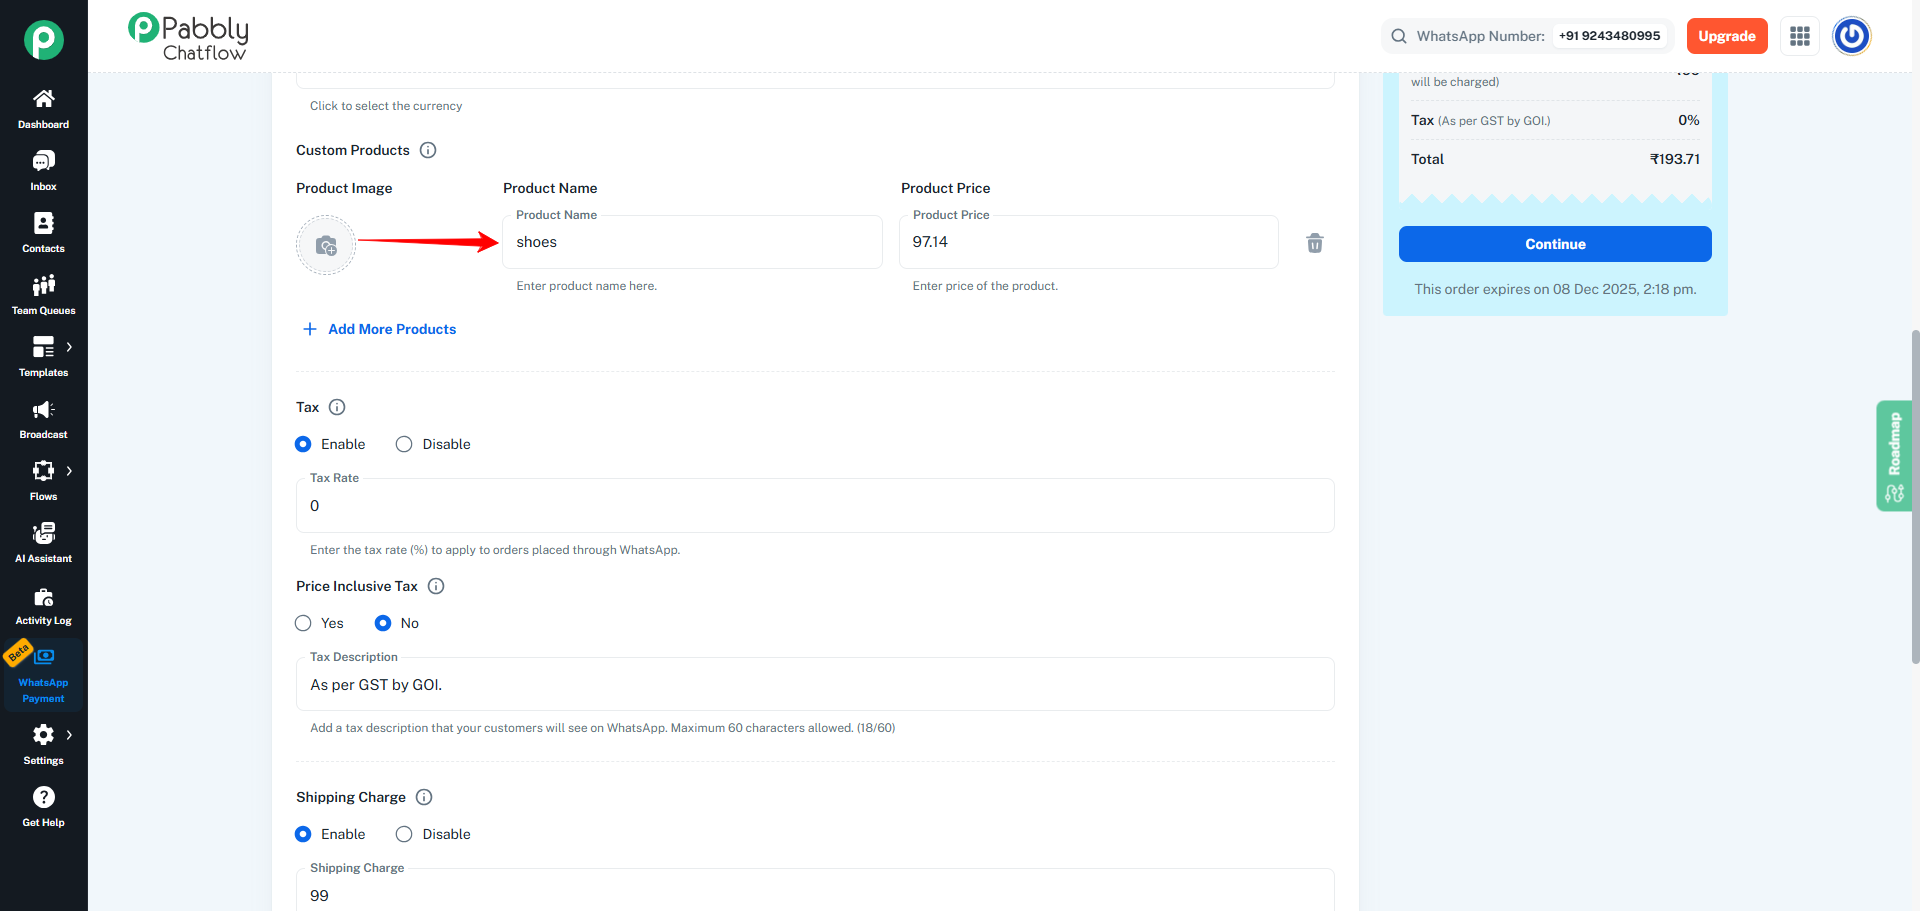
1.3 Edit the Product Name
- In the Product Name field, update the name of the product.
- Use a clear, customer-friendly name (for example: “Black Leather Shoes – Size 9”).
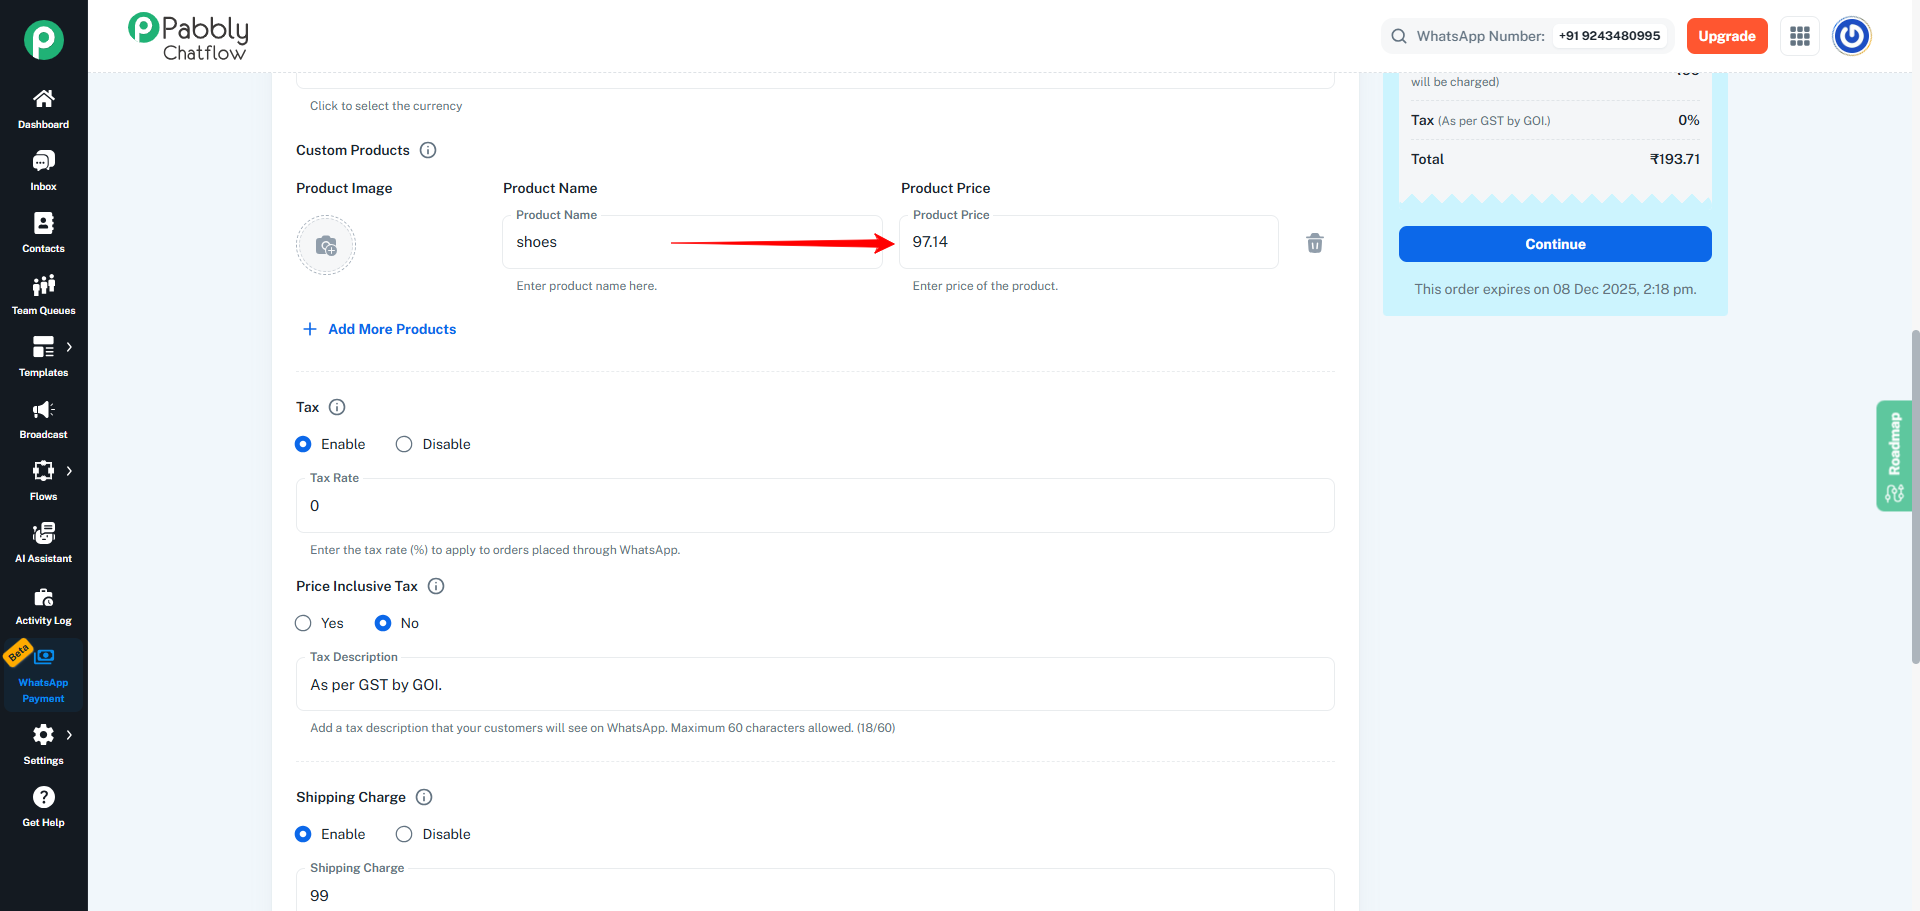
1.4 Edit the Product Price
- In the Product Price field, enter the updated price.
- Make sure the price matches your current catalog or offer.
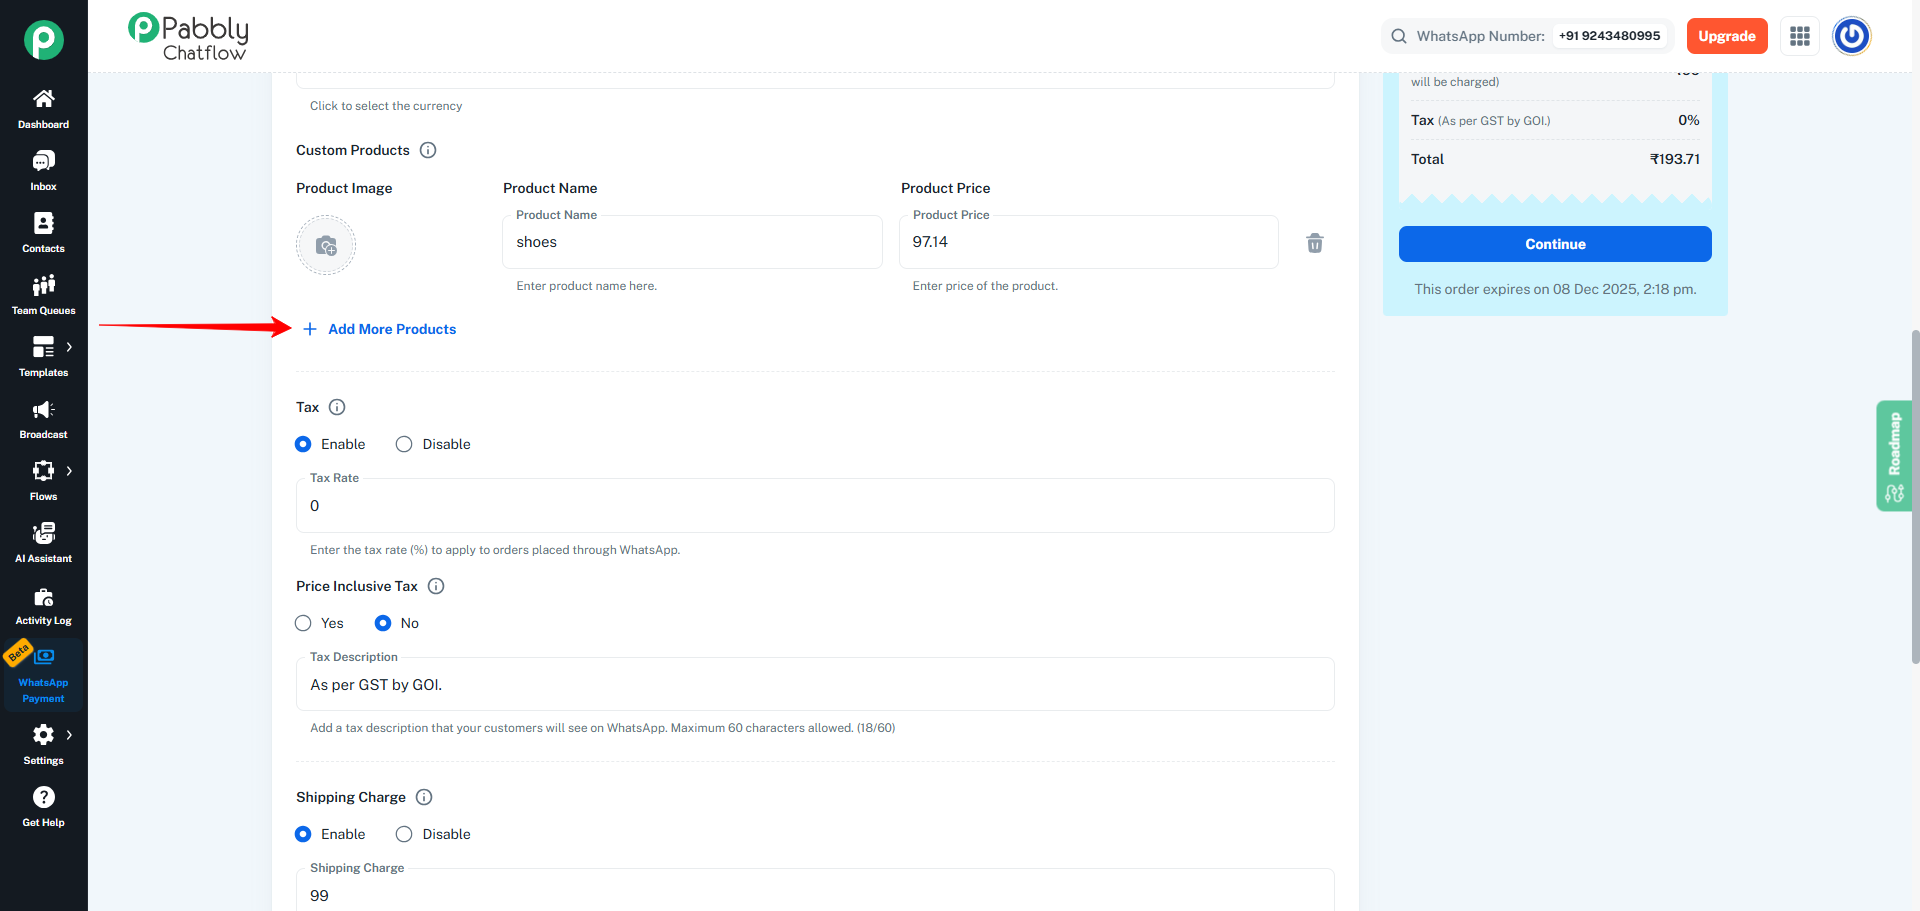
1.5 Add More Products (Optional)
- Click on + Add More Products.
- A new row will appear with Product Image, Product Name, and Product Price fields.
- Fill in the details for the additional product(s).
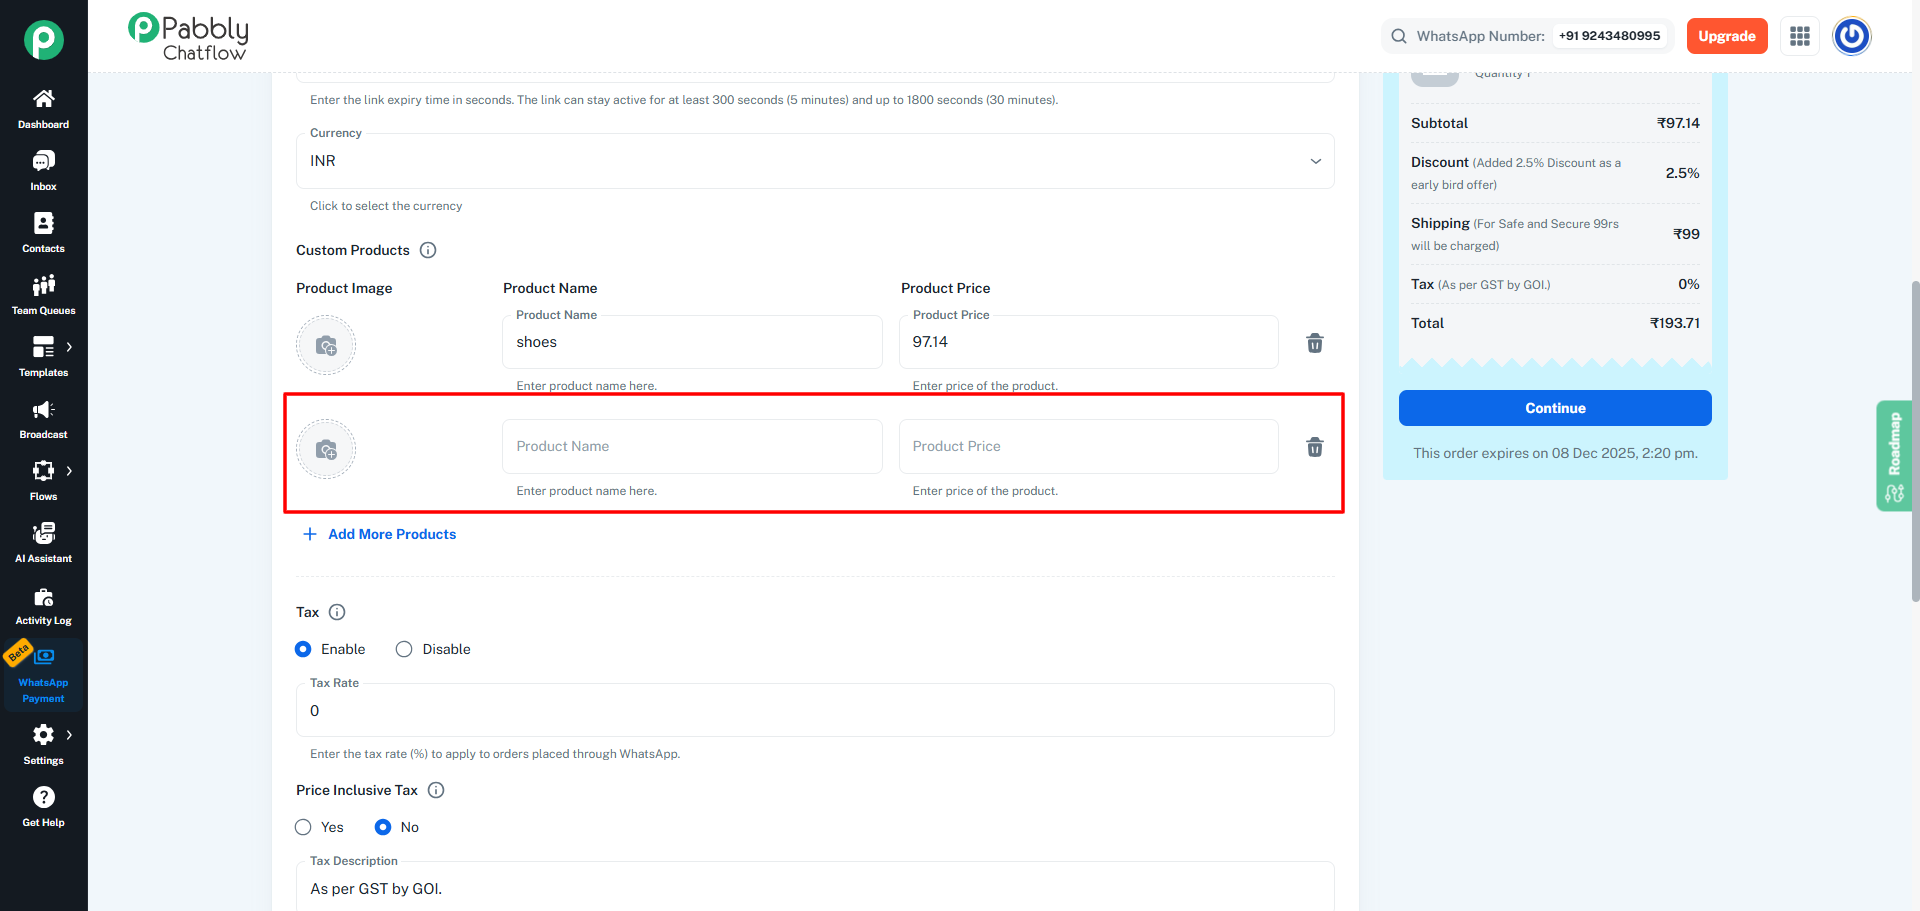
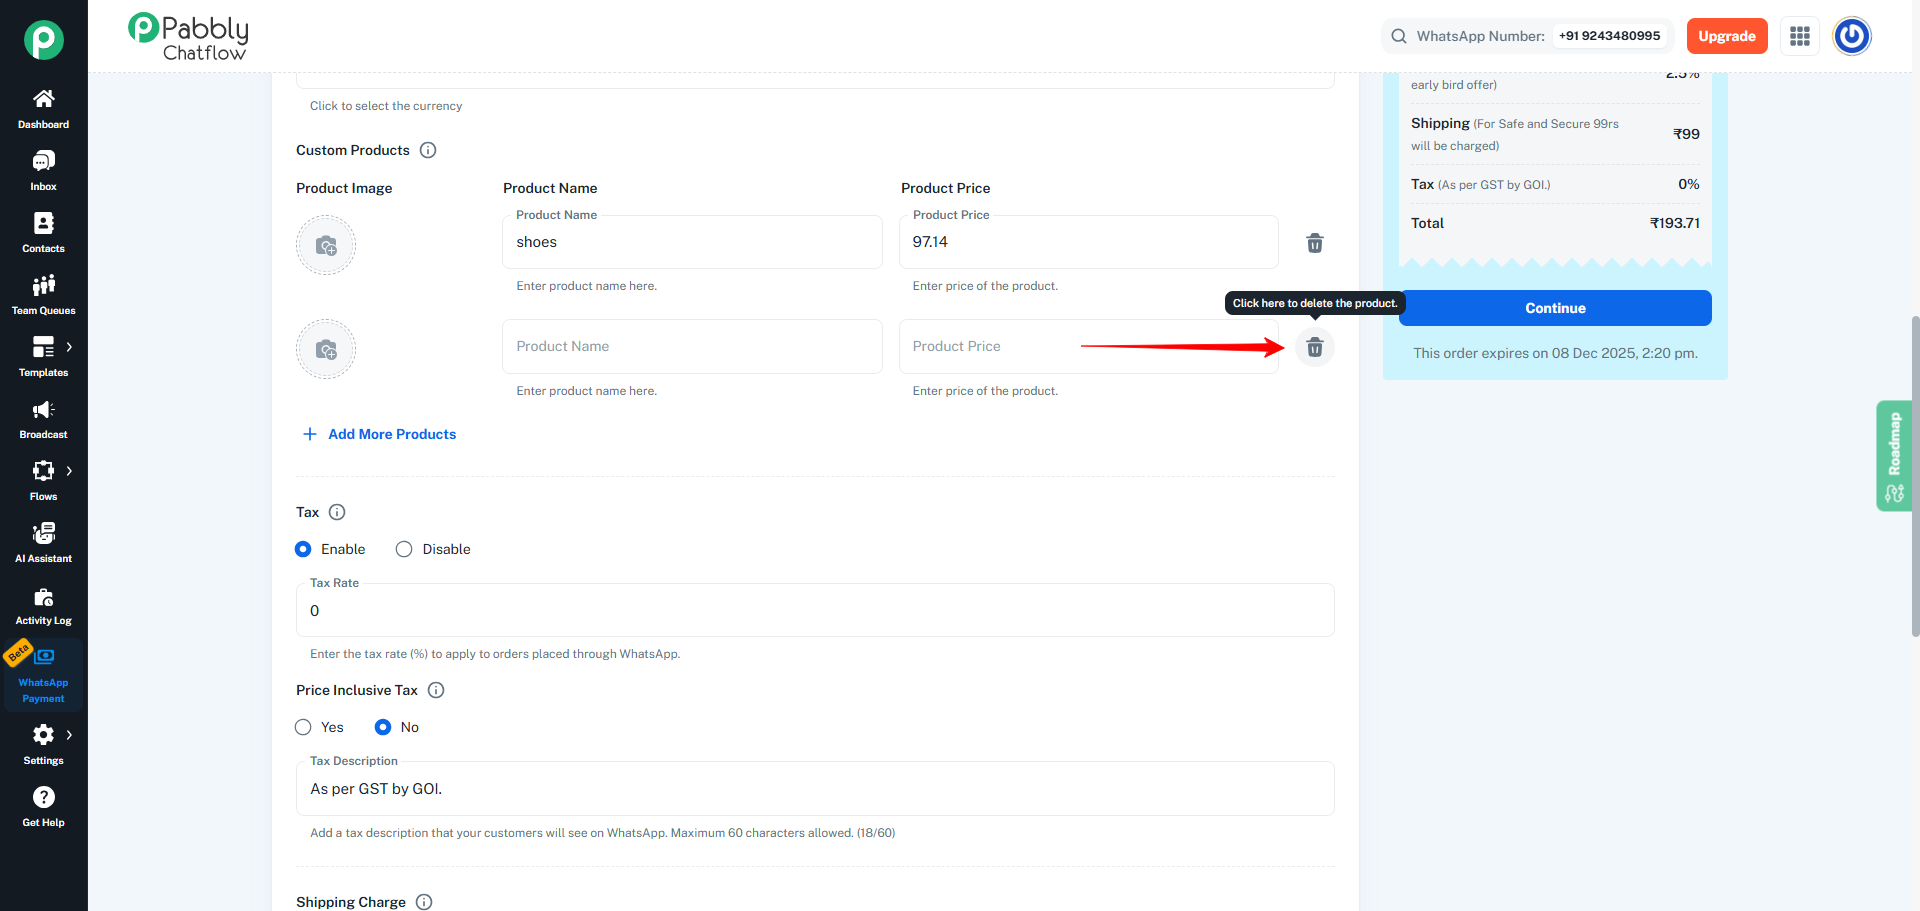
1.6 Delete a Product
- To remove a product, click the trash icon at the end of that product row.
- The selected product will be removed from the order message.
After editing Custom Products, continue with the same Step 10 (Currency), Step 11 (Tax), Step 12 (Shipping), Step 13 (Discount) and finally click Update as already documented.
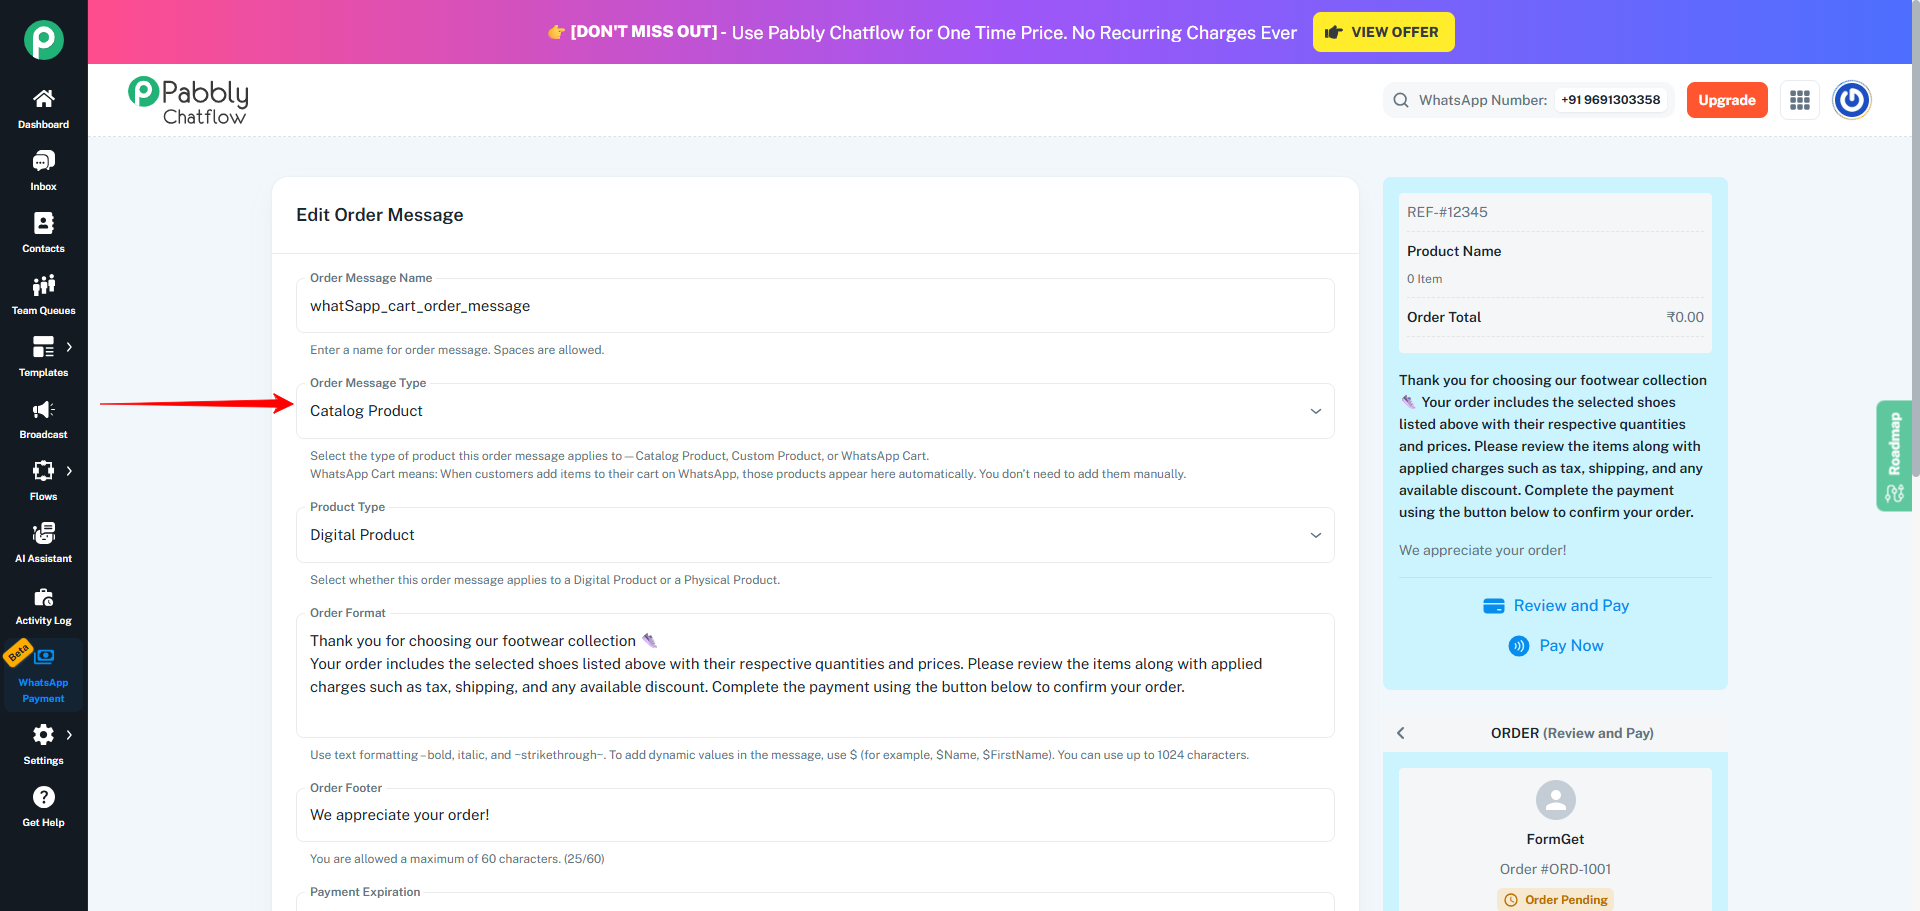
2. Editing Products for Catalog Product Order Message
Use these steps when in Step 5 you selected Order Message Type = Catalog Product.
When this type is selected, you first choose products from your connected catalog, and then you can adjust their details if required.
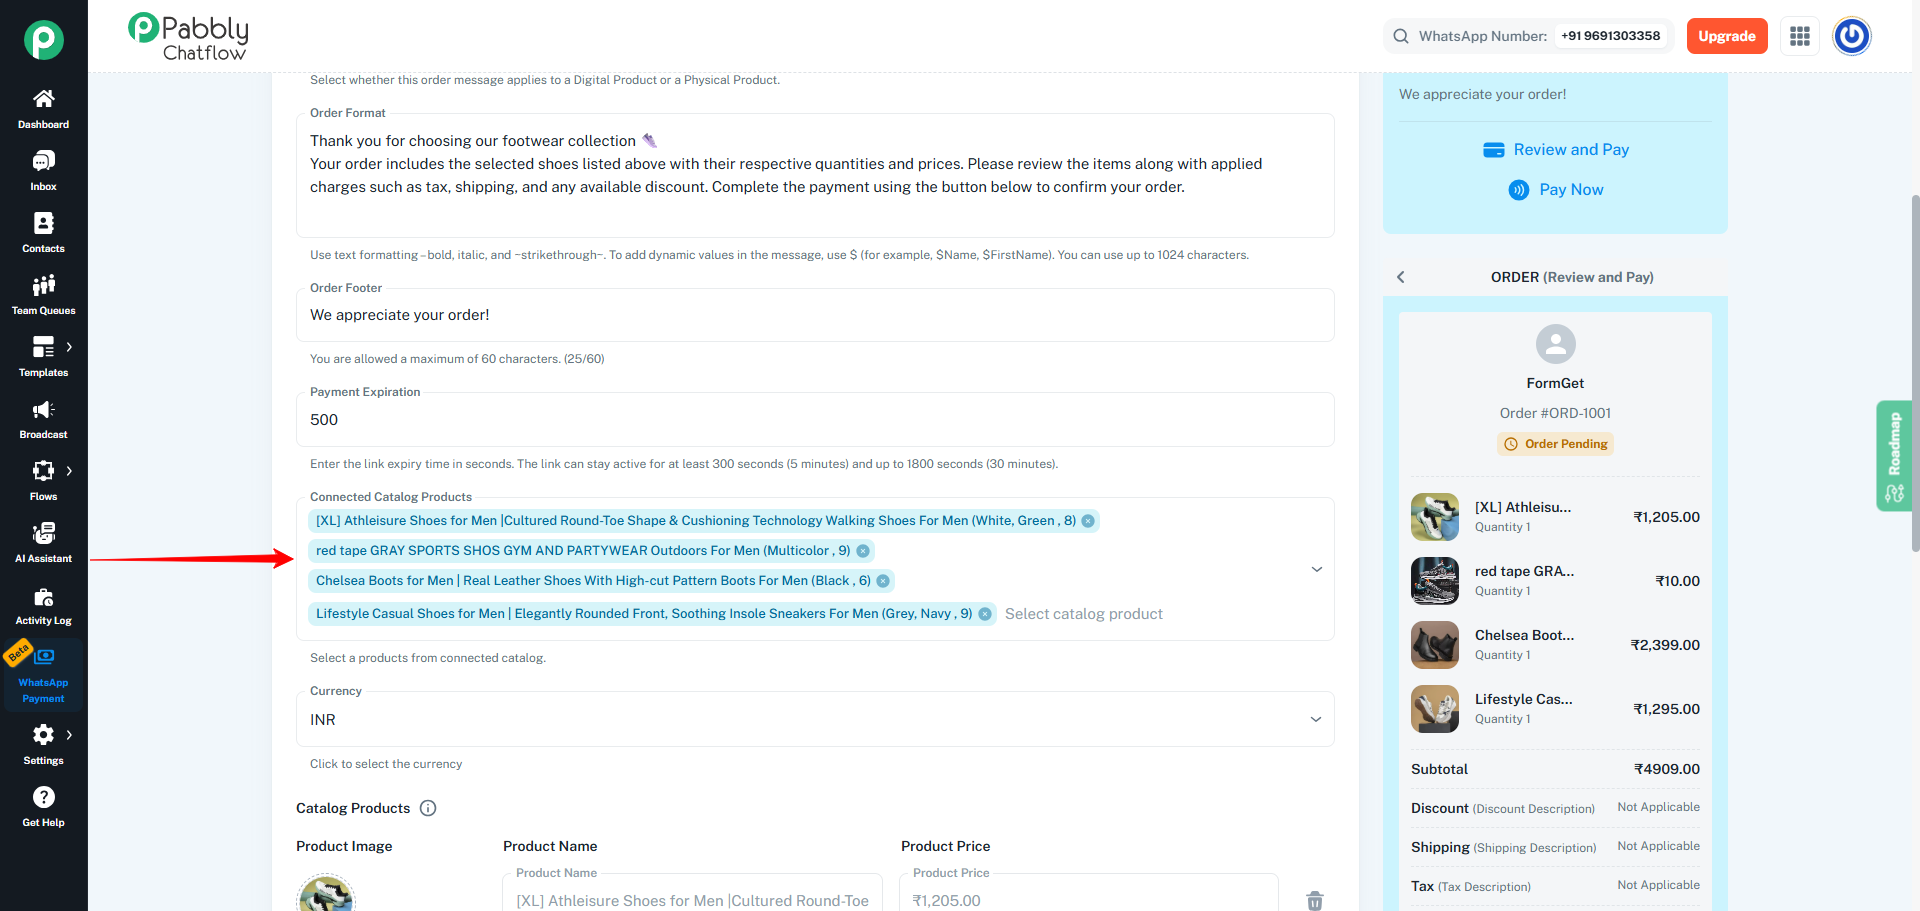
2.1 Open the Connected Catalog Products Dropdown
- Scroll down to Connected Catalog Products.
- Click on the dropdown labeled “Select catalog product”.
- A list of products from your connected catalog will appear.
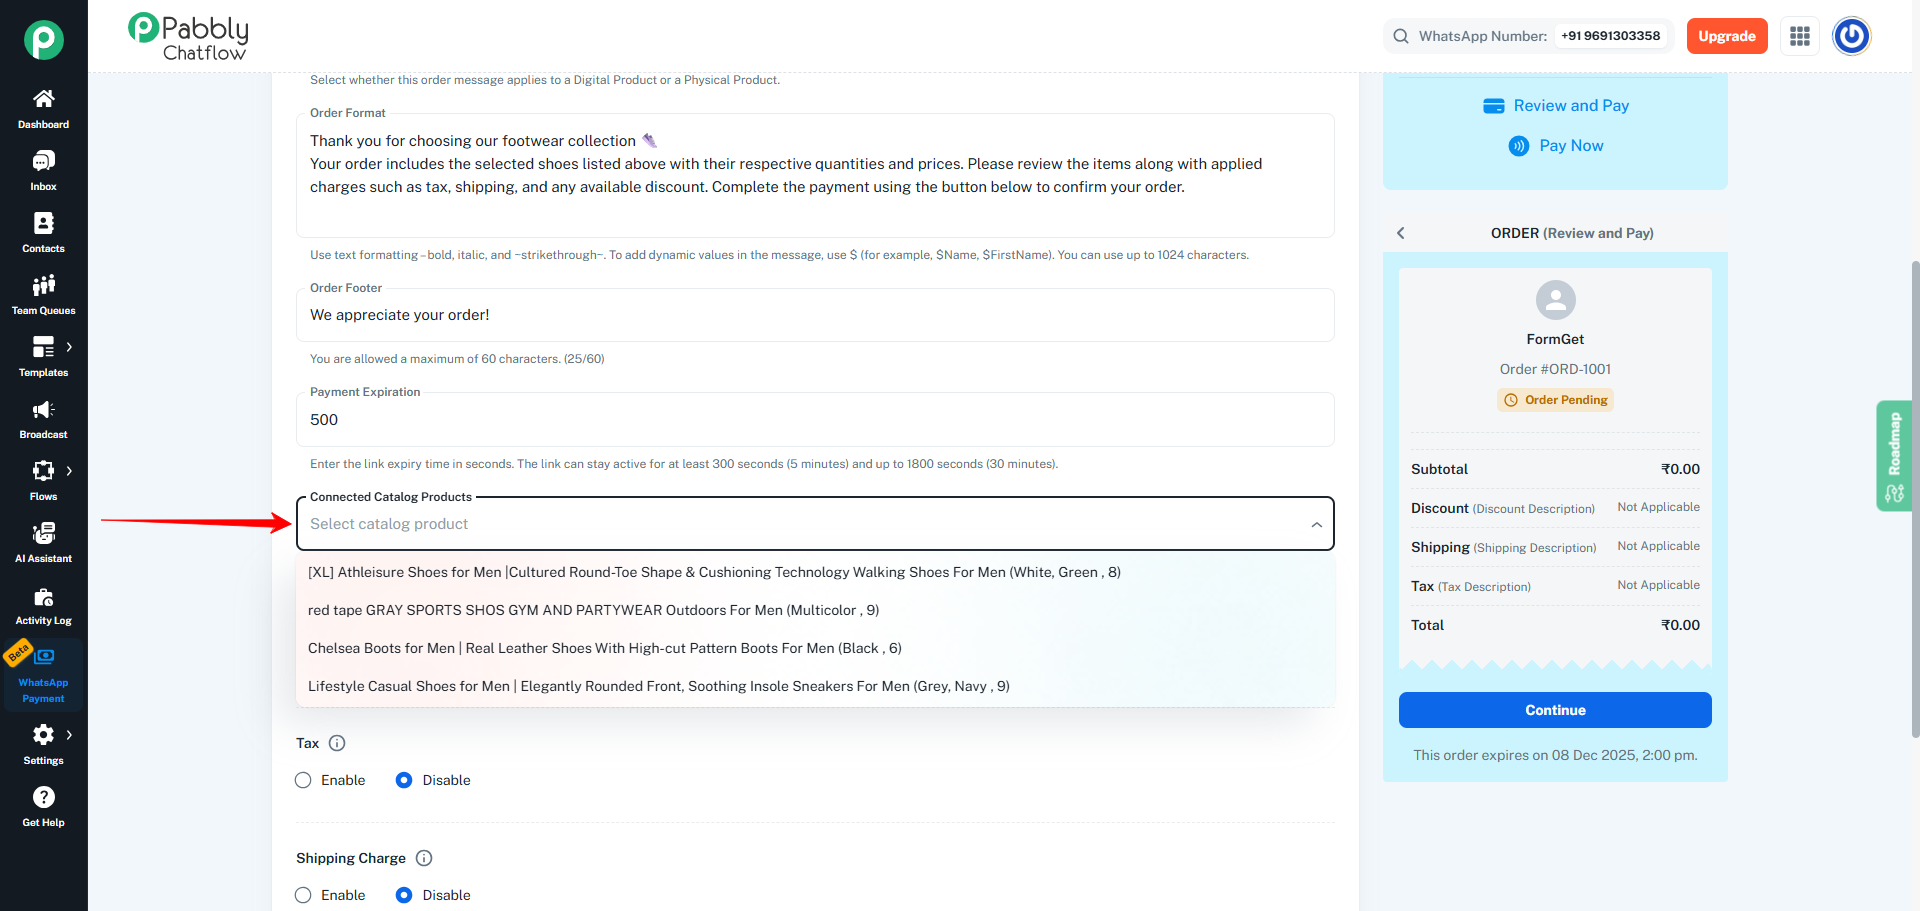
2.2 Select Catalog Products
- From the dropdown list, click on the products you want to include in this order message.
- Selected products will appear as Labels inside the Connected Catalog Products field.
2.3 View the Catalog Products Section
- After selecting products, scroll slightly down.
- A Catalog Products section will appear.
- This section shows rows for each selected catalog product with:
- Product Image
- Product Name
- Product Price
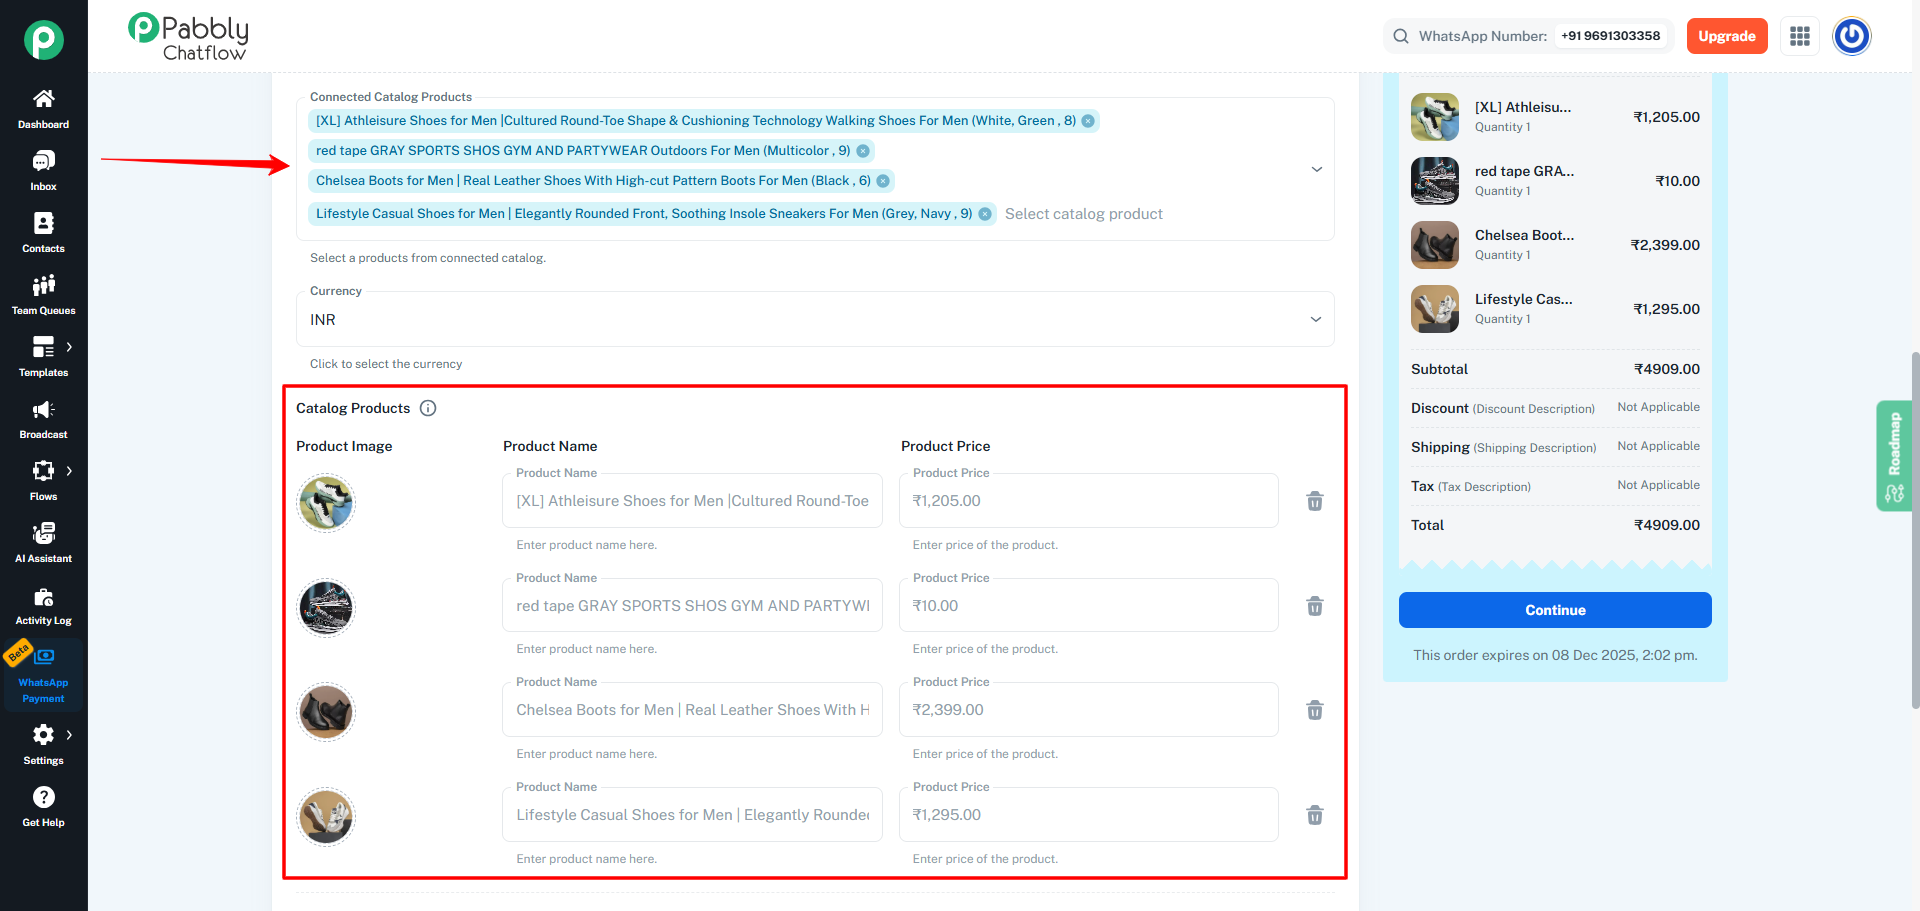
For Catalog Products, Product Image, Product Name, and Product Price can’t be change. Only Select or Unselect products from the connected catalog is allowed.
After editing Catalog Products, continue with the same Step 10 (Currency), Step 11 (Tax), Step 12 (Shipping), Step 13 (Discount) and click Update as already documented above.
 Pabbly Chatflow Team•Updated Oct 24, 2026•6 min read