Help Guide
 Pabbly Connect Team•Updated Aug 24, 2026•2 min read
Follow the steps below to create a Xero Developer app and retrieve the credentials required to establish a connection in Pabbly Connect.
Log in to your Xero Developer account.
On your Xero Developer dashboard, click on the “New App” button.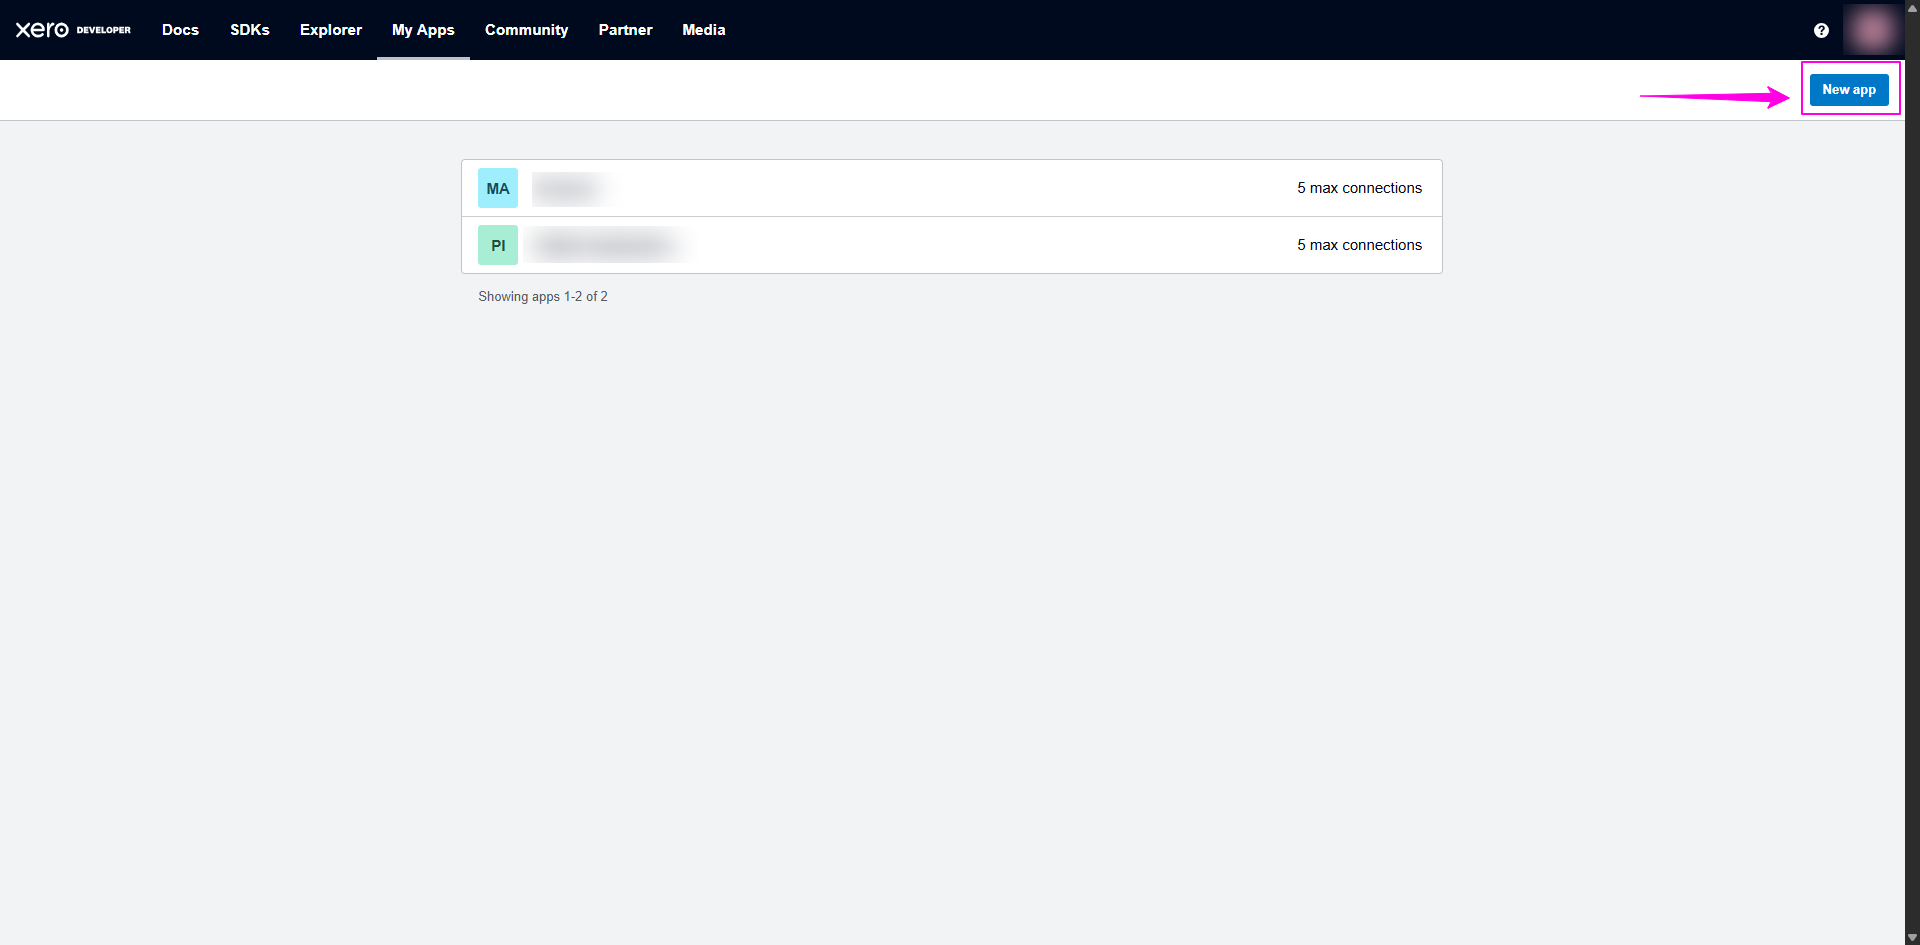
Enter the App Name.
Note: Enter a unique name for your application.
Example: My Personal App
In the “Integration type” section, select “Web App”.
Answer the questions displayed on the screen accordingly.
Enter your Company or application URL.
Example: https://example.com/
In the OAuth 2.0 redirect URI field, enter the following Pabbly Connect Callback URL:
Pabbly Connect Callback URL: https://connect.pabbly.com/callback-url
Click on the “Create app” button. 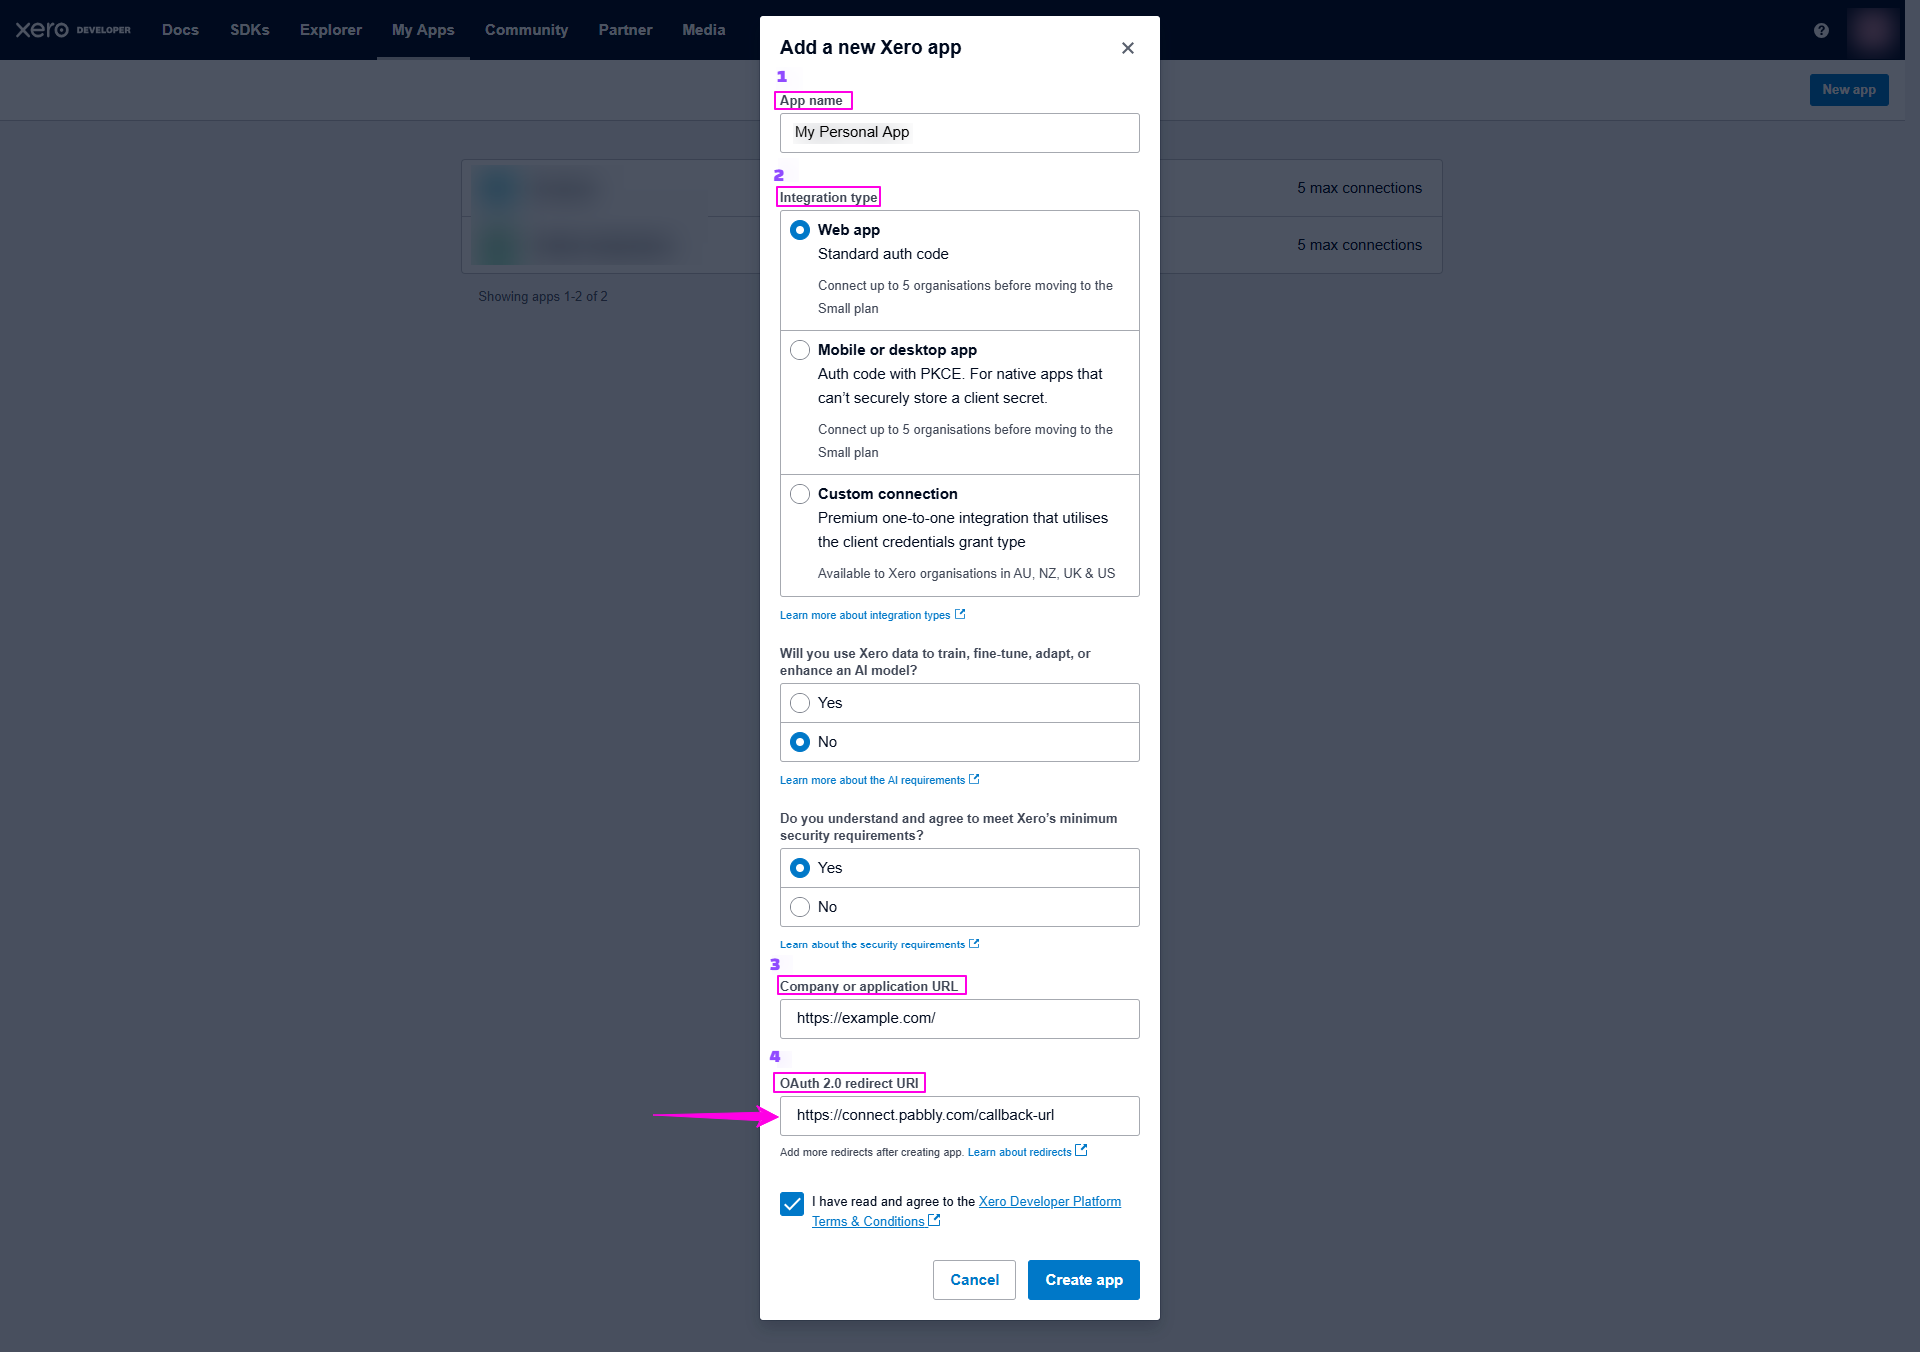
Now, navigate to the “Configuration” section of your application.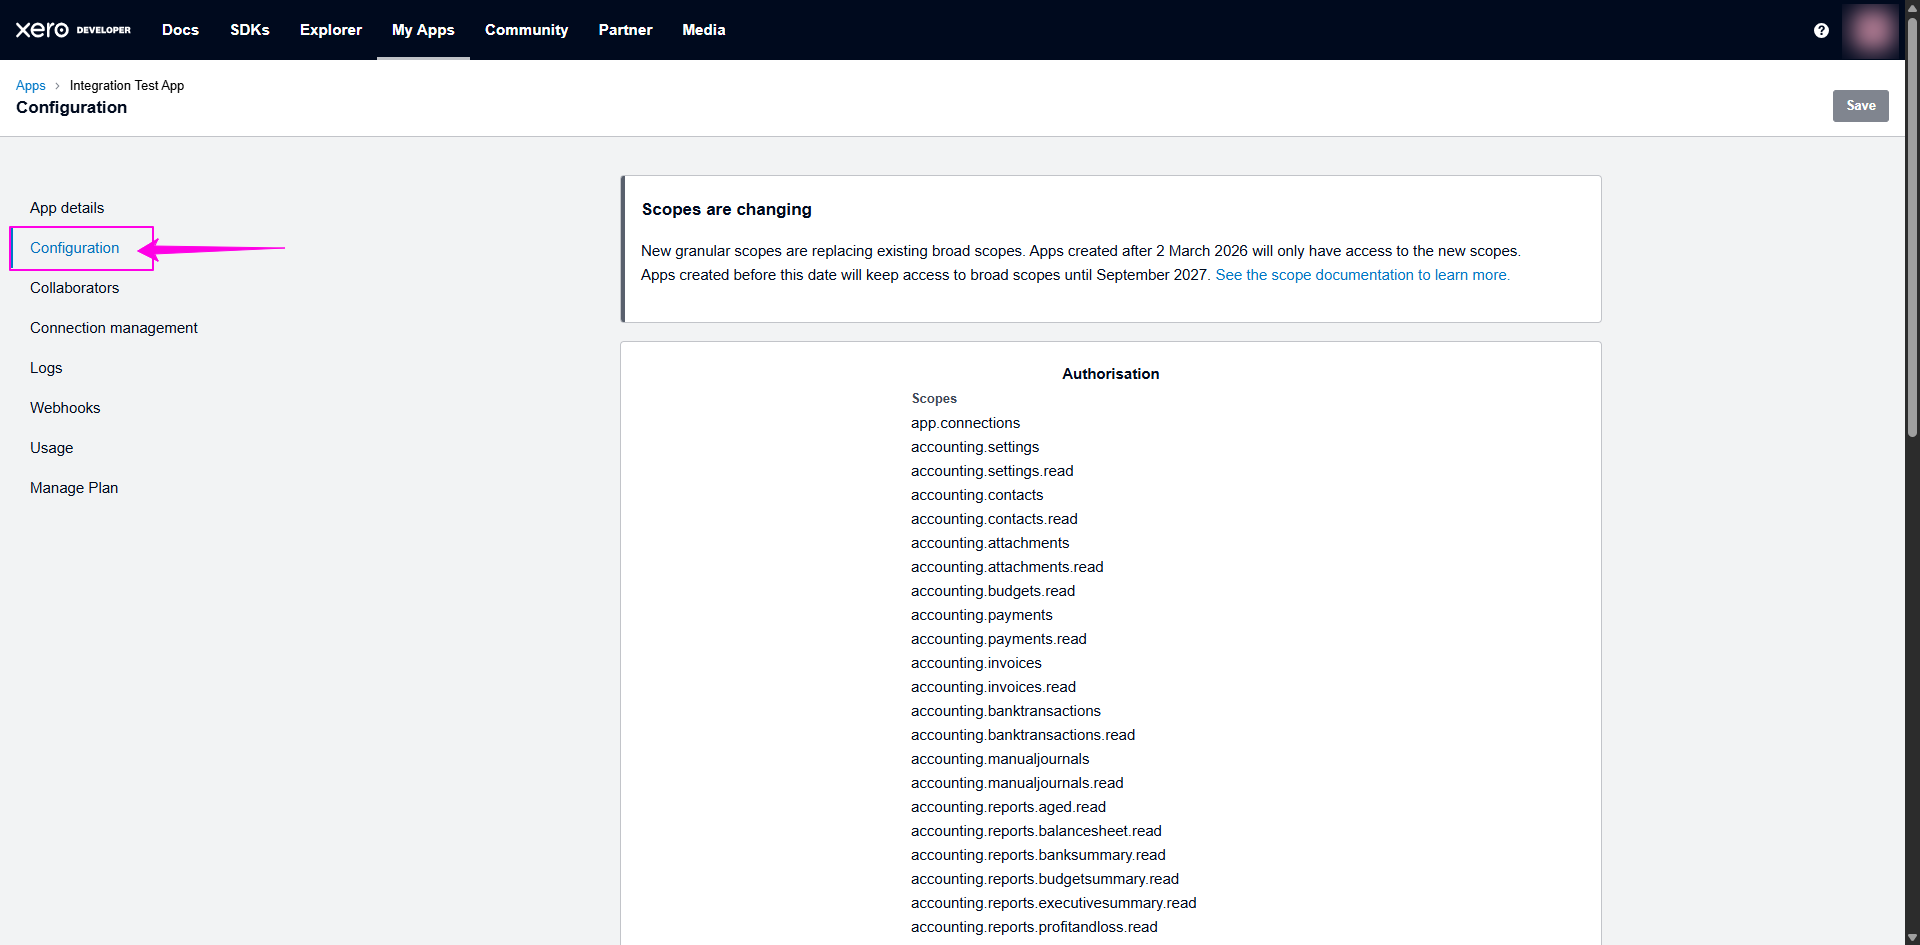
Scroll down the page to locate your Client ID and Client Secret.
Copy the displayed Client ID. To create the Client Secret, click on “Generate a secret”.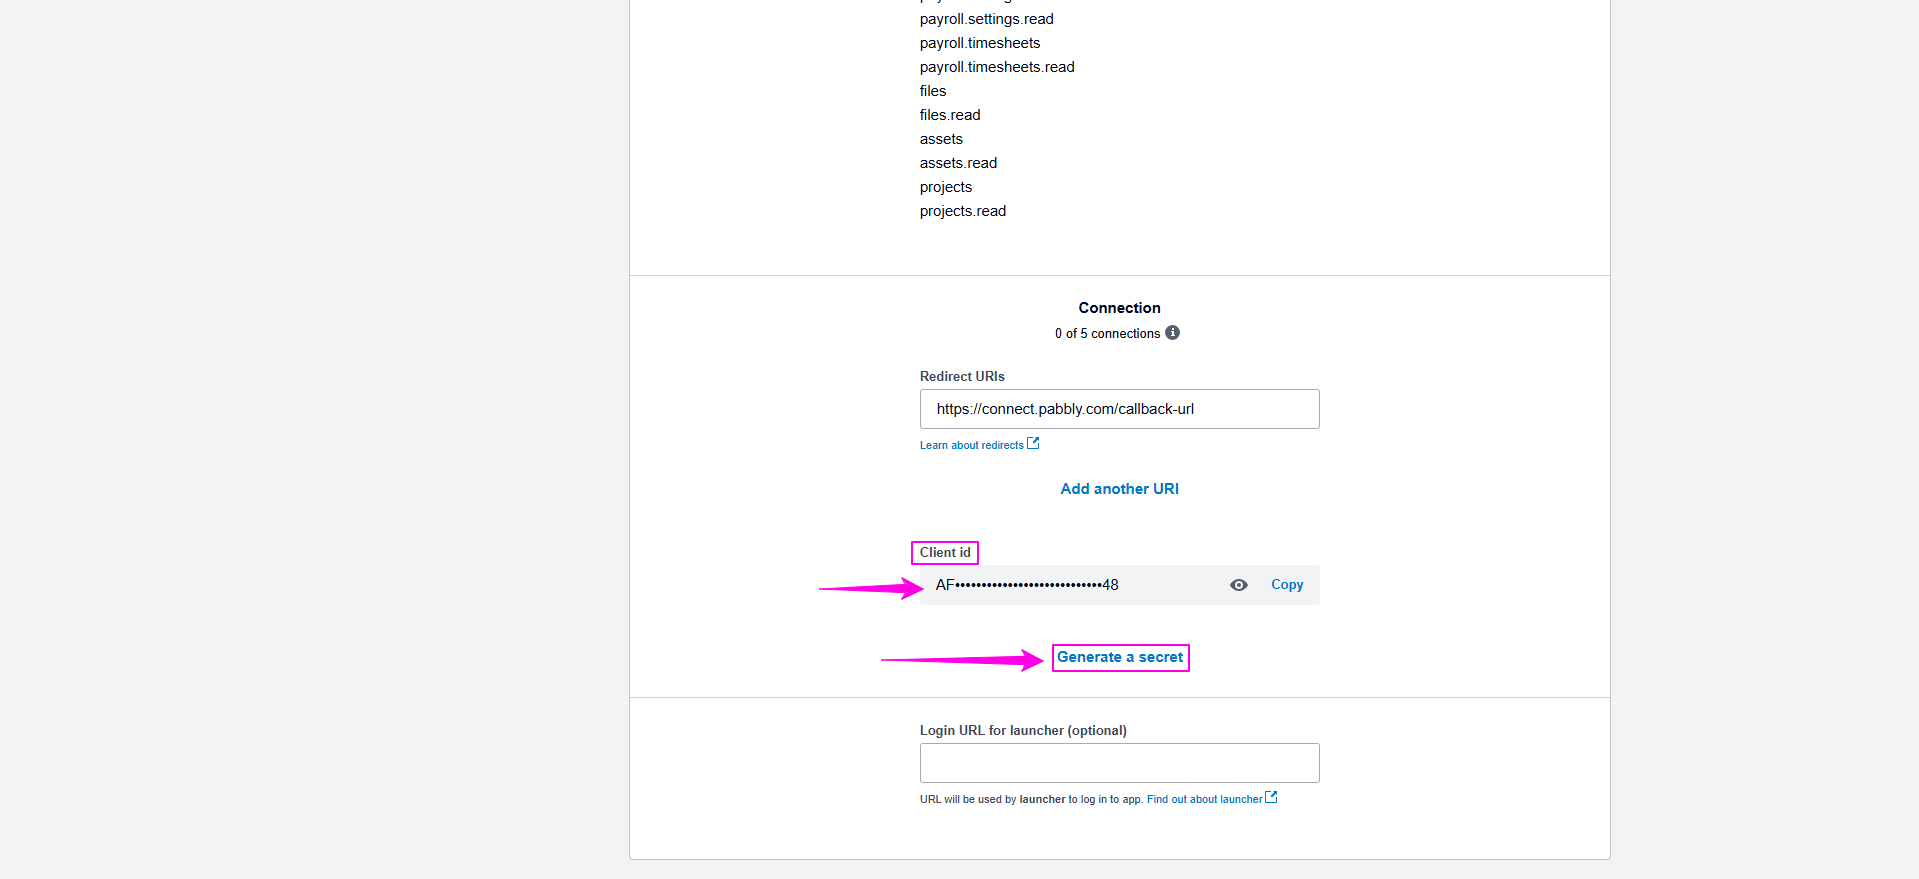
Note: Make sure to copy and securely save your newly generated secret immediately. You will not be able to view the secret again after leaving the page. Do not share your Client ID and Client Secret, keep it secured.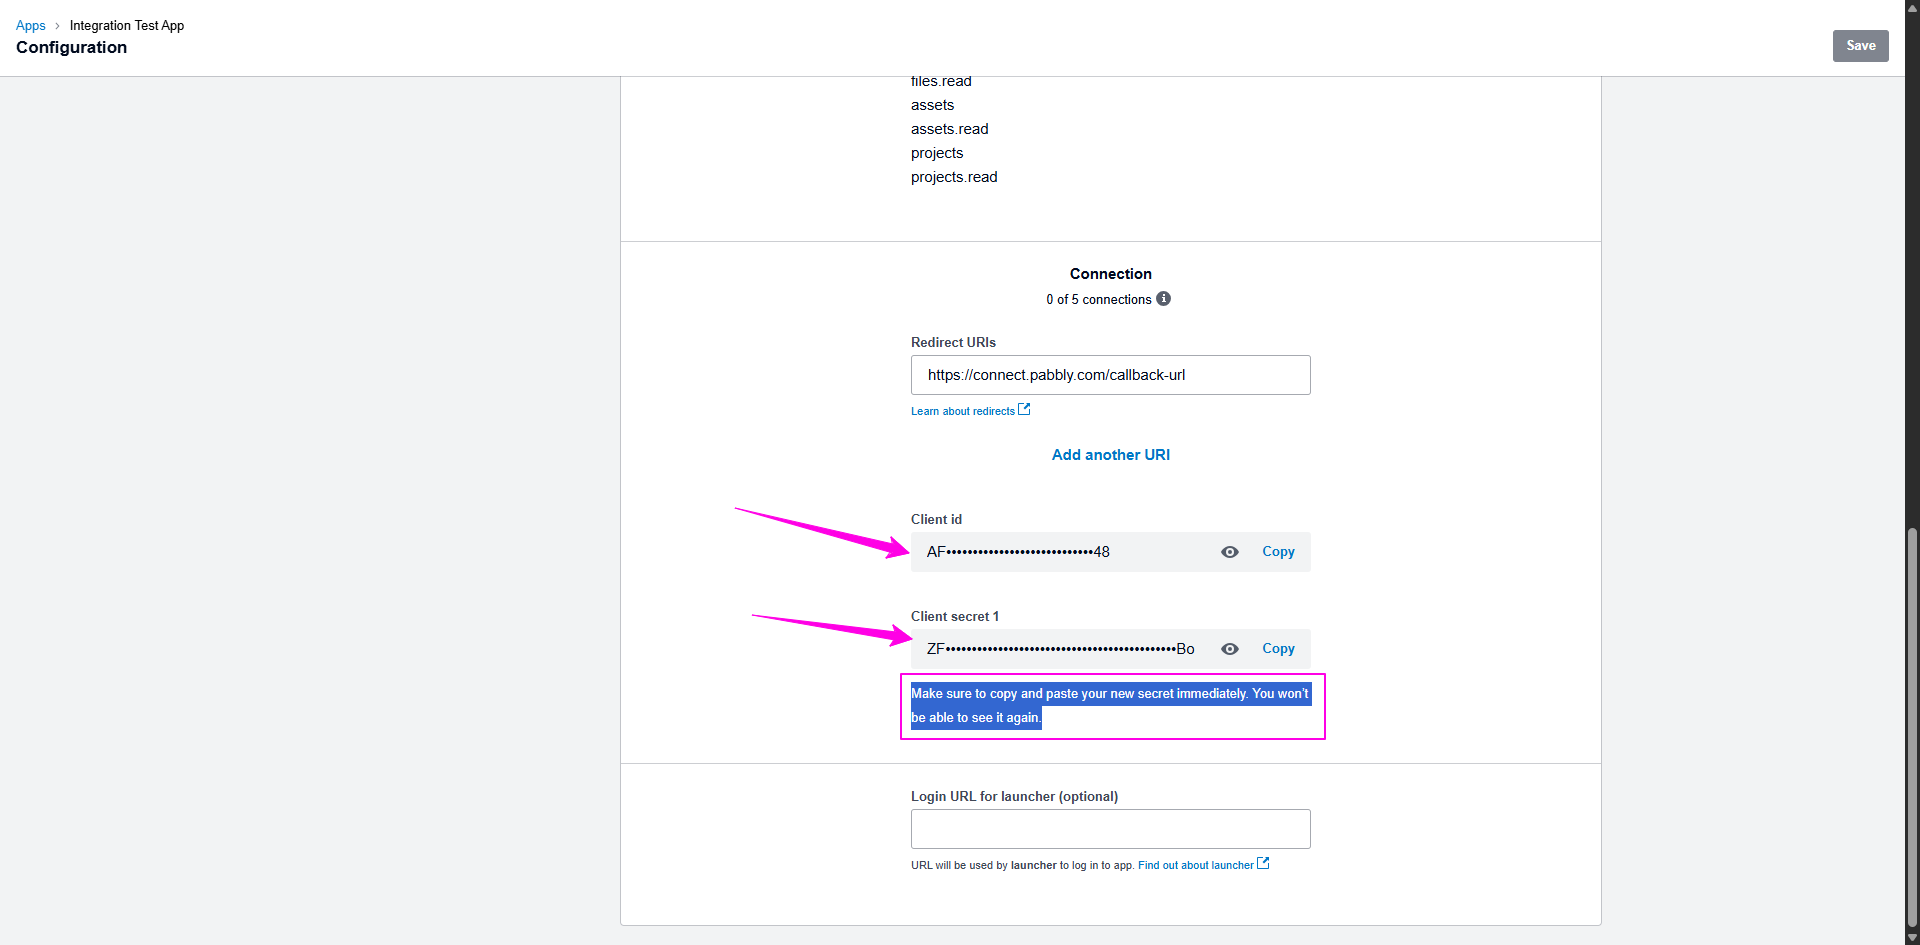
Now, go to Pabbly Connect, select the Xero (Developer) app, and paste the copied Client ID and Client Secret into the respective fields while creating a connection with your Xero Developer app.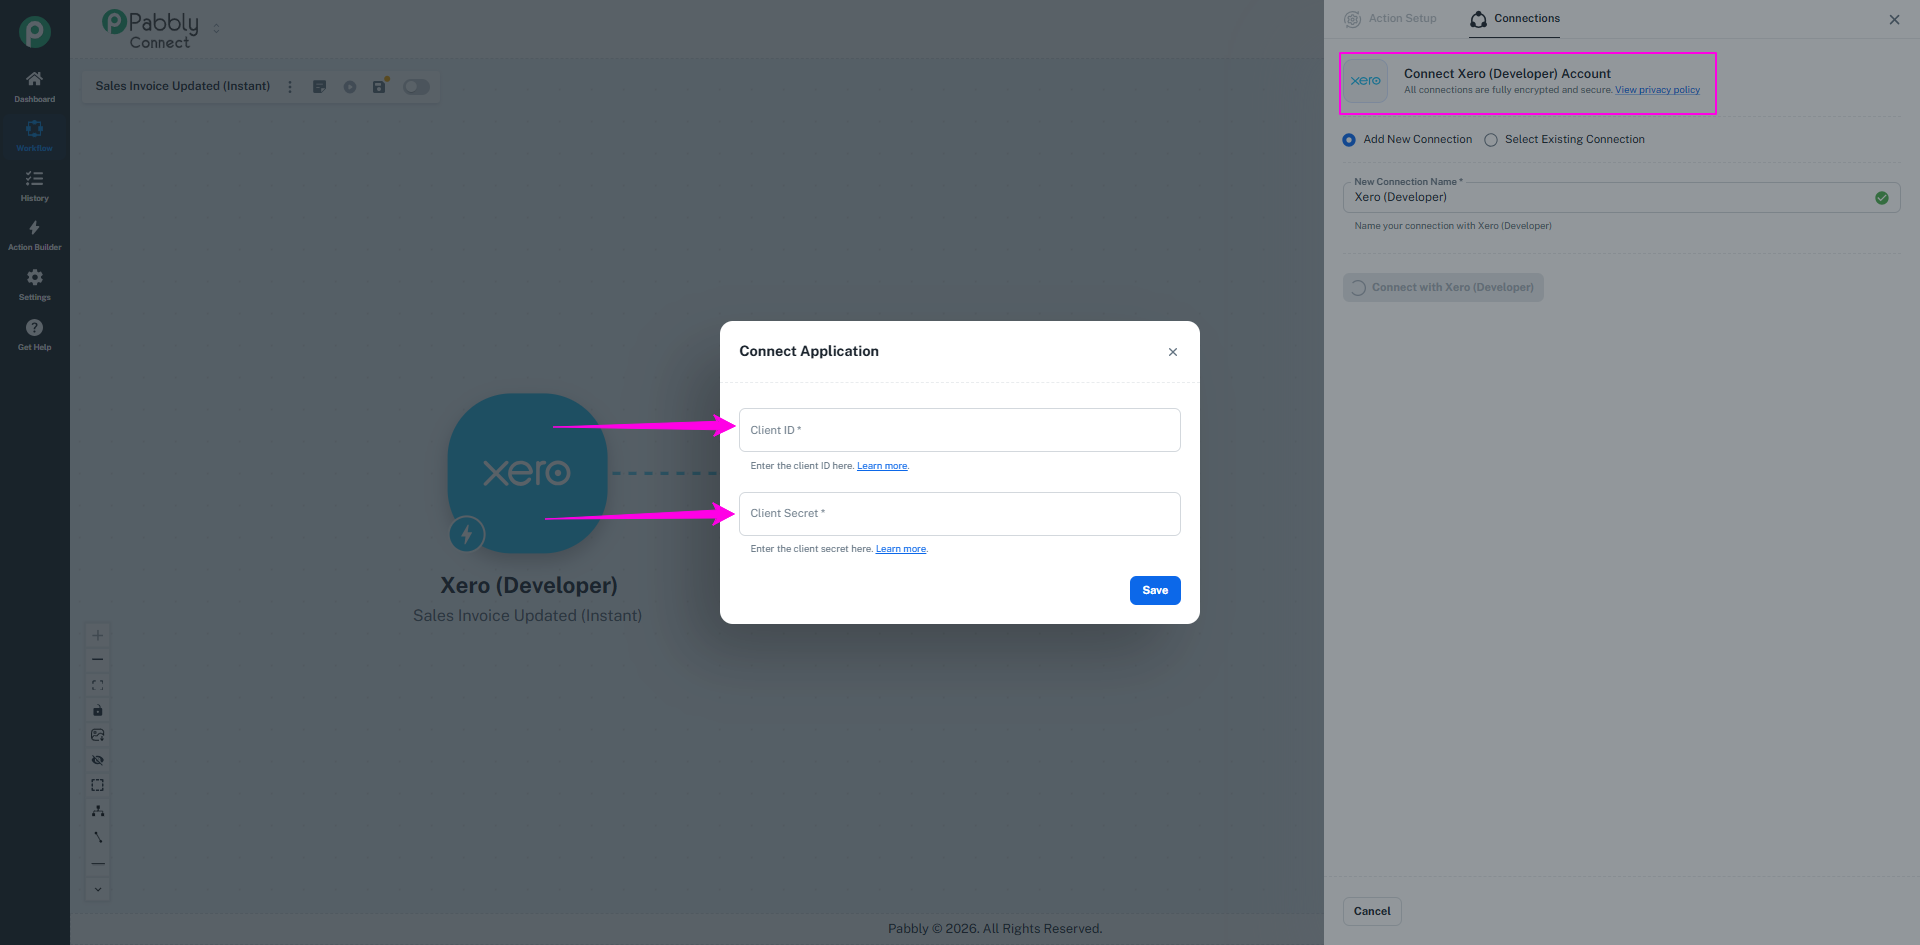
Once the Xero Developer app has been created and the Client ID and Client Secret have been configured in Pabbly Connect, follow the steps below to configure Webhooks for Instant Triggers.
Follow the above steps to authorize the Xero Developer app in Pabbly Connect.
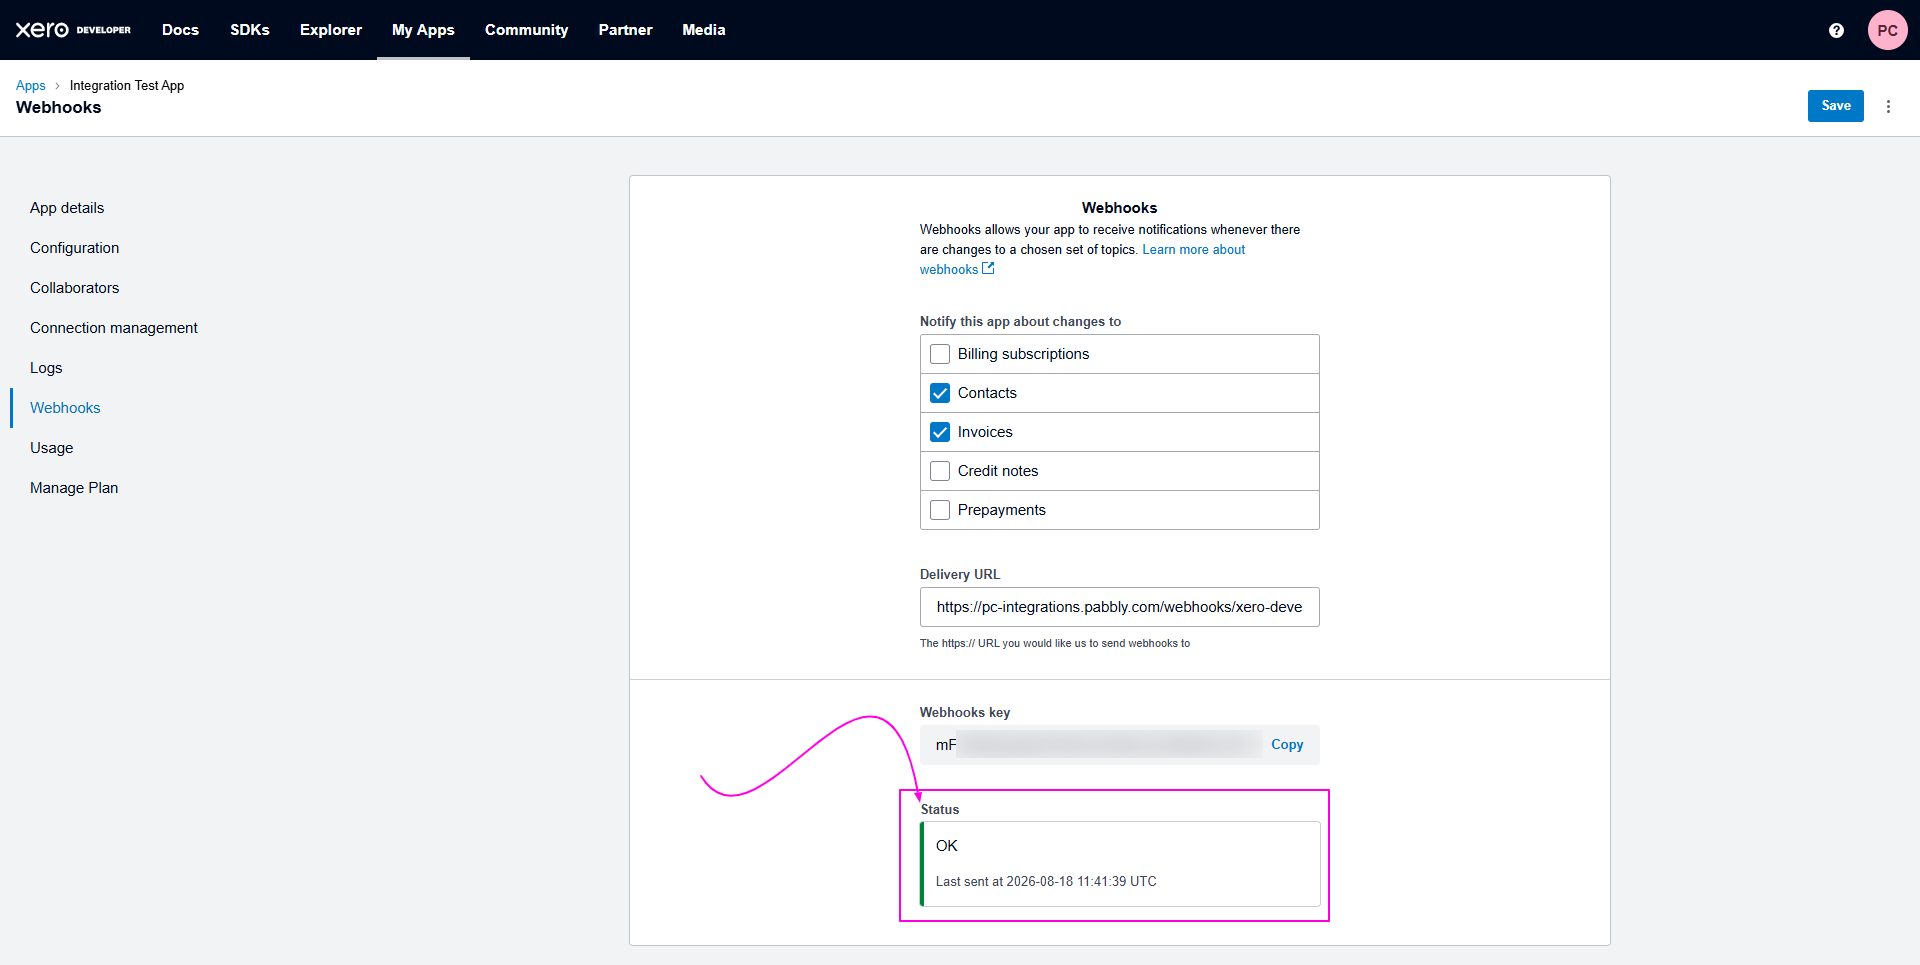
Now, navigate to the “Webhooks” section in the Xero Developer Portal.
Under “Notify this app about changes to”, select the following events:
Contacts
Invoices
In the “Delivery URL” field, paste the following URL:
https://pc-integrations.pabbly.com/webhooks/xero-developer/webhookurl?tenant=YOUR_TENANT_ID 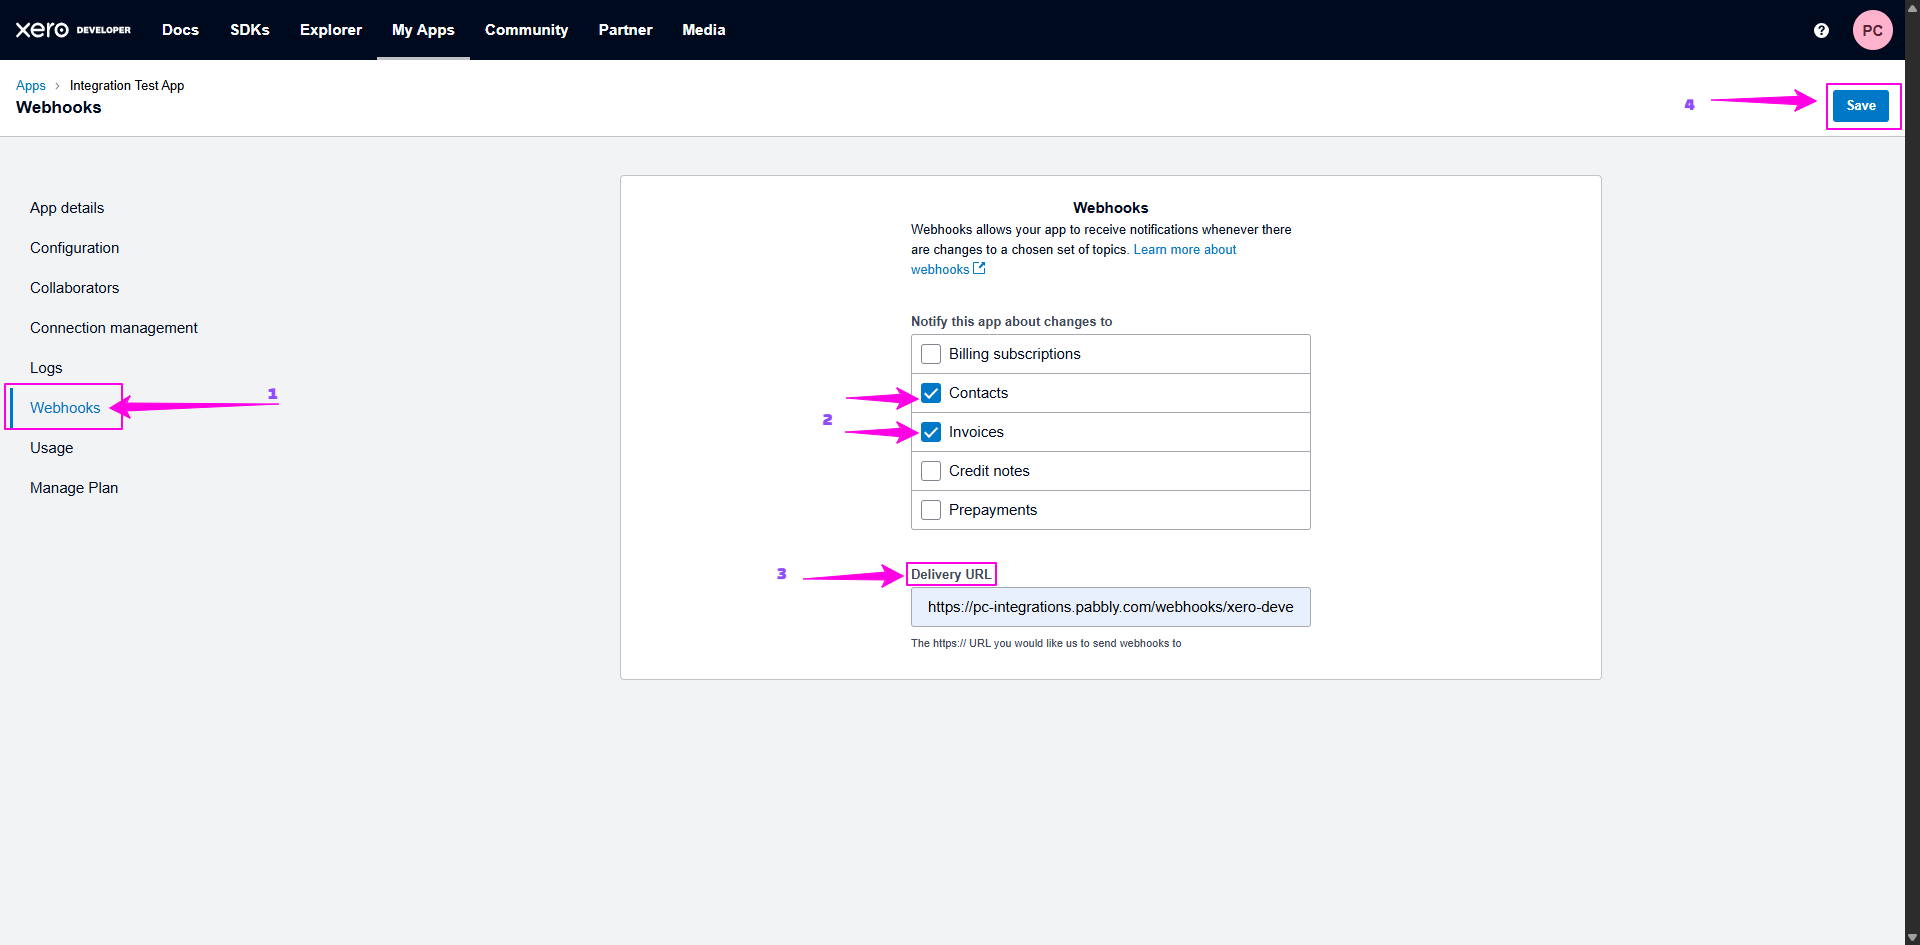
To obtain your TENANT_ID for the Delivery URL:
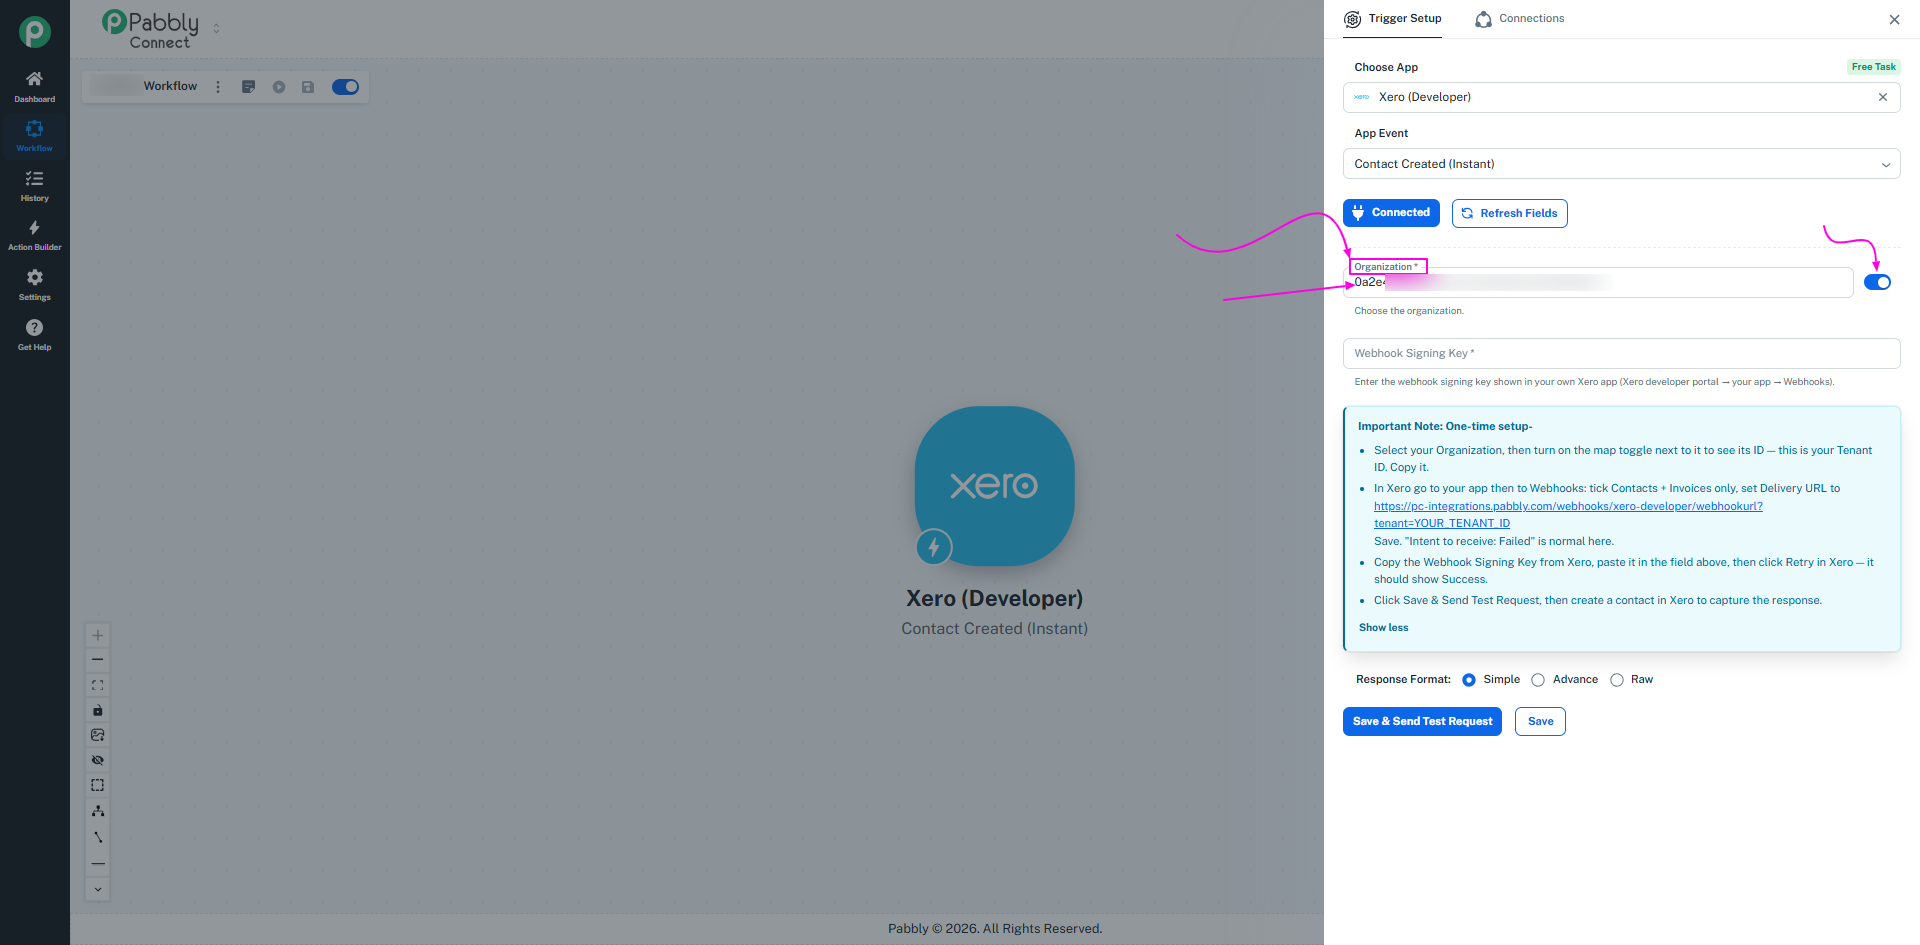
Go back to the Trigger Setup in Pabbly Connect.
Turn the MAP button ON for the Organization field.
Copy the value displayed in the Organization field.
Replace YOUR_TENANT_ID in the Delivery URL with the copied value.
Example:
After entering the Delivery URL, click on the “Save” button.
After saving, Xero will provide a “Webhooks key”. 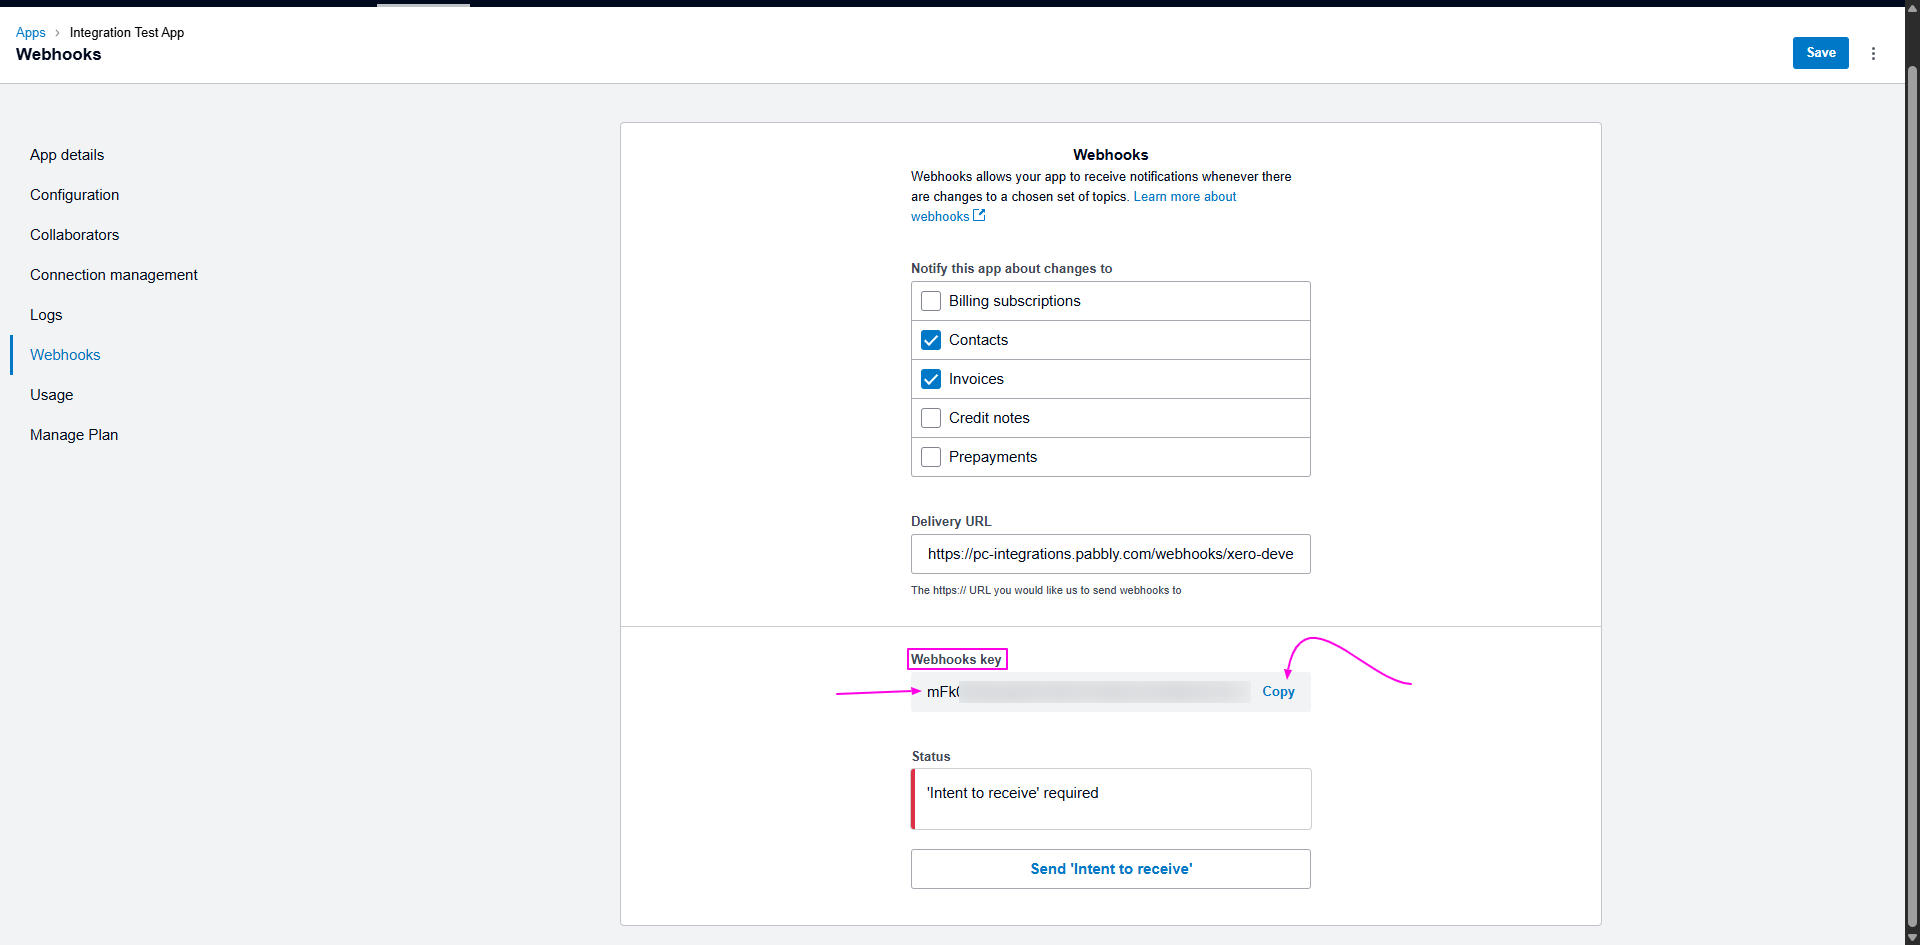
Copy the generated Webhooks key and paste it into the “Webhook Signing Key” field in Pabbly Connect.
In Pabbly Connect, click on the “Save & Send Test Request” button. 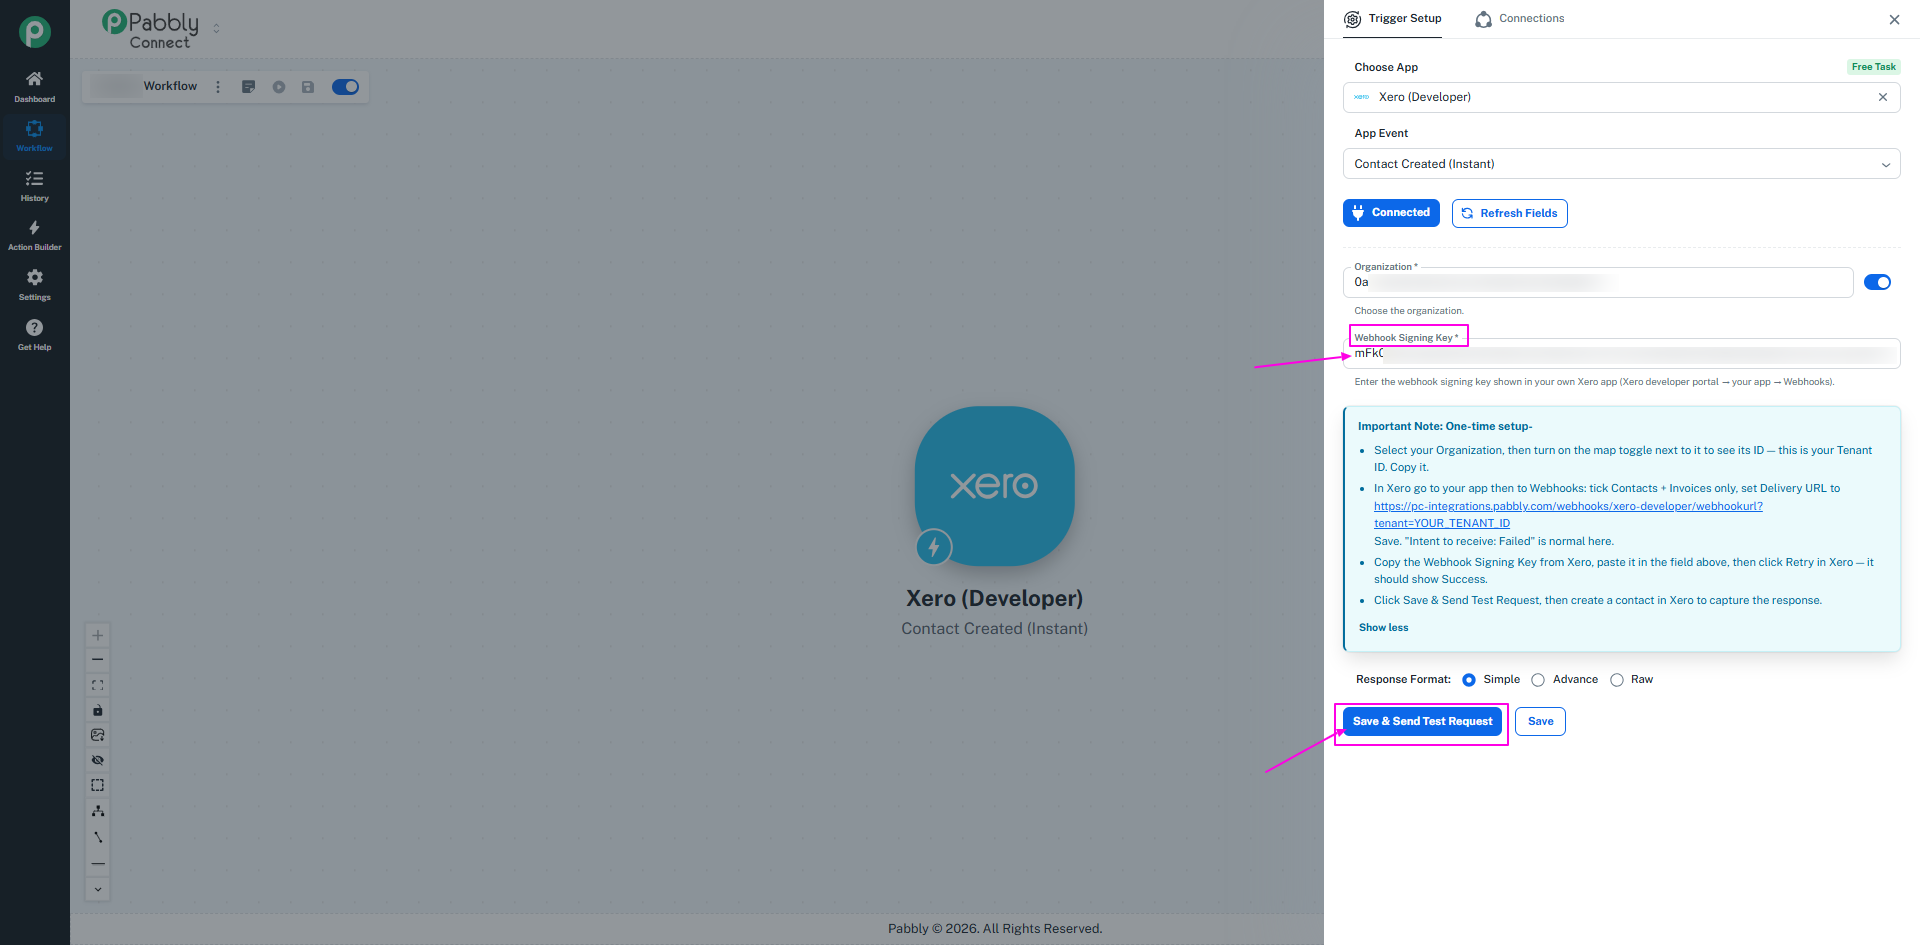
Now, go back to the Xero Developer Portal and click on “Intent to receive”.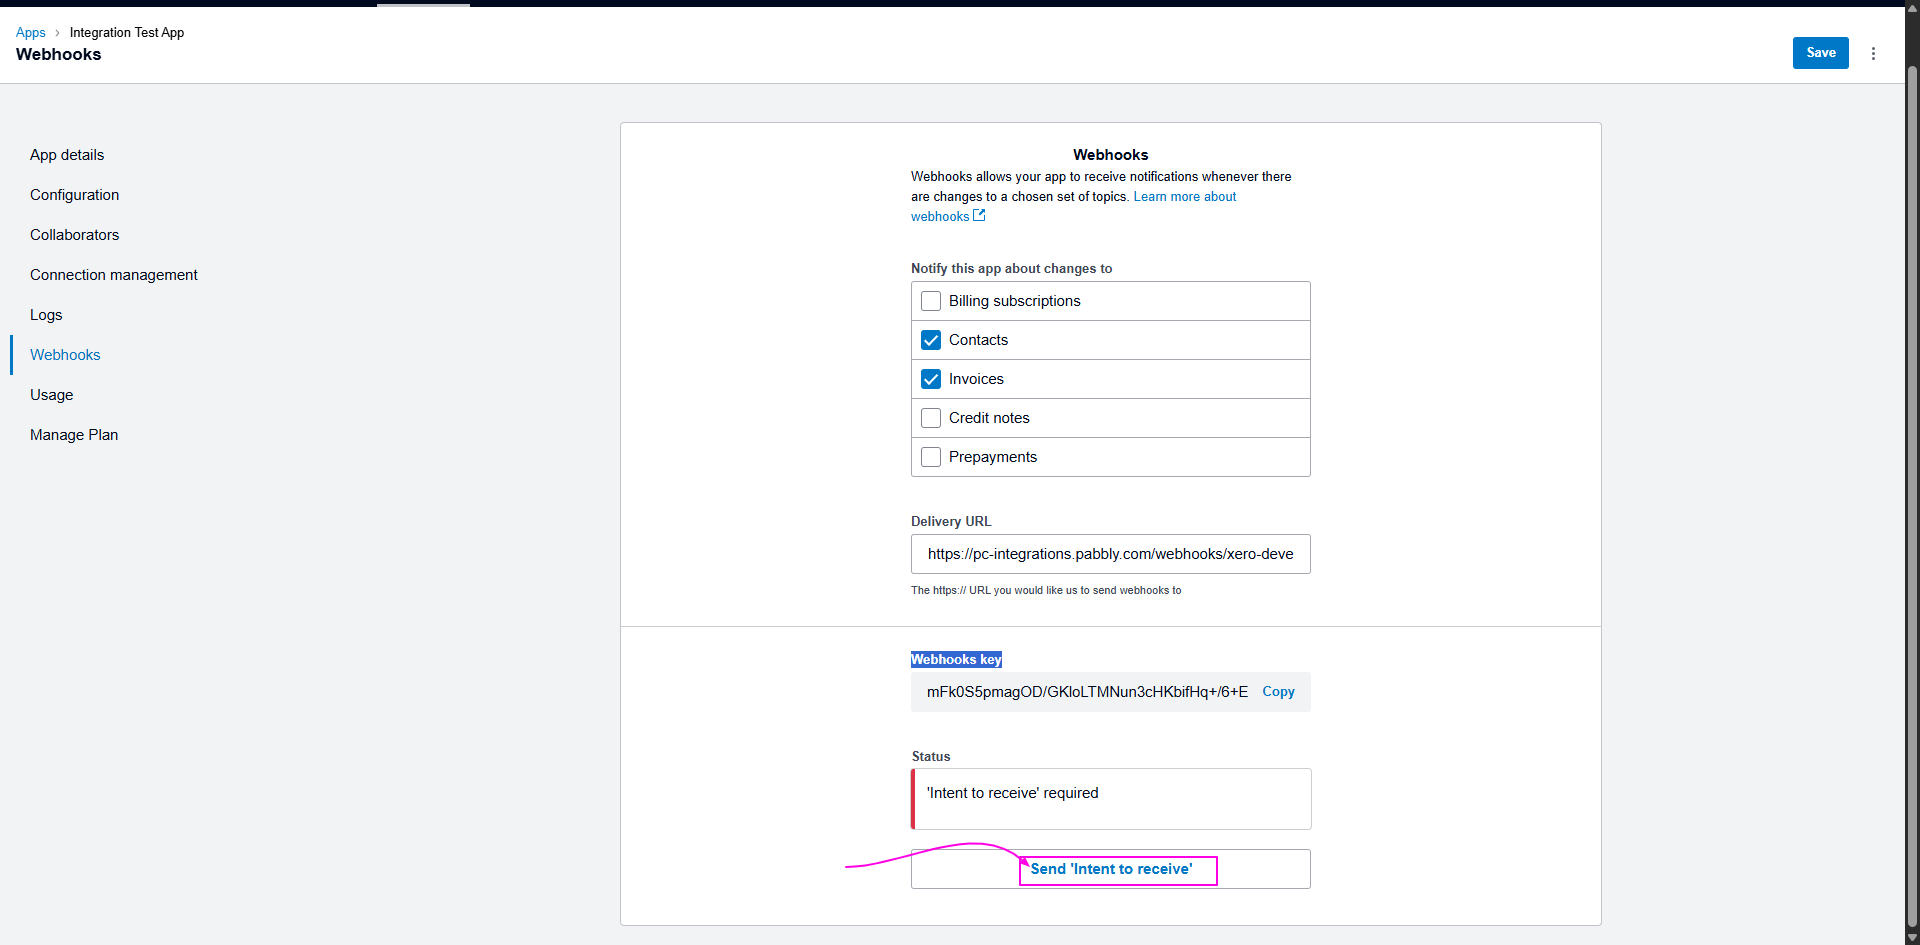
Note: If you initially see “Intent to receive: Failed”, this is normal at this stage.
Once the status changes to “OK”, the Webhook setup is completed successfully.