Delivery Server
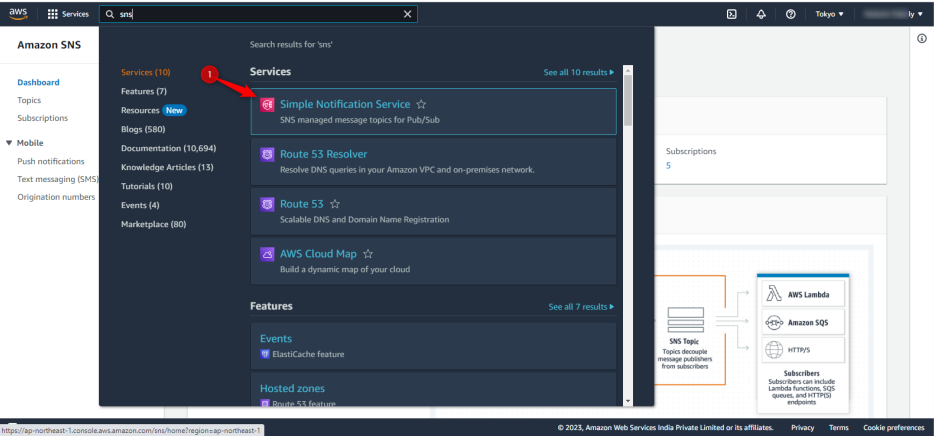
tep 1: Search for Simple Notification Service in your AWS Console in the same region where Amazon SES is connected:
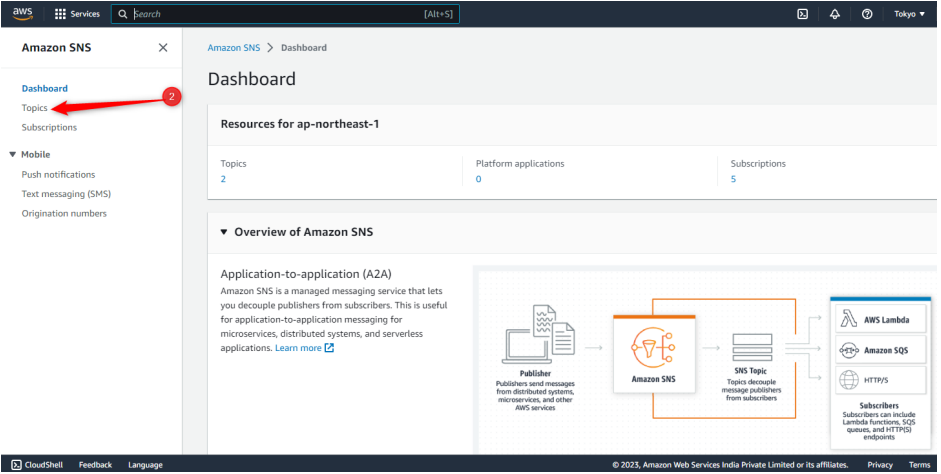
Step 2: Click on “Topics”
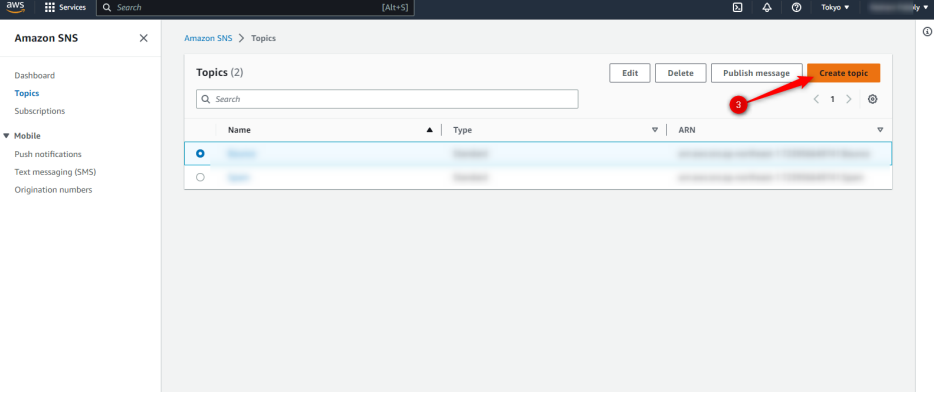
Step 3: Click on “Create Topic”
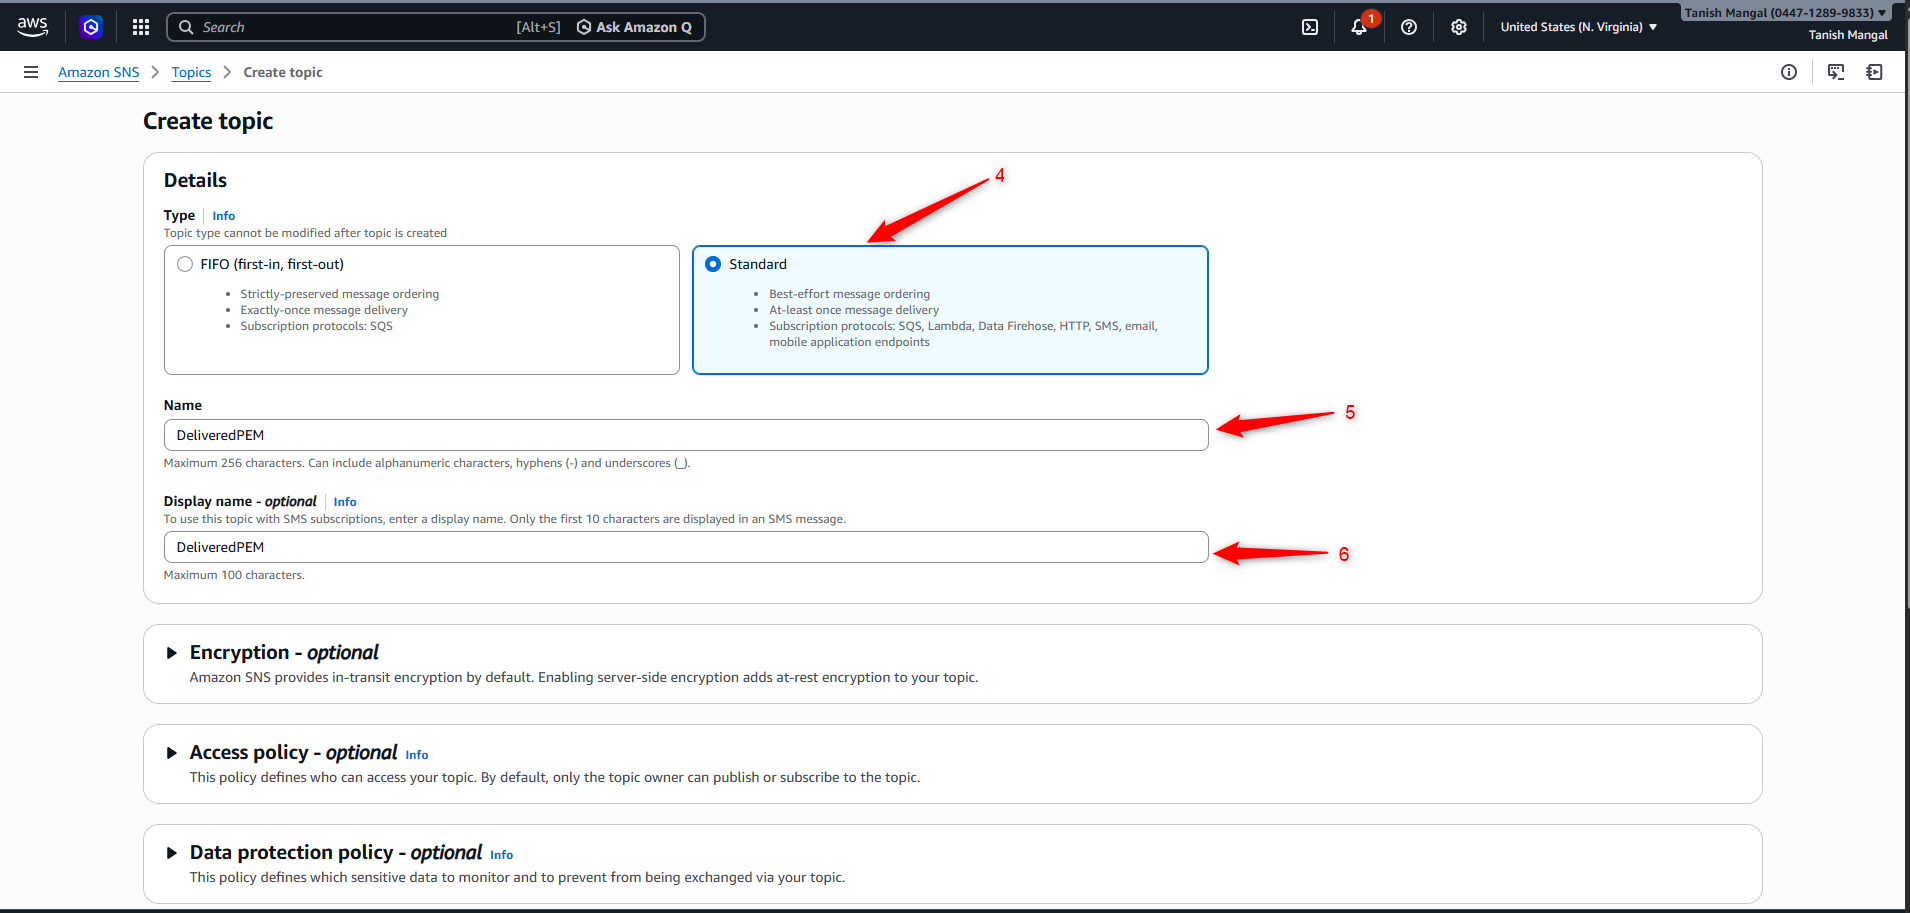
Step 4: Click on “Standard" Step 5: Add the name of your topic Step 6: Add a Display name for your topic
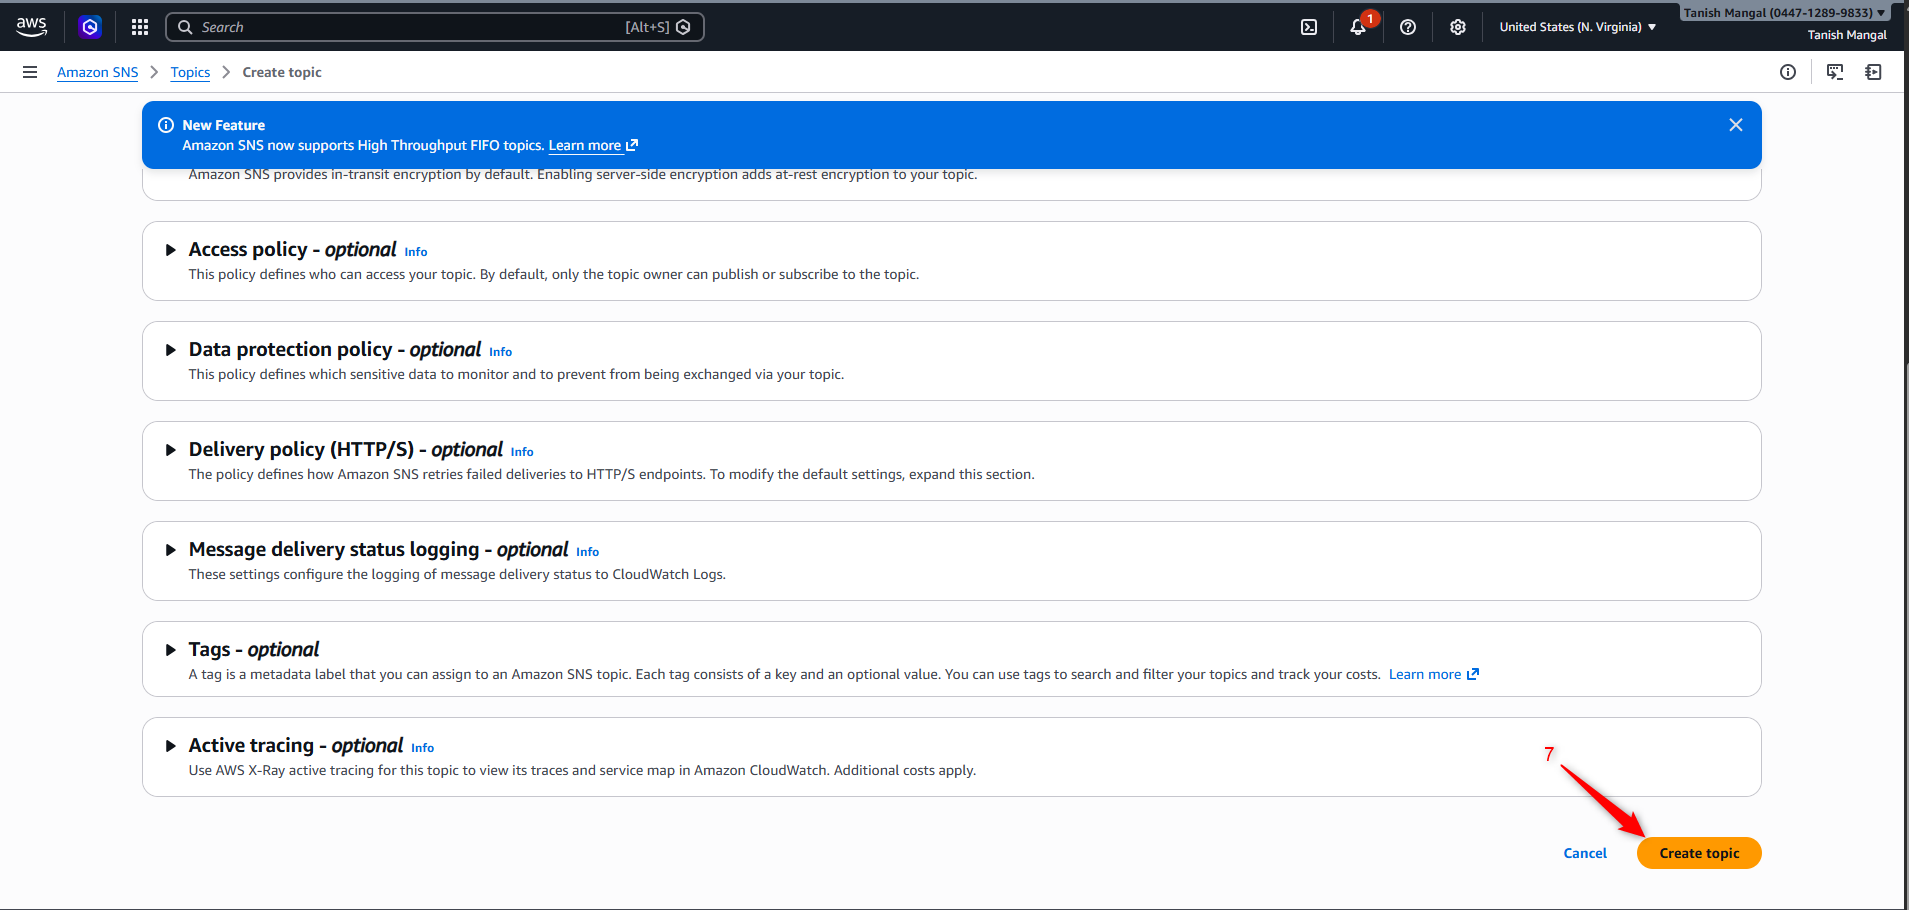
Step 7: Click on “Create Topic” Button present in bottom right corner
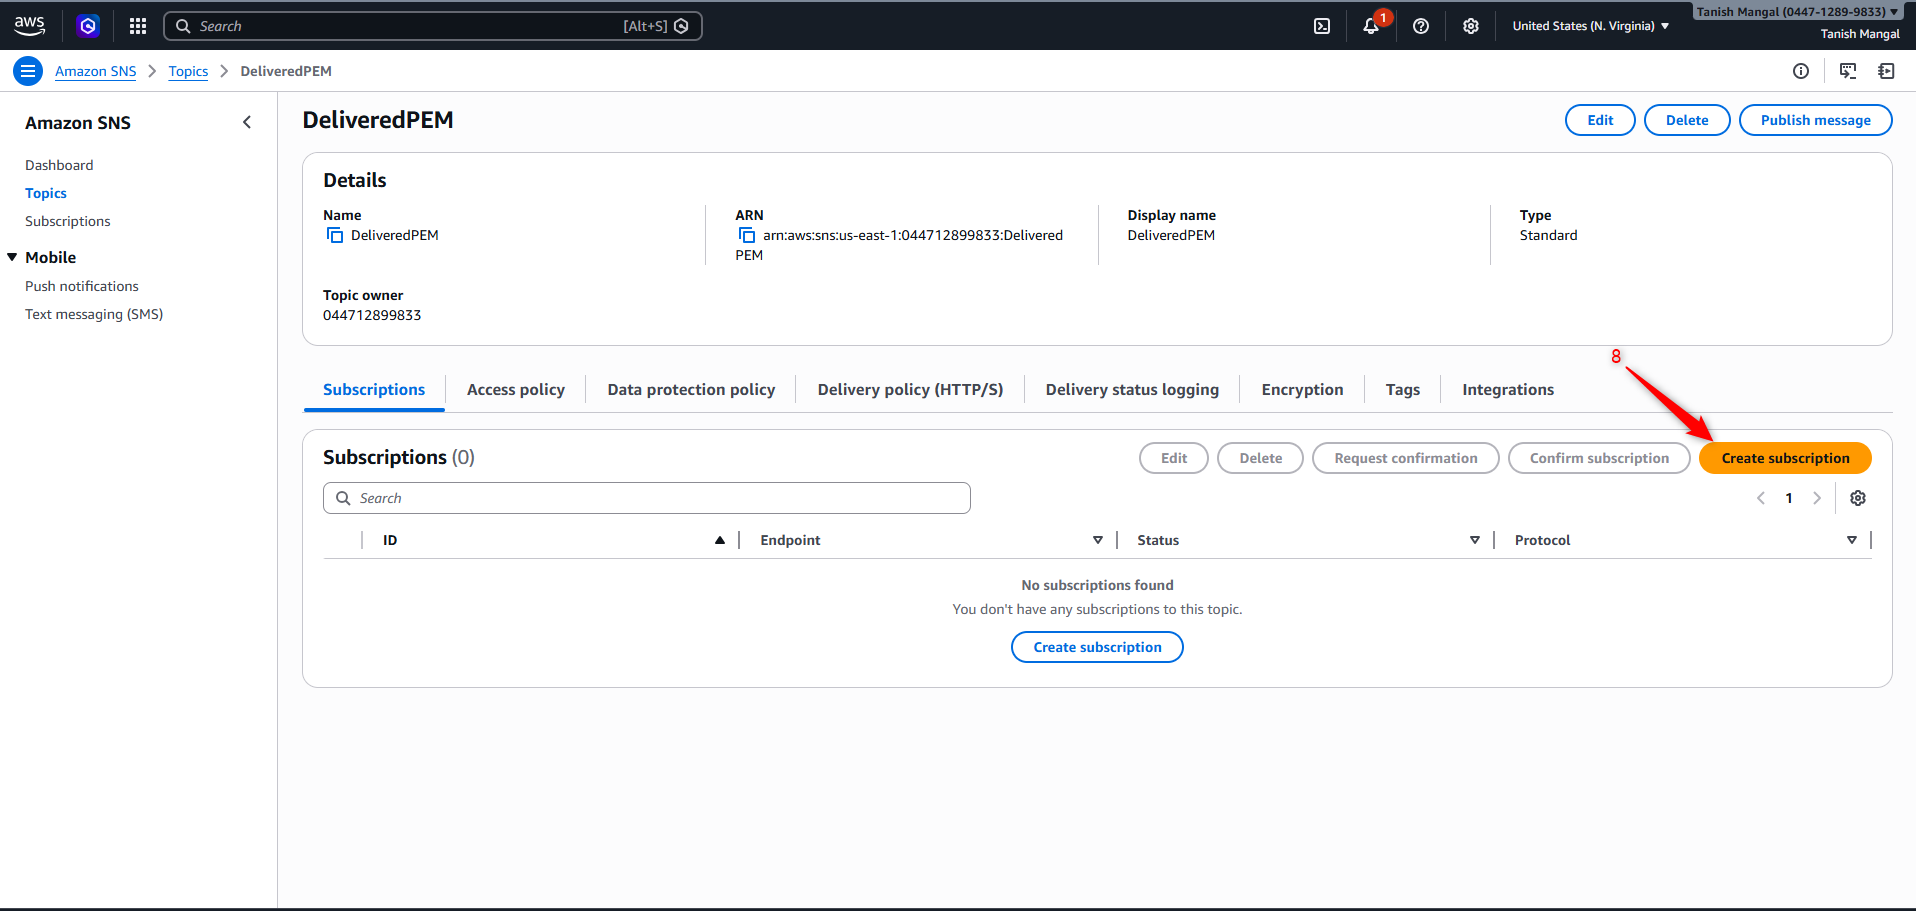
Step 8: Click on the “Create subscription” button.
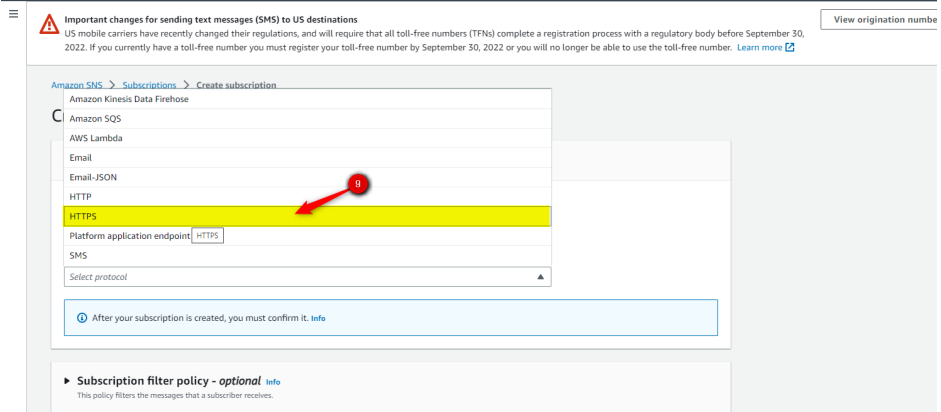
Step 9: Select “HTTPS” from dropdown
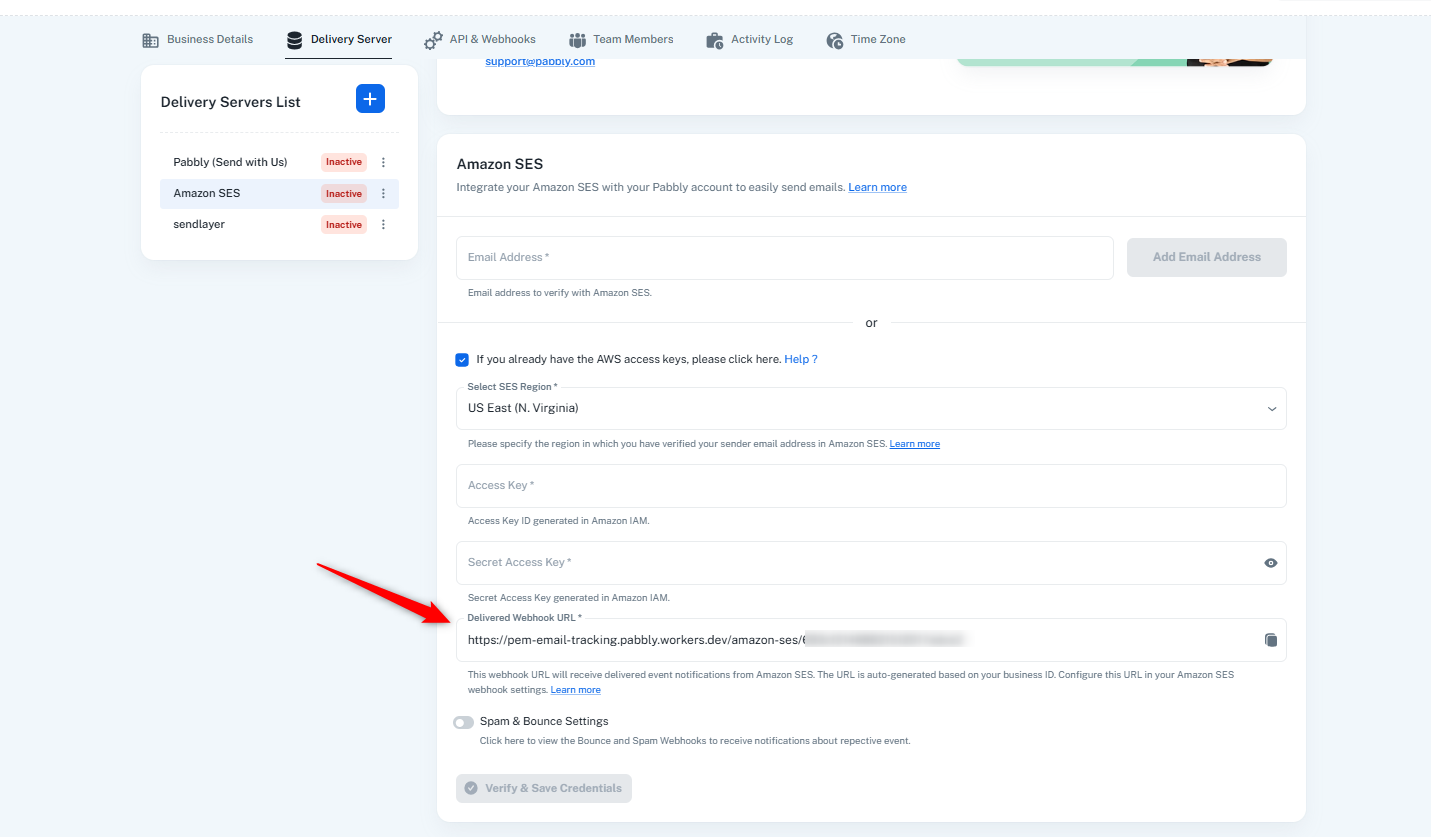
Step 10: Go to Pabbly Email Marketing “Delivery Server '' page in your Amazon SES, click on Spam & Bounce Settings, copy the URL.
Step 11: Paste it in Endpoint.
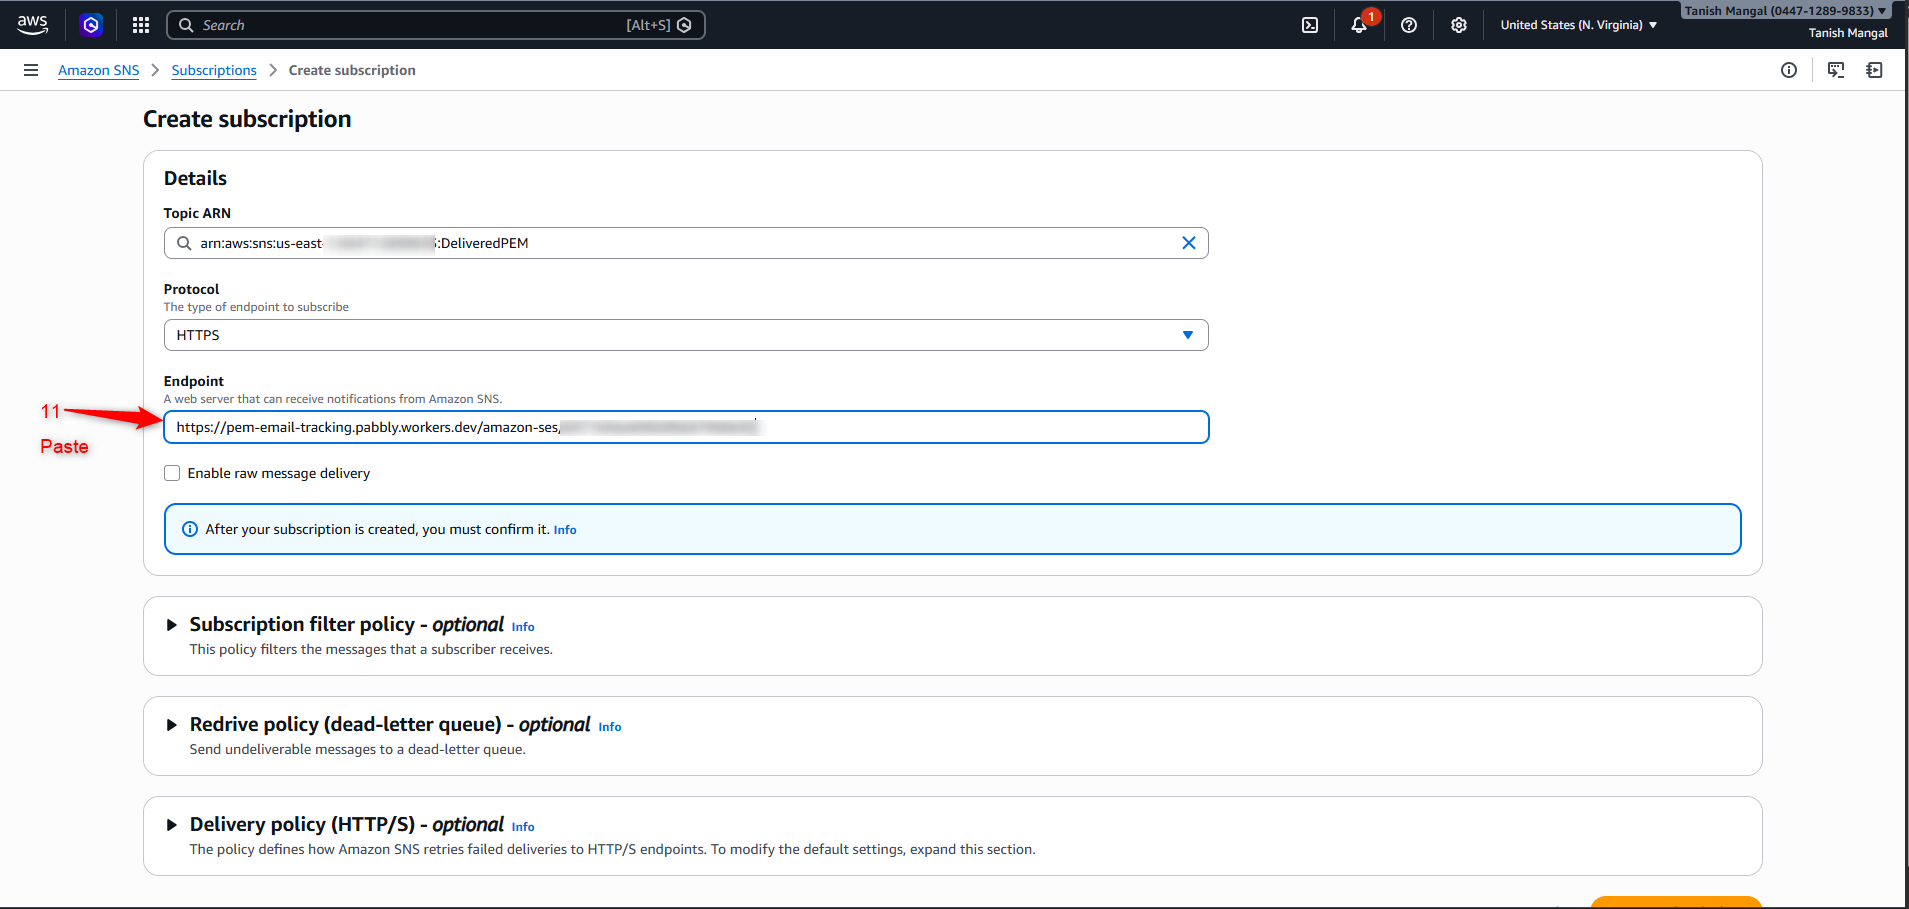
Step 12: Click on “Create subscription” button present on the bottom right corner.
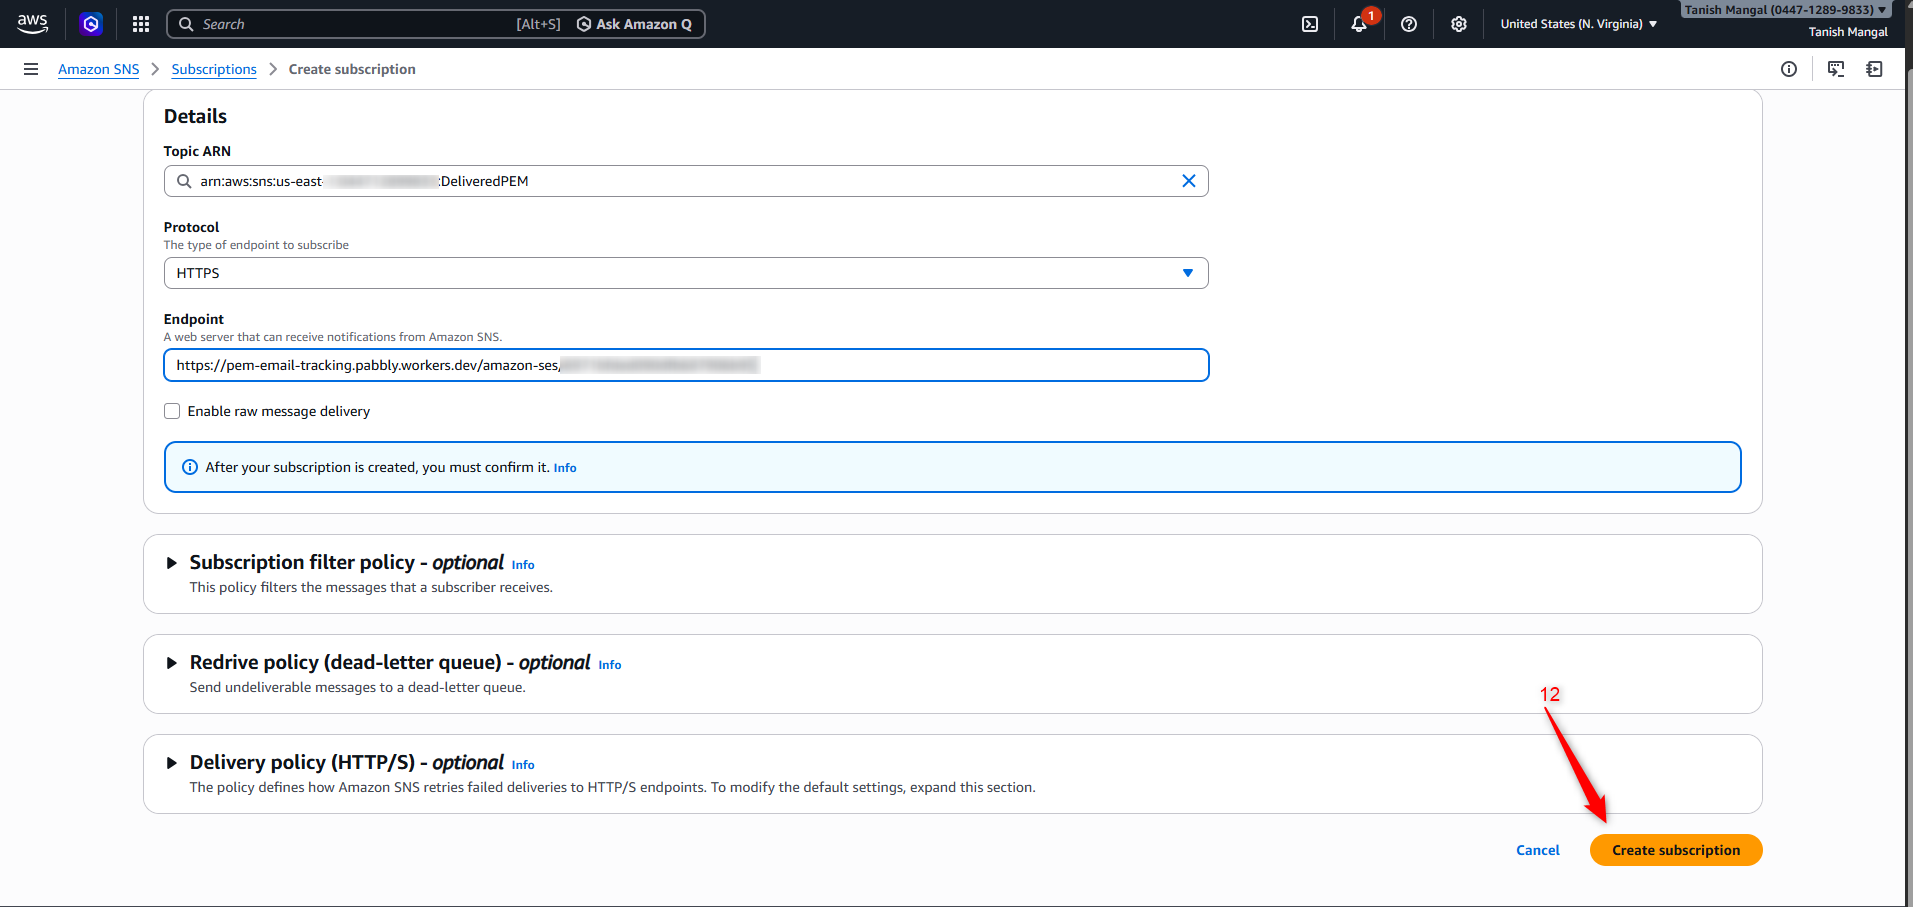
Your Delivered webhook setup is now completed successfully.
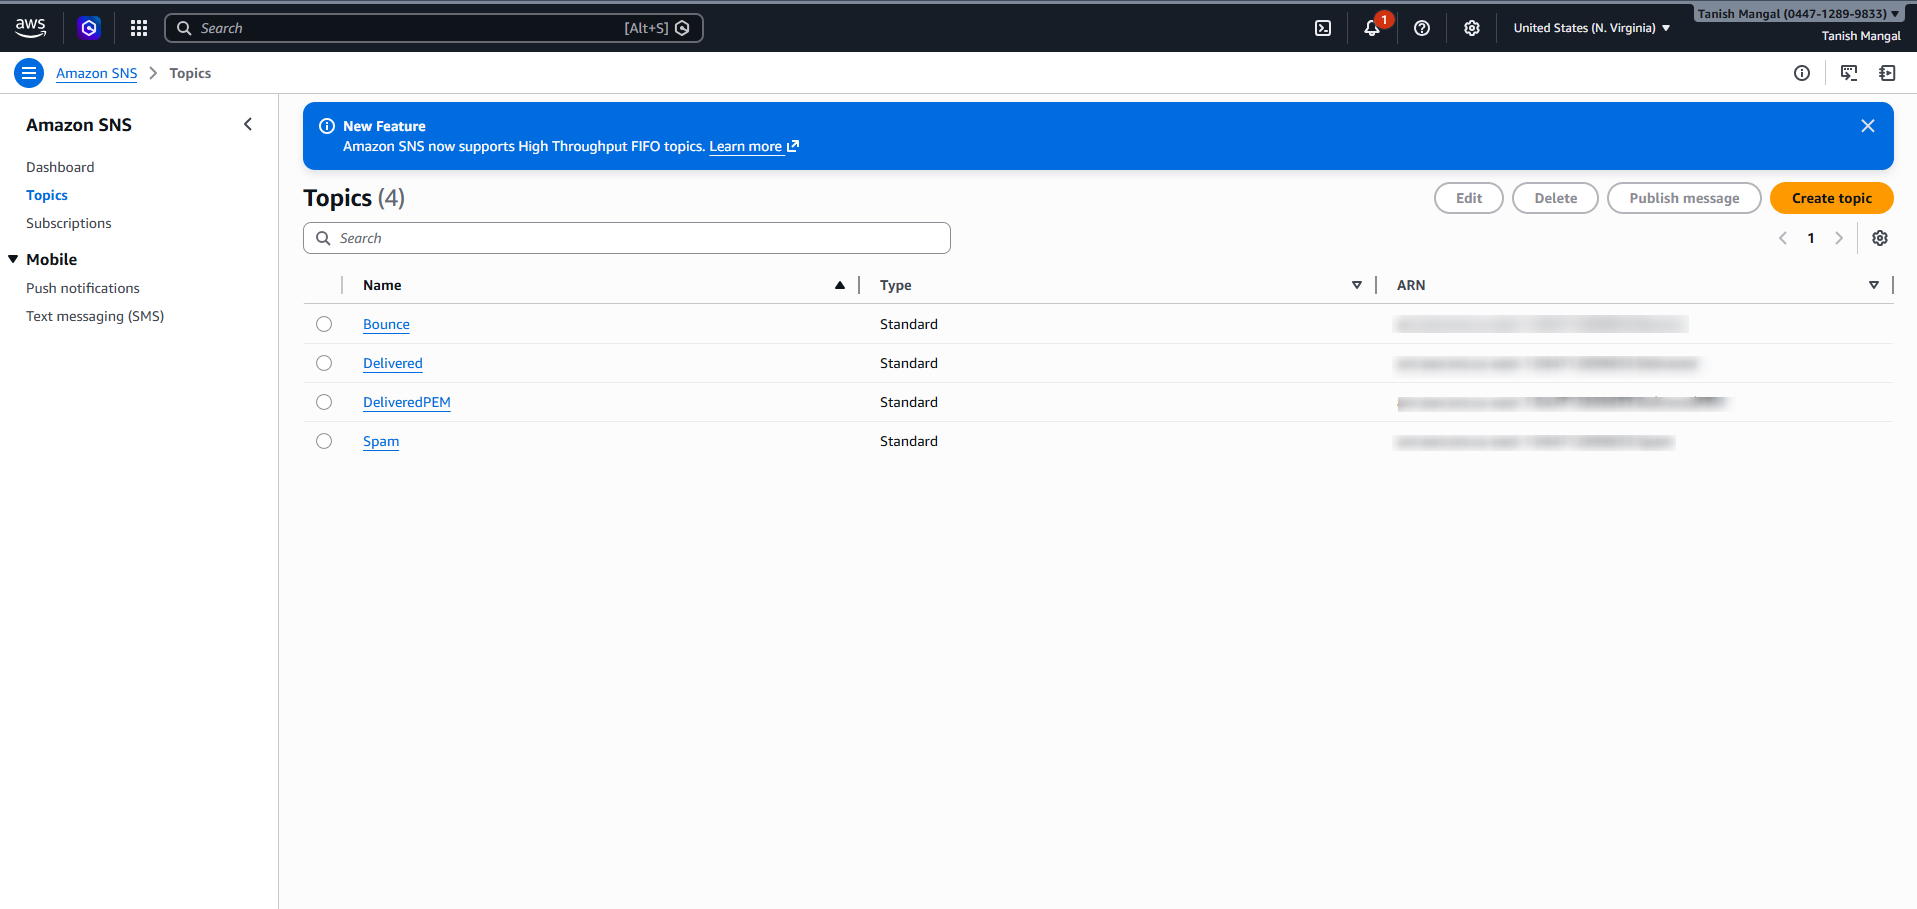
Please follow the same process to configure the Bounce and Spam webhooks using the same URL.
Once completed, you will find that two topics will be created under your “Topics.”
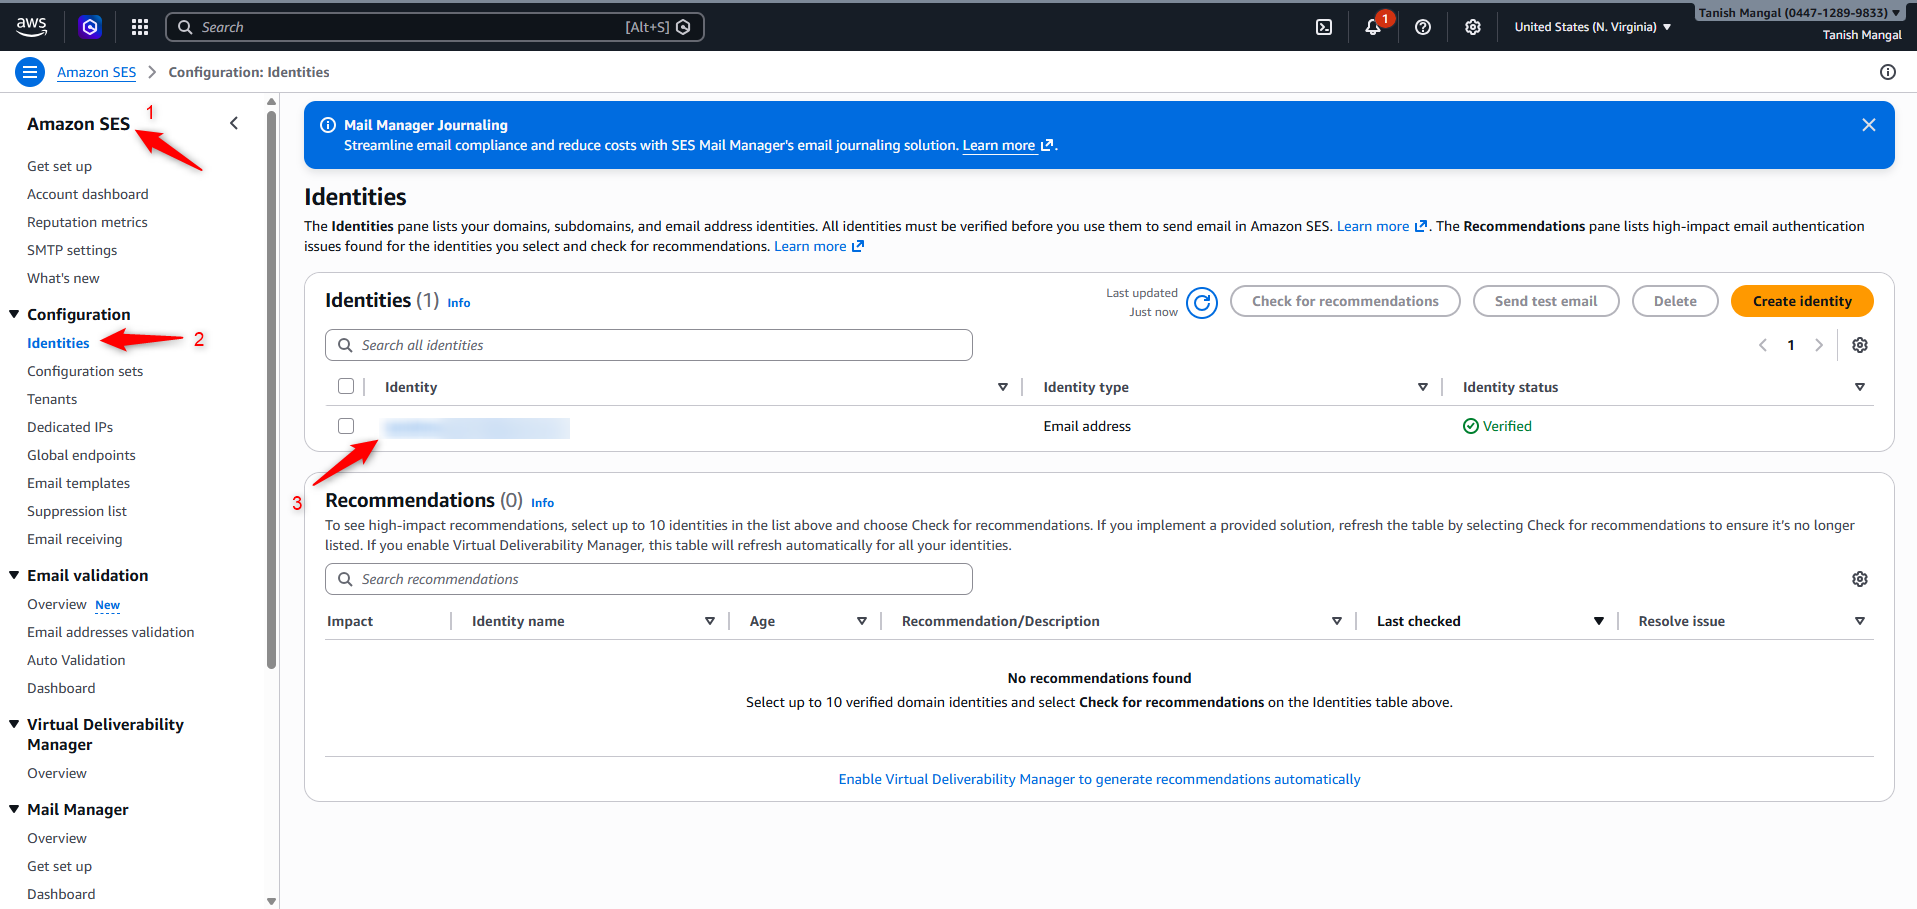
Step 13: Go back to Amazon SES: Verified identity, and select the email address from which you will be sending emails, if you send emails from more than one email address, this process has to be followed for all the sender email addresses individually.
Step 14: Upon selecting the email address, select Notification
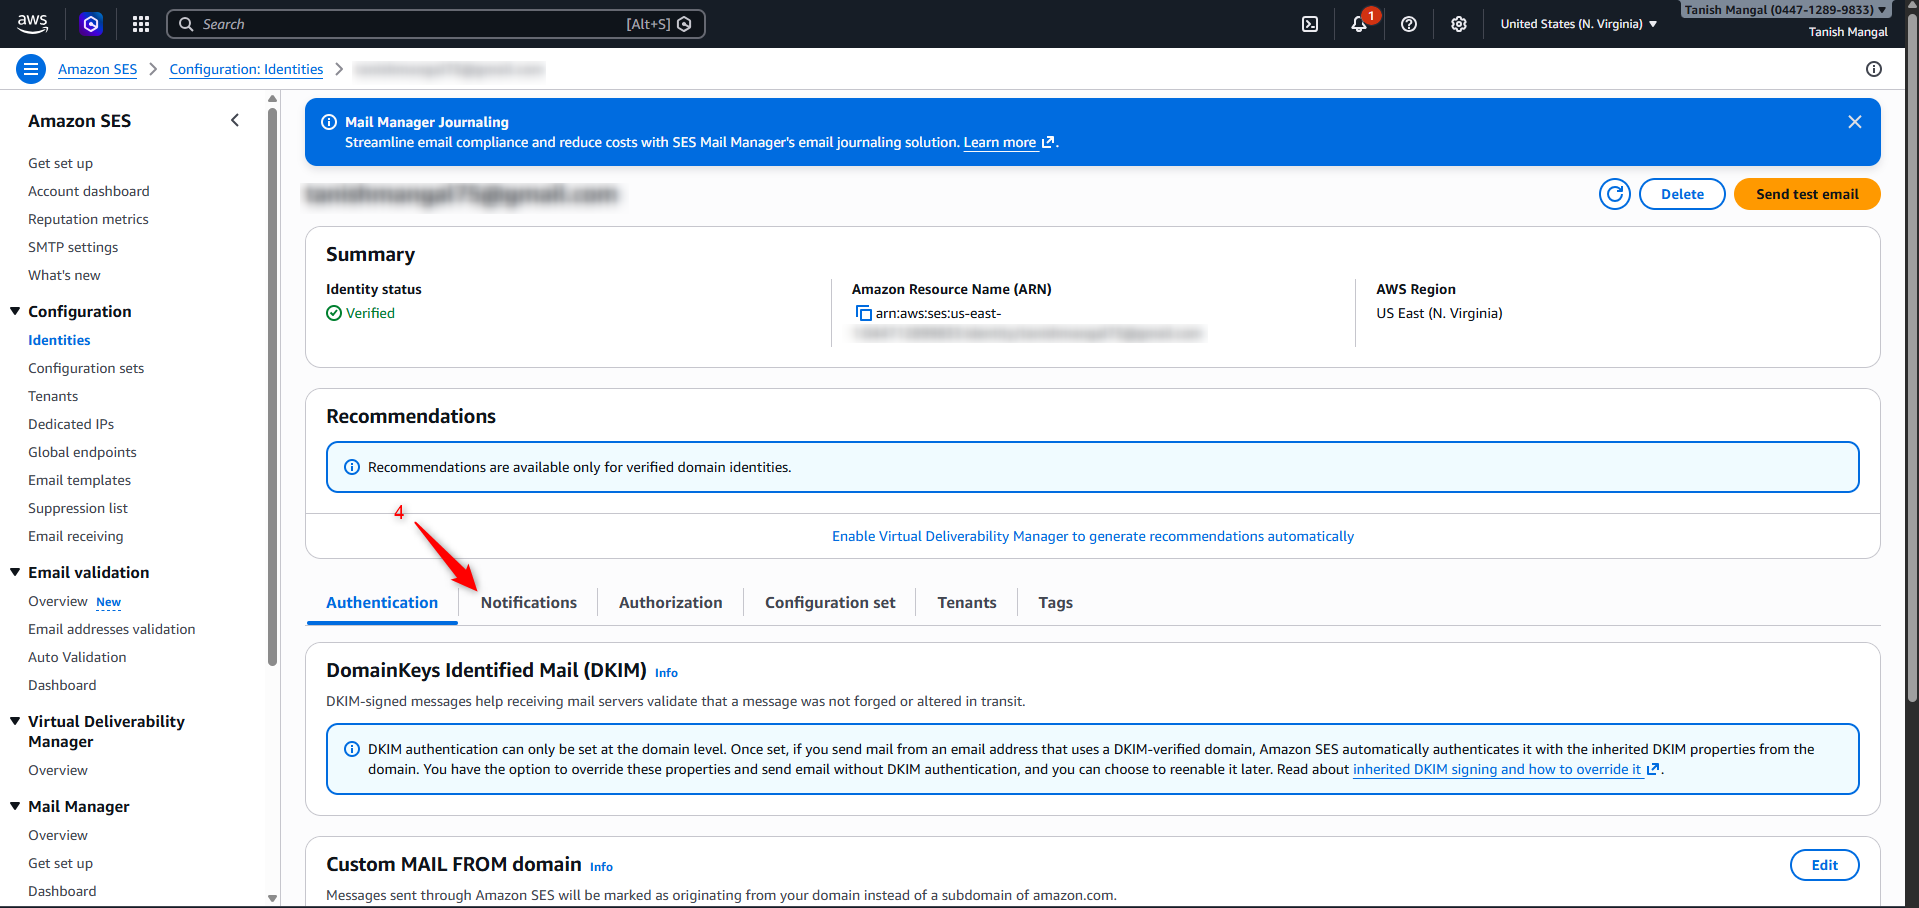
Step 15: Edit the feedback notification
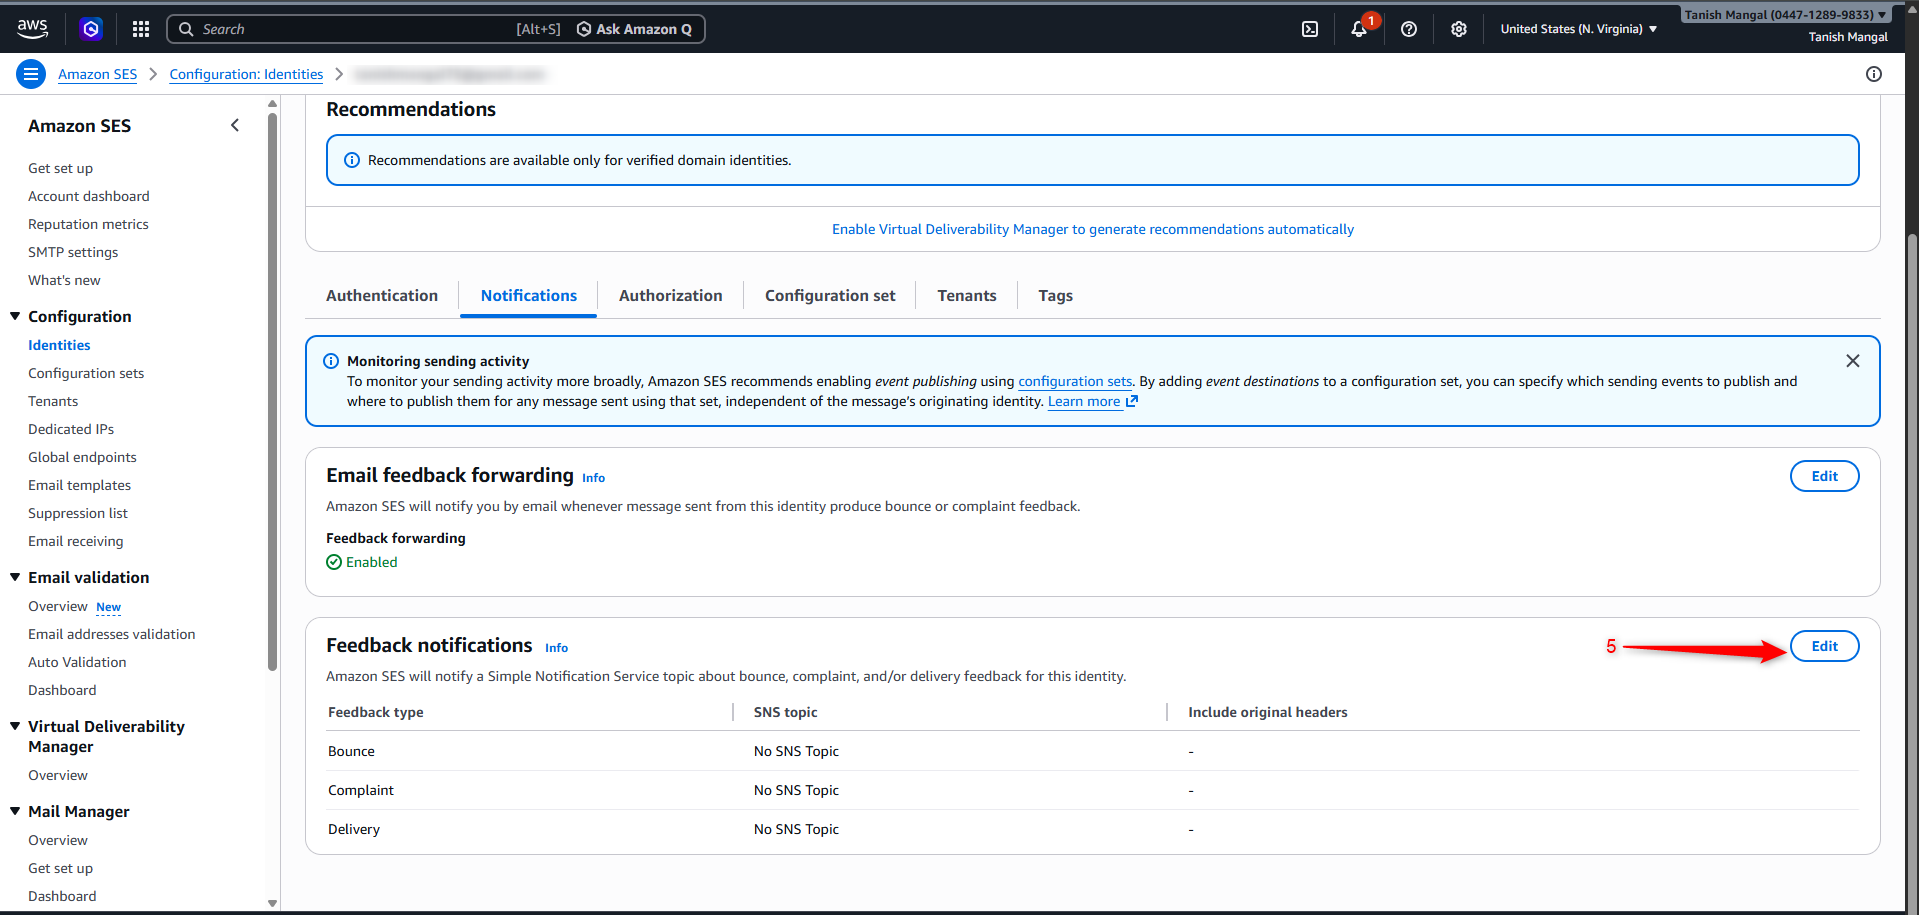
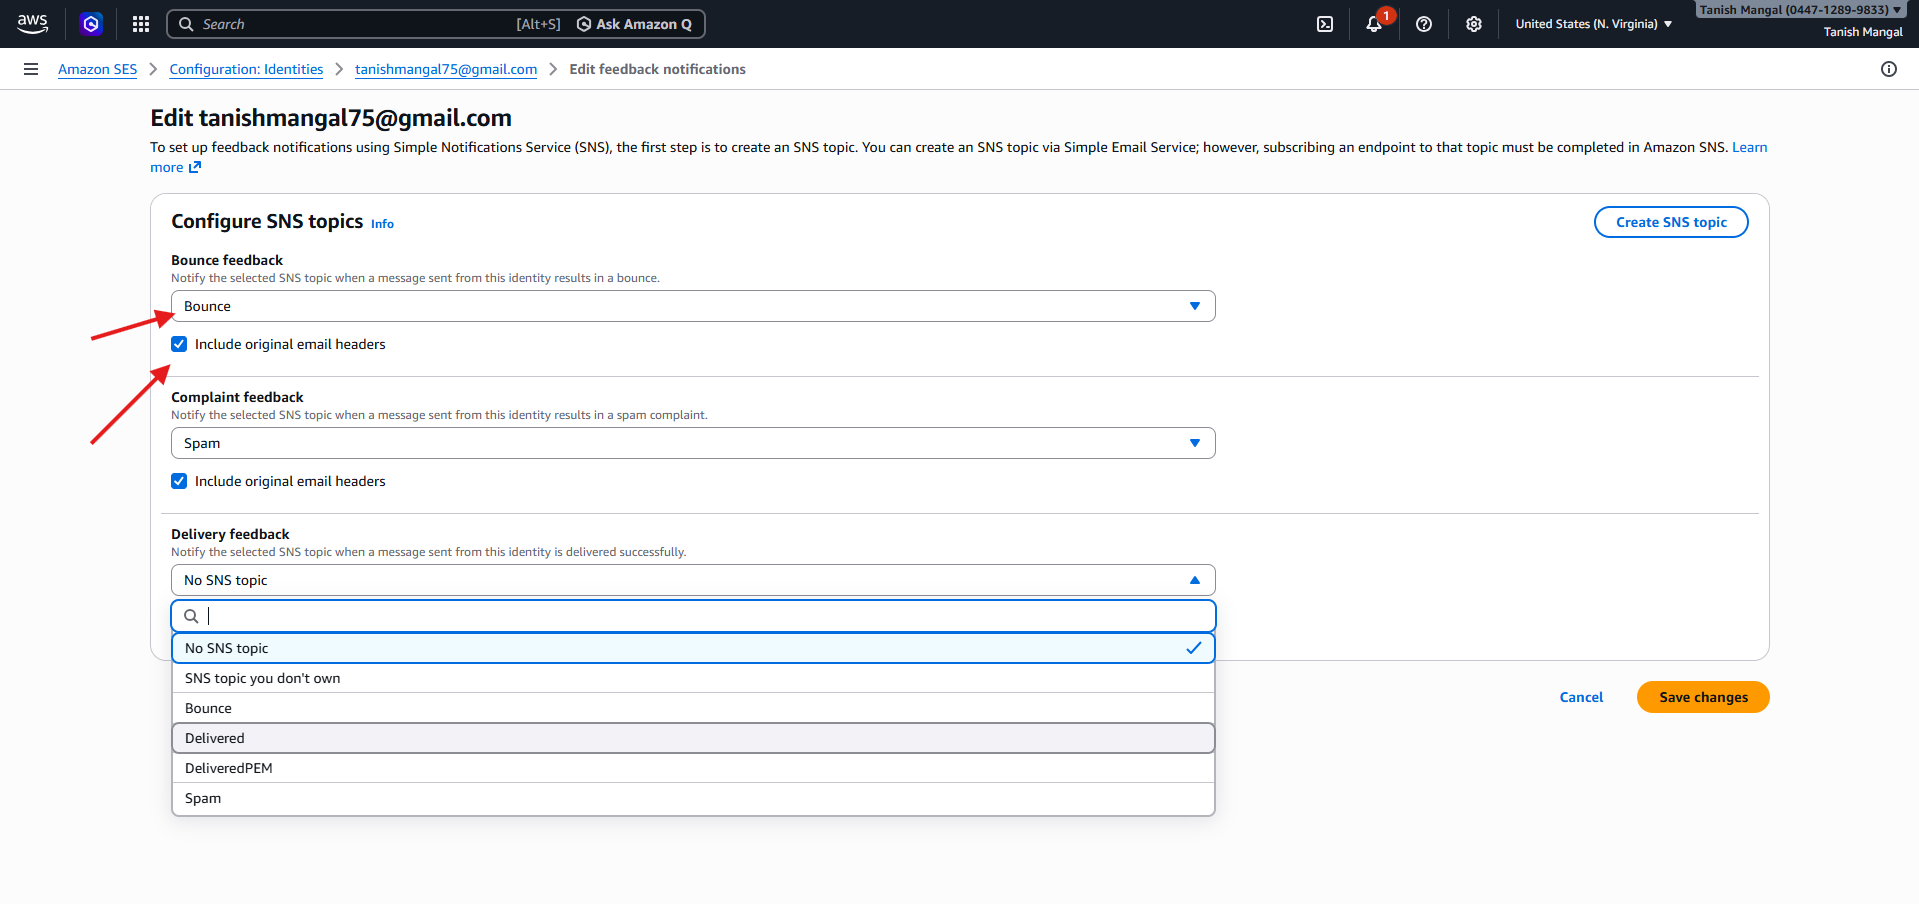
Step 16: Configure the SNS topics by selecting the Delivered, Bounce, and Spam topics from the dropdown. Then, enable the checkbox "Include original email headers" and save the changes.
Once added the layout will look like the image added below:
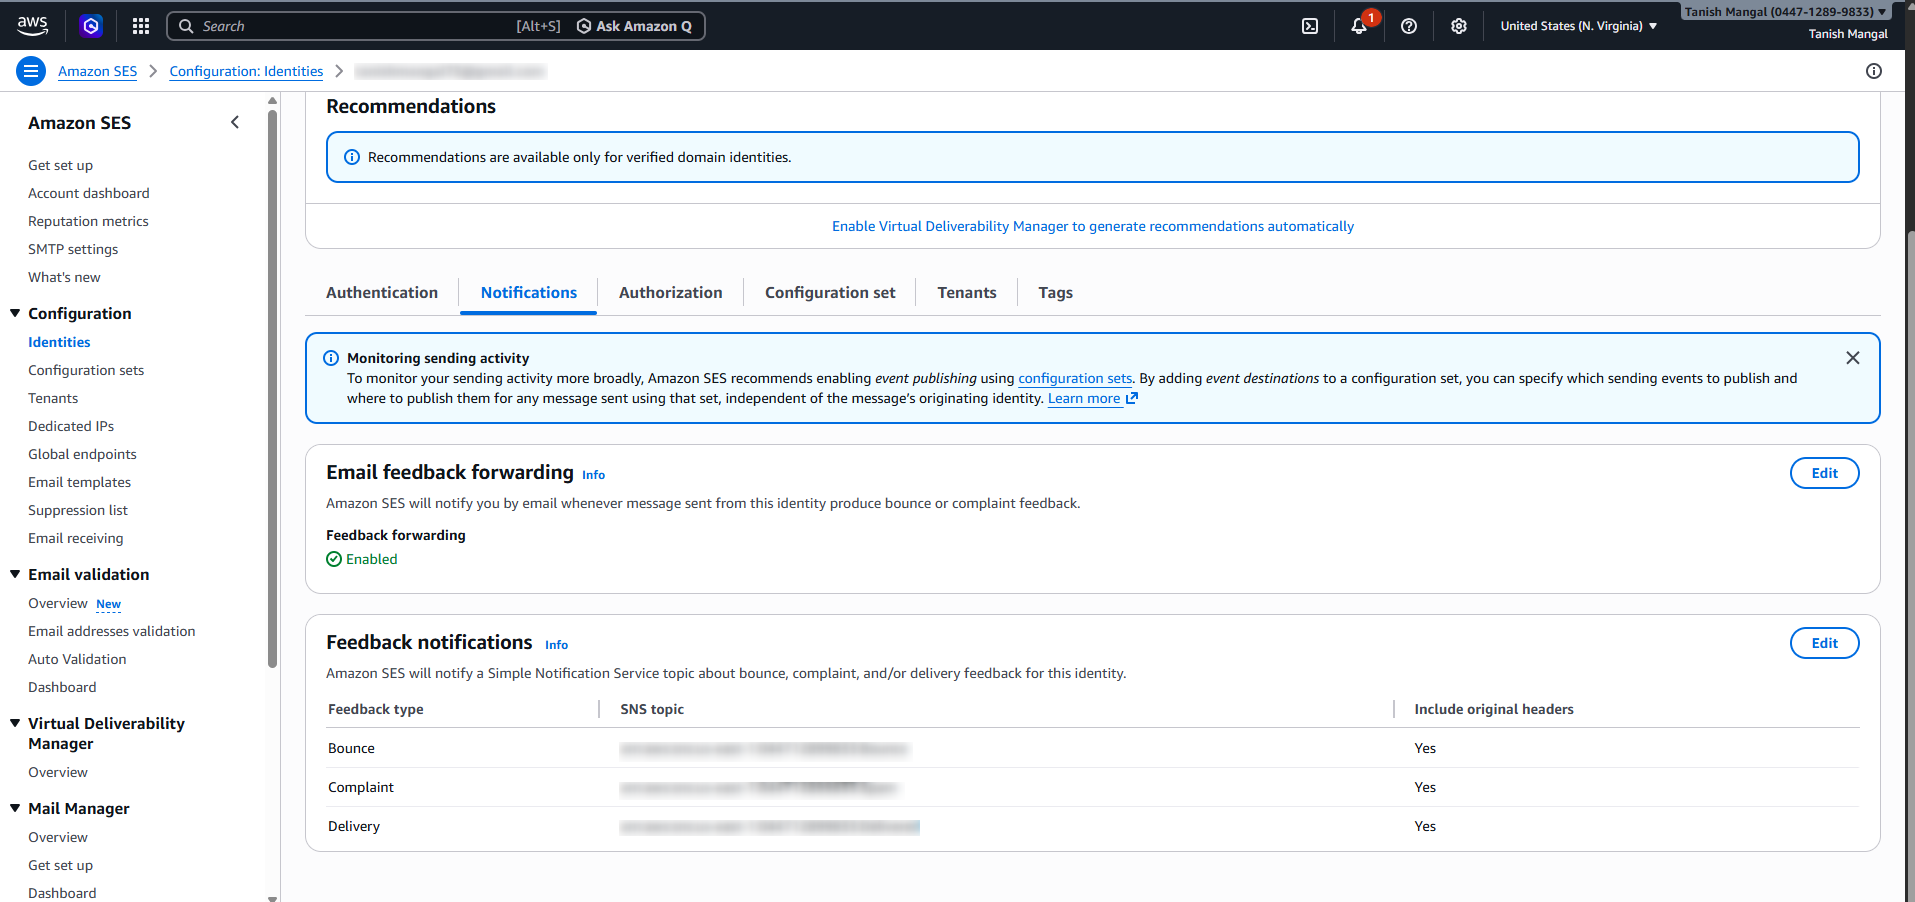
Now that you have configured the Delivered, Bounce, and Spam webhooks, whenever you send emails via Amazon SES, Pabbly Email Marketing will receive notifications for these events.
Based on these events, we will automatically add the respective email addresses (bounce and spam) to the suppression list and block future email sending to them.
Originally posted by Hrishabh.pabbly on 2026-04-01 (forum thread #35614).
