Automation Workflow
This first example demonstrates how you can create an automation using the Subscriber Lifecycle trigger and the Email action.
When a new subscriber is added → An email is automatically sent to that subscriber.
New Subscriber Added → Send Email
This setup allows your workflow to detect when a new subscriber joins your list and immediately send them a follow-up or welcome email.
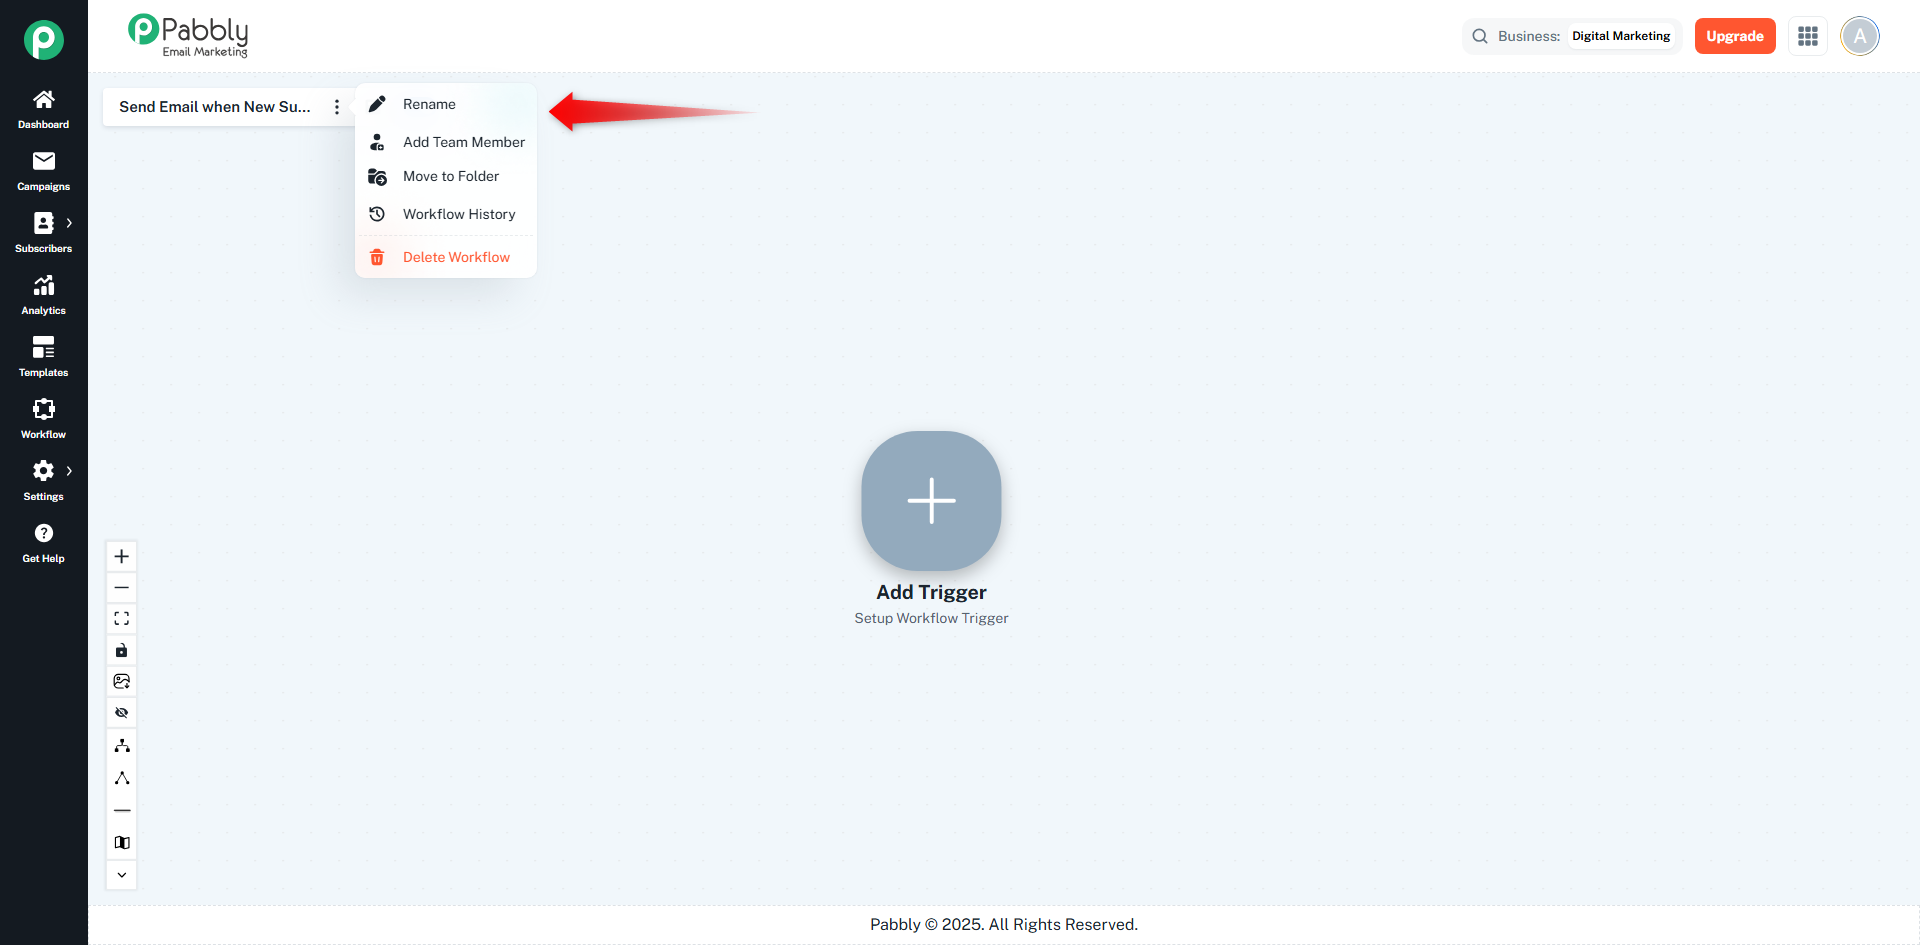
After creating a workflow, the system automatically opens the Workflow Builder interface.
Here you can design automation using Trigger Nodes and Action Nodes.
The header includes:
Workflow Name
Save option
Active/Inactive toggle
Options menu (Rename, Move to Folder, Add Team Member, View History, Delete Workflow)
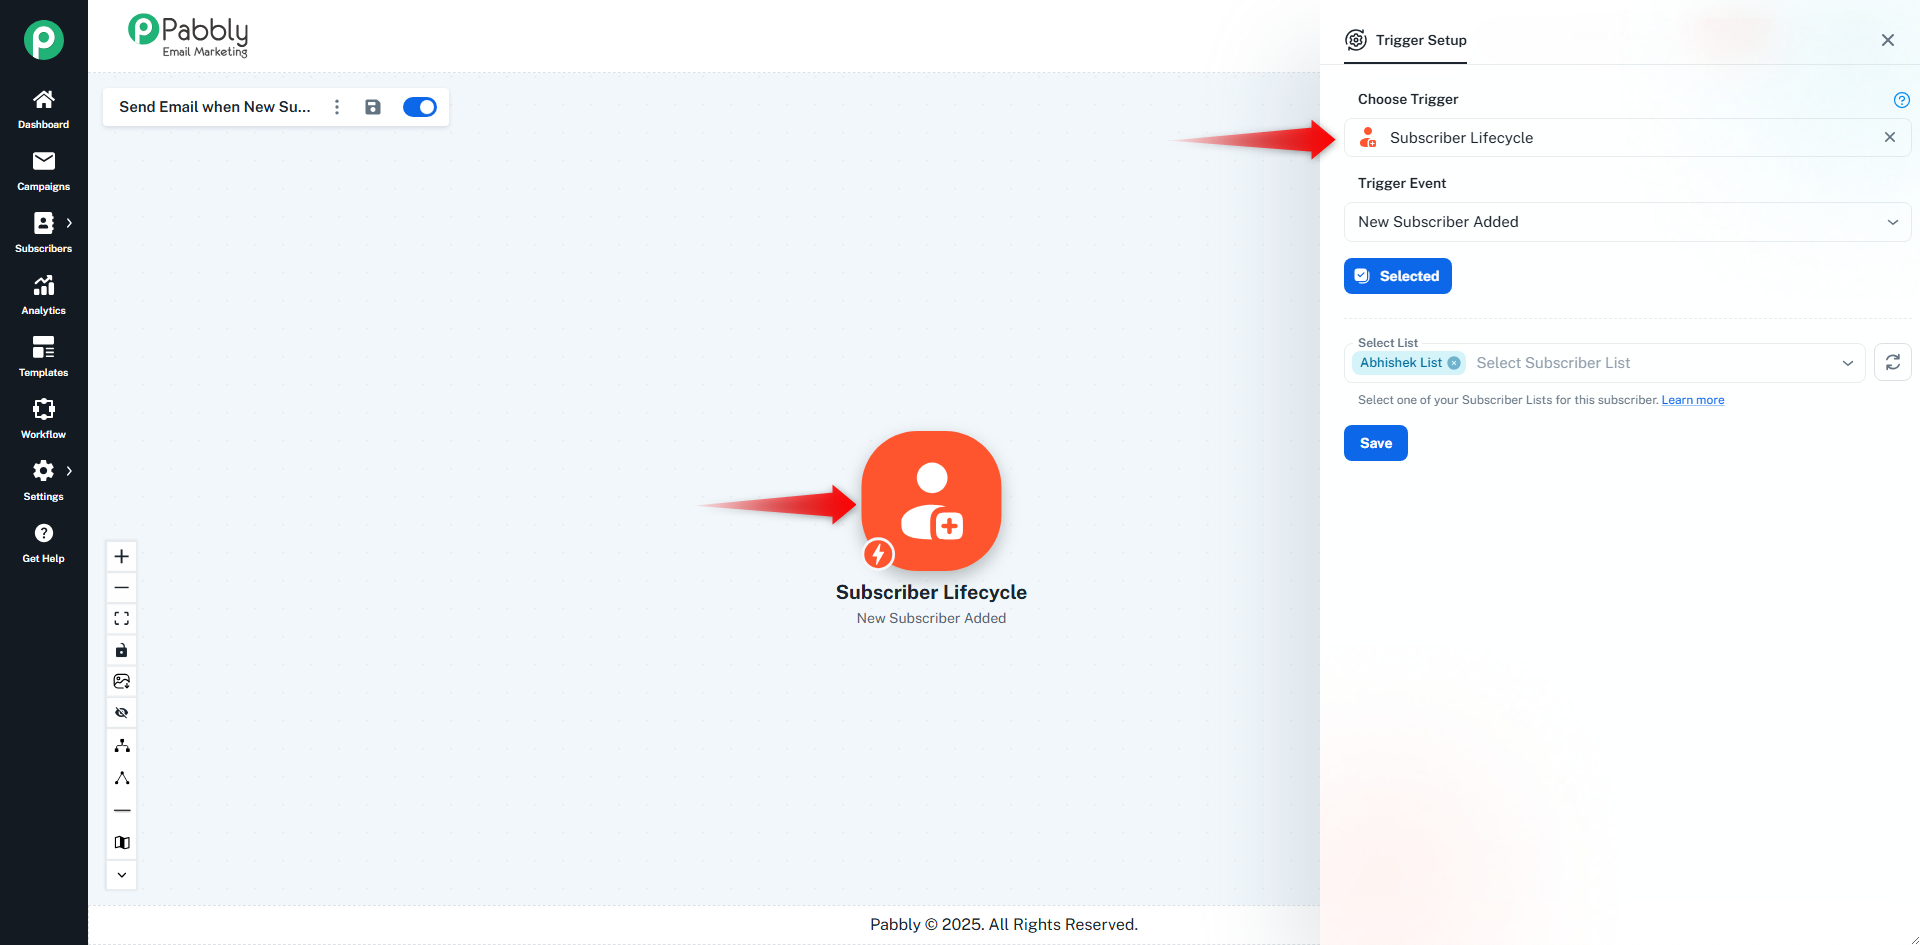
A drawer titled Trigger Setup opens from the right side.
From the drawer, choose Subscriber Lifecycle.
Available events include:
New Subscriber Added
Subscriber Updated
Subscriber Removed
Custom Field Updated
Tag Added
Tag Removed
For this example, select New Subscriber Added.
This confirms your trigger event.
A dropdown appears where you can choose the subscriber list that will activate this workflow.
Click Save.
A success toast appears: “Subscriber Life Cycle settings saved successfully!”
The drawer closes automatically
The trigger node becomes active on the workflow canvas
A + button (Add Action) appears on the right side of the node.
A new Action Node is created.
At the same time, the Action Setup drawer opens automatically.
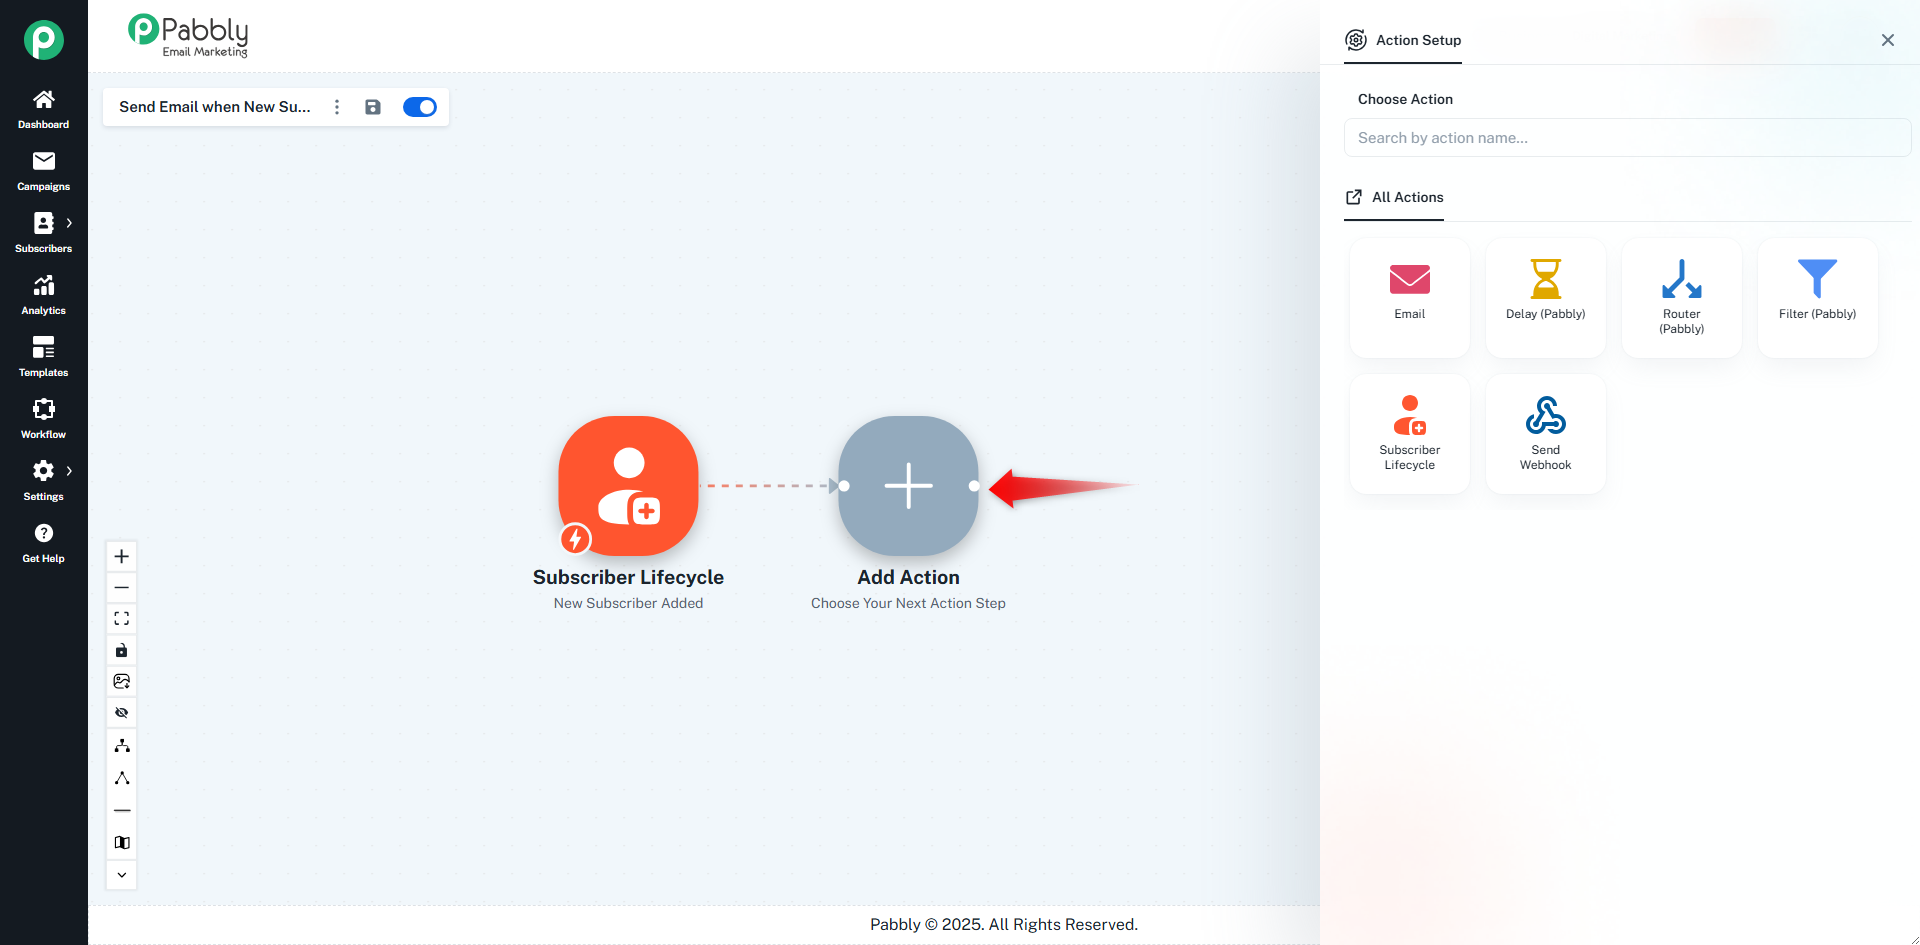
The Action Drawer contains multiple action types:
Delay (Pabbly)
Router (Pabbly)
Filter (Pabbly)
Subscriber Lifecycle
Lead Score
Send Webhook
Each action type allows you to build different logic inside your workflow.
But in this documentation, we will explain only the Email action, as part of our example workflow.
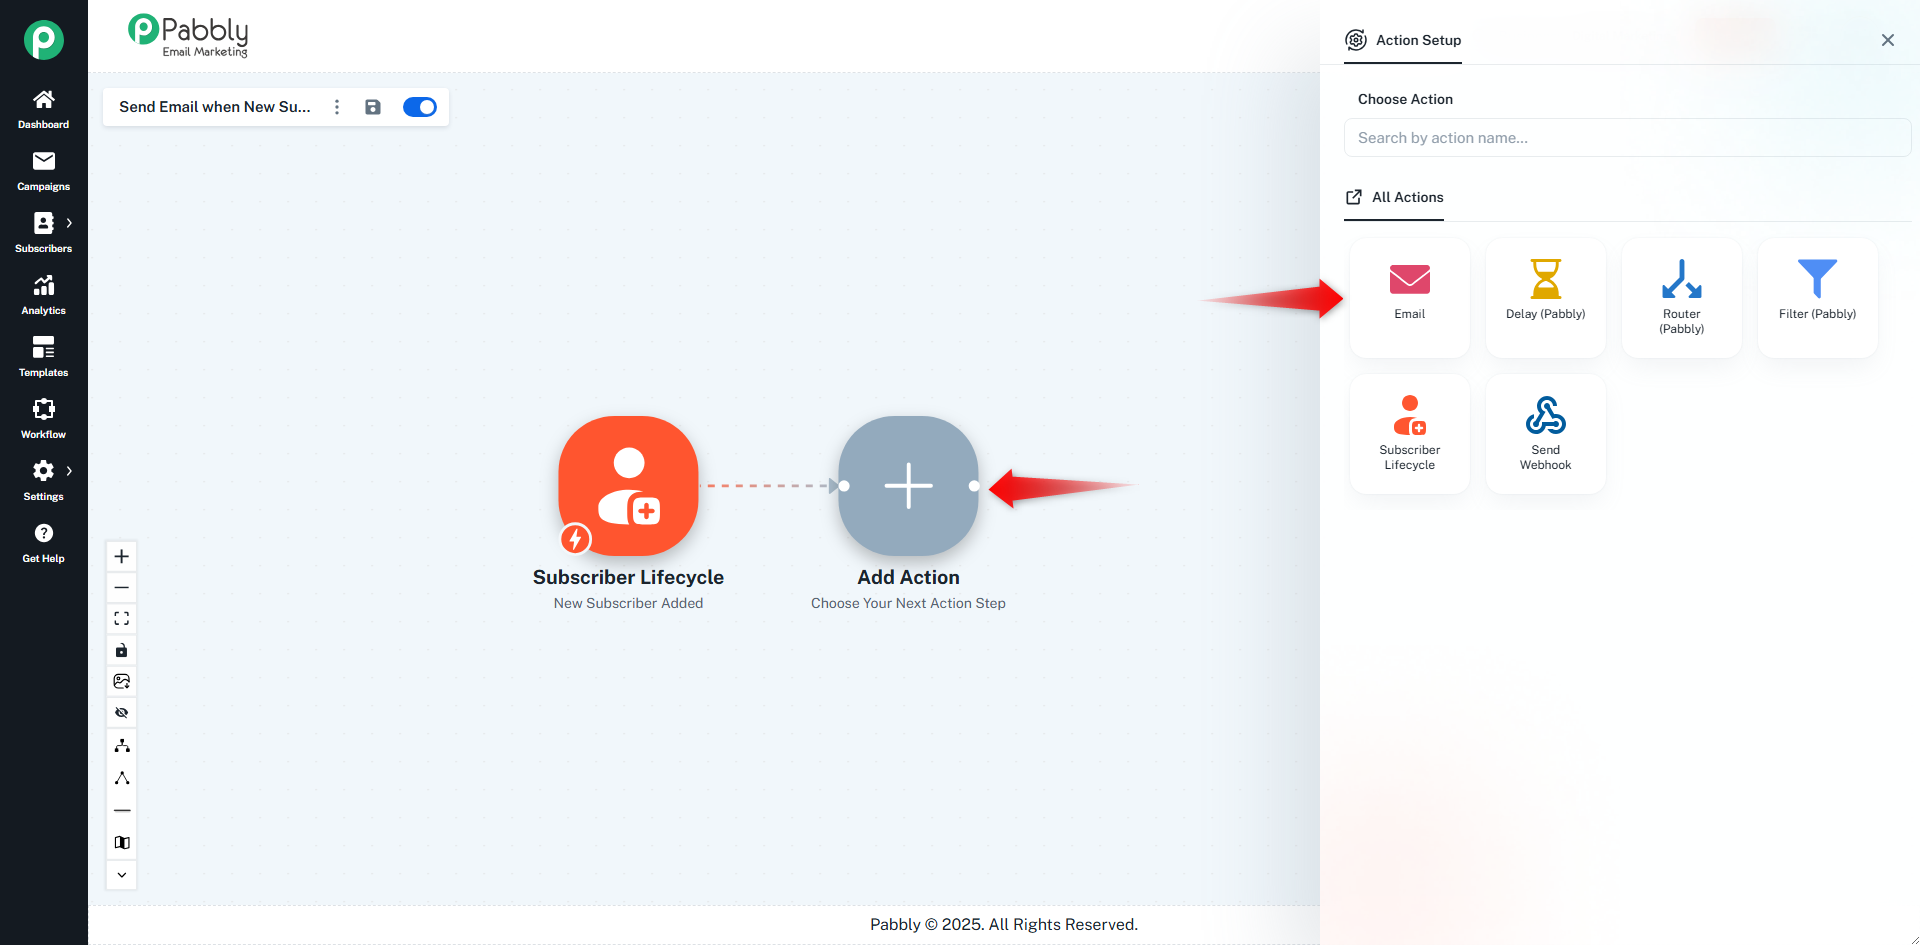
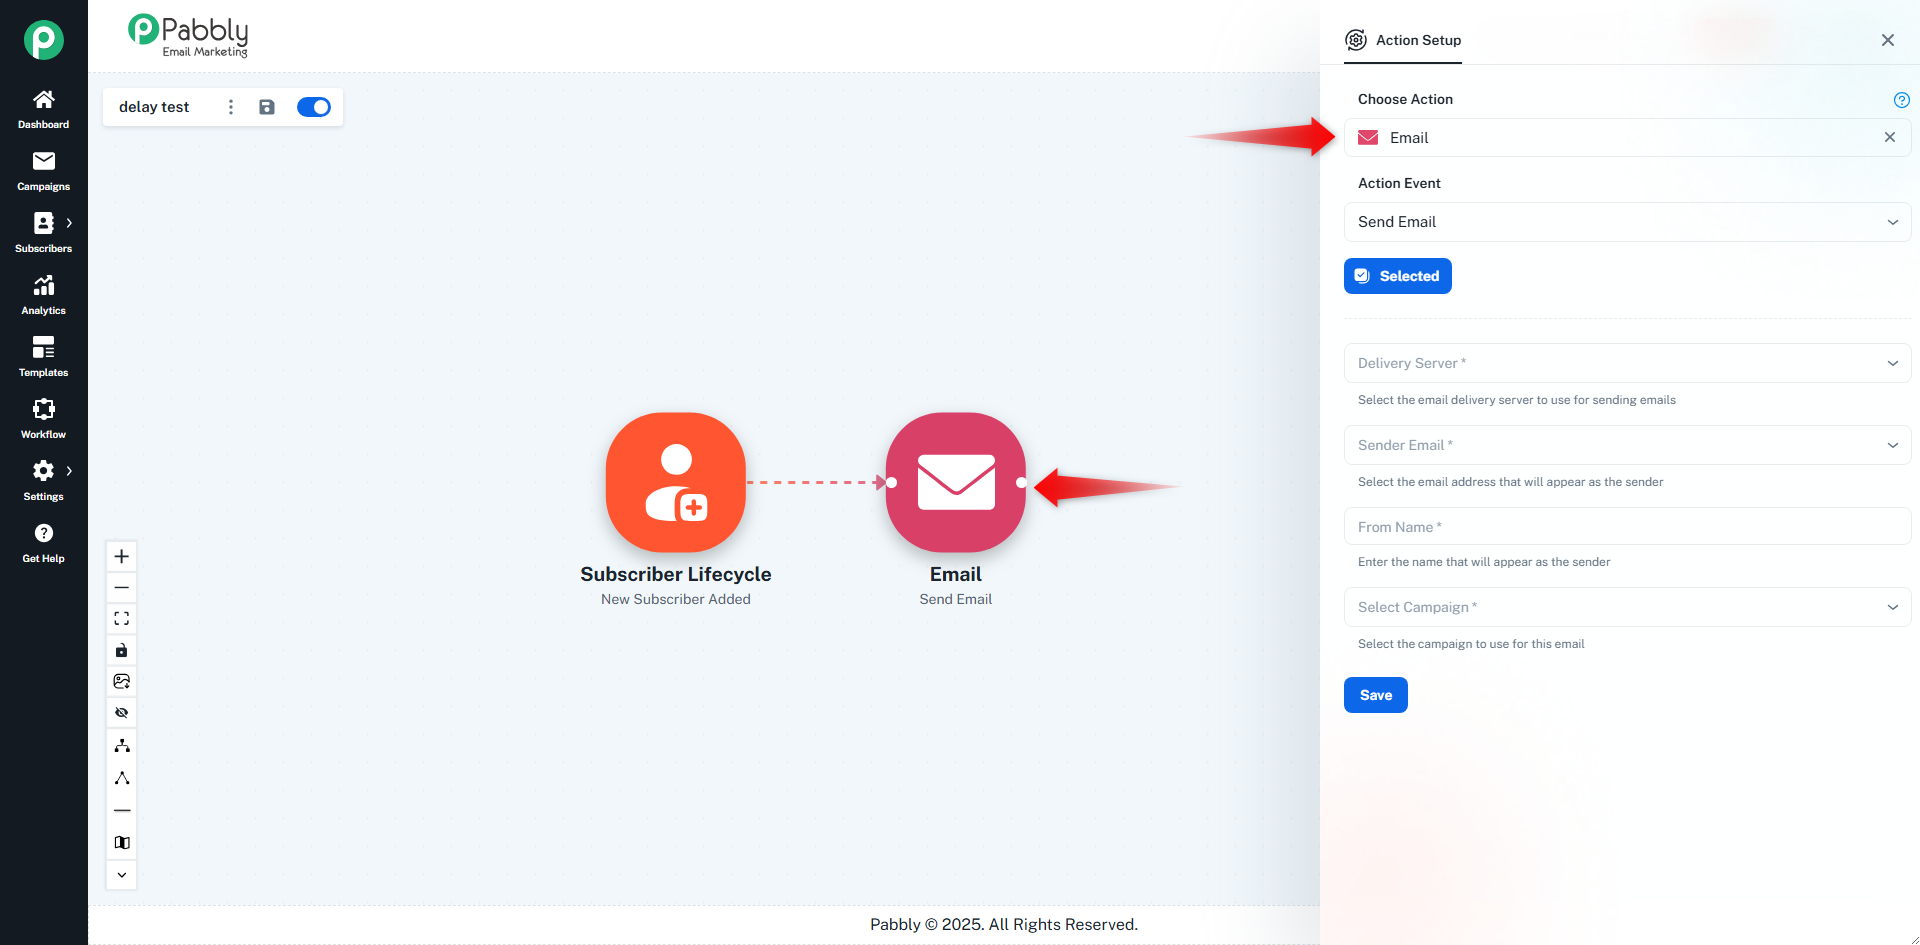
The email node appears on the canvas.
From the Action Event dropdown, select:
✔ Send Email
This loads the email configuration form.
You will now see these required fields:
Delivery Server* → Choose the server used to send emails
Sender Email* → The email address that will appear as the sender
From Name* → The name displayed in the recipient’s inbox
Select Campaign* → Choose the email campaign to send
These fields ensure that the email is properly delivered.
After completing all required fields:
Click Save
A success toast appears:
✔ “Email settings saved successfully!”
The drawer closes automatically
Your workflow now contains:
🔹 Trigger: New Subscriber Added
🔹 Action: Send Email
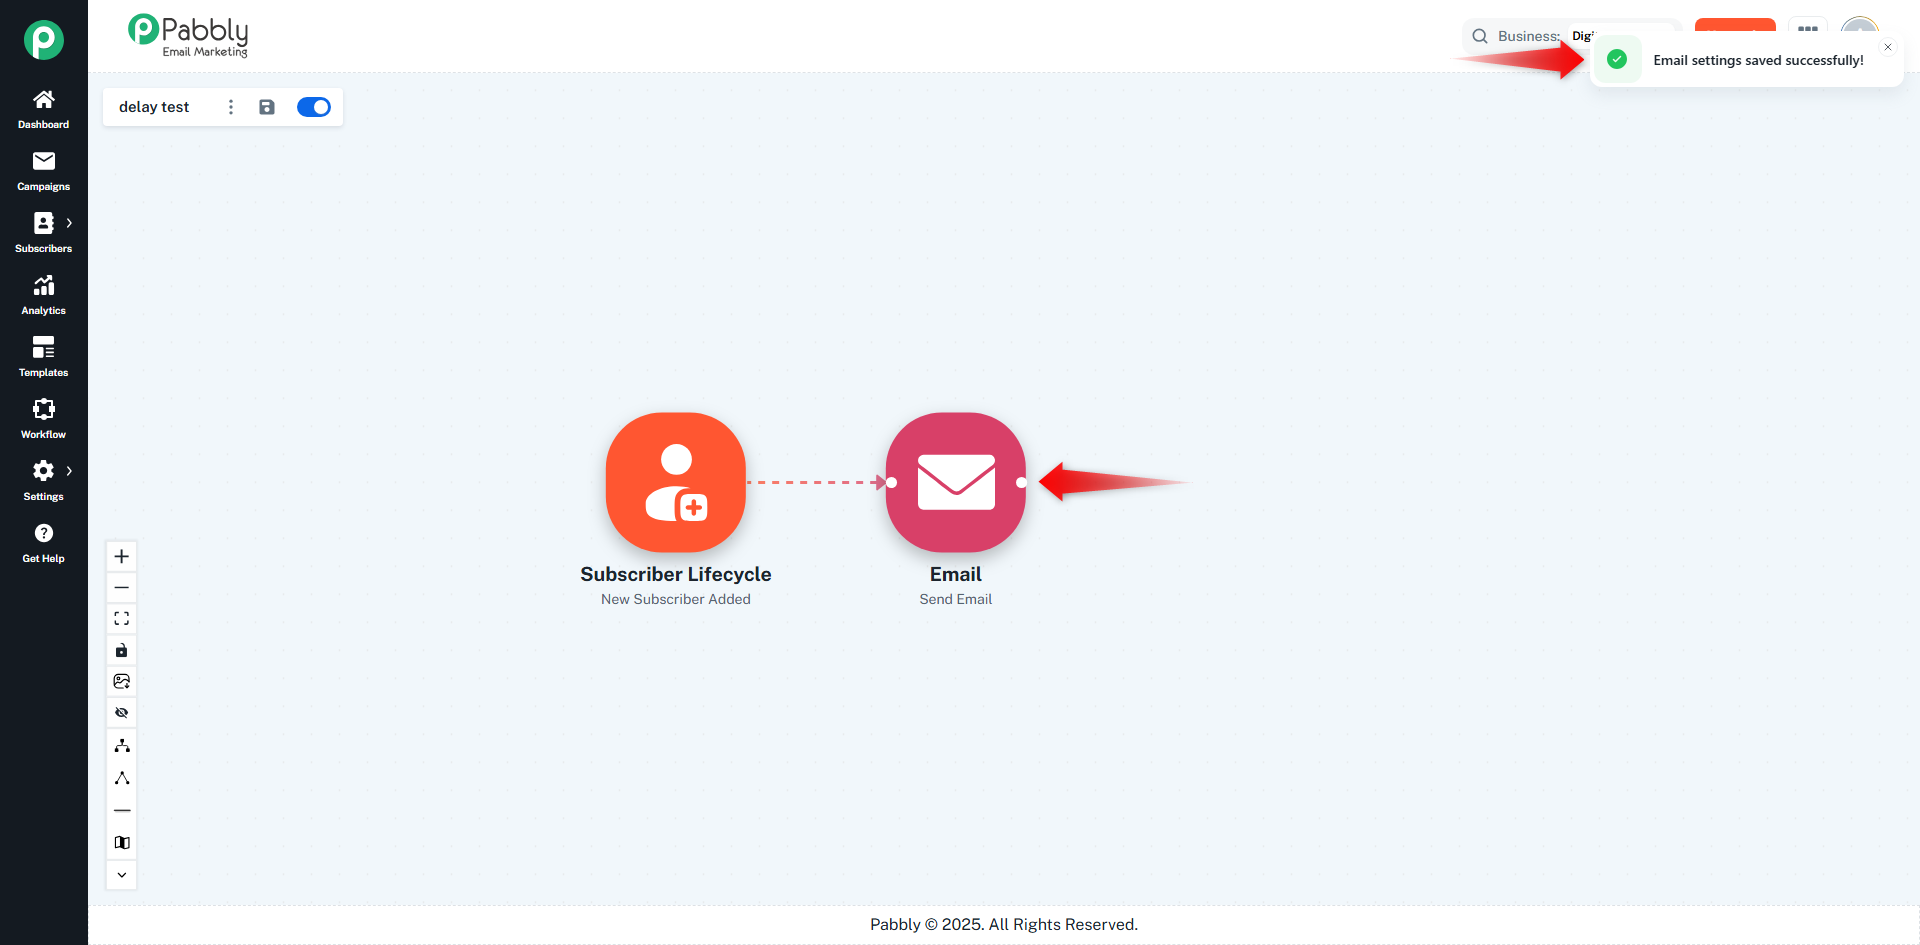
This example workflow automates the following behavior:
➡ Whenever a new subscriber is added to the selected list
➡ The Email Action is triggered
➡ The system automatically sends the selected email campaign to that subscriber
This allows you to create:
Welcome email sequences
Onboarding messages
Confirmation emails
Automated follow-ups
Without any manual action required.
This second example demonstrates how you can extend your automation by adding a Delay (Pabbly) action and using it as part of a looping workflow.
This workflow is useful for drip campaigns, periodic reminders, or repeated follow-ups until a condition is met.
Subscriber Lifecycle → Delay → Email → (Optional Condition / Loop Back)
This setup allows the workflow to pause, execute an action, and then repeat based on conditions you configure.
Just like the previous example, the workflow begins when a subscriber is:
Newly added
Updated
Removed
etc.
For this example, we use:
➡️ New Subscriber Added
➡️ Select Subscriber List
➡️ Save (drawer closes automatically)
Once saved, the subscriber trigger node appears on the canvas.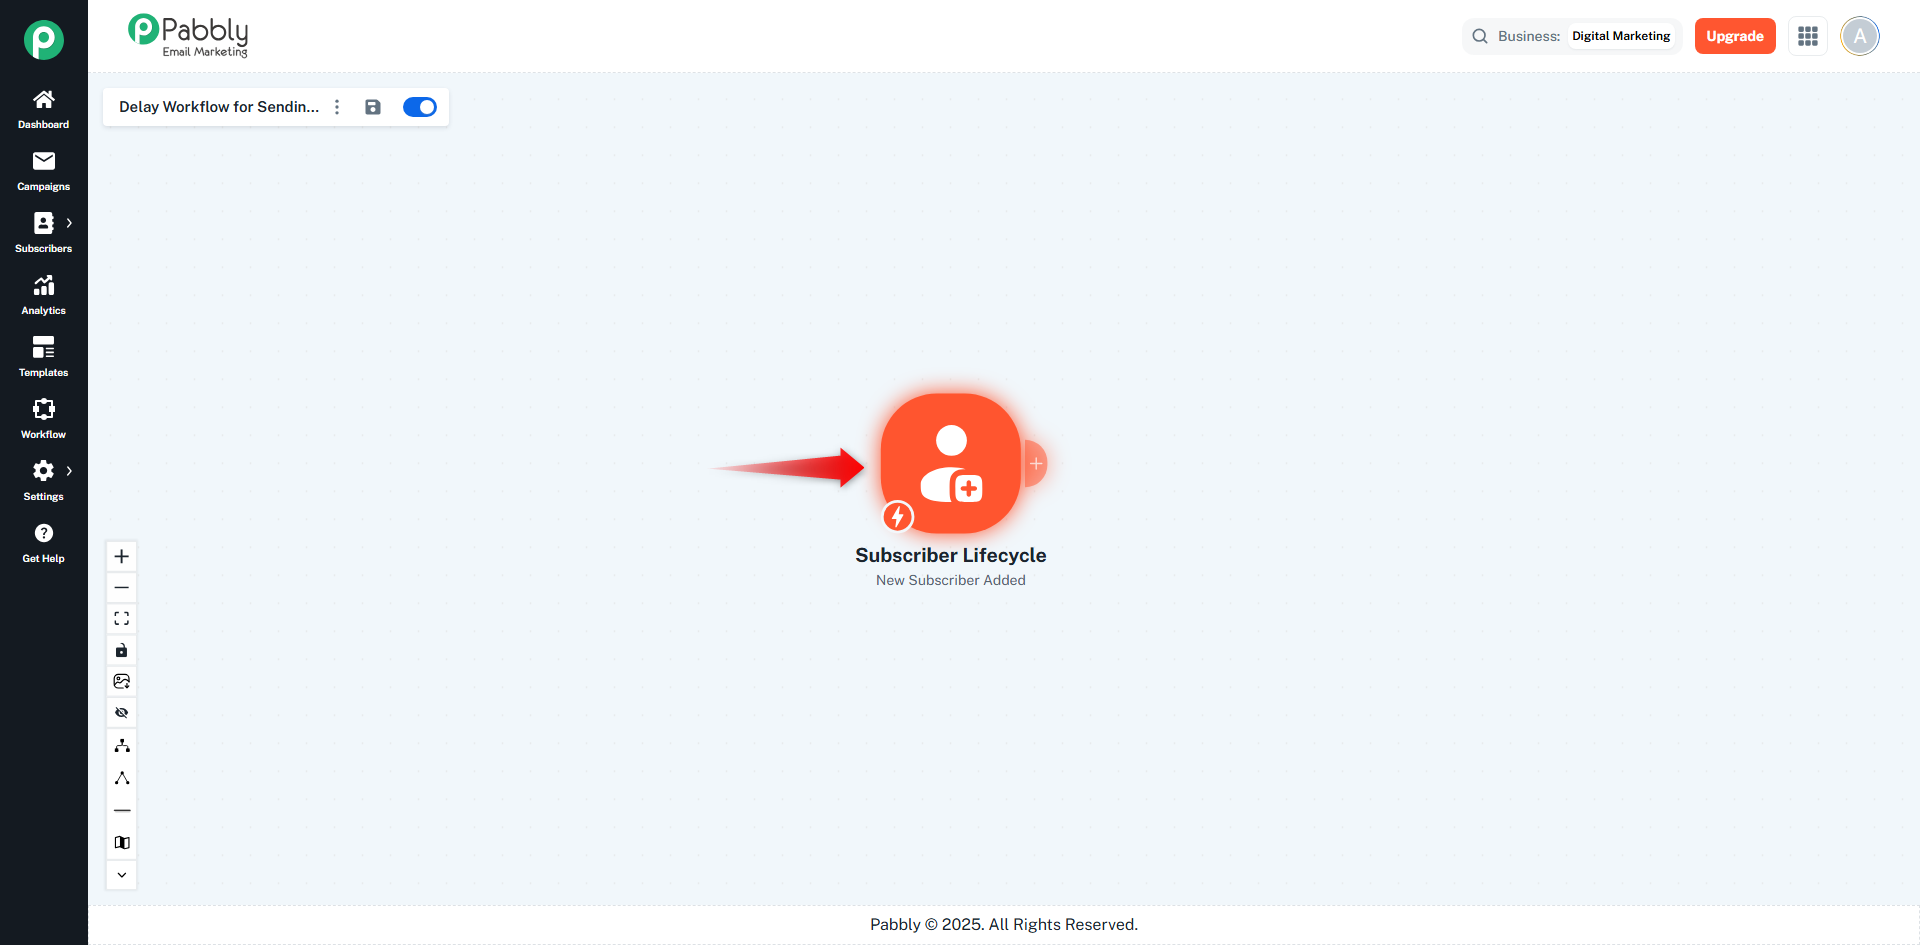
Click the Add Action (+) button near the trigger node.
From the action drawer, select:
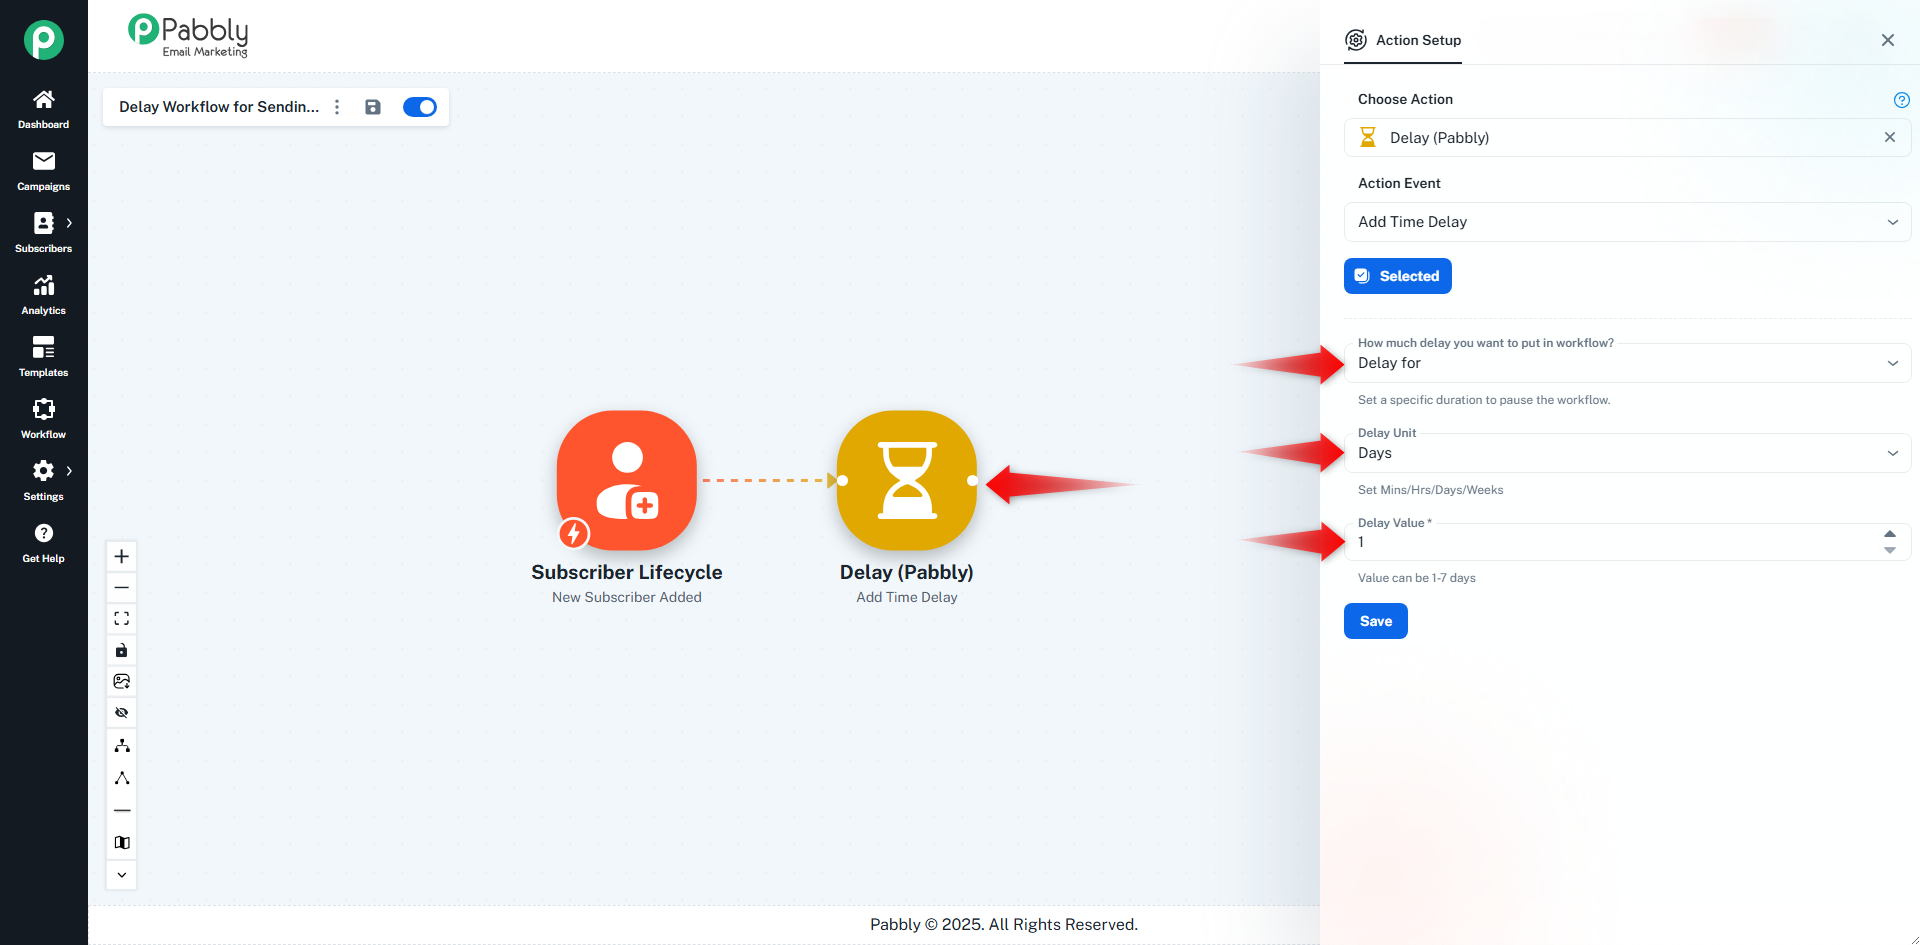
➡️ Delay (Pabbly)
➡️ Add Time Delay
You now configure how long the workflow should pause before continuing.
Pause for:
Minutes
Hours
Days
Weeks
Example:
➡️ Delay for → 1 Day
(This is common in email drip sequences.)
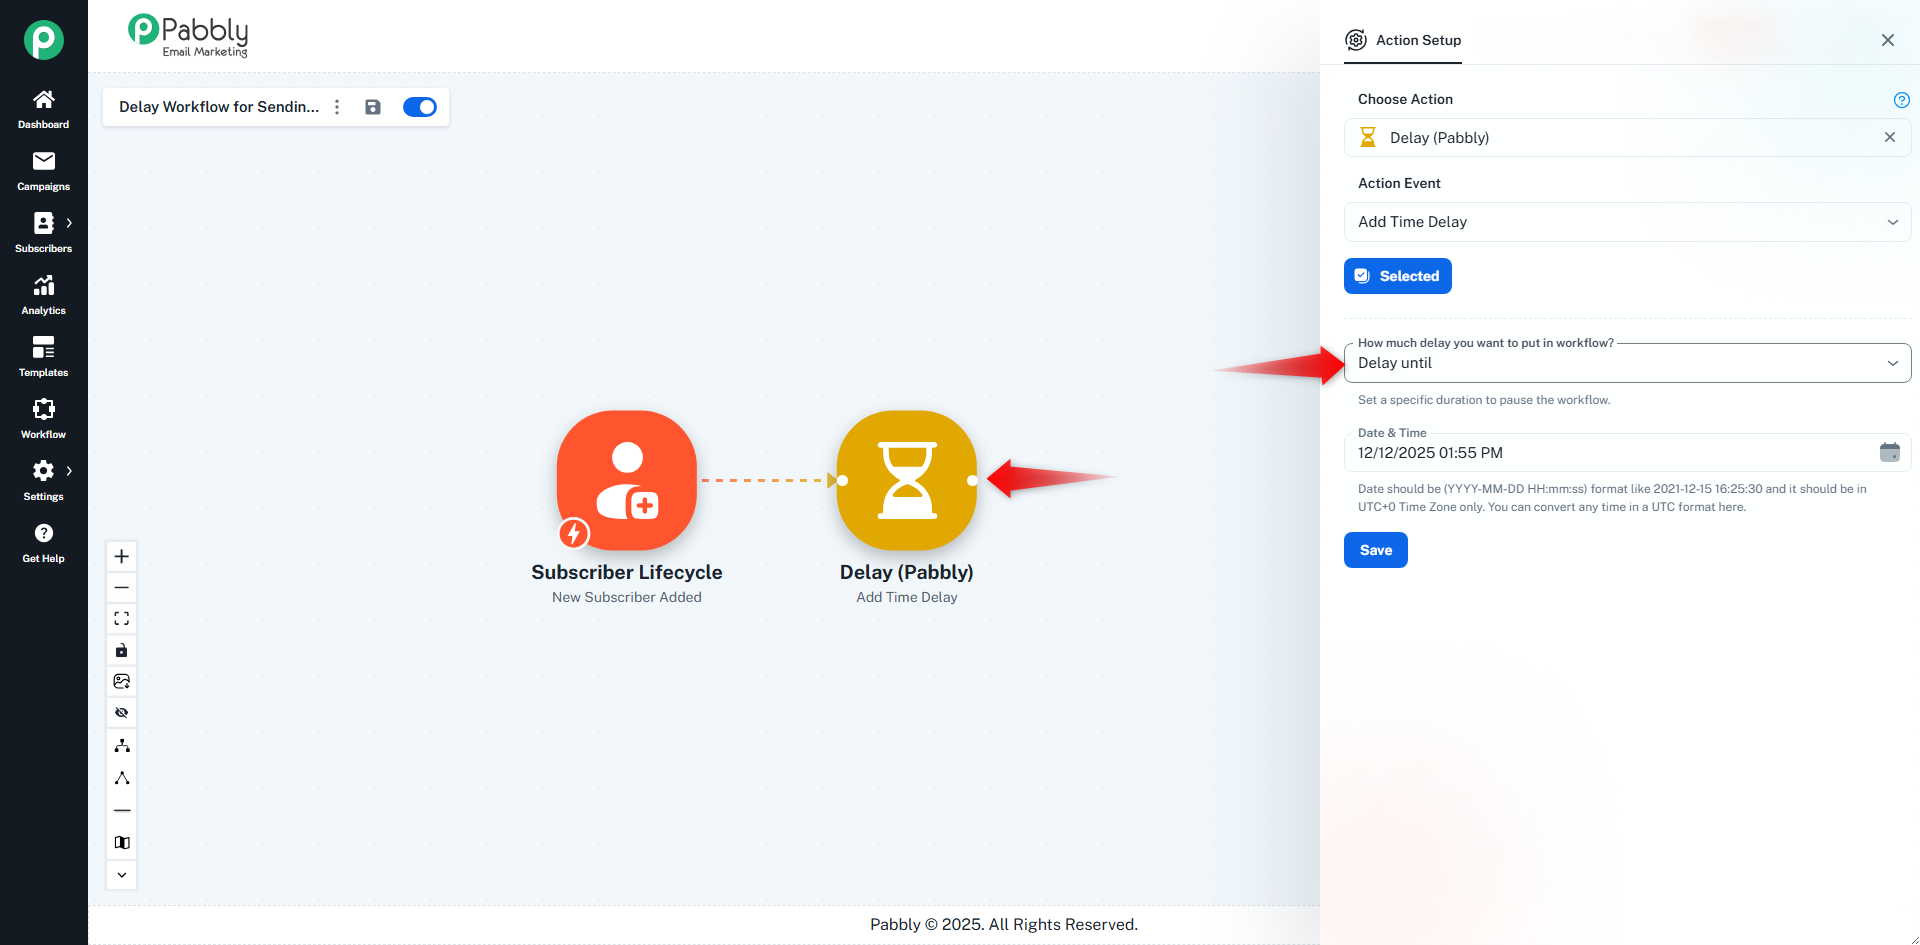
Pause the workflow until a specific:
Date
Time (UTC)
Example:
➡️ Delay until → 12/11/2025 03:53 PM
After selecting, click Save.
A success message appears, and the drawer closes automatically.
The Delay node now sits between the Trigger and the Email.
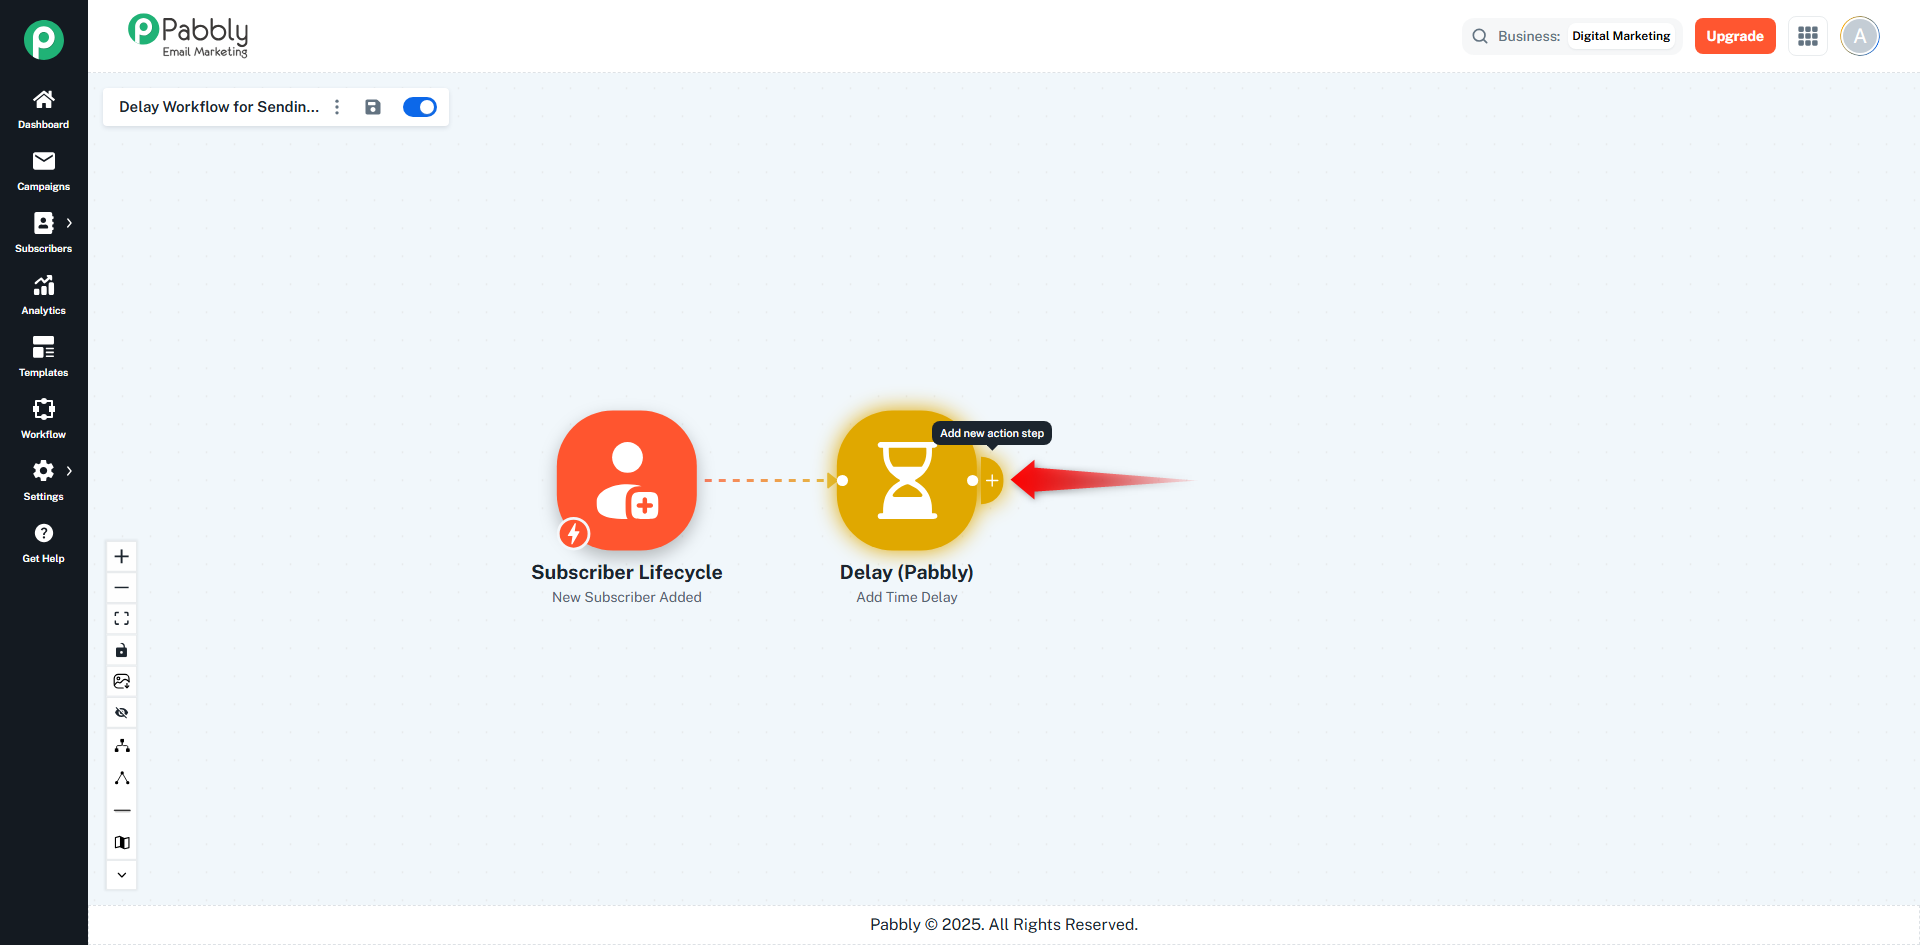
Next, hover on the Delay node and click the Add Action (+) button.
From the drawer:
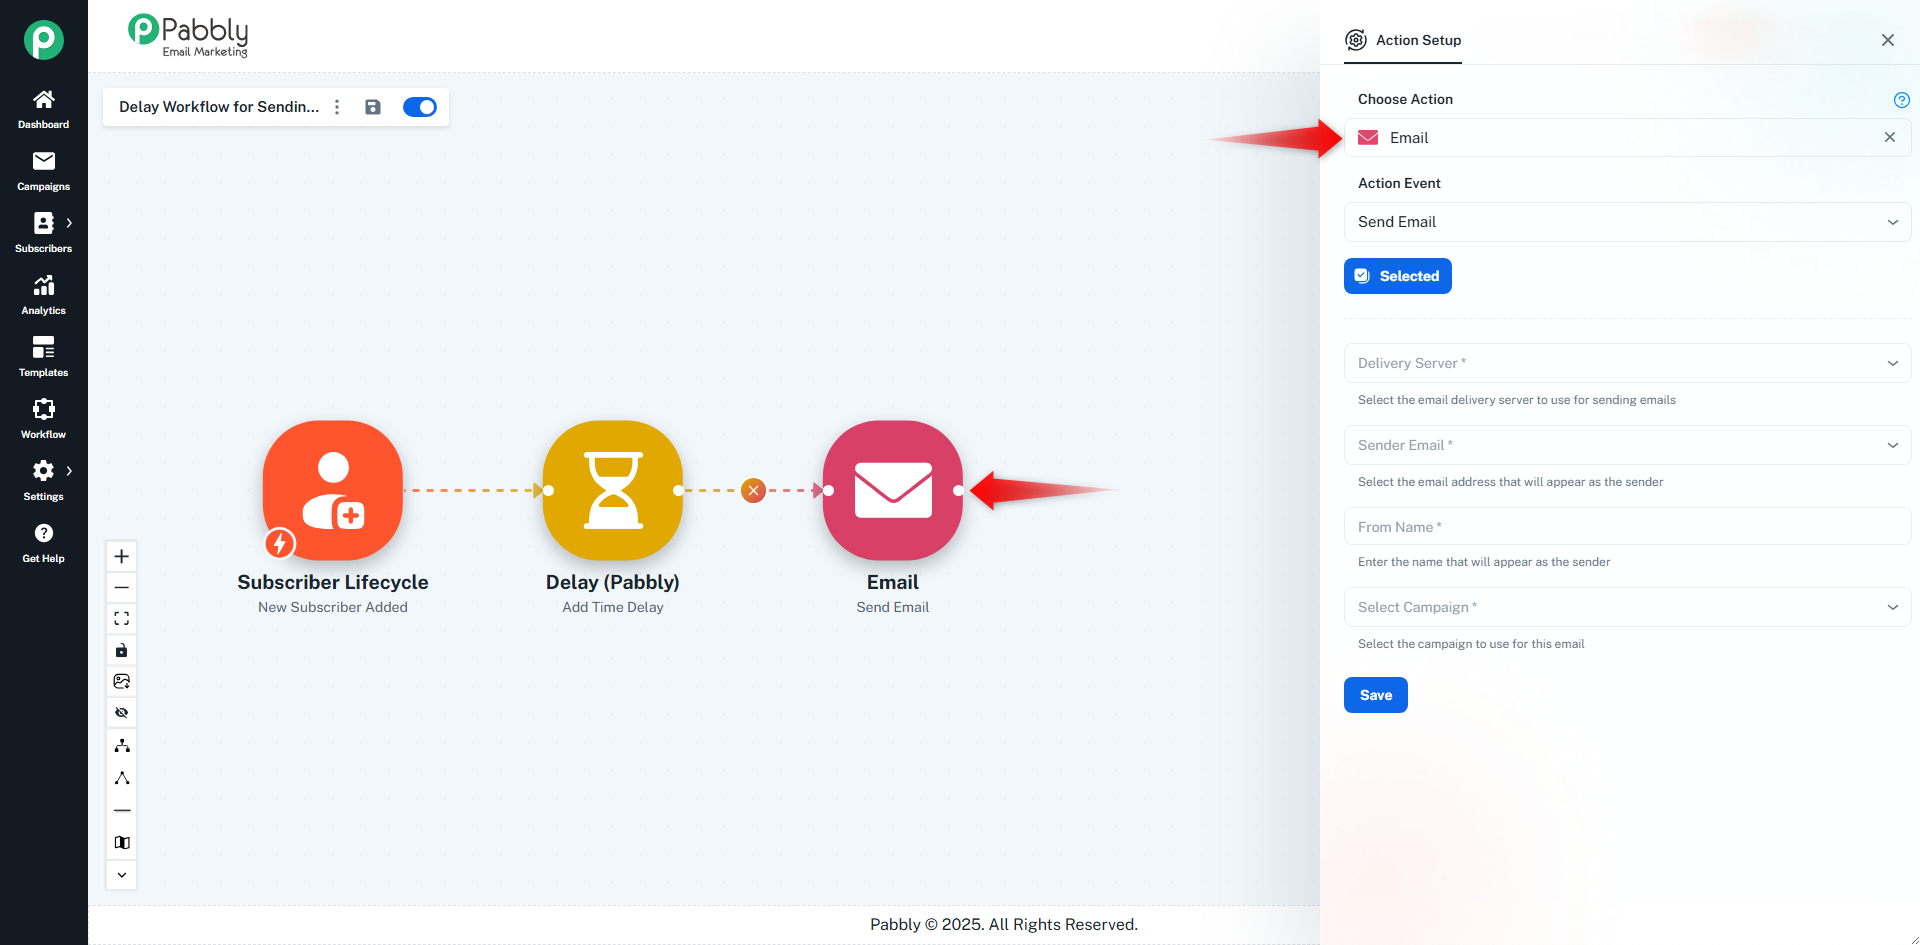
➡️ Choose Email
➡️ Event: Send Email
➡️ Click Select
➡️ Fill out required fields
➡️ Save
(The drawer closes automatically.)
The workflow now looks like:
Subscriber Lifecycle → Delay → Email
Now that the Delay step is added, you can optionally use it to build a looping sequence.
For example:
➡️ After the Email node, add a Router or Filter node
➡️ If the condition is NOT met → connect the path back to the Delay node
➡️ The workflow loops again after the configured delay
This allows you to create:
Repeated reminder emails
Multi-step drip campaigns
Follow-up sequences
Periodic checks (e.g., “Has user opened the email yet?”)
To prevent infinite rapid loops, the system requires at least one Delay node inside any looping path.
This ensures:
Workflows execute safely
System resources aren’t overloaded
Emails are sent at proper intervals
Loops run predictably and responsibly
If a loop is created without a Delay step, the workflow will not run and the system may show a warning.
This workflow shows how automation works when you combine Subscriber Lifecycle, Delay, and Email:
The workflow is triggered immediately.
If the user sets 2 minutes, the system will wait exactly 2 minutes before moving to the next step.
The workflow will send the email from the selected email campaign to that specific subscriber.
The delay guarantees that the email is not sent instantly but only after the time chosen by the user.
