Automation Workflow
After creating a new workflow, the system automatically redirects you to the Workflow Builder interface. This is where you design your automation by adding triggers and actions.
When the builder opens, you will see:
Located at the top-left of the builder:
Workflow Name – Displays the current name of your workflow (editable).
Save Icon – Allows you to save updates to the workflow.
Toggle Switch (Active/Inactive) – Enables or disables the workflow.
Three-dot Menu → Options:
Rename
Add Team Member
Move to Folder
Workflow History
Delete Workflow
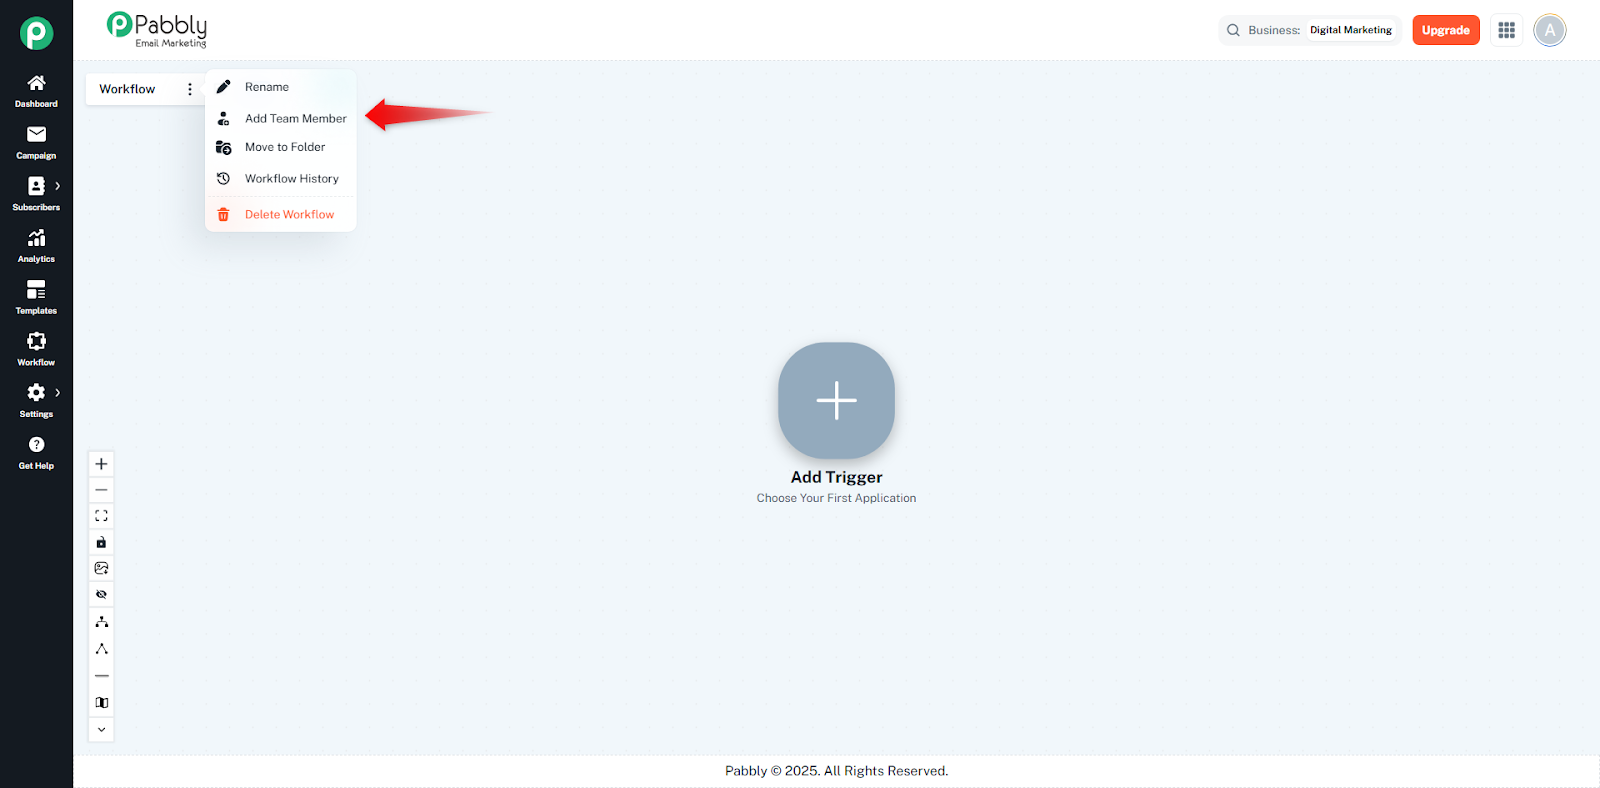
This header helps you manage workflow settings without leaving the builder.
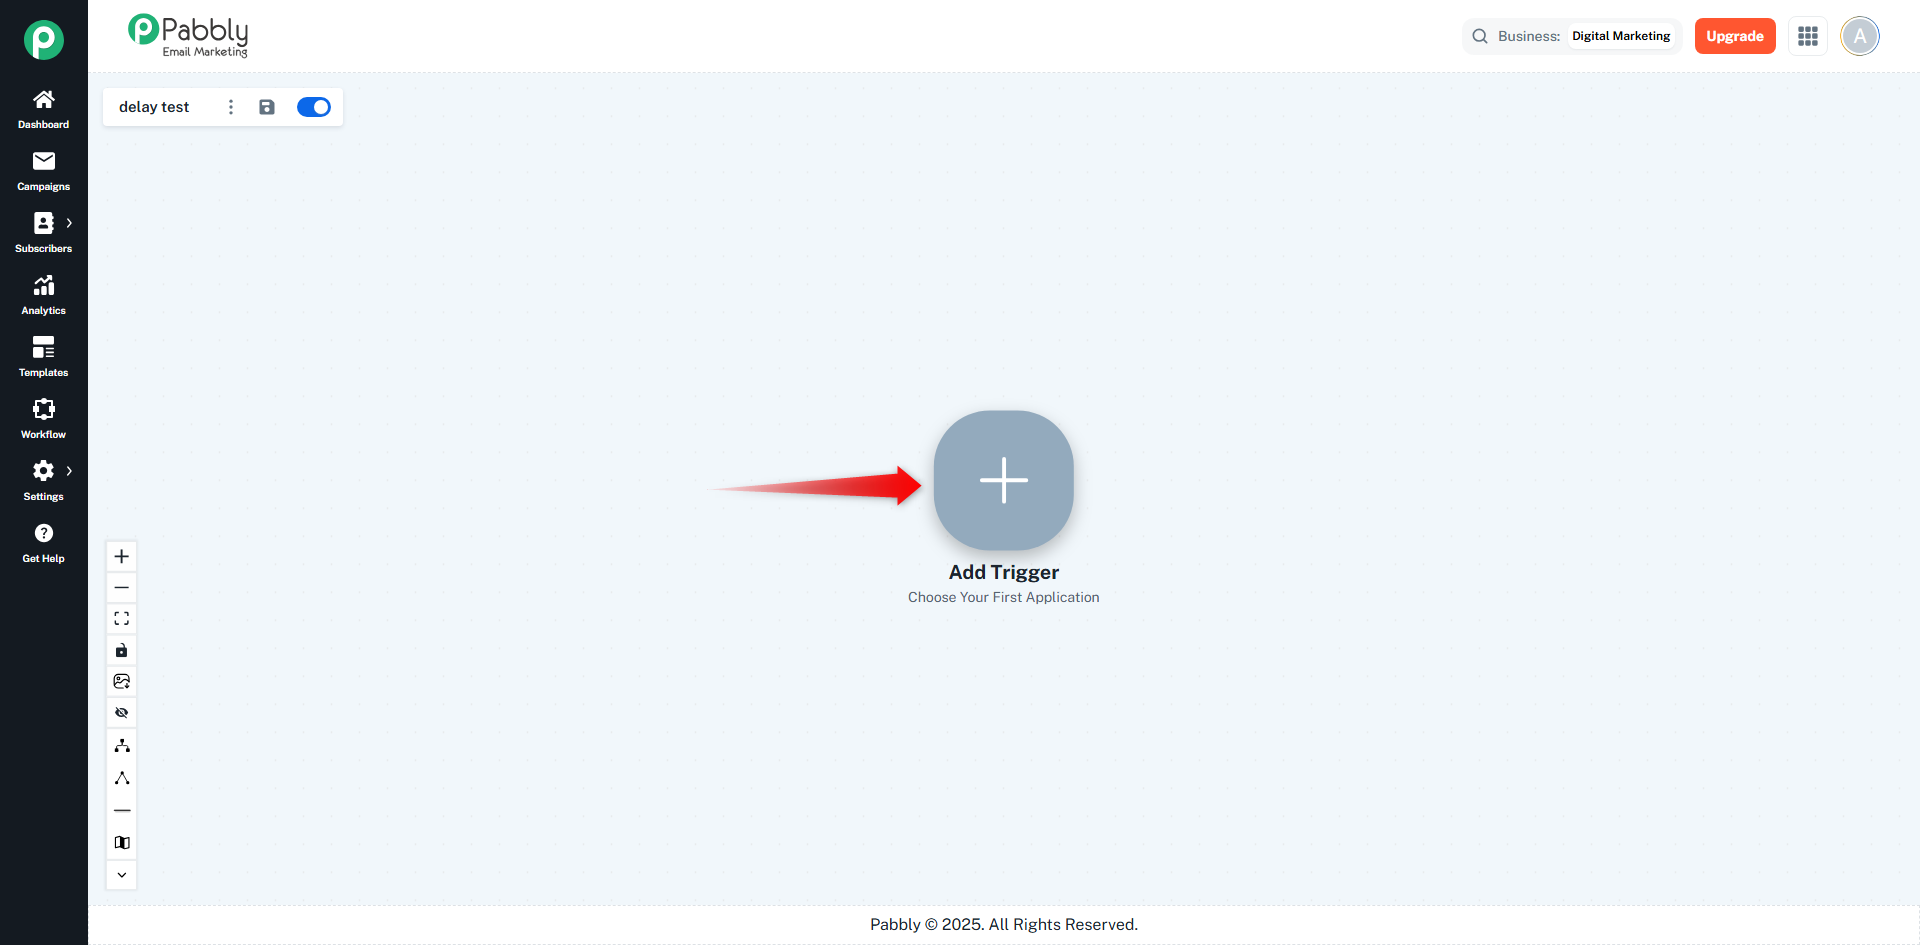
In the center of the canvas, you will see a large (+) button labeled:
“Add Trigger – Choose Your First Application”
This is the starting point of every workflow.
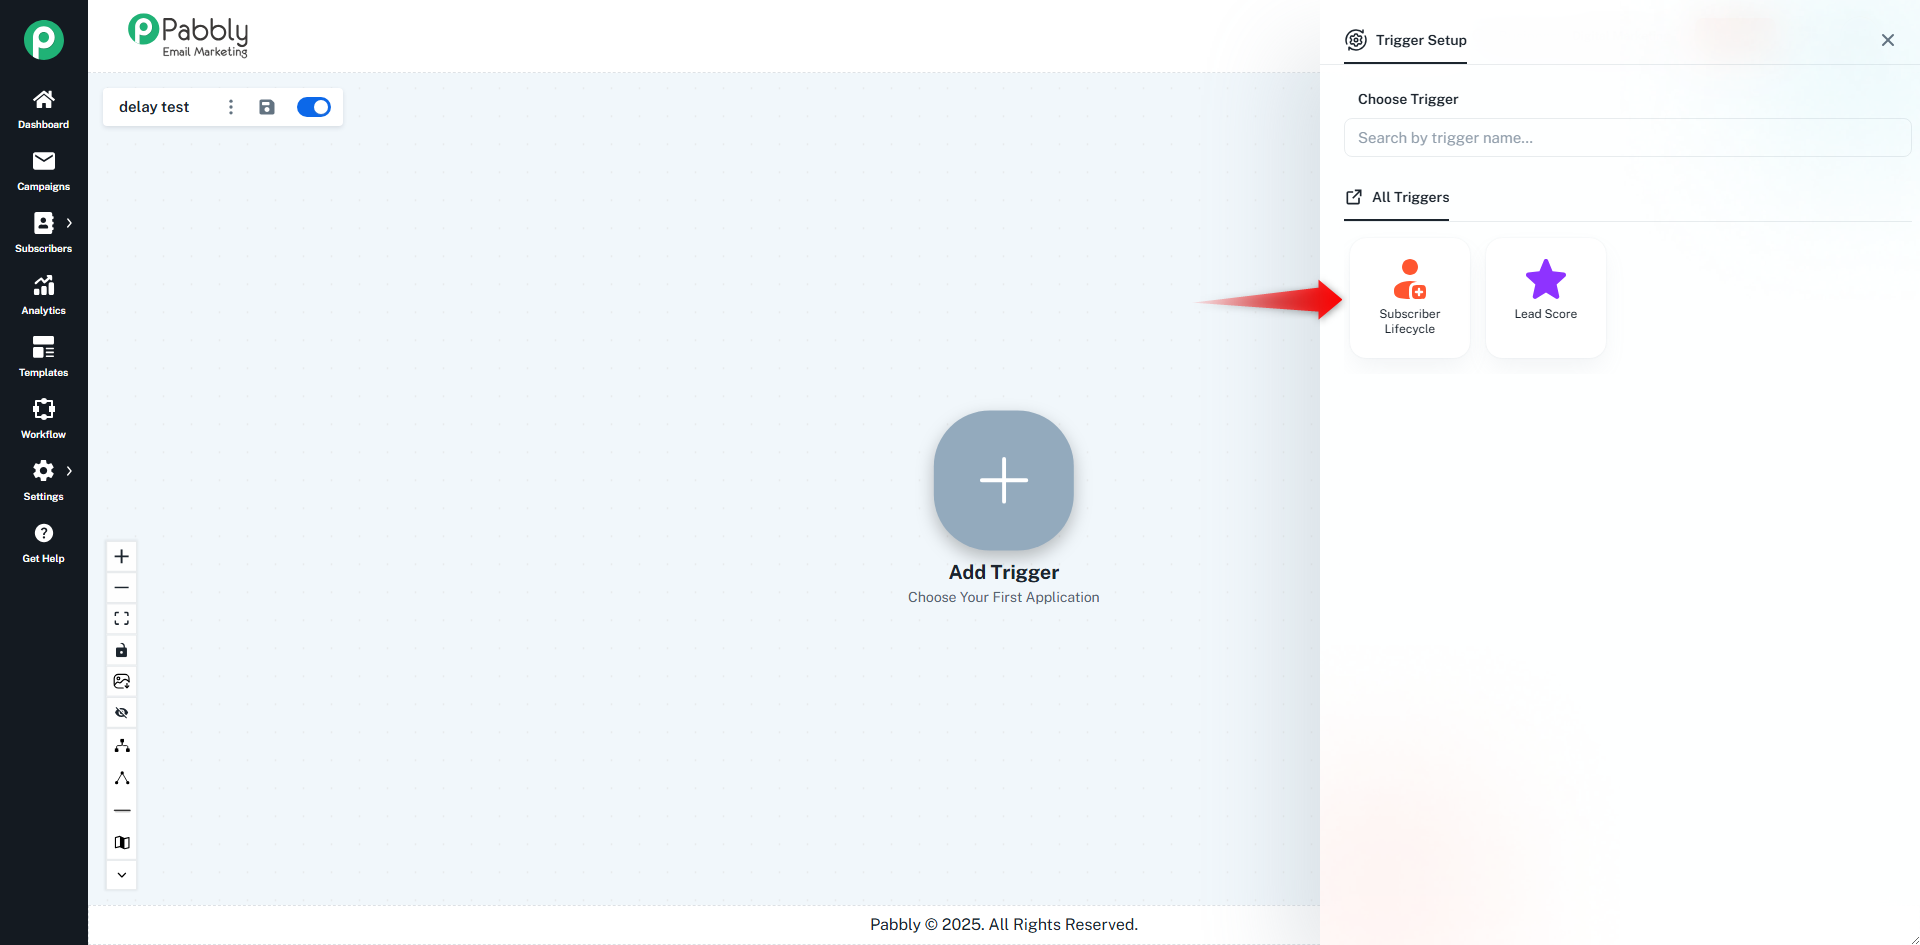
When you click the + Add Trigger node:
This drawer shows all available triggers that can start your automation.
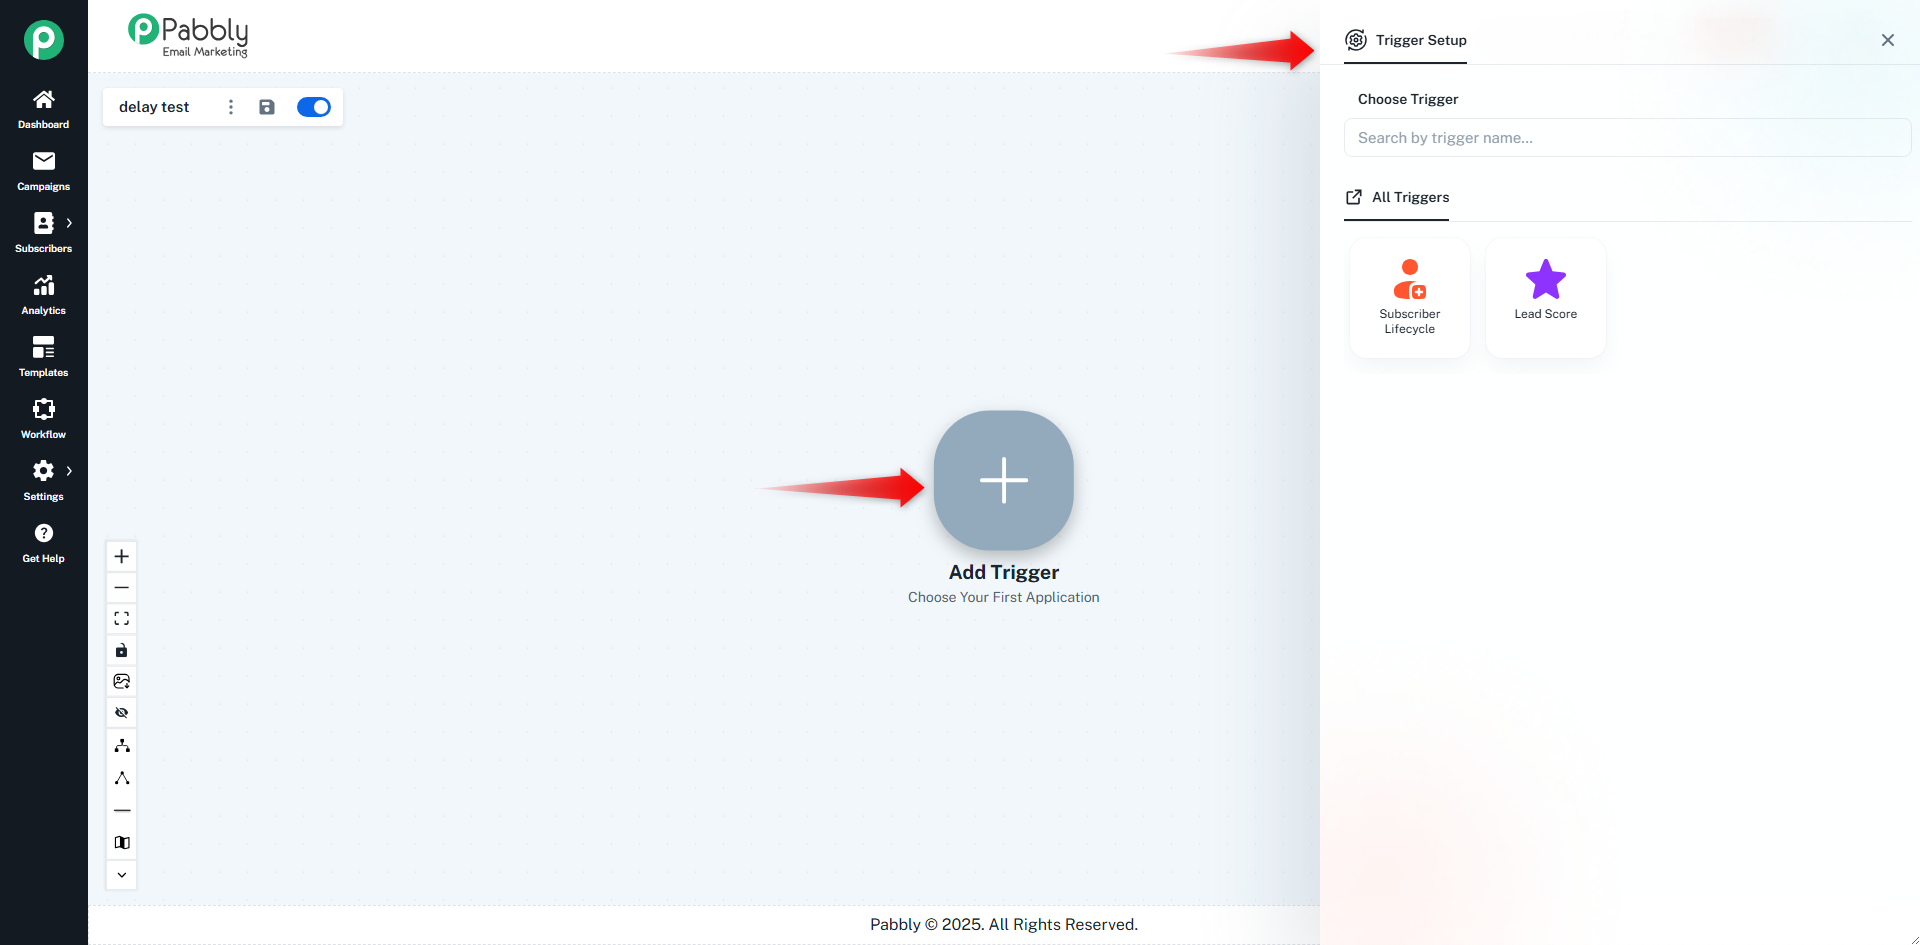
The Trigger Drawer contains:
Allows you to search triggers by name.
This shows all available trigger categories.
Example triggers include:
Subscriber Lifecycle
Trigger when a new subscriber is added, subscriber updated, subscriber removed, custom field updated, tag added and tagged removed.
Lead Score
Trigger based on subscriber score added or score subtract.
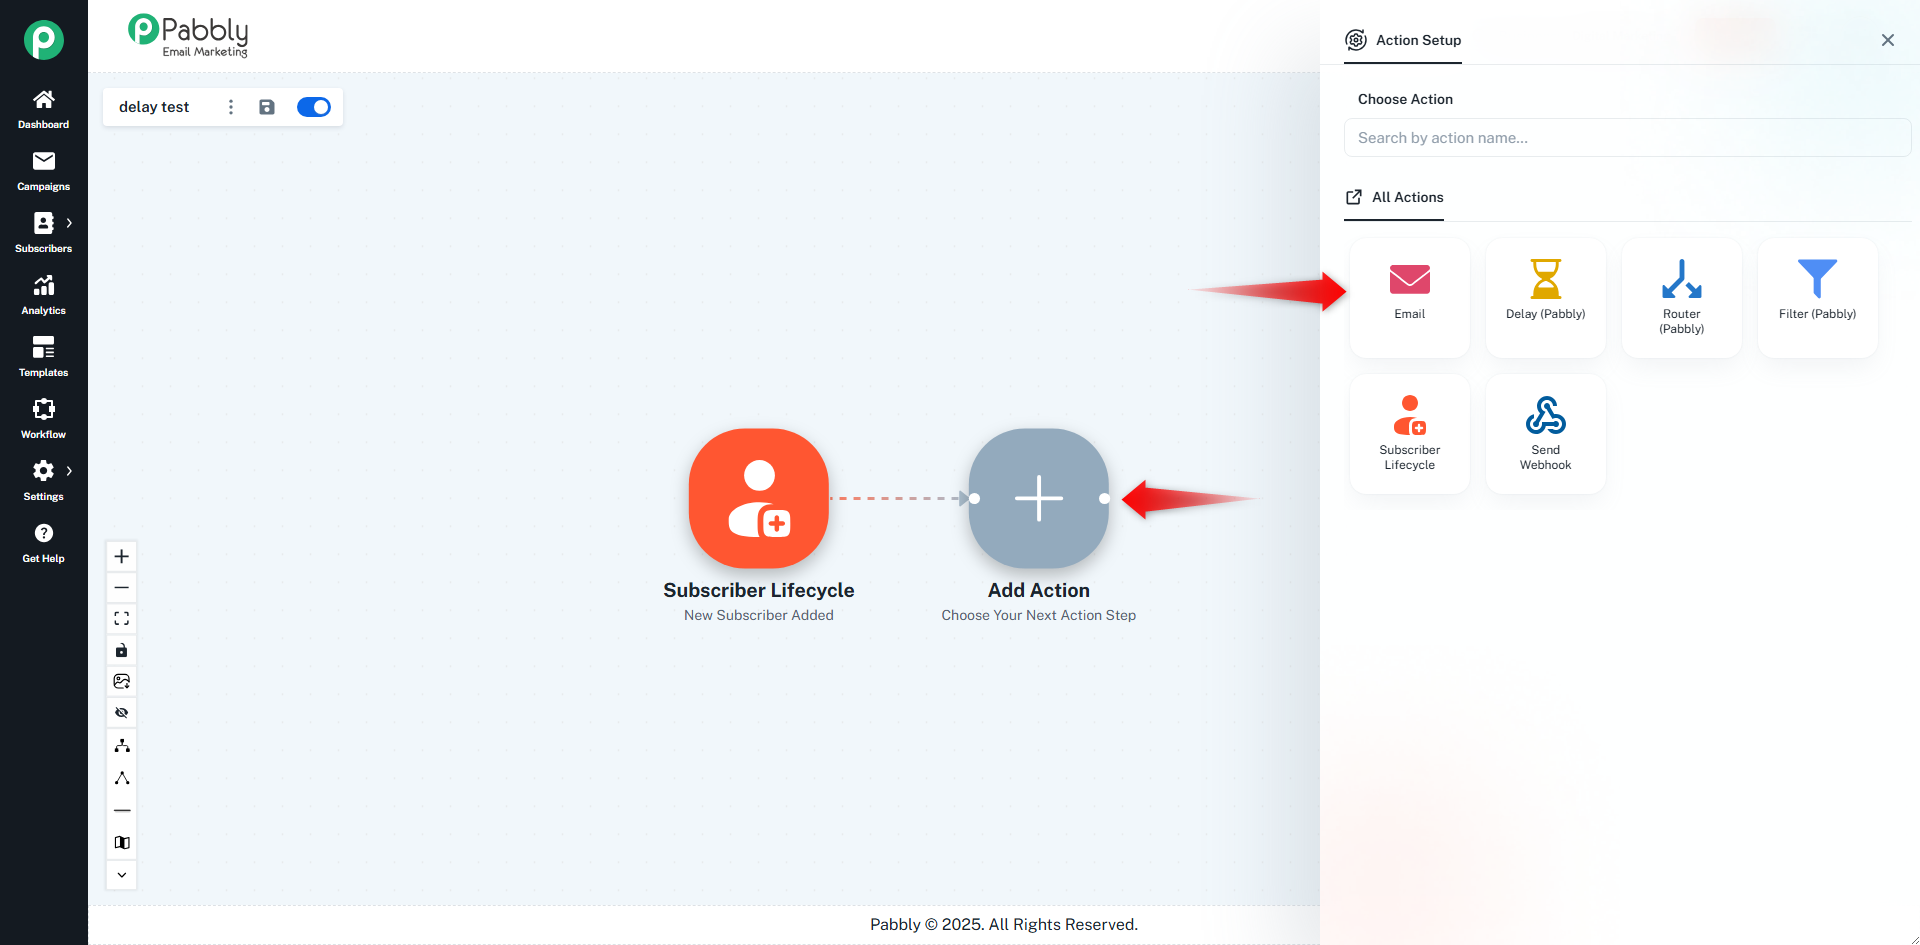
The Action Drawer appears when you click on the Add Action (+) node in the workflow builder.
From here, you can select what action should occur after the trigger or previous step.
Allows you to search actions by name.
Helps quickly locate the required action for large workflows.
This section displays all available action categories that can be added to your automation workflow.
Example actions include:
Sends an email to the subscriber using your configured email settings.
Pauses your workflow before moving to the next action.
Useful for drip emails, reminders, and loop intervals.
Splits your workflow into multiple conditional paths.
Each path can run different actions based on your logic.
Runs an action only when specific conditions are met.
Useful for checking subscriber data, tags, or fields before continuing.
Allows updating subscriber details, adding tags, removing tags, updating custom fields, etc.
Sends data to an external application or API endpoint.
Useful for integrations beyond built-in actions.