How to Organize and Manage Contacts

The Contact Module in Pabbly Chatflow empowers users to efficiently manage and organize their contacts. Whether you want to add individual contacts or bulk upload multiple contacts, this module offers flexible options to streamline your contact management and broadcasting processes.
You can also create Contact Lists to categorize and segment contacts, enabling targeted communication for better engagement.
Single Contact: To add one contact at a time, refer to the Single Contact Addition Guide.
Bulk Contacts: To upload multiple contacts in one go, refer to the Bulk Contact Upload Guide.
A Contact List helps organize and filter contacts for targeted broadcasting. Follow these steps to create a contact list:
Log in to Pabbly Chatflow.
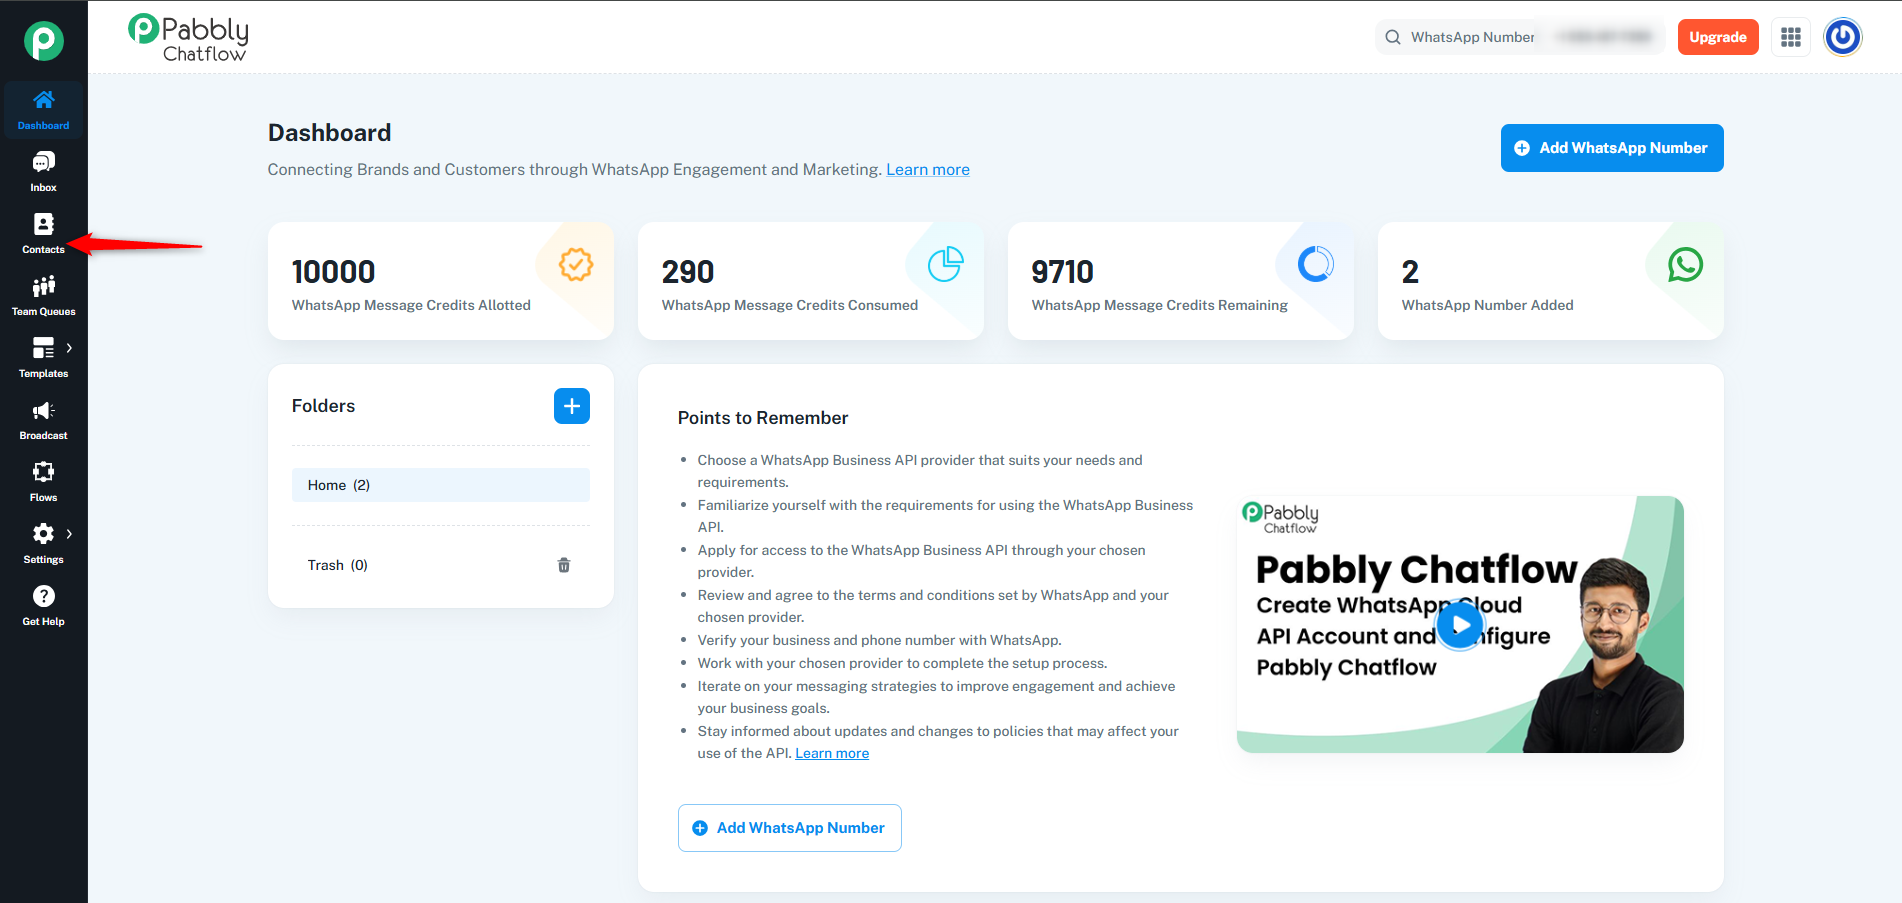
Navigate to the Inbox from the sidebar.
On the left sidebar, locate and click on the Contacts module.
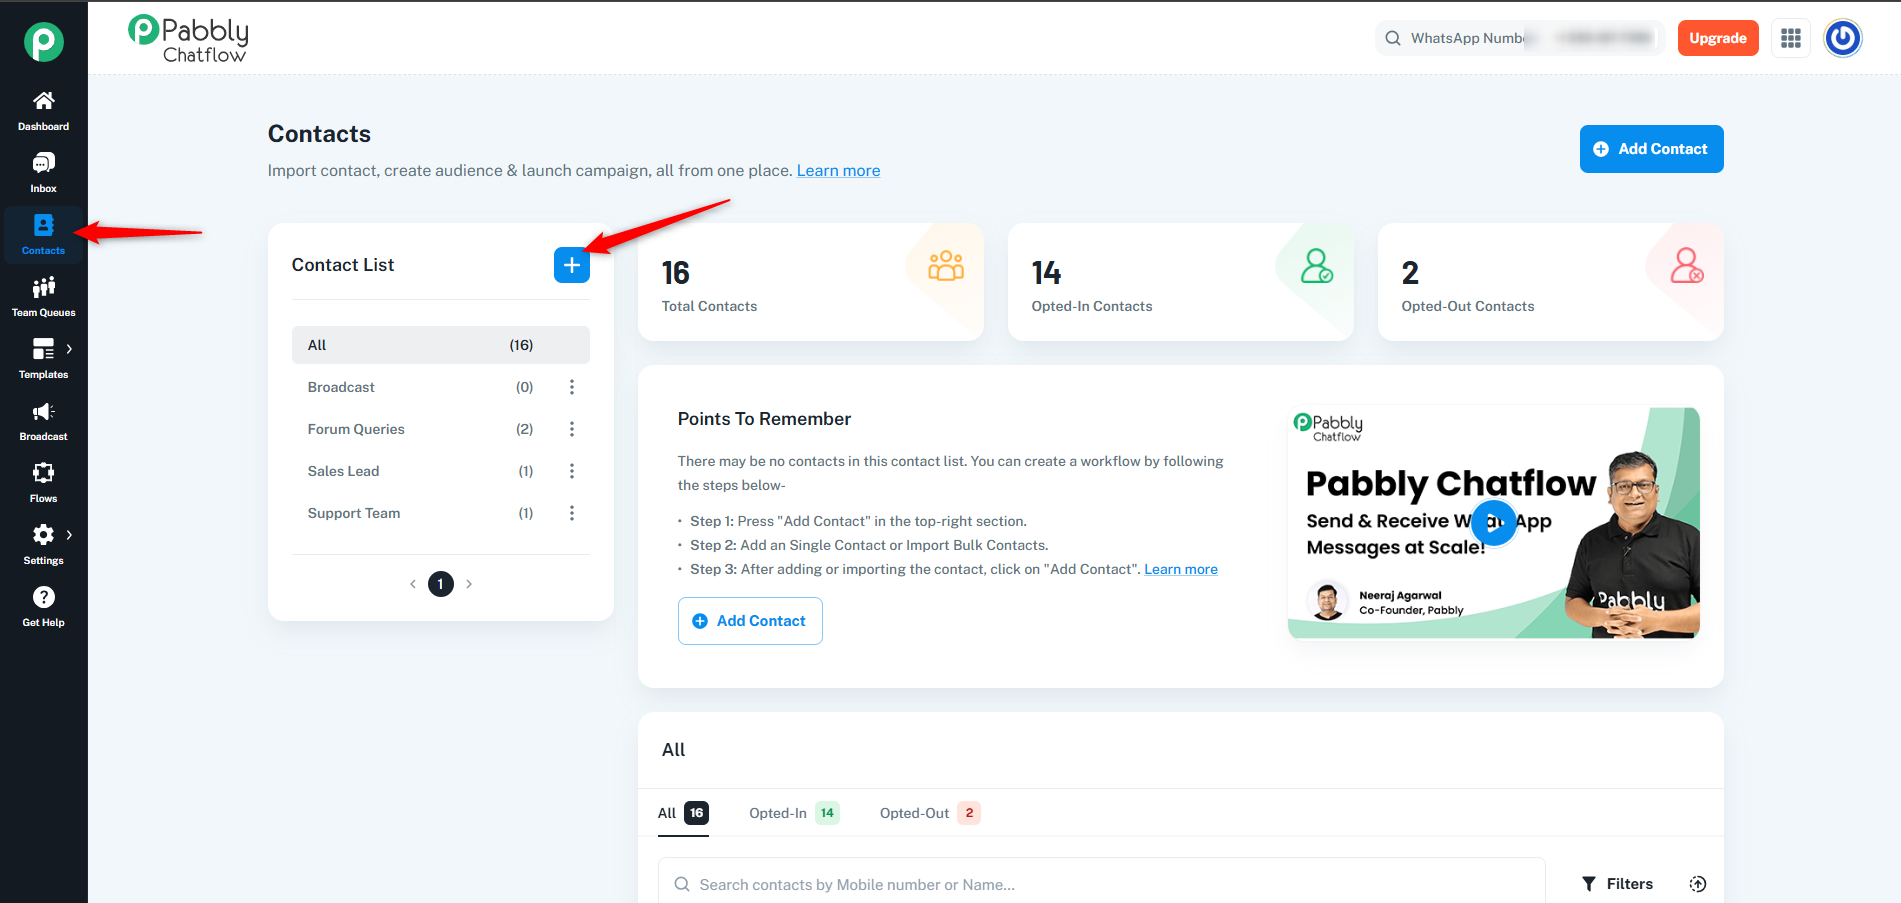
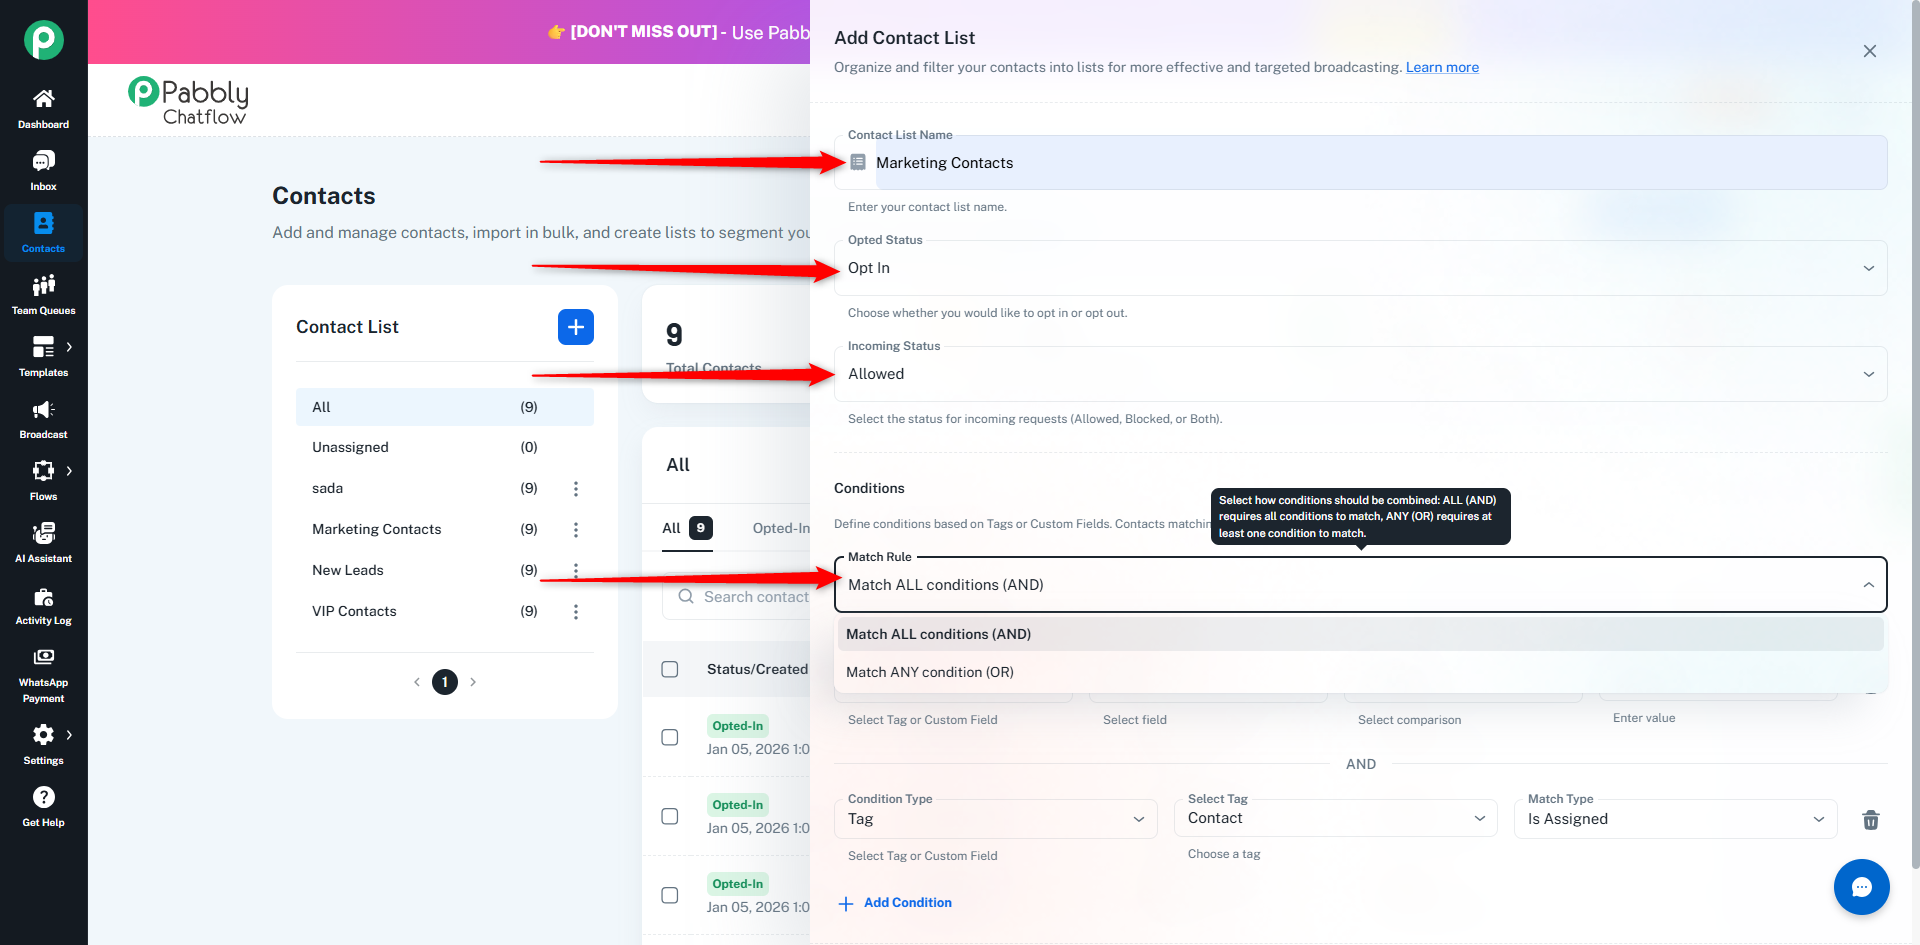
Contact List Name: Assign a name for easy selection during broadcasts.
Tags: Tags help categorize contacts for precise targeting. (Make sure you have added tags for the required category.)
Opt-in Status: Define whether the contacts in this list have opted in or out.
Incoming Status: Specify the contact’s status for incoming messages.
While creating a Contact List, you can add multiple conditions under the Conditions section. These conditions can be based on Tags or Custom Fields.
In Match Rule, you will see two options:
Match ALL conditions (AND)
Match ANY condition (OR)
If you select AND, the contact must match all the added conditions.
If even one condition does not match, the contact will not be added.
Example:
Tag = VIP
Custom Field “Plan” = Premium
Only contacts who have VIP tag AND Premium plan will be included.
You can also use only Custom Fields, like:
Custom Field “City” = Delhi
Custom Field “Plan” = Premium
In this case, both conditions must match.
This option is useful for creating a specific contact list.
If you select OR, the contact must match at least one condition.
If any one condition matches (Tag or Custom Field), the contact will be added.
Example:
Tag = Marketing Contacts
Tag = New Leads
Contacts who have either tag will be included.
You can also use Custom Fields:
Custom Field “City” = Mumbai
Custom Field “Plan” = Gold
Contacts matching either condition will be included.
This option is useful when you want to include a wider group of contacts.
You can click on Add Condition to add more Tag or Custom Field filters and choose the comparison type as per your requirement.
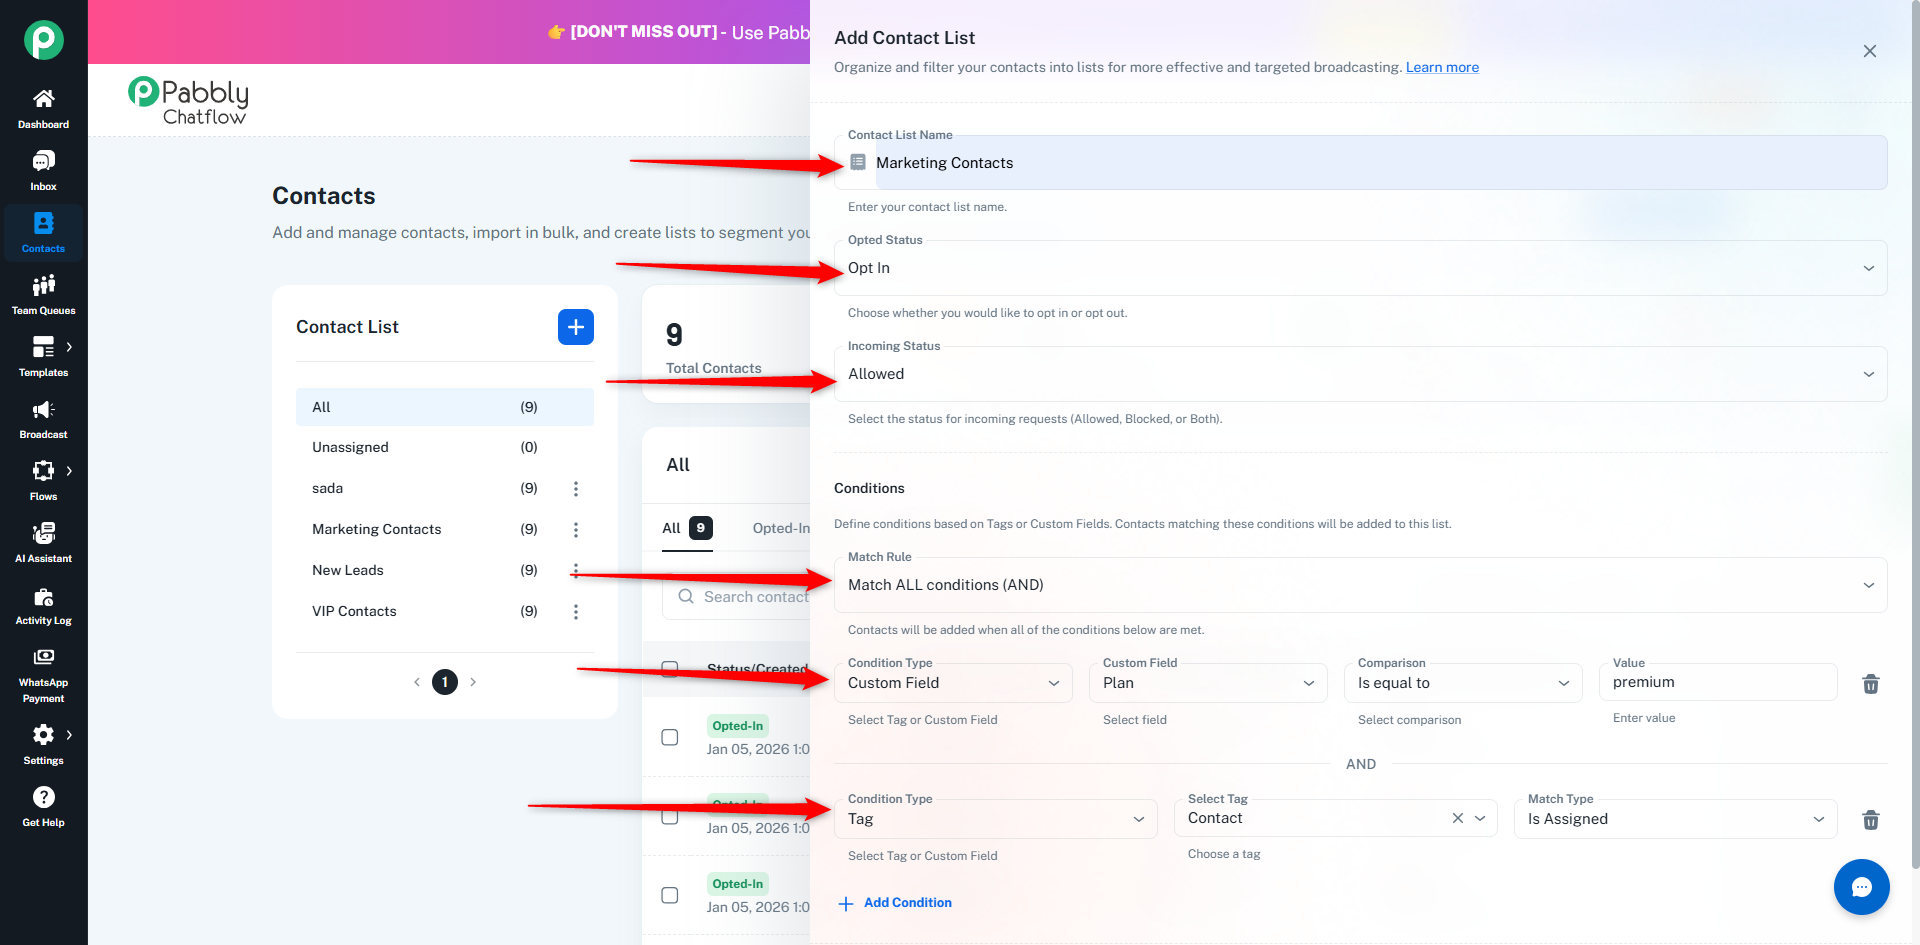
Click Add Contact List to save the list.
Once your contact list is added, if any of your contacts have the same tag that is added in the contact list, that contact will be shown in the list by default.
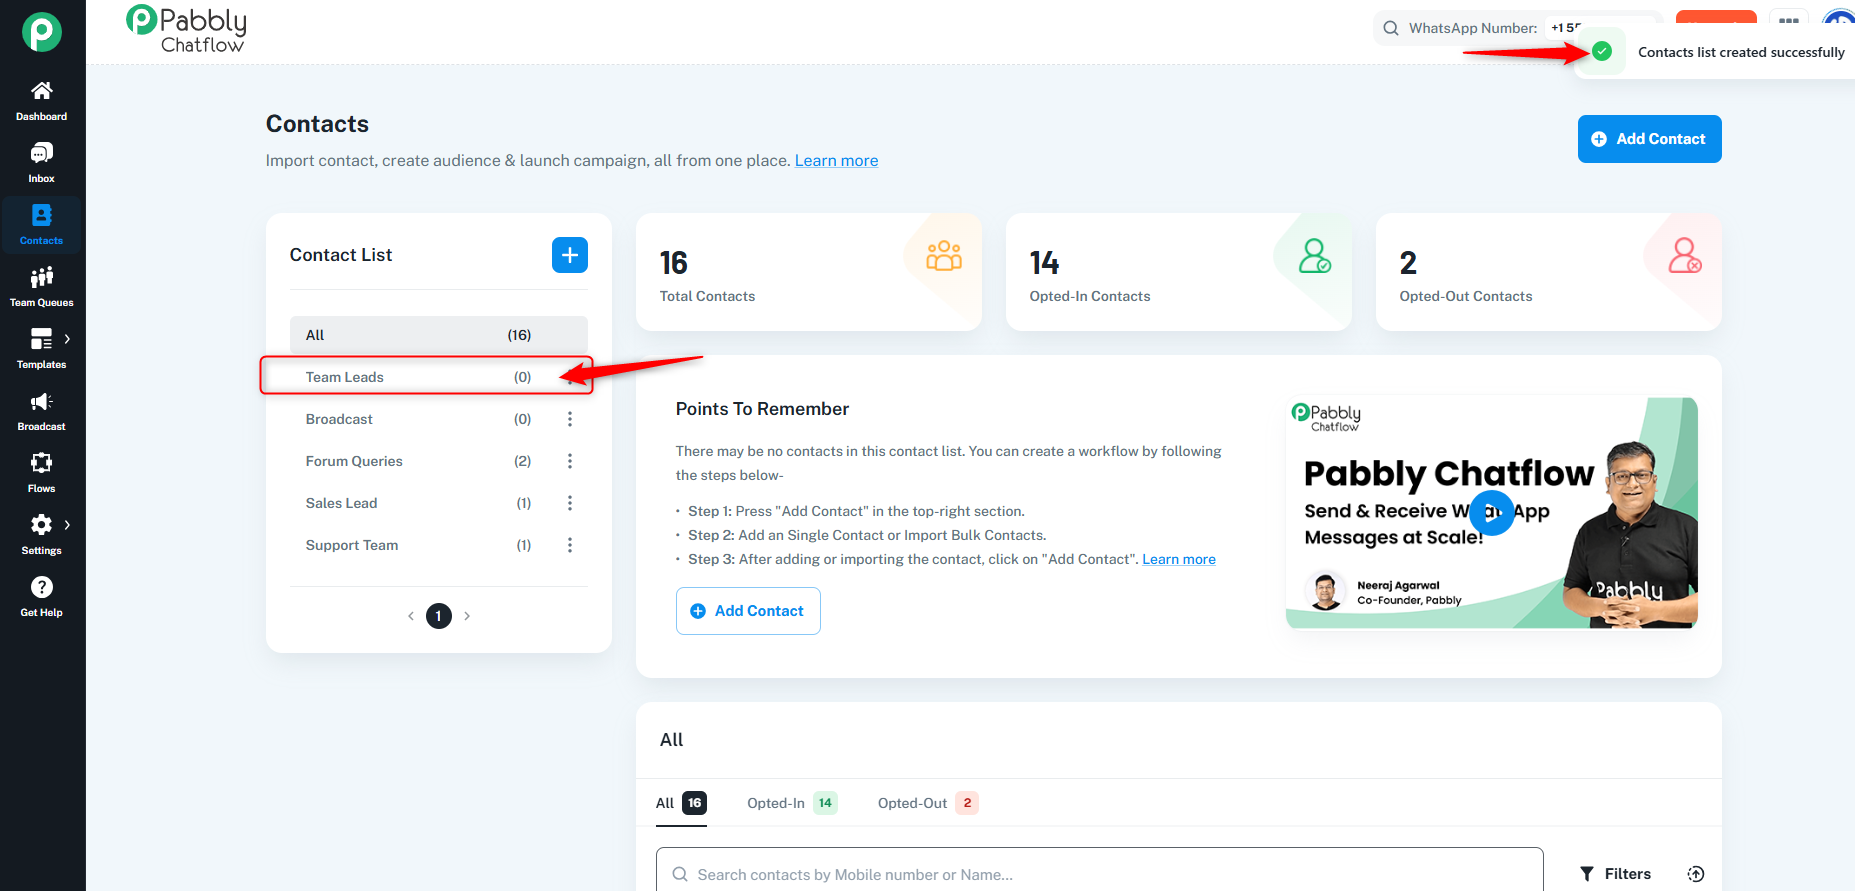
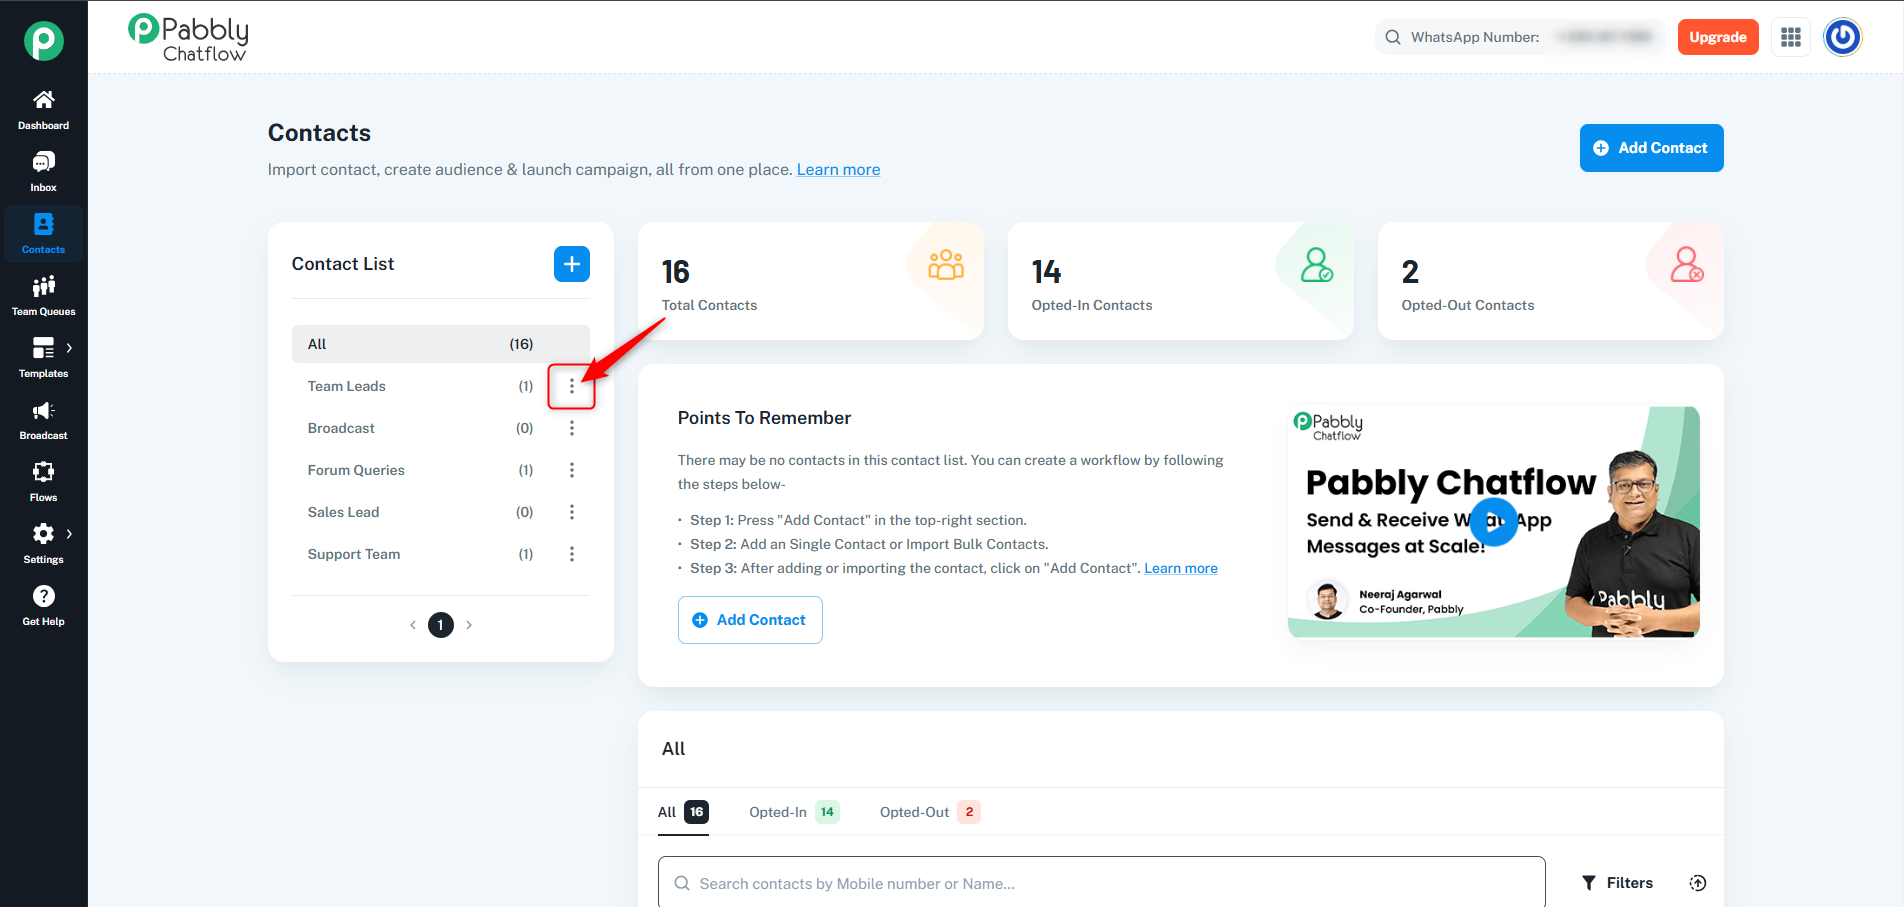
You can also edit or delete your contact list as per your requirement from the three dots menu.
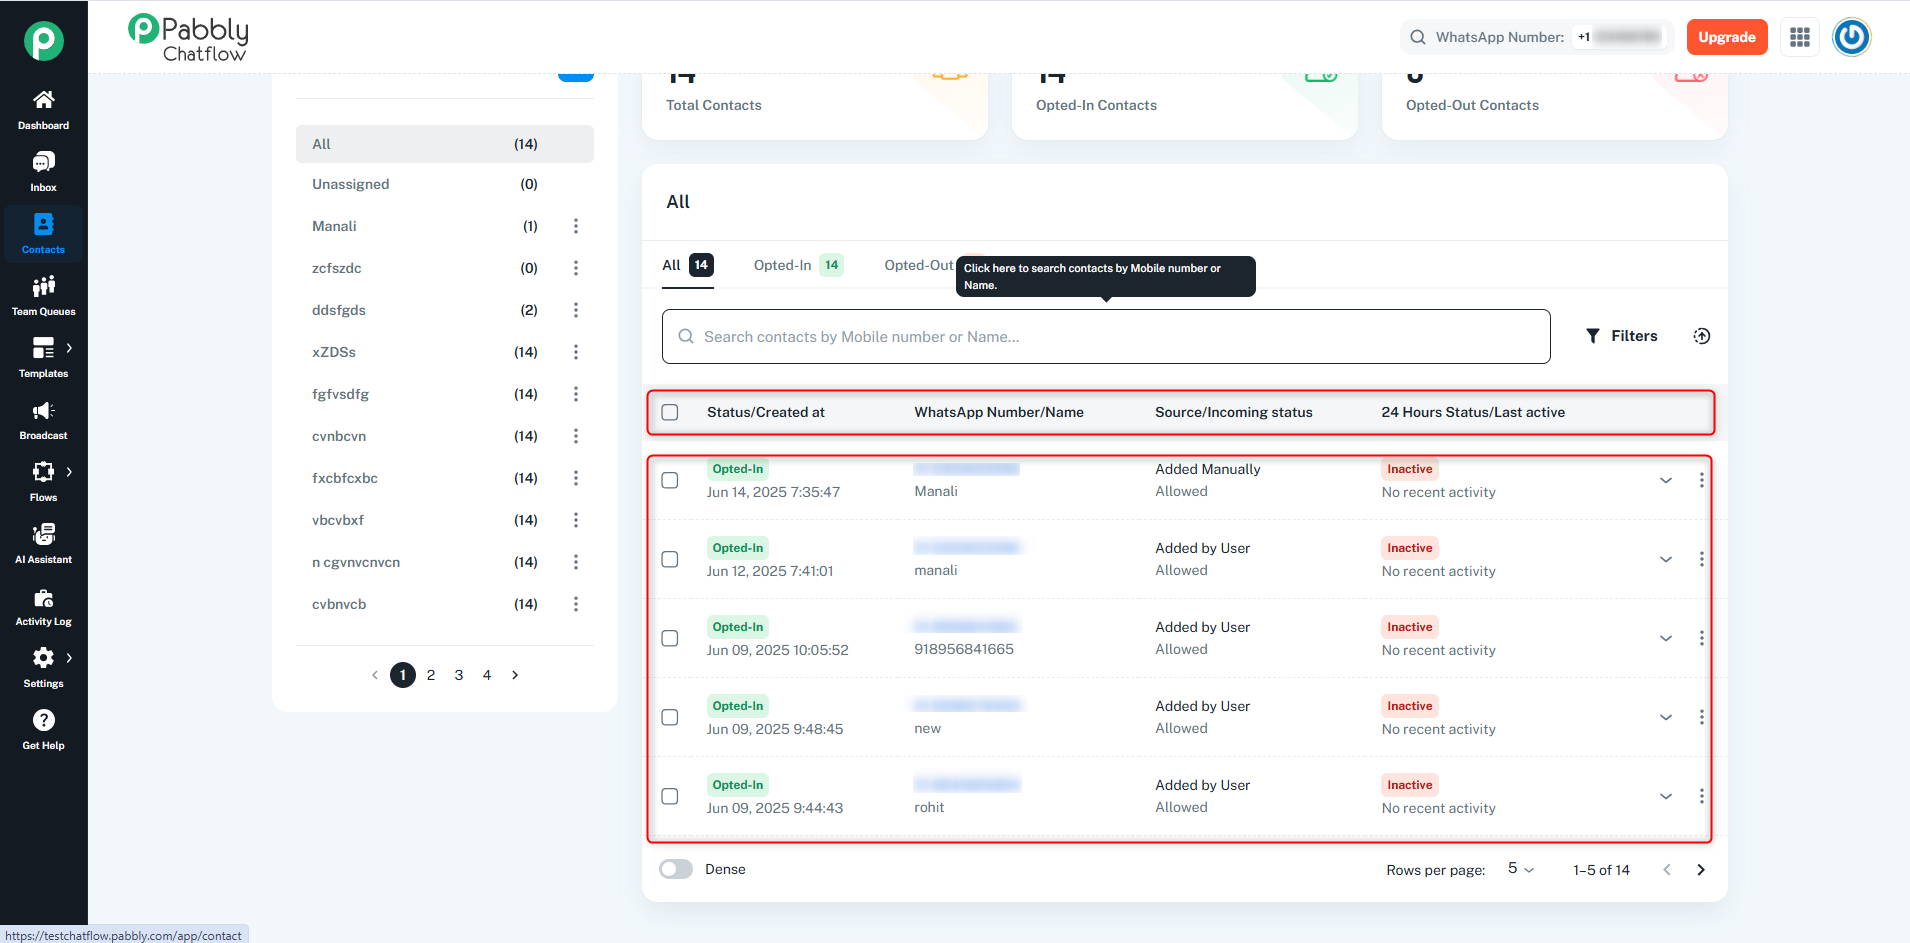
Once the contact list is created, you can view all the contacts inside the table or contact list in the Contacts module.
The table will display:
Contact Name and WhatsApp Number.
Opt-in Status and Incoming Status.
24 Hours Status/Last Active.
You can select all the contacts visible on the current page by checking the checkbox at the top of the table. You can only select the contacts that are visible on the current page
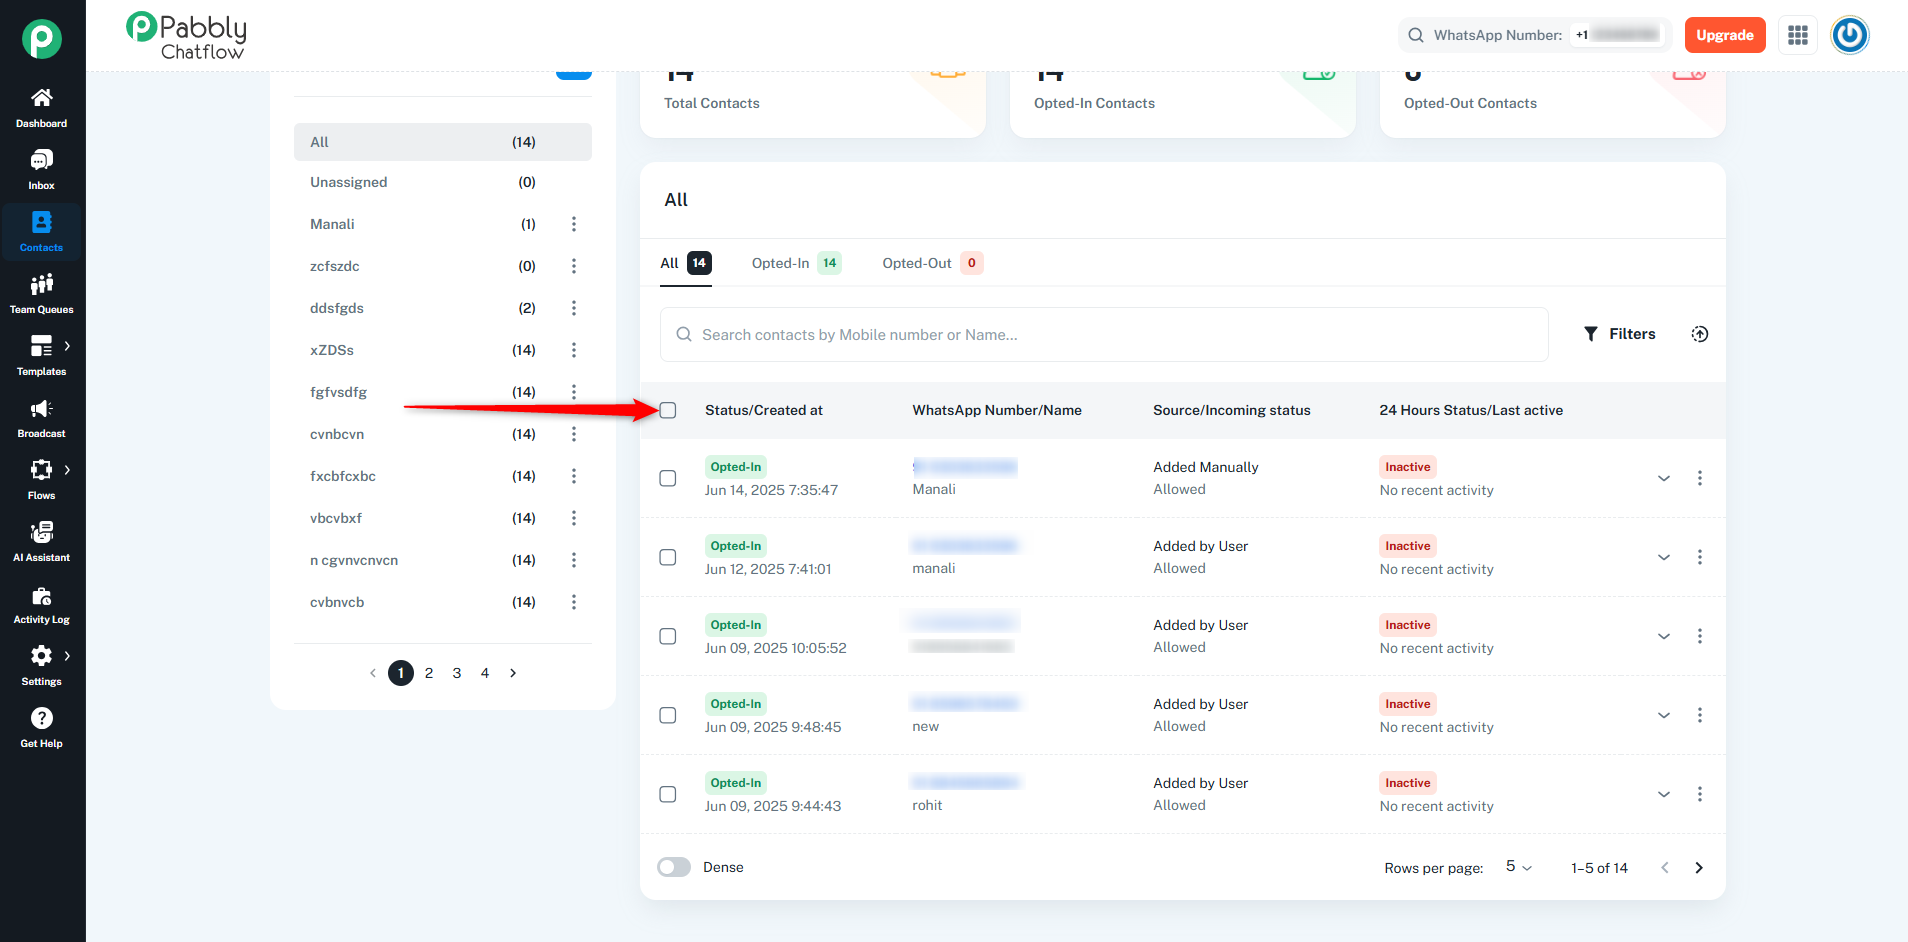
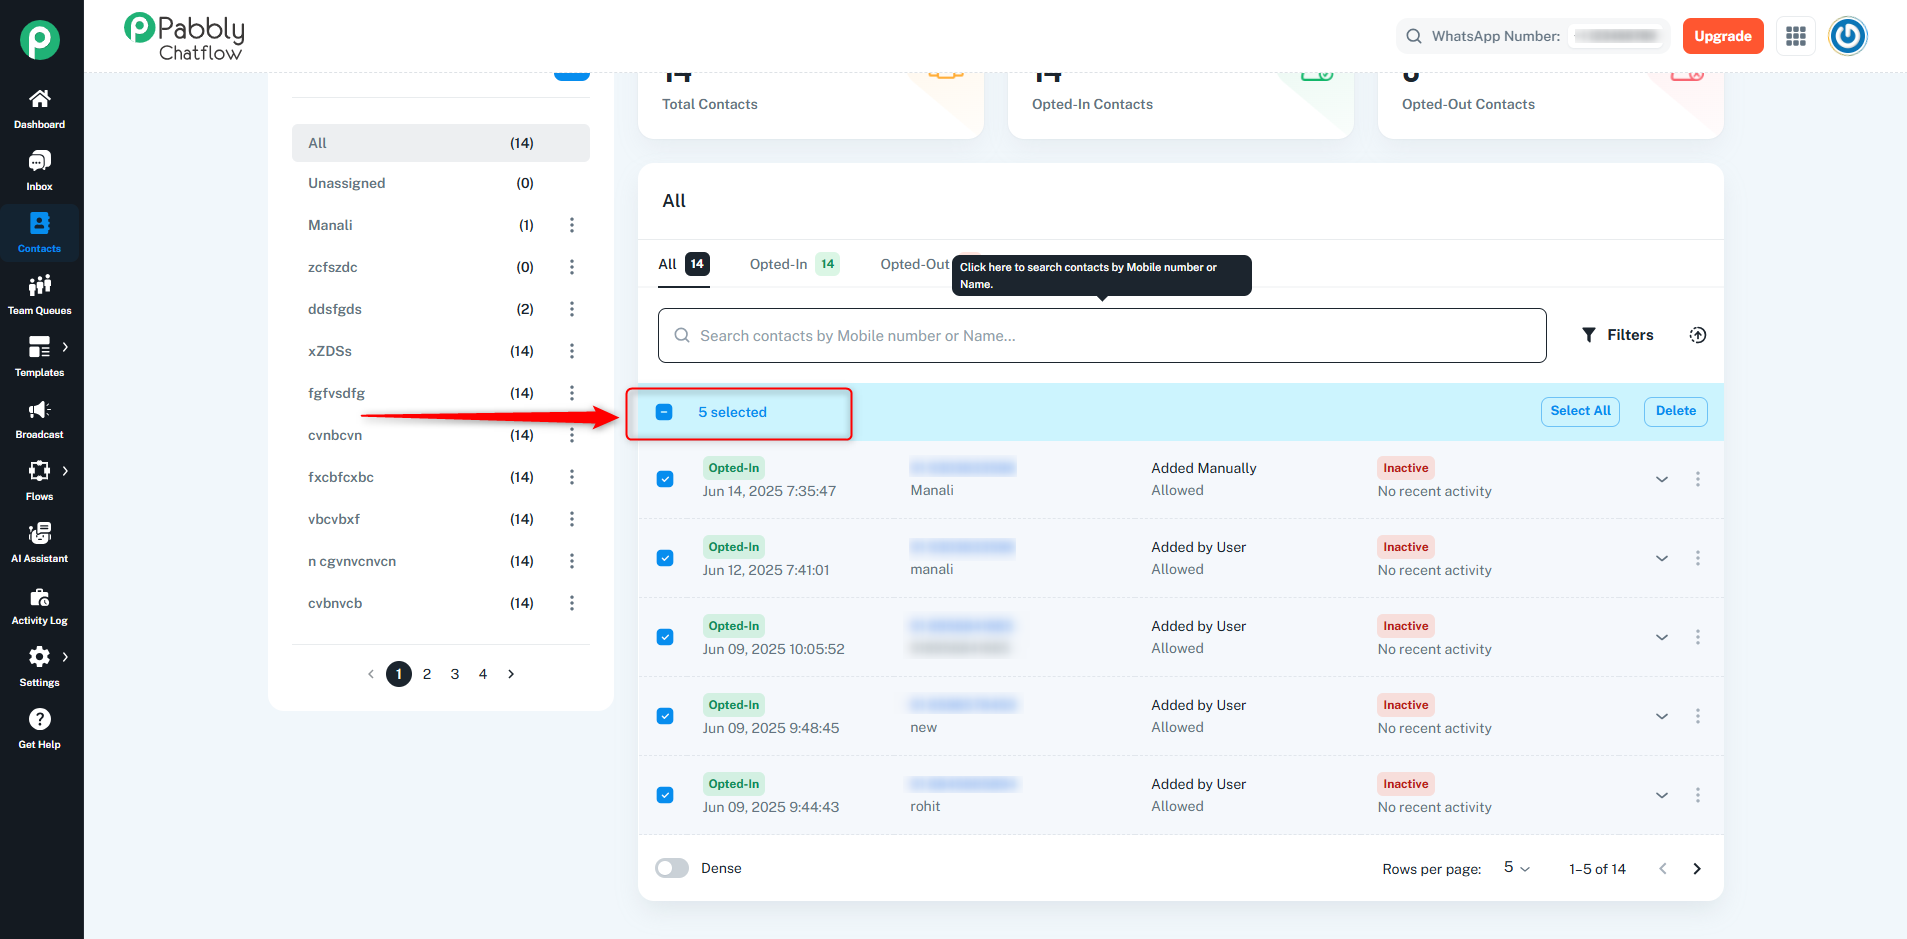
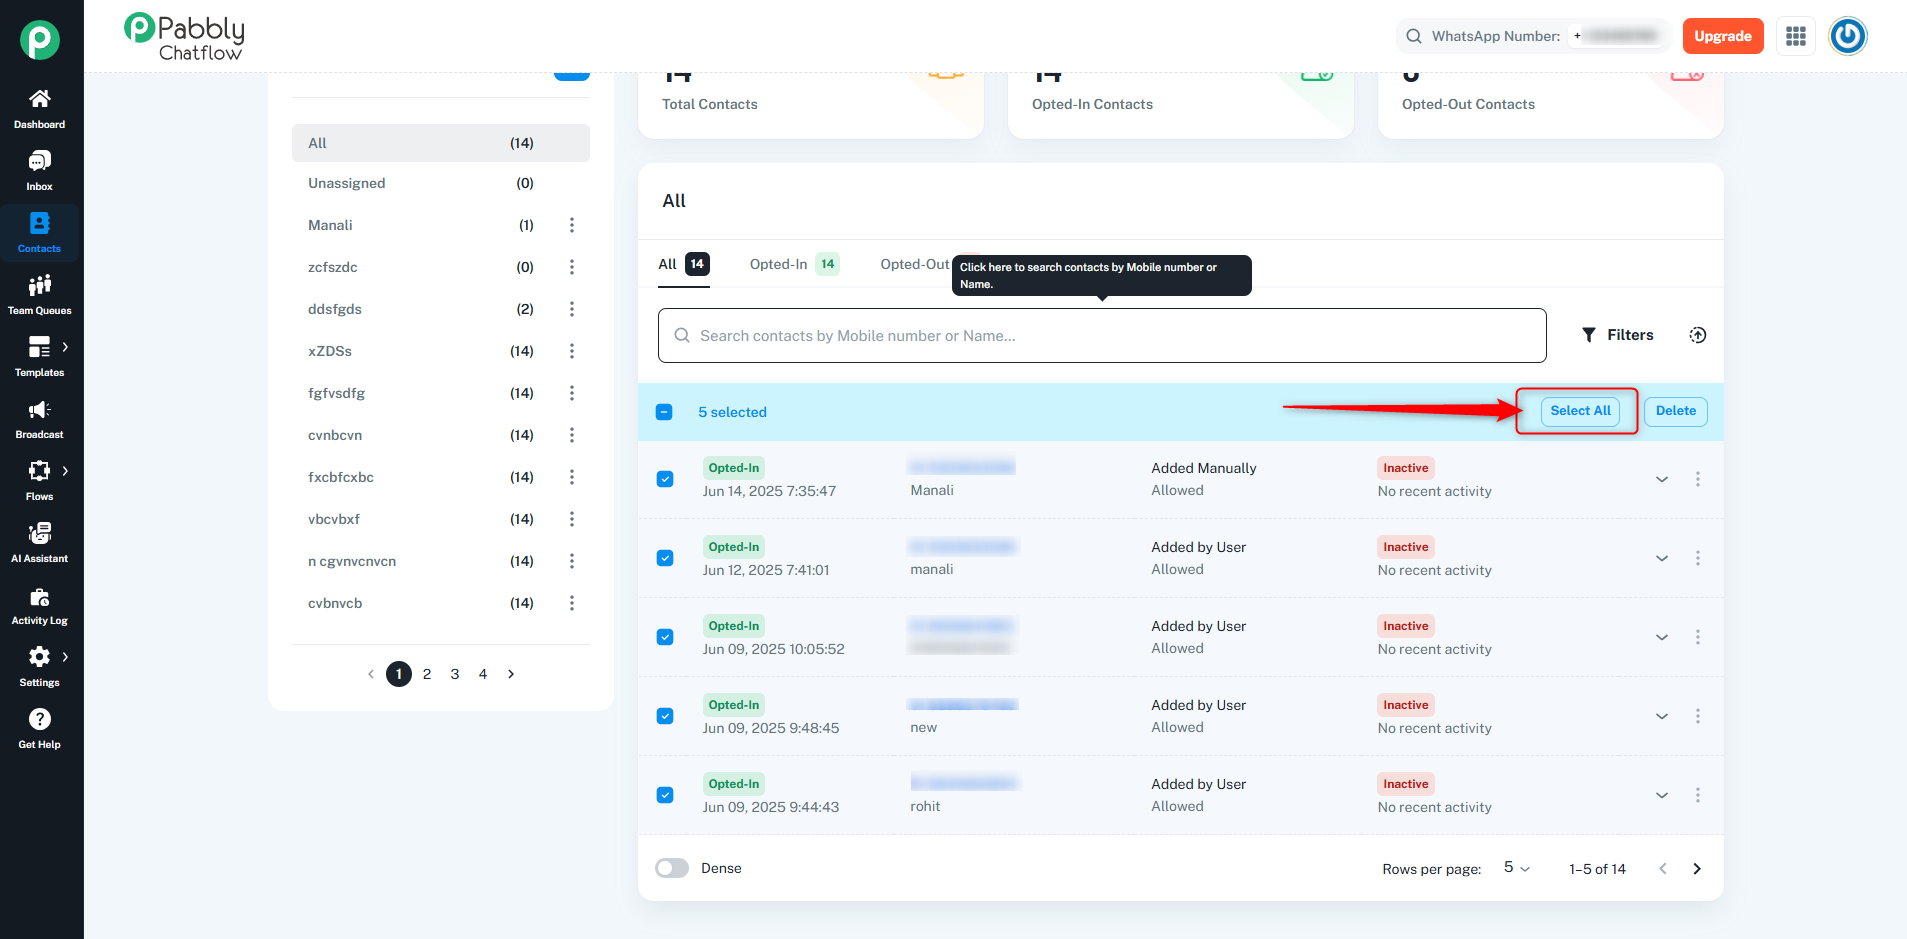
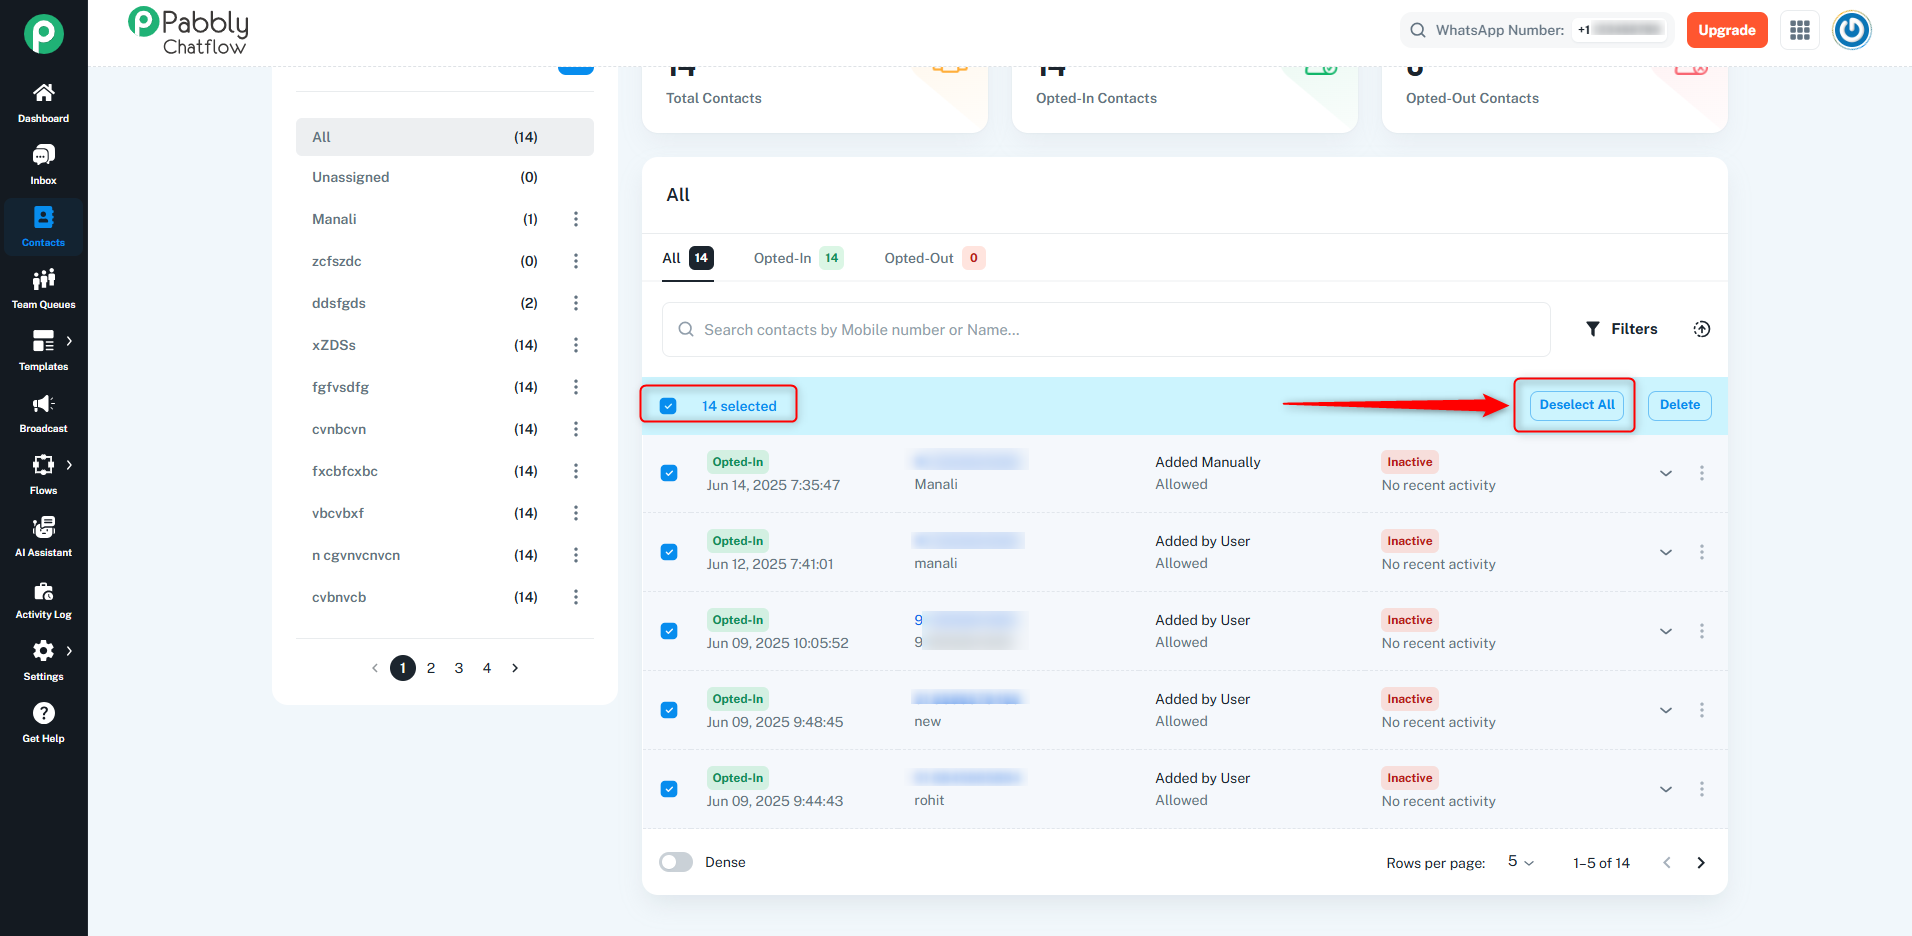
After selecting the visible contacts, the Select All option will appear, allowing you to select all contacts across all pages of the table.
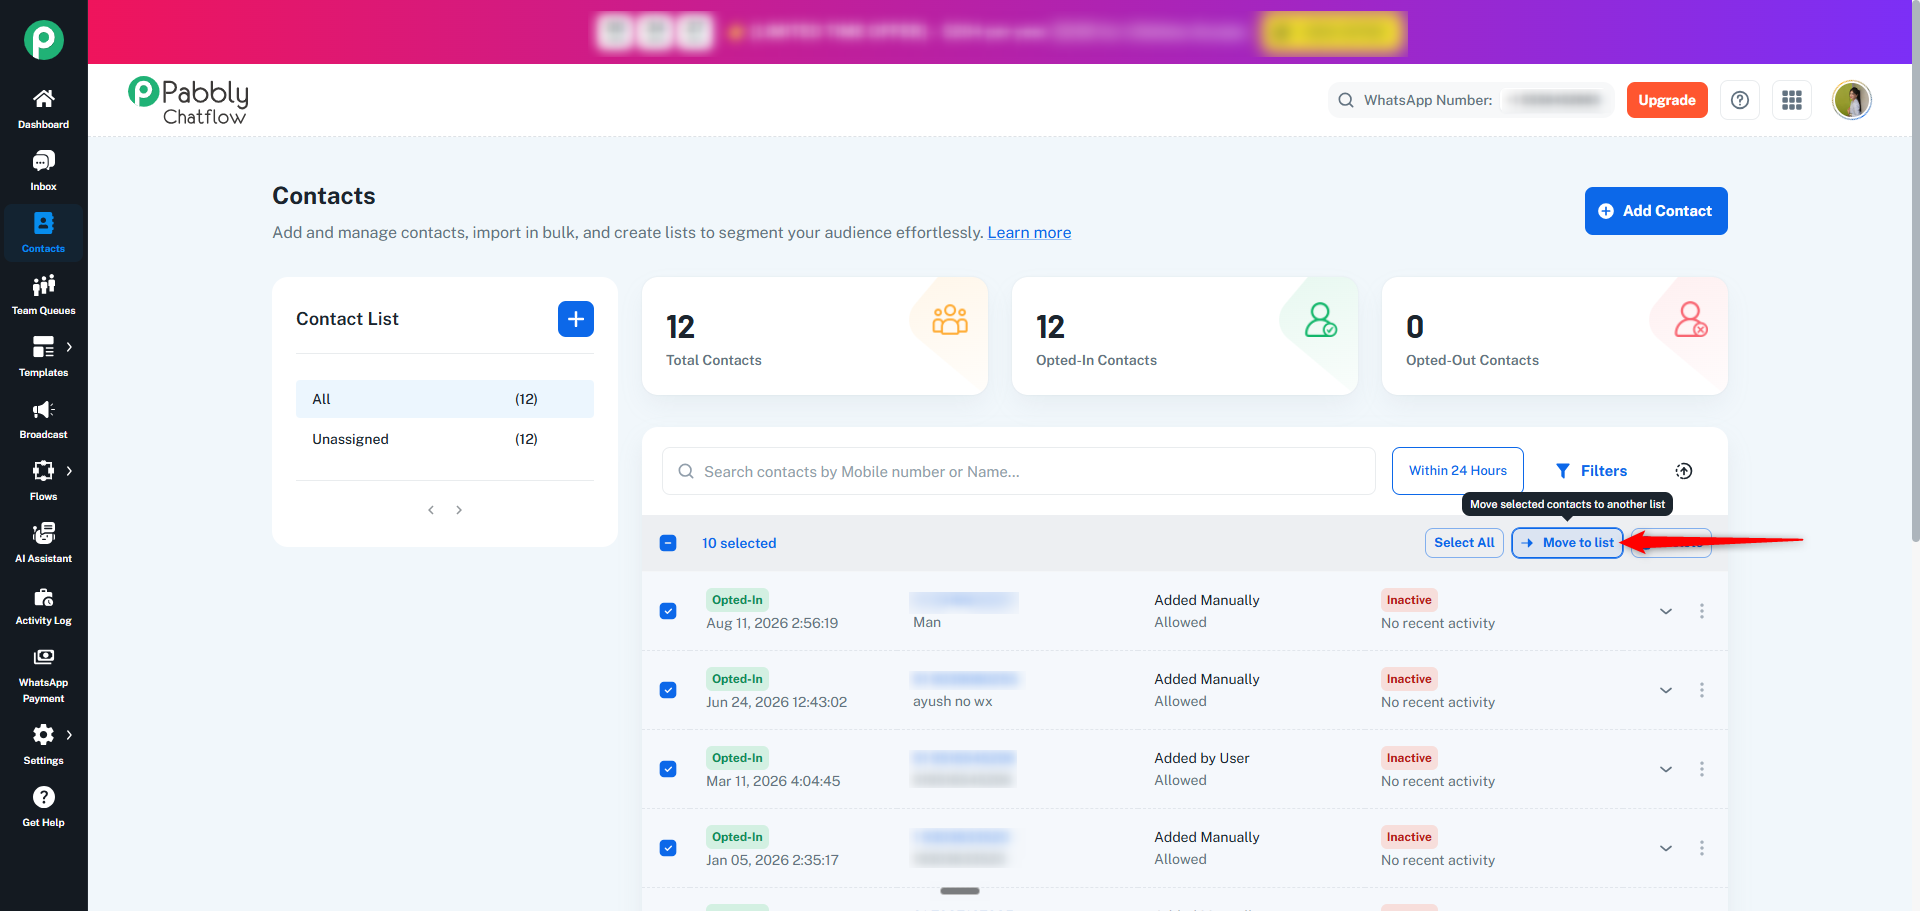
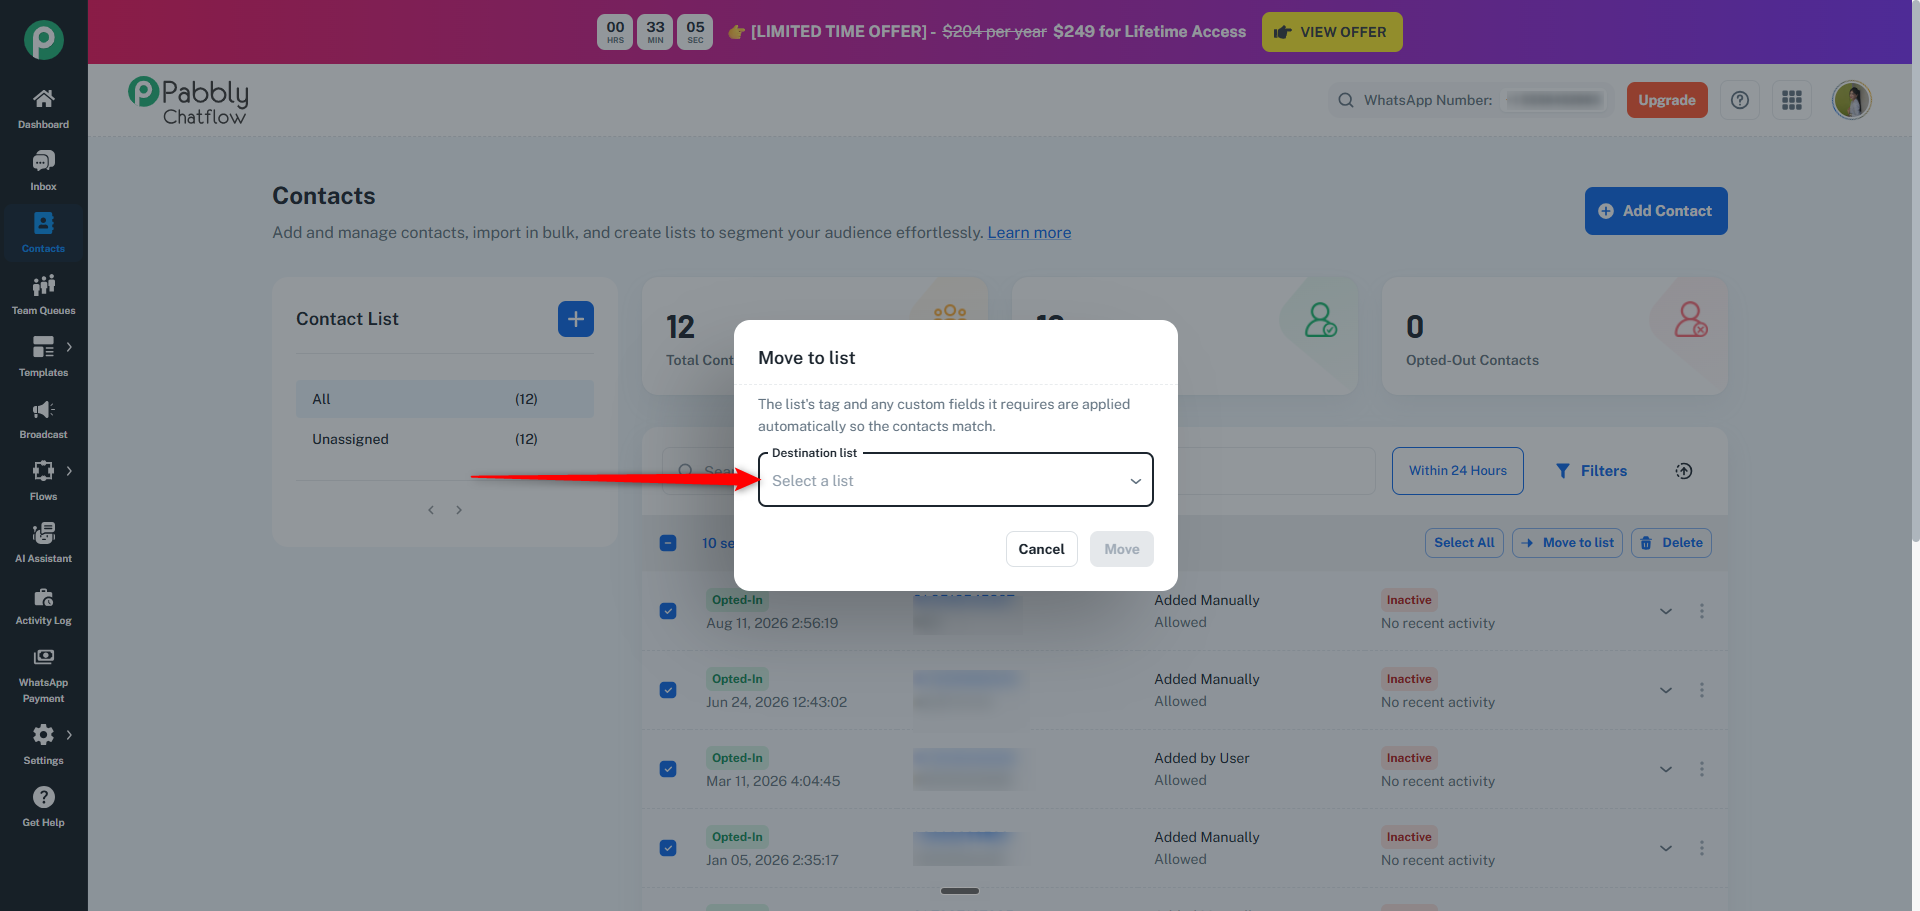
Move to list: After selecting contacts, you can move the selected contacts to another contact list using the Move to list option.
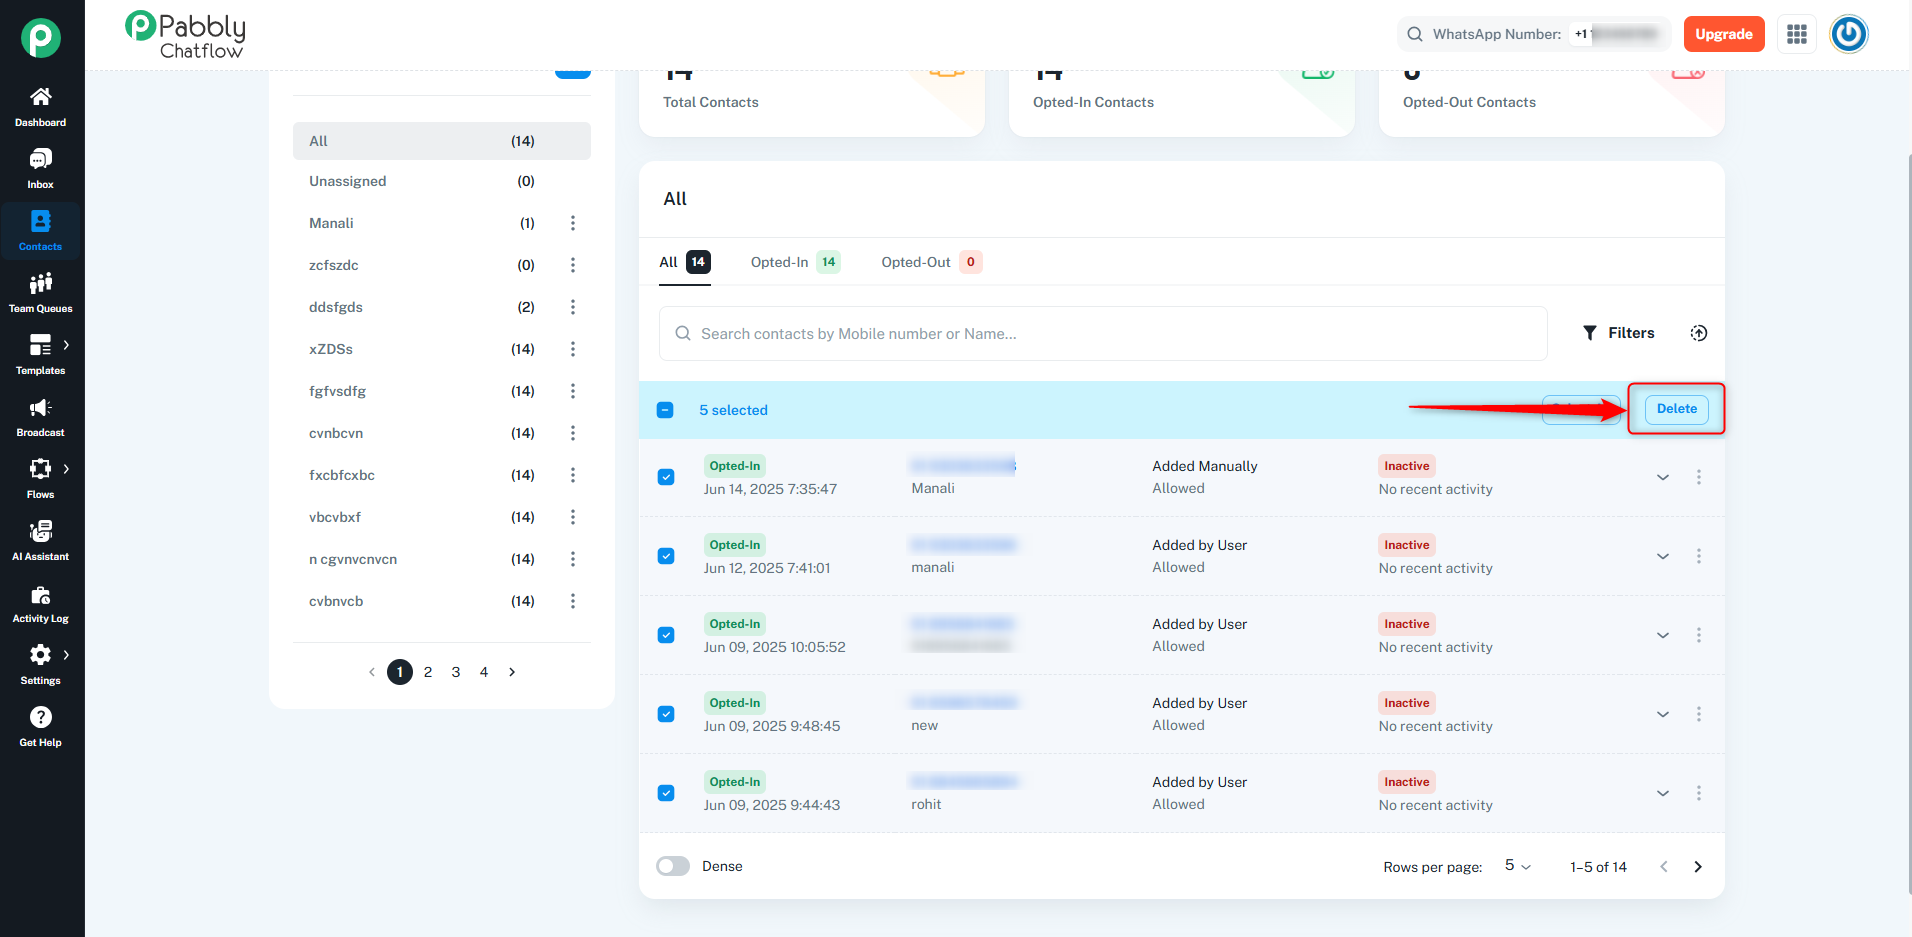
Delete: After selecting contacts, you can delete them using the Delete option.
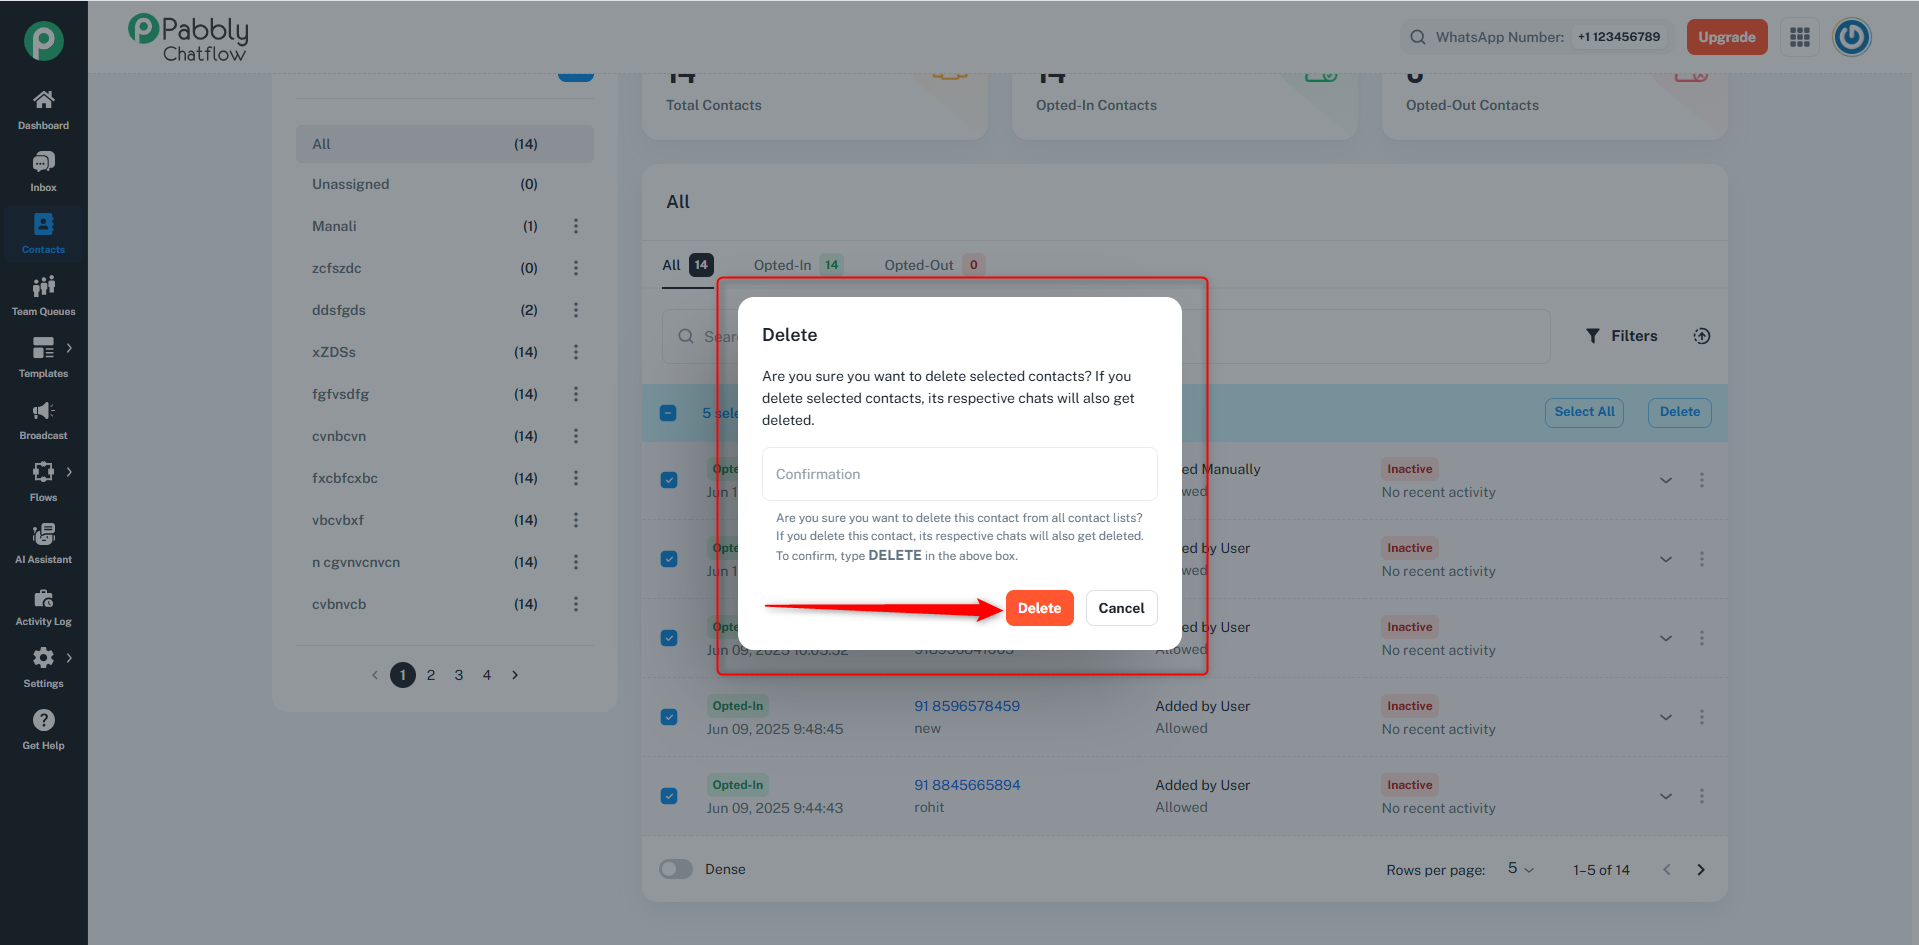
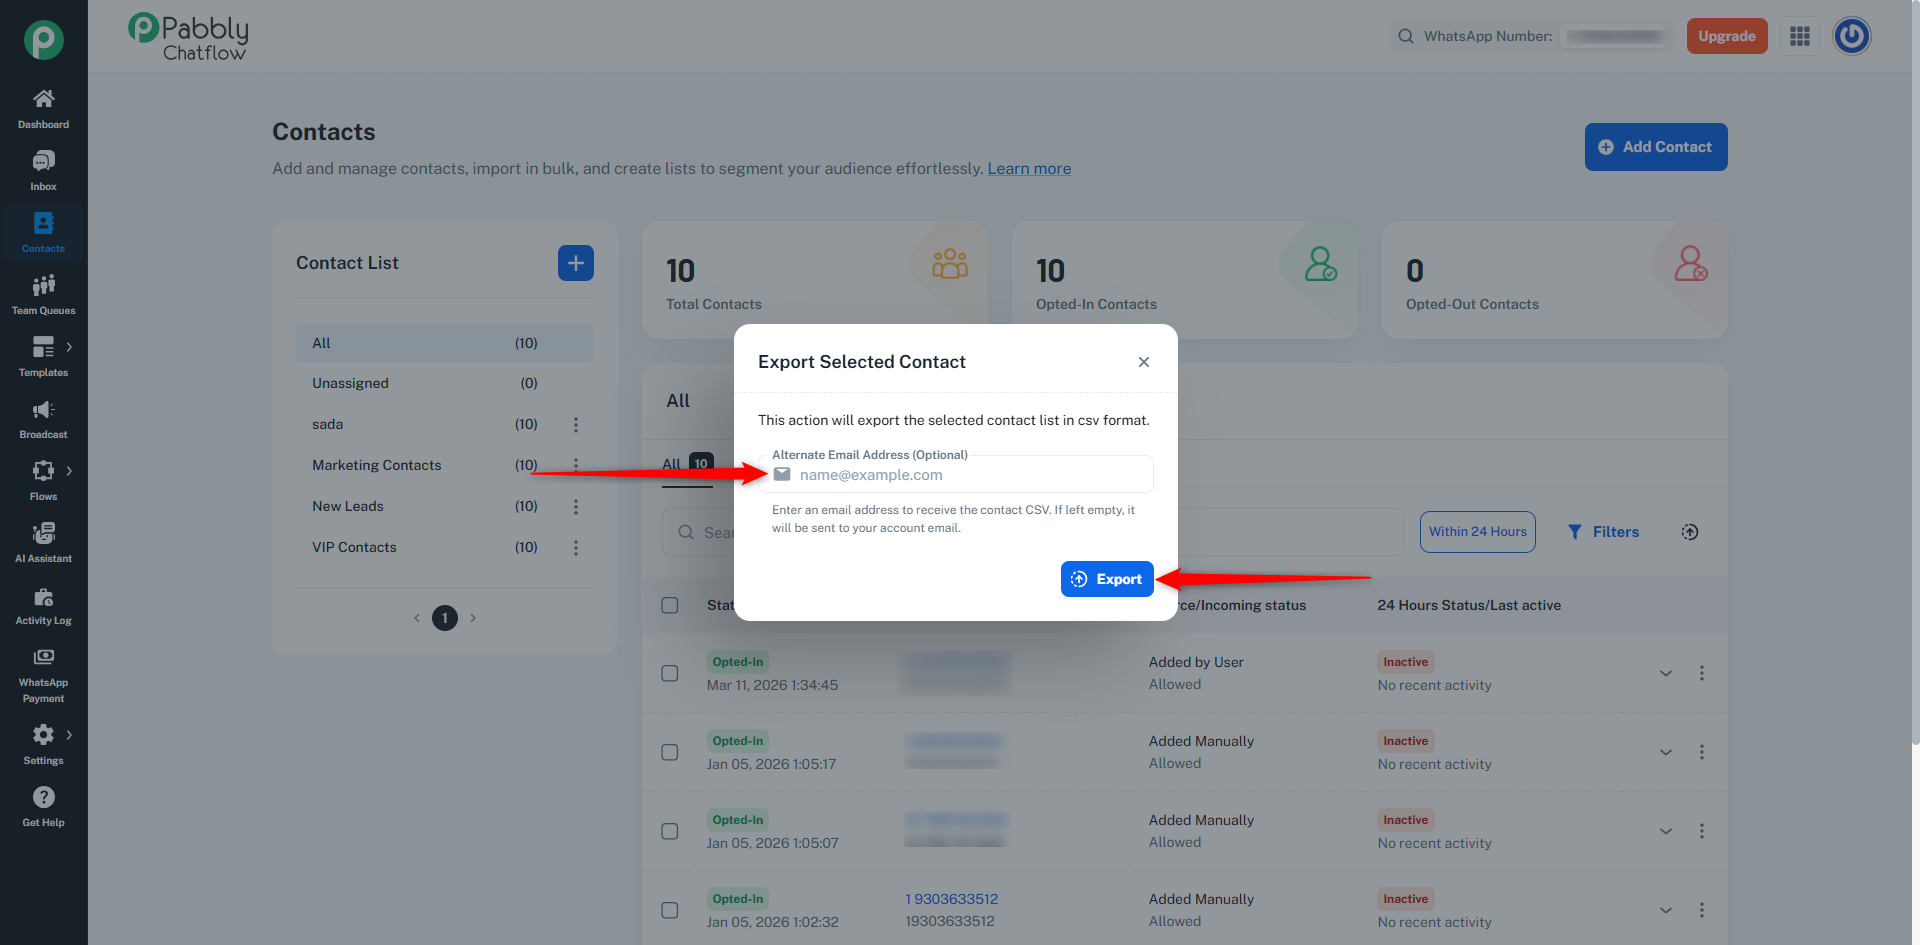
Export Selected Contacts: This action will export the selected contact list in CSV format.
Admins can export selected contacts directly to any email address of their choice using the Alternate Email Address field available in the Export Selected Contact dialog.
How It Works:
After selecting contacts from the table and clicking on the Export Selected Contacts option, a popup will appear with an optional Alternate Email Address field.
If an alternate email address is entered, the contact CSV will be sent to that email.
If the field is left empty, the CSV will be sent to the registered account email.
The Alternate Email Address field is completely optional.
This option is visible only for Admin accounts.
Team members will not see this field.
The exported file will be shared in CSV format.
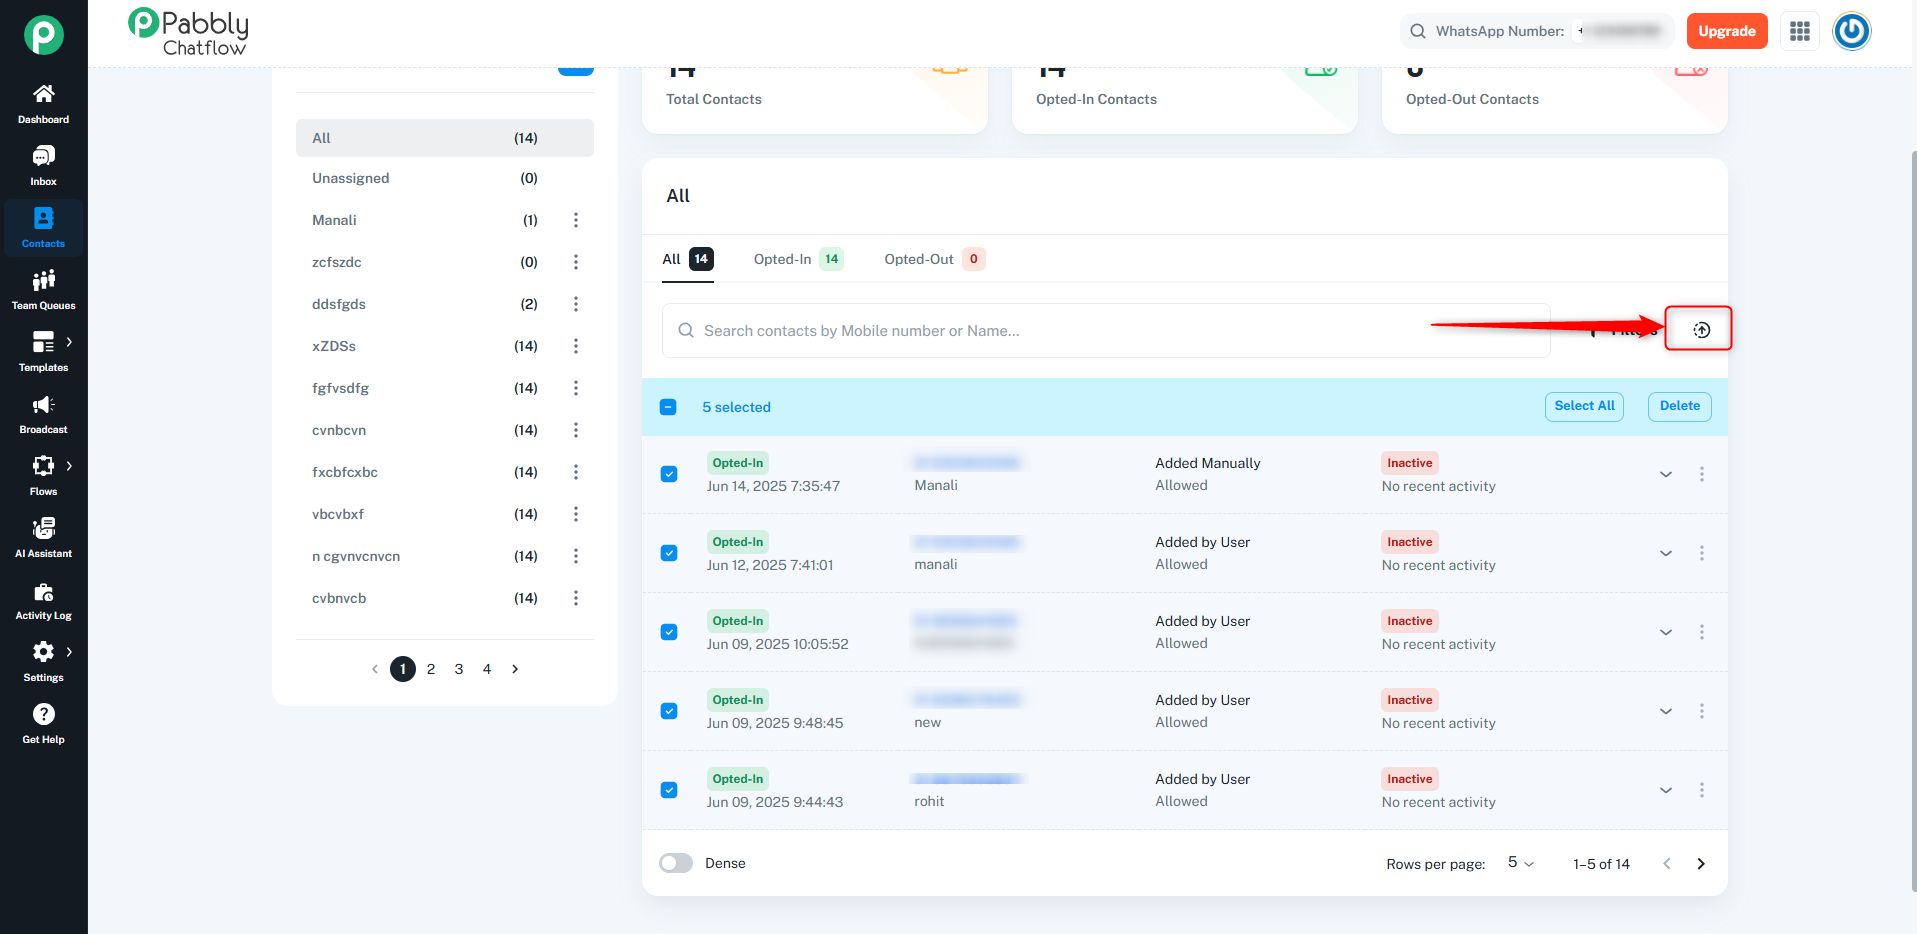
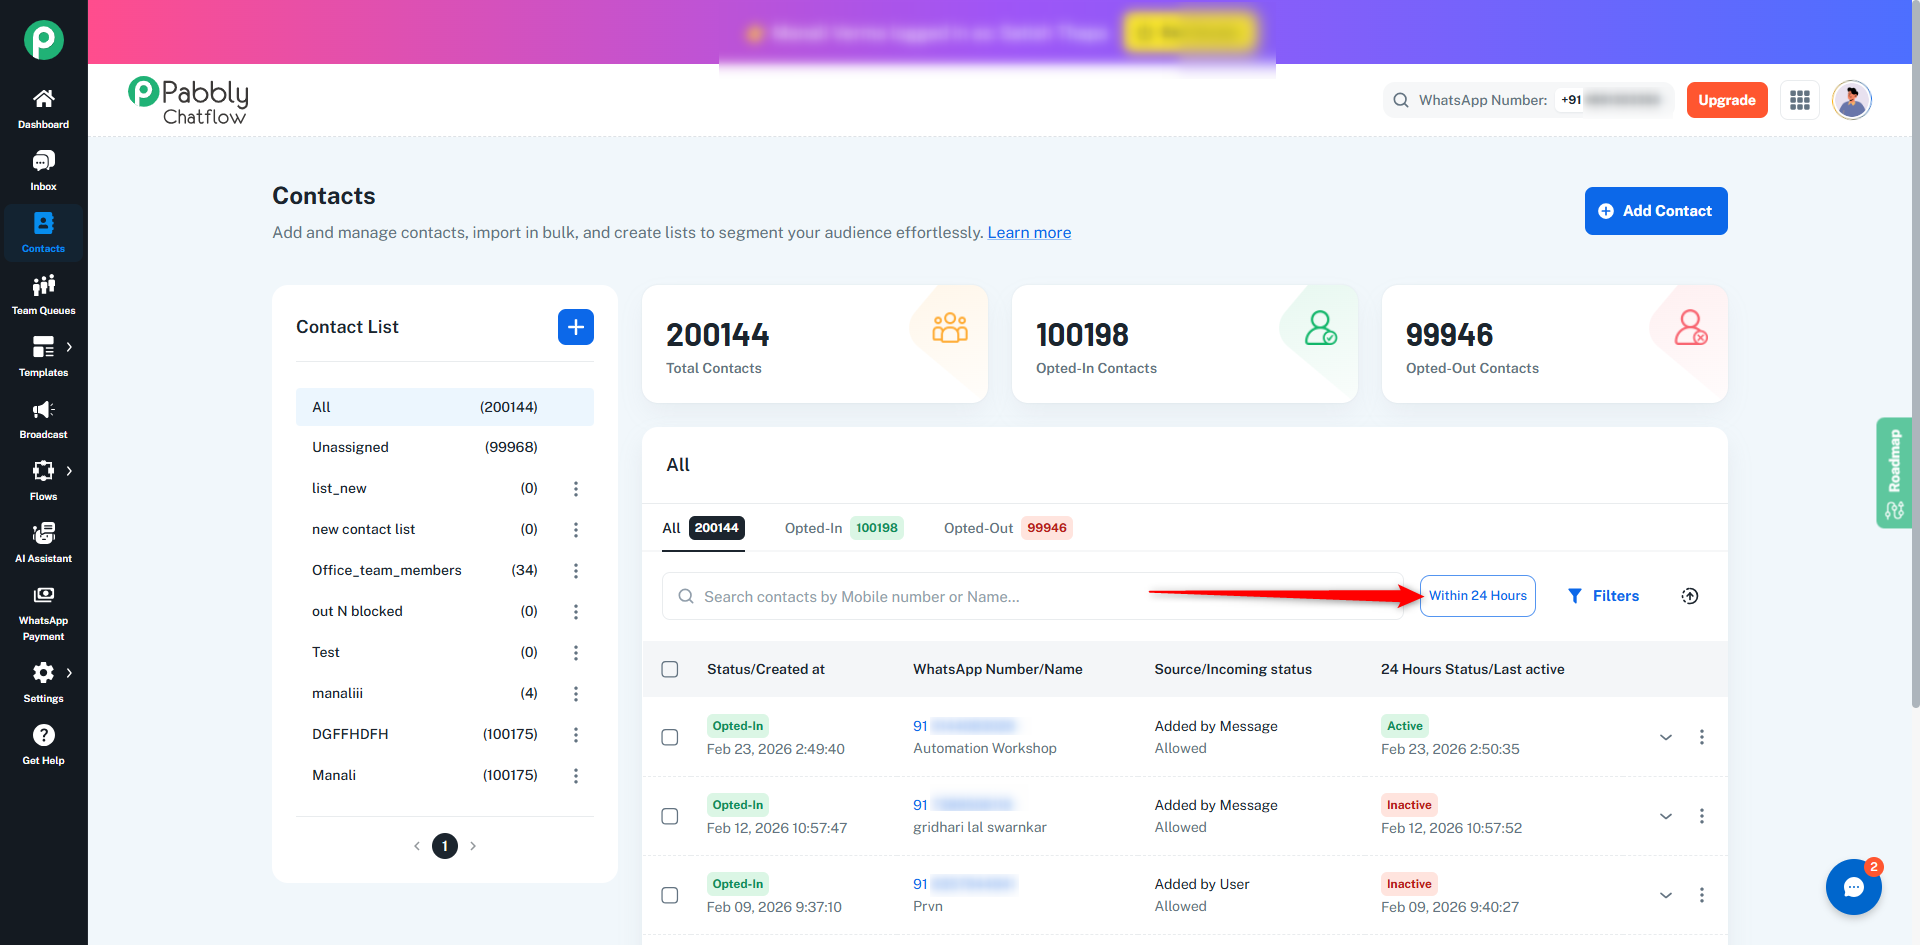
You will see a “Within 24 Hours” filter option above the contacts table.
This filter helps you quickly view contacts who are currently within WhatsApp’s 24-hour messaging window.
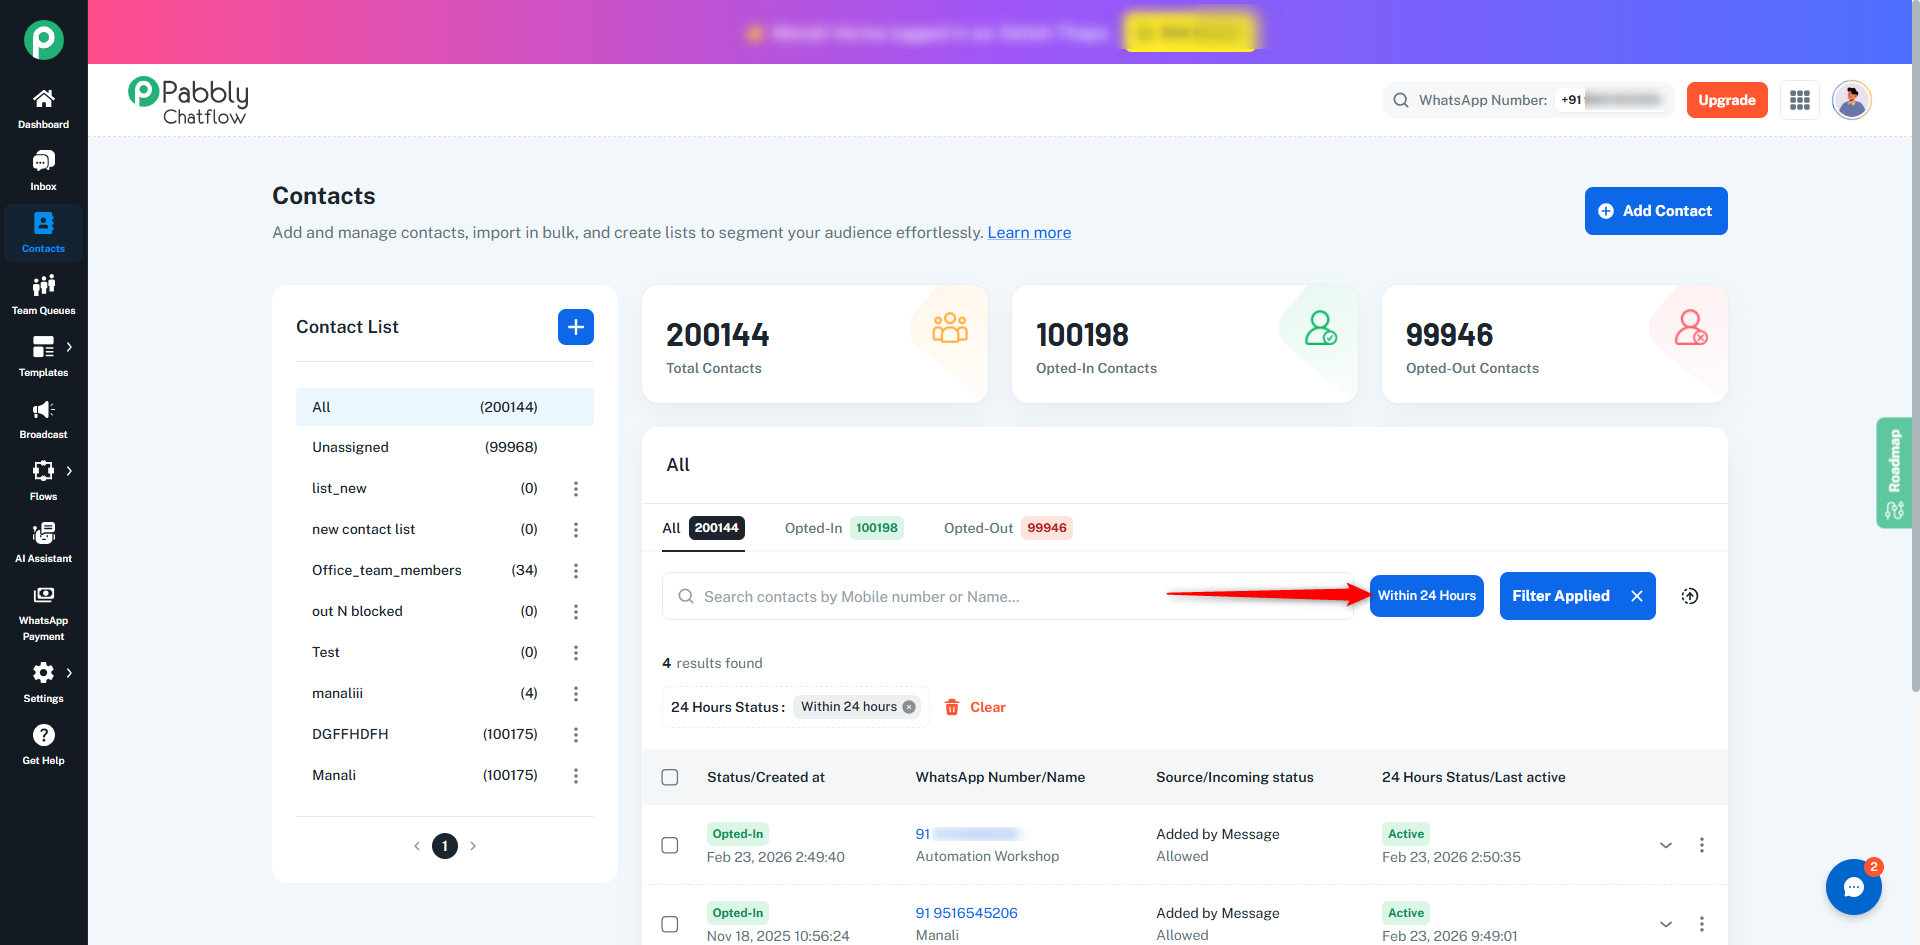
When you click on Within 24 Hours:
Only contacts whose 24-hour session is active will be displayed.
This makes it easier to send messages without using template messages.
A well-structured contact list enables efficient message broadcasting by:
Filtering and targeting specific groups.
Enhancing engagement through personalized communication.
Simplifying campaign management by segmenting contacts.
By leveraging contact lists, users can optimize their outreach and improve the effectiveness of their communication strategies.
