The Inbox Settings feature in Pabbly Chatflow helps you automatically respond to users who message your business on WhatsApp. This ensures that customers get a reply even if you're not available right away.
With Inbox Settings, you can:
- Send a Welcome Message when users message you during working hours.
- Send an Off-Hours Message when users message you outside working hours.
- Define Working Hours to manage when each type of message should be sent.
You can set up these messages in two ways:
- Regular Message – A message that you create and customize.
- Pre-Approved WhatsApp Template – A message that has been approved by WhatsApp and synced from your Meta Developer Account.
Step 1: Accessing Inbox Settings
To set up your automatic responses:
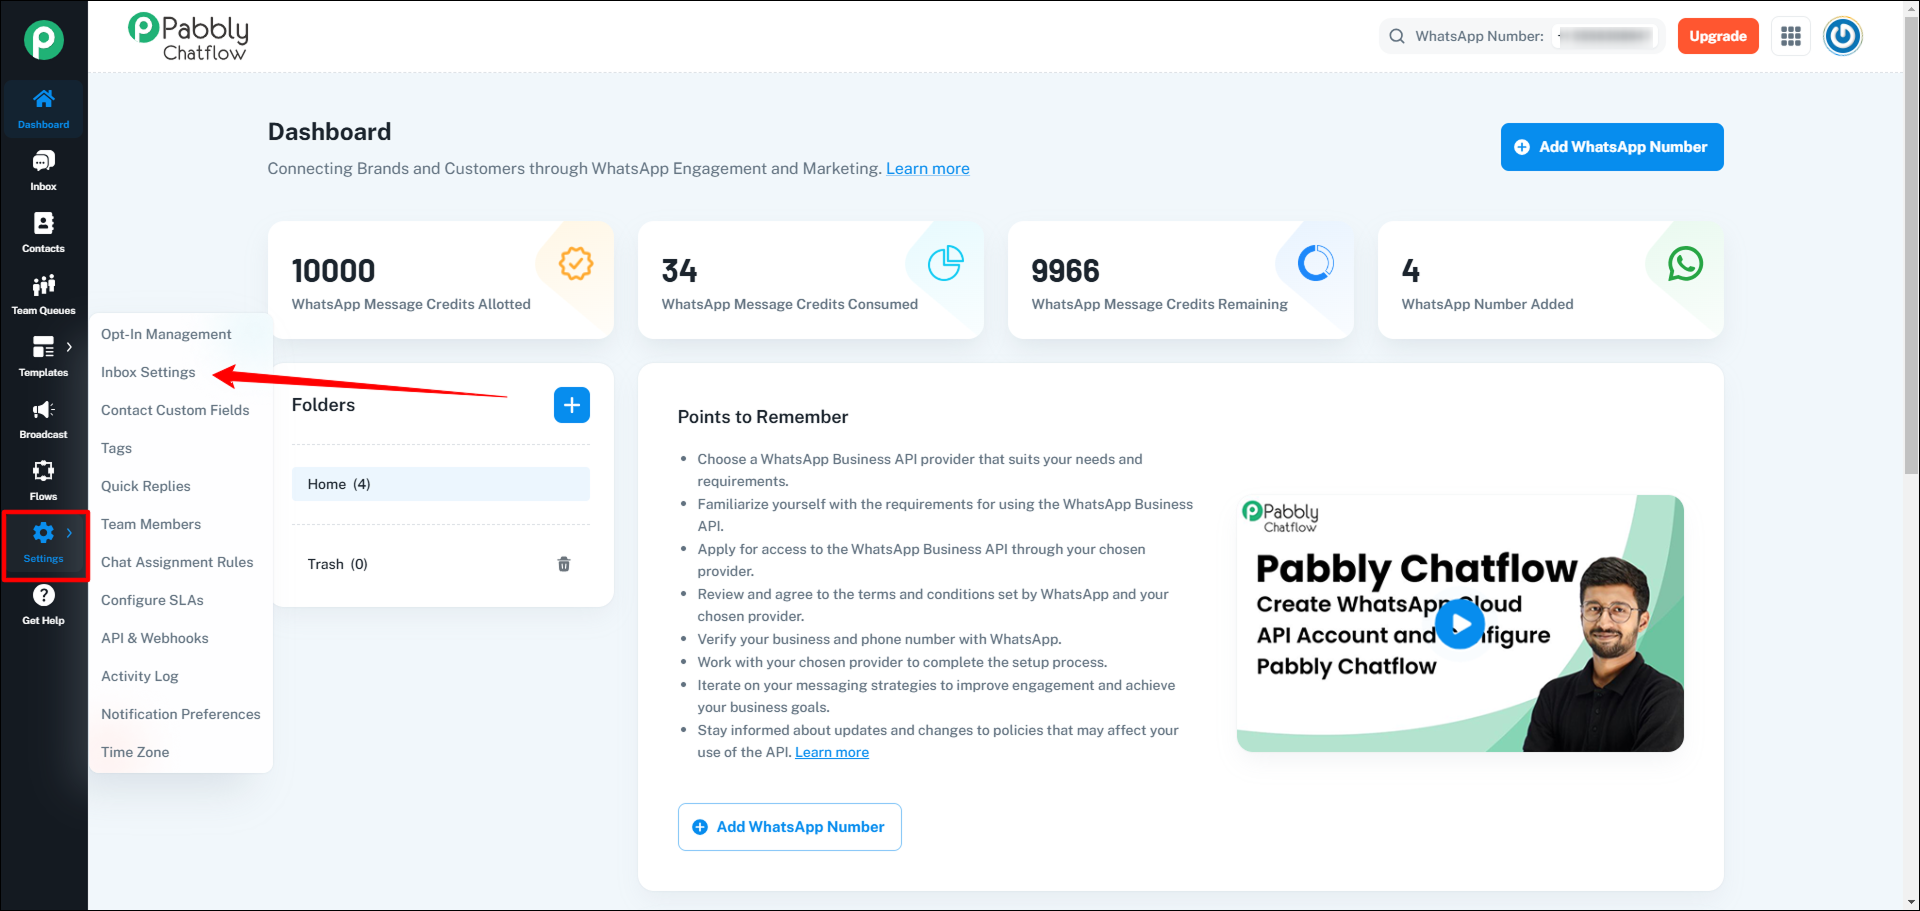
- Log in to your Pabbly Chatflow account.
- Click on Settings from the left menu.
- Select Inbox Settings.
Step 2: Setting Up a Welcome Message
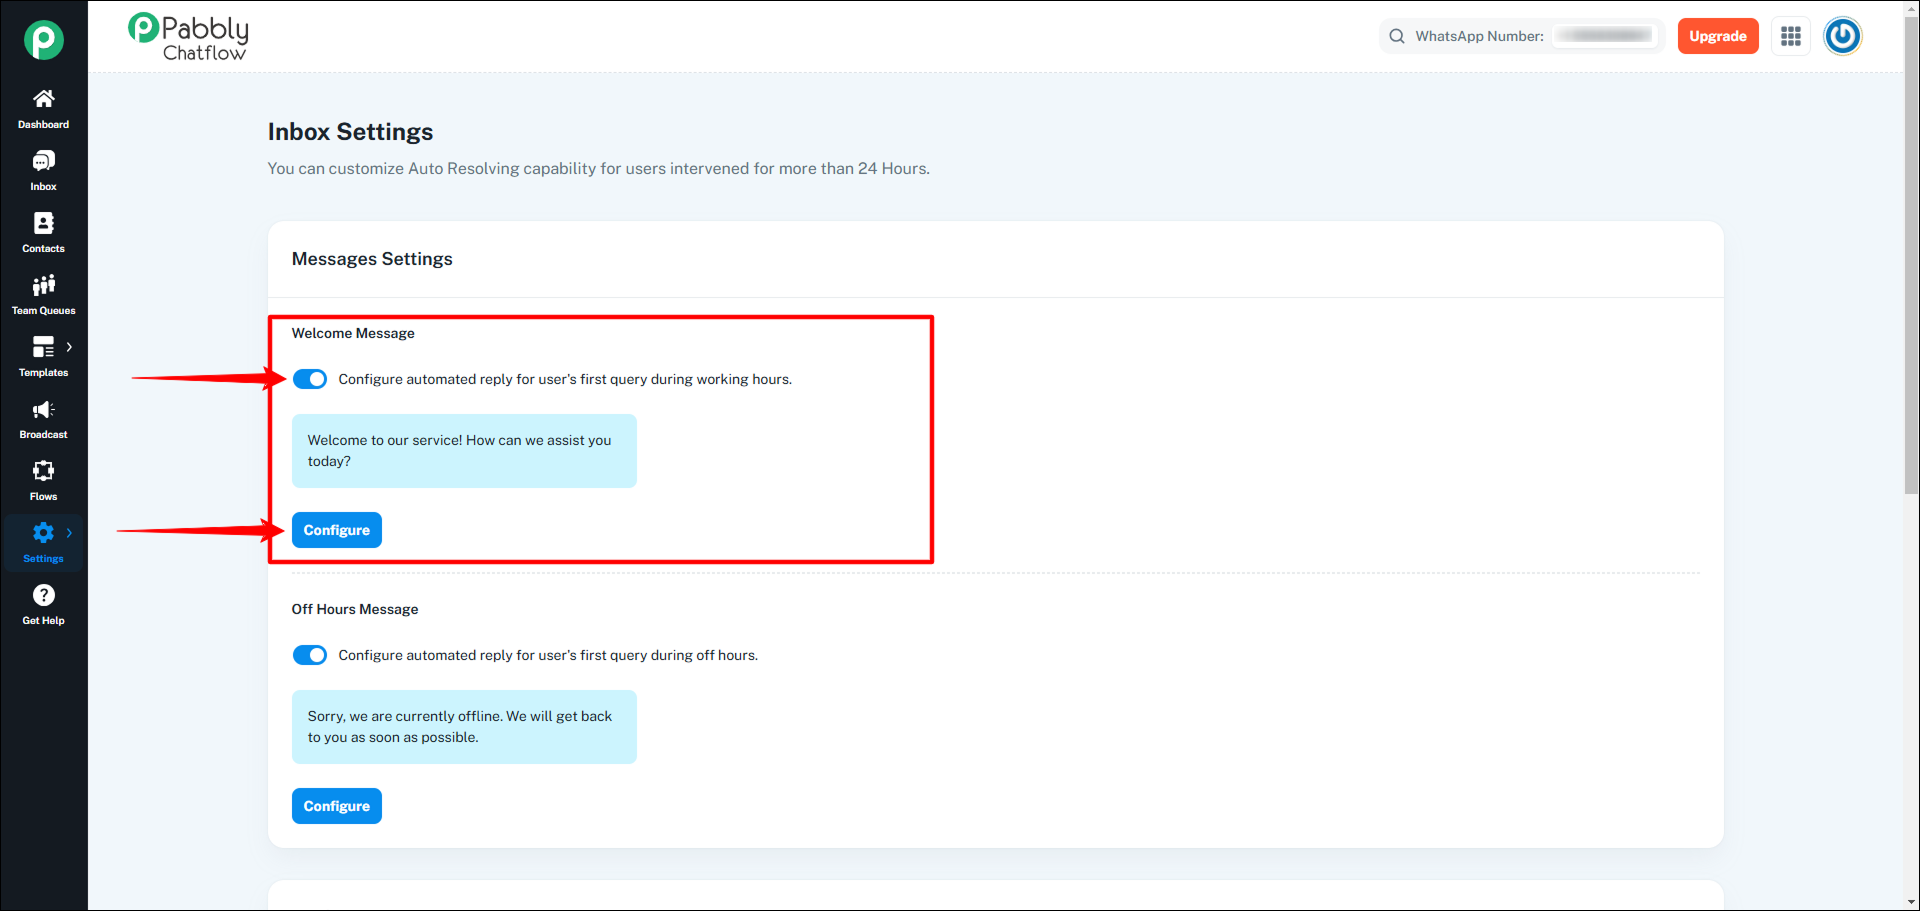
A Welcome Message is automatically sent when a user messages you for the first time during your working hours.
Turning on the Welcome Message
- Find the Welcome Message section.
- Turn on the toggle switch to enable the message.
- Click the Configure button to set up your response.
Choosing a Message Type
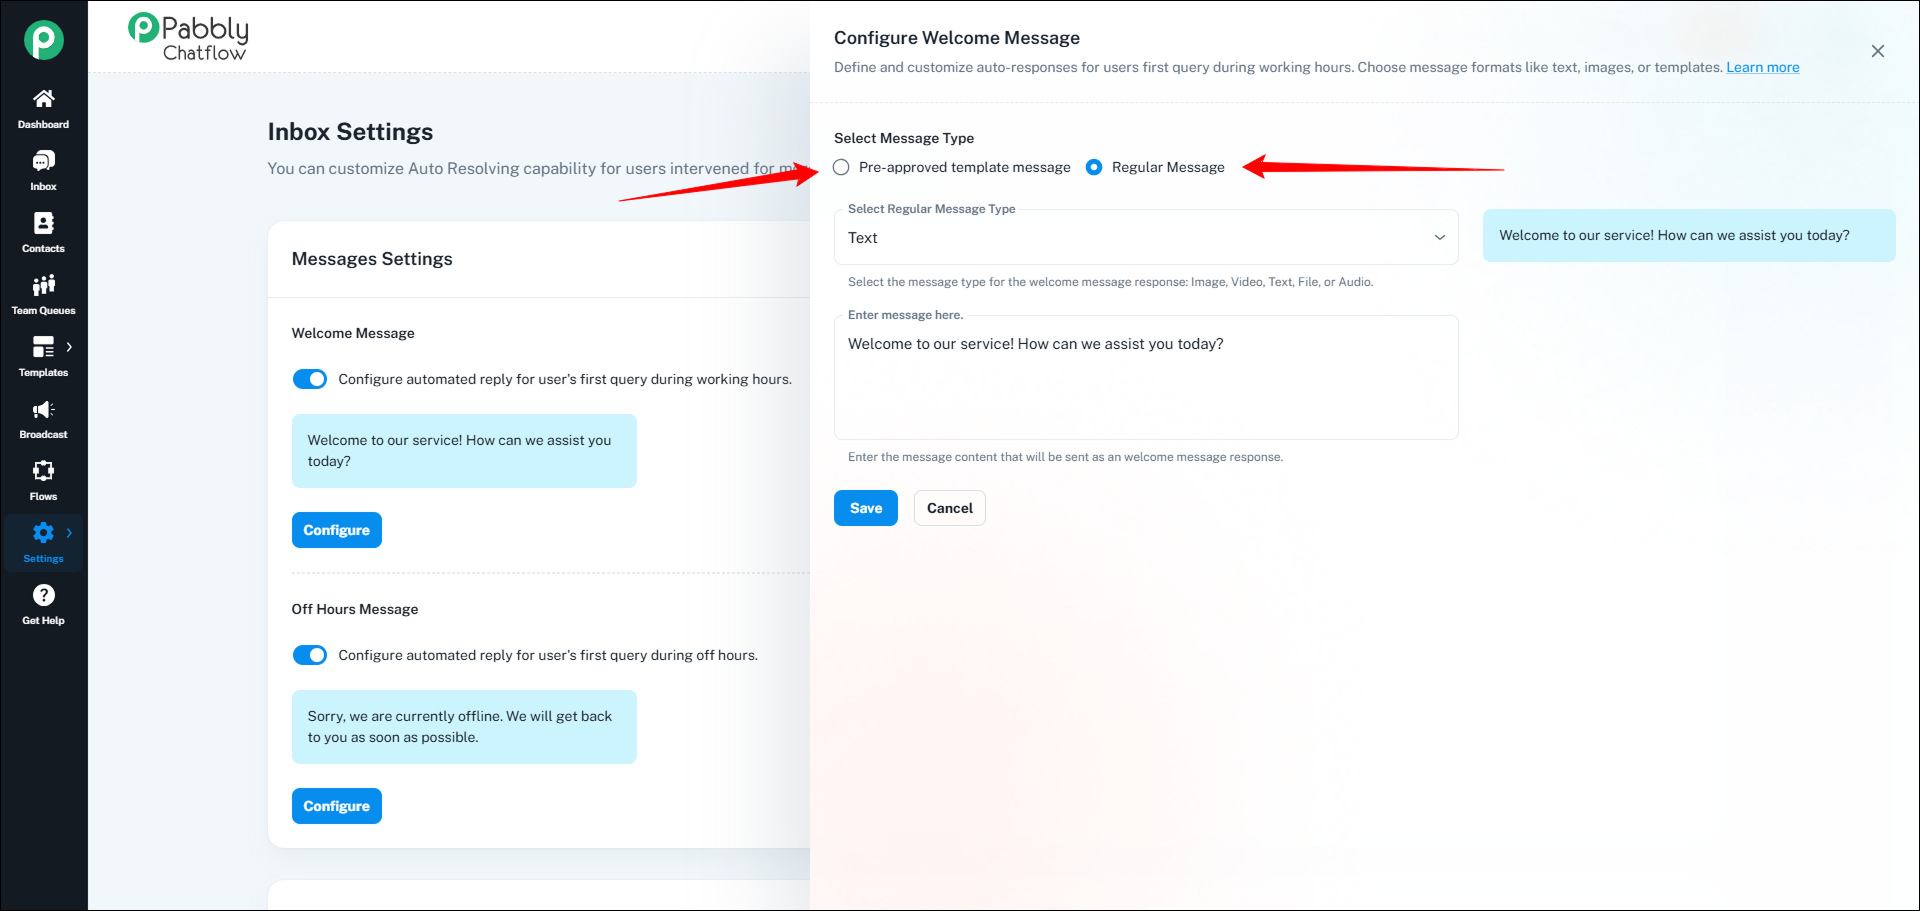
When you click Configure, a dialog box will appear where you can choose between two options:
- Regular Message
- Pre-Approved WhatsApp Template
Step 3: Configuring a Regular Message
A Regular Message allows you to create a custom response in different formats.
Choosing the Type of Regular Message
You can select from:
Text Message – Enter a simple text message and click Save.
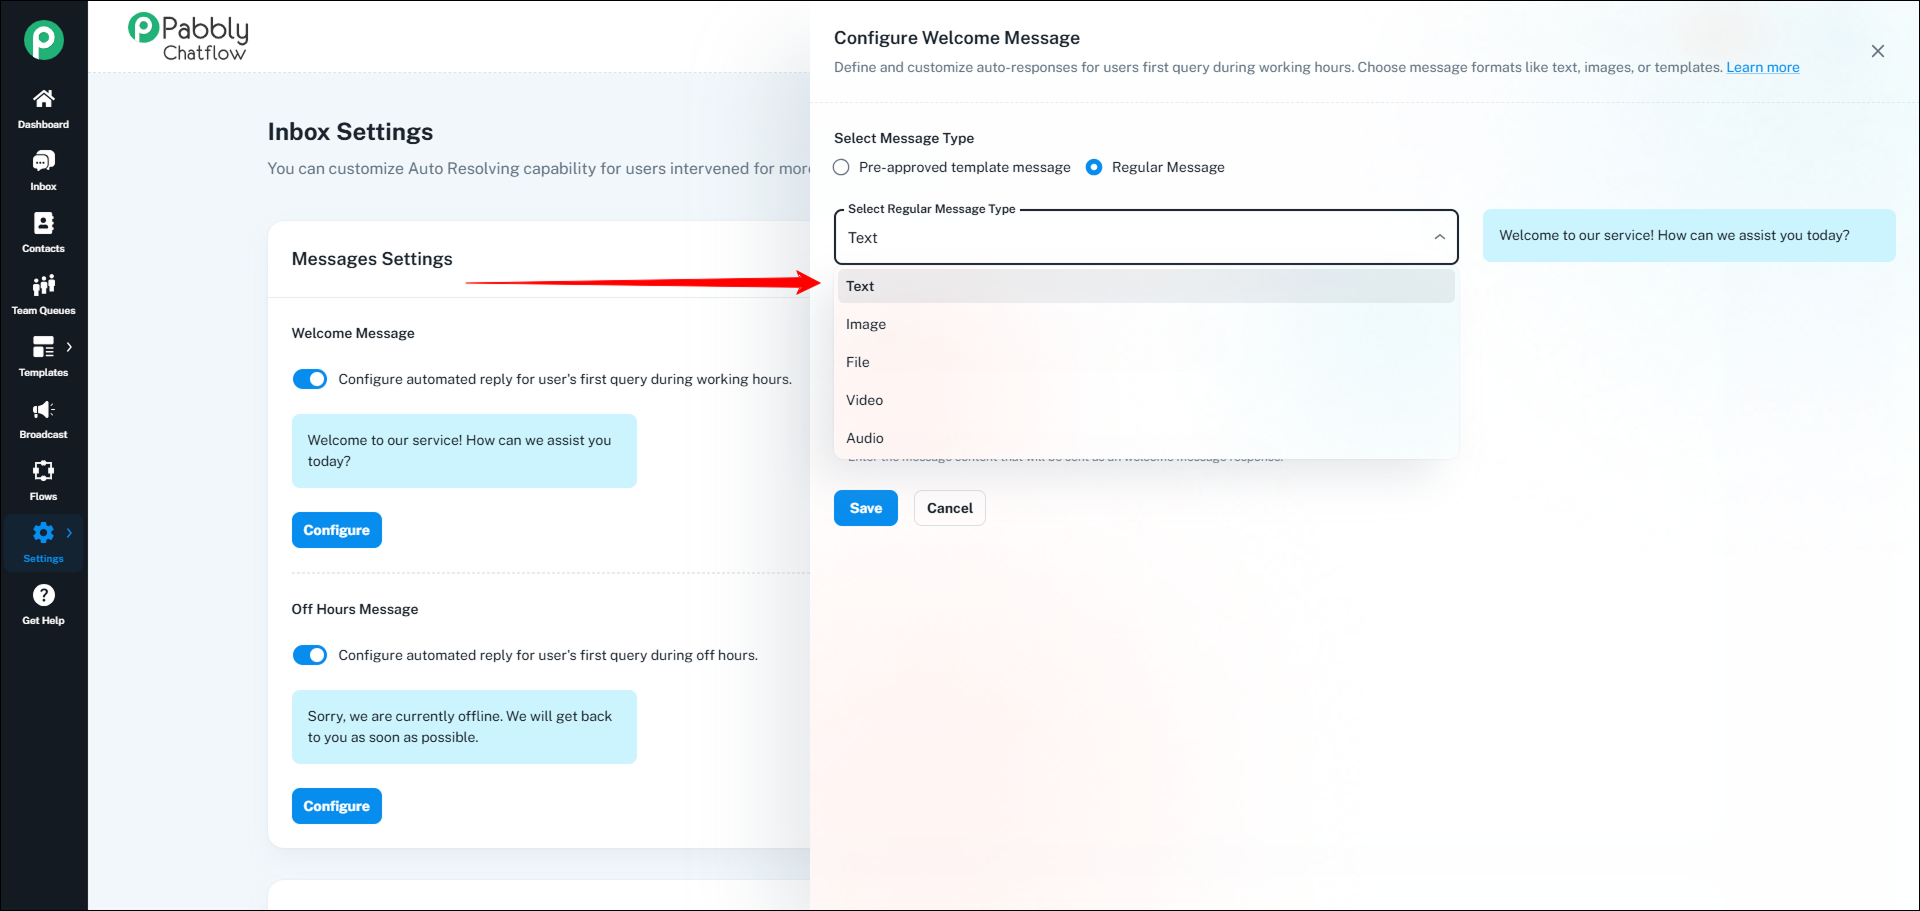
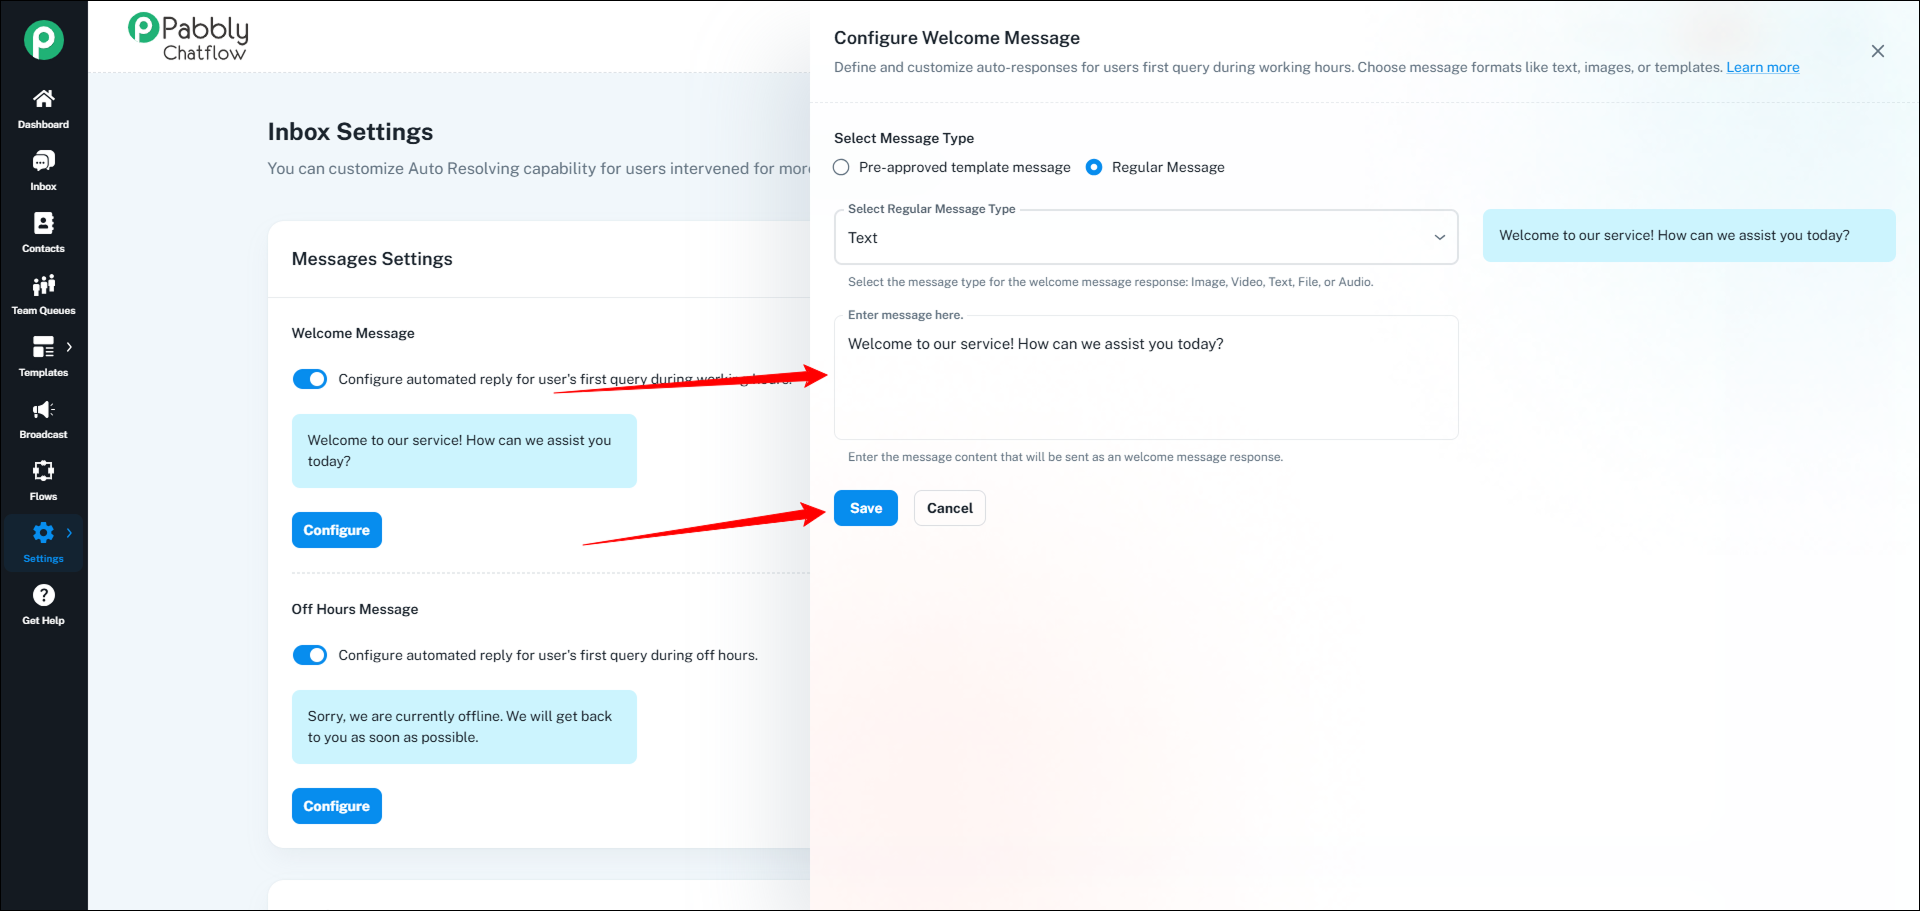
Image Message – Add an optional caption, paste an image URL, or upload an image file. Click Save after uploading.
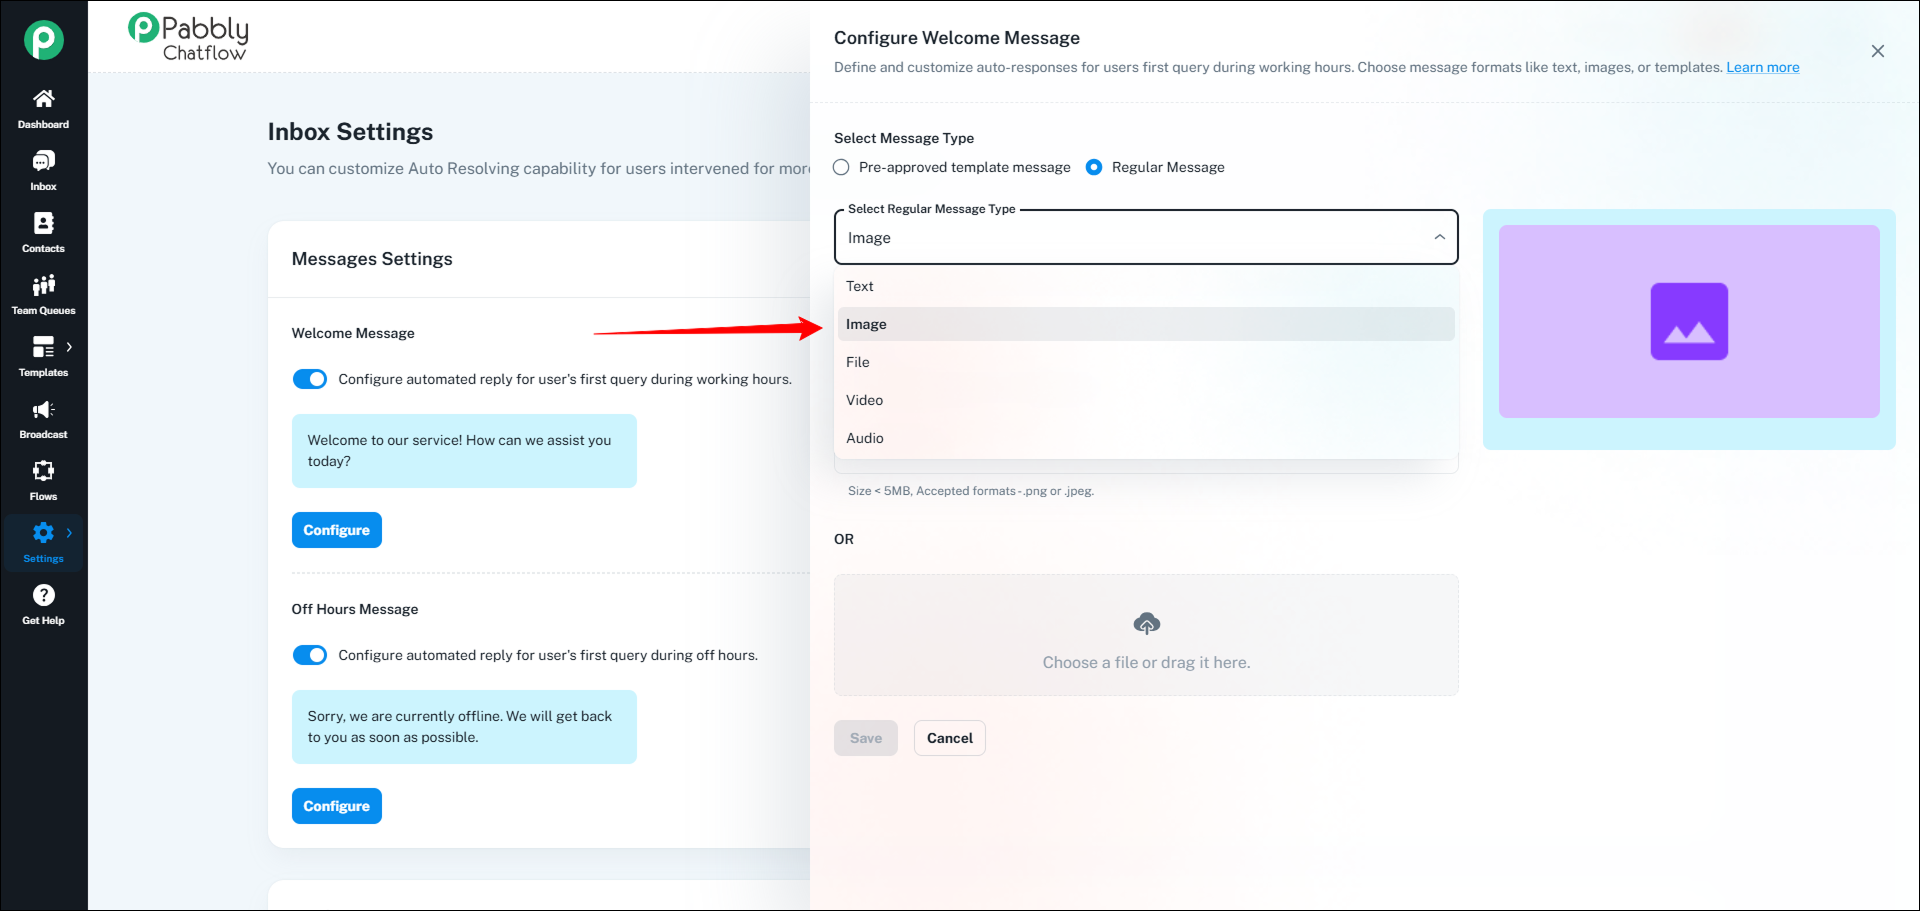
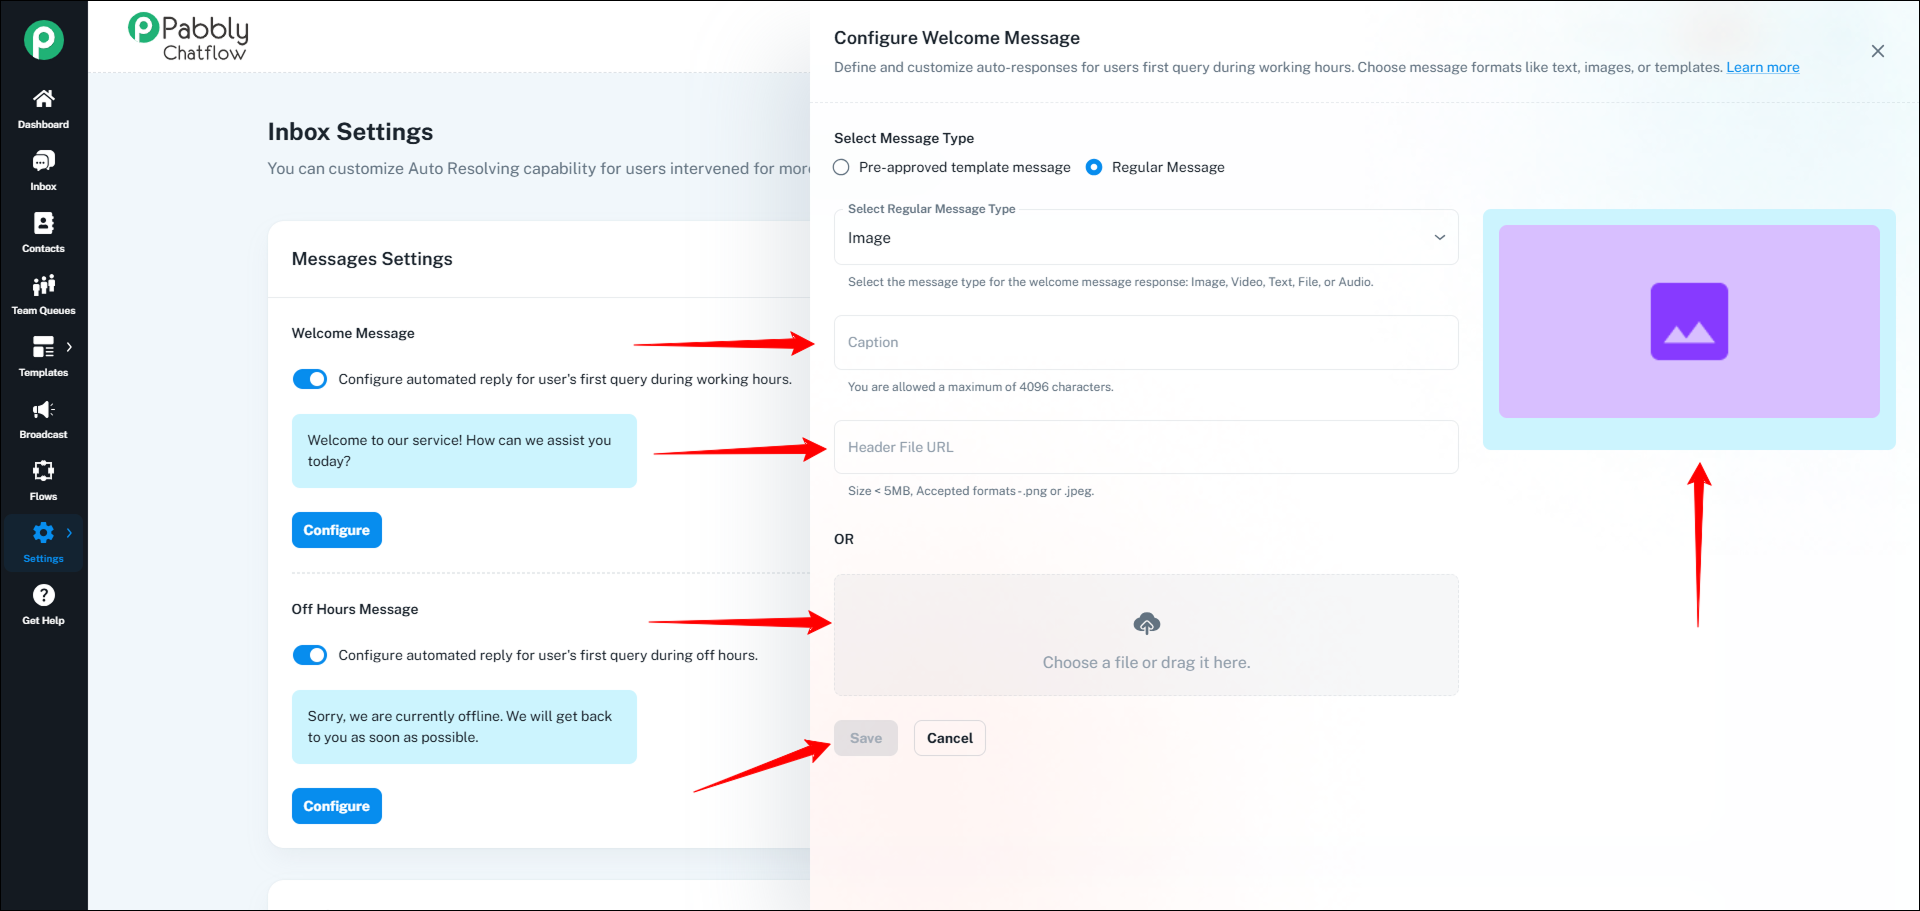
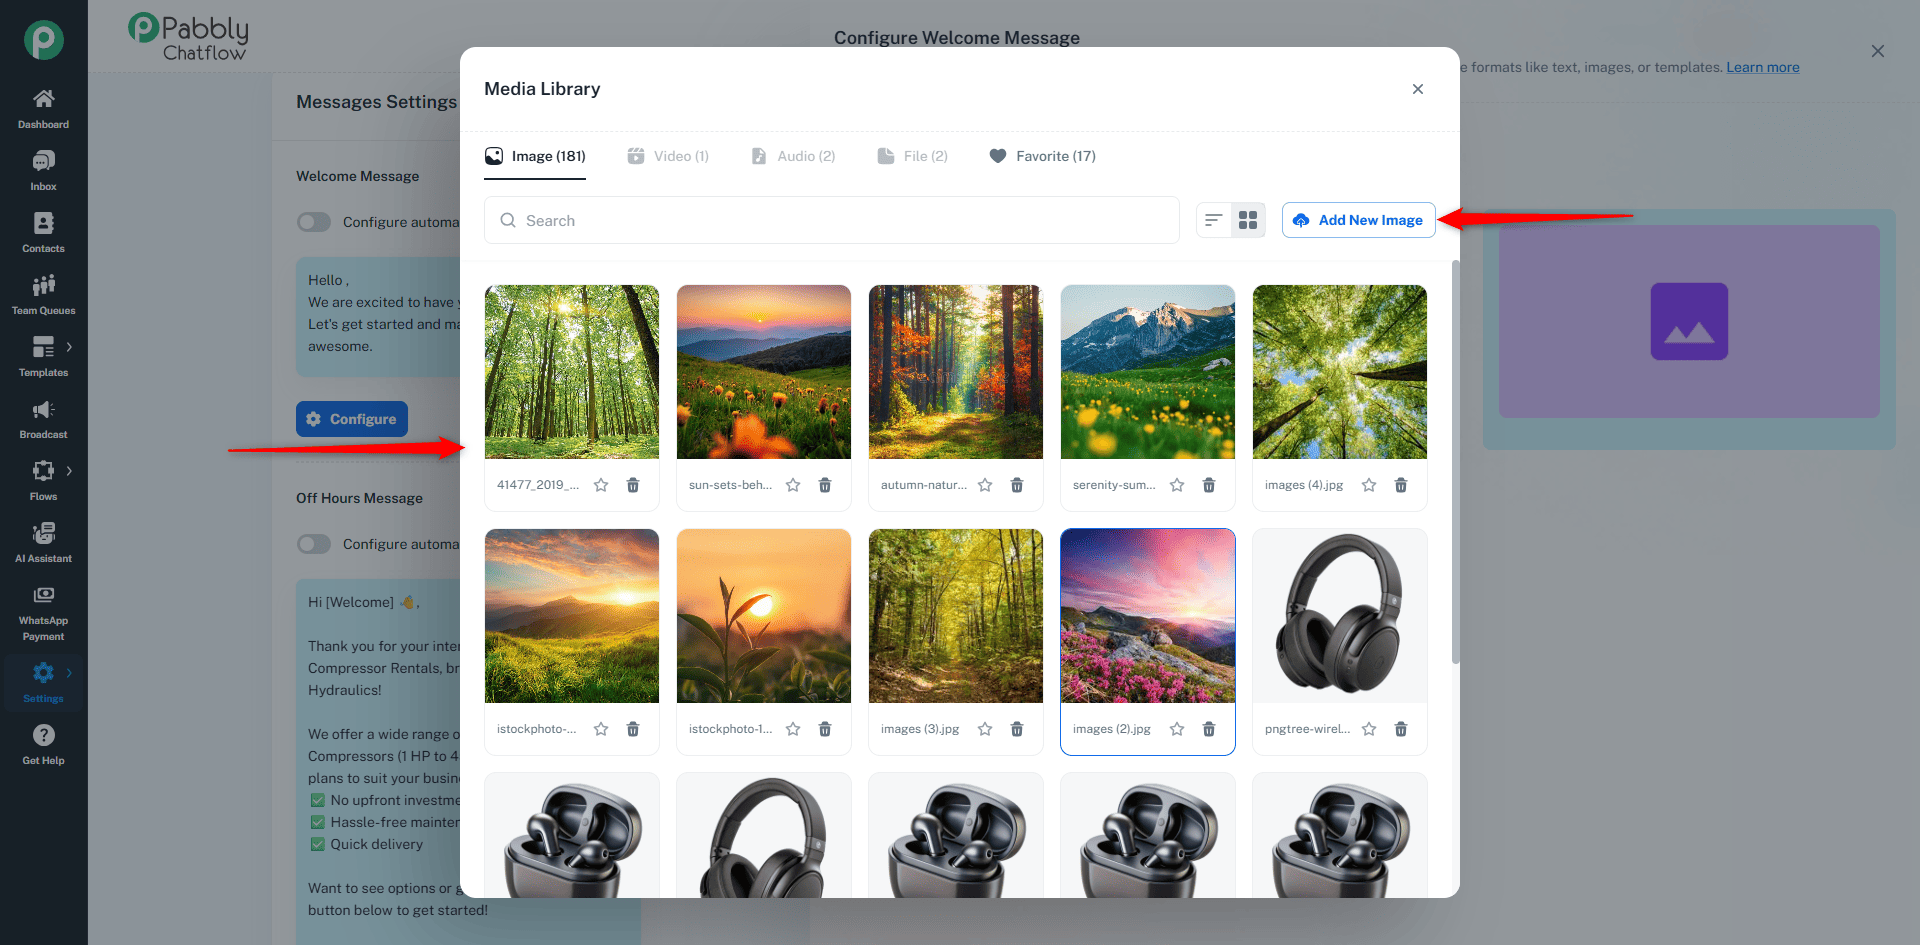
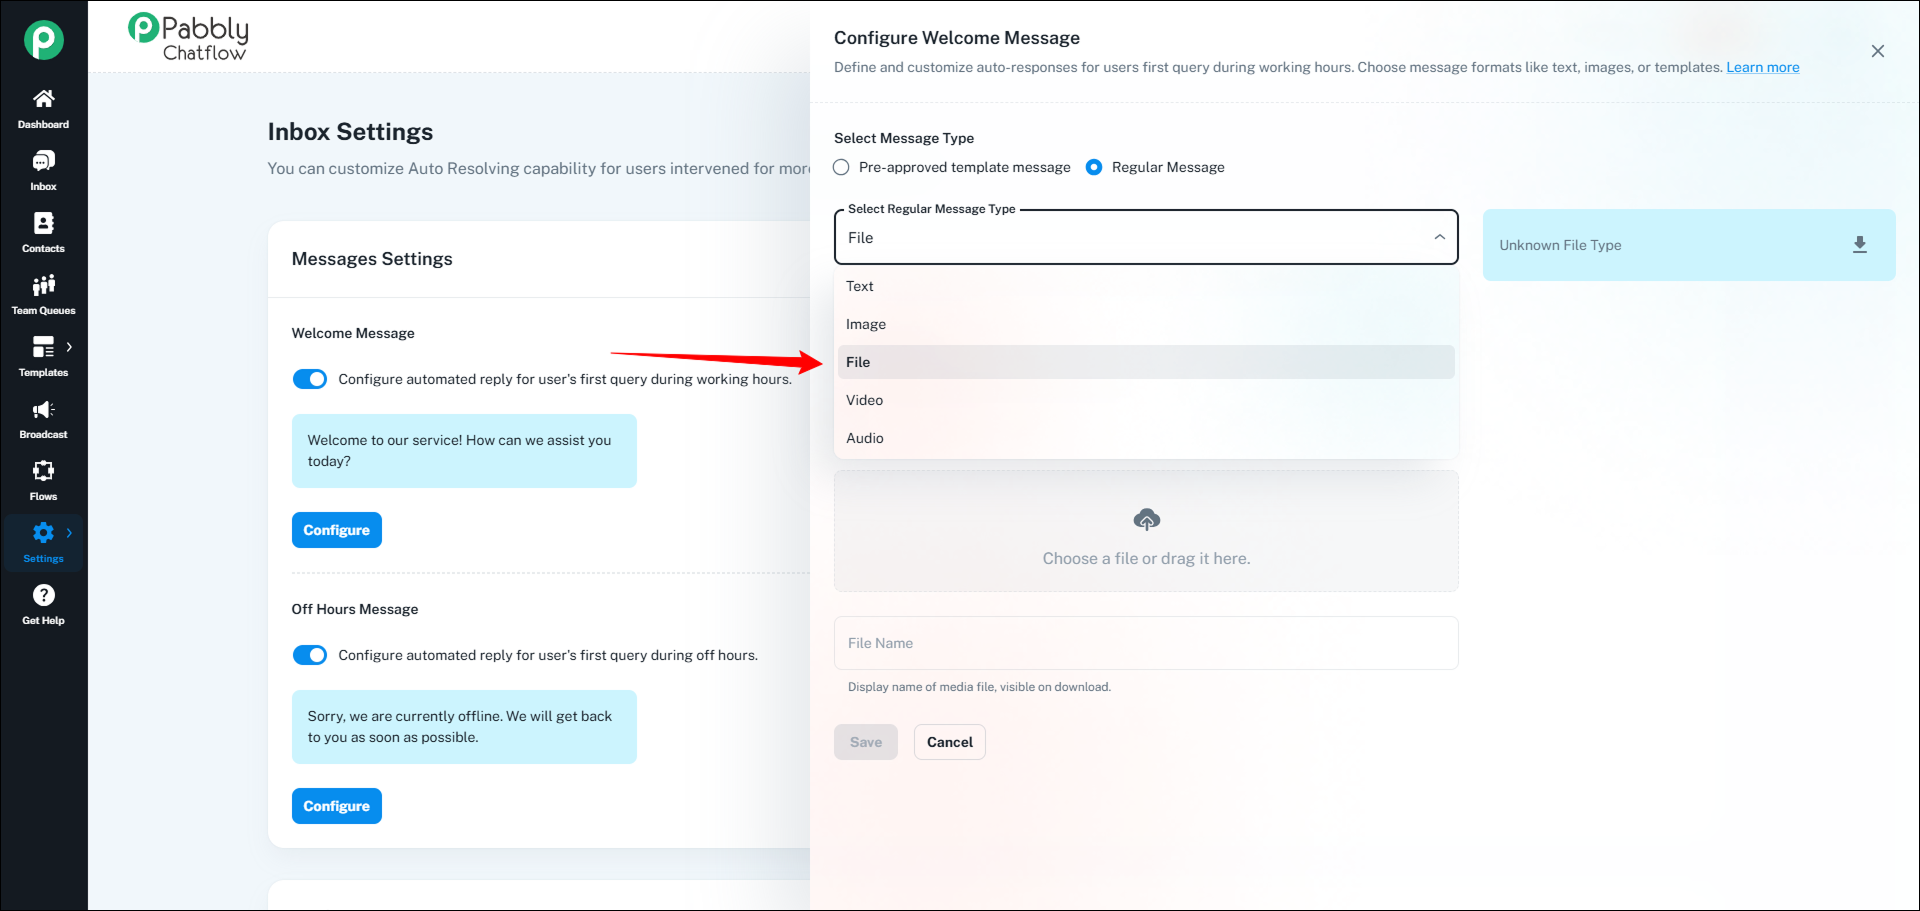
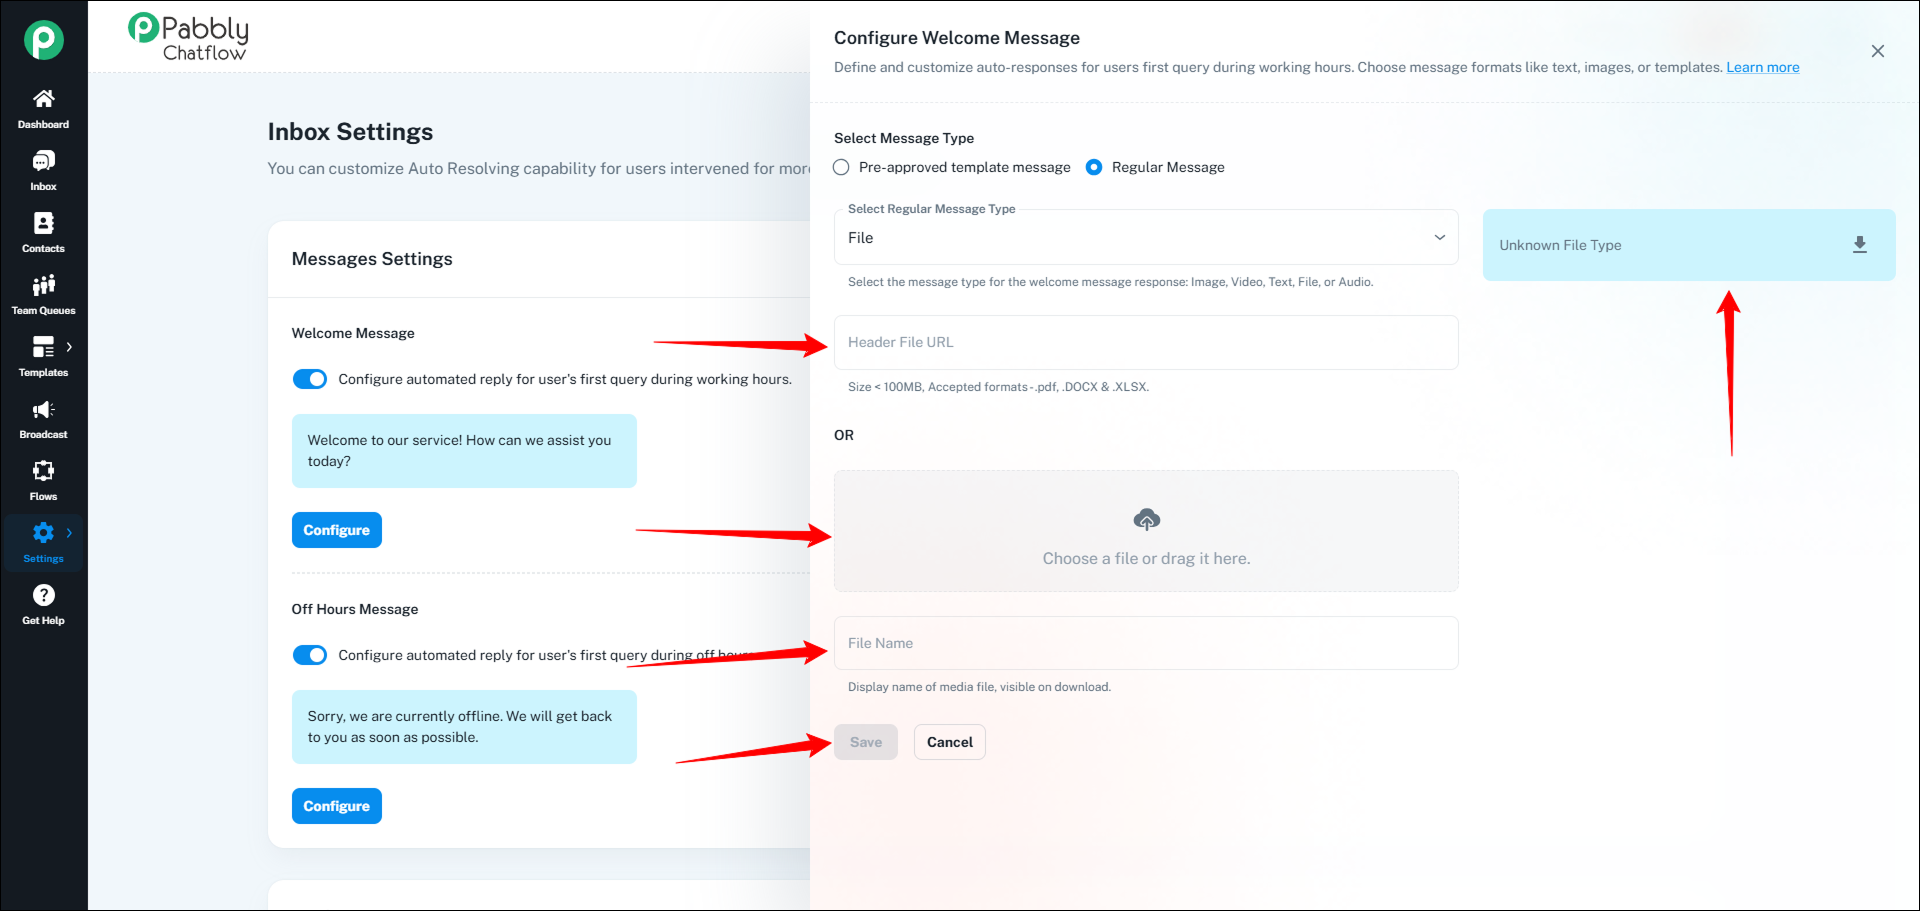
File Message – Enter a file name, paste a file URL, or upload a document (PDF, DOCX, XLSX). Click Save.
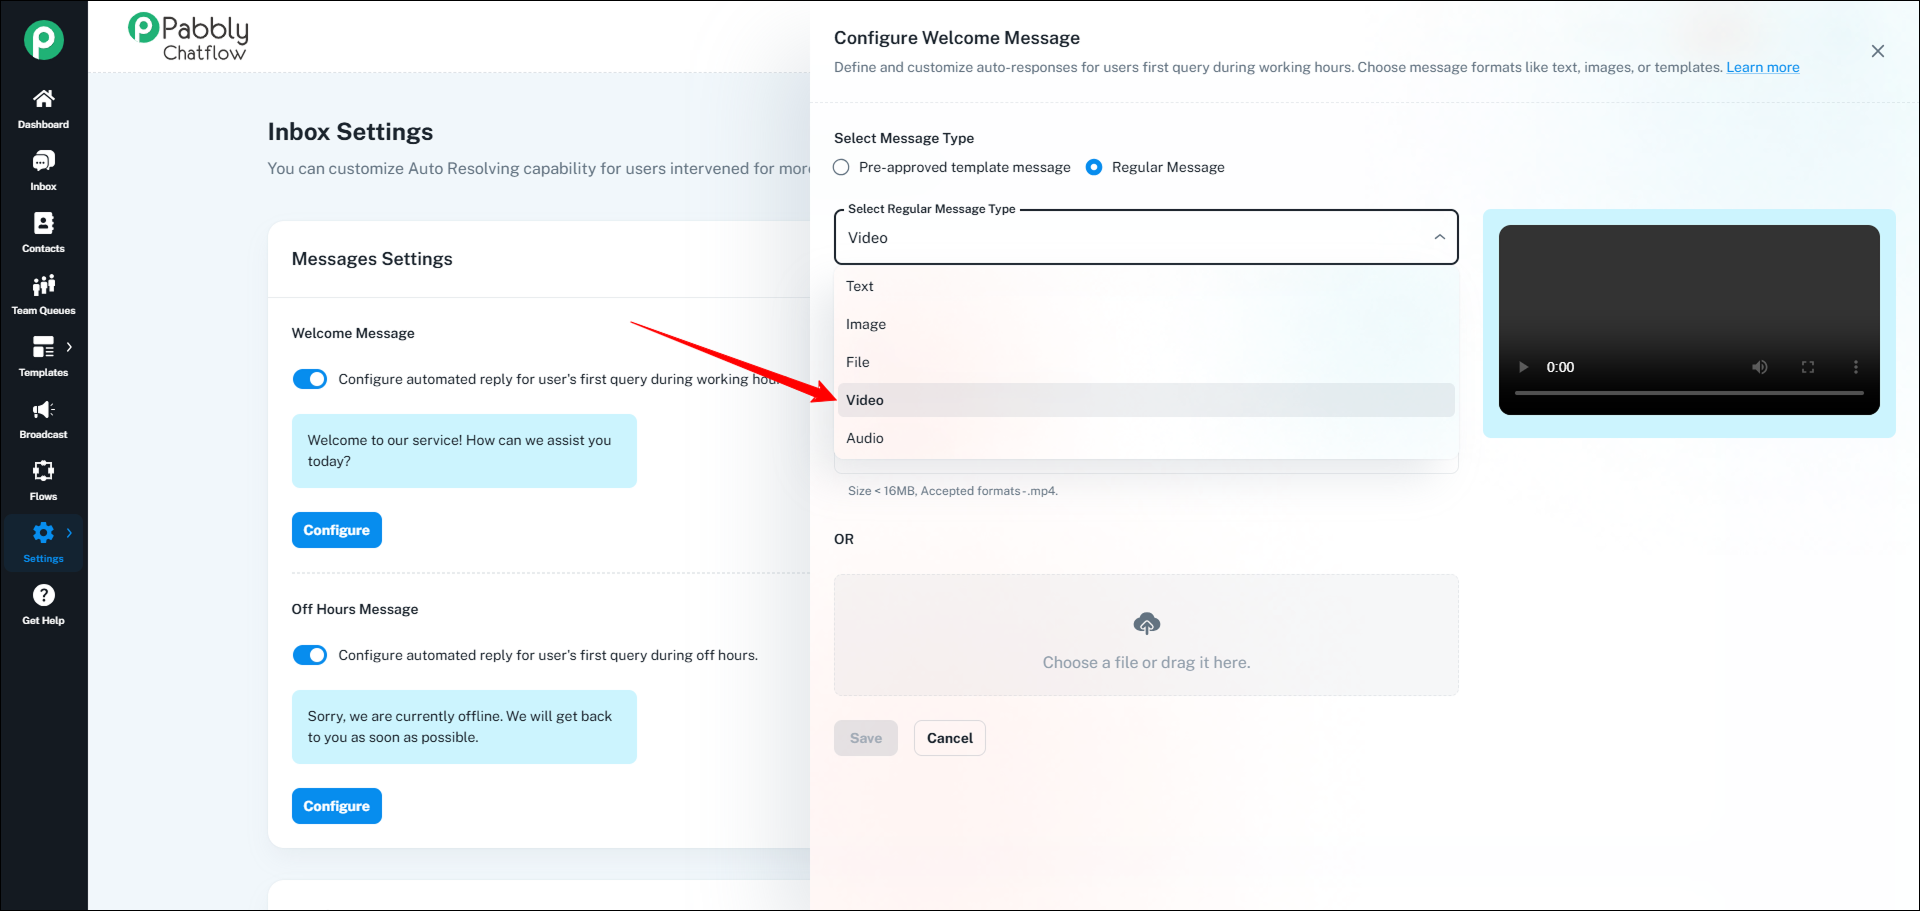
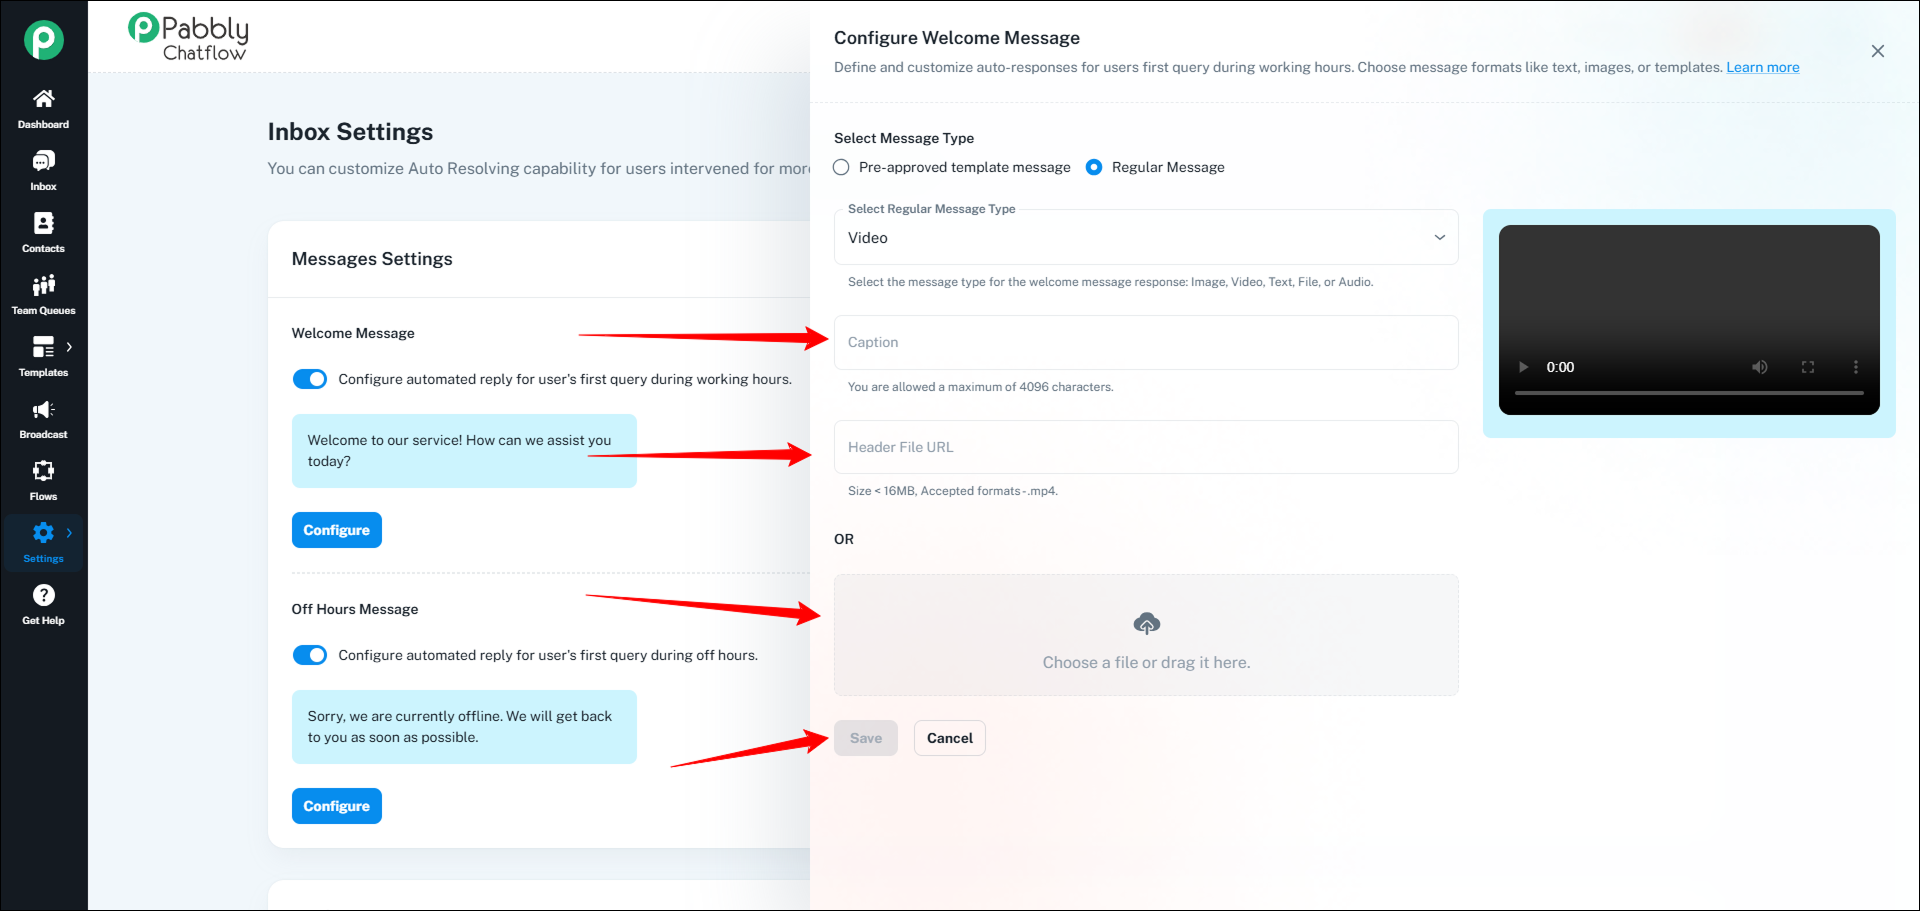
Video Message – Add a caption (optional), paste a video URL, or upload a .mp4 file (max 16MB). Click Save.
Audio Message – Paste an audio file URL or upload an .mp3 file (max 16MB). Click Save.
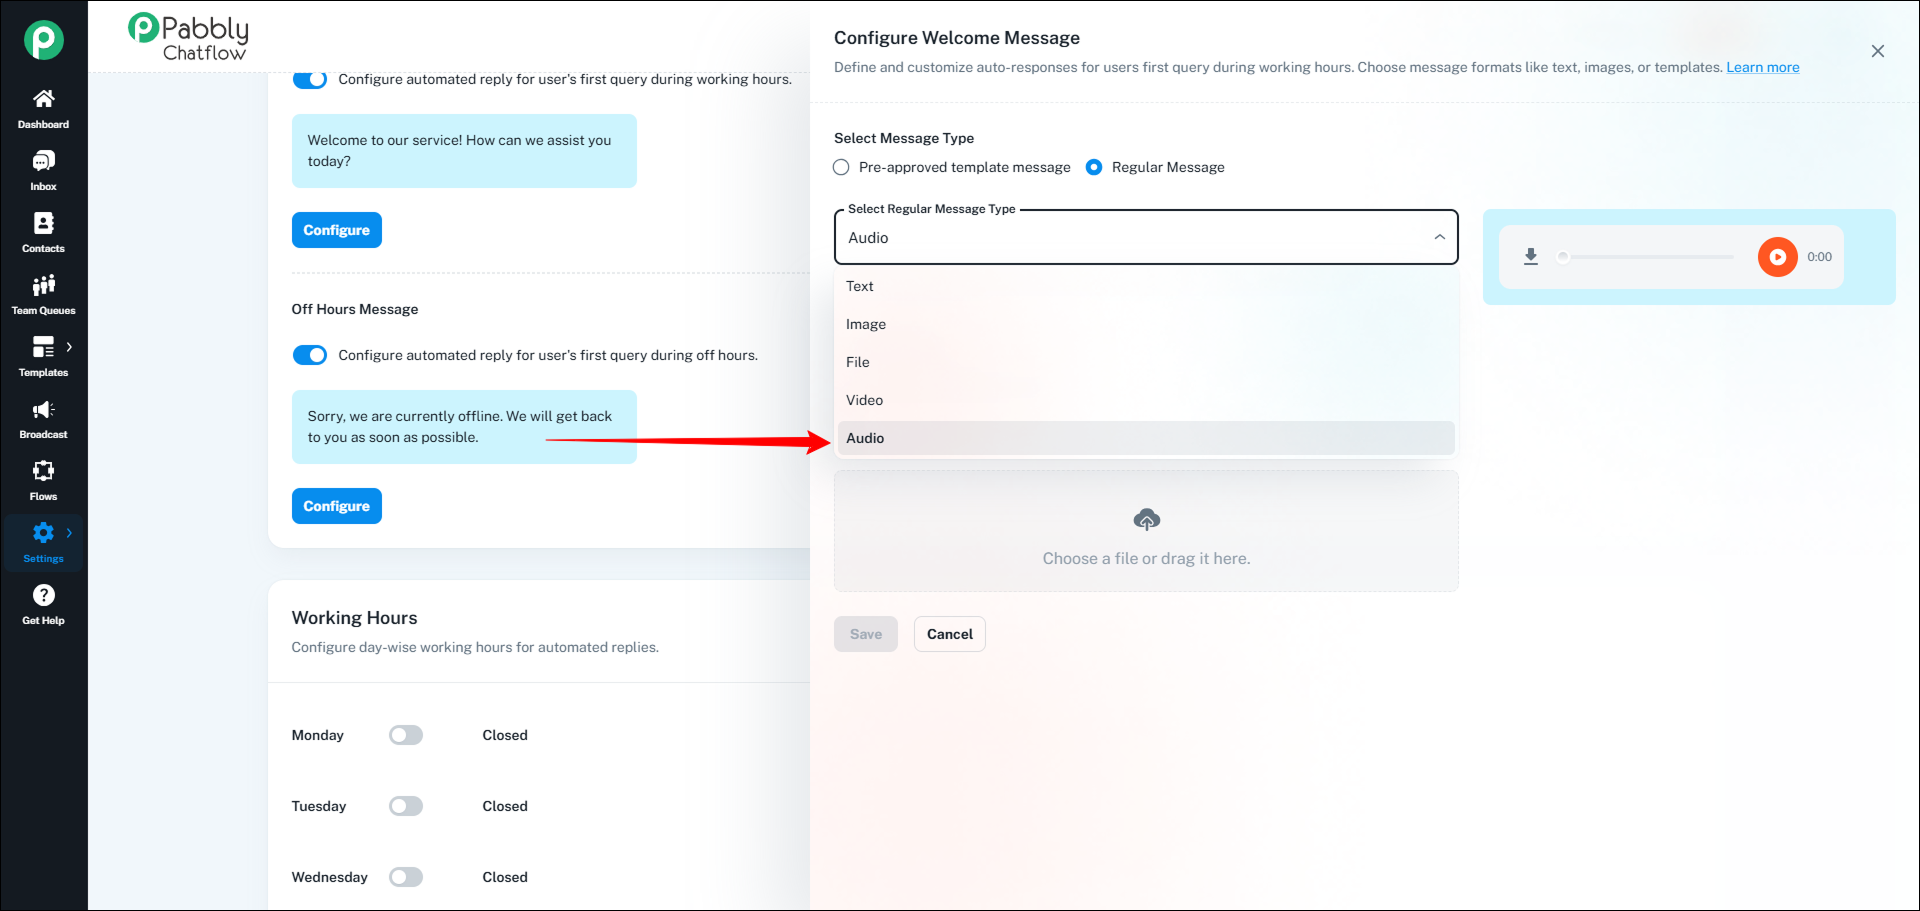
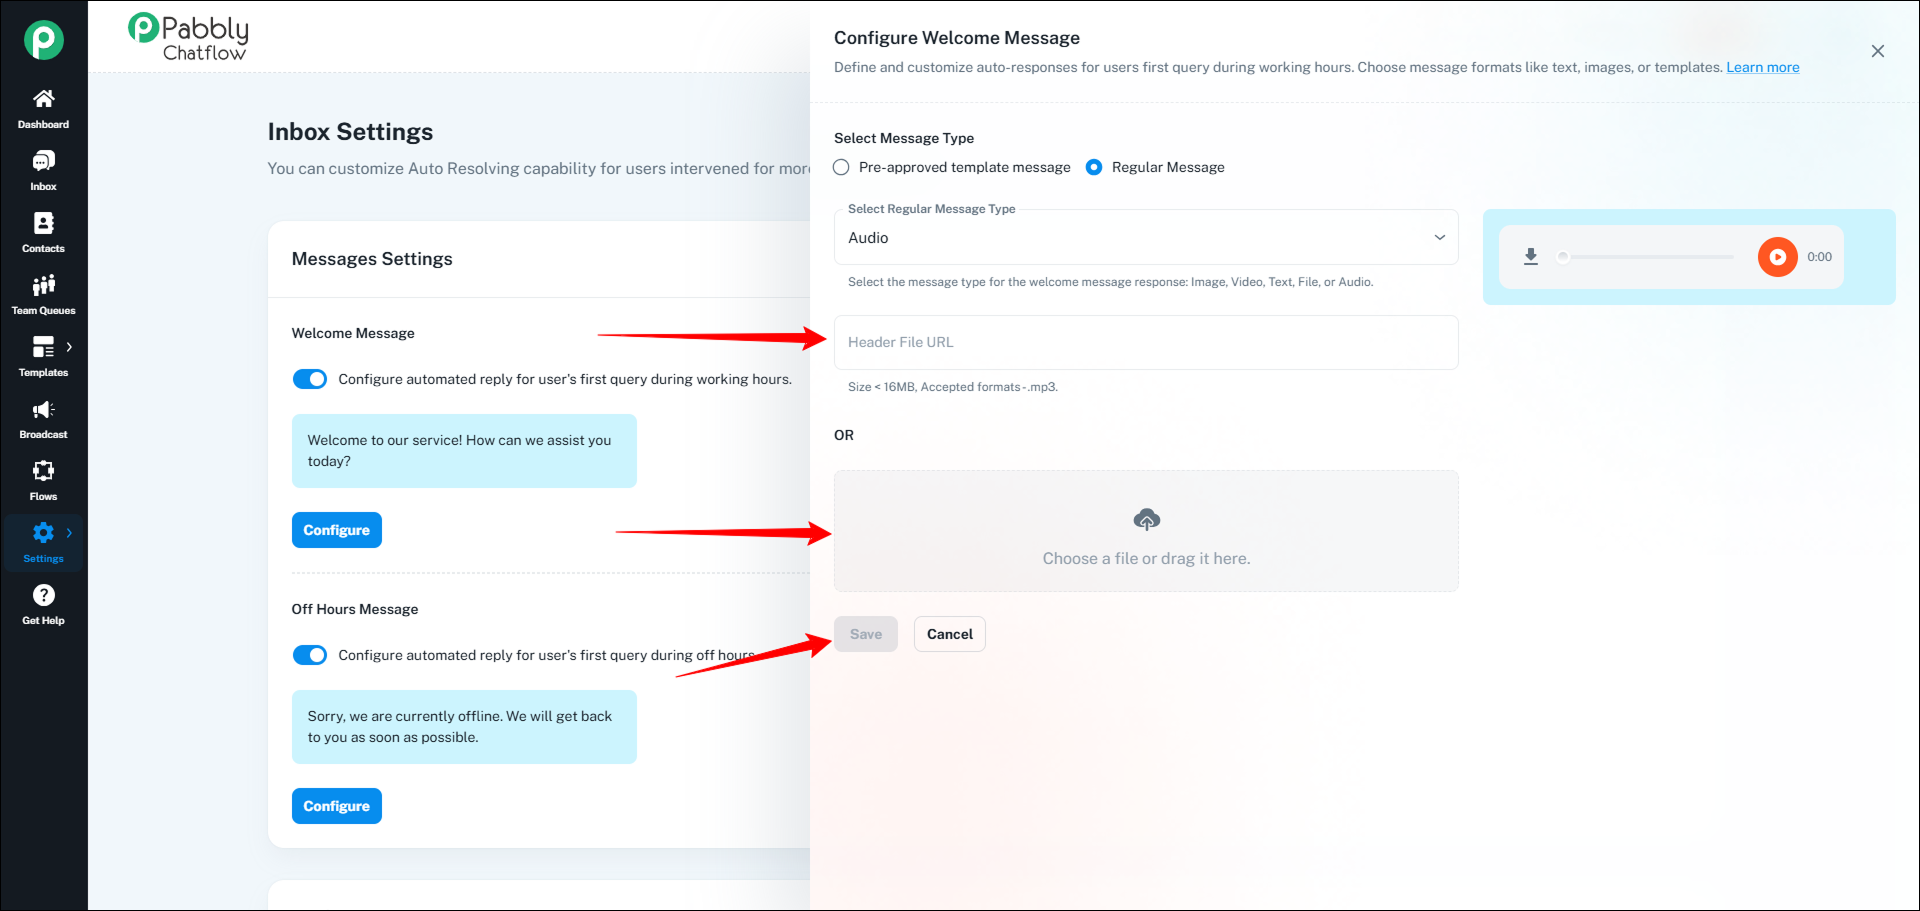
Once saved, the message will be automatically sent to users when they message you during working hours.
Step 4: Using a Pre-Approved WhatsApp Template
If you prefer to use a WhatsApp-approved template, follow these steps:
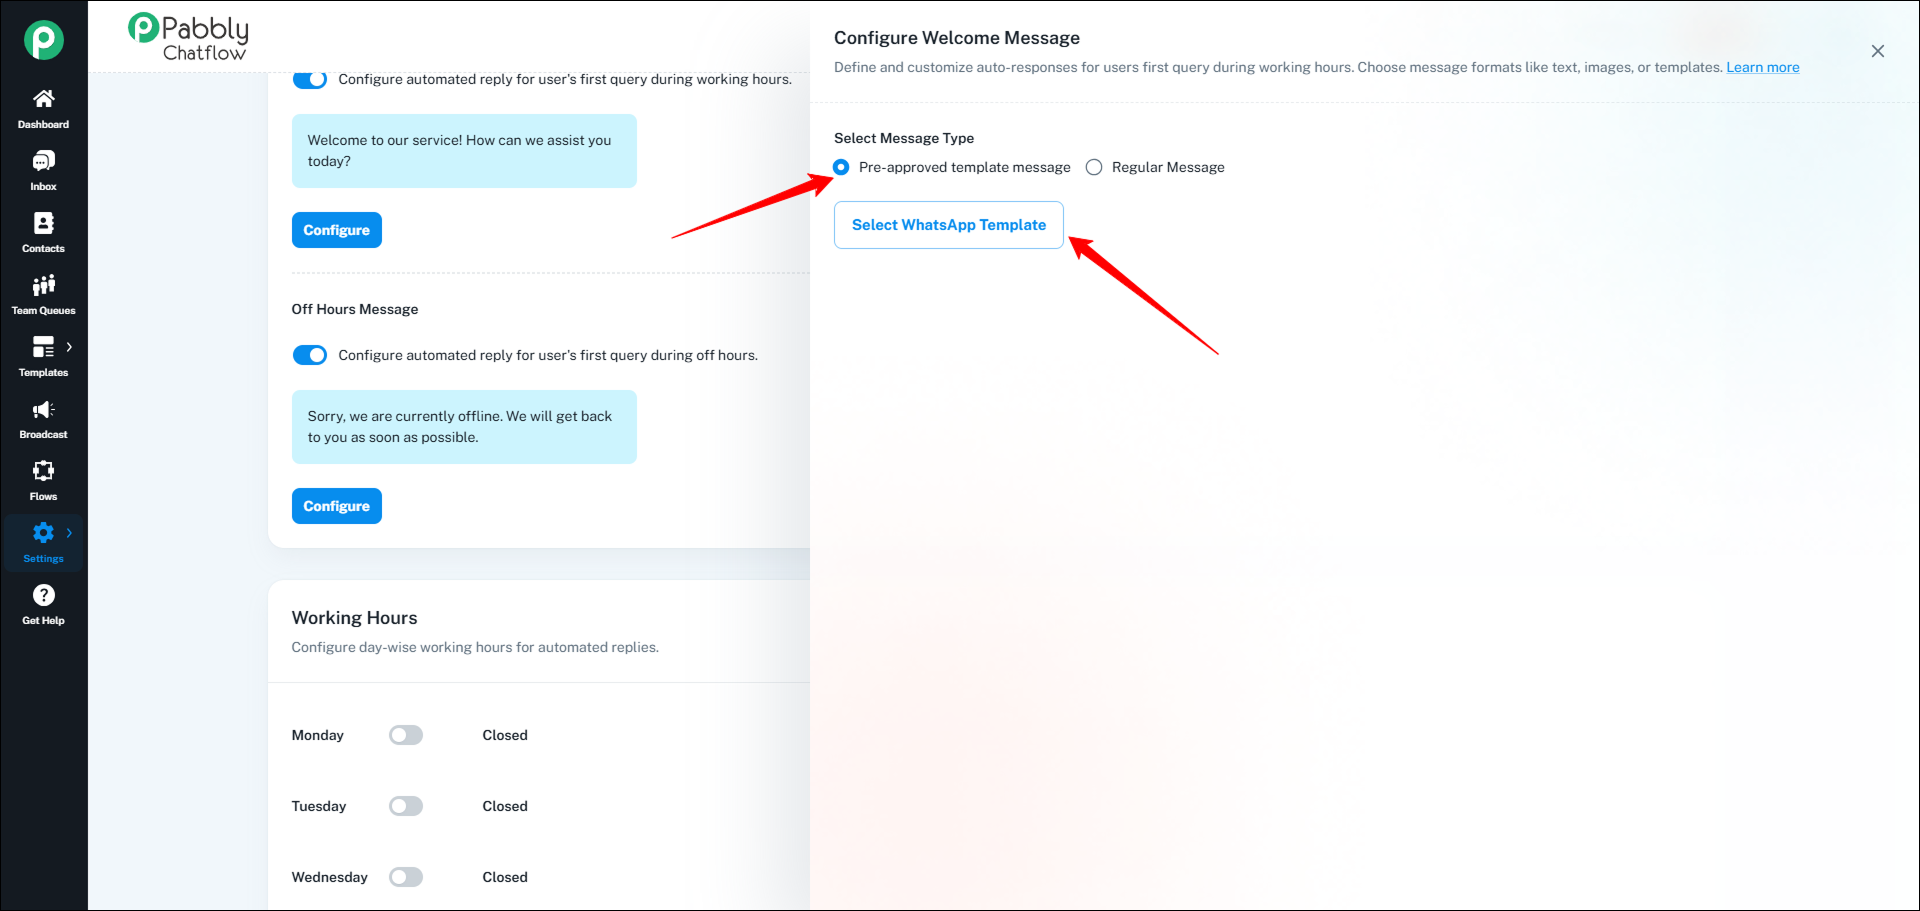
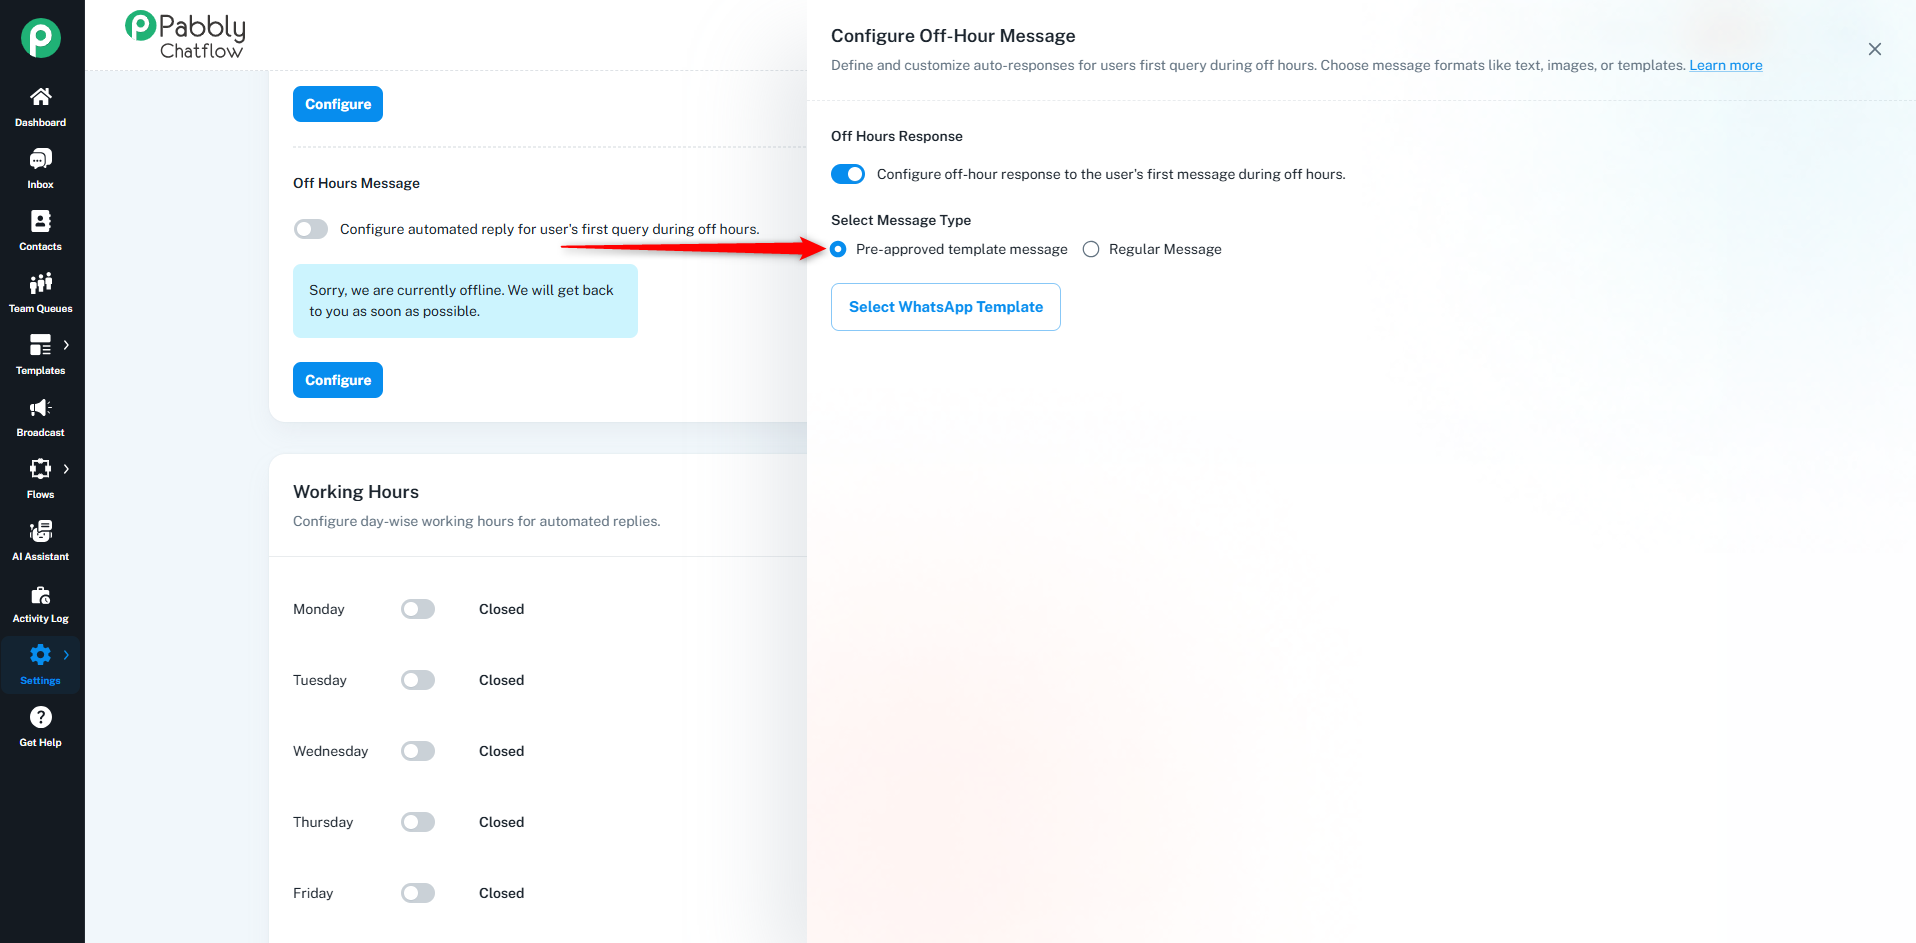
- Select Pre-Approved Template Message instead of Regular Message.
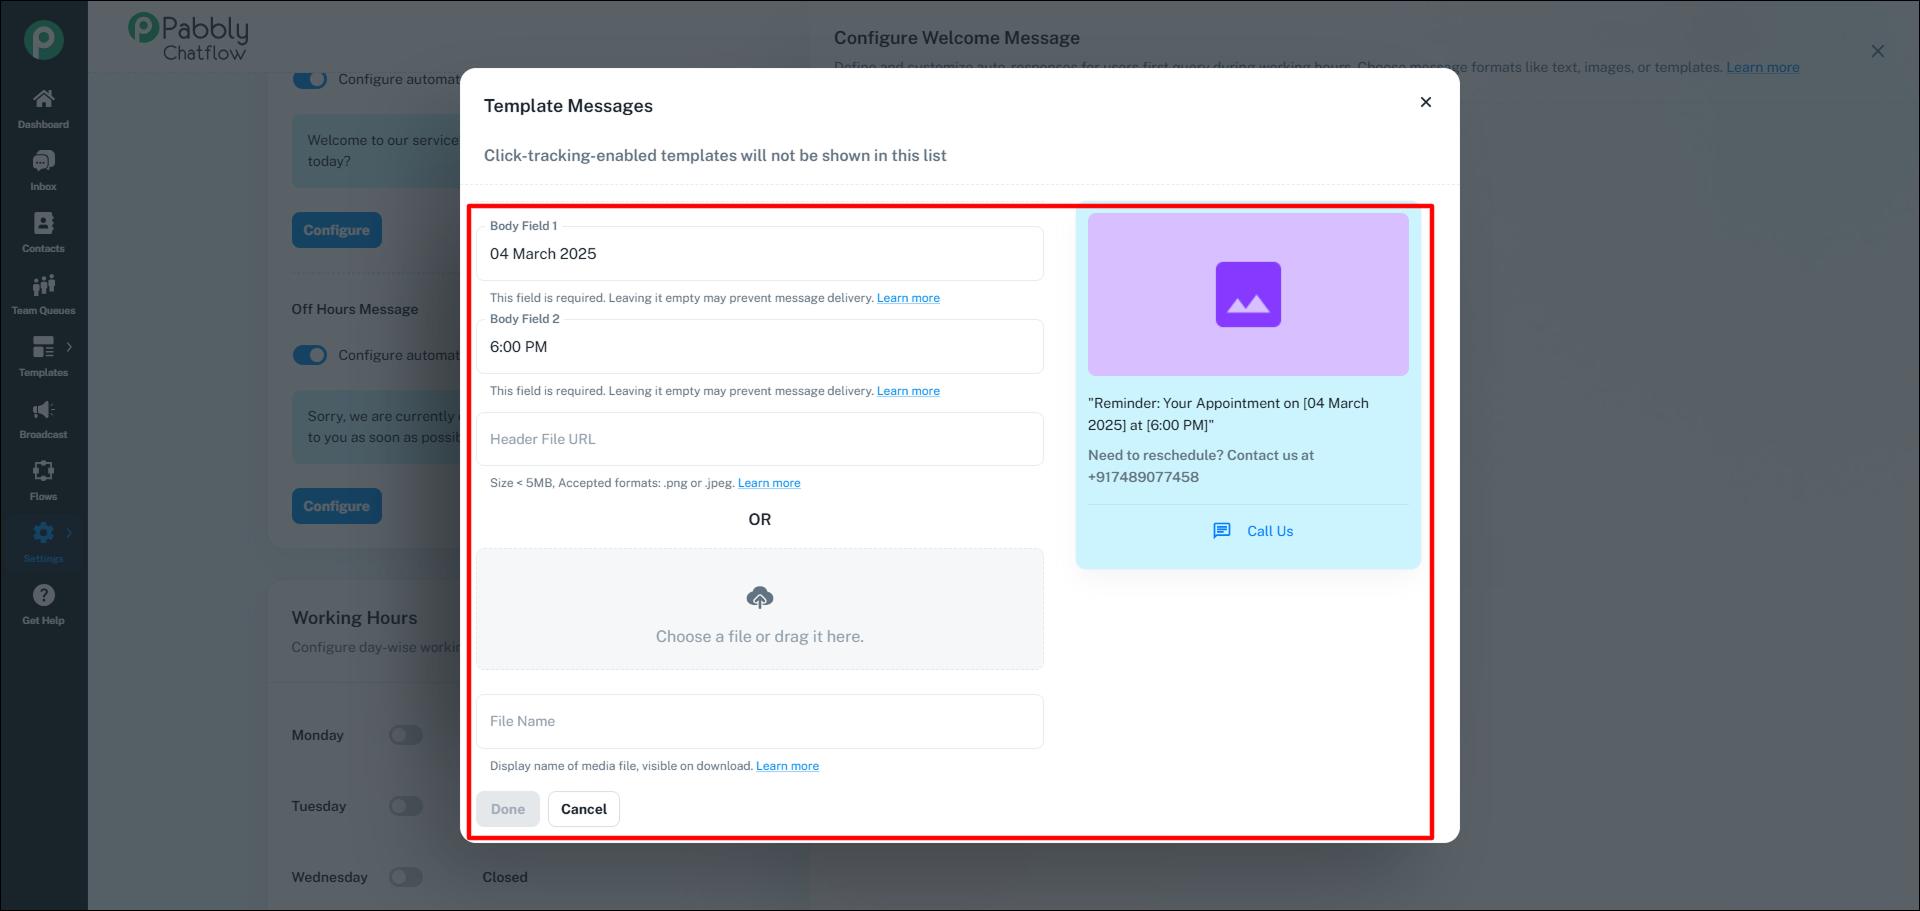
- Click the Select WhatsApp Template button.
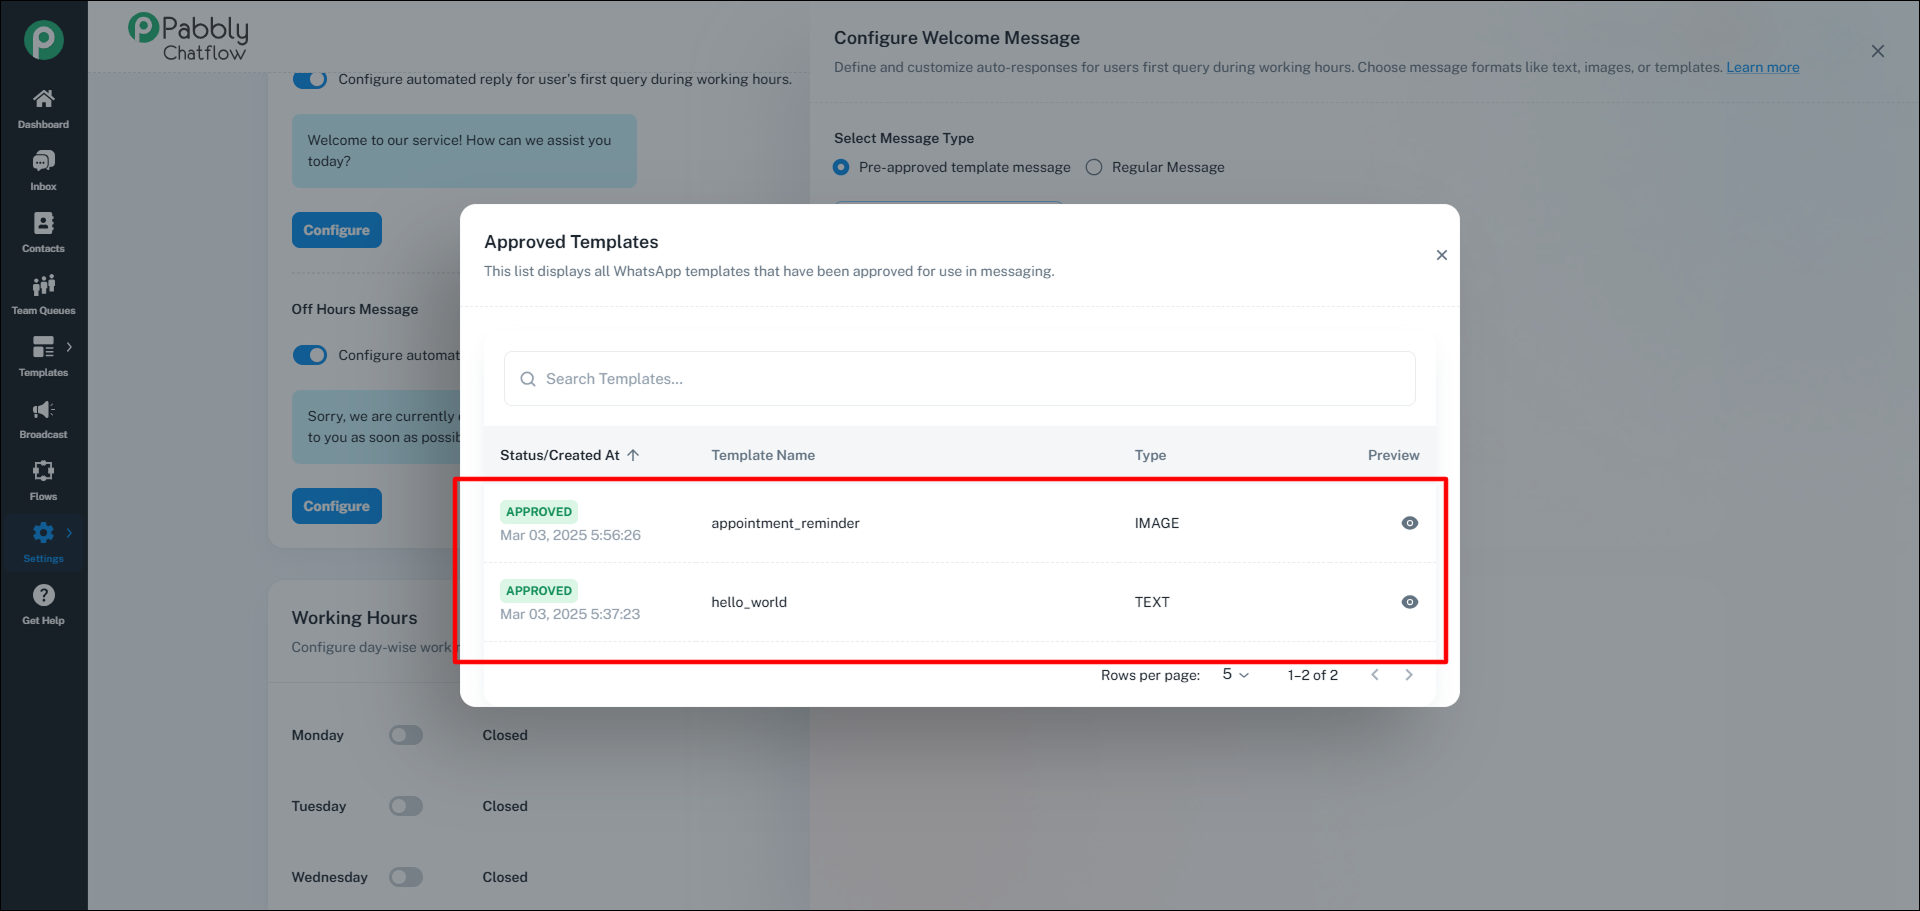
- A list of approved templates (synced from your Meta Developer Account) will appear.
- Search and select the template you want to use.
- Fill in the required fields for the template (if applicable).
- Click Done to save the selection.
Once selected, this template will be used as an automated welcome message.
Step 5: Setting Up an Off-Hours Message
The Off-Hours Message is sent to users who message you outside of your working hours.
To set this up:
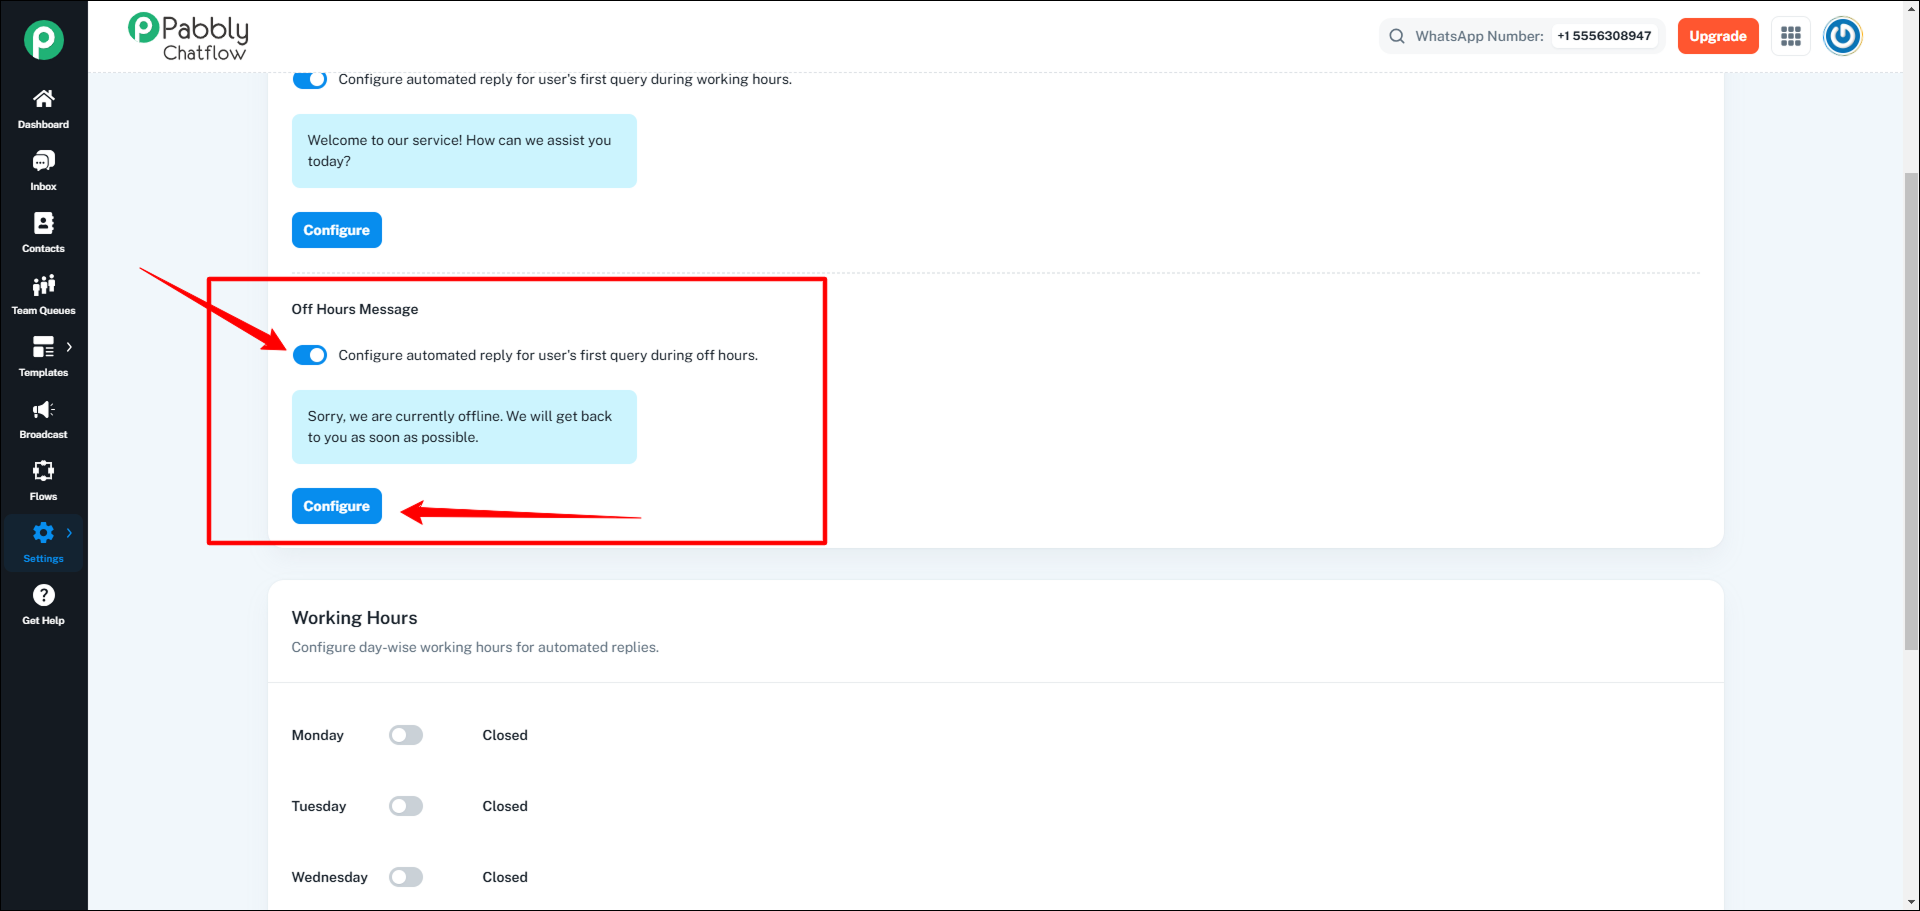
- Turn on the toggle switch for Off-Hours Message.
- Click Configure to set up your response.
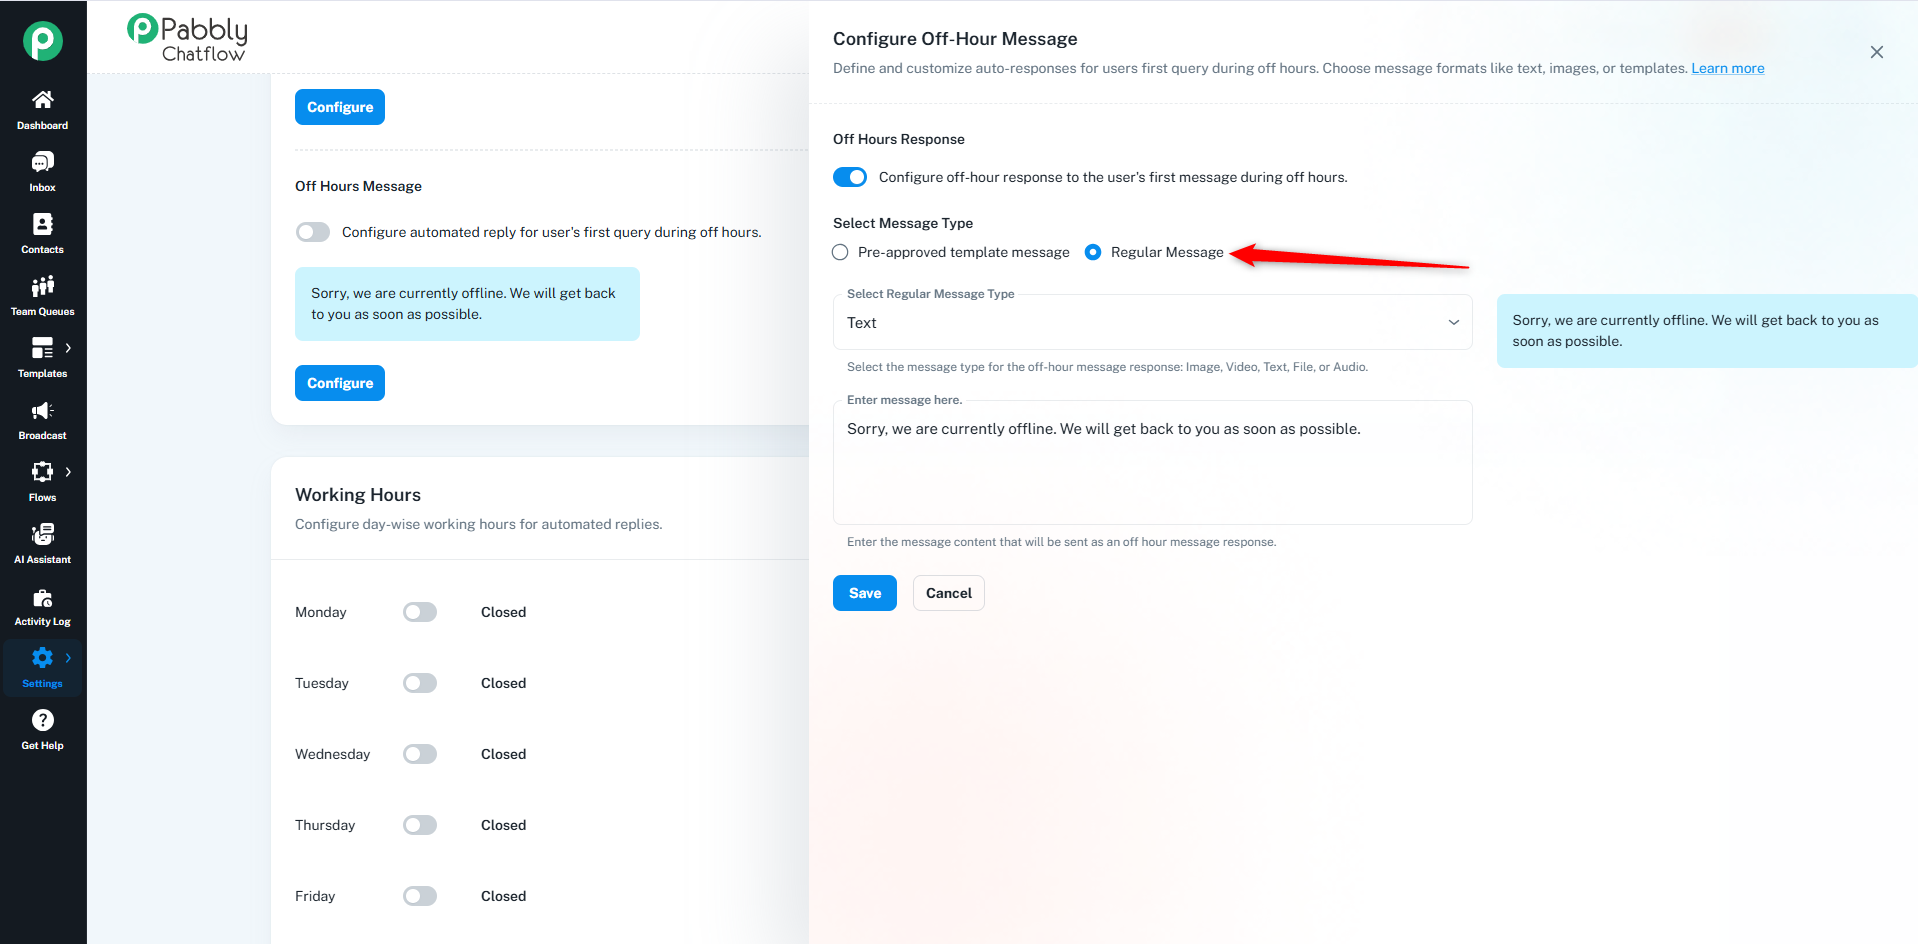
- Follow the same steps as for the Welcome Message, either using a Regular Message or a Pre-Approved WhatsApp Template.
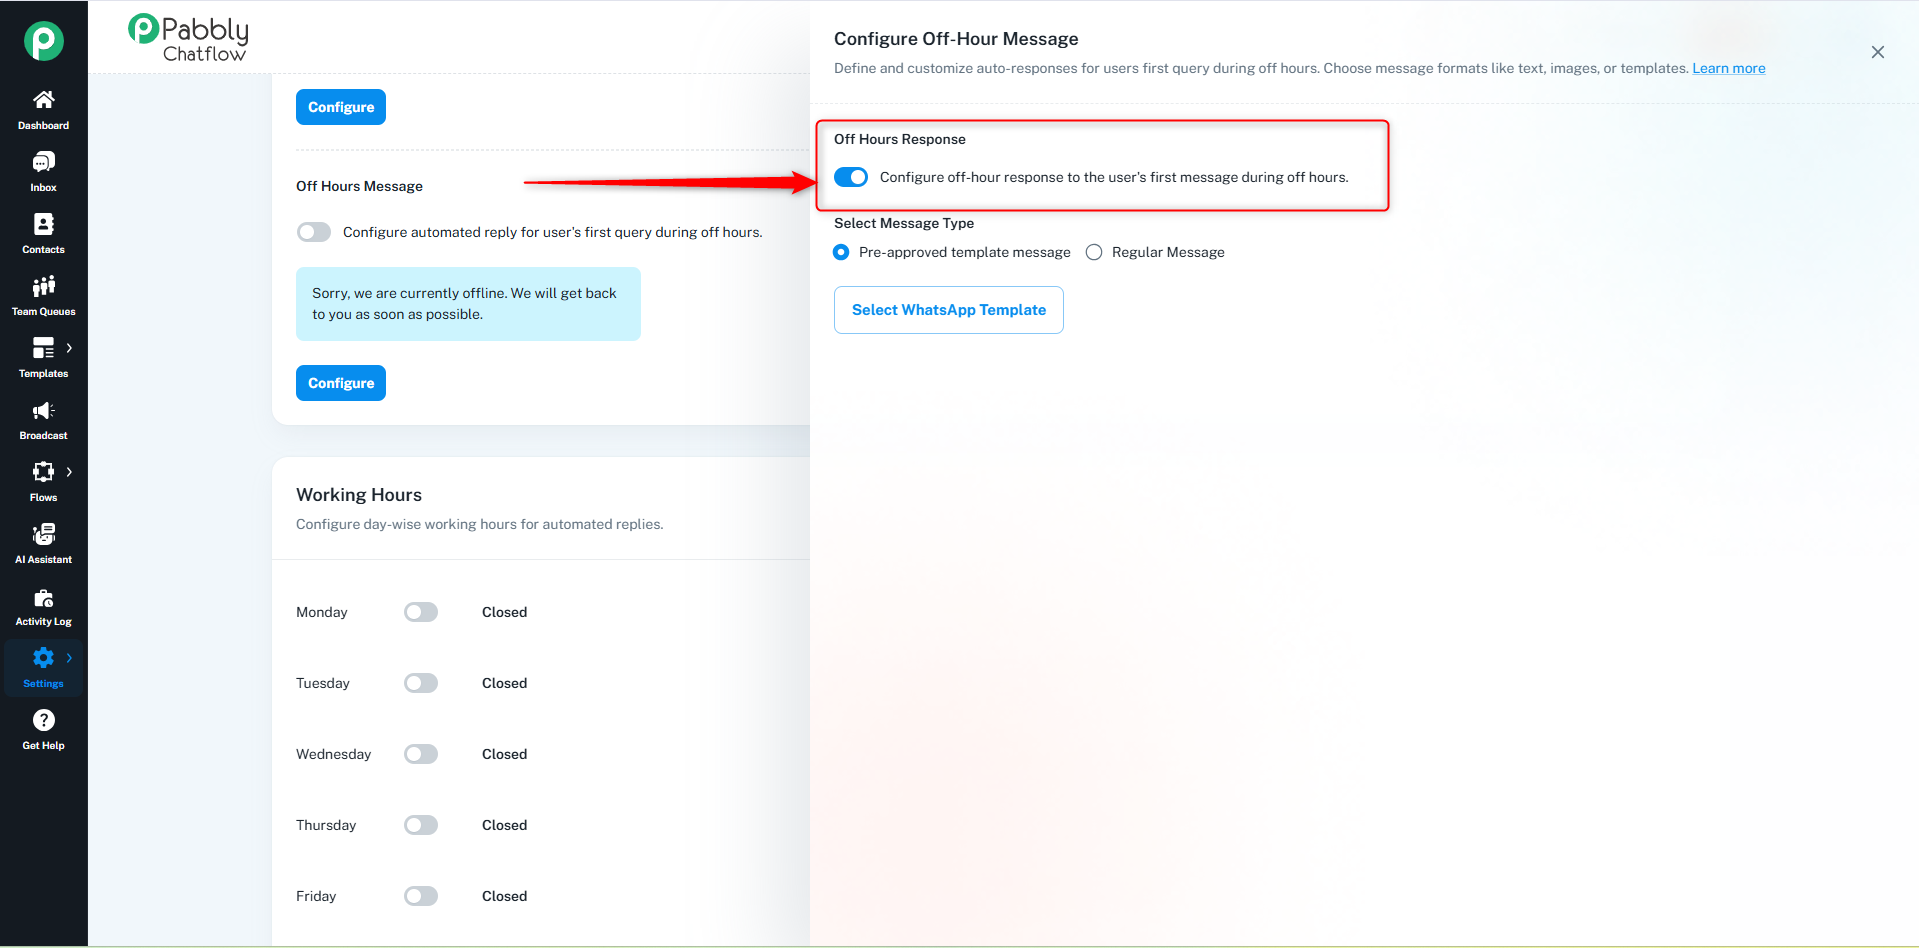
- Enable the Toggle for Off-Hours Response:
After configuring your message, turn on the toggle labeled Configure off-hour response to the user’s first message during off hours.
This ensures that the Off-Hours Message is automatically sent when a user reaches out during off-hours.
Note: If the Off-Hours Response toggle is disabled, only the flow message will be sent, not the off-hour message.
The only difference is that the Off-Hours Message is sent when a user messages you outside of your defined working hours.
Step 6: Defining Working Hours
Step-by-Step Guide to Selecting Time
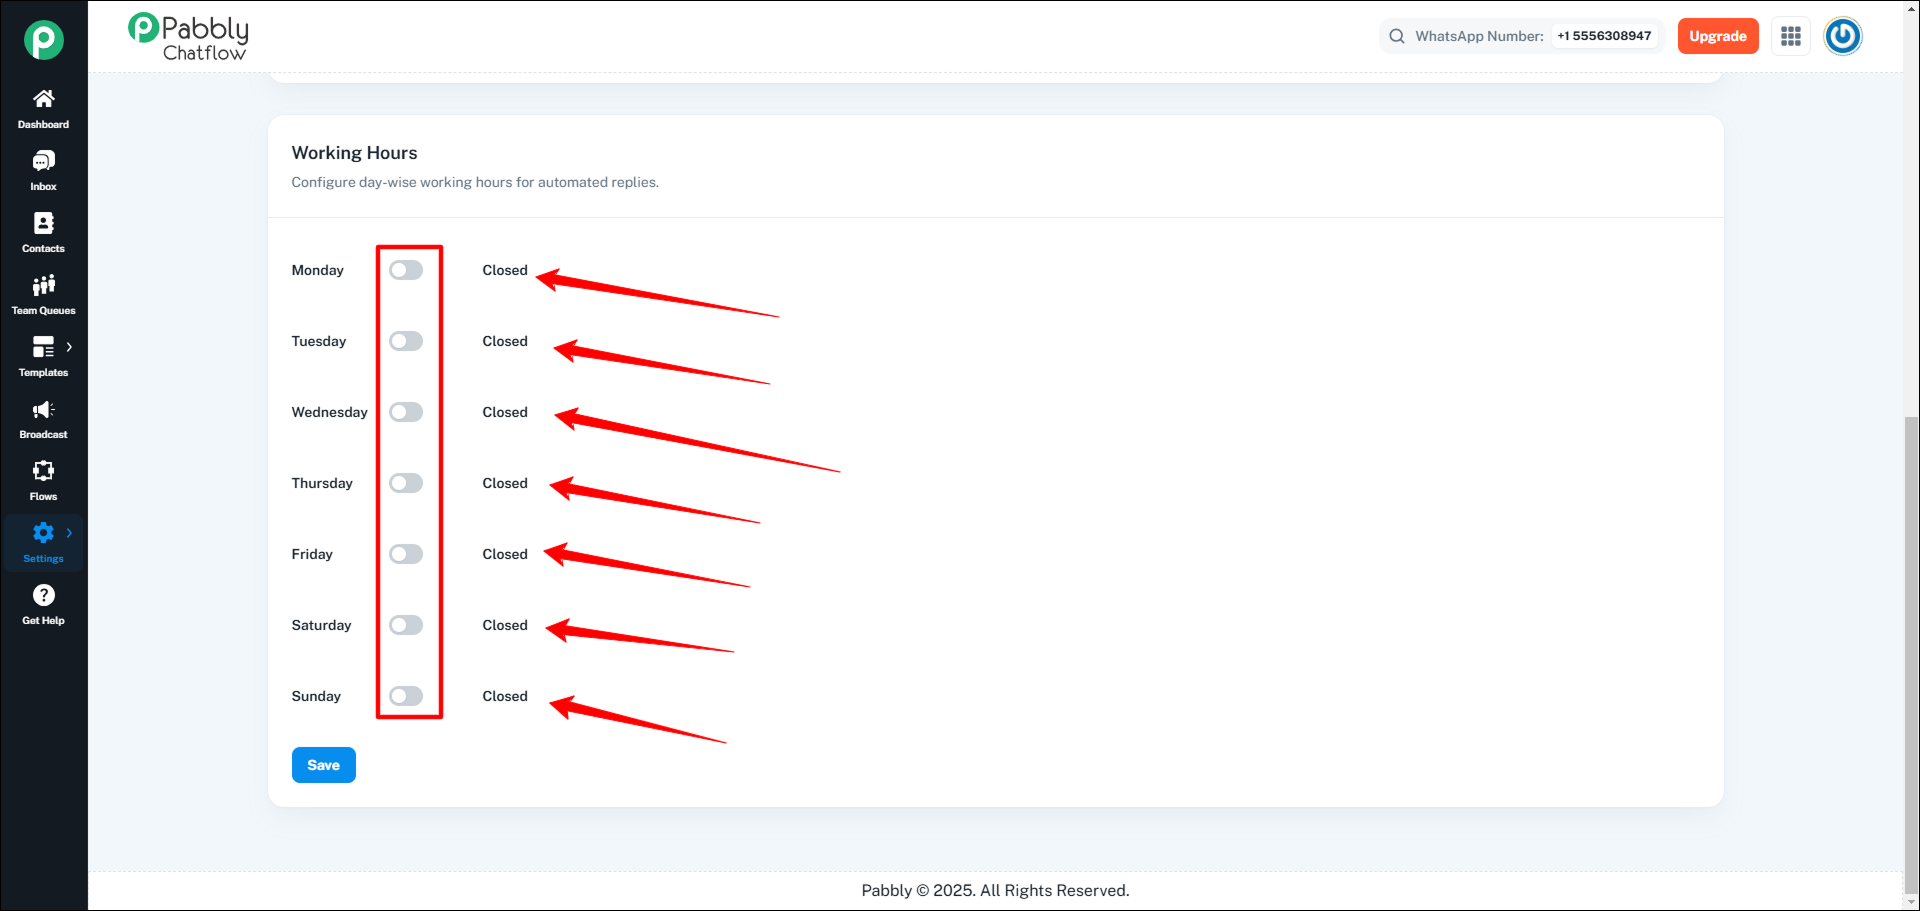
- Enable Working Hours for a Specific Day
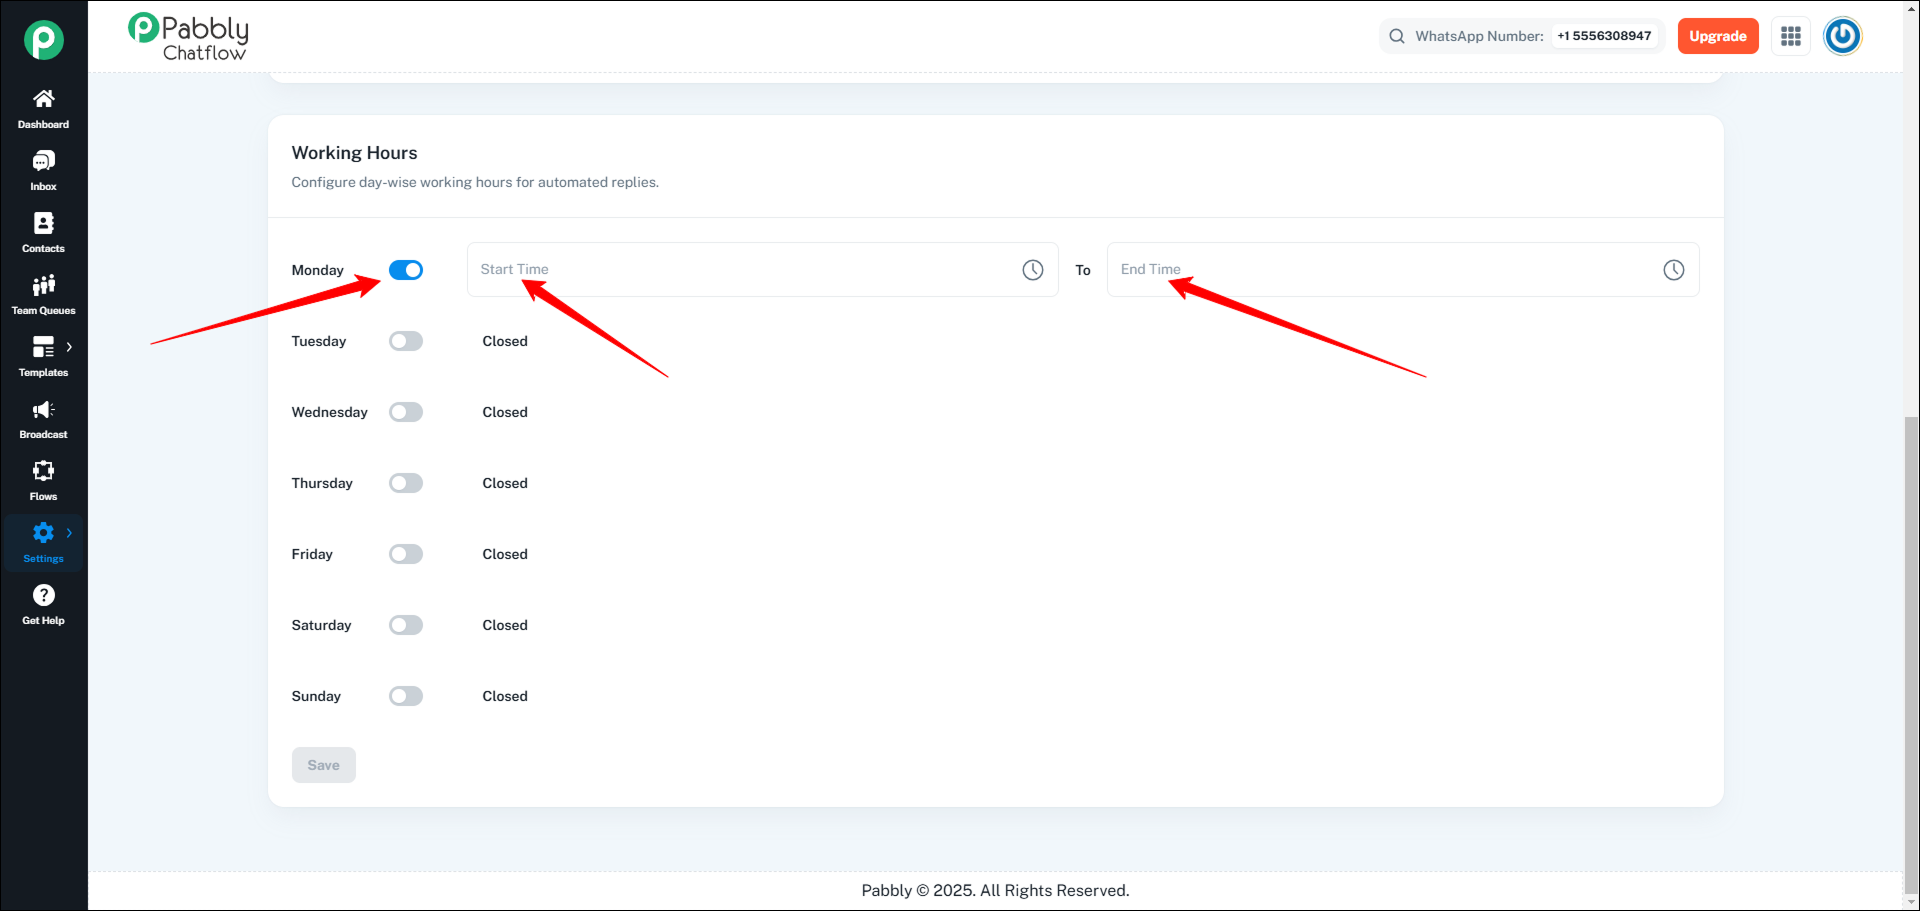
- Turn ON the toggle for the day you want to configure (e.g., Monday).
- Open the Time Picker
- Click on the Start Time field.
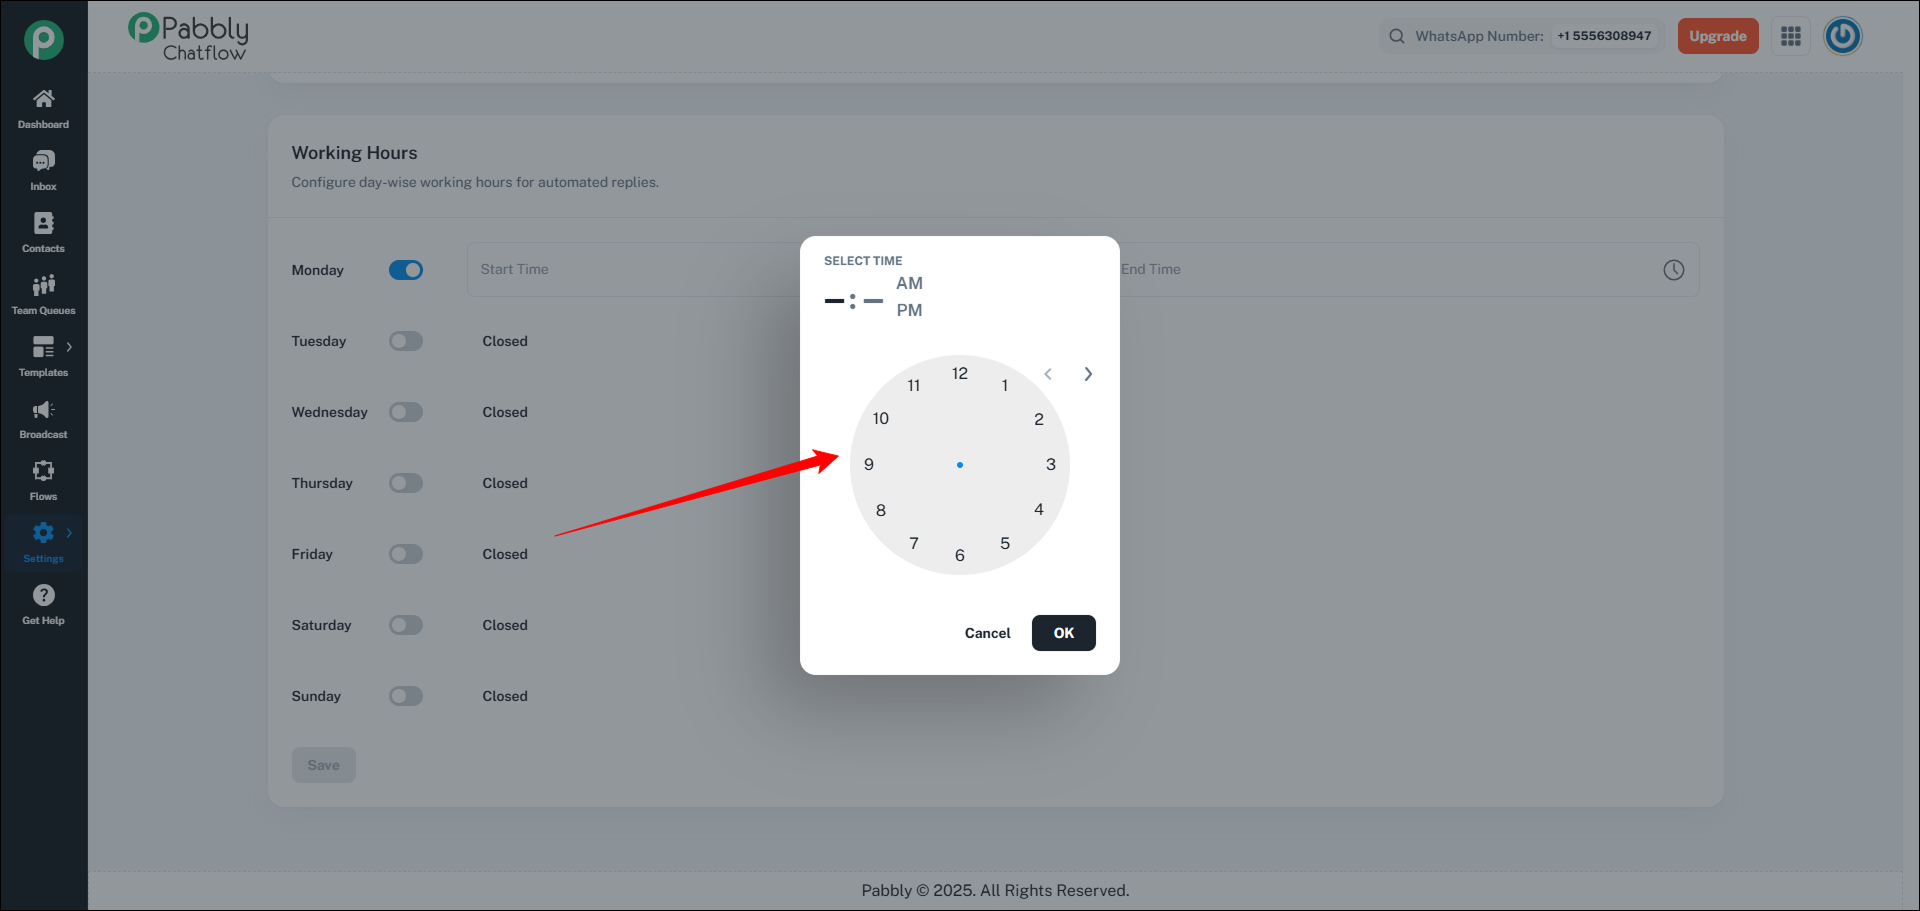
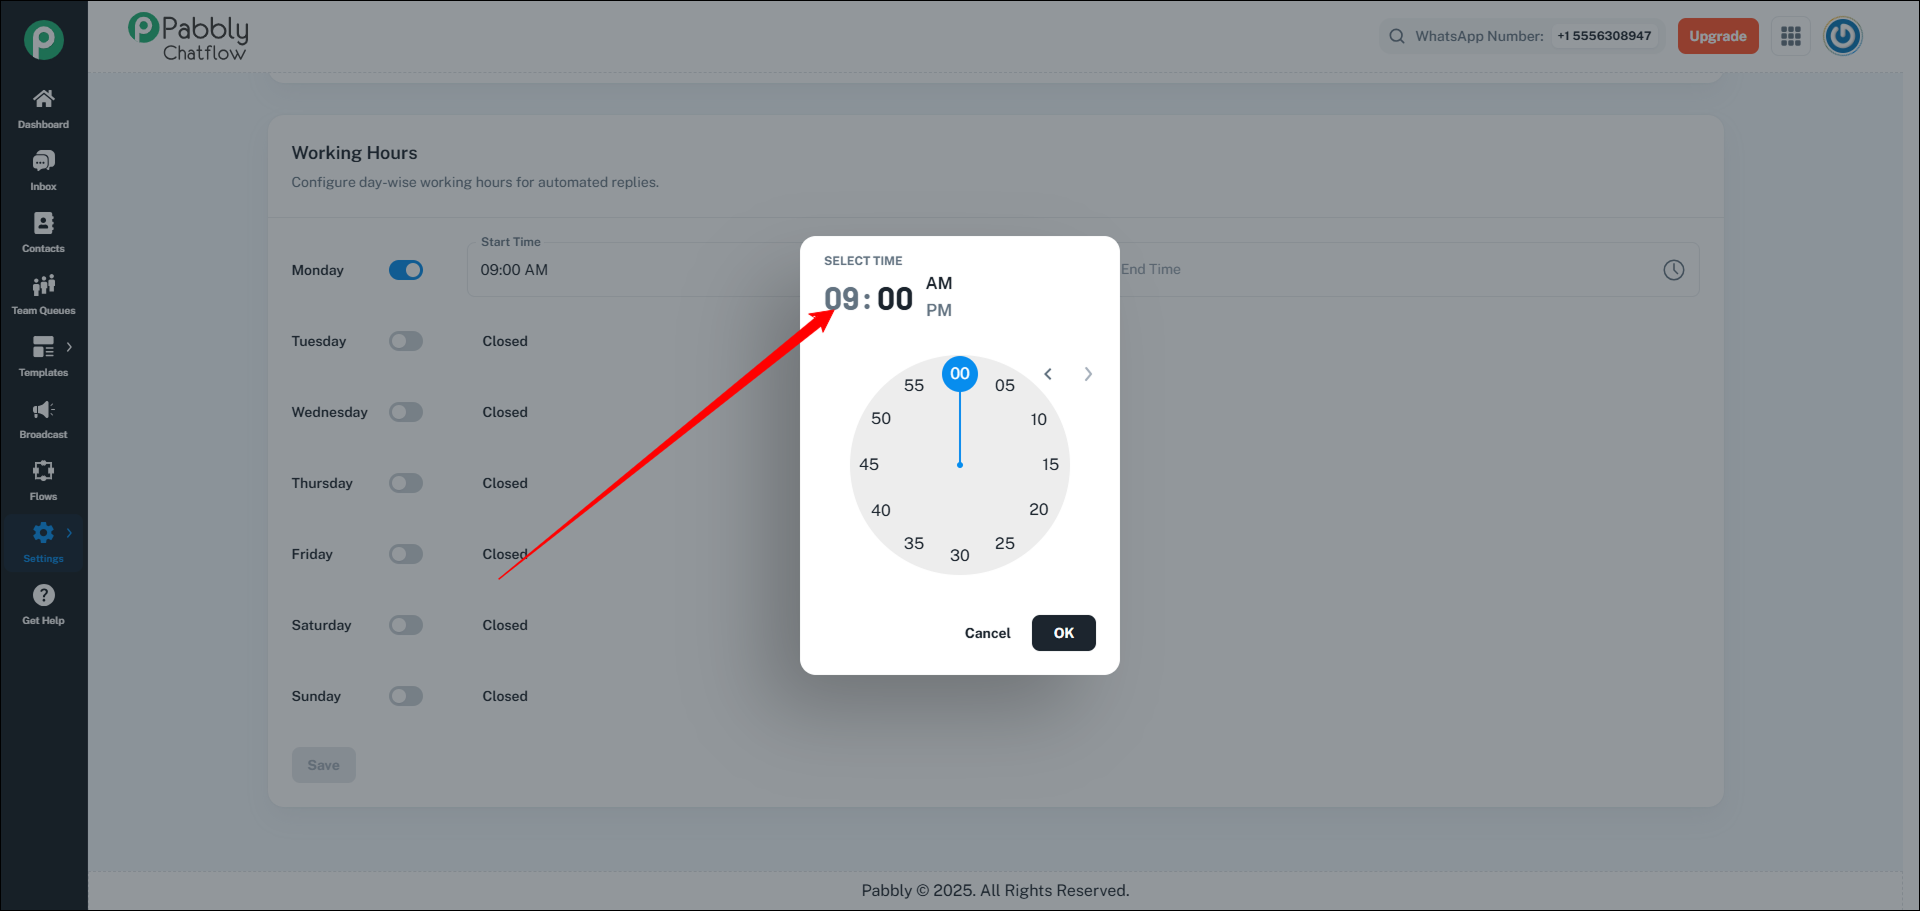
- A clock-style time picker will appear, as shown in the image.
- Select the Hour
- The time picker first asks you to select the hour.
- Click on the desired hour (e.g., 9 for 9:00 AM).
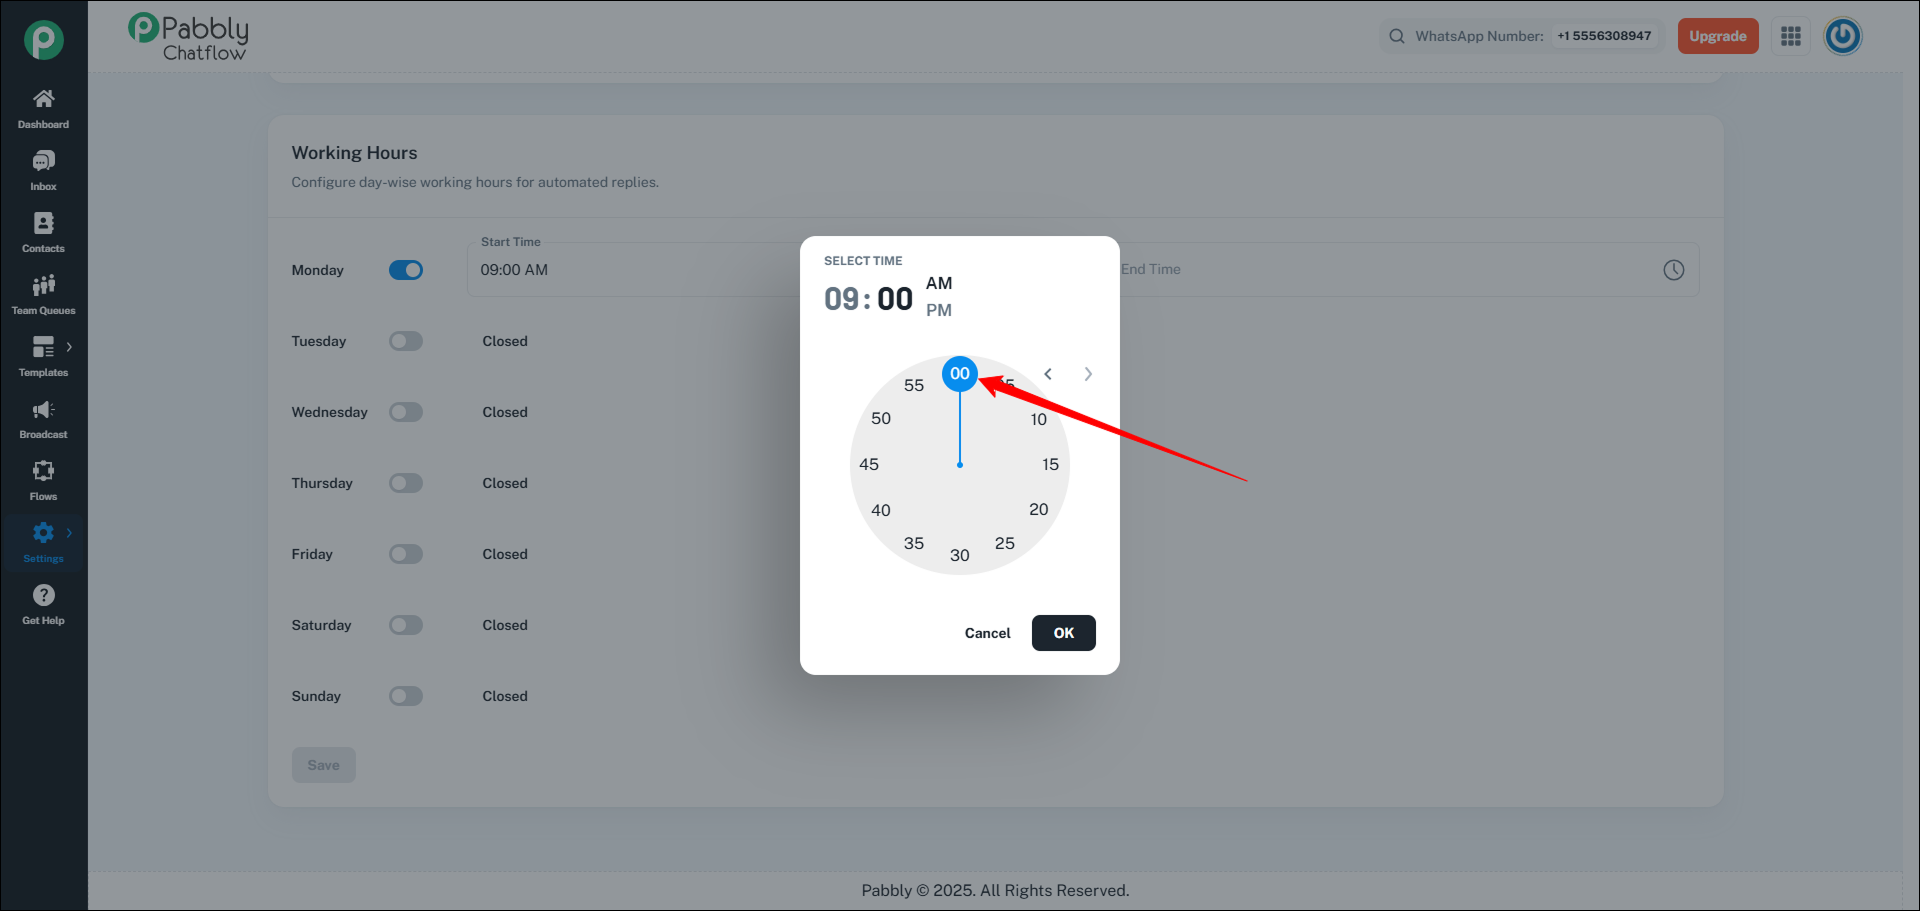
- After selecting the hour, the clock will switch to minute selection.
- Select the Minutes
- Use the clock dial to choose the minutes (e.g., 00 for 9:00 AM).
- If you need a specific minute, select accordingly.
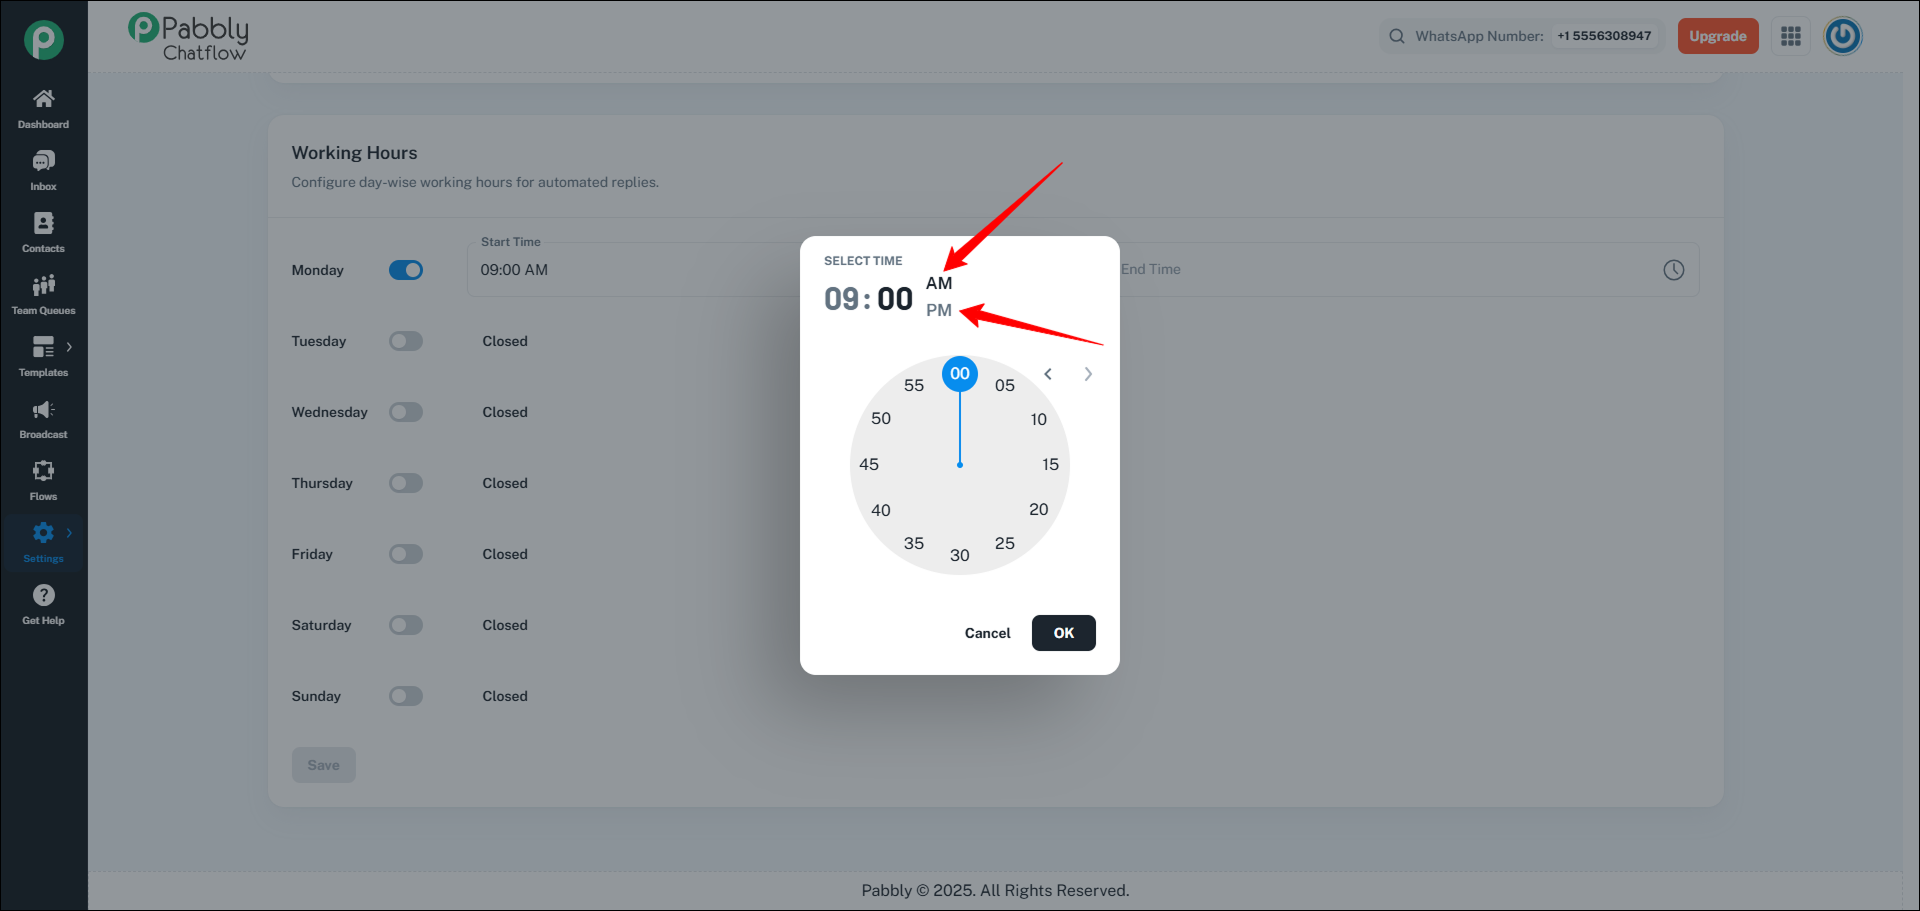
- Choose AM or PM
- At the top of the dialog, you will see options for AM or PM.
- Select AM if your business opens in the morning (e.g., 9:00 AM).
- Select PM if your business opens in the afternoon (e.g., 3:00 PM).
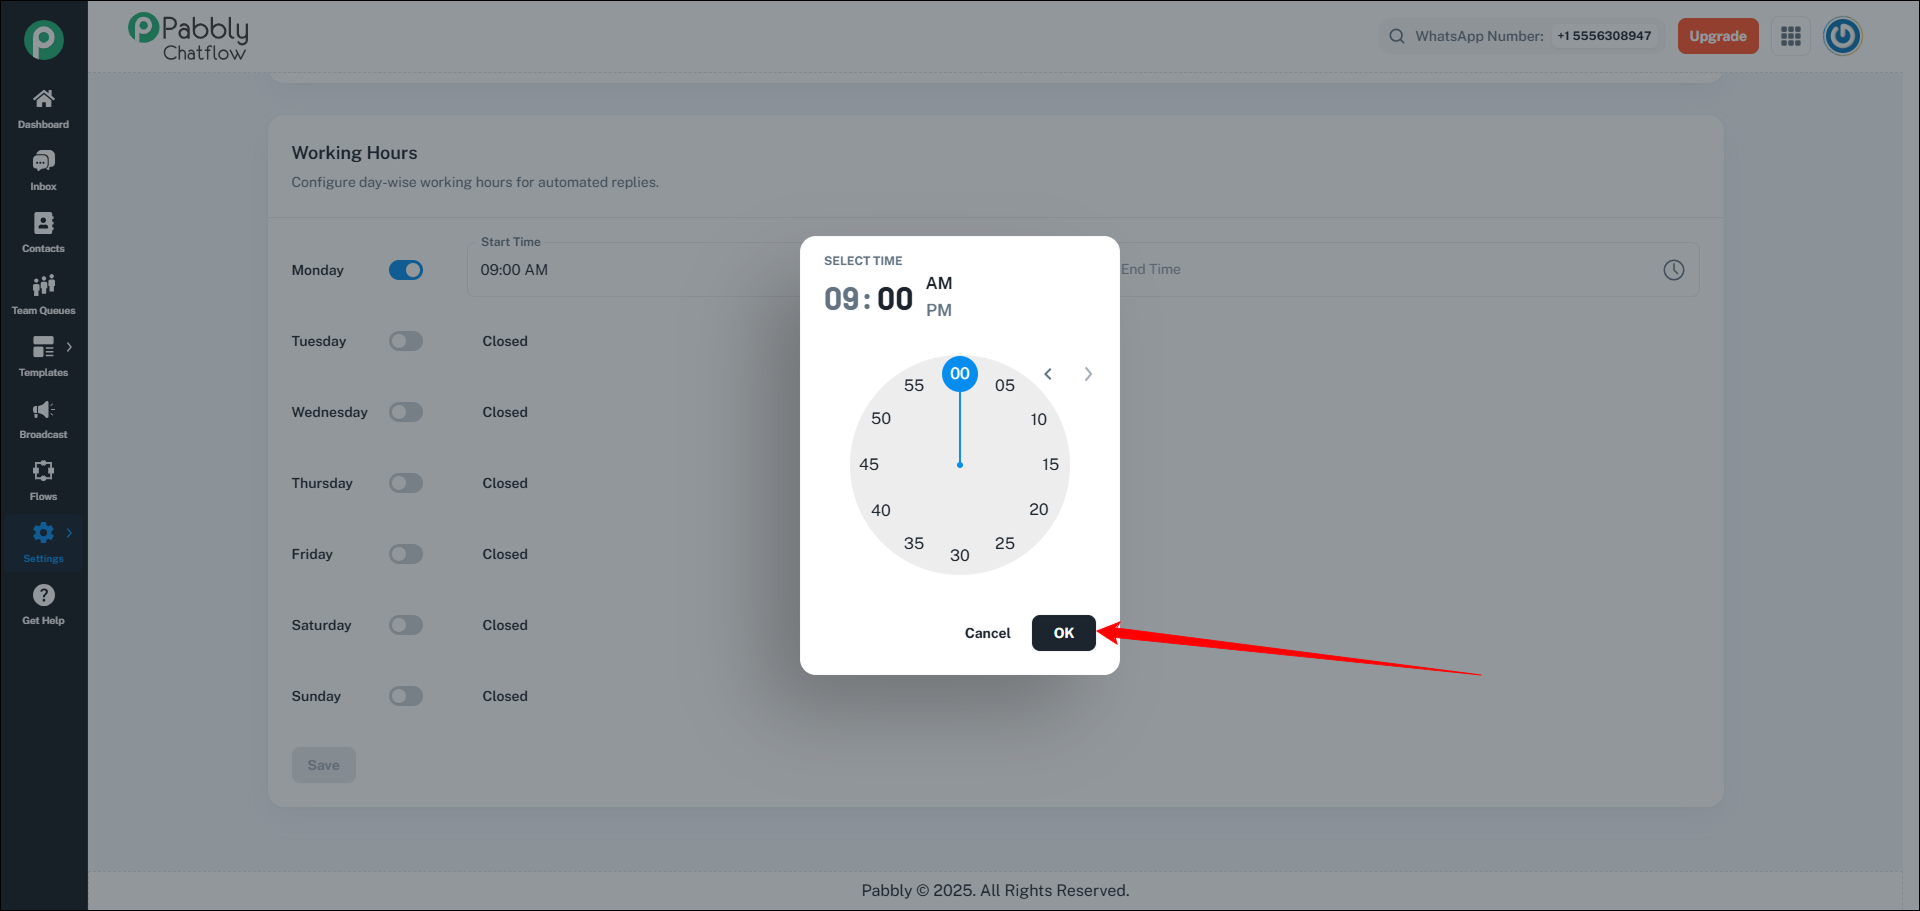
- Confirm the Selection
- Click the OK button to finalize the time selection.
 2. Set the End Time
- Repeat the same steps for the End Time field.
- Ensure the end time is later than the start time.
- Example: If your business hours are 9:00 AM to 6:00 PM, select 6:00 PM for the End Time.
- Save the Changes
- Once you have set both Start Time and End Time, click the Save button.
- Your working hours for that day are now updated.
Example Scenario
Example 1: Setting Business Hours from 9:00 AM to 6:00 PM
- Turn ON the toggle for Monday.
- Click the Start Time field and select 9:00 AM.
- Click the End Time field and select 6:00 PM.
- Click Save to confirm.
Example 2: Setting Different Hours for Weekdays and Weekends
- Monday to Friday: 9:00 AM - 6:00 PM
- Saturday: 10:00 AM - 2:00 PM
- Sunday: Closed (keep toggle OFF)
Step 7: Configuring AI Auto-Reply Settings
The AI Auto-Reply Settings feature allows you to configure AI assistants to automatically respond to messages from specific contact lists. This provides intelligent, automated responses using your configured AI assistants.
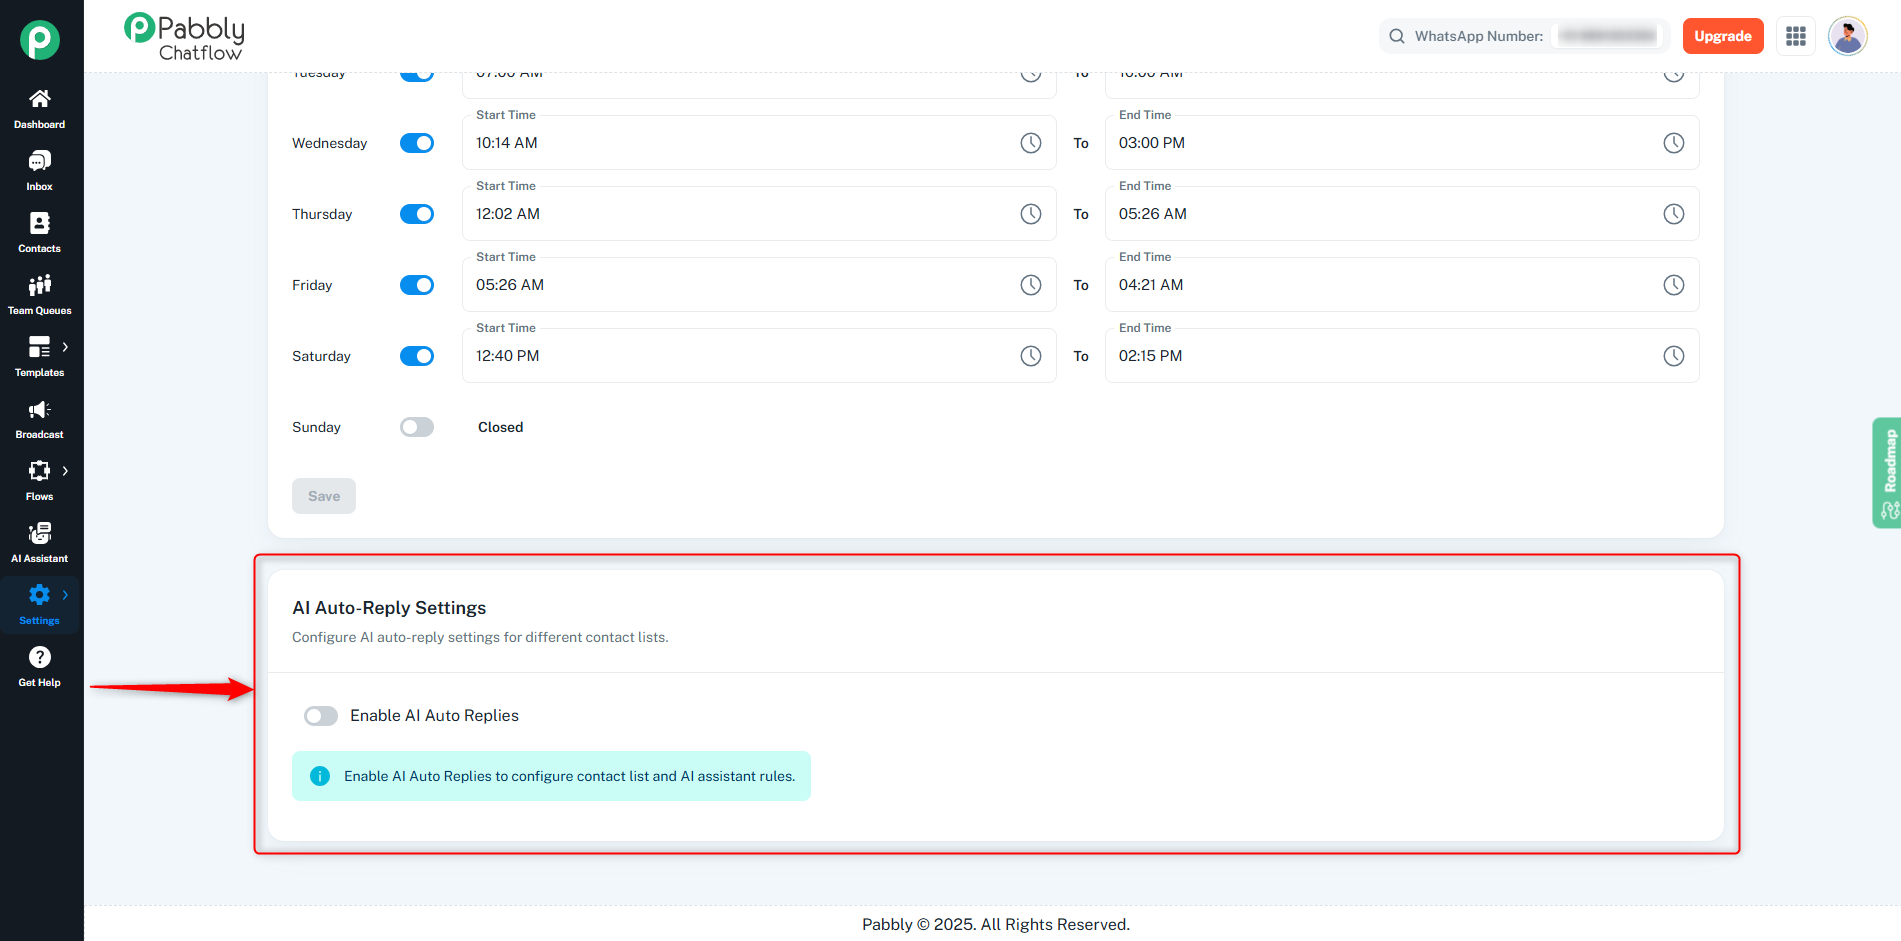
Enabling AI Auto-Replies
- Turn on AI Auto-Replies
- Find the AI Auto-Reply Settings section in your Inbox Settings.
- Toggle ON the Enable AI Auto Replies switch.
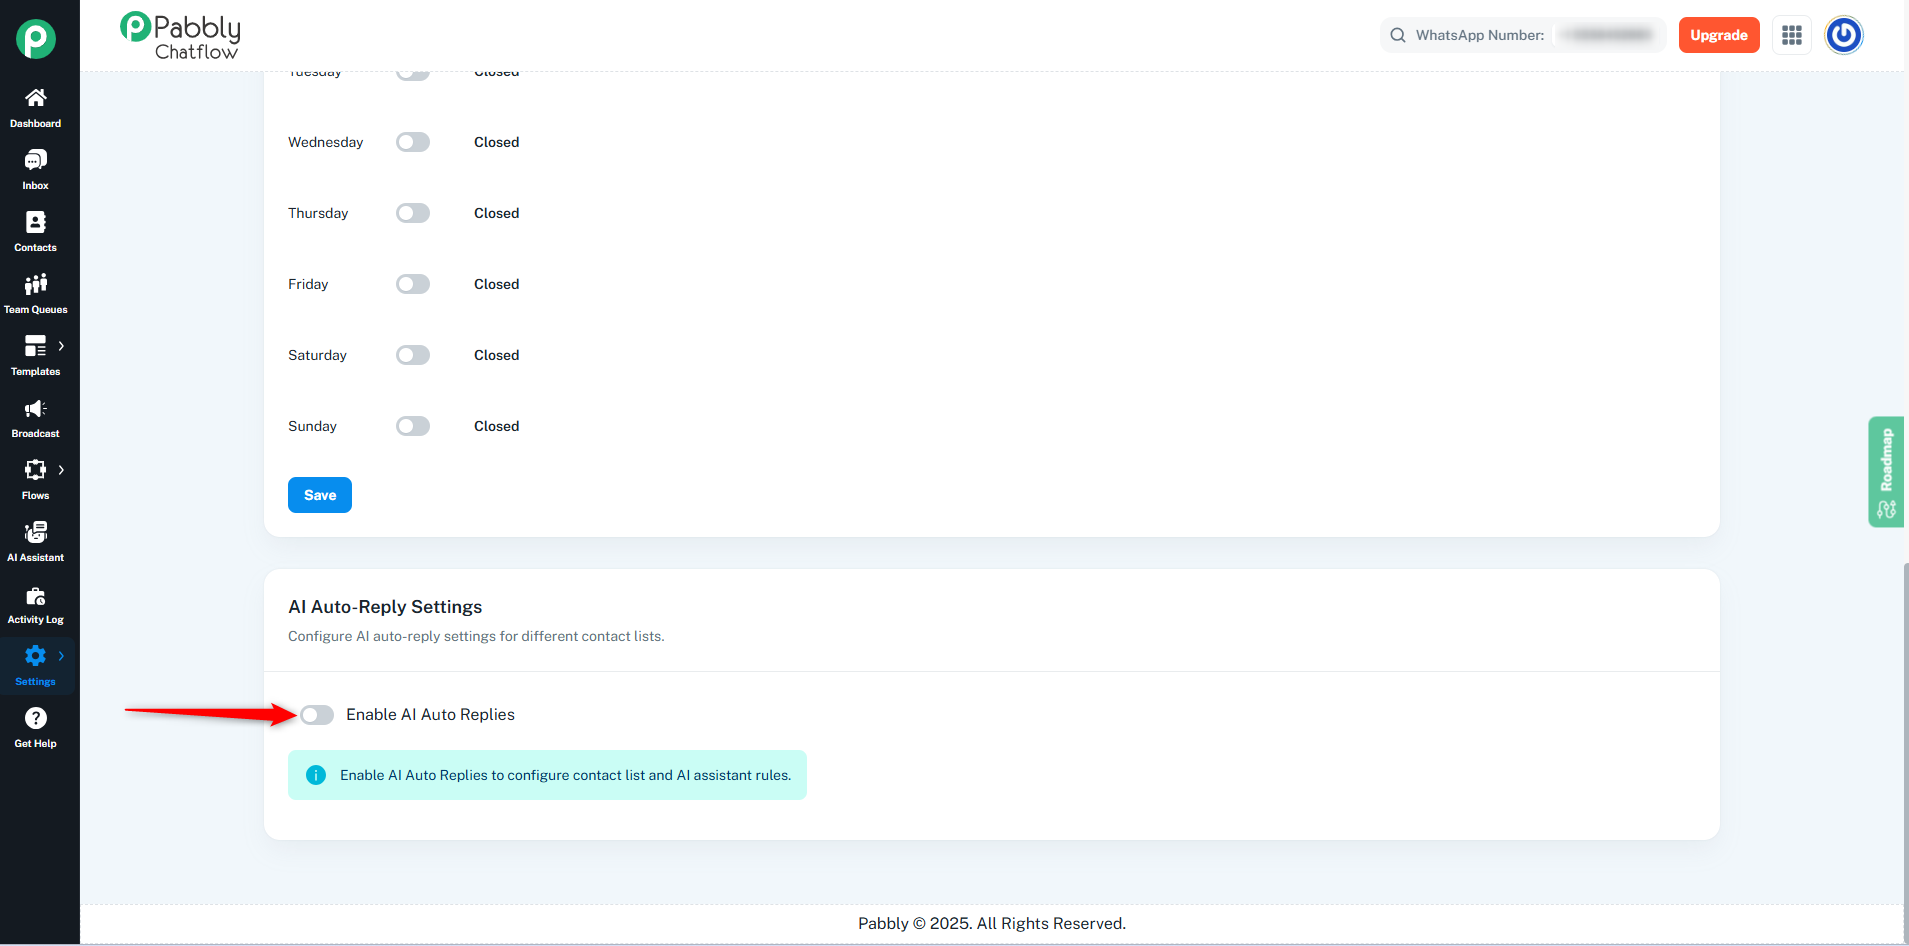
Setting Up AI Auto-Reply Rules
Once enabled, you can configure which AI assistants respond to which contact lists:
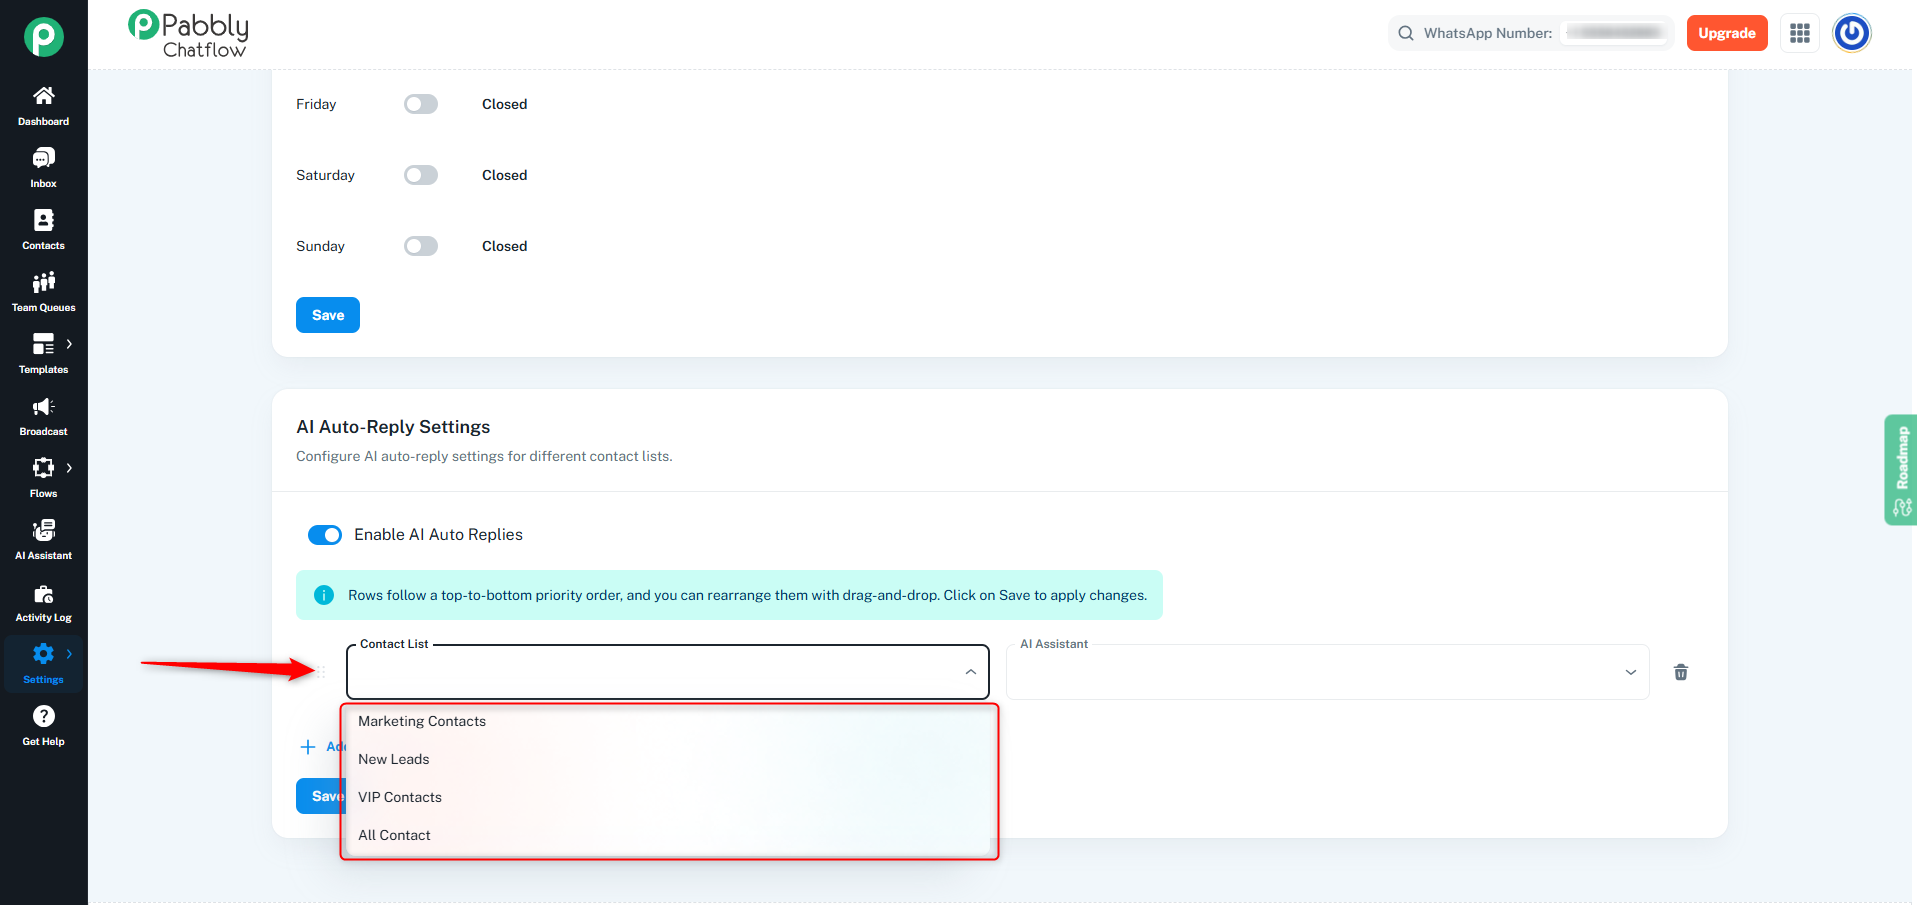
- Contact List Selection
- Click on the Contact List dropdown for the first rule.
- Select the contact list you want to configure AI auto-replies for.
- Option: All Contacts - You can also select "All Contacts" to assign an AI assistant to handle messages from all contacts, regardless of which specific list they belong to.
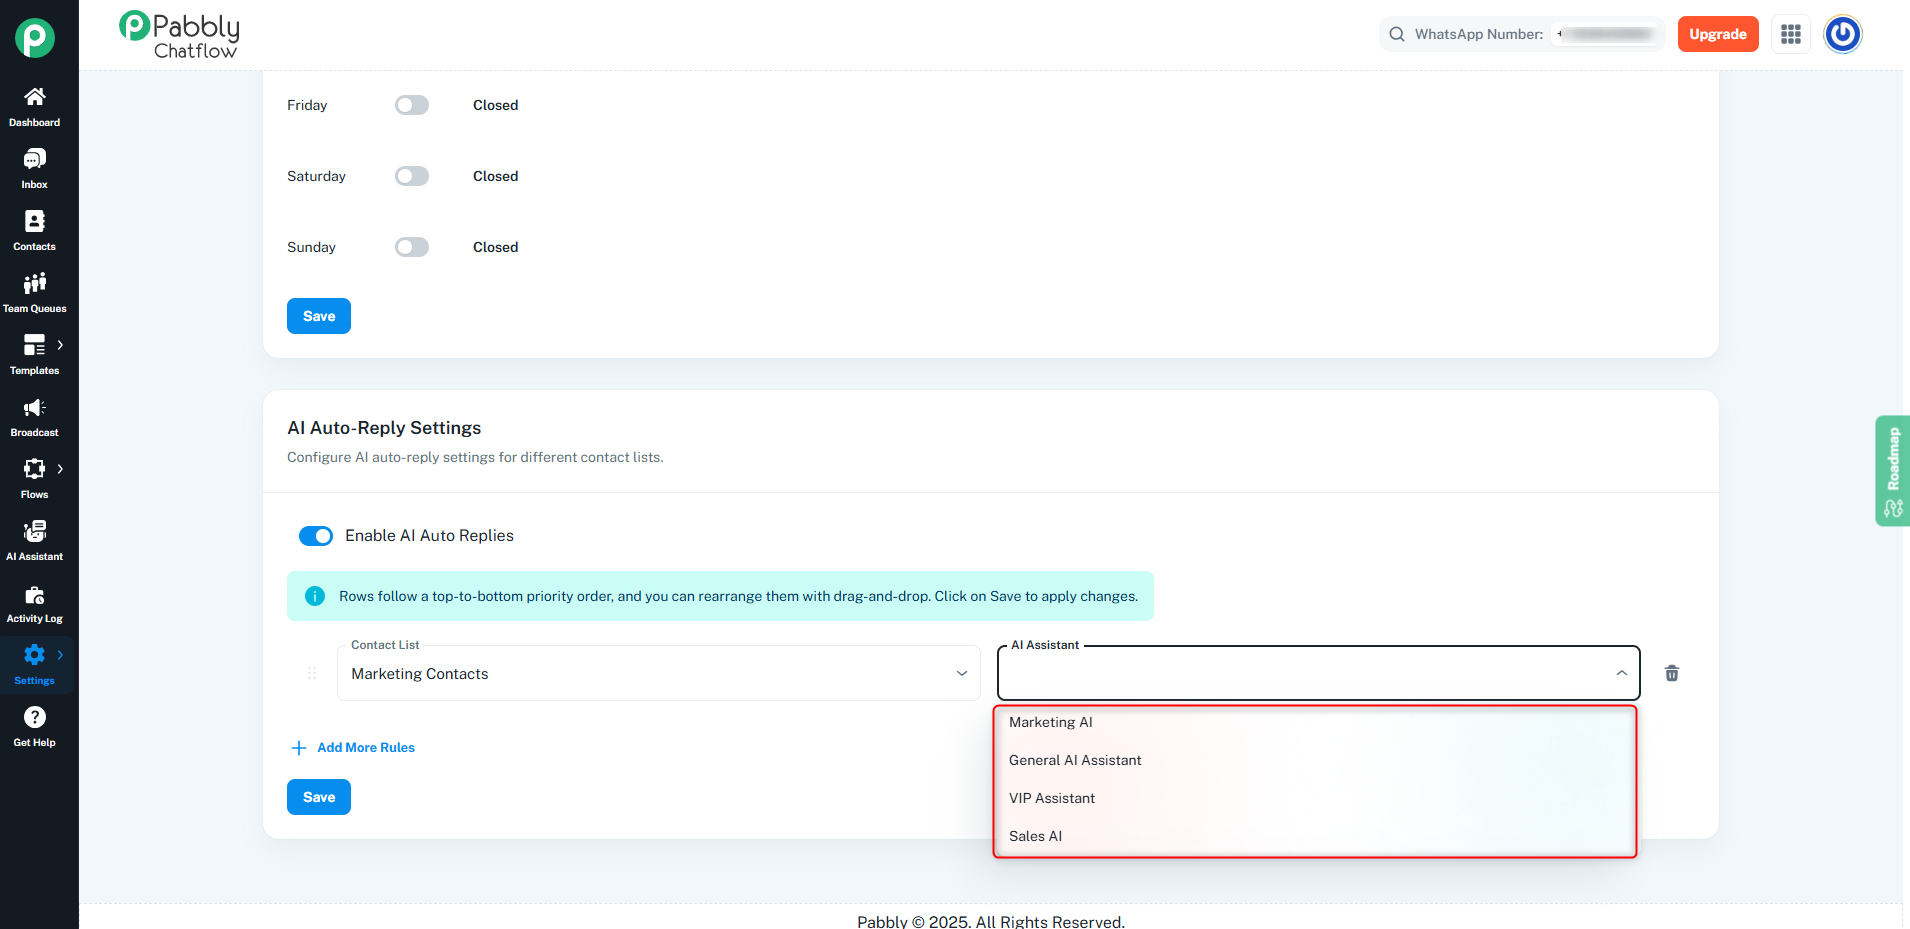
- AI Assistant Selection
- Click on the AI Assistant dropdown.
- Choose the AI assistant that should handle responses for the selected contact list or all contacts.
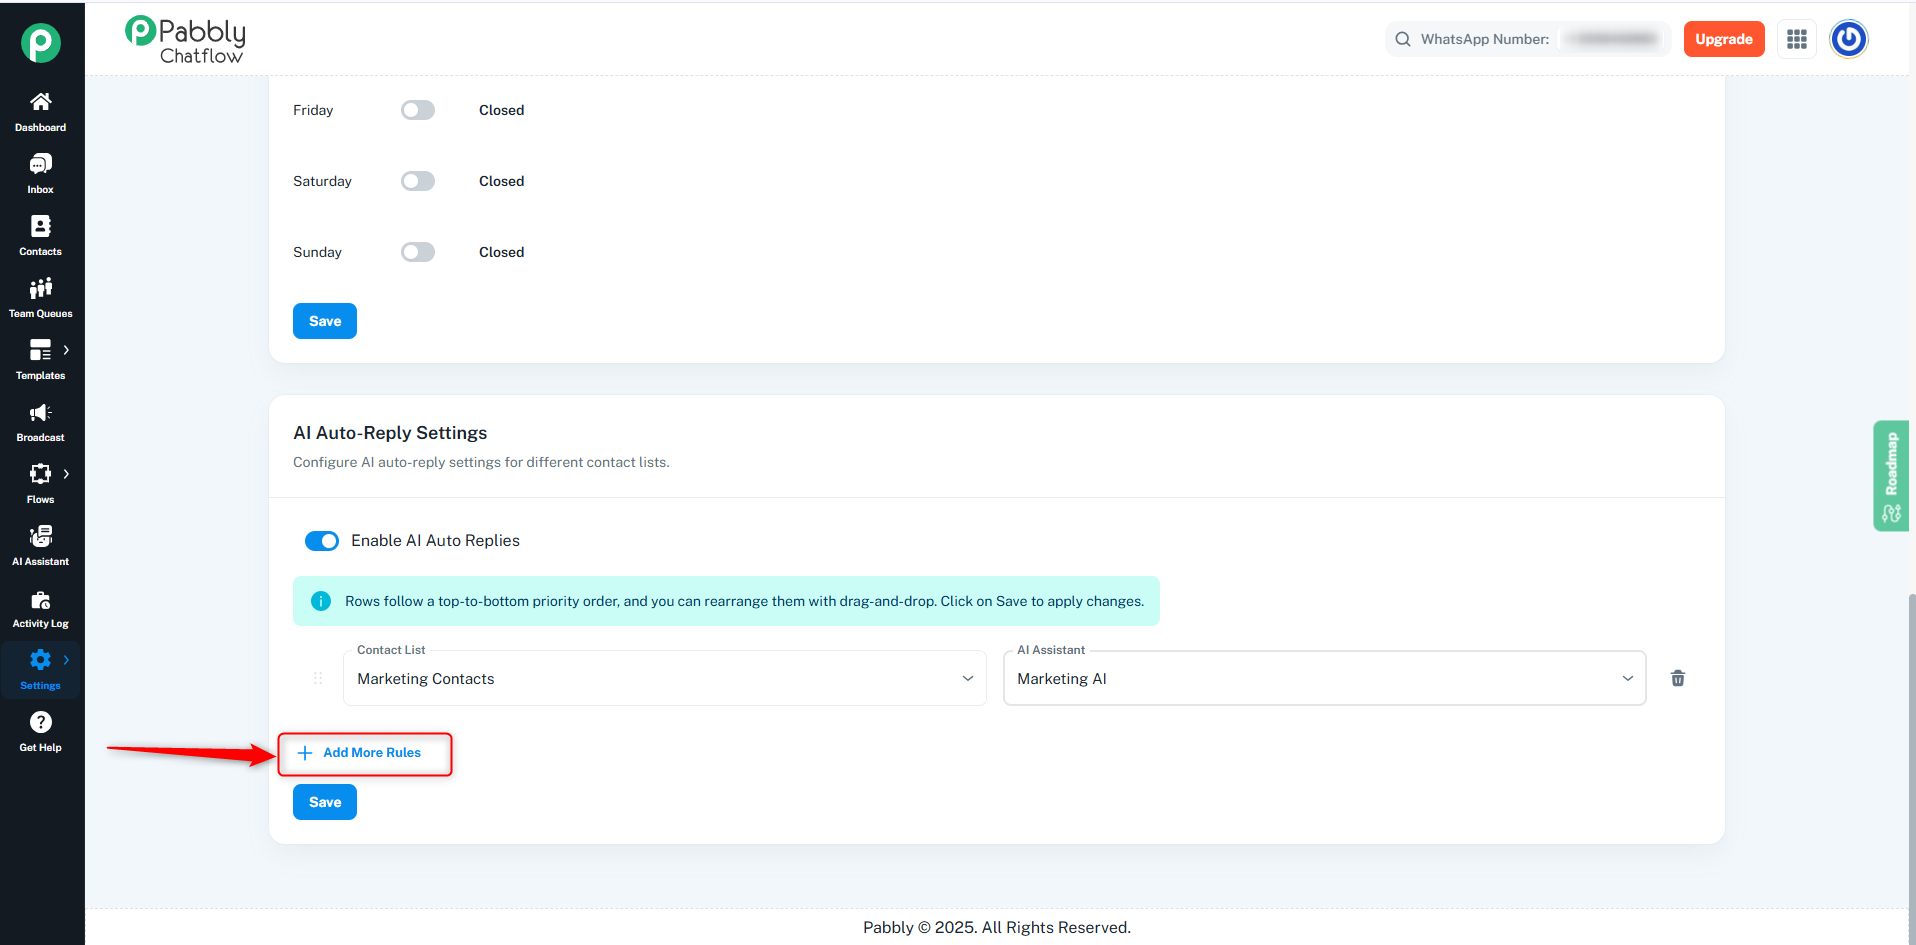
- Adding Multiple Rules
- Click Add More Rules to create additional AI auto-reply configurations.
- Each rule can have a different contact list and AI assistant combination.
Managing Rule Priority
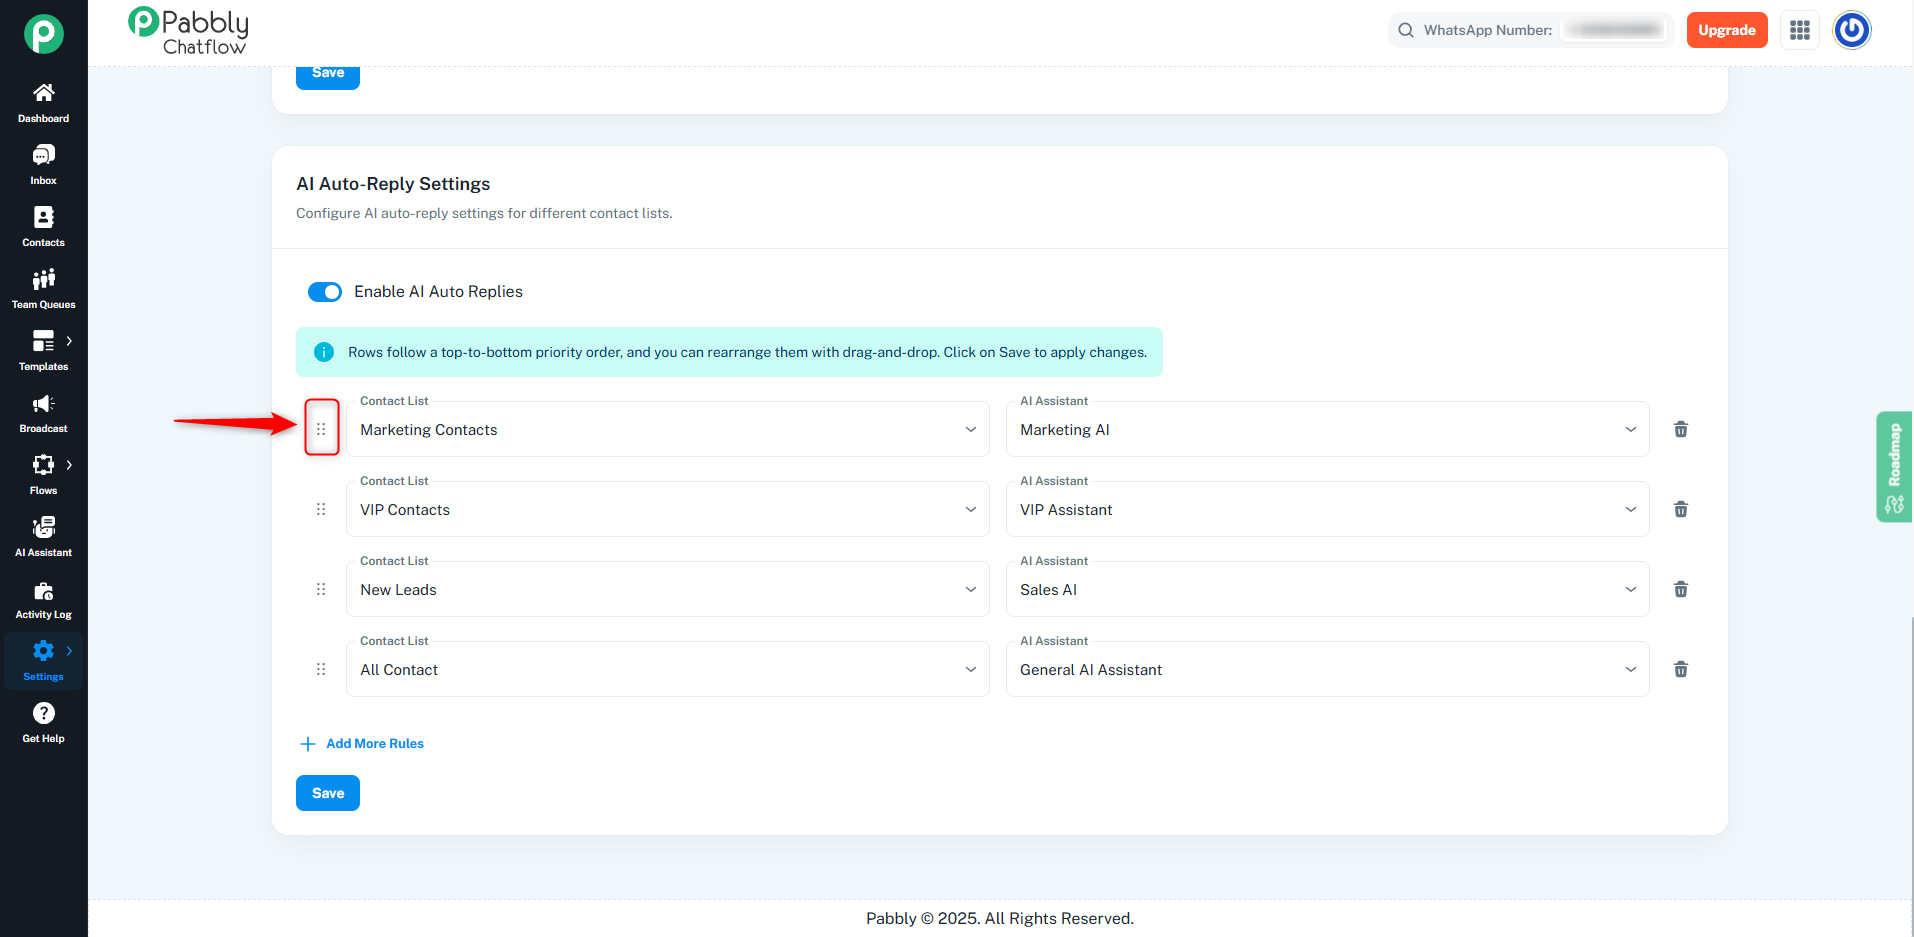
Rules follow a top-to-bottom priority order:
- The rule at the top has the highest priority.
- You can drag and drop rules to rearrange their priority order.
- When a contact matches multiple rules, the rule with higher priority (closer to the top) will be applied.
Editing and Deleting Rules
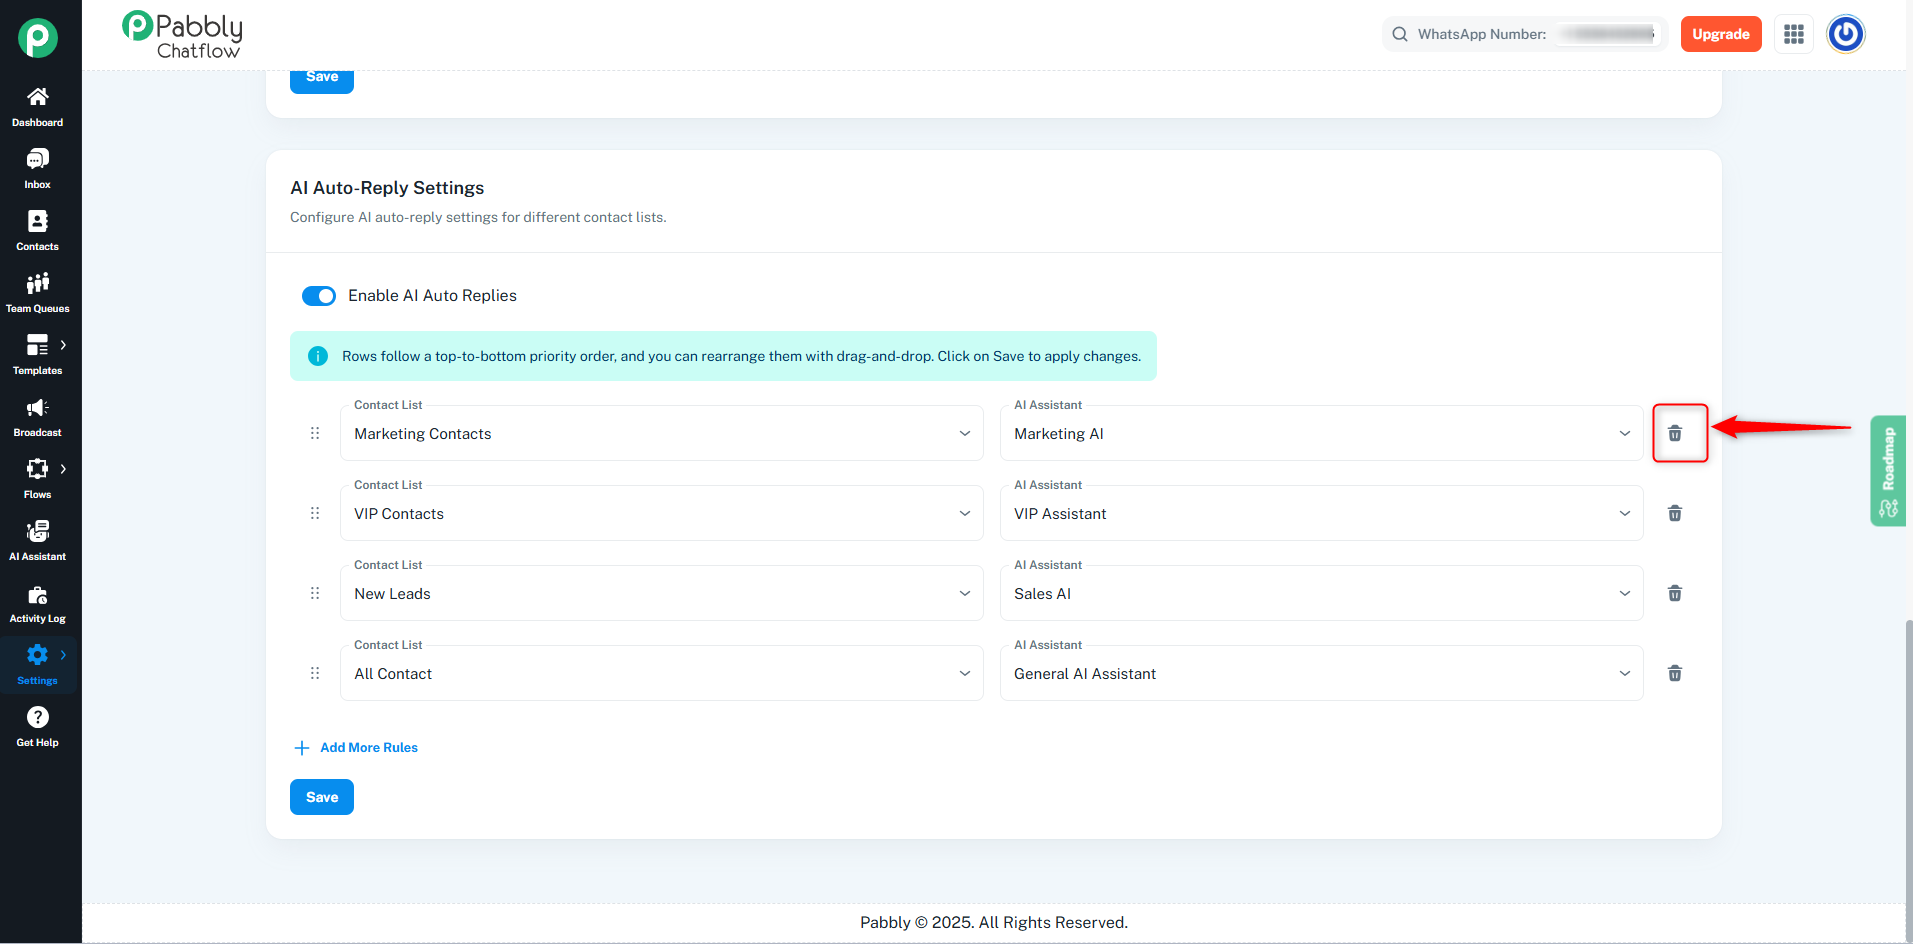
- To modify a rule: Click on the dropdown menus to change the contact list or AI assistant.
- To delete a rule: Click the trash/delete icon on the right side of the rule.
Saving Changes
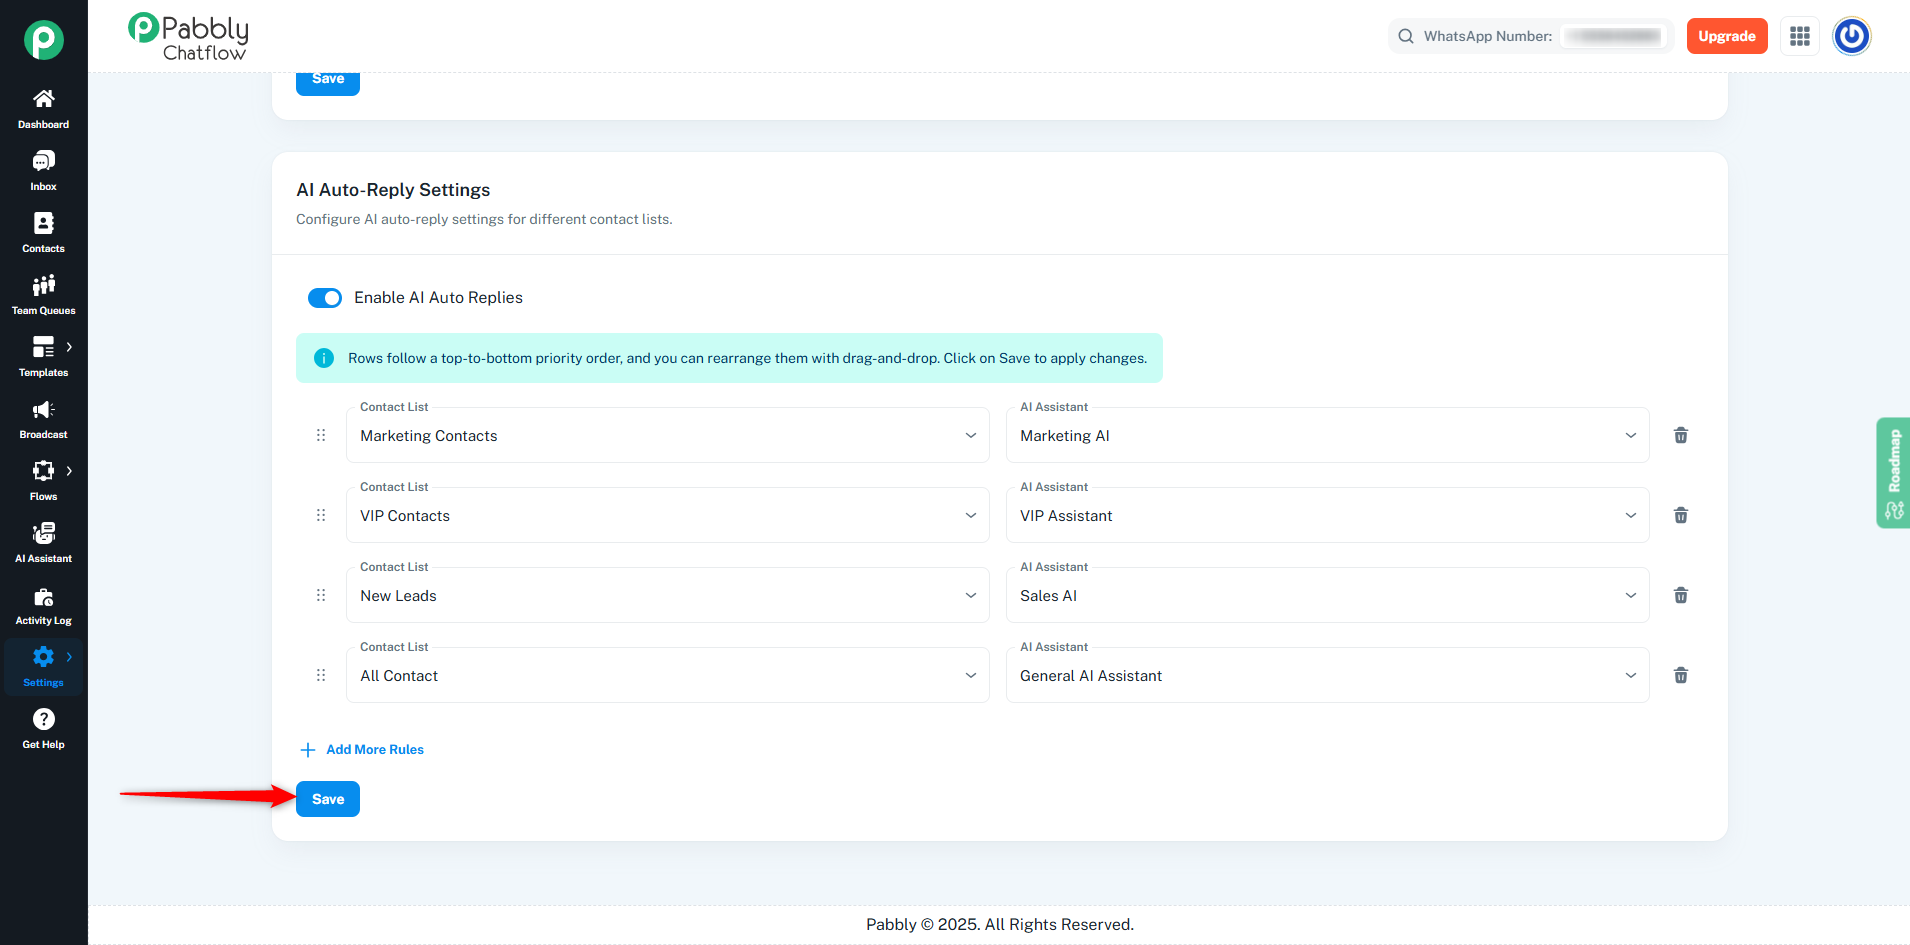
After configuring your AI auto-reply rules:
- Click the Save button to apply all changes.
- AI will now automatically reply to chats based on the rules you created.
Disabling AI Auto-Replies
If you need to disable AI auto-replies, you can do so by turning off the Enable AI Auto Replies toggle. When you attempt to disable this feature, a confirmation dialog will appear with the following options:
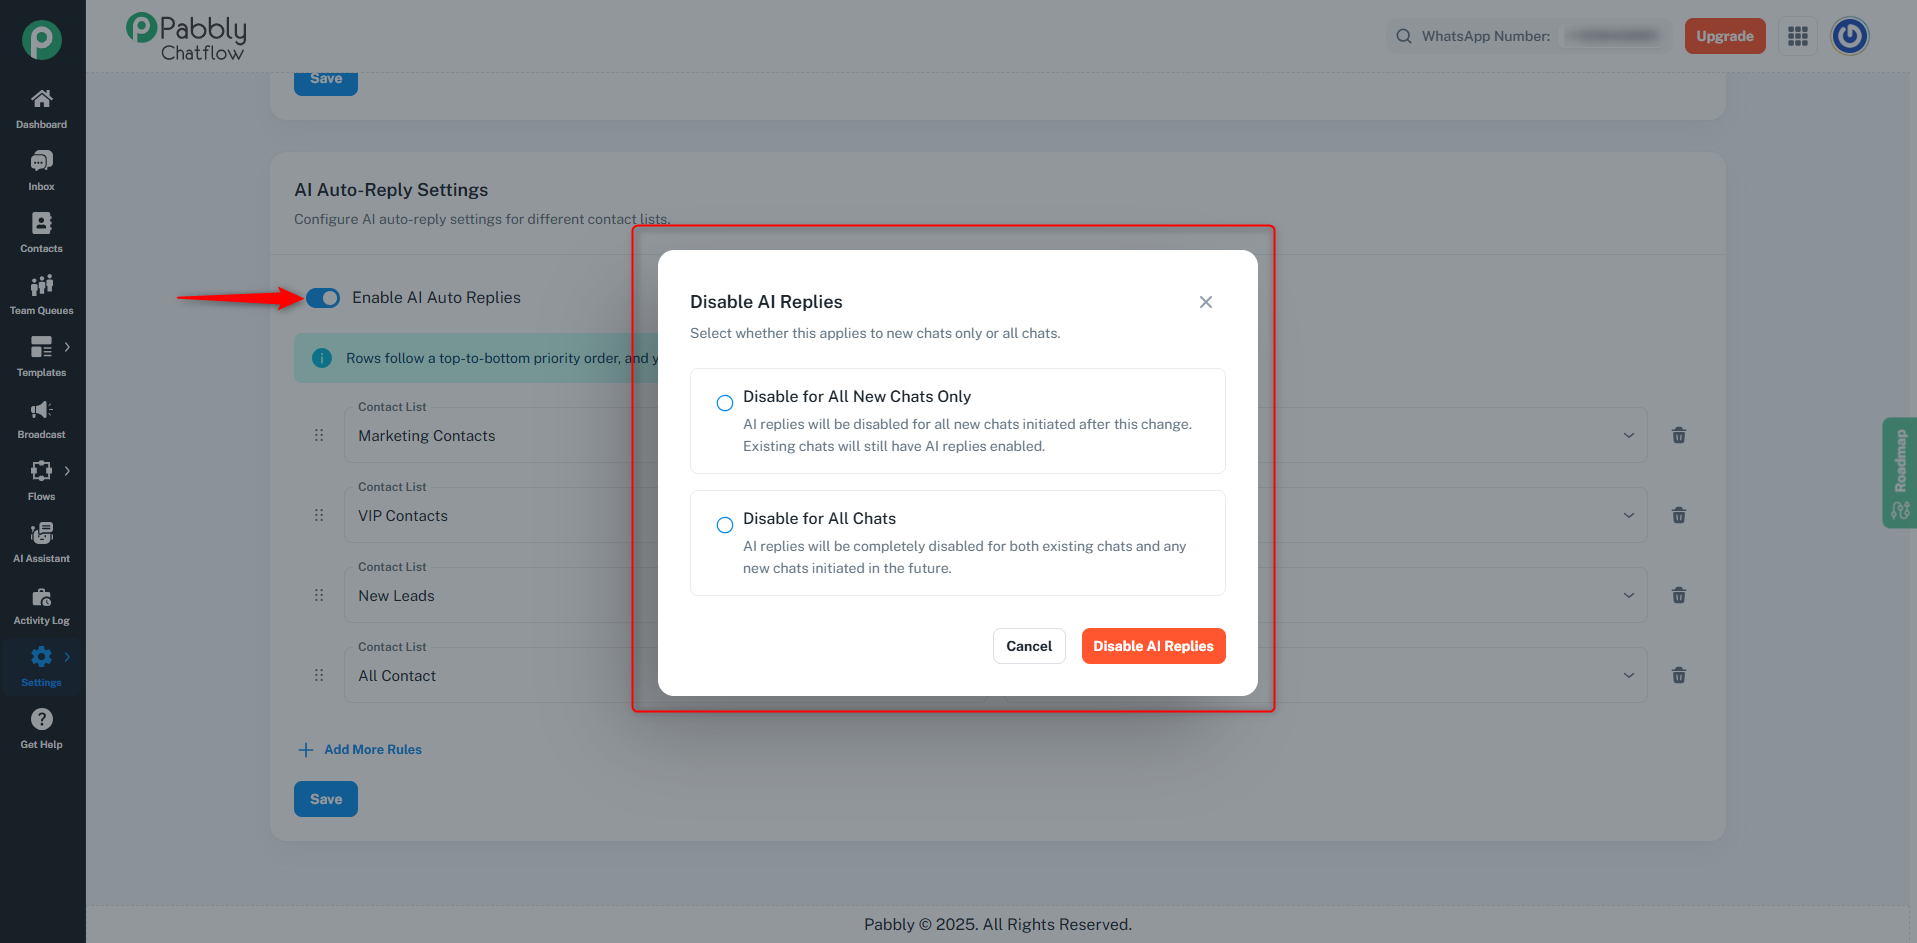
Disable Options
- Disable for ALL New Chats Only
- AI replies will be disabled for all new chats initiated after this change.
- Existing chats will still have AI replies enabled.
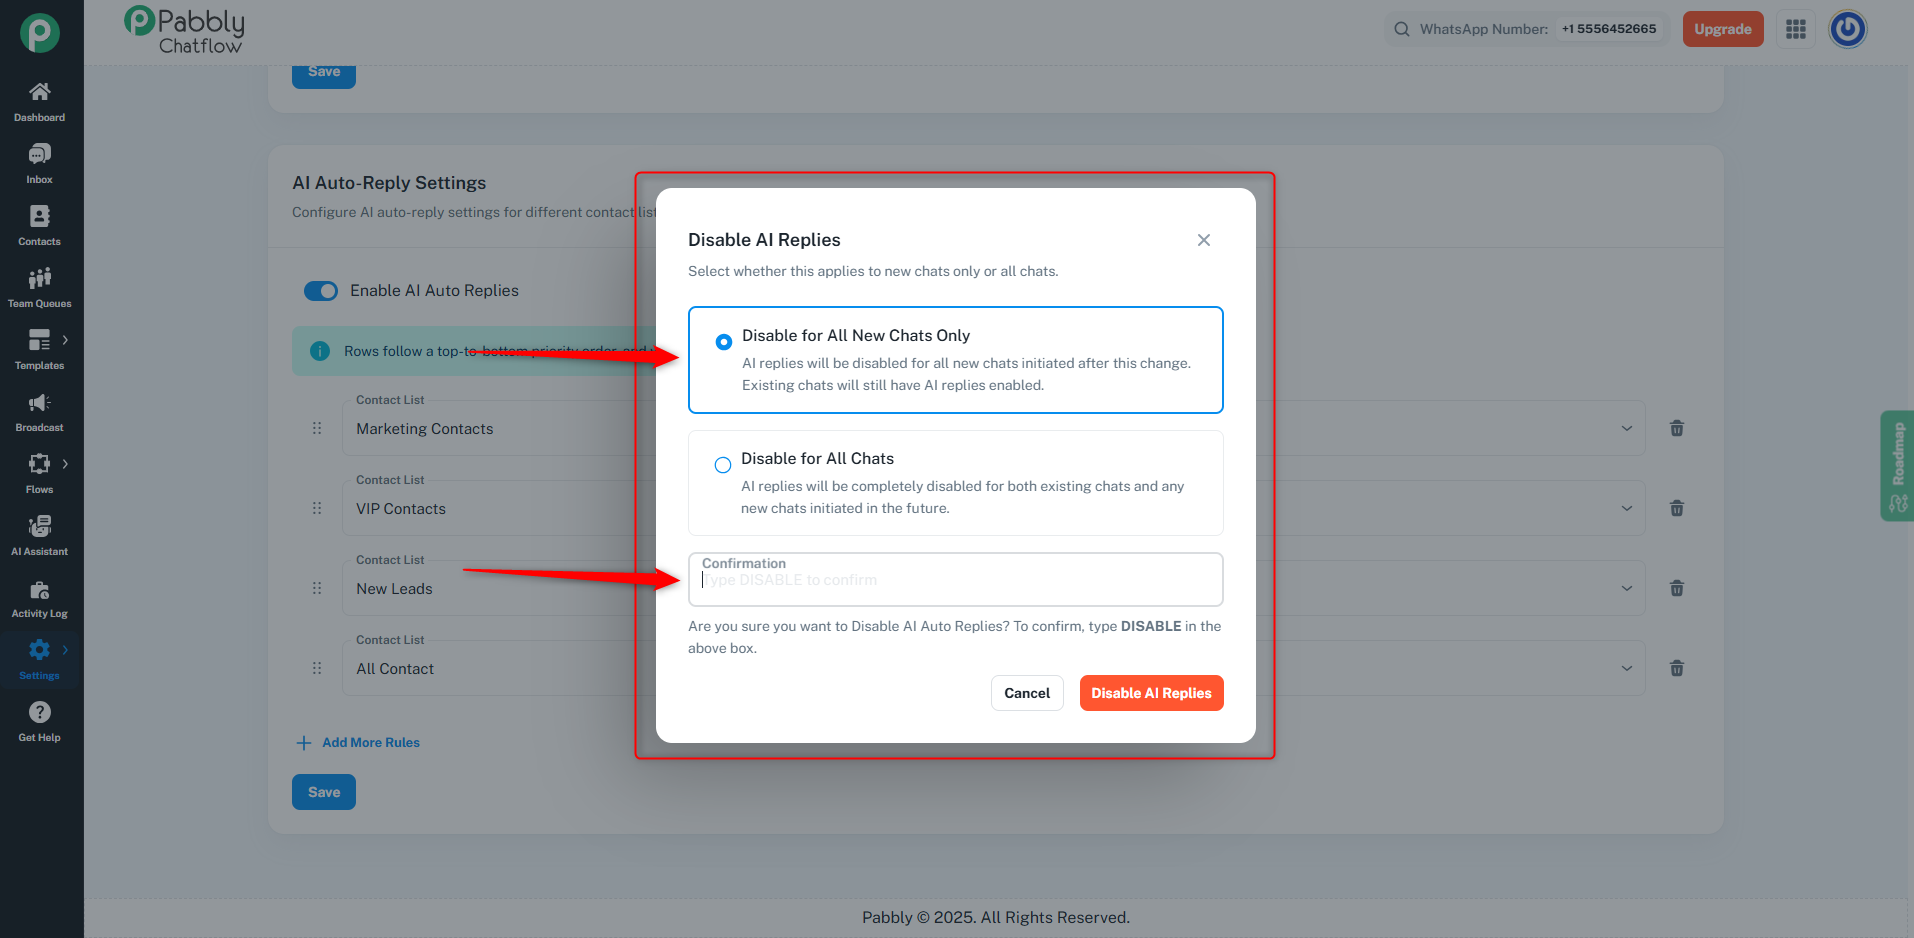
- Disable for All Chats
- AI replies will be completely disabled for both existing chats and any new chats initiated in the future.
- When you select this option, an additional Select Status dropdown appears.
- You can choose which chat status should apply when disabling AI replies:
- Open
- Intervened
- On Hold
- Pending
- Replied
- Resolved
- Closed
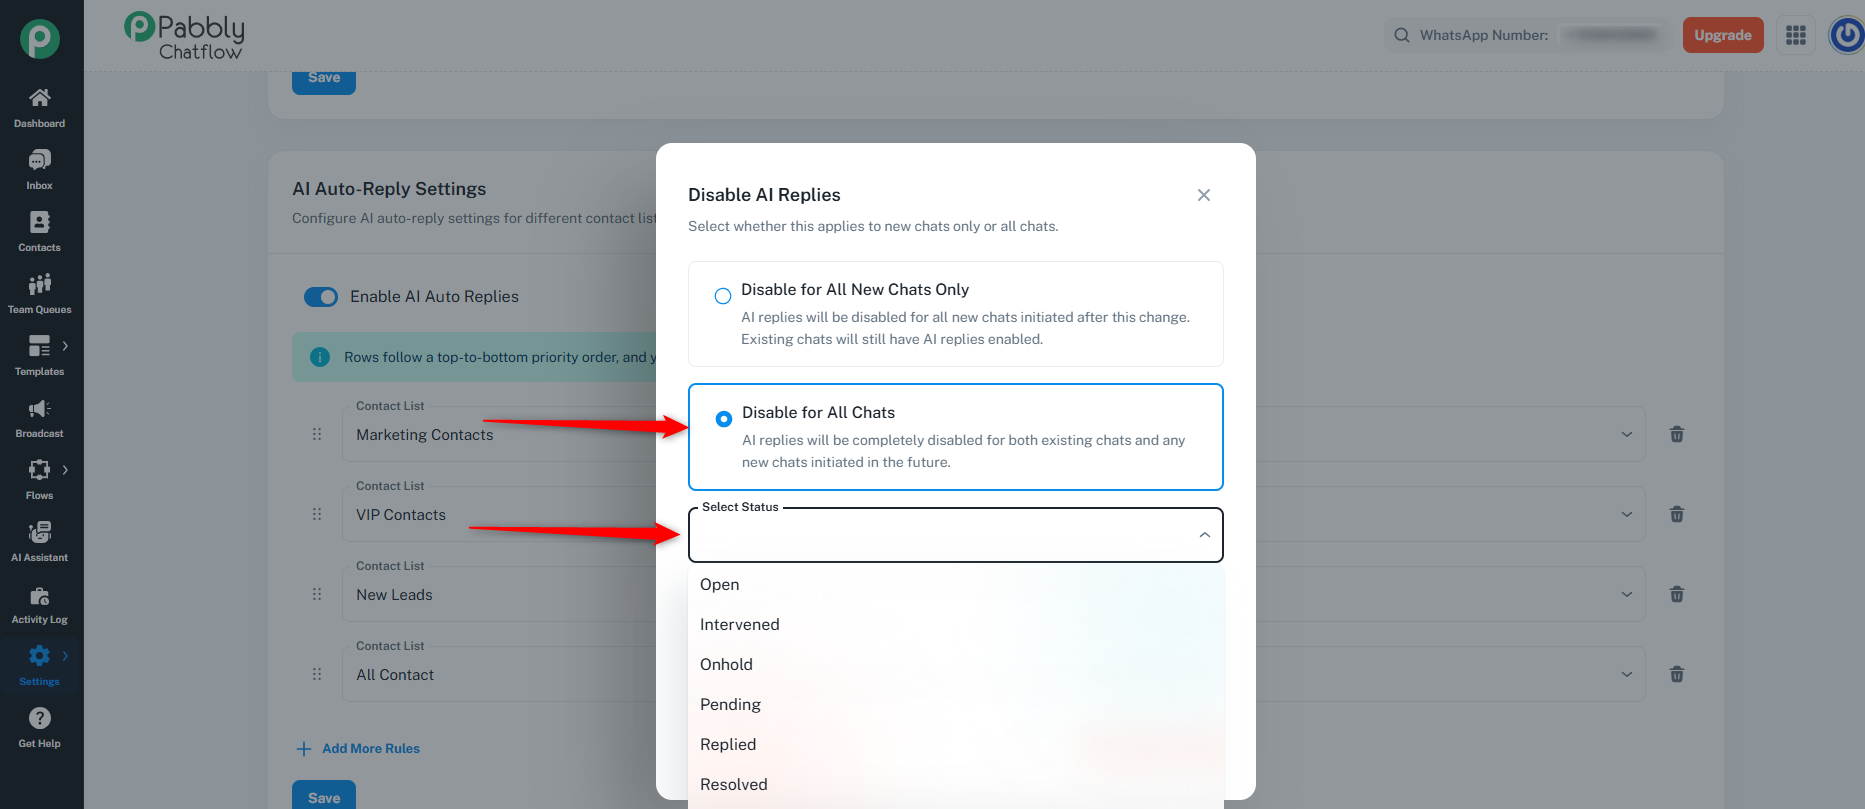
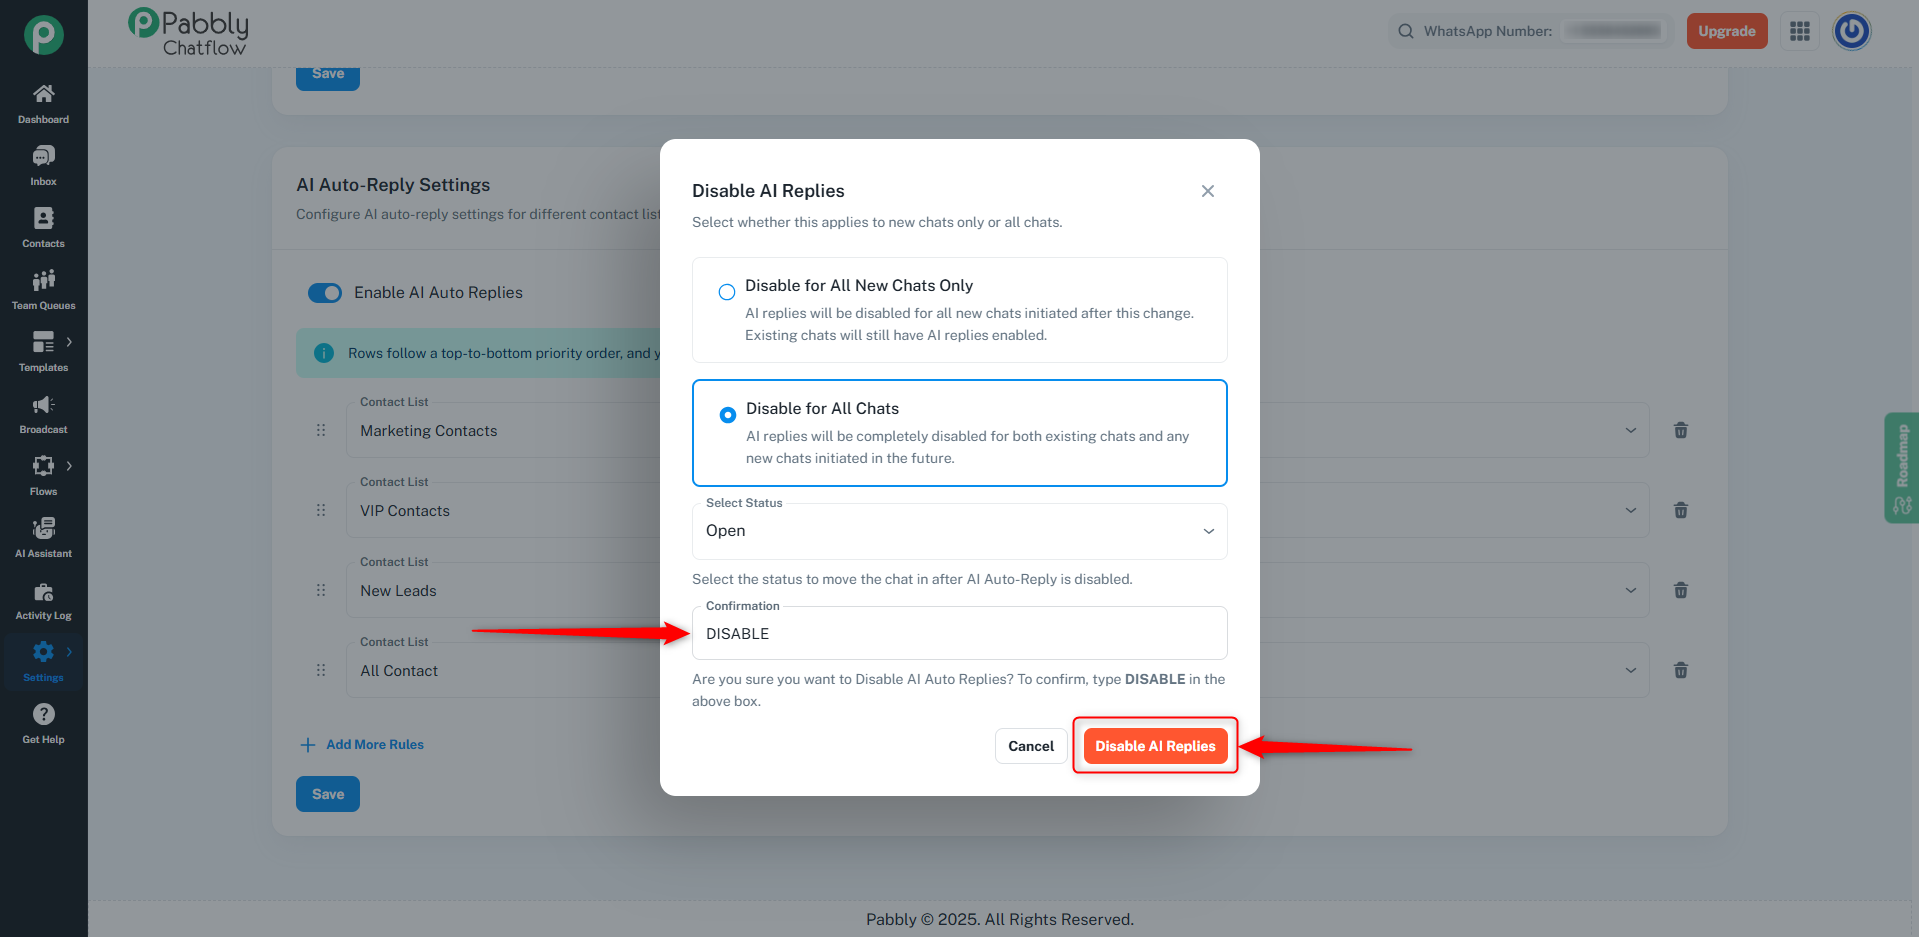
Confirmation Process
To complete the disable action:
- Select your preferred disable option (new chats only or all chats).
- If disabling for all chats, select the appropriate status from the dropdown.
- In the Confirmation section, type DISABLE in the text box.
- Click the Disable AI Replies button to confirm, or Cancel to abort the action.
Example AI Auto-Reply Setup
Scenario 1: Different AI assistants for different types of customers
- Rule 1 (Highest Priority)
- Contact List: "VIP Customers"
- AI Assistant: "Premium Support AI"
- Rule 2
- Contact List: "General Inquiries"
- AI Assistant: "General Support AI"
- Rule 3 (Lowest Priority)
- Contact List: "New Leads"
- AI Assistant: "Sales AI"
Scenario 2: Using "All Contacts" option
- Rule 1 (Highest Priority)
- Contact List: "Priority Customers"
- AI Assistant: "VIP Support AI"
- Rule 2 (Lower Priority)
- Contact List: "All Contacts"
- AI Assistant: "General AI Assistant"
Note: Each contact list can be assigned to only one AI assistant at a time, ensuring clear handling of messages. However, the same AI assistant can be reused across multiple contact lists, allowing you to efficiently manage responses for different user segments using a single assistant.
