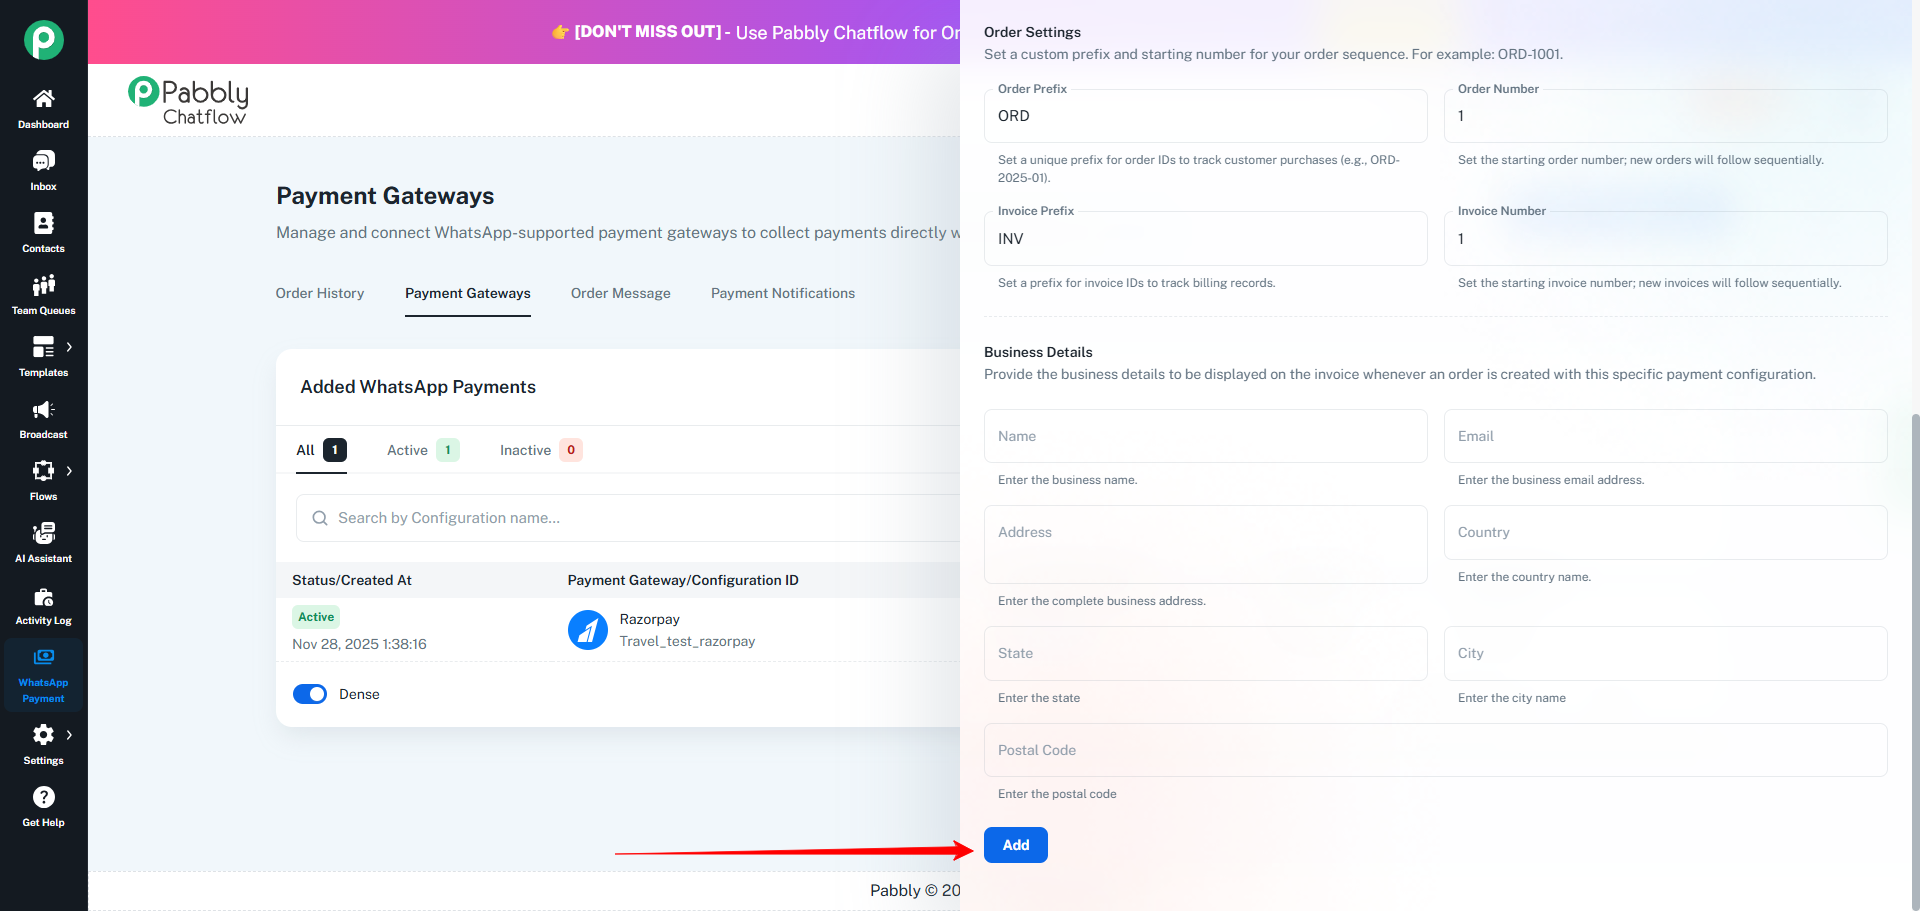
1. Opening the Payment Configuration Tab
The Payment Configuration tab is the starting point for setting up WhatsApp Payments inside Pabbly Chatflow.
Default Tab Behaviour
- If you are configuring WhatsApp Payments for the first time, this tab will automatically open, ensuring you begin the setup immediately.
- If you already have at least one payment configuration, your default landing tab will be Order History, as it is the primary operational screen used daily.
Here, you can:
- Add a new WhatsApp payment setup
- View or edit existing configurations
- Sync your payment methods from Meta
- Manage all connected gateways
To begin, click the “Add WhatsApp Payment” button.
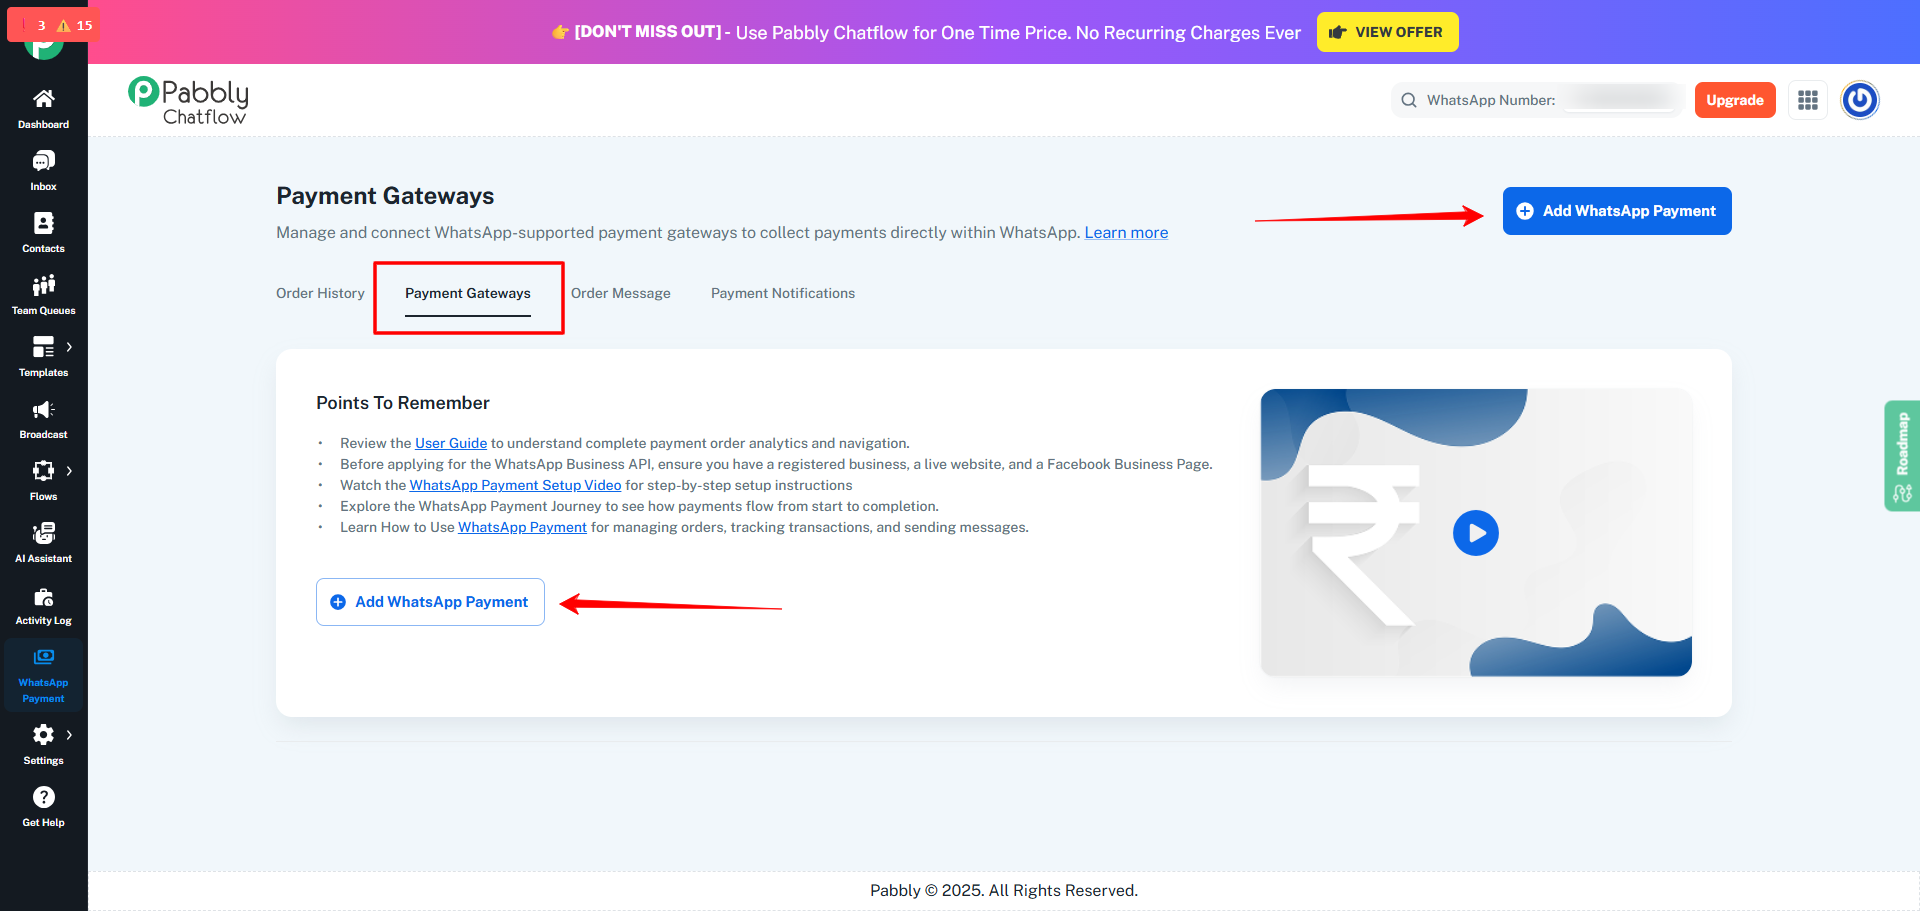
2. Starting a New Payment Configuration
When you click Add WhatsApp Payment, a configuration drawer opens from the right side of the screen.
This drawer contains all required fields to establish your WhatsApp payment connection.
You must complete each section step-by-step in the order displayed.
Figure 3 – Payment Configuration Drawer Opened
3. Step-by-Step Configuration Guide
Below is a detailed explanation of every setting in the configuration drawer.
3.1 Configuration Name
Enter a descriptive and unique name to identify your payment gateway.
Examples:
- Razorpay India – Primary
- WhatsApp Store Payments
- Retail Shop Billing – 2025
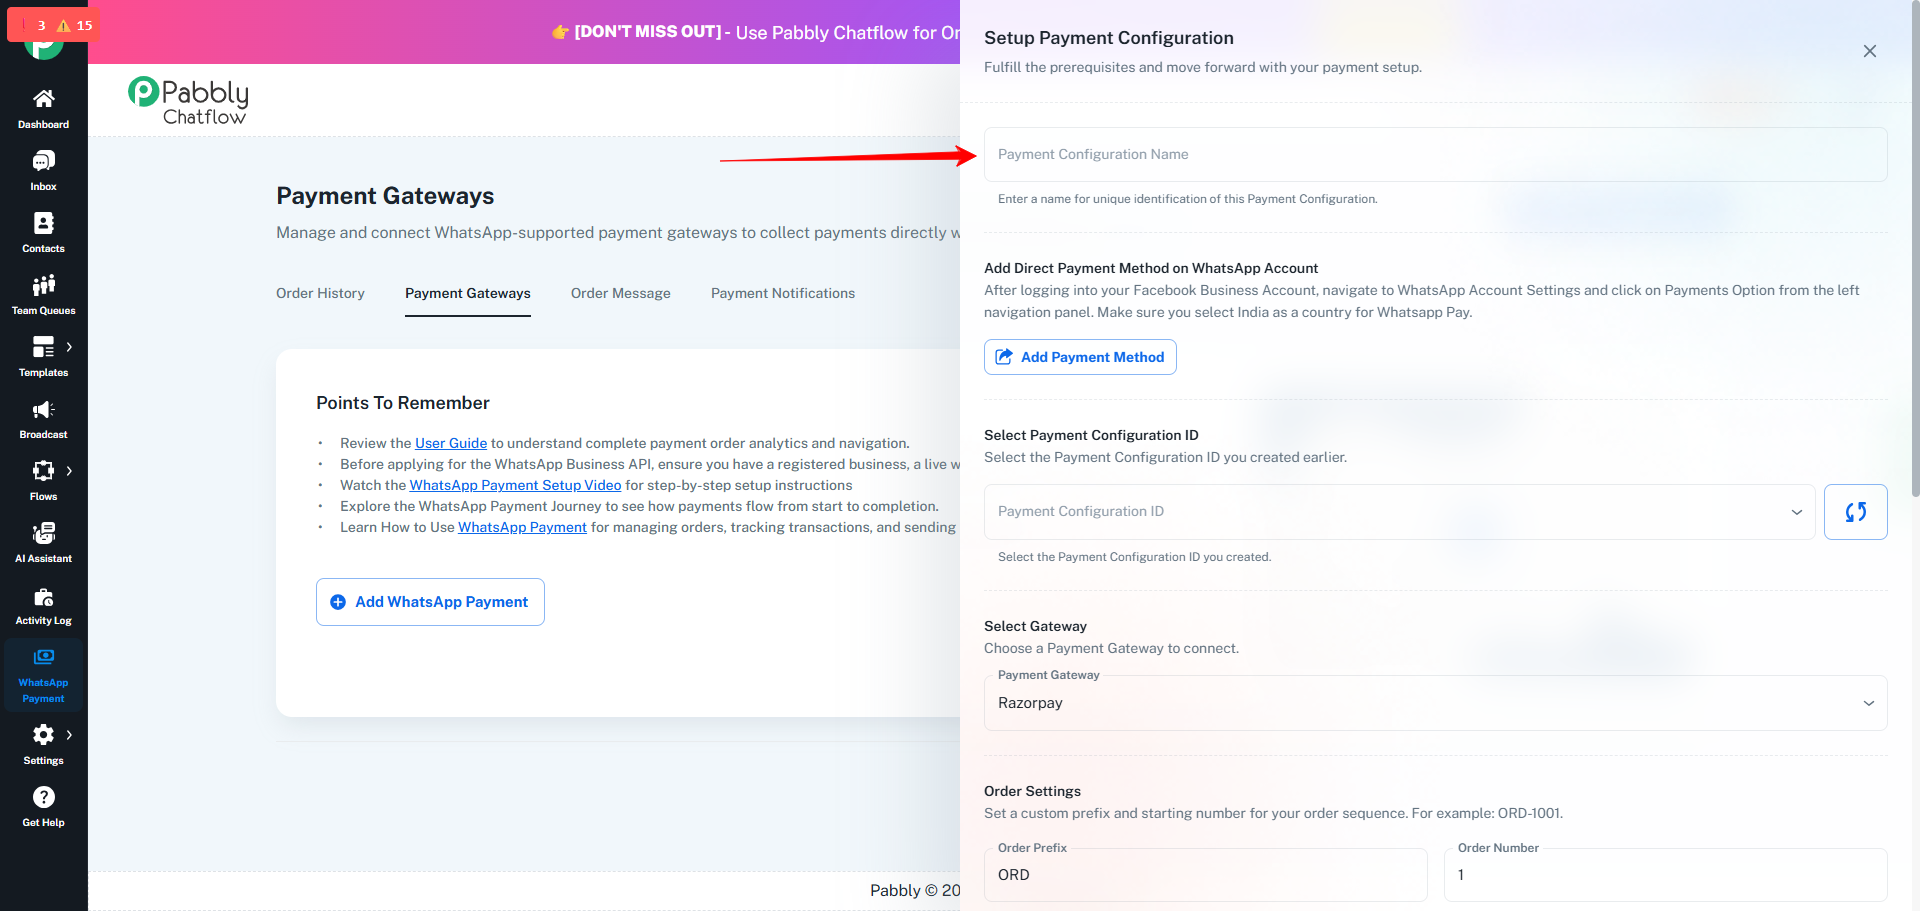 Figure 4 – Configuration Name Field
Before linking any gateway, you must have a Direct Payment Method added inside your Meta WhatsApp Business Account.
Prerequisites for Payment Gateways
- A supported payment gateway merchant account (such as Razorpay or PayU) must be configured in Meta WhatsApp Business Manager.
- The payment configuration status in Meta must be set to Active.
Steps to follow:
- Click Add Payment Method
- This will redirect you to the Meta Business WhatsApp Manager
- Follow step-by-step to add the new configuration
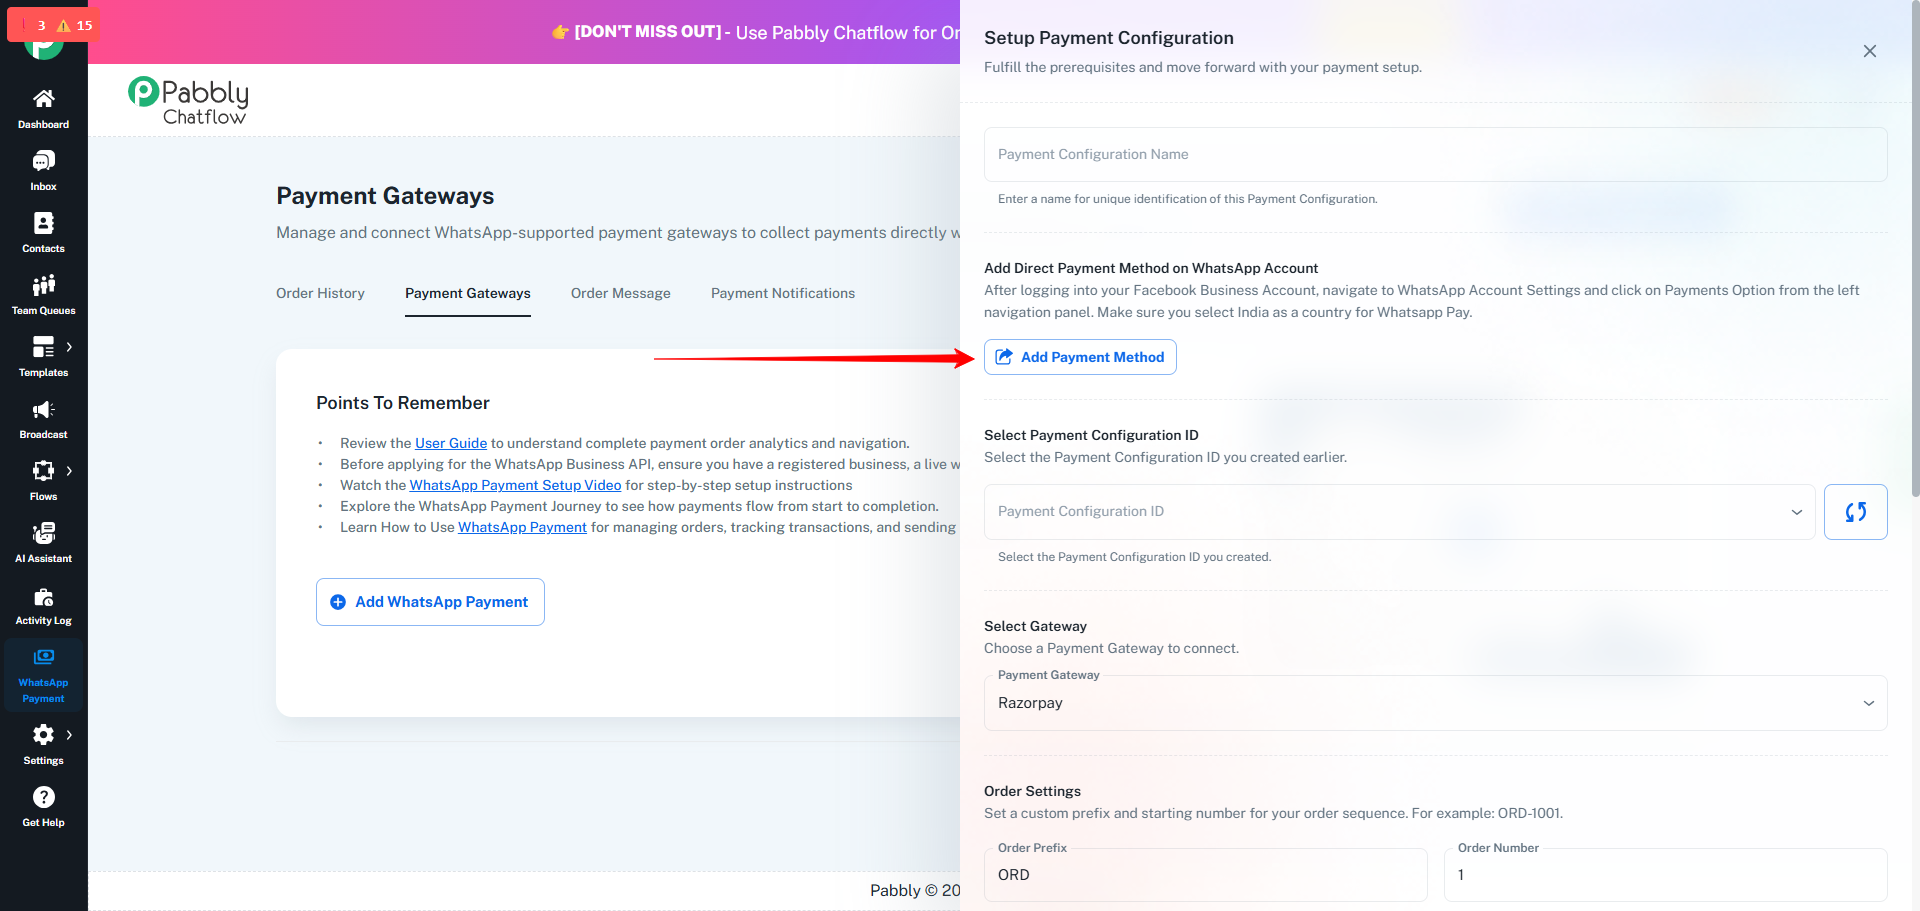
Add a New Payment Method in WhatsApp Manager
- Click Add Payment Method
- Go to WhatsApp Manager → Payment configurations.
- Click the New configuration button in the top-right corner.
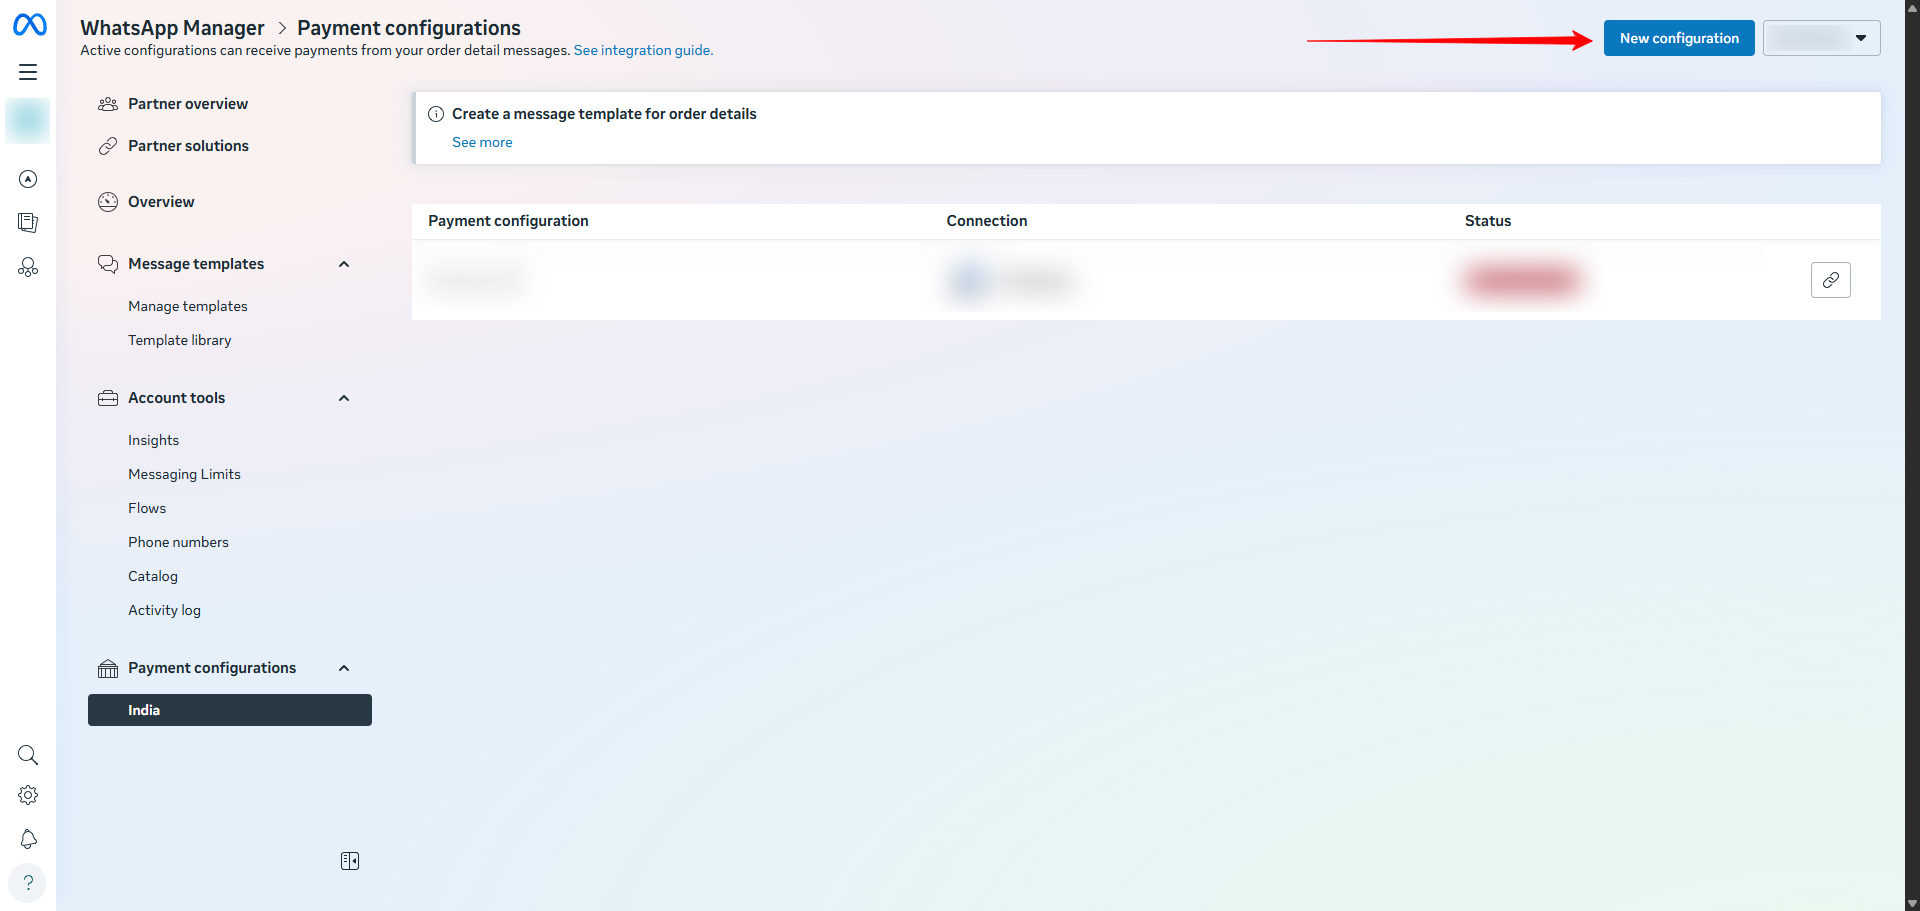
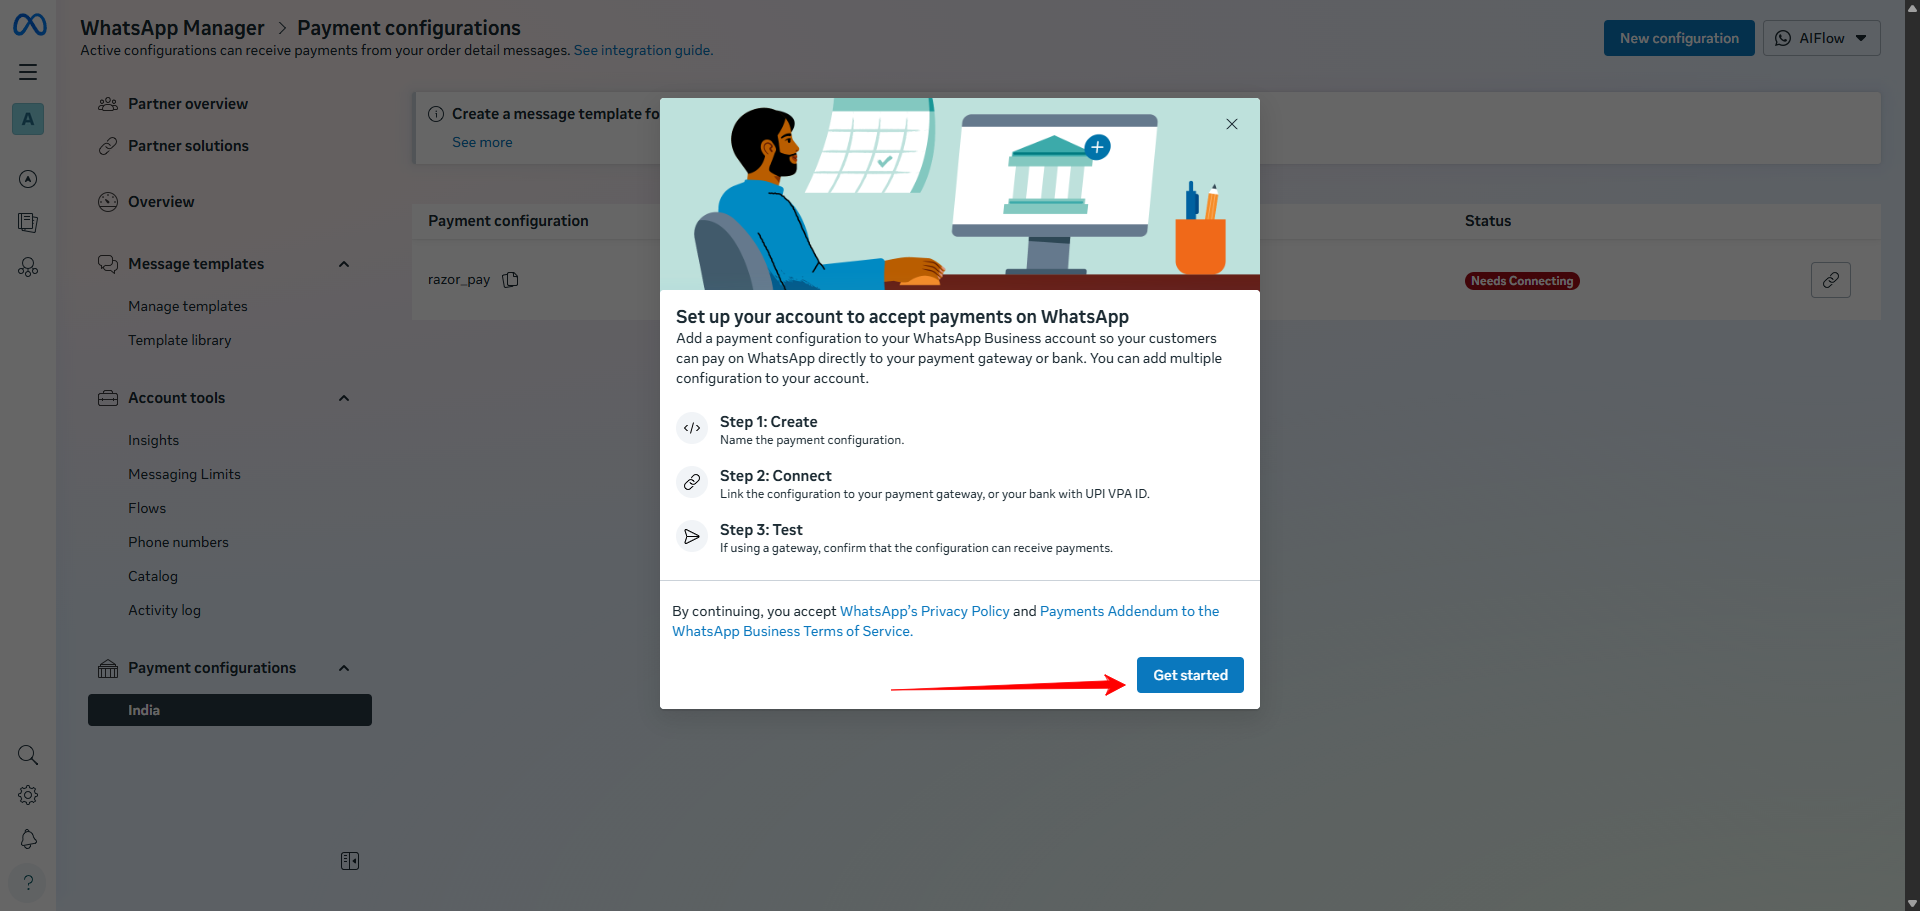
- Start the Setup Wizard
- A popup titled “Set up your account to accept payments on WhatsApp” will appear.
- Review the short overview of the steps.
- Click Get started to continue.
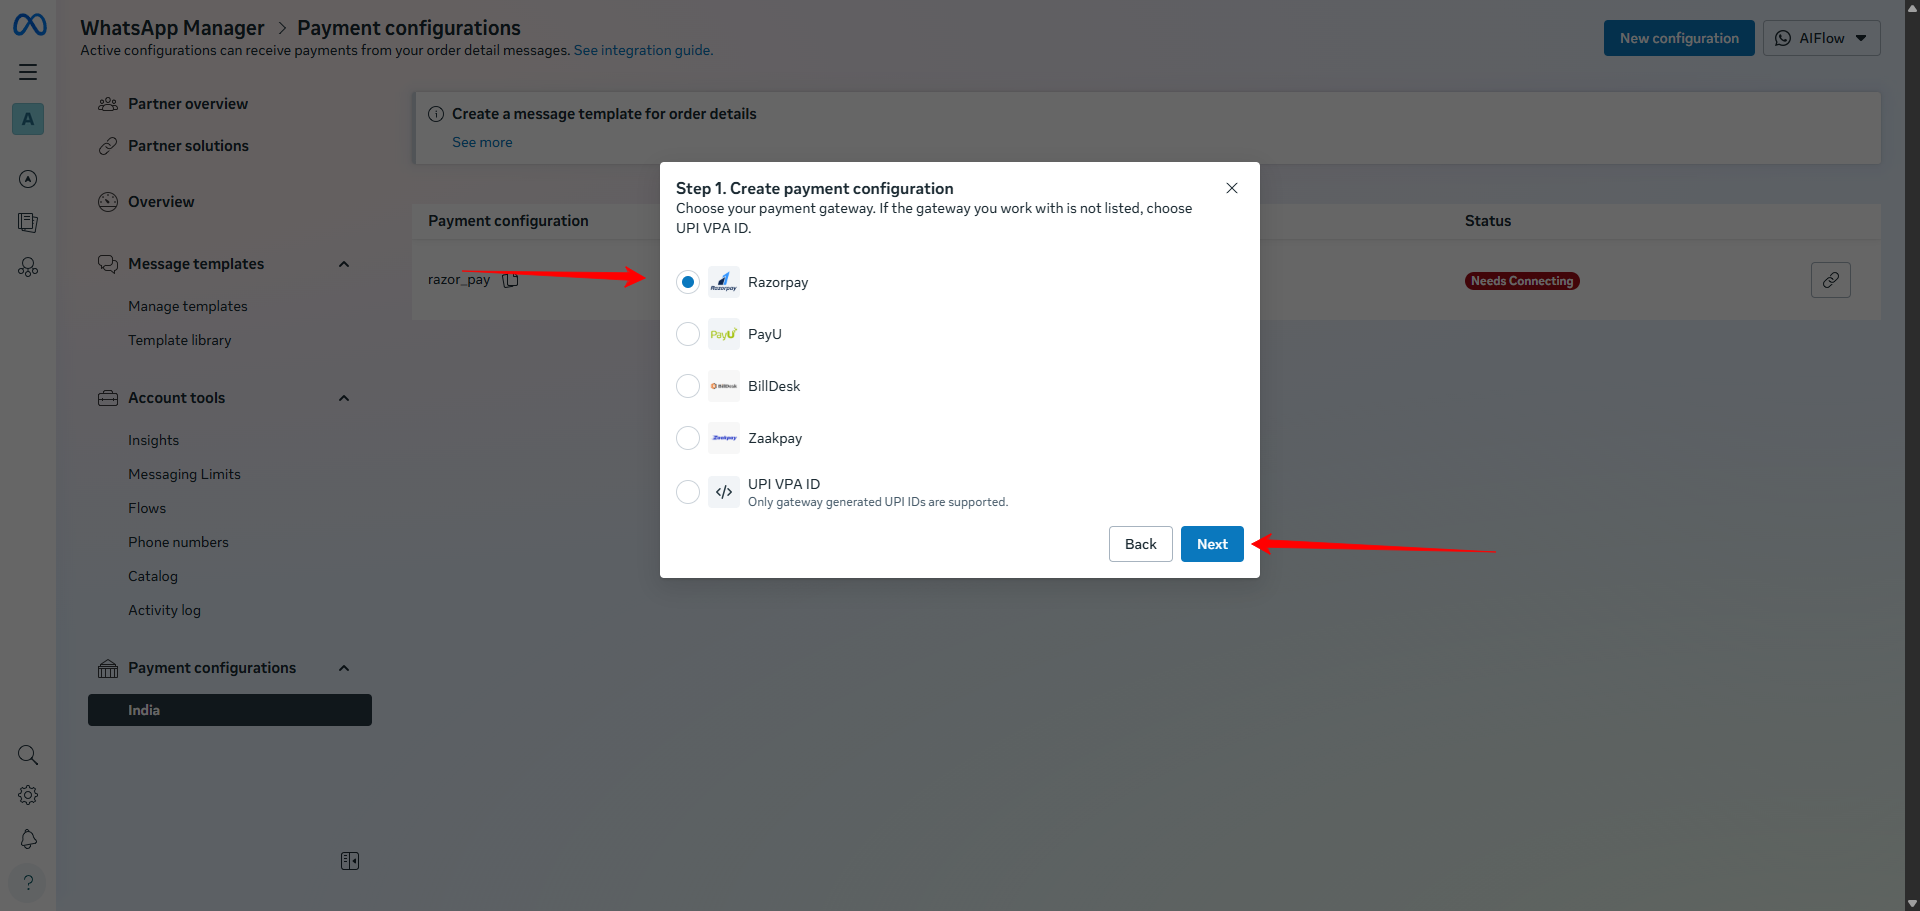
- Select a Payment Gateway
- In Step 1. Create payment configuration, choose your gateway from the list.
- Select Razorpay or PayU from the list, as both gateways are supported by Pabbly Chatflow.
- Click Next to proceed.
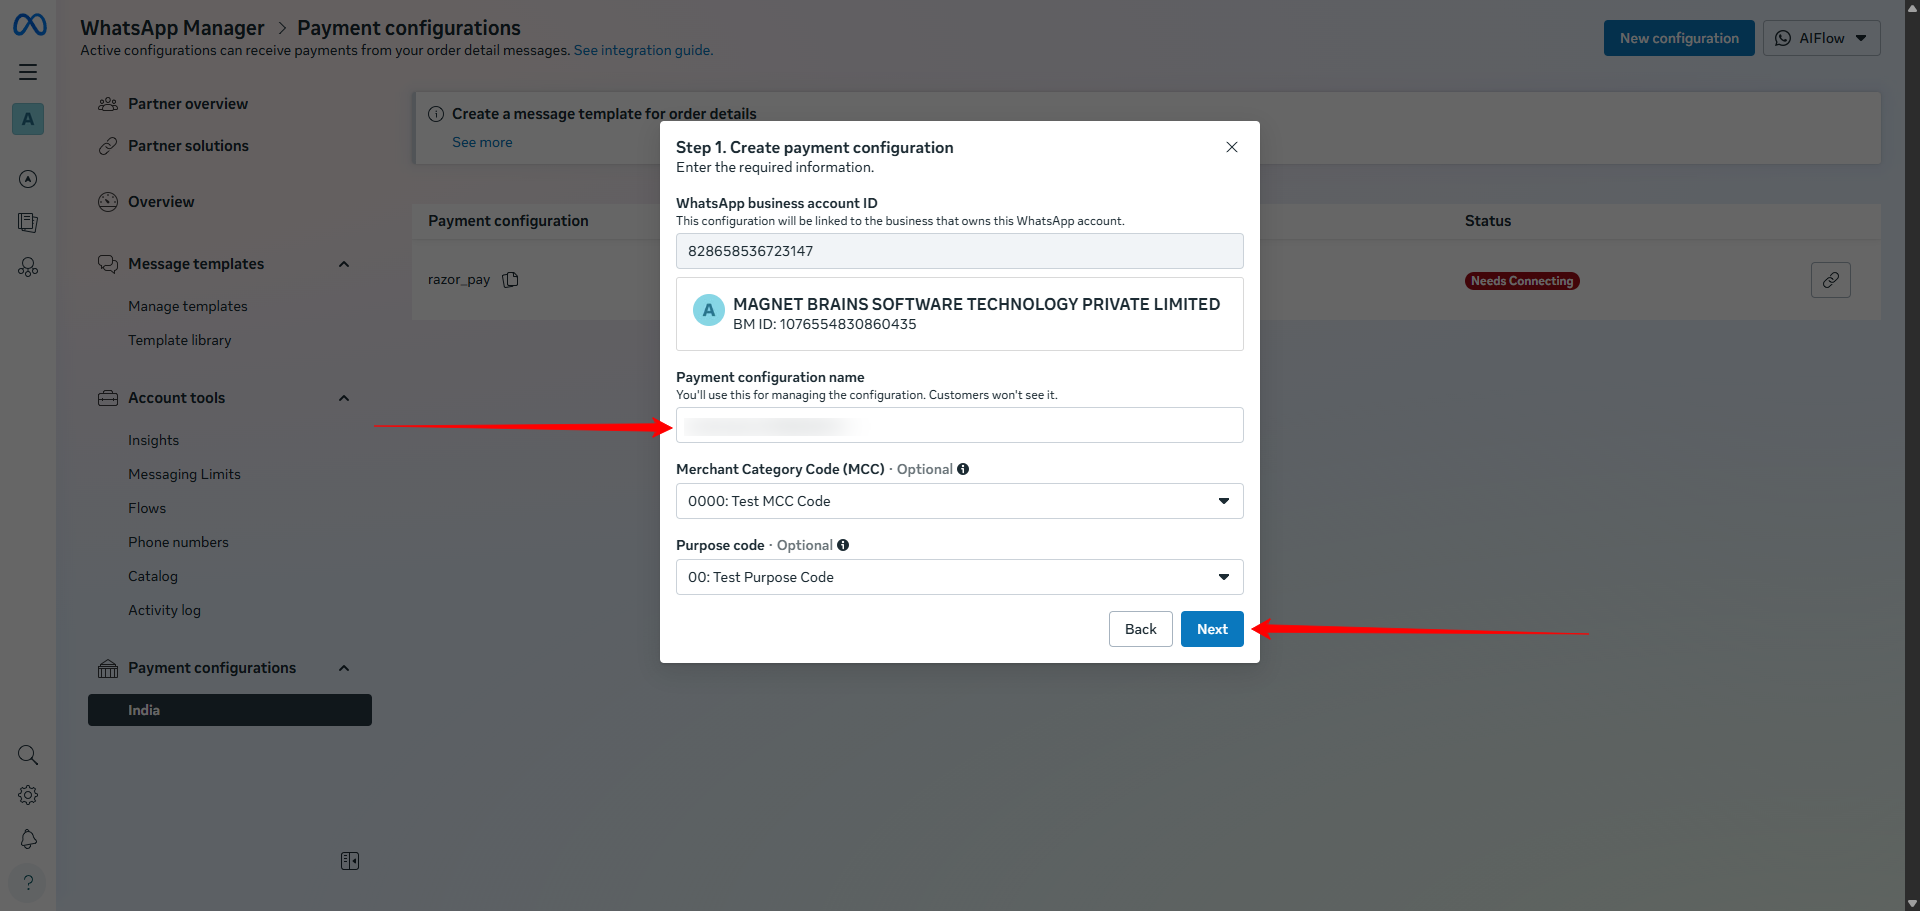
- Create the Payment Configuration
- Verify the WhatsApp business account ID shown at the top.
- Enter a Payment configuration name.
- (Optional) Select a Merchant Category Code (MCC) and Purpose code, if required for your business.
- Click Next to continue.
- Confirm Using Meta Account Password
- You’ll be asked to re-enter your Meta account password to securely create the configuration.
- Enter the password and click Confirm.
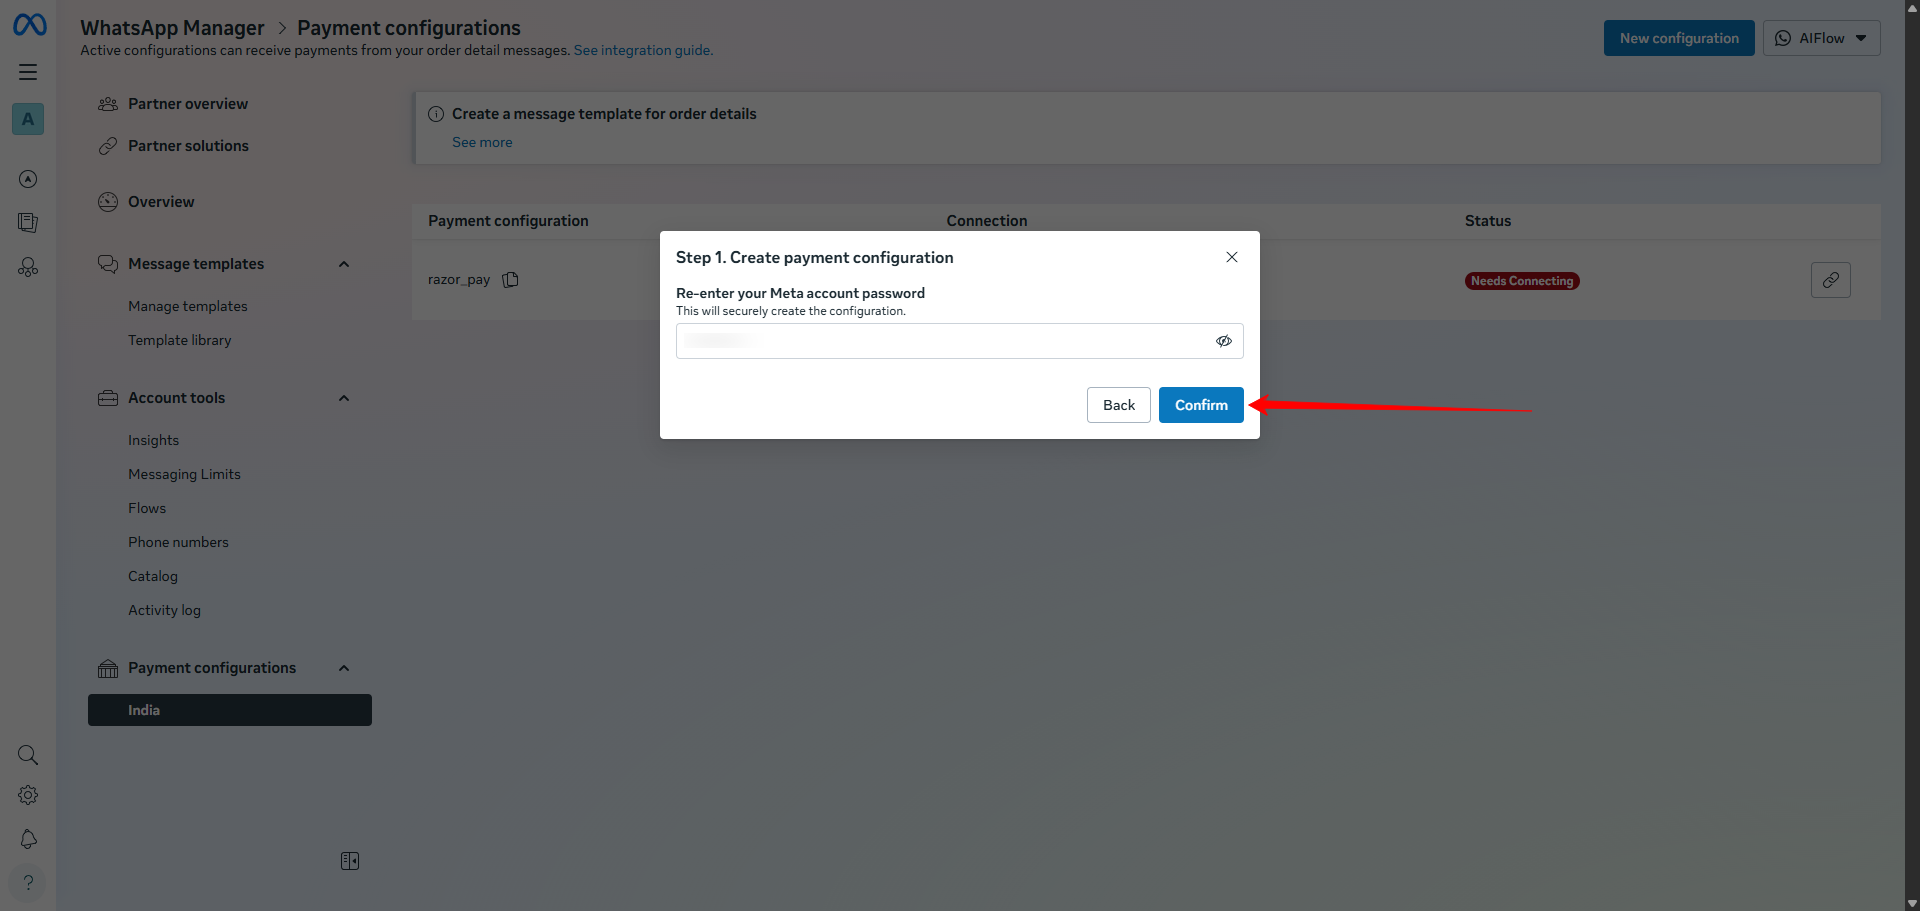
- Choose How to Connect the Gateway
- In Step 2. Connect configuration and gateway, choose one of the options:
- Connect now – log in immediately with the payment gateway account owner’s credentials, or
- Account owner will connect later – send a link to the account owner to authorize the connection.
- Note: The login credentials must belong to the gateway account owner.
- Click Next.
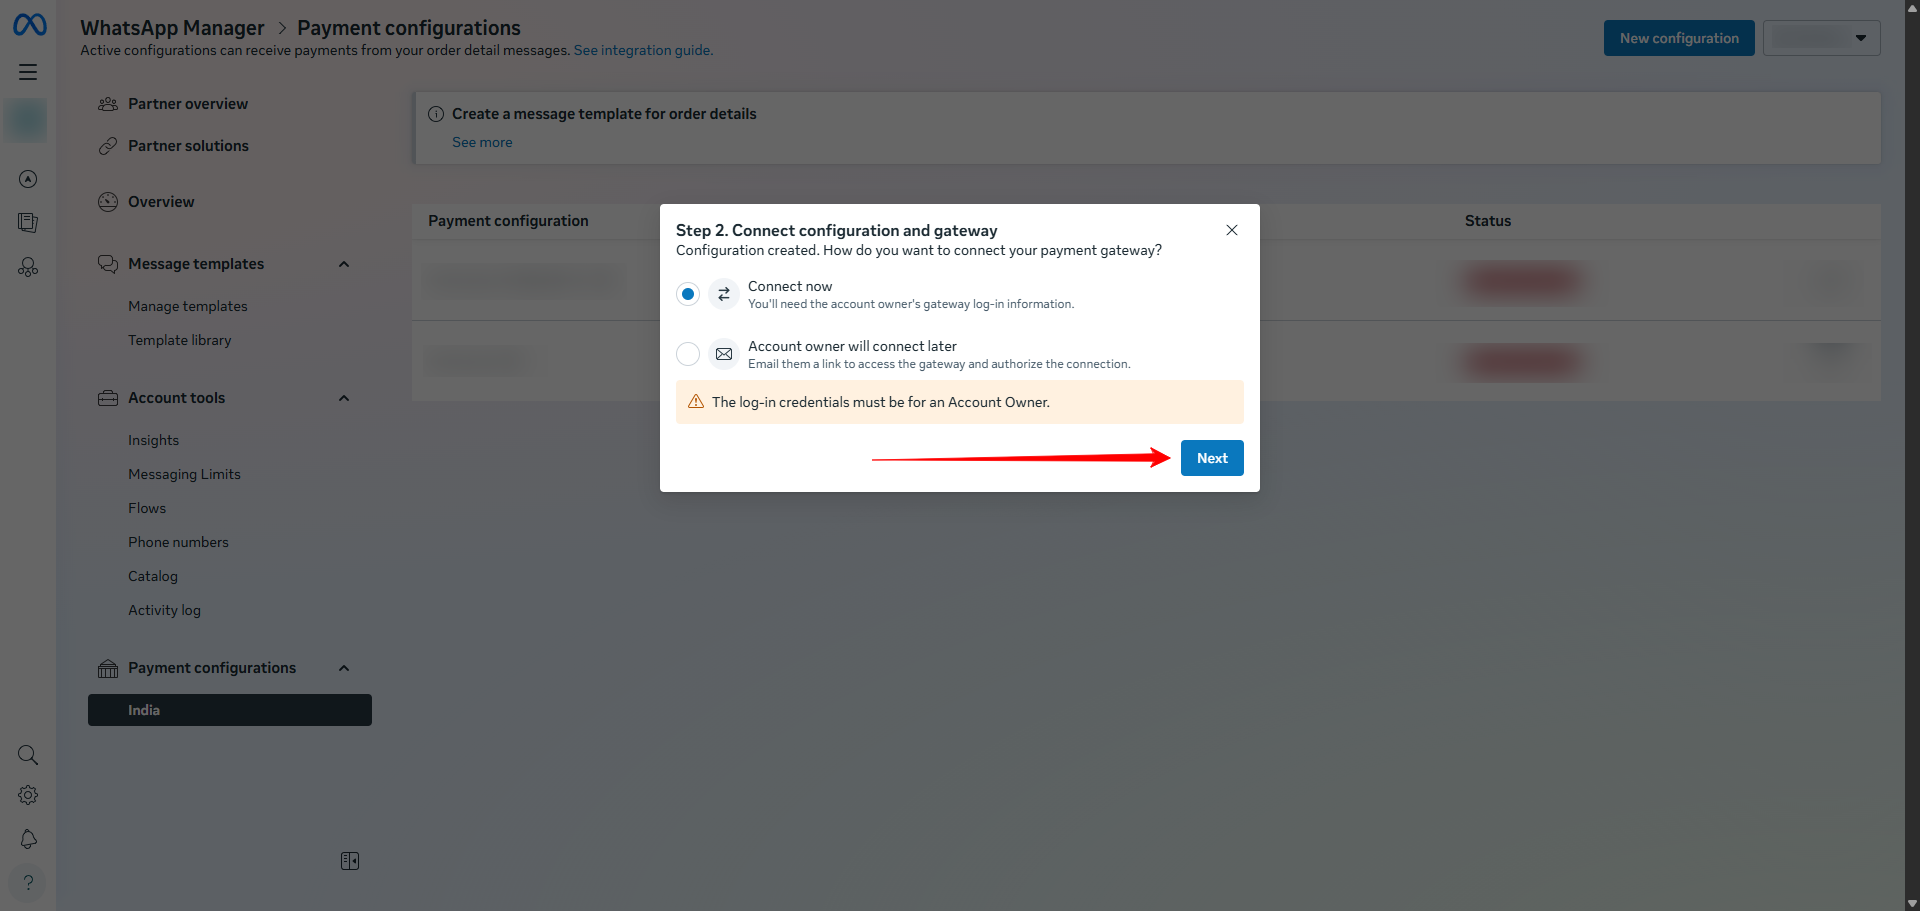
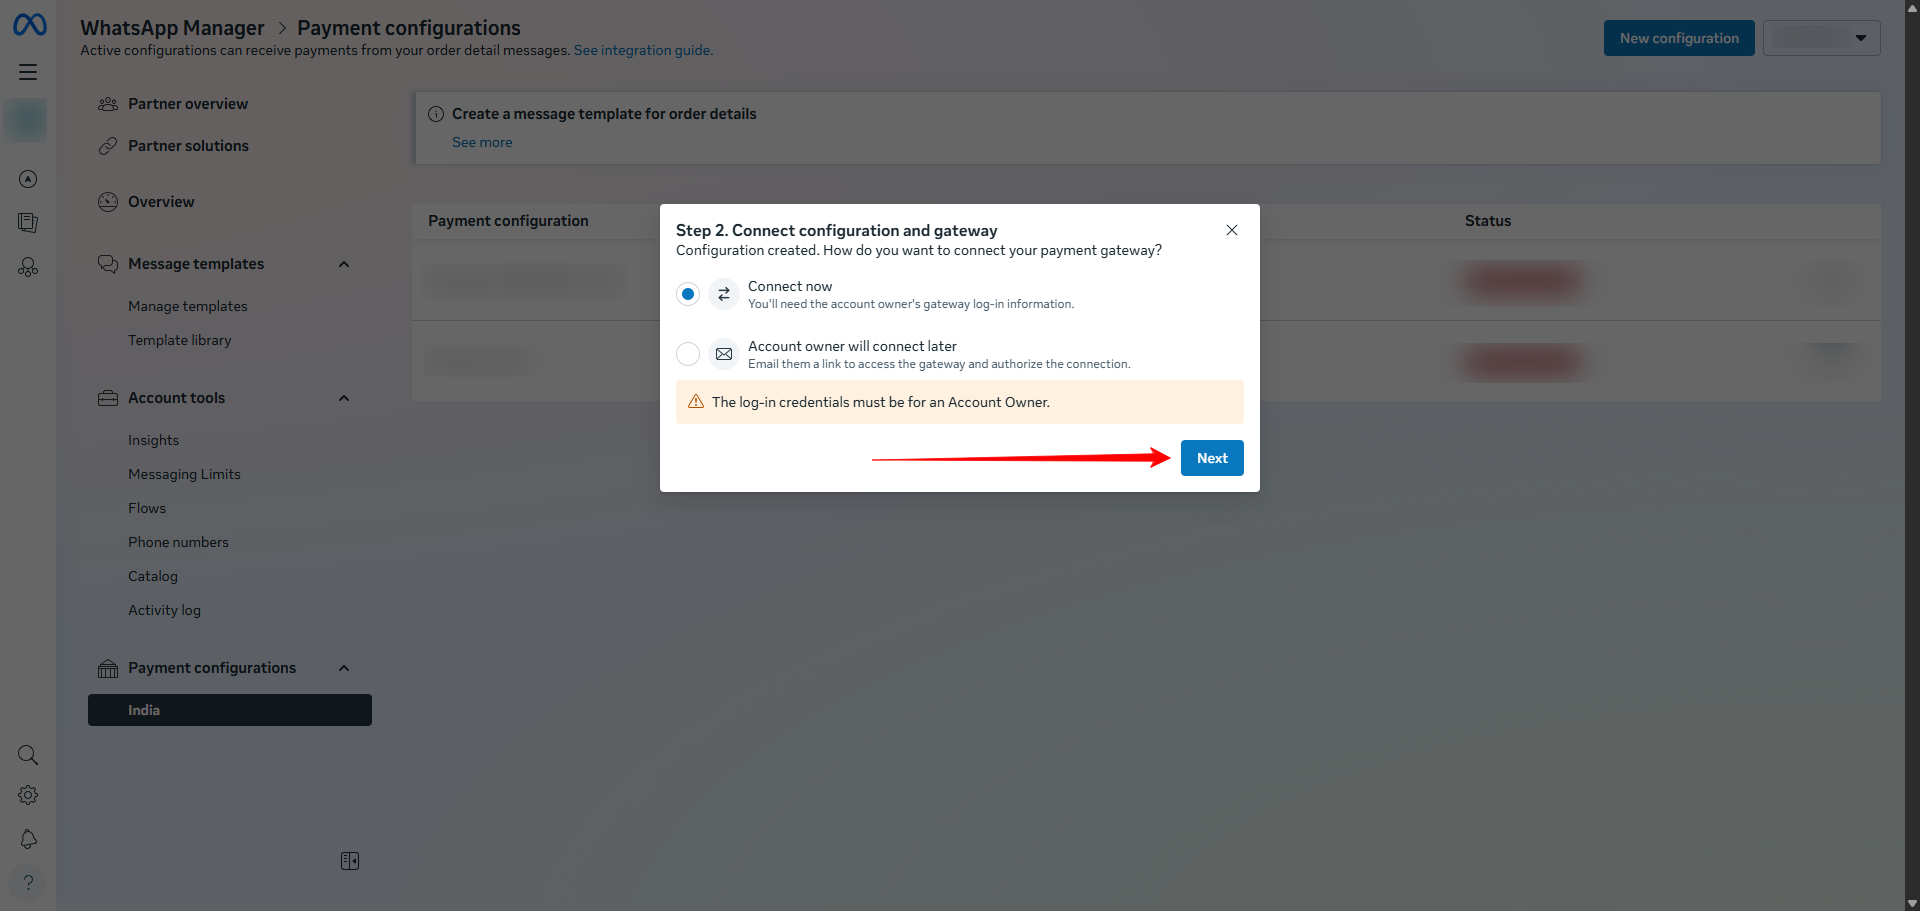
- Redirect to the Gateway and Authorize
- A popup will show “Redirecting to the selected payment gateway…”.
- Click Go Now if needed.
- Complete the authorization flow on the gateway’s website to link it with WhatsApp.
Now get back to Pabbly Chatflow Add WhatsApp Payment Drawer
If the newly added payment method doesn’t appear, use the Sync icon to refresh the list.
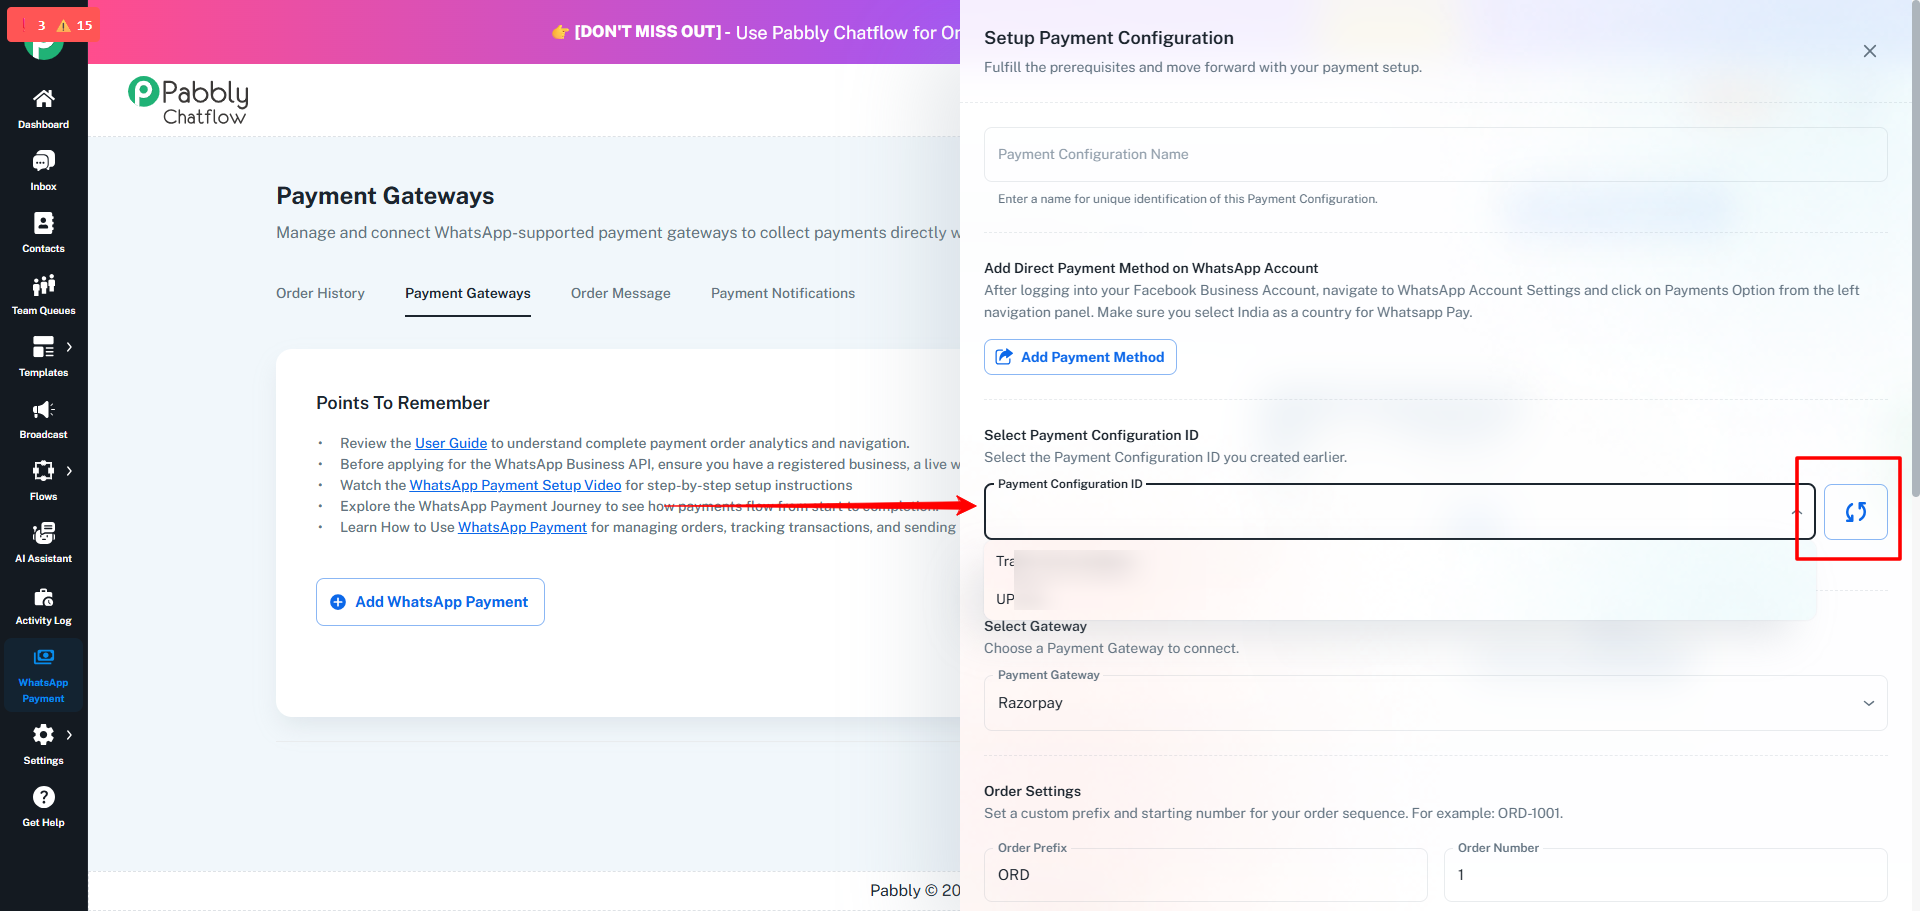
3.3 Select Payment Configuration ID
After syncing, Chatflow loads all available Payment Configuration IDs from your Meta account.
- Select the configuration ID you want to use
- If it does not appear, click Sync again
3.4 Select Payment Gateway
Currently, Chatflow supports the following payment gateways:
Select the required payment gateway from the dropdown to proceed.
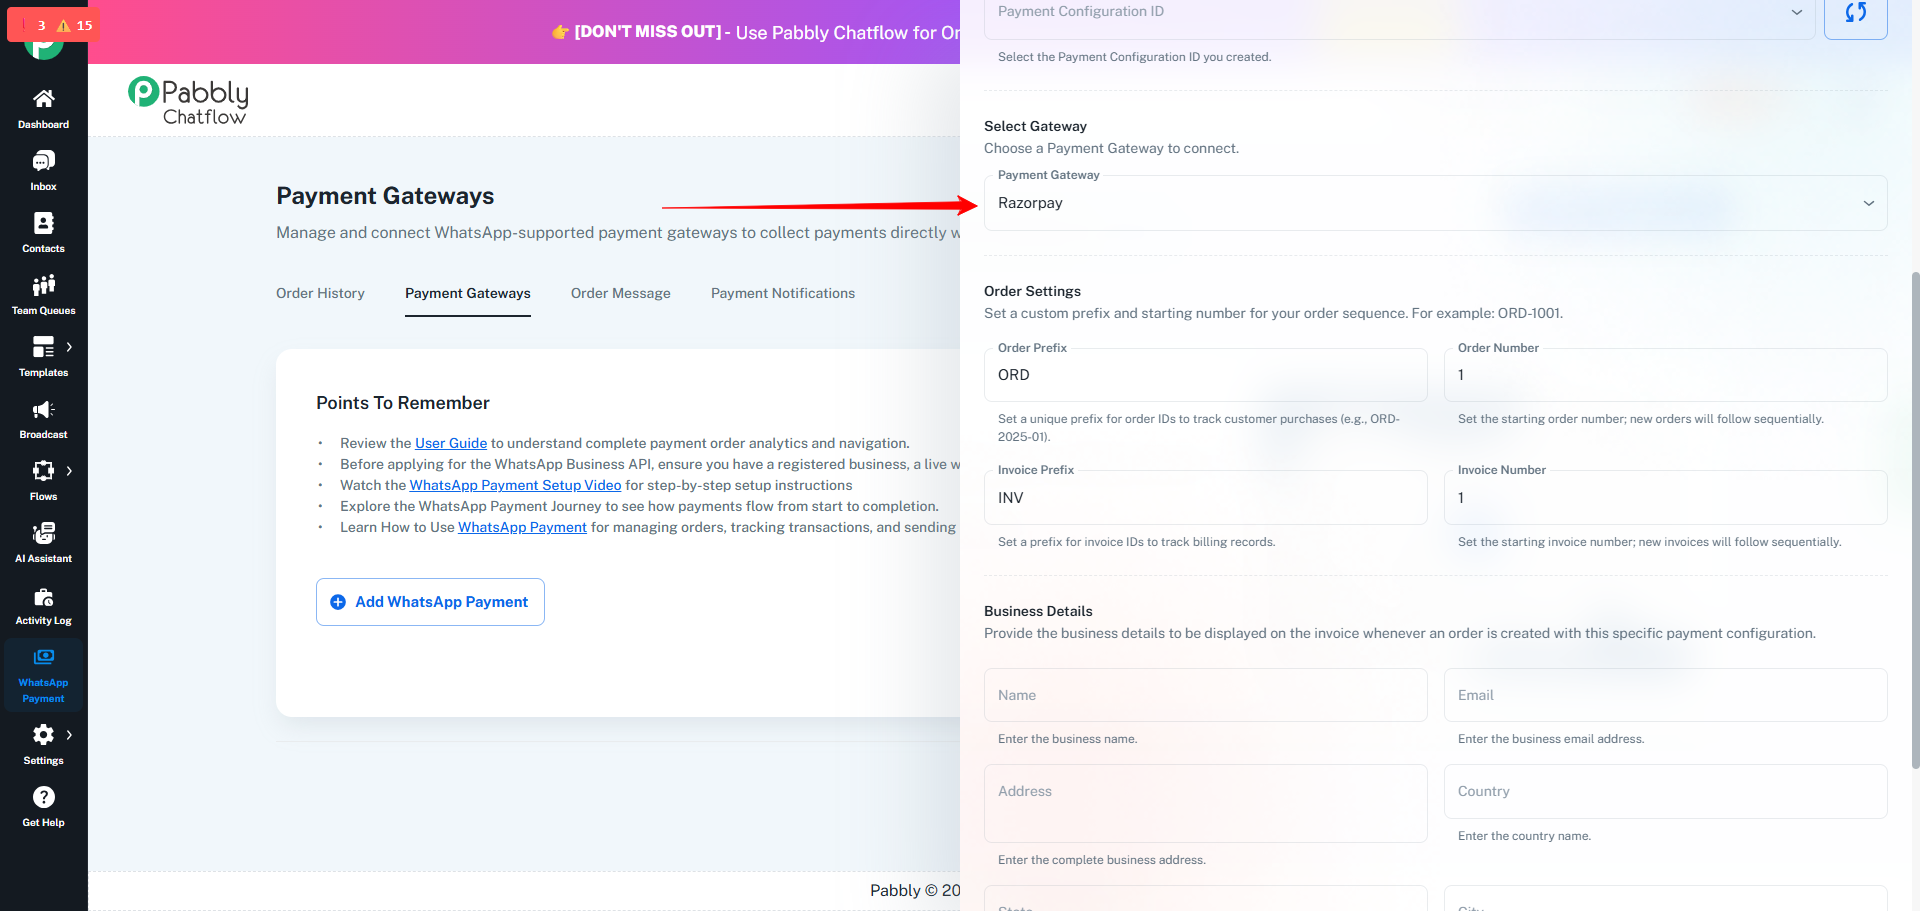 Figure 8 – Payment Gateway Dropdown
4. Order Settings
The Order Settings section determines how Chatflow generates your Order IDs and Invoice IDs for every transaction created using this payment configuration. These settings ensure that each order and invoice you generate follows a consistent, trackable, and unique numbering format.
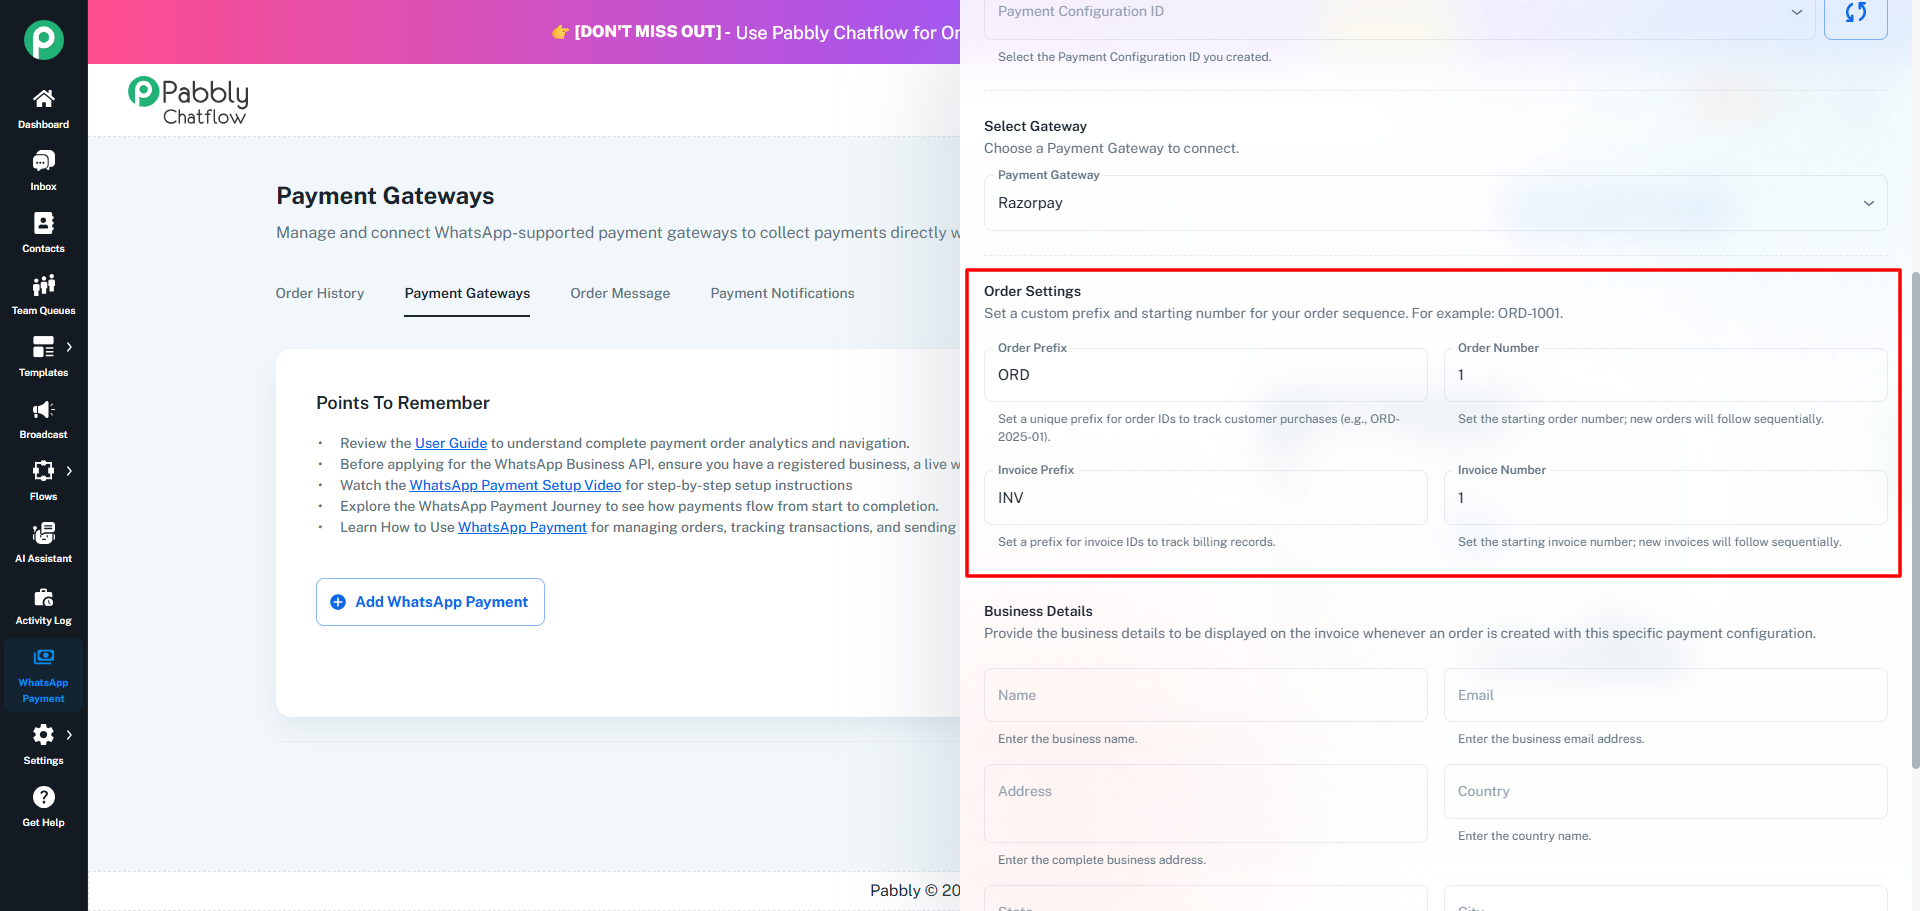
4.1 Order Prefix
The Order Prefix is the text that appears at the beginning of every Order ID.
- By default, the prefix is set to “ORD”.
- You can change this prefix according to your business requirement.
- The prefix should remain unique across all WhatsApp Payment configurations to avoid conflicts or duplicate order sequences.
Example Format:
ORD-2025-01
This prefix helps categorize and identify orders generated from a specific configuration.
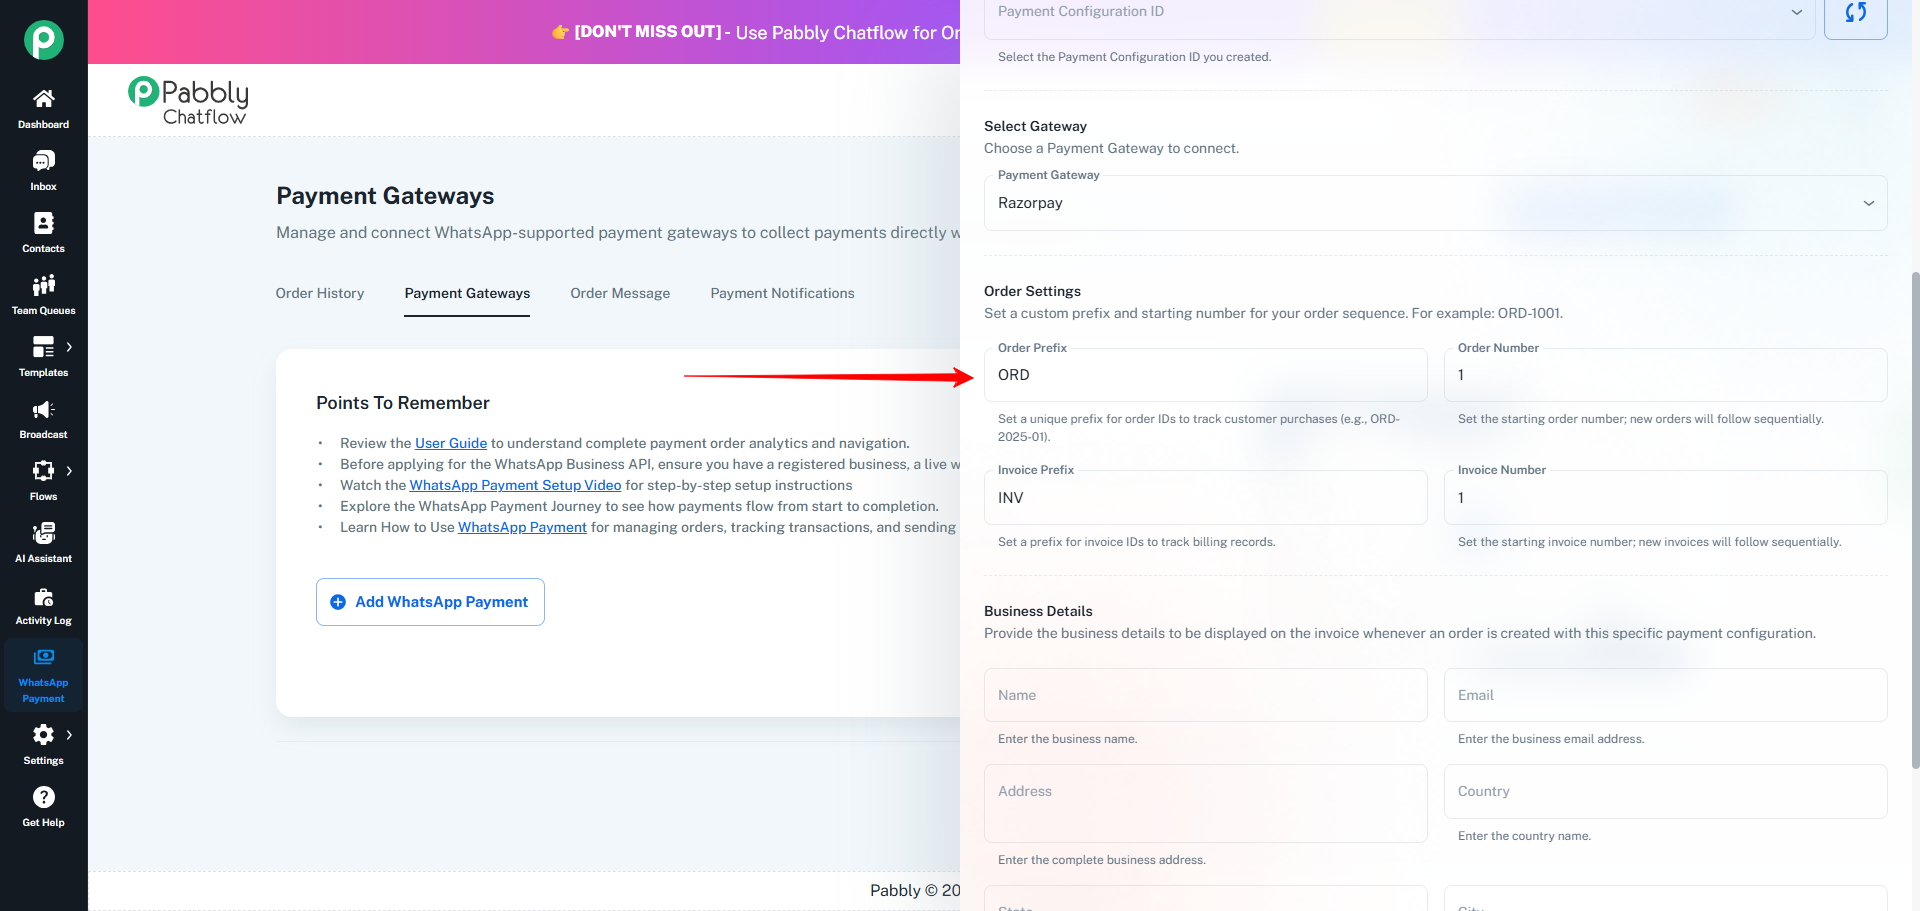
4.2 Order Number
The Order Number determines the starting point of your order sequence.
- By default, the Order Number is set to “1”.
- You can change this value if you want the sequence to start from a different number.
- This number also needs to be unique within the configuration.
Once set, Chatflow automatically increments the order number for every new order.
Example Sequence (with Prefix: ORD-2025-01):
- First Order:
ORD-2025-01-01
- Second Order:
ORD-2025-01-02
- Third Order:
ORD-2025-01-03
This sequence continues automatically without manual updates.
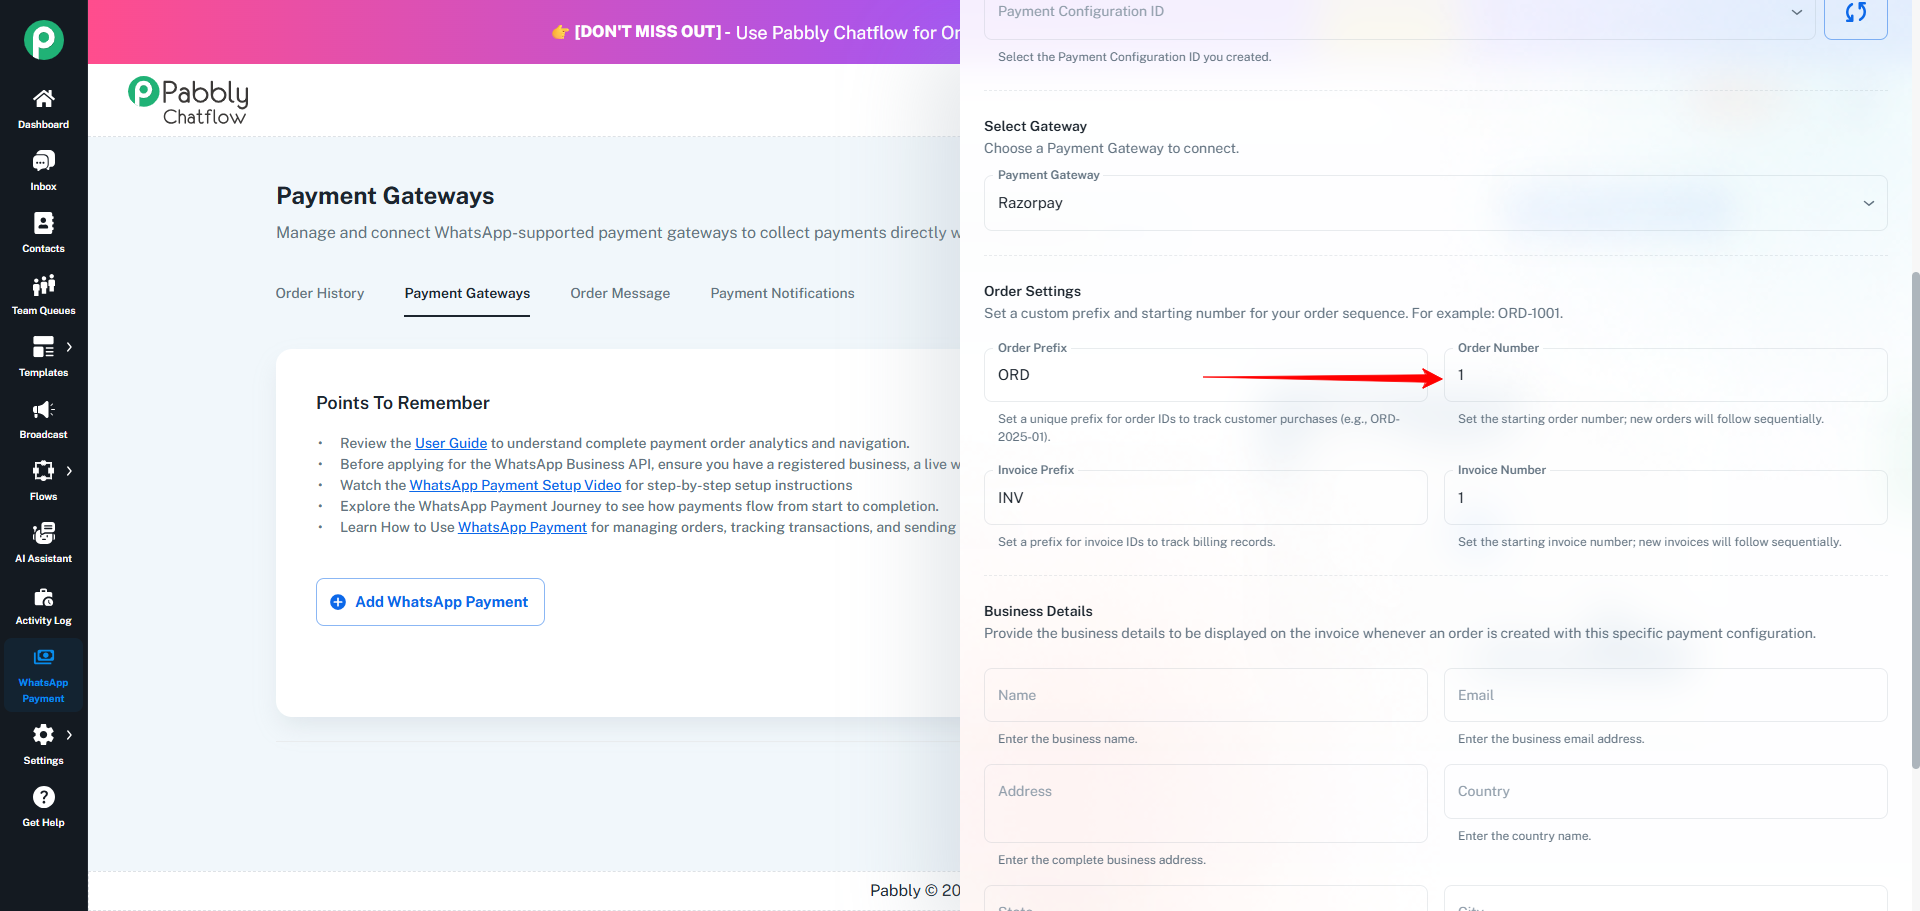
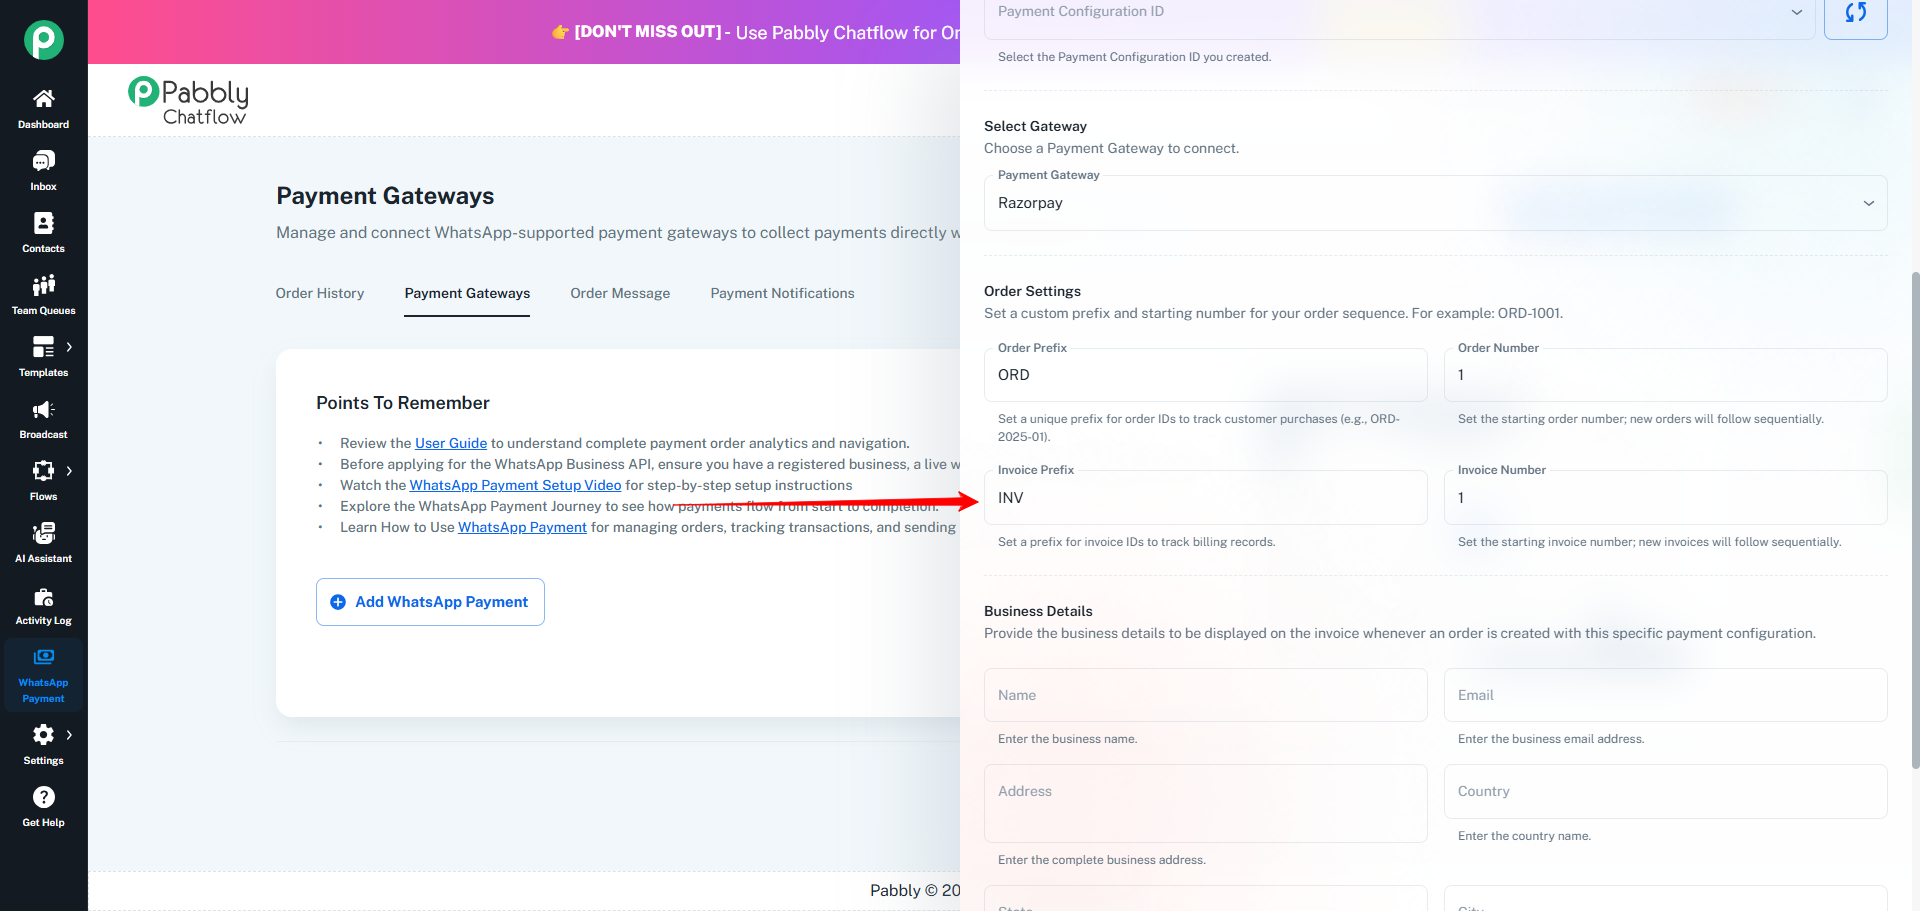
4.3 Invoice Prefix
The Invoice Prefix functions the same way as the Order Prefix, but it is used specifically for Invoice IDs.
You can choose any meaningful prefix based on your invoicing requirements.
Common Examples:
This prefix also helps in separating invoice sequences from your order sequences.
4.4 Invoice Number
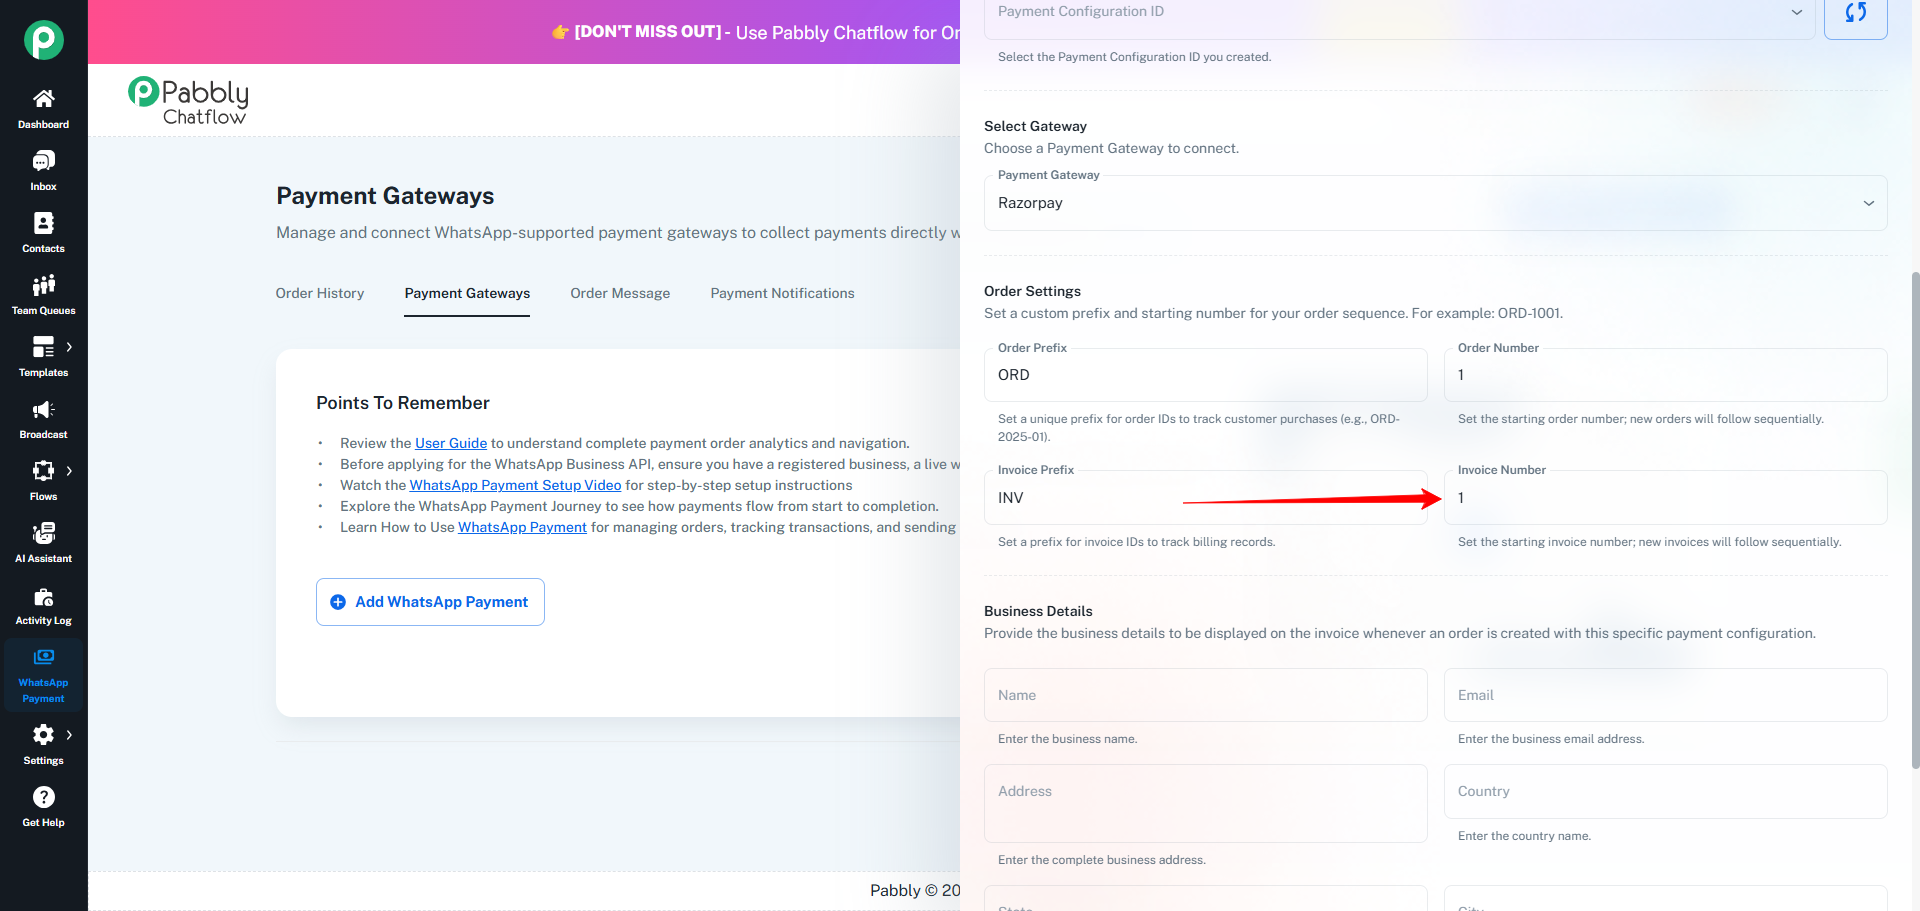
The Invoice Number acts as the starting point for your invoice sequence.
- Like the Order Number, it starts at 1 by default.
- You can modify this value based on your existing invoicing system.
- Each invoice number will automatically increment by 1 after every new invoice is generated.
Example:
- First Invoice:
INV-01
- Second Invoice:
INV-02
- Third Invoice:
INV-03
Automatic increments ensure that every invoice generated through Chatflow maintains a consistent and traceable numbering pattern.
5. Business Details
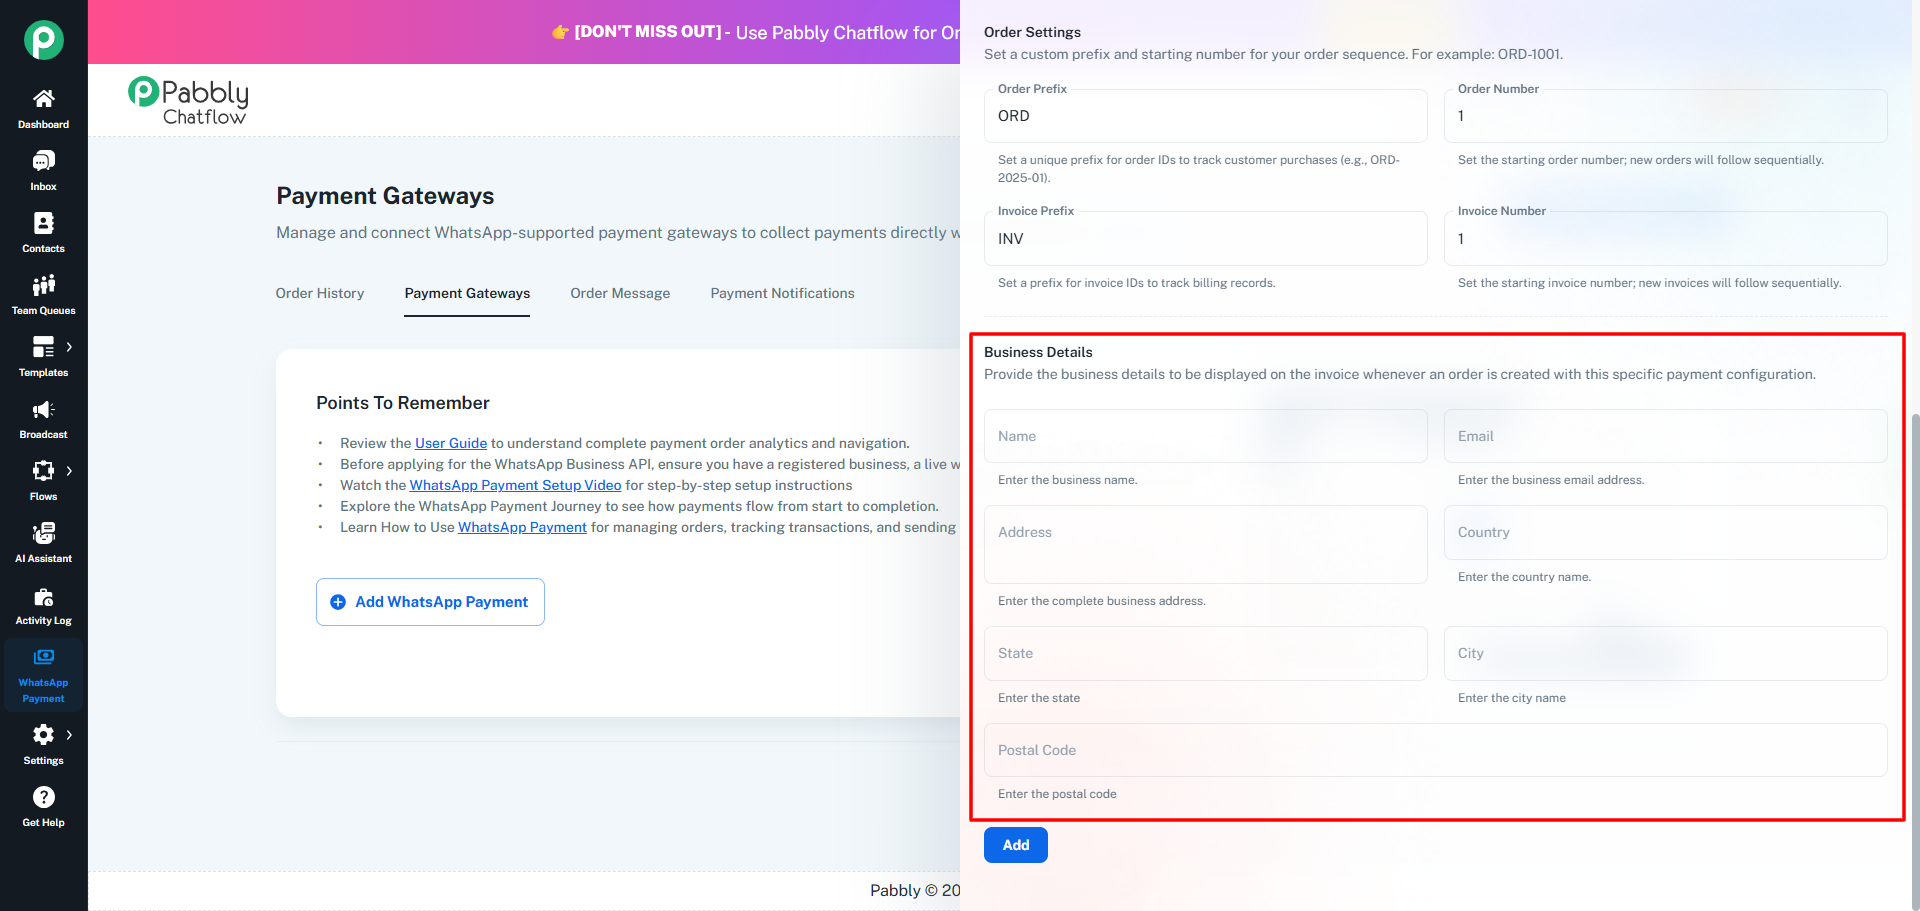
These details appear on every order receipt generated through WhatsApp.
You must enter:
- Business Name
- Business Email
- Full Address
- Country
- State
- City
- Postal Code
6. Completing the Configuration
At the bottom of the configuration drawer, the system displays a button based on whether you have previously created any Order Messages. Although the button label changes, the purpose remains the same: to save your Payment Configuration.
There are two possible button states:
Add & Next / Add
- Add & Next appears only when no Order Message template exists.
After saving the configuration, it automatically redirects you to the Add Order Messages page so first-time users can complete the remaining setup steps.
- Add appears when at least one Order Message already exists.
It saves the configuration but does not redirect, allowing you to create multiple payment configurations without leaving the page.
In both cases, the configuration is saved successfully — the only difference is whether Chatflow redirects you to the Order Messages section or remains on the same screen.