This the complete step-by-step process to edit an existing WhatsApp Payment Configuration in Pabbly Chatflow.
Editing a payment configuration allows you to update the configuration name, payment configuration ID, connected payment gateway, and order prefix settings , business details without creating a new setup.
Step 1: Open the Payment Gateways Page
- Log in to your Pabbly Chatflow account.
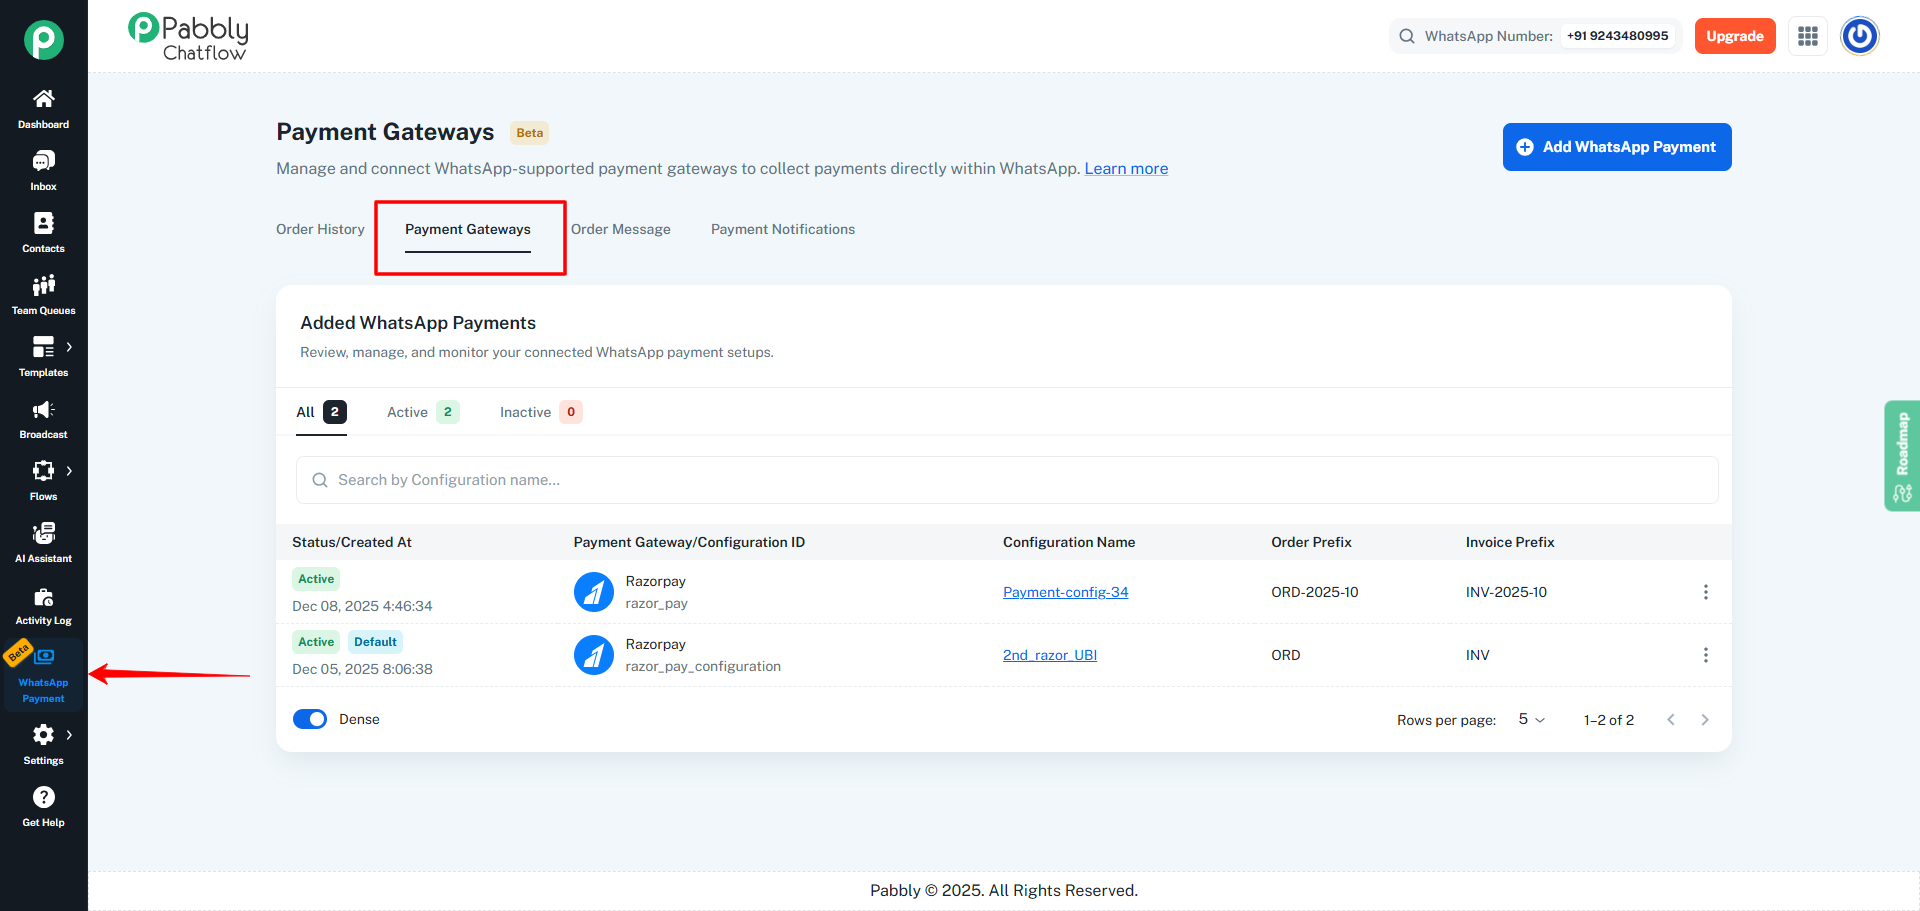
- From the left sidebar, click on WhatsApp Payment.
- On the top of the page, go to the Payment Gateways tab.
Step 2: Locate the Payment Configuration
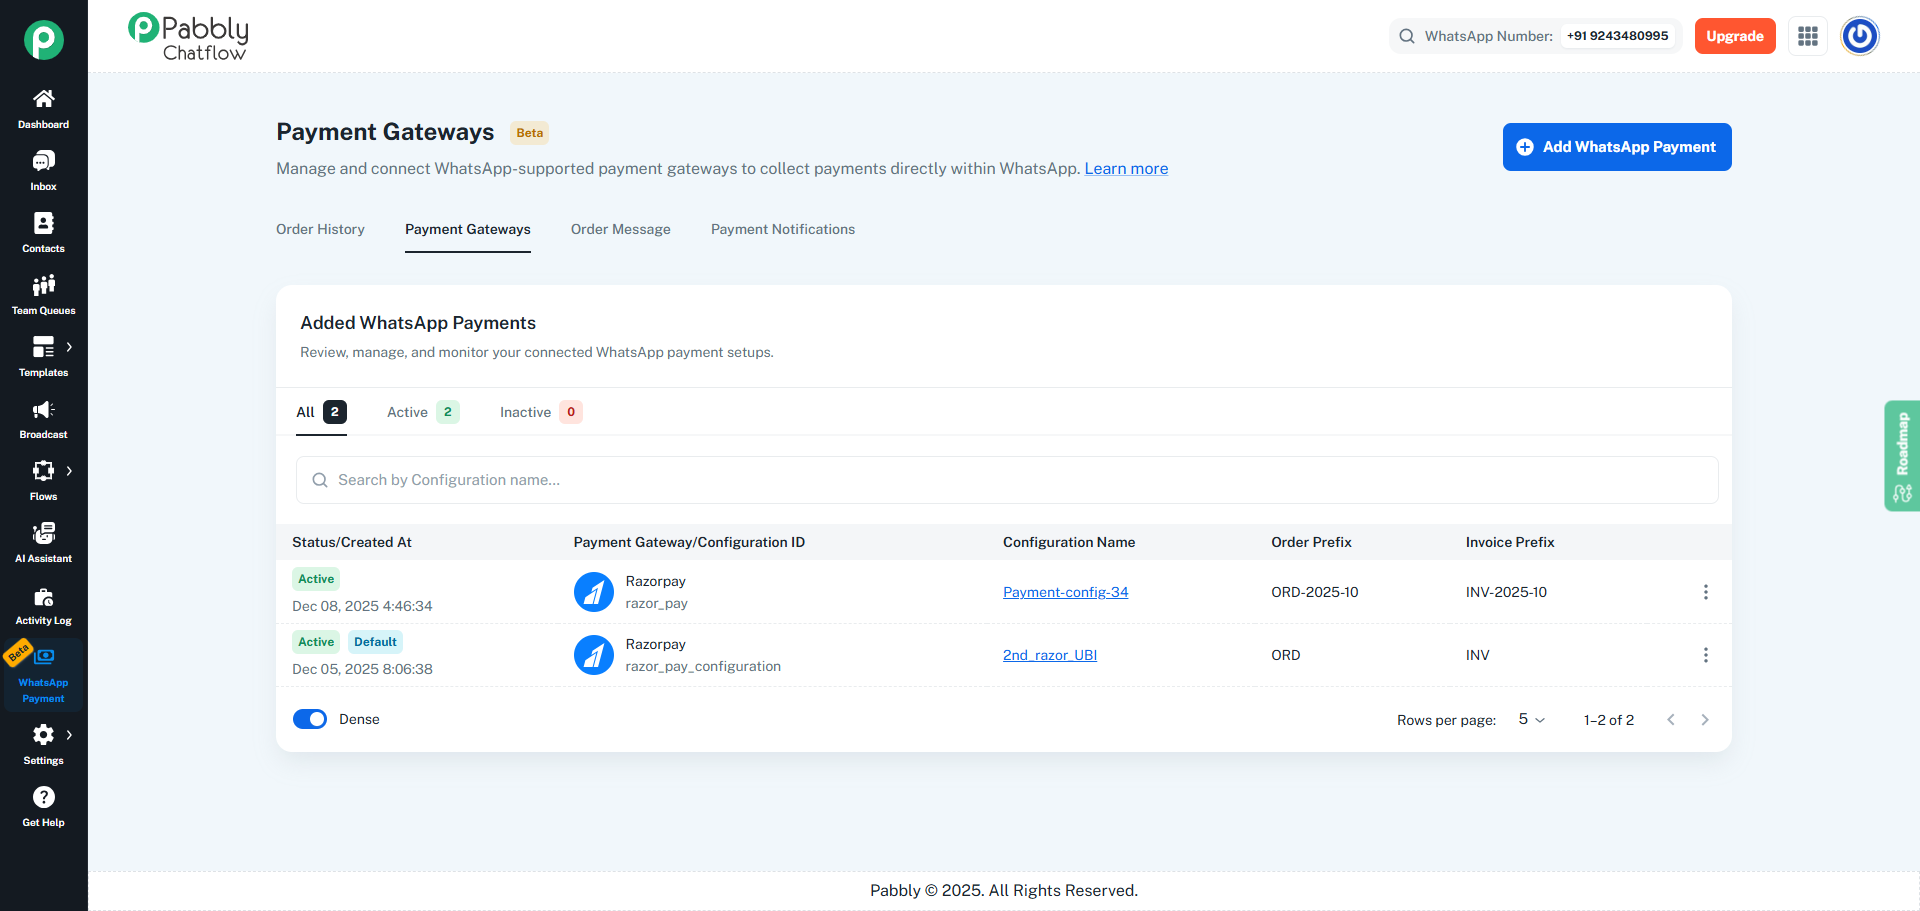
- In the Added WhatsApp Payments section, you’ll see a list of all existing payment configurations.
Step 3: Open the Edit Screen
You can open the edit screen in either of these ways:
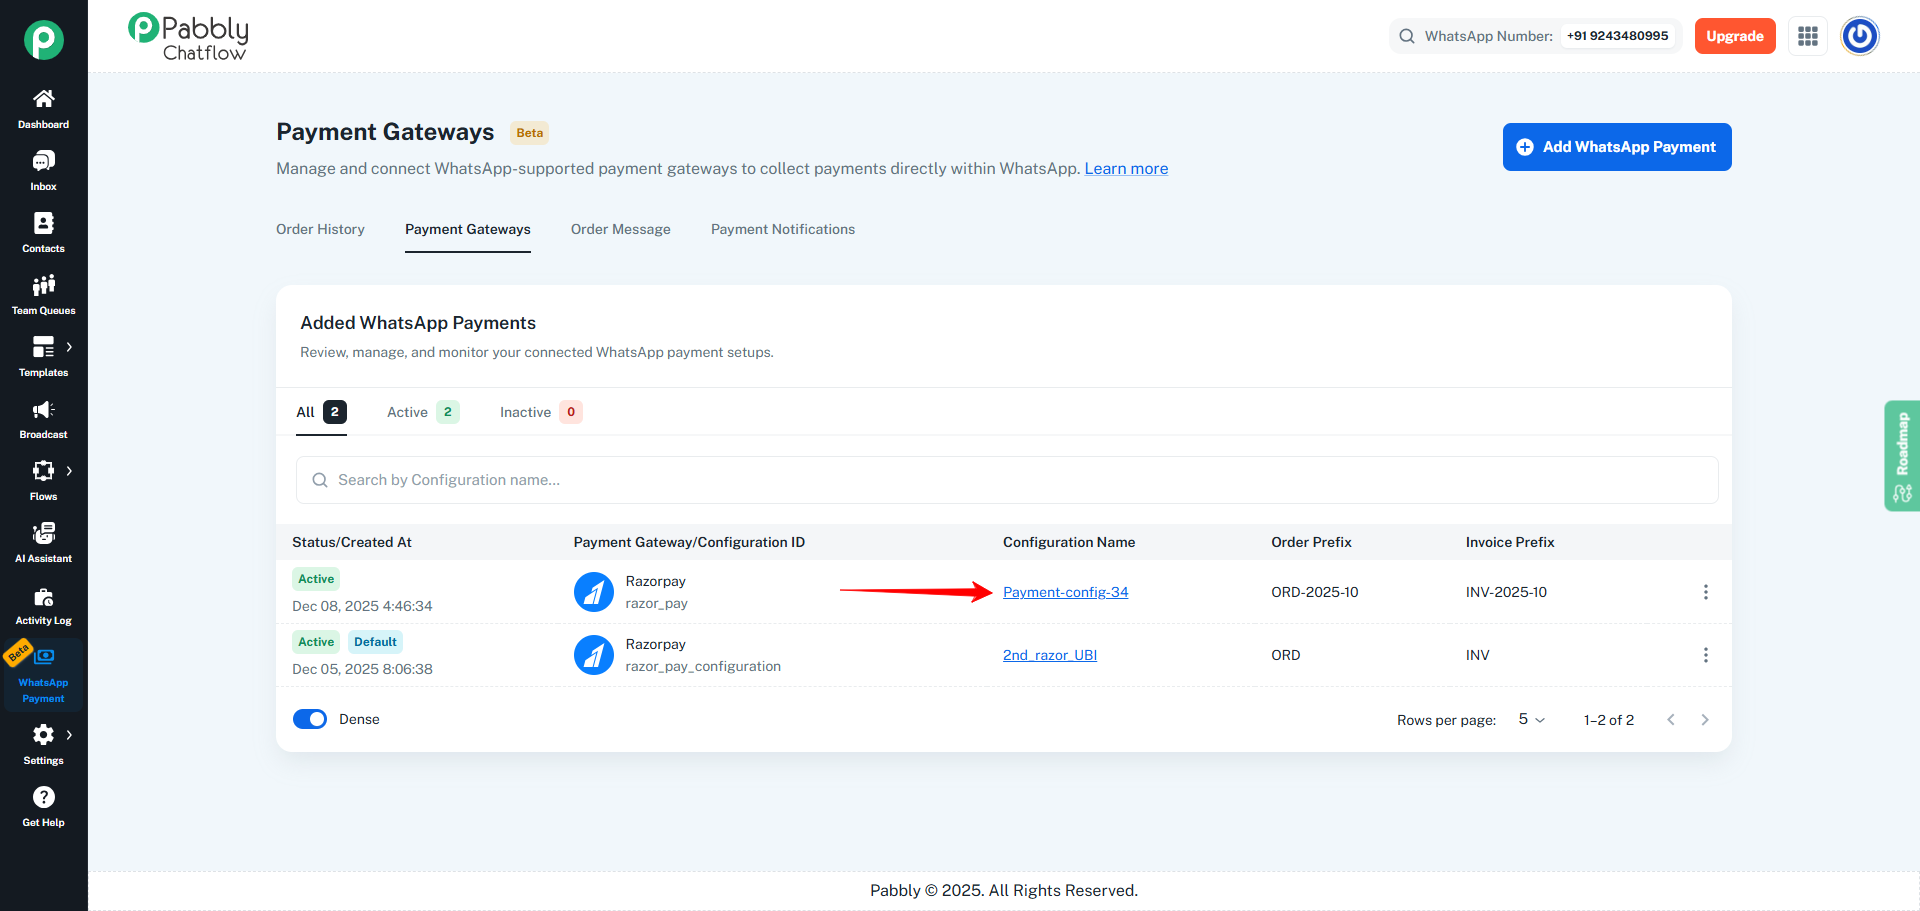
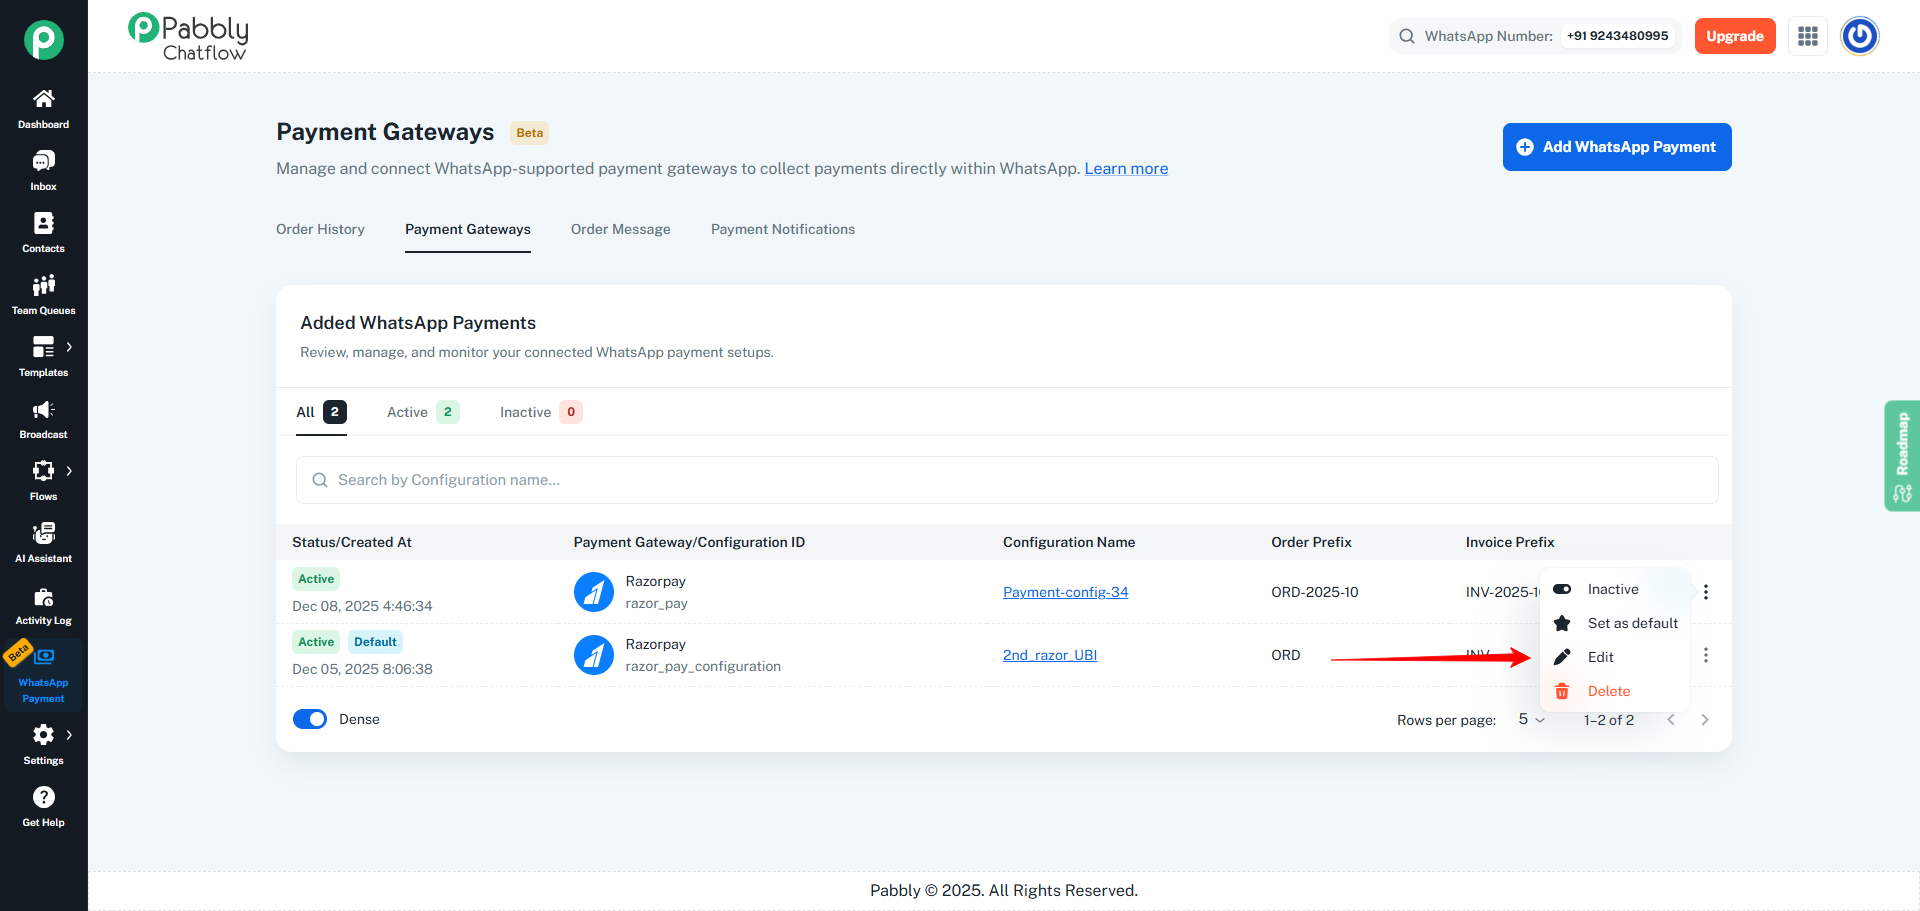
This will open the Edit Payment Configuration panel on the right side of the screen.
Step 4: Edit Basic Configuration Details
In the Edit Payment Configuration panel:
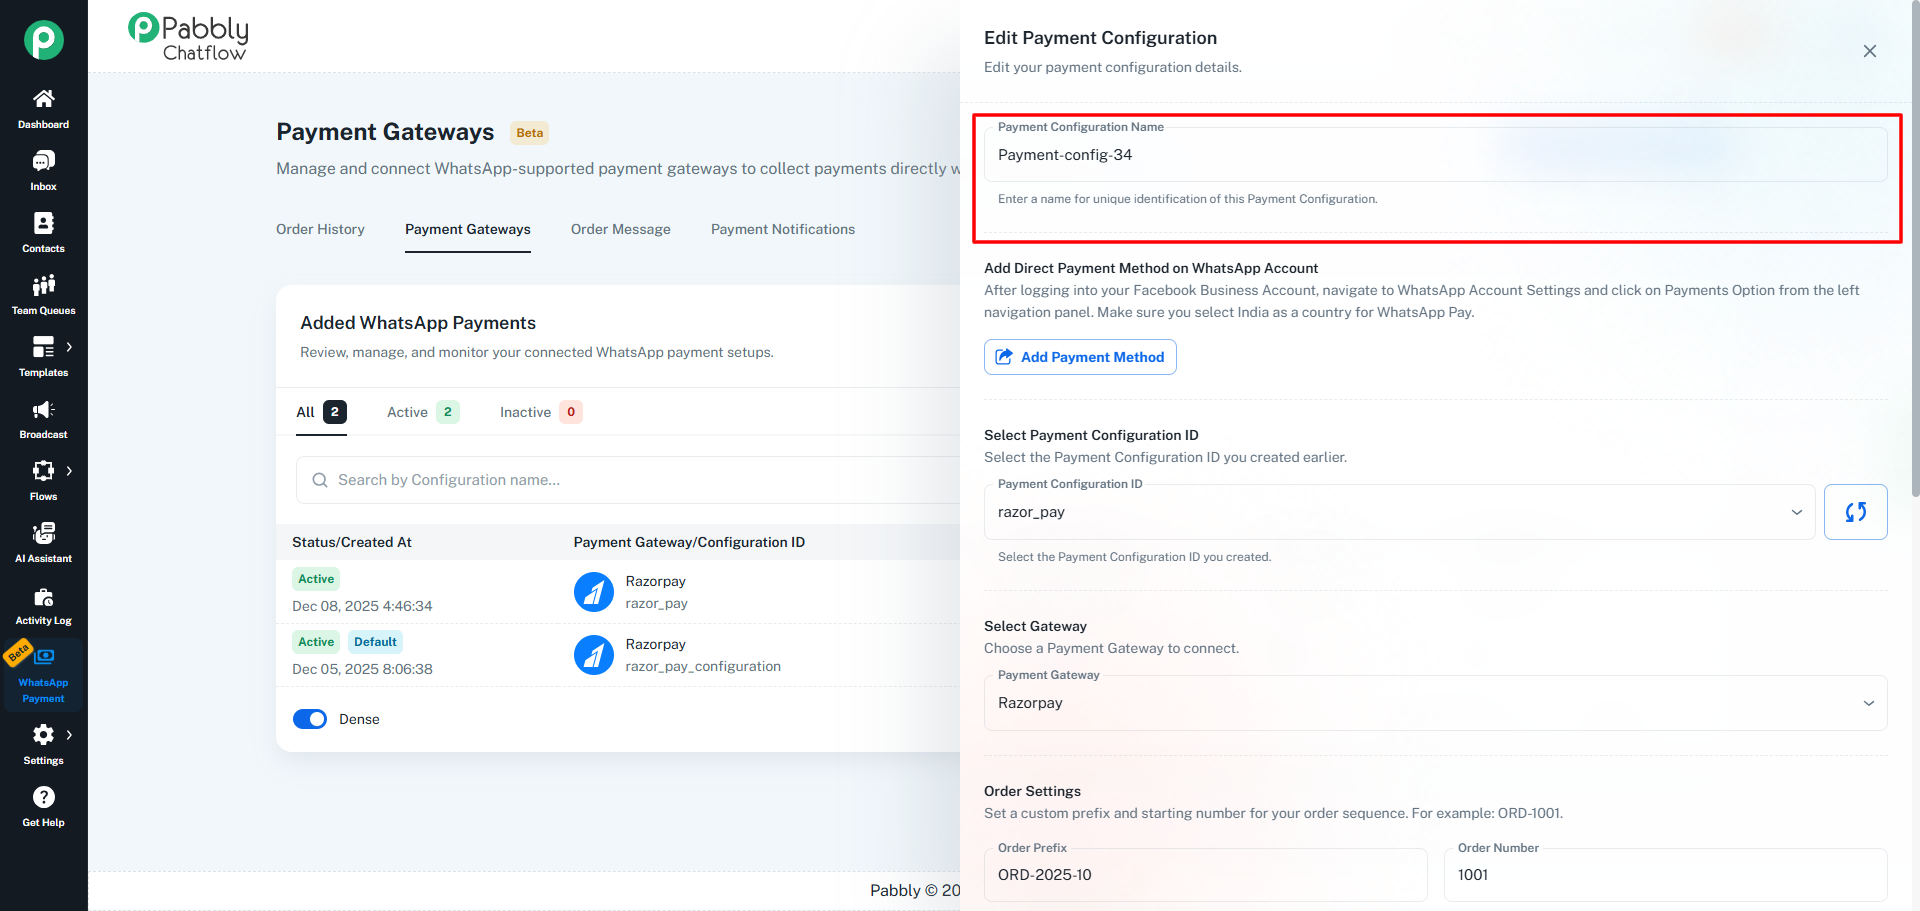
- Update the Payment Configuration Name if required.
- Enter a clear and unique name that helps you identify this configuration later.
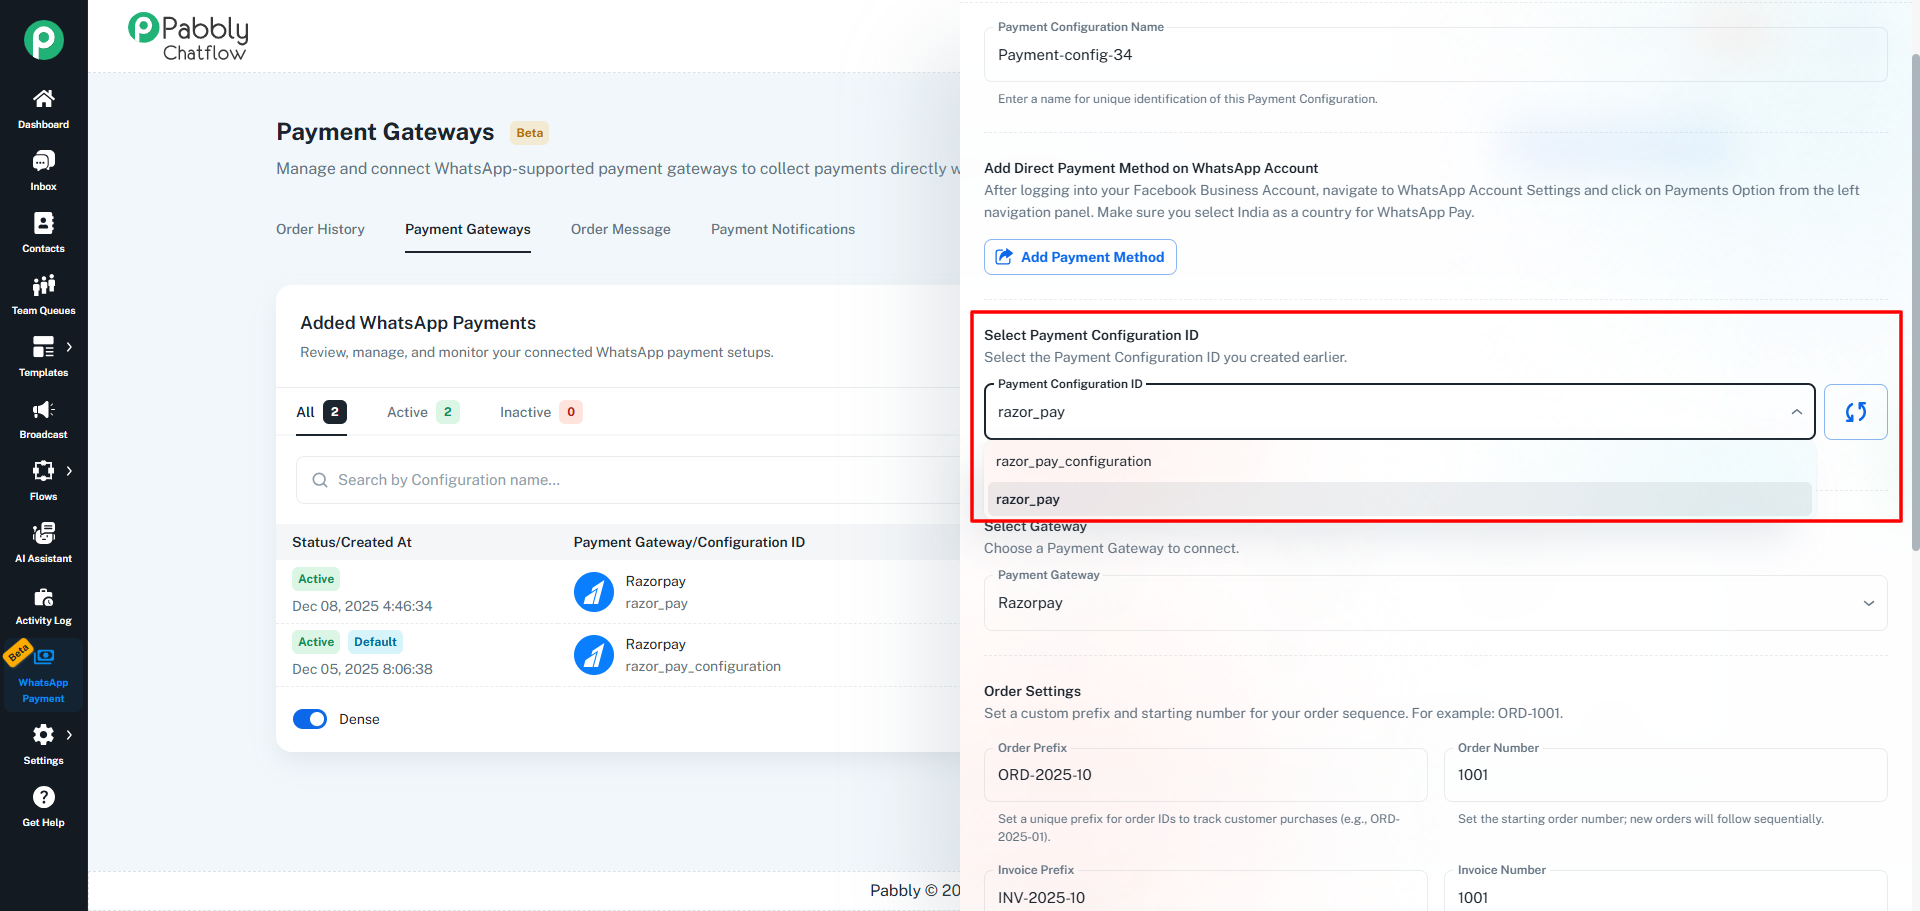
Step 5: Verify or Change the Payment Configuration ID
- Under Select Payment Configuration ID, open the dropdown.
- Select the appropriate Payment Configuration ID (e.g.,
razor_pay) that you created earlier in your WhatsApp/Facebook settings.
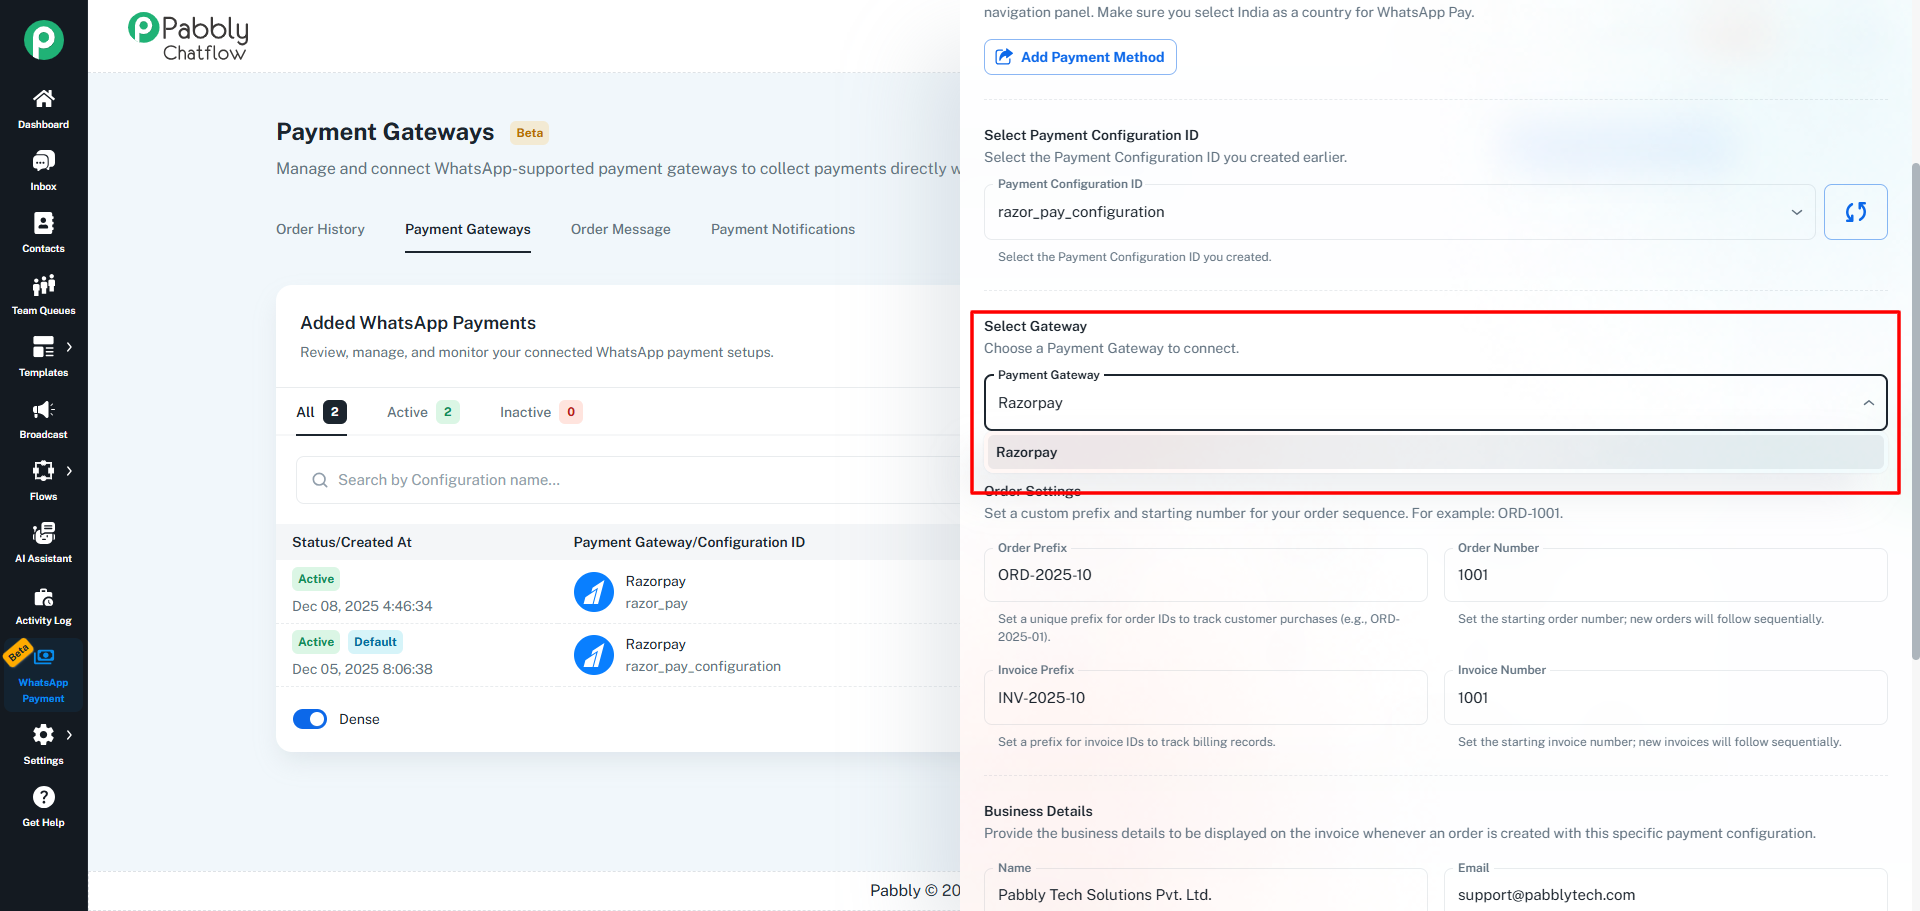
Step 6: Verify the Payment Gateway
- In the Select Gateway section as currently there is only one Payment Gateway is supported.
- Ensure the Razorpay gateway is selected for configuration.
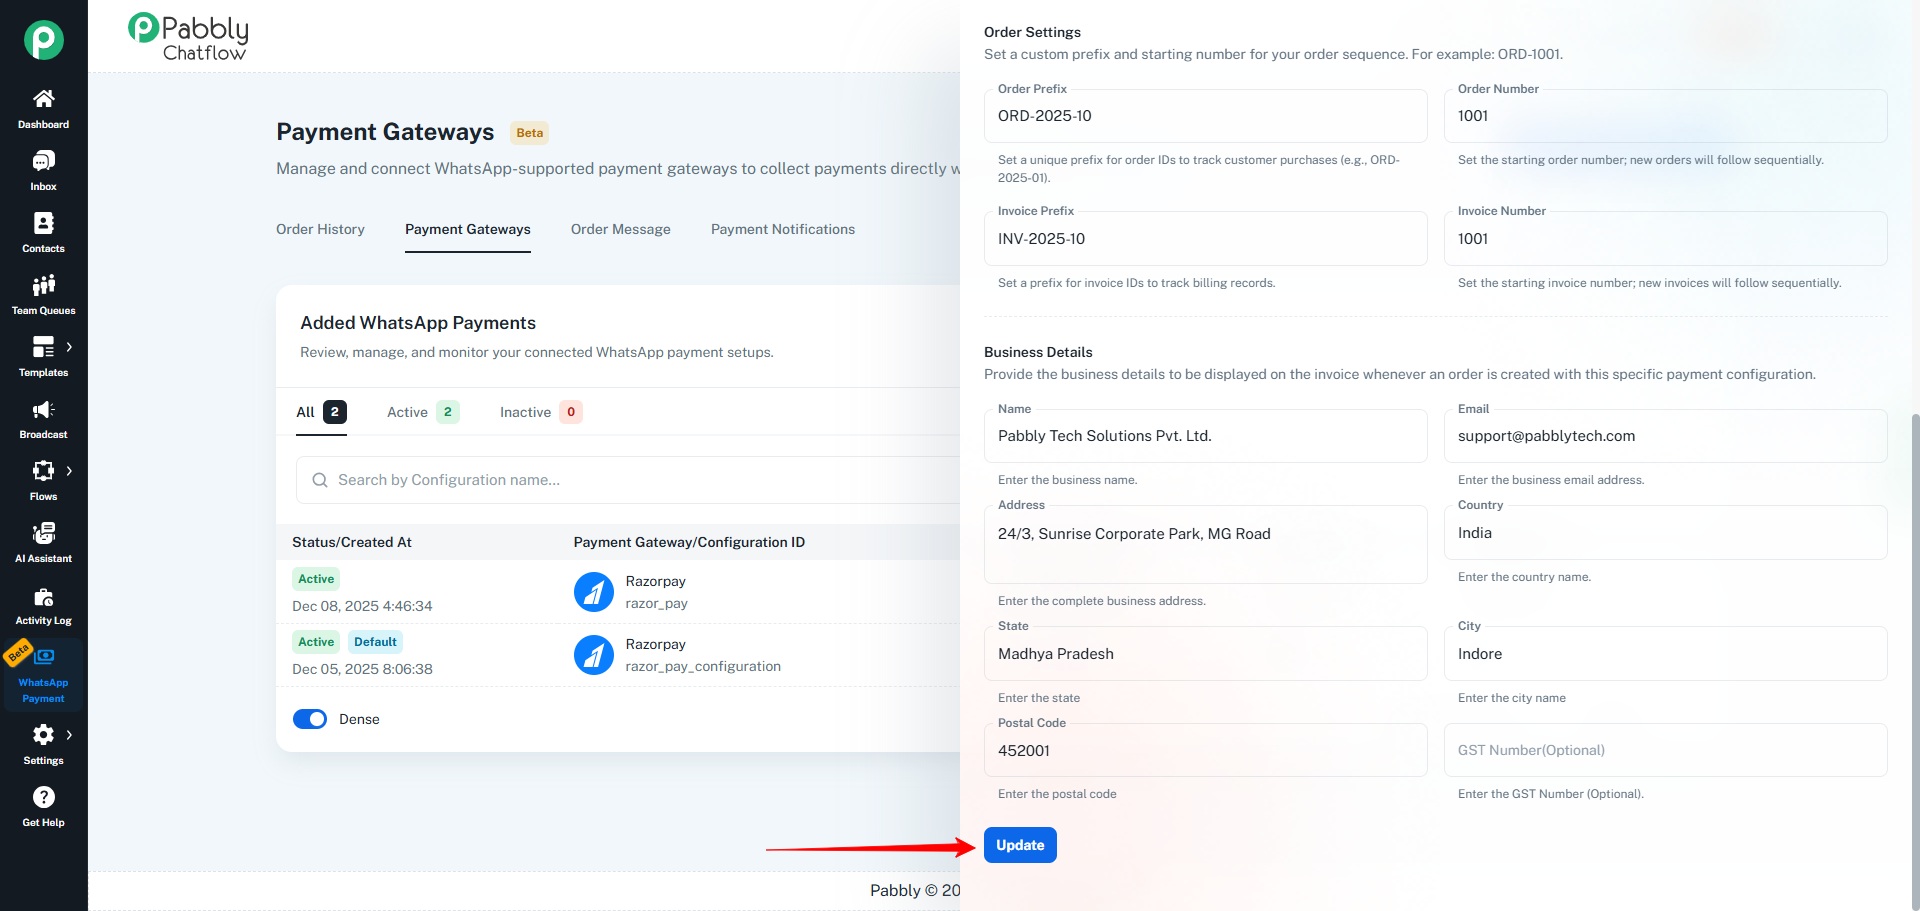
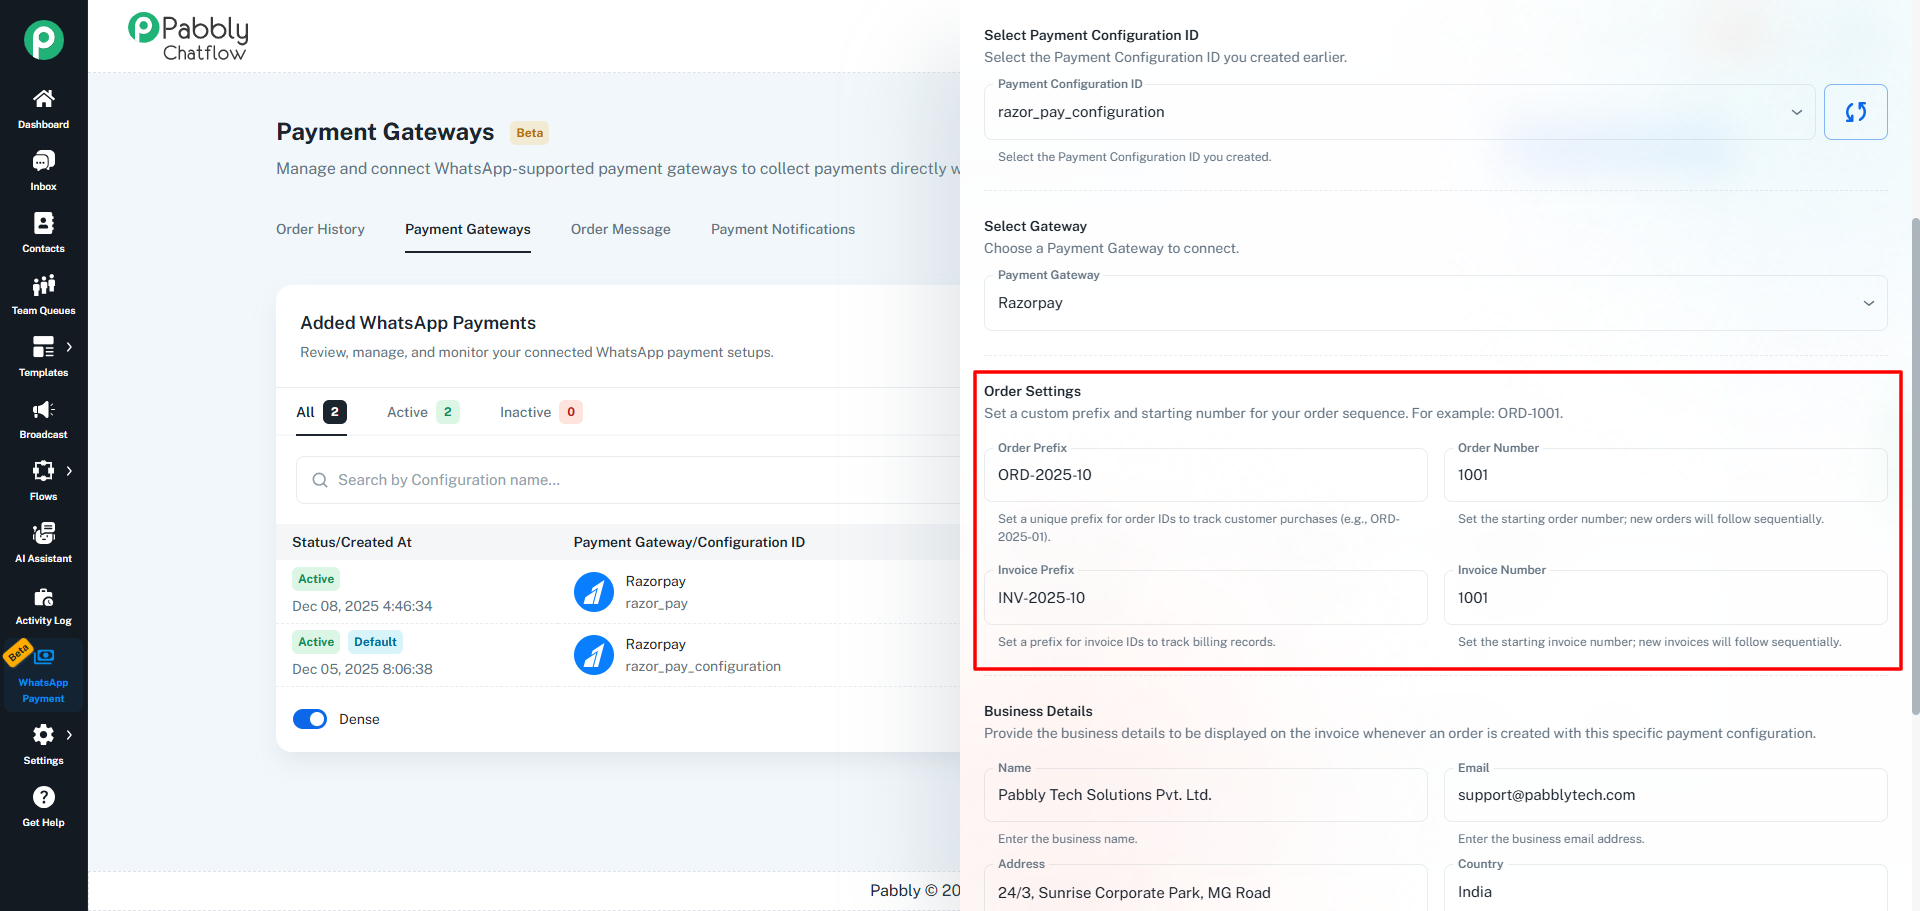
Step 7: Update Order Settings
- Scroll down to the Order Settings section.
- Review and update the following fields as needed:
- Order Prefix (e.g.,
ORD-2025-10)
- Order Number (starting sequence number for new orders)
Understanding Current Order Number & Current Invoice Number
When editing a Payment Configuration, the Order Number and Invoice Number fields shown in the Order Settings section do NOT represent the starting number anymore. Instead, these fields display the current running numbers based on how many orders and invoices have already been generated using this payment configuration.
What This Means
- These numbers are auto-updated by the system.
- They represent the latest order and invoice sequence that has already been used.
- Every new order and invoice created must always be unique, so the system automatically increments these numbers.
Example Scenario for Better Understanding
Let’s assume the following setup when you initially created the payment configuration:
- Order Prefix:
ORD-2025
- Starting Order Number:
10
- Invoice Prefix:
INV-2025
- Starting Invoice Number:
10
Now, if you create 50 orders using this same payment configuration:
- The order numbers will be generated sequentially:
- ORD-2025-10
- ORD-2025-11
- ORD-2025-12
- ...
- ORD-2025-59
- Similarly, invoice numbers will also increment:
- INV-2025-10
- INV-2025-11
- ...
- INV-2025-59
What You See While Editing the Configuration
When you later open this same Payment Configuration in Edit Mode, you will:
- NOT see
10 again.
- Instead, you will see:
- Order Number:
59 (or the last used number)
- Invoice Number:
59
This indicates that:
- 59 orders and invoices have already been created, and
- The next new order will automatically start from
60.
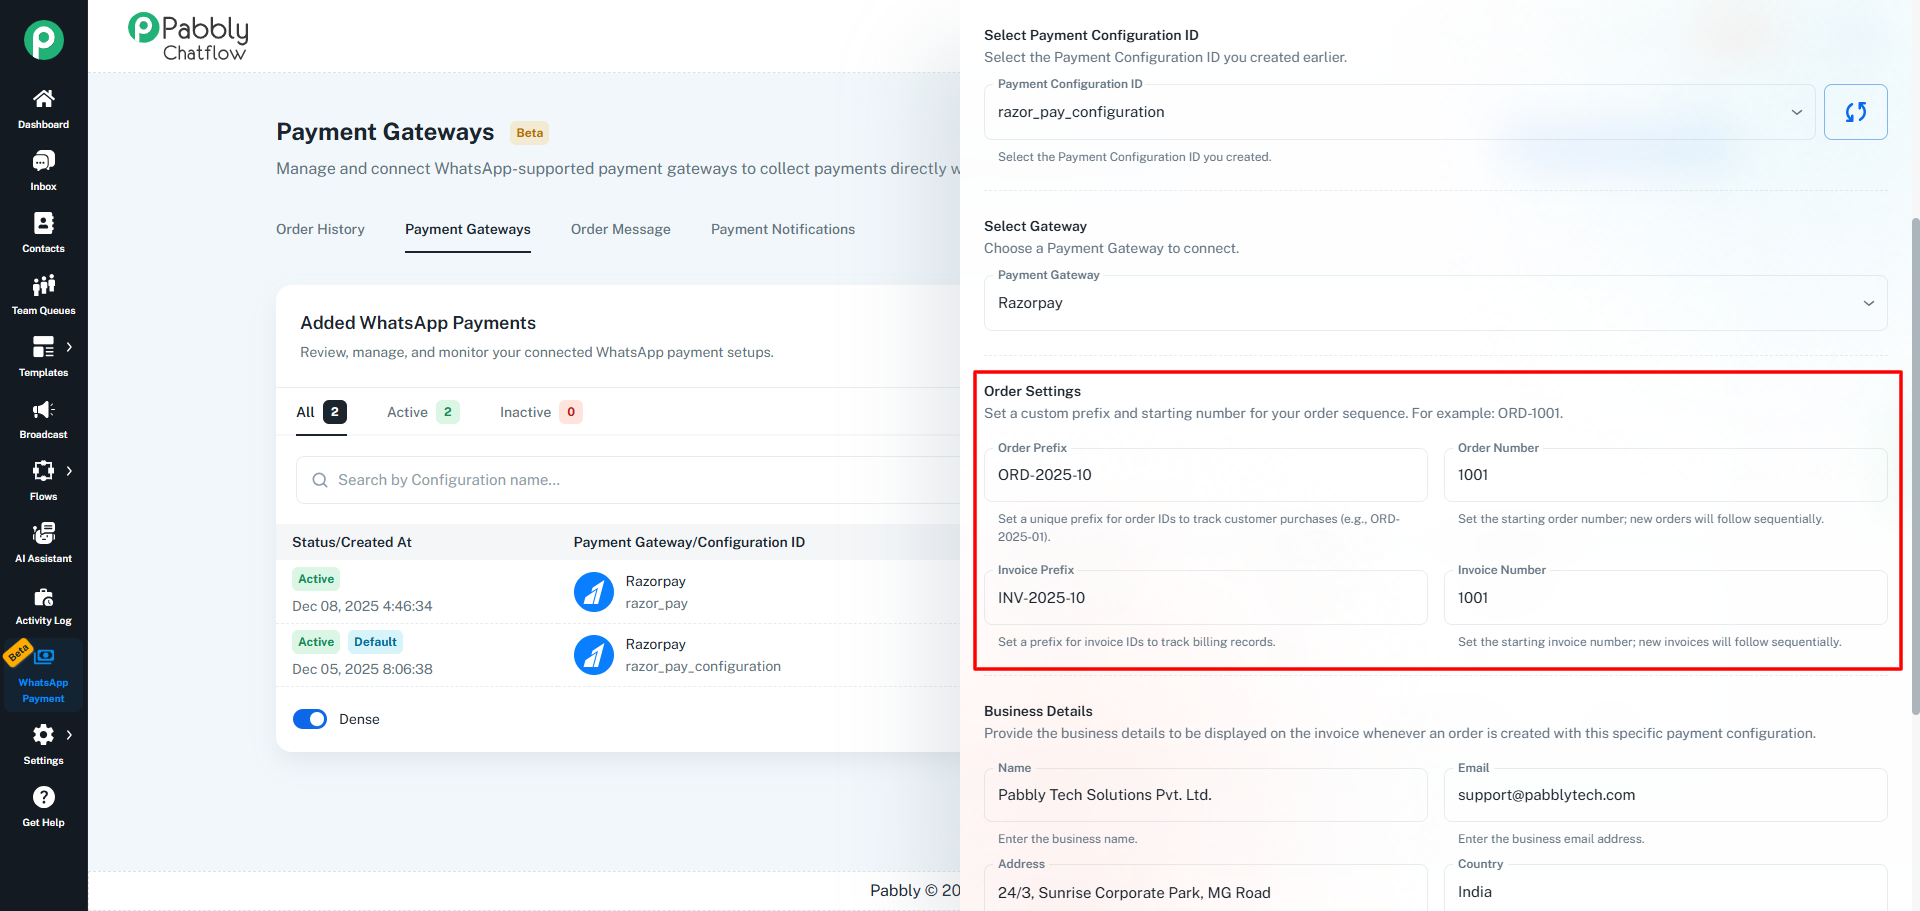
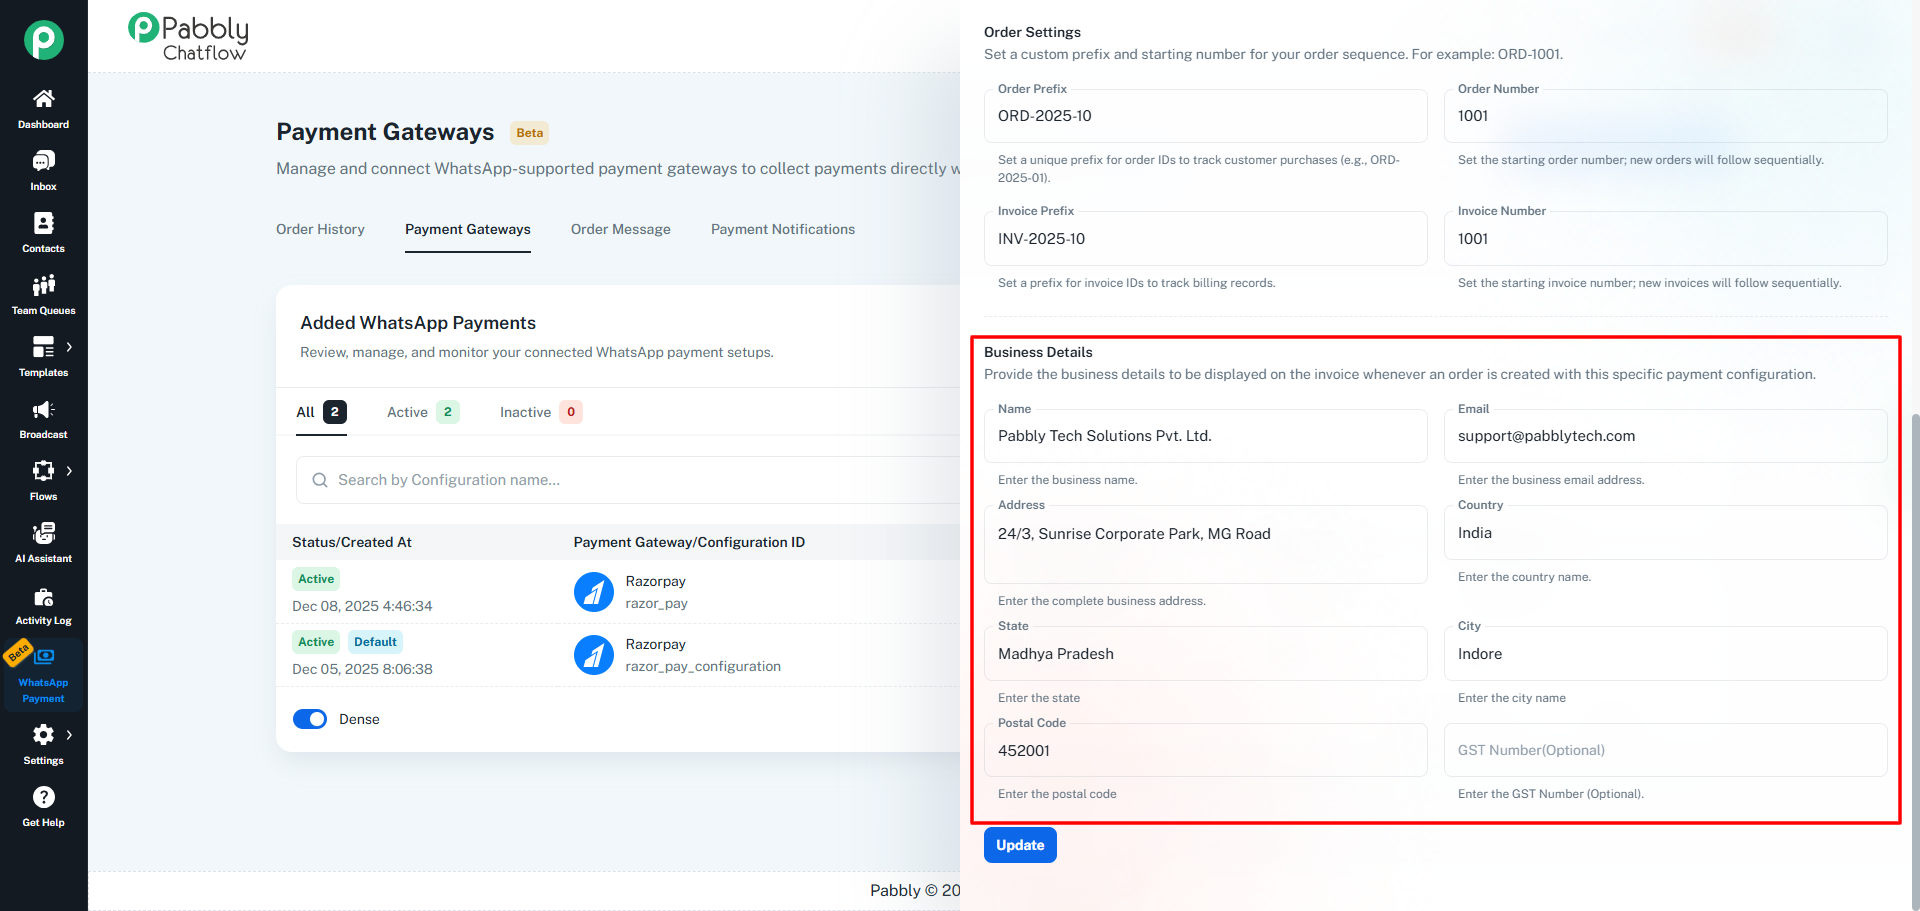
Scroll further down to the Business Details section.
These details are used to display your business information on order receipt generated through this Payment Configuration.
Fill in or update the following fields:
- Business Name
- Business Email
- Business Address
- Country
- State
- City
- Postal Code
- GST Number (Optional)
These details will be automatically printed on every order receipt generated using this payment configuration.
Step 9: Save the Changes
- After making all required updates, scroll to the bottom of the panel.
- Click Update to apply the changes.
Your payment configuration is now successfully updated and will be used for new WhatsApp payment orders based on this setup.