Getting Started
 Pabbly Studio Team•Updated Oct 1, 2026•3 min read
Pabbly Studio builds a complete web app from a simple description of what you need. You write what the app should do, and Pabbly Studio designs it, builds it and puts it live on its own link. This usually takes just a few minutes. You do not need to write any code.
This guide walks you through creating your first app, from signing in to seeing it live.
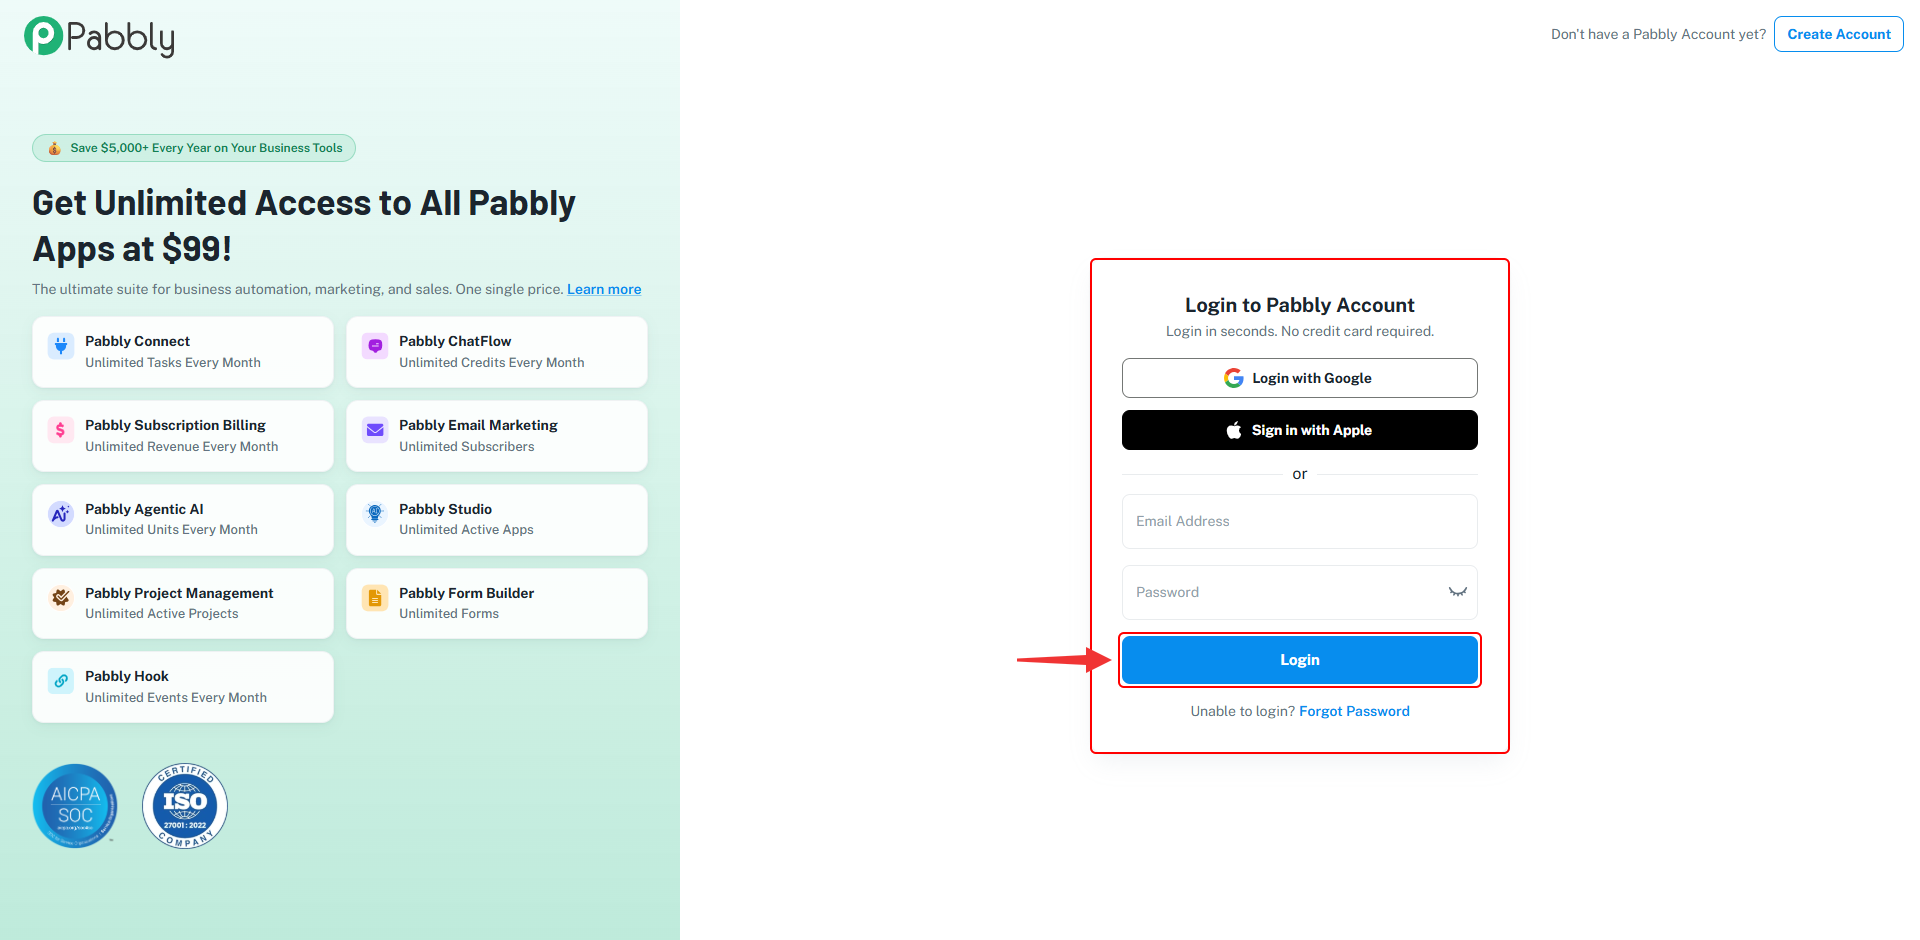
1. Log in to your Pabbly account from here - https://accounts.pabbly.com/login
Sign in with Google, Apple, or your email address and password. If you do not have a Pabbly account yet, click Create Account at the top right.
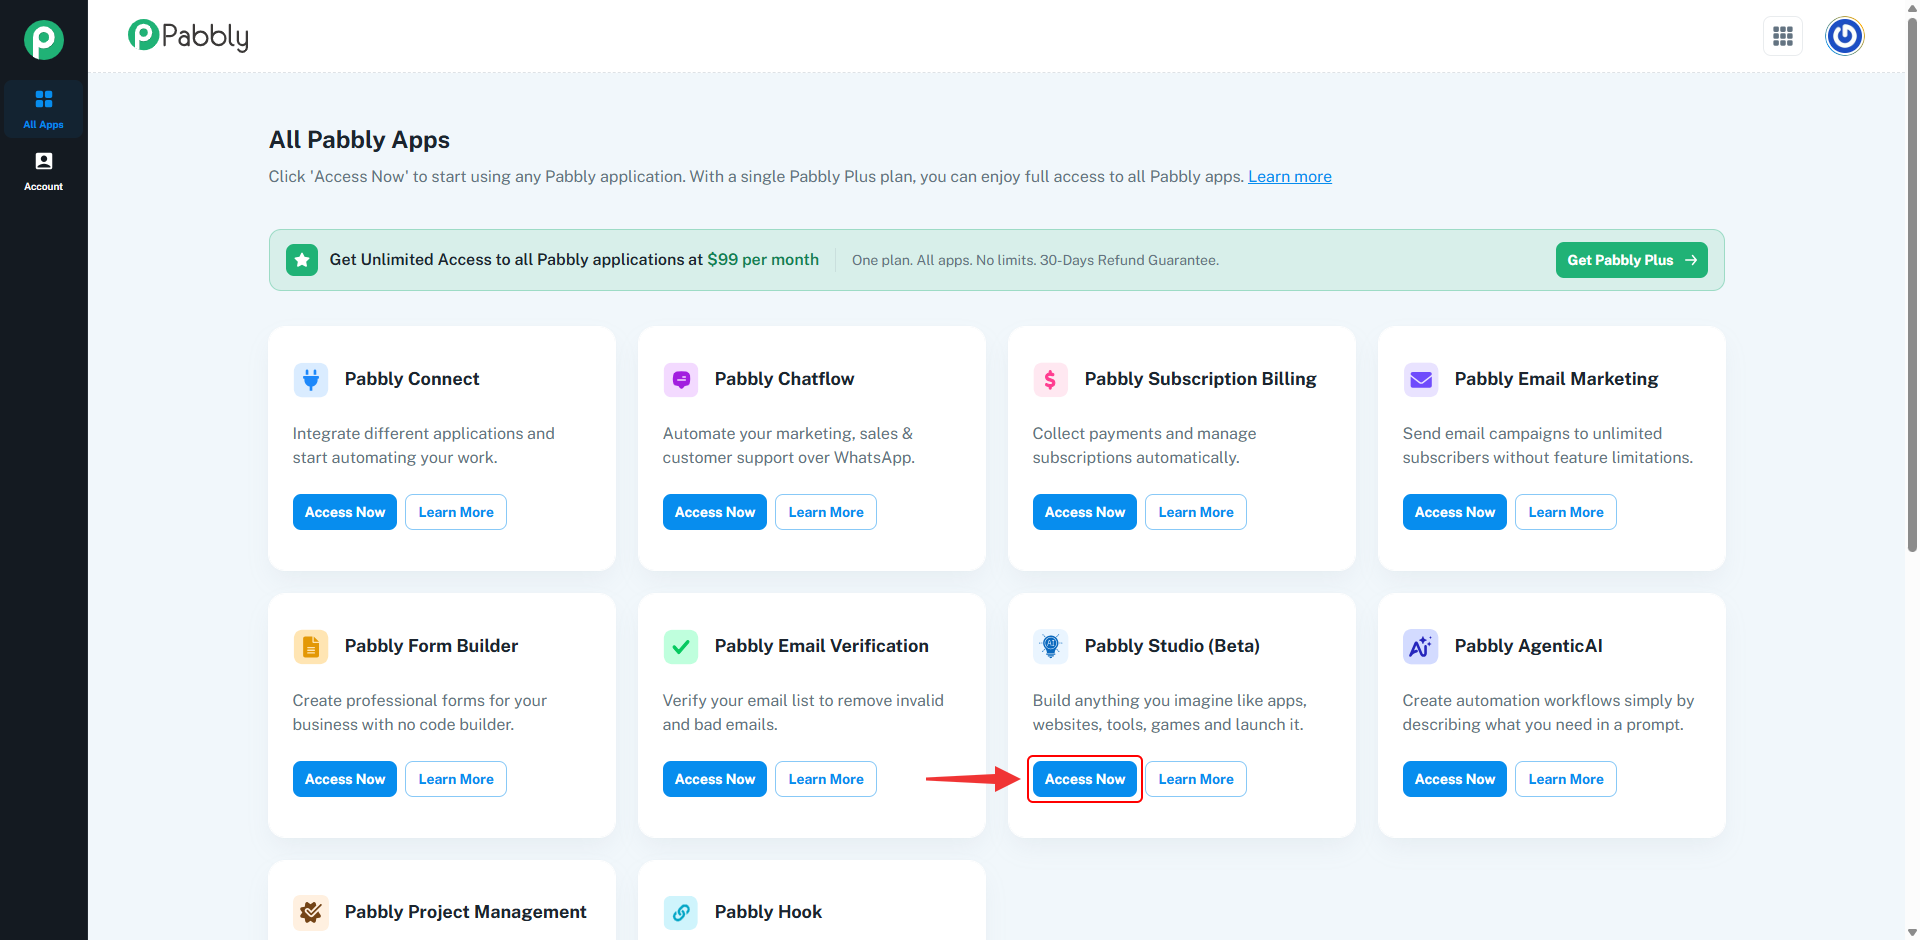
2. Open Pabbly Studio from the All Pabbly Apps page. After you log in, you will land on the All Pabbly Apps page. Find the Pabbly Studio card and click Access Now. Pabbly Studio opens in a new tab.
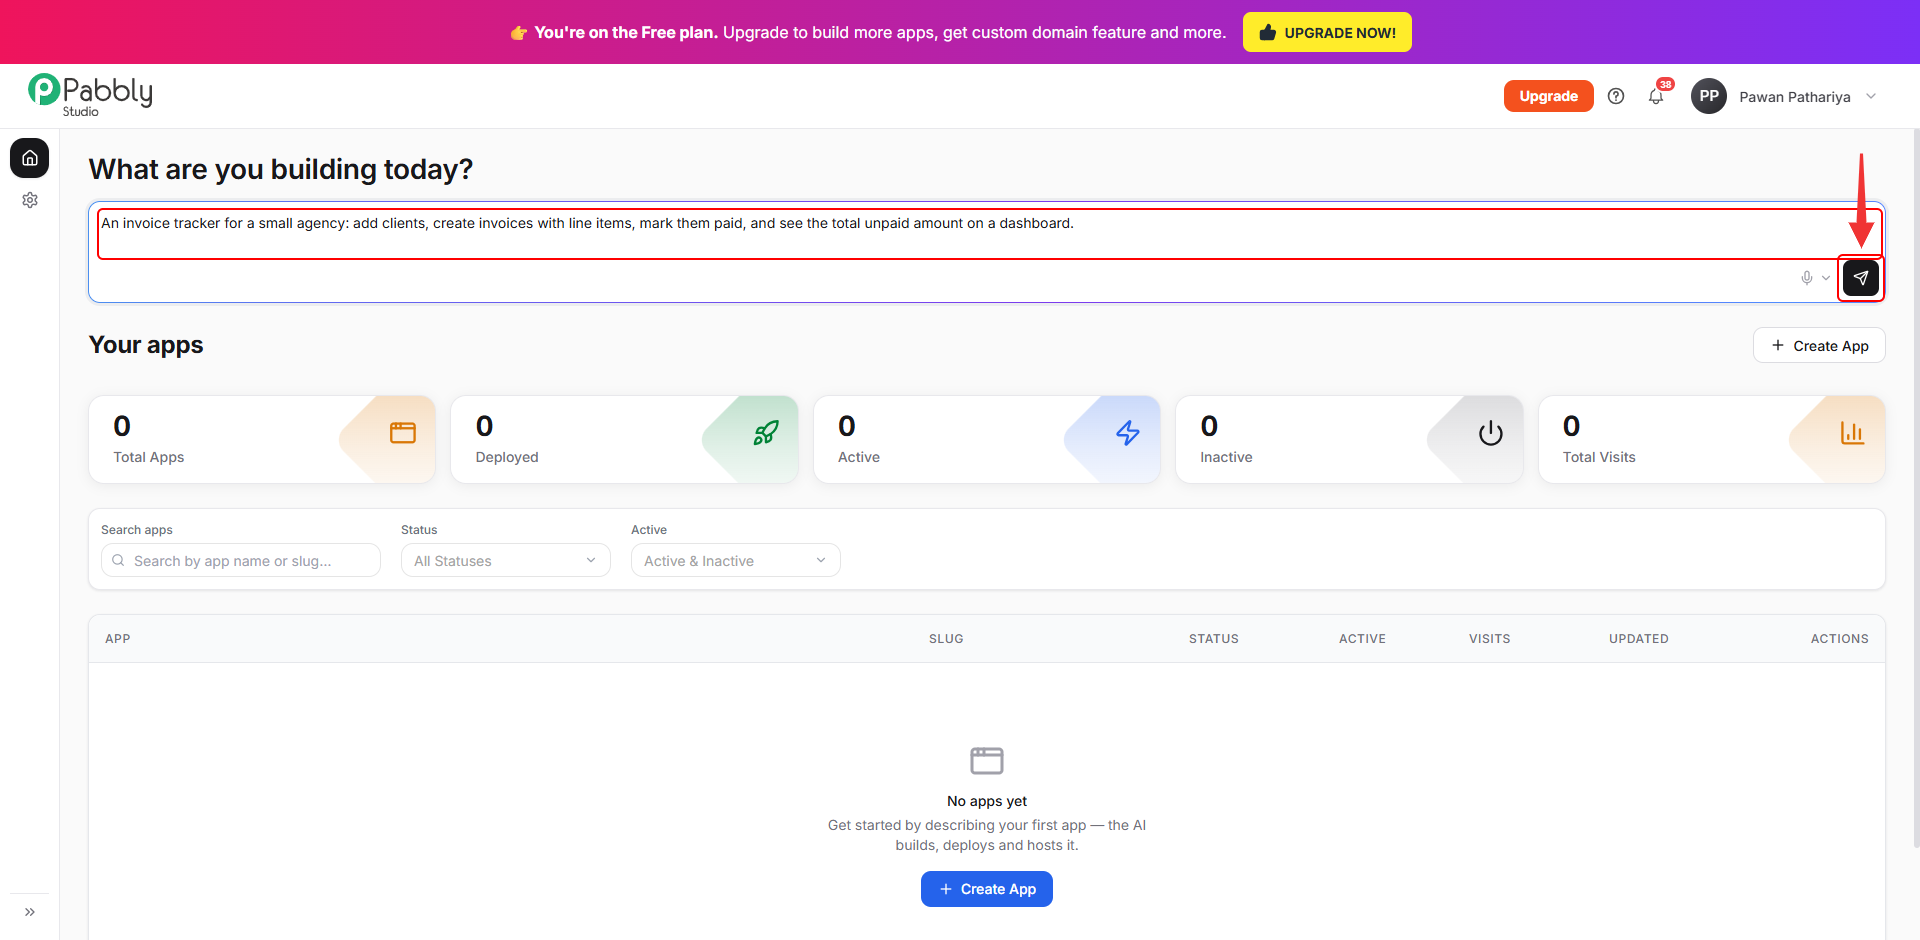
3. Describe the app you want to build. On the Pabbly Studio dashboard, type a description of your app in the What are you building today? box. Mention who the app is for and what people should be able to do in it. For example:
An invoice tracker for a small agency: add clients, create invoices with line items, mark them paid, and see the total unpaid amount on a dashboard.
Then click the Build it button (the arrow at the bottom right of the box).
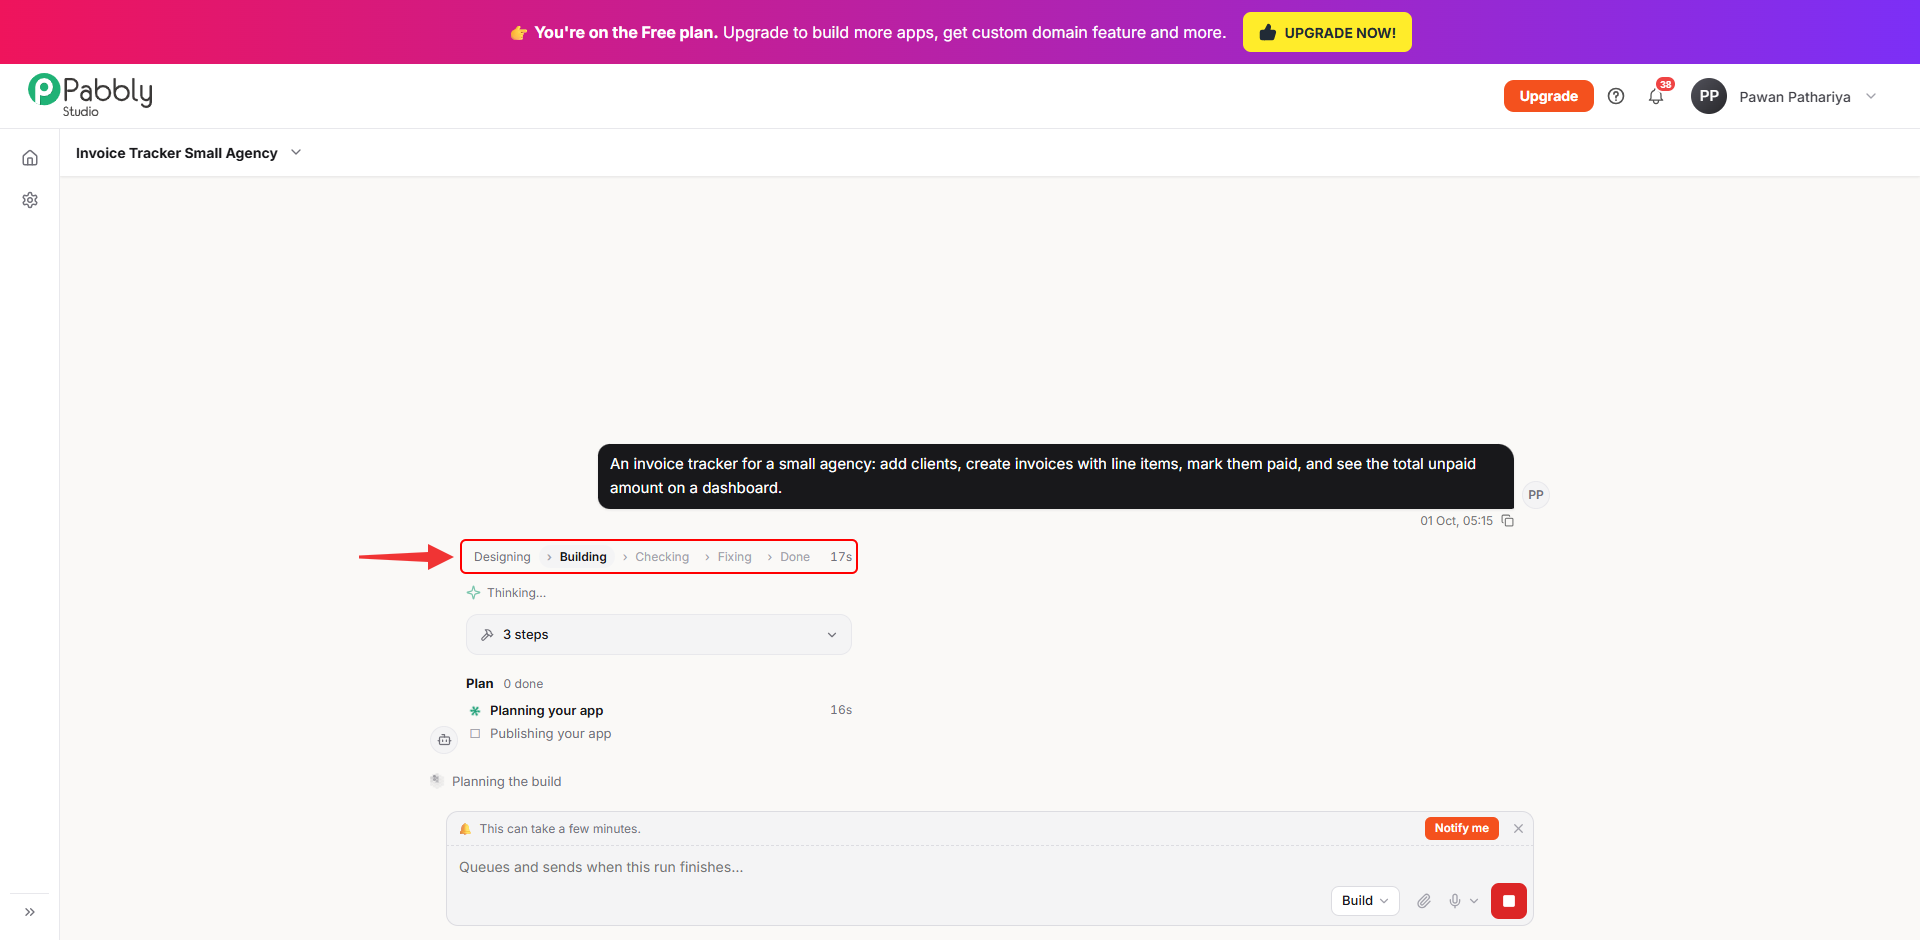
4. Watch your app being built. Pabbly Studio creates the app and opens it in the builder. The progress bar above the reply shows the current stage of the build: Designing, Building, Checking, Fixing and Done. It also shows how much time has passed so far.
Below the progress bar, you can see the plan Pabbly Studio is following. Each step is ticked off as it finishes.
A build usually takes a few minutes. You can keep the tab open and watch, or click Notify me to get a browser notification when it is done.
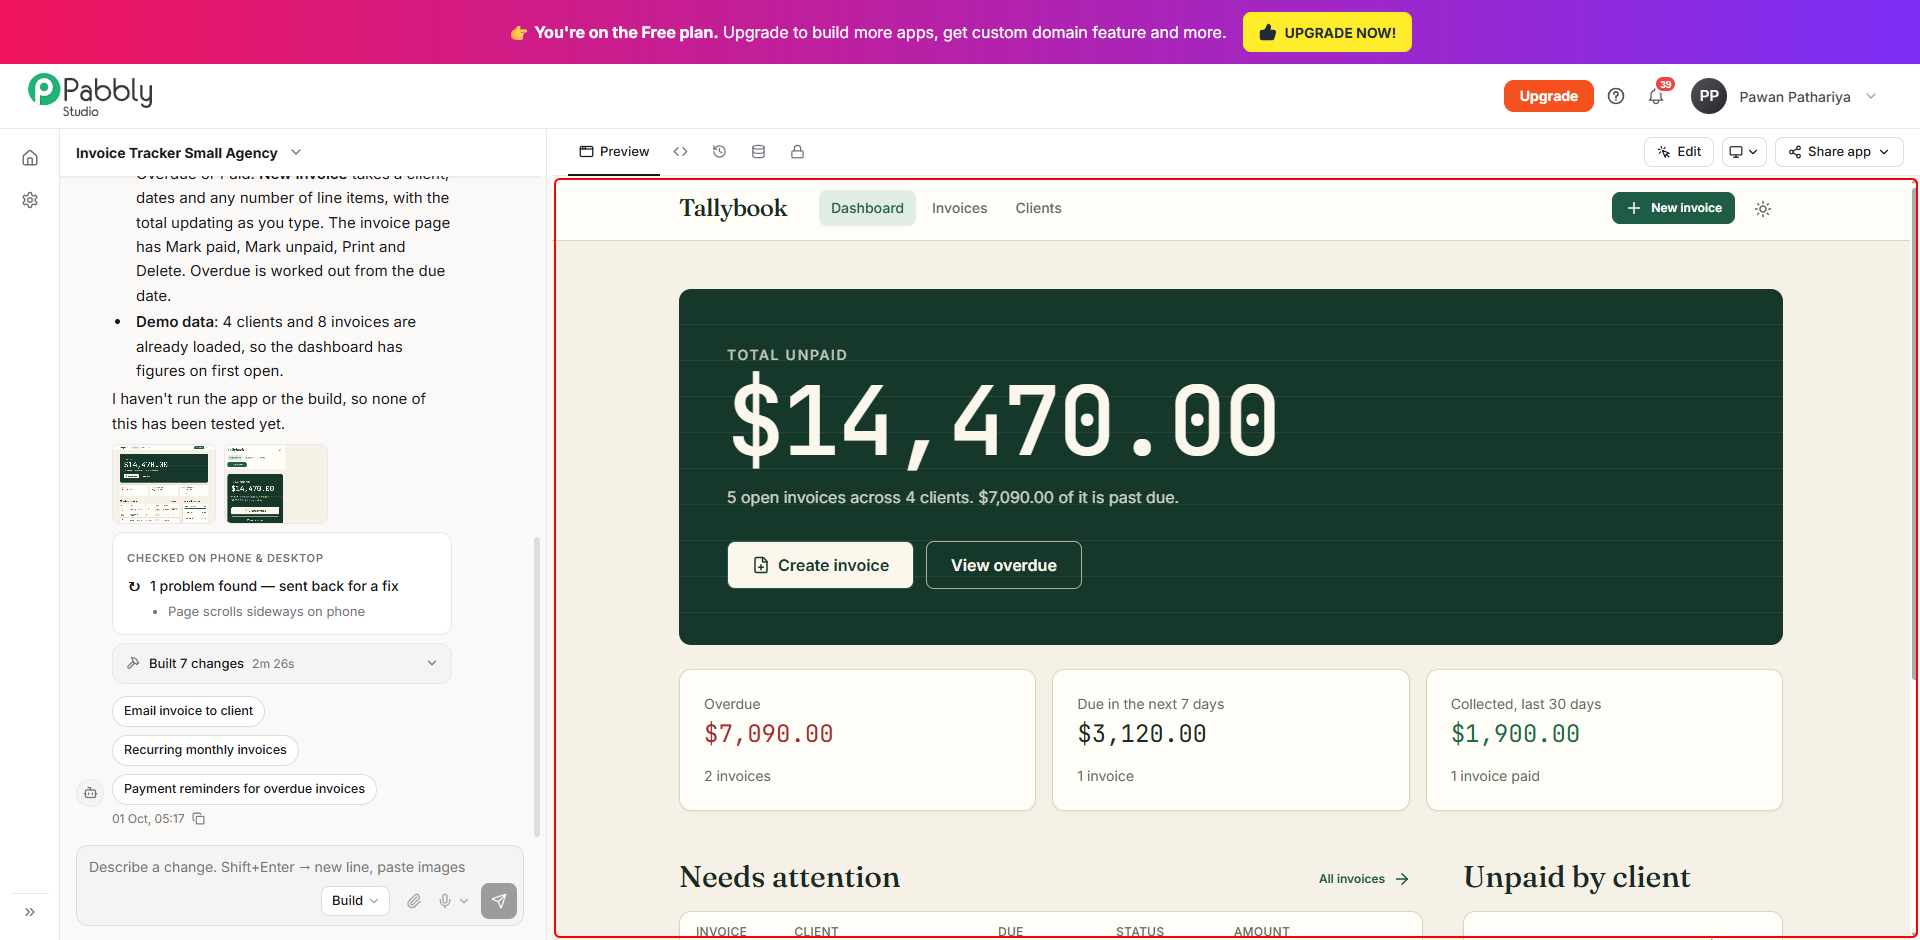
5. Your app is live. When the build finishes, you will see Your app is deployed. The chat on the left explains what was built, and the Preview on the right shows your working app. You can click around in the preview just like your users will.
From here, you can ask for changes by typing in the message box at the bottom left. You can also click Share app at the top right to get your app's public link.
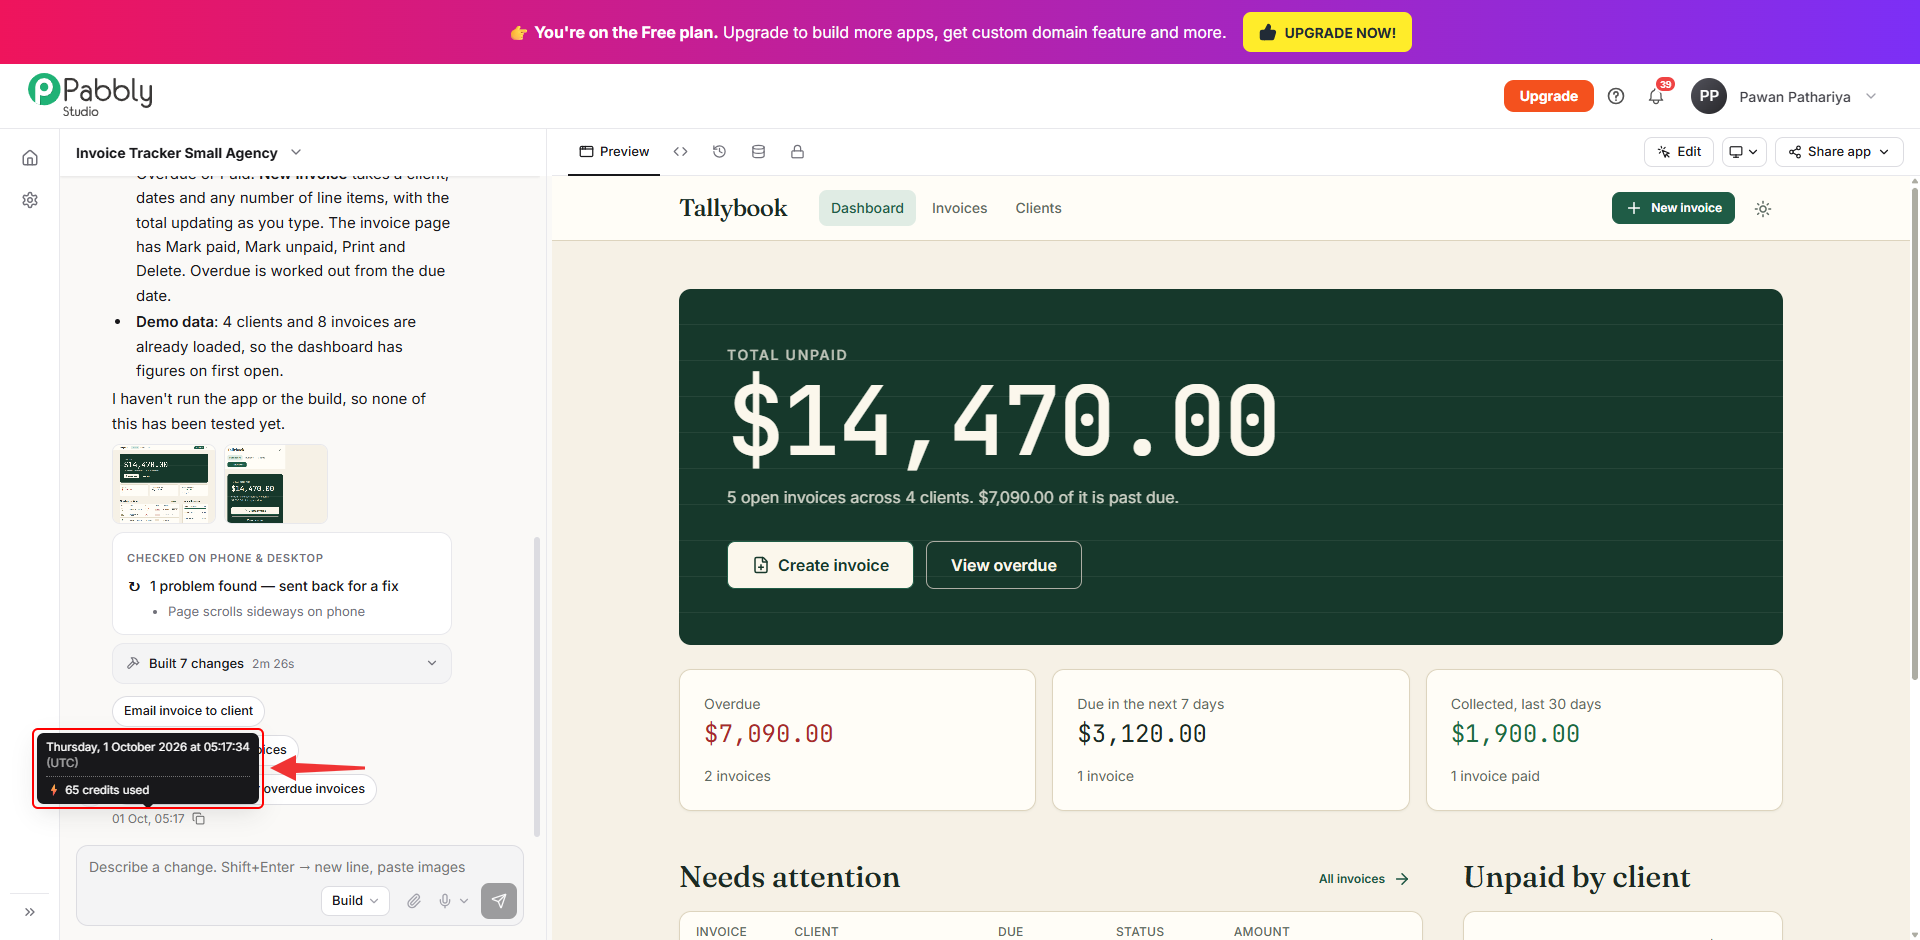
6. See how many credits the build used. Every reply in the chat has a timestamp just below it. Hover over the timestamp of a reply to see when it was sent and how many AI credits that prompt used, for example 65 credits used.
Each message you send is counted separately, so you can check the cost of every change you ask for.
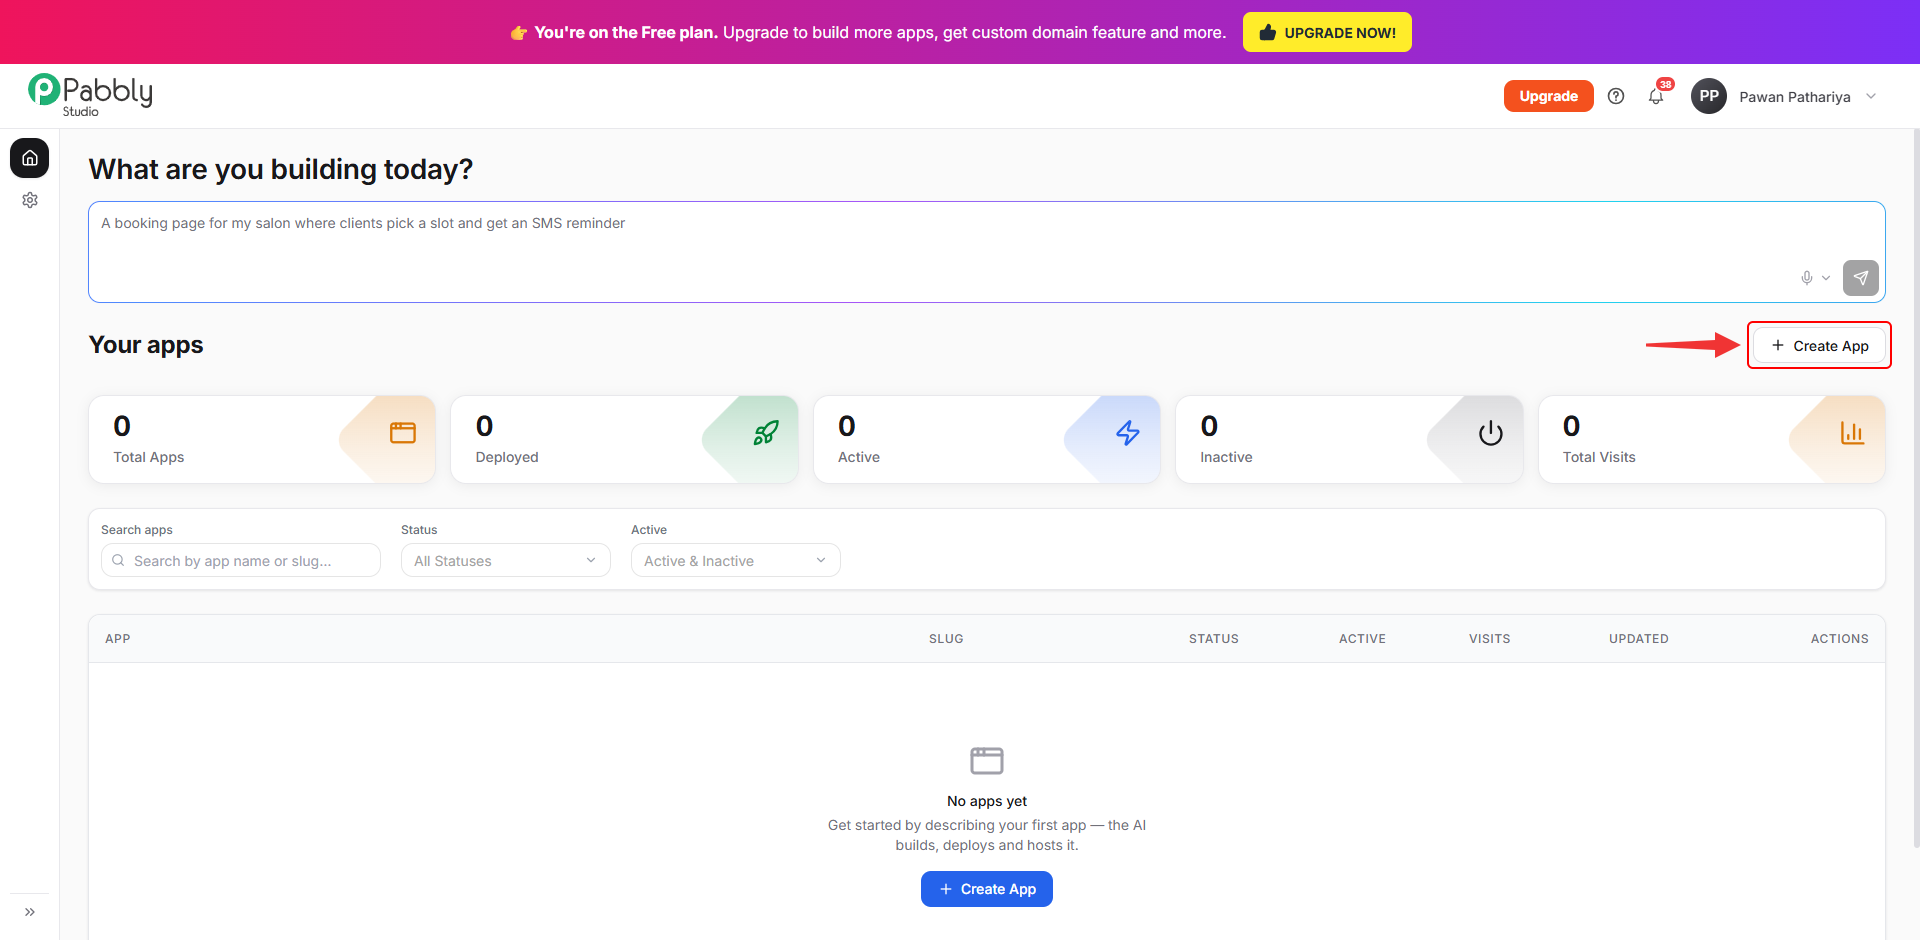
If you prefer to name your app before describing it, click Create App in the Your apps section of the dashboard.
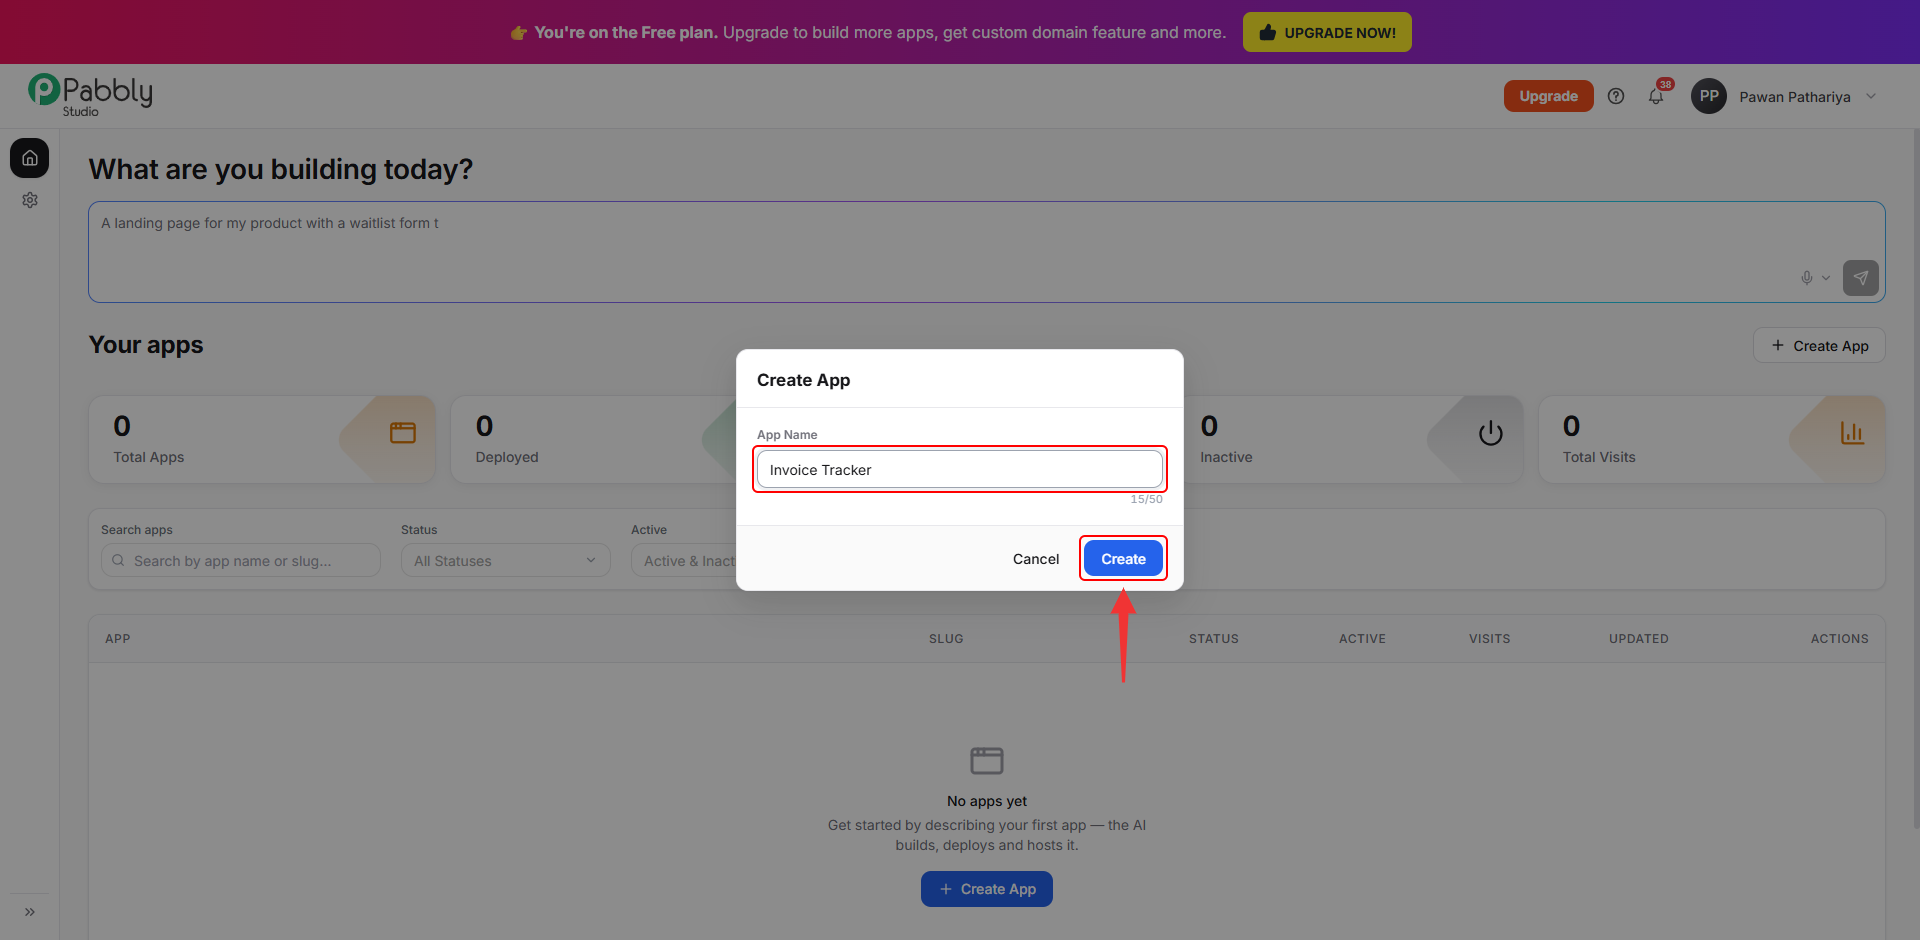
Enter an App Name and click Create. Pabbly Studio opens the empty app in the builder. Describe what you want in the message box, and the build starts the same way as above.
Note: The number of apps you can create depends on your plan. The Free plan includes one app. To build more apps, click Upgrade at the top of Pabbly Studio.
This is how you can create your first app in Pabbly Studio. If you still have any questions, feel free to reach out to us.
