Subscribers
 Pabbly Email Marketing Team•Updated Oct 25, 2026•3 min read
A Suppression List gives you all the important details related to email delivery for your business:
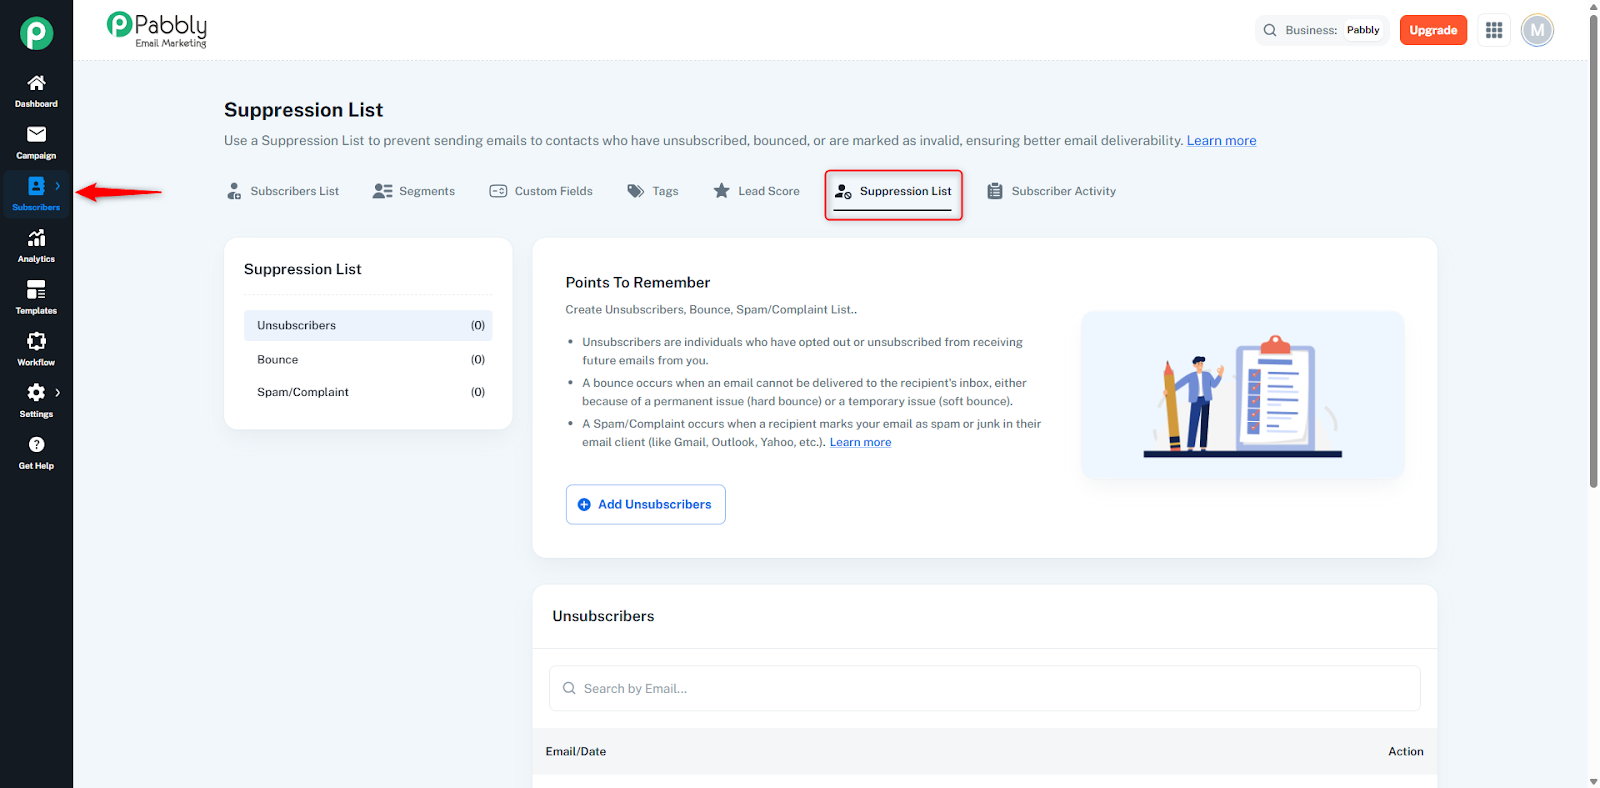
Total Unsubscribers – Shows how many users have unsubscribed from your business emails.
Bounce Count – Shows how many emails sent from your business were bounced.
Spam Complaints – Shows how many users received your email in their spam folder or marked it as spam.
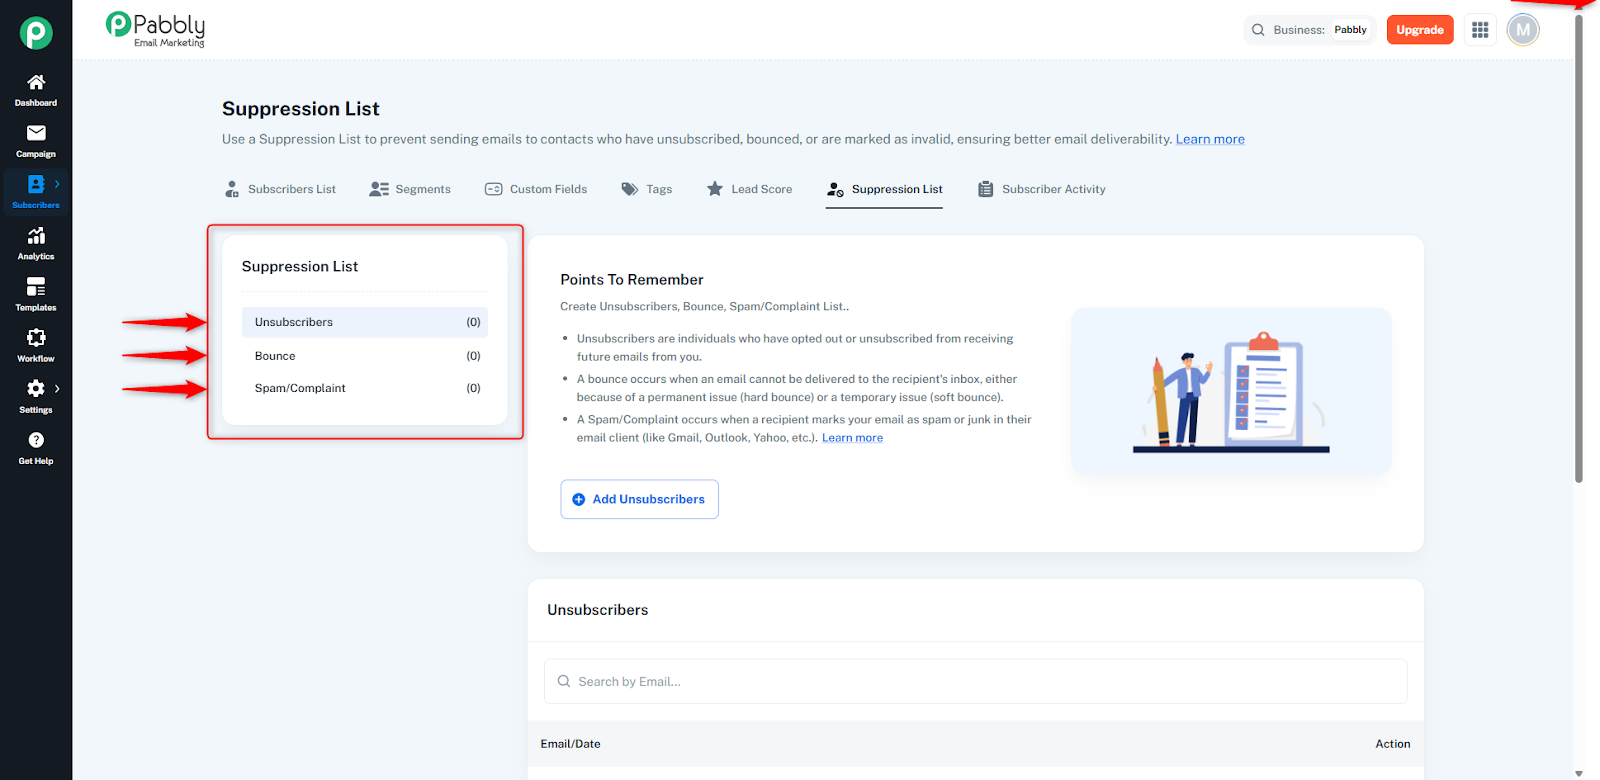
We use the Suppression List to track and manage all these activities.
This list ensures that we avoid sending emails to users who have unsubscribed, bounced, or reported spam—helping maintain better email deliverability and a strong sender reputation.
How to Add an Unsubscriber to the Suppression List
If a user has clicked the Unsubscribe link from your email, they will be automatically added to the Suppression List.
But if any subscriber personally tells you that they no longer want to receive emails from your business, you can manually add them to the list.
Here are the steps:
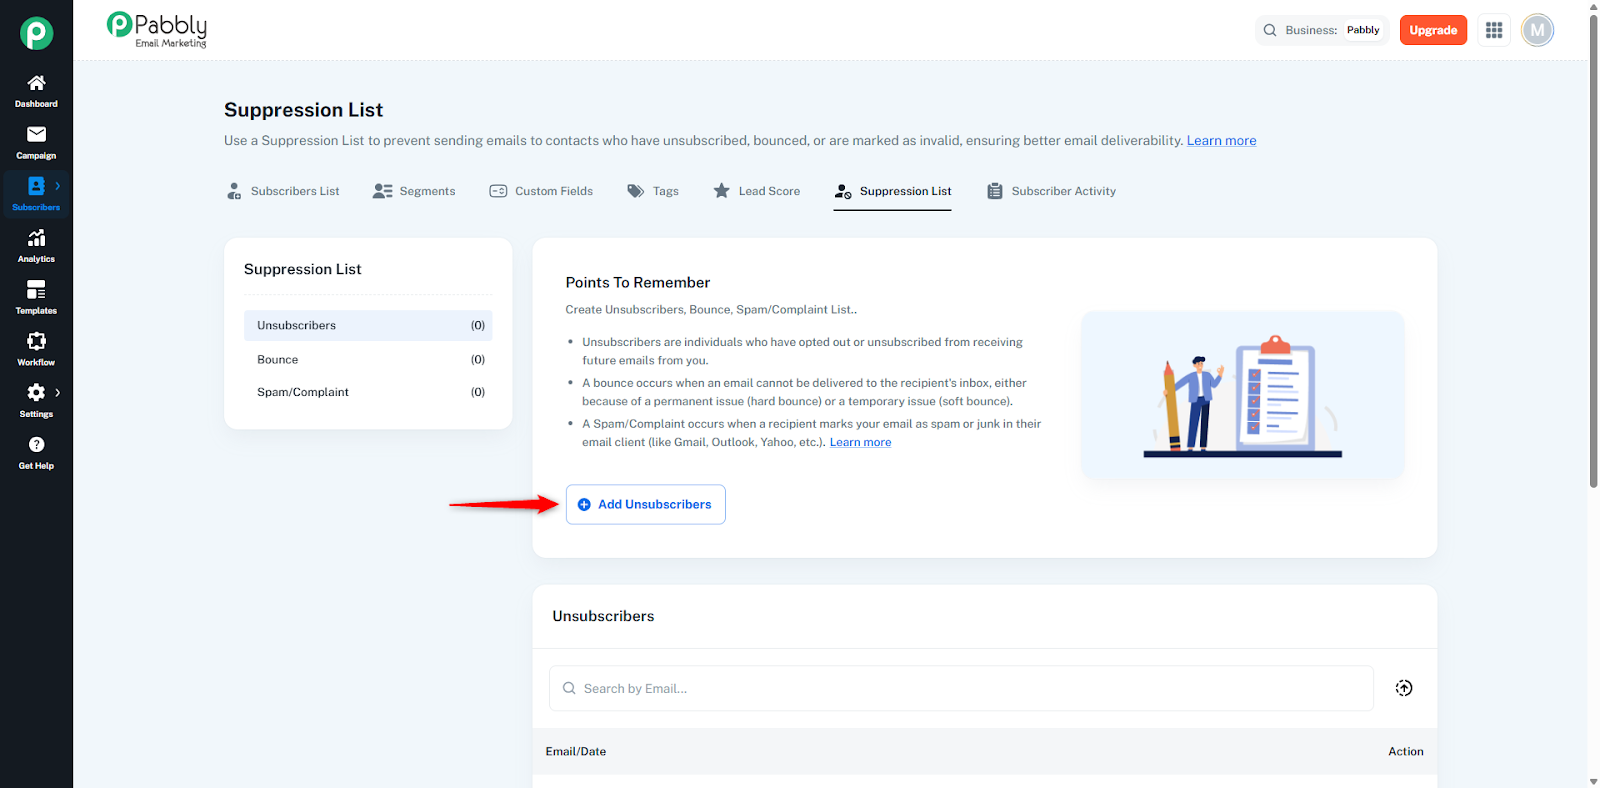
Click on Add Unsubscriber, and a dialog box will open.
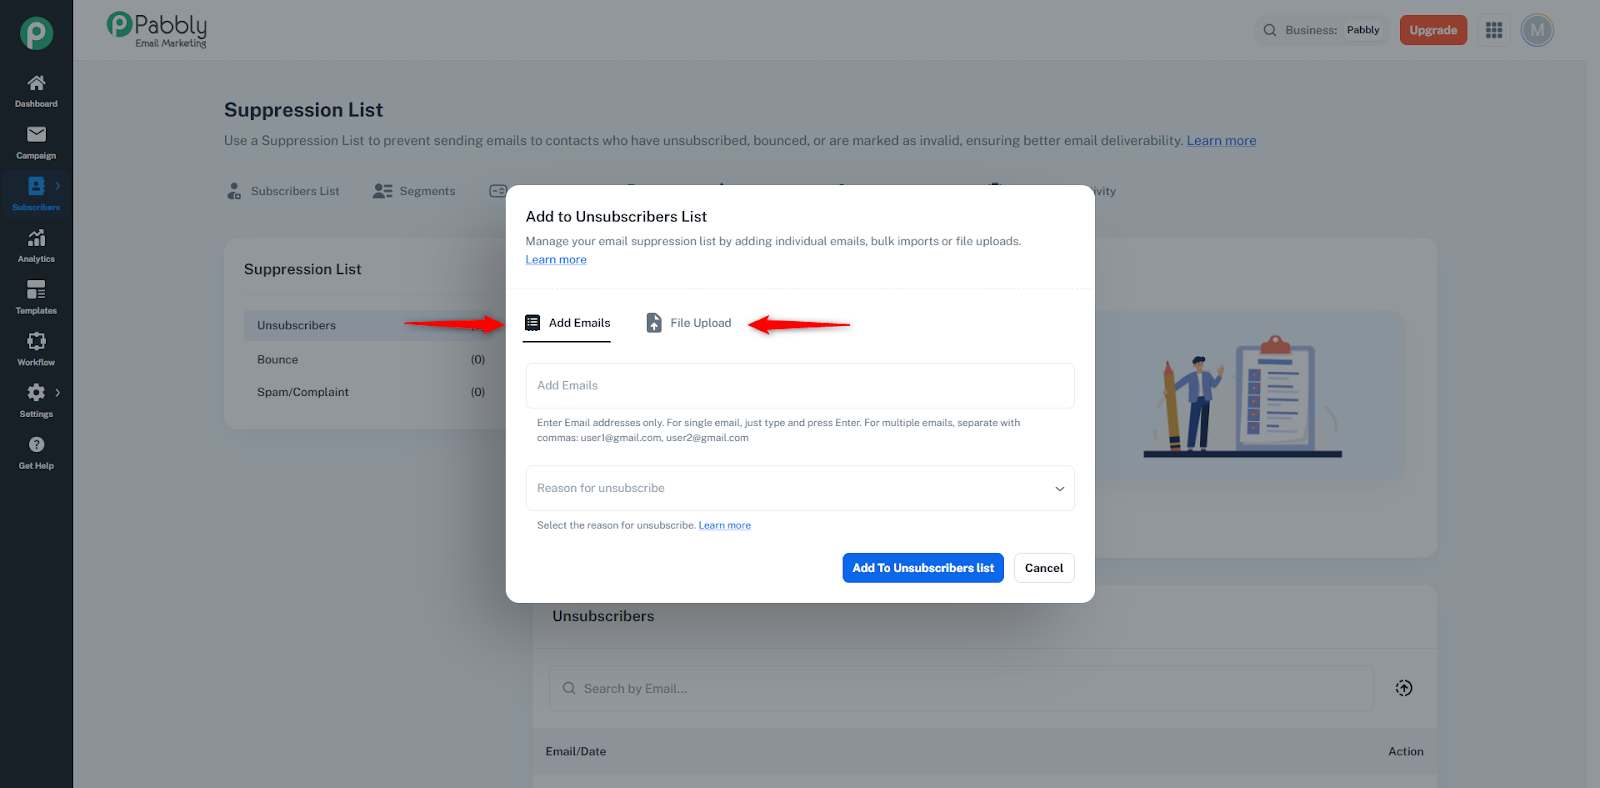
This dialog contains two tabs:
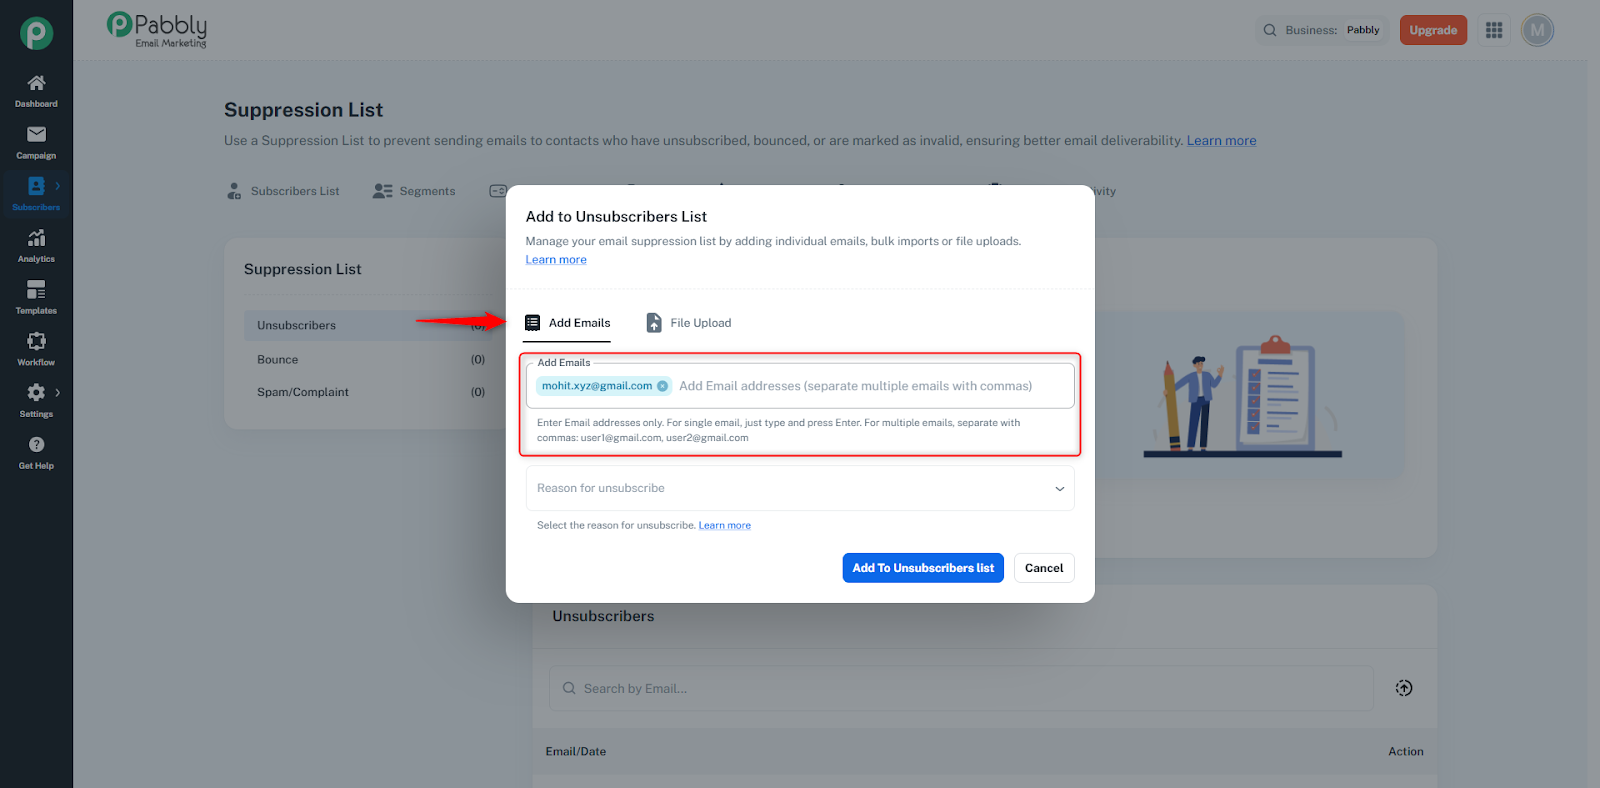
You will see an input field where you can type the subscriber’s email.
After typing the email, press Enter, and it will create a small email chip.
(Adding the chip is necessary to add the email.)
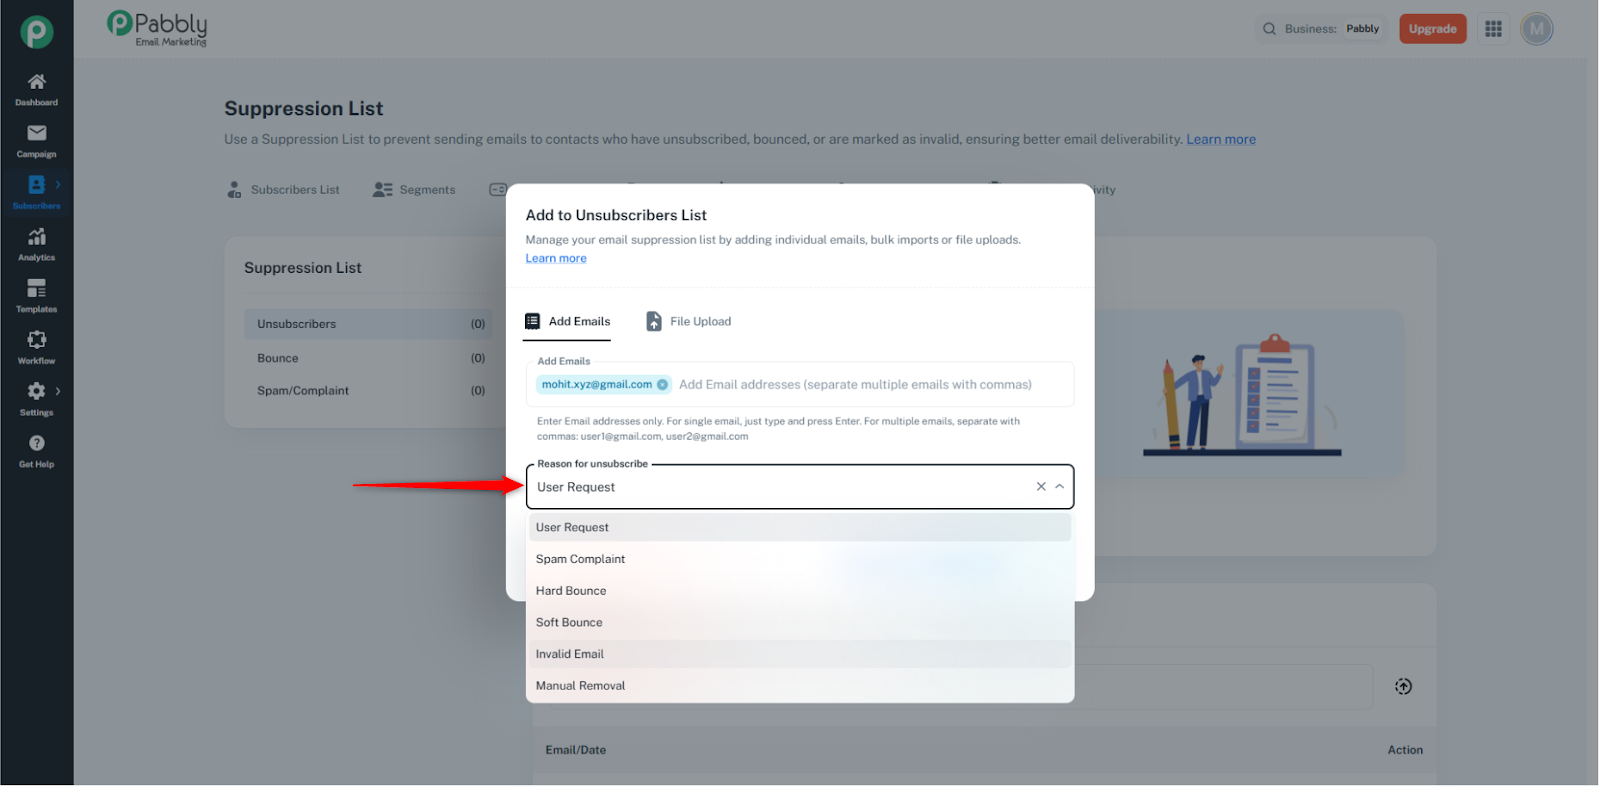
Below the email field, there is a dropdown list where you must choose the reason for unsubscribing.
The available options are:
User Request
Spam Complaint
Hard Bounce
Soft Bounce
Invalid Email
Manual Removal
Selecting a reason is mandatory.
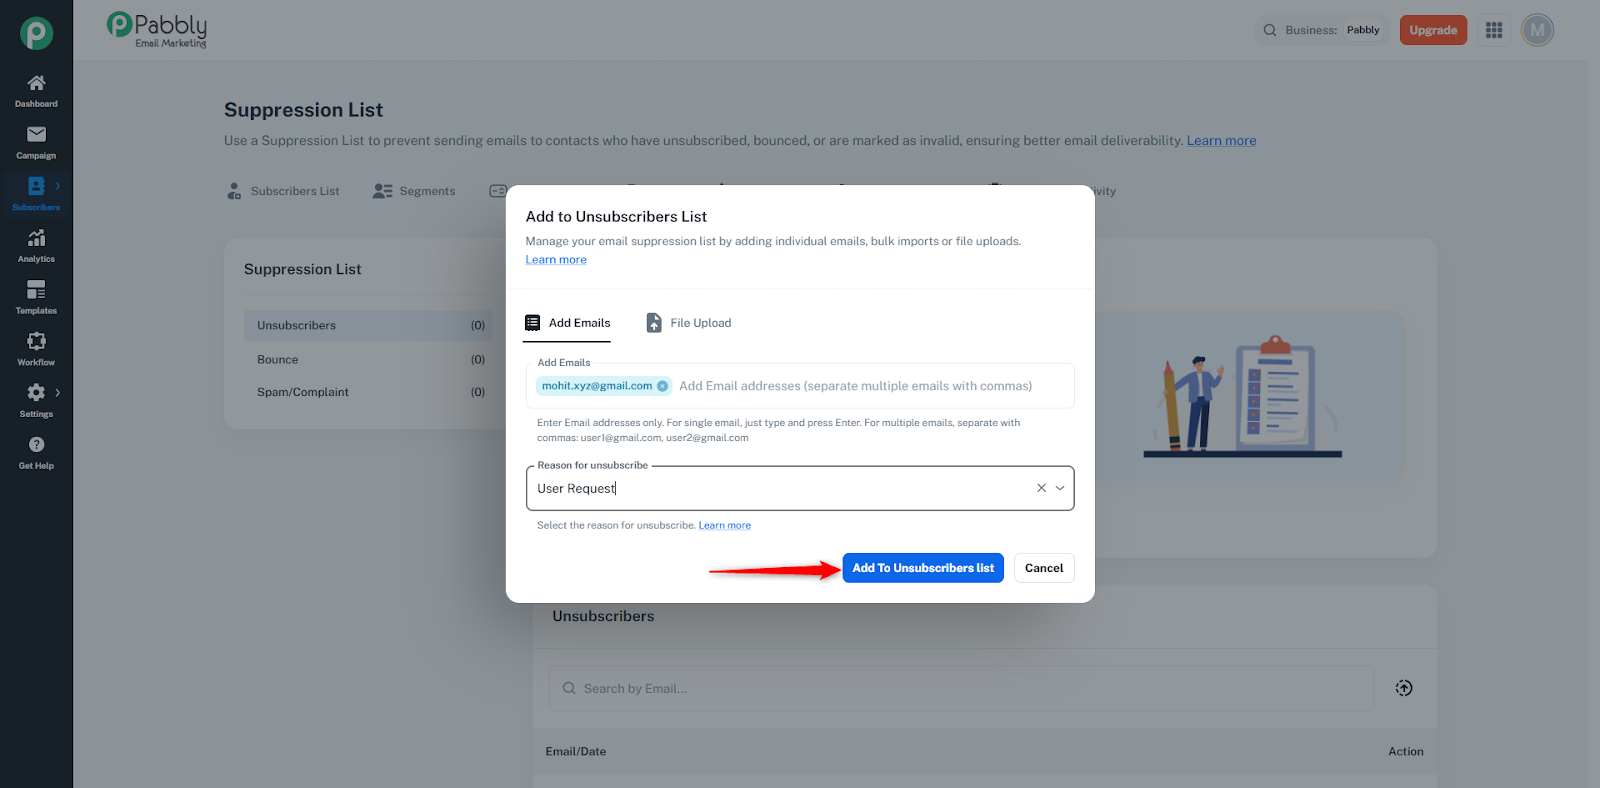
Once the email and reason are added, click the Add to Unsubscriber List button.
The subscriber will now appear in your Unsubscriber List.
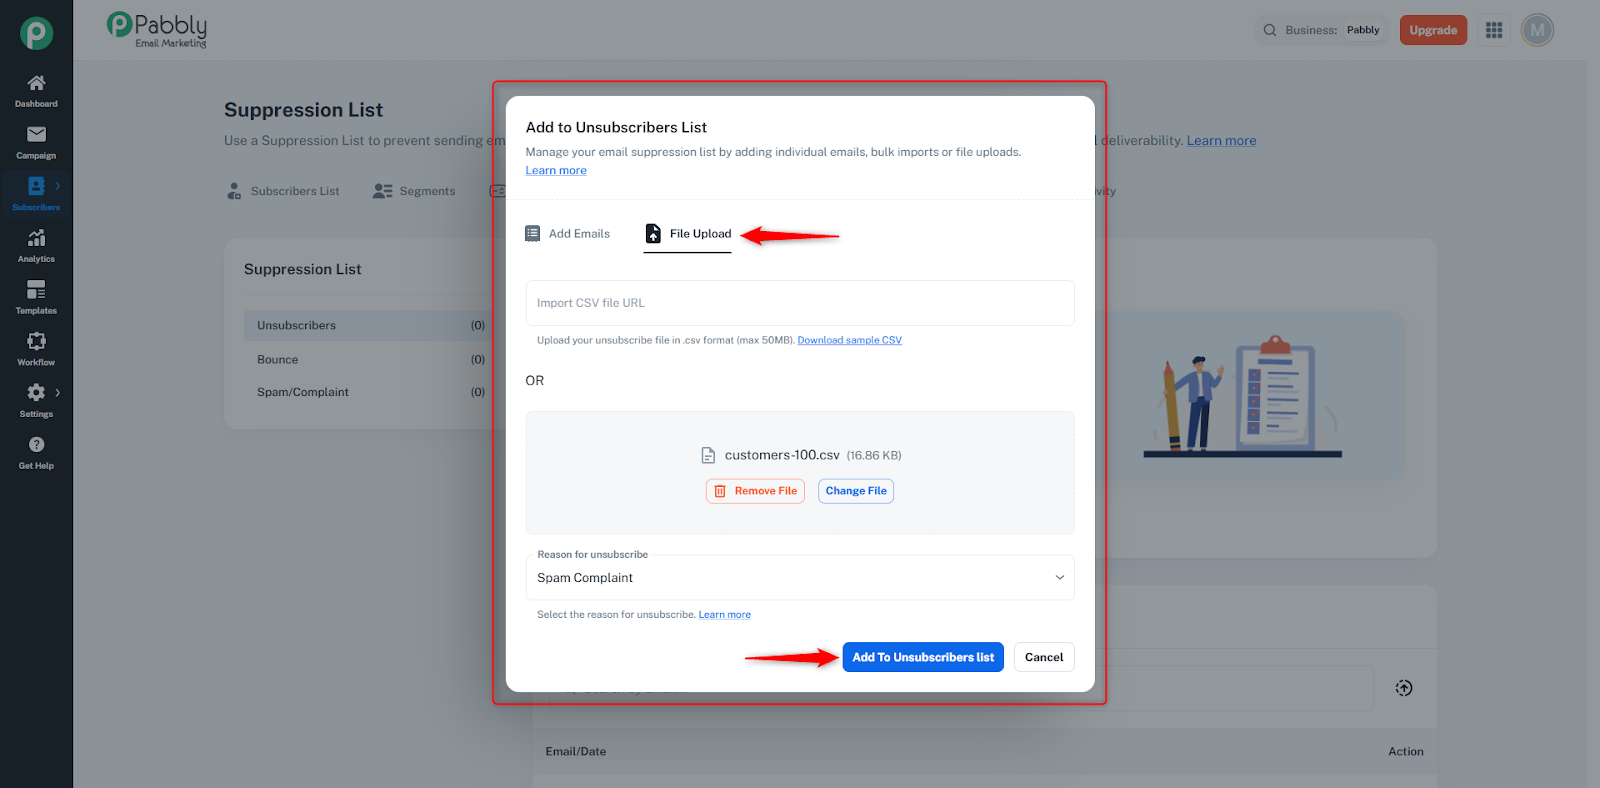
If you want to add multiple unsubscribers at once, use the File Upload tab.
You can add emails in two ways:
Paste the CSV file URL directly.
Select the reason for unsubscribe and click Add to Unsubscriber List.
Choose a CSV file from your computer.
Again, select the reason and click Add to Unsubscriber List.
All email addresses in the file will be added to the Suppression List.
All unsubscribed, bounced, and spam/complaint email addresses will appear in their respective lists inside the Suppression List folder — when you open the
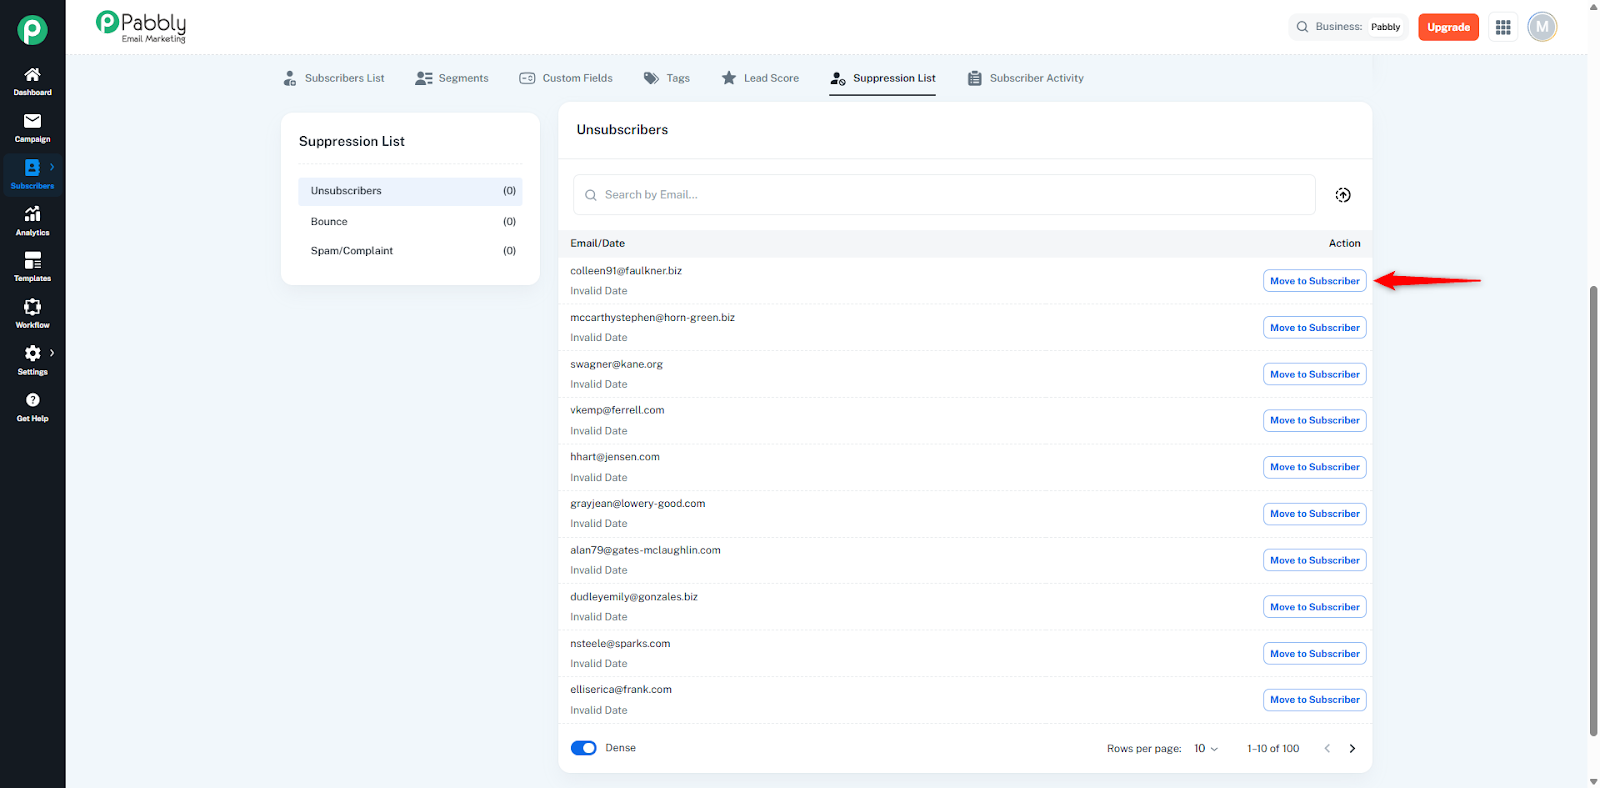
Unsubscriber List you will see all unsubscribers in the table, when you open the Bounce List you will see all bounced emails in the table, and when you open the Spam/Complaint List you will see all spam/complaint emails in the table.
You can also move any unsubscriber back to your subscriber list.
When you click Move to Subscriber from the table, a dialog box will open.
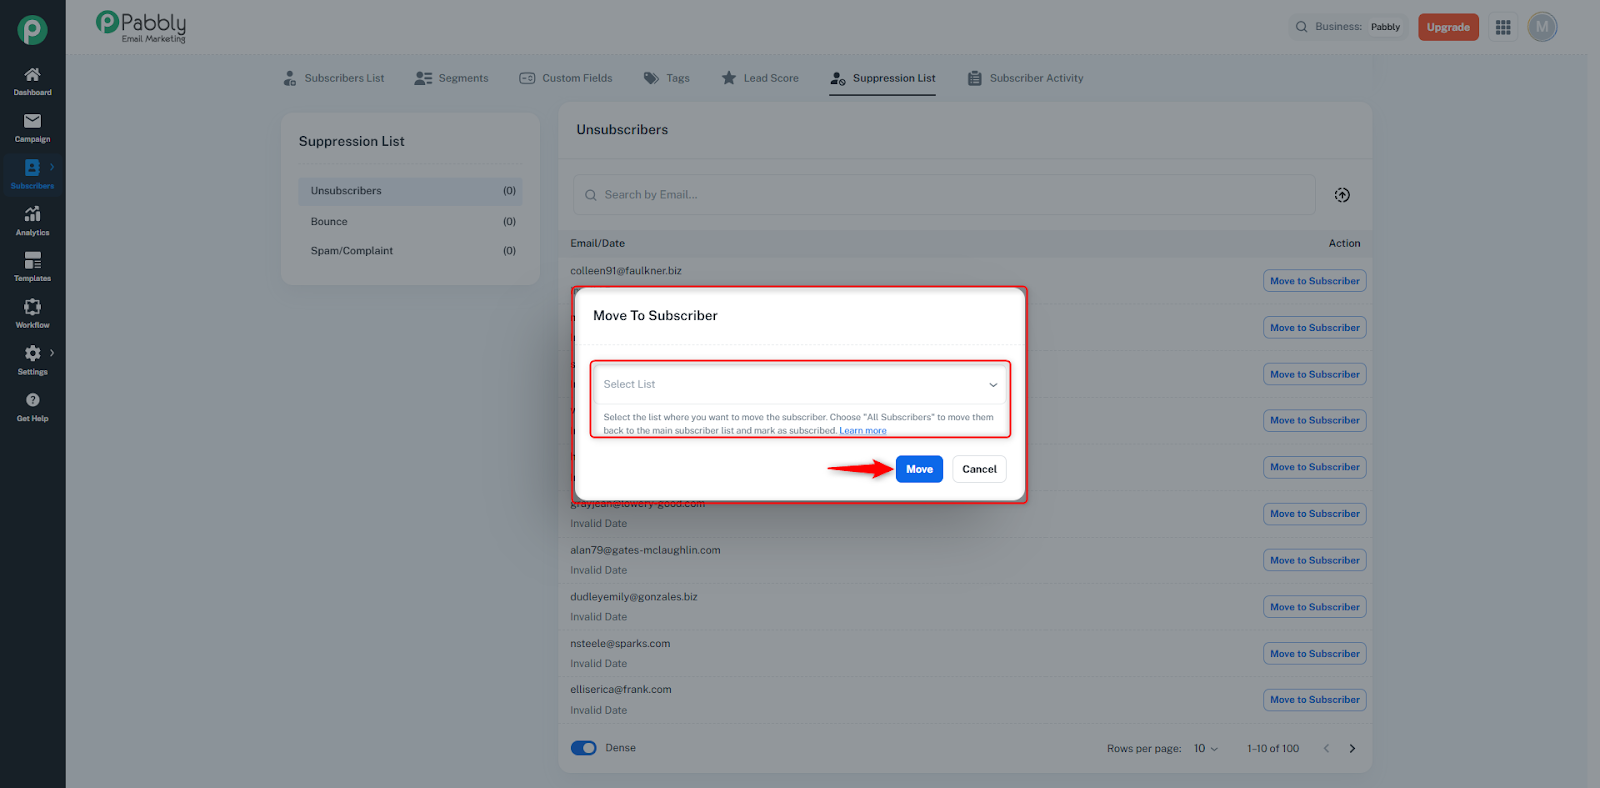
Here, you simply need to select the list where you want to move this subscriber.
After selecting the desired list, click the Move button
Once done, the subscriber will be successfully moved from the Unsubscriber List back to the Subscriber List.
